PROPOSAL
Since I have the free will to bring my vision of art to real life by using photography as a medium to communicate and express my creative idea.
I’m quite aware that I’m well-adopting gear from the digital age. My understanding of the film camera is obviously insufficient to expect. However, I am motivated to use a film roll camera to explore the realm of fine art, whether by using a 35mm film roll, medium format, or large format 5×4.
Therefore, I would like to create a double exposure and long exposure project by using human and nature to describe the story of human that entirely depends on nature to live by generating the CO2 or H2O from mother nature.
One of the reasons that I would like to point out in this project as well is because nowadays we all know that electronics have grown globally, and the entire human race is utilizing them as a tool for everyday life by building things that sometimes we think we might be able to replace everything that mother nature has offered us freely. No, we are not capable of replacing nature in our life; we are all fully aware of that.
I also know that this type of project is not something that is new in the photography world but for me to explore with Mamiya RB67 medium format camera and a 35mm film from eos 5 to create a vintage style art is a must to gain more knowledge and contribute to human consciousness.
Allow me to bring the Human and nature concept by using the double exposure with black and white picture style from a medium format camera Mamiya RB67 and 35mm film camera.
Research
The principal and underlying criteria that distinguish fine art photography from other fields in photography are that fine art photography is not about recording a subject as it is. Using a camera to document what exactly appears in front of the photographer usually falls in the category of photojournalism. It is frequently found in publications that feature purist images taken with a camera to record the scene, as it exactly existed at a precise moment in time.
When it comes to photography as fine art, the focus is almost entirely on the artist. It is not about catching what can be seen by the camera; rather, it is about capturing what can be seen by the artist. Therefore, in the practice of fine art photography, the artist utilizes the camera as yet another instrument in the process of creating an artistic work. Instead of capturing what is in front of the lens, the camera is used to create an artistic work that displays the vision of the artist and makes a statement about that vision. This is performed rather than photographing the matter.
Have you ever heard about double-exposure photography? Yes, of course, many of us have seen it in our daily life from online or event printing art galleries, but to create it takes an effort of a vision in the powerful imagination of an artist to project it in a frame.
In the past, people used to create the art of double exposure directly from a camera; nowadays, the artist can stack up two images using a computer or gadgets to create the beautiful art of double exposure.
DOUBLE EXPOSURE ARTISTS/PHOTOGRAPHERS
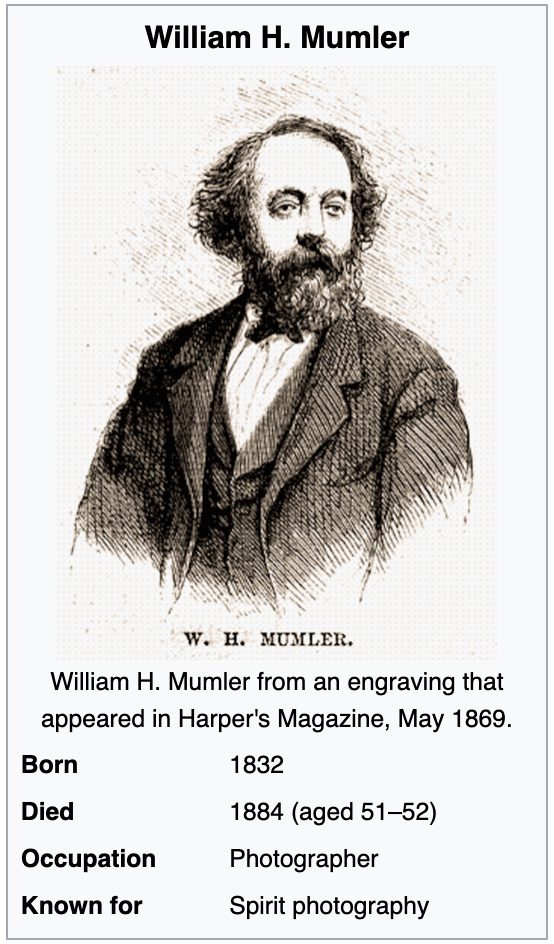
- William H. Mumler
The origins of double-exposure photography may be traced back to the 1860s when William H. Mumler was the first person to pioneer what he called spirit photography. Mumler used this technique of “double exposure.” When he took a portrait, he would sometimes utilise an old negative that had been exposed before, and the final photograph gave the impression that it had a spirit.
It is interesting when we talk about Mumler because what he was doing back then was a fraud that tried to trick people and almost put him into jail.
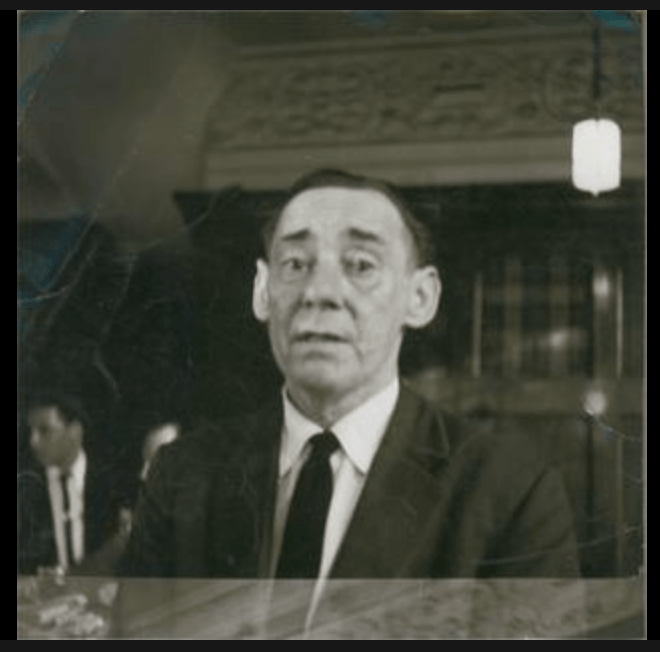
One of the famous art that he created was the first lady Marry Todd Lincoln and her late husband USA former president Abraham Lincoln picture in low opacity exposed behind her.
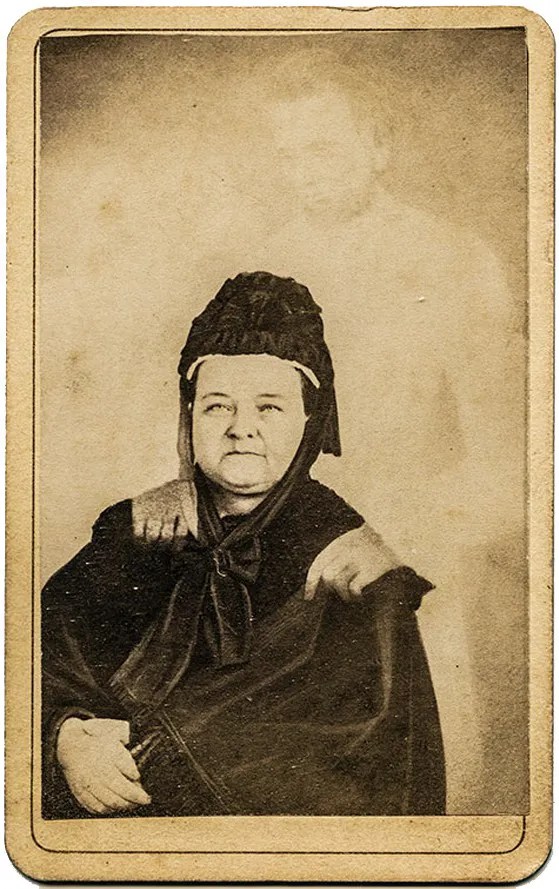
In Mumler’s sombre painting of the First Lady after her husband’s death, Mr Lincoln seems to be placing his ghostly hands on her shoulder. Fake yet effective, the image represents the “calm and consolation to the weary spirit” that Mumler hailed as his signature. He regarded himself as a vendor of “the dazzling, effulgent beams of a spiritual sun.” If his most credulous clients were too anxious to bask in those rays, who really can blame them? No one wonders what’s causing the clouds to split while they’re in the midst of a major emotional crisis.
This image now has been famously spread across the internet as one of the artistic visions of an artist applied through a camera as a medium.
- John Deakin
Some people may believe that double exposure is a relatively new method, although it has grown highly popular in many mainstream media outlets recently. However, the accompanying photograph demonstrates that double exposure has indeed been performed at least as far back as the 1860s. This was a tremendous boost to commerce in the 1860s. “they discovered how to make a portrait subject appear twice in a frame as if they had an identical twin. In each of the pictures, the person was striking a different pose.” (Barnes, 2017)
When looking at other photographers’ work, it is fascinating to look at John Deakin’s works that related to double exposure back to the 1930 war’s year.
Deakin is one of the British photographers that first picked up a camera in 1939 in Paris and spent his years in the military as a sergeant in Malta and did a job at a unit called film photography.
Double exposure is the idea of when you can use to put different positions or images into one frame to create something that can tell something else.
John Deakin used this technique to photograph an English novelist and journalist Collin MacInnes.
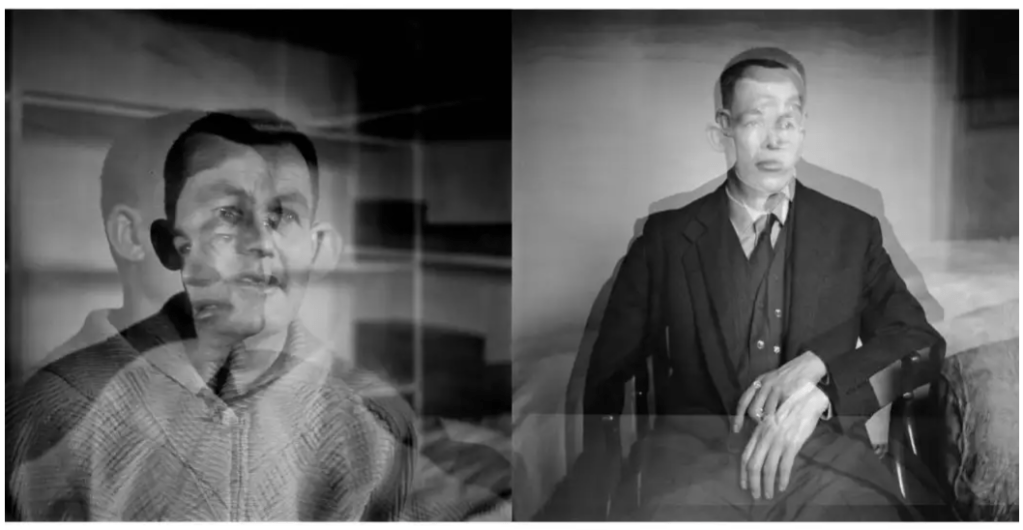
These images were taken by John Deakin in early 1950 using multiple exposure and double exposure.
For the double exposure image is believed that the photoshoot was commissioned by vogue magazine but there is no evidence that can prove that it was being used or not. the image is telling us how powerful young Collin back then as a talented writer in the early 1950s.
the second one is multiple exposures where the light is very correctly exposed and I believe it was shot with a tripod that we can tell from the background that it barely moved.
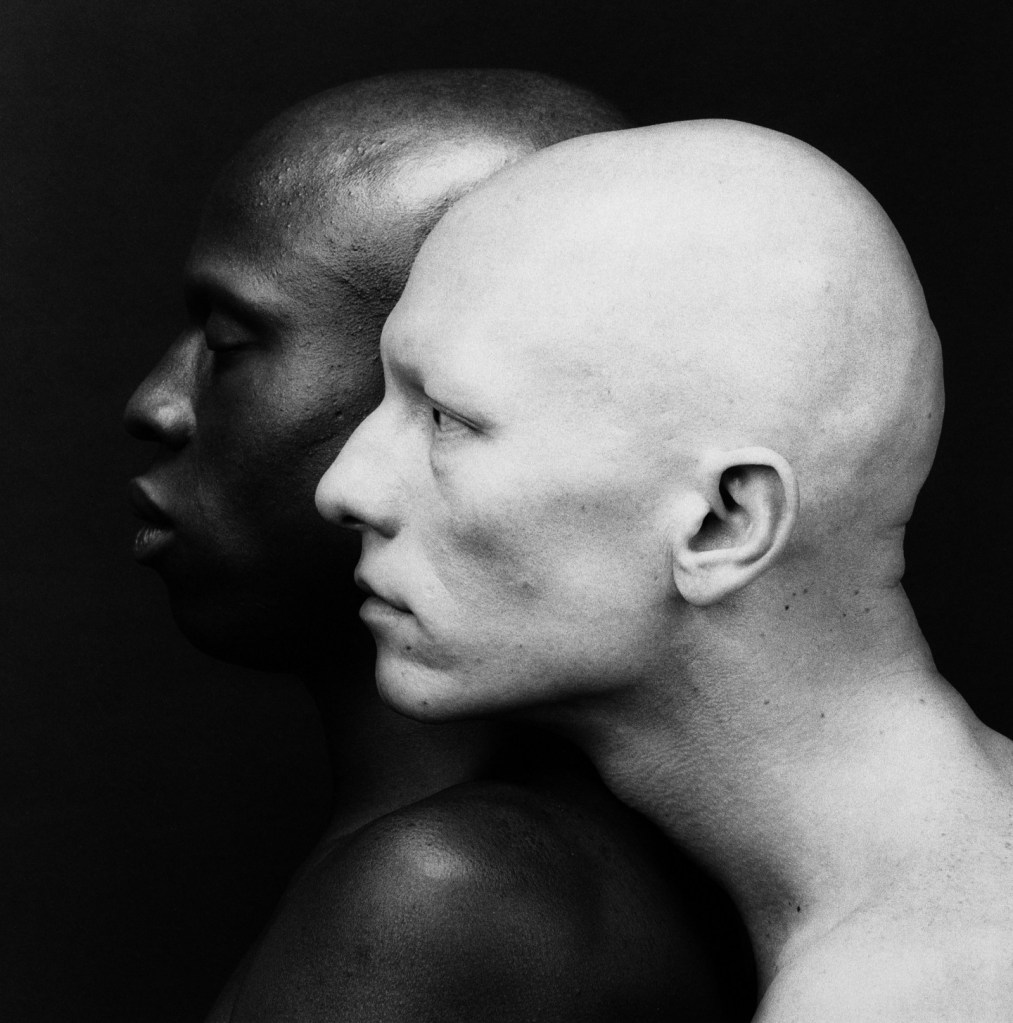
- Luke Gram
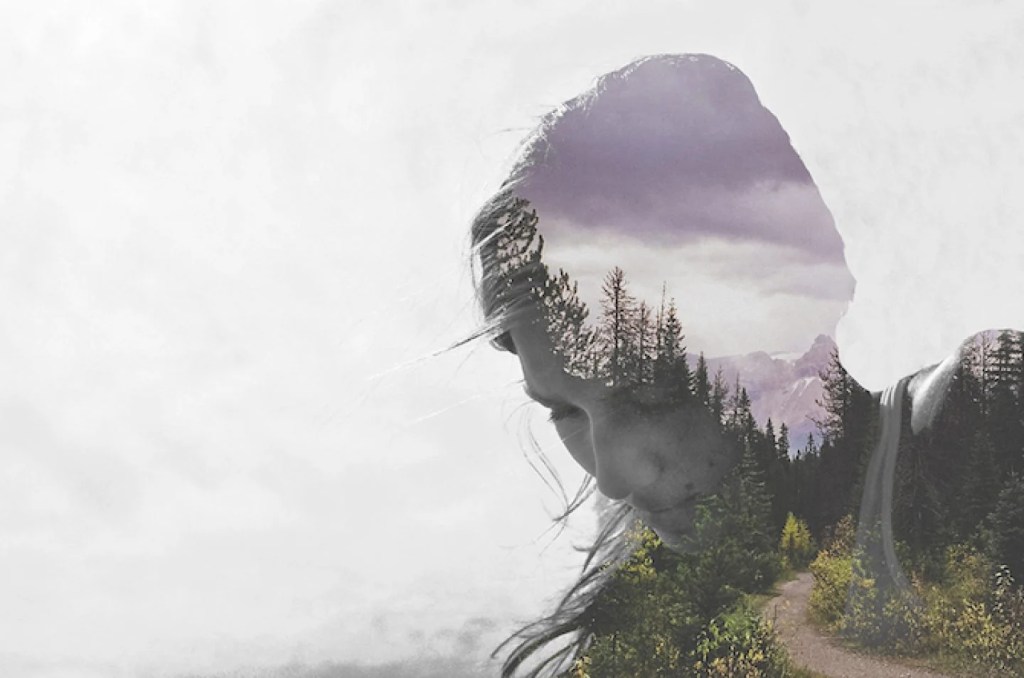
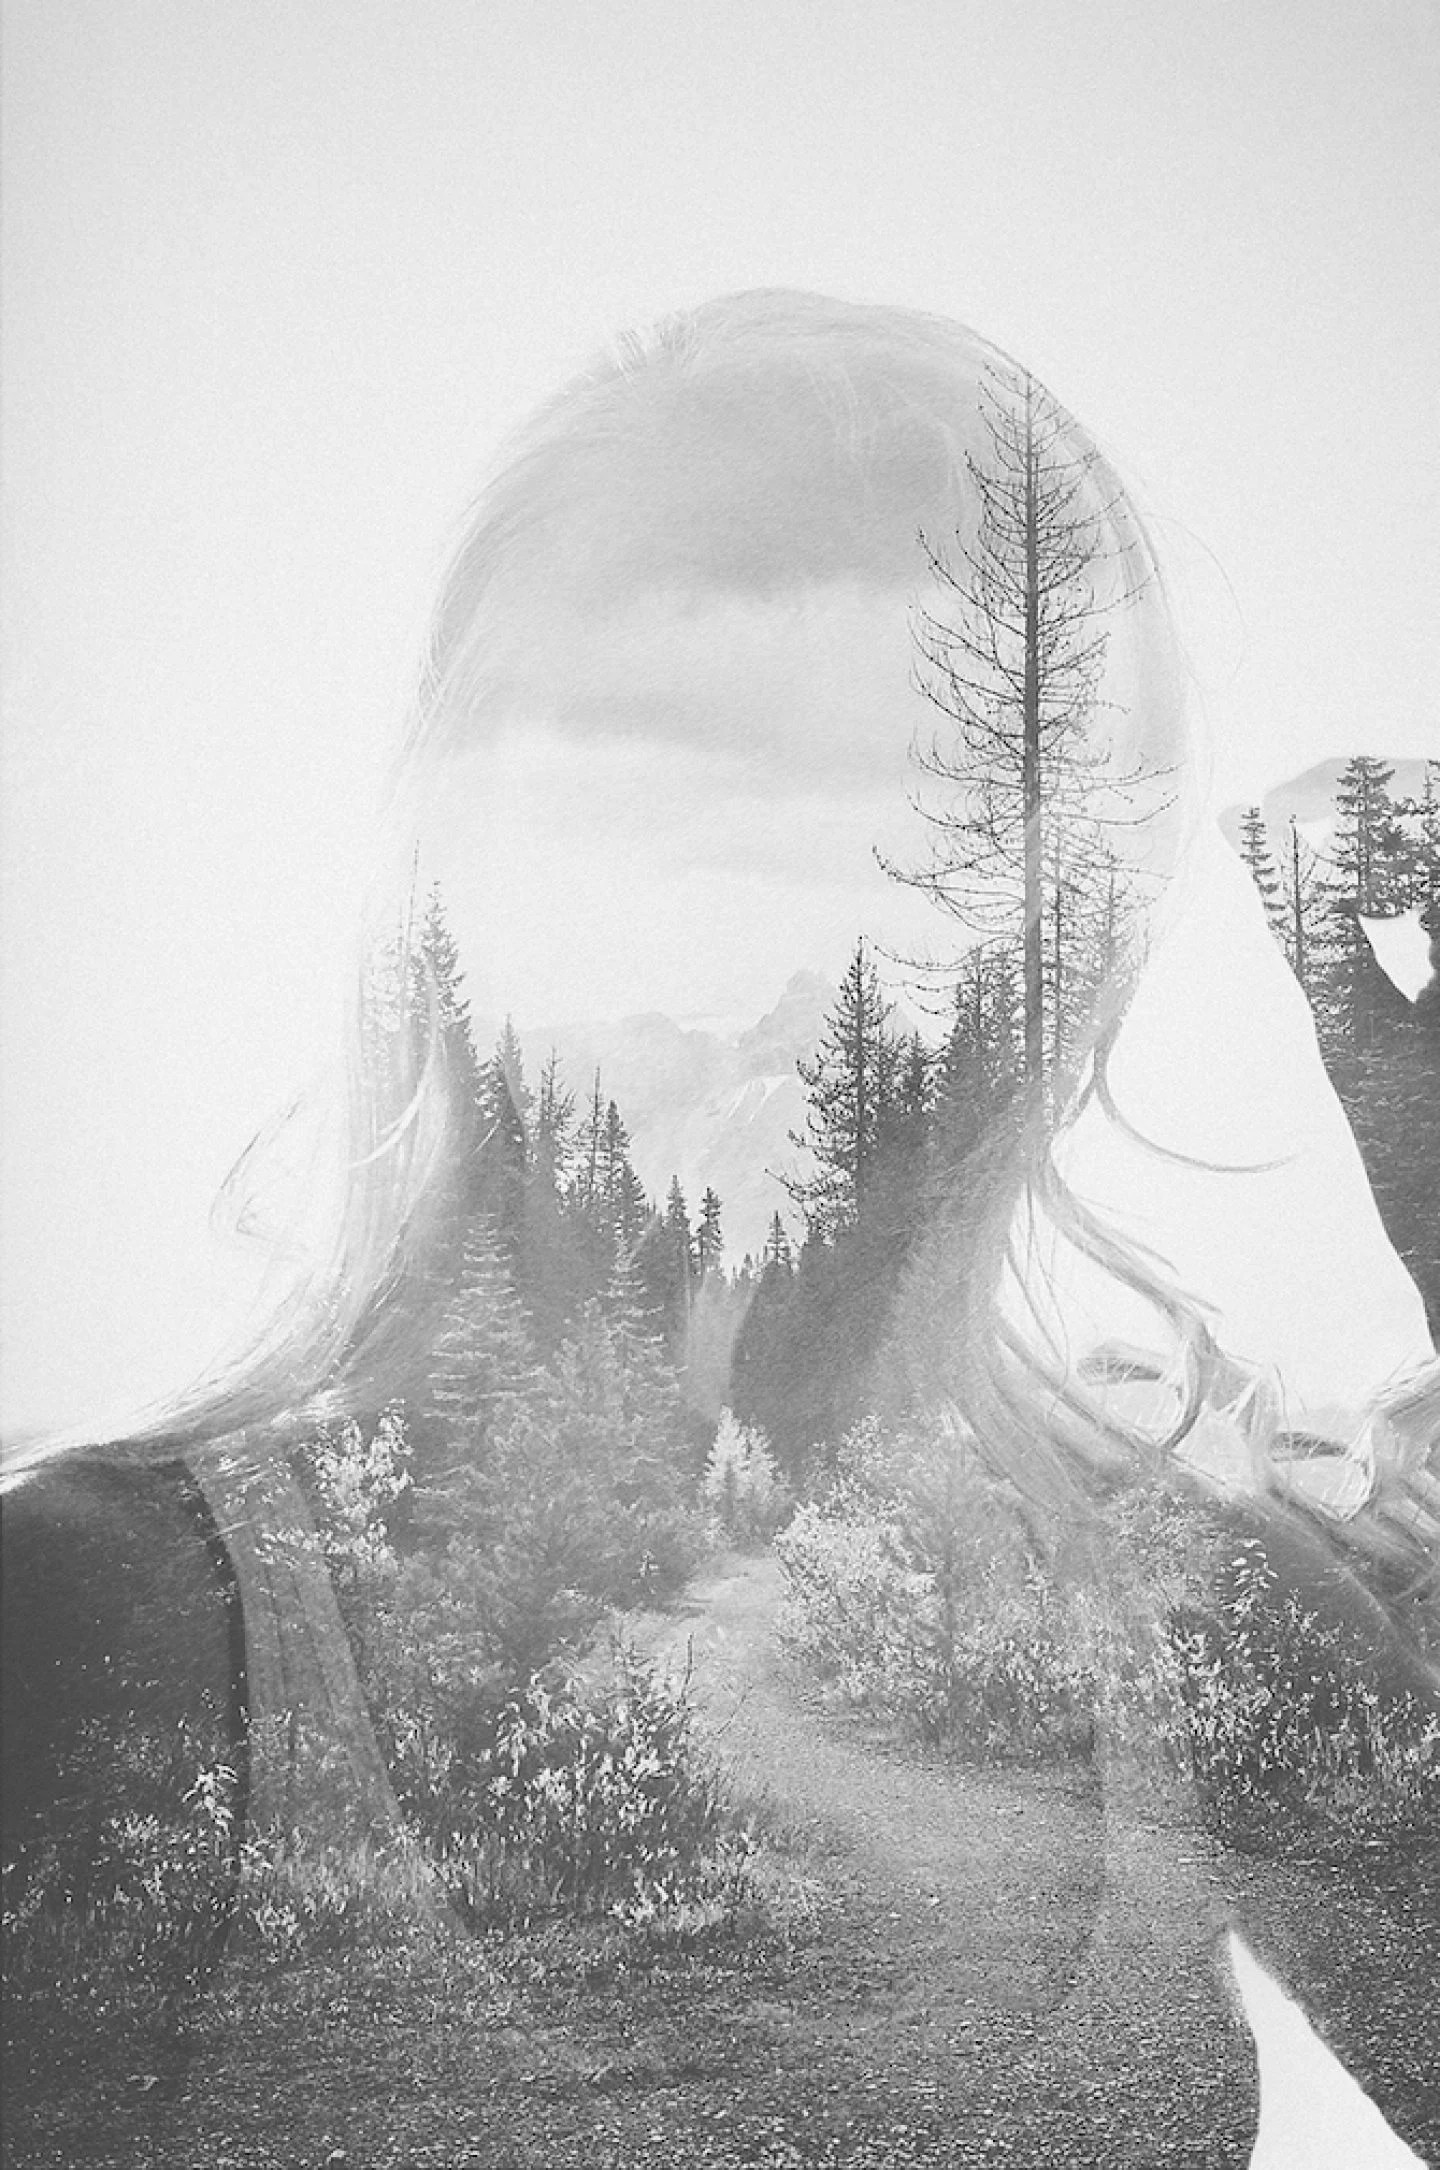
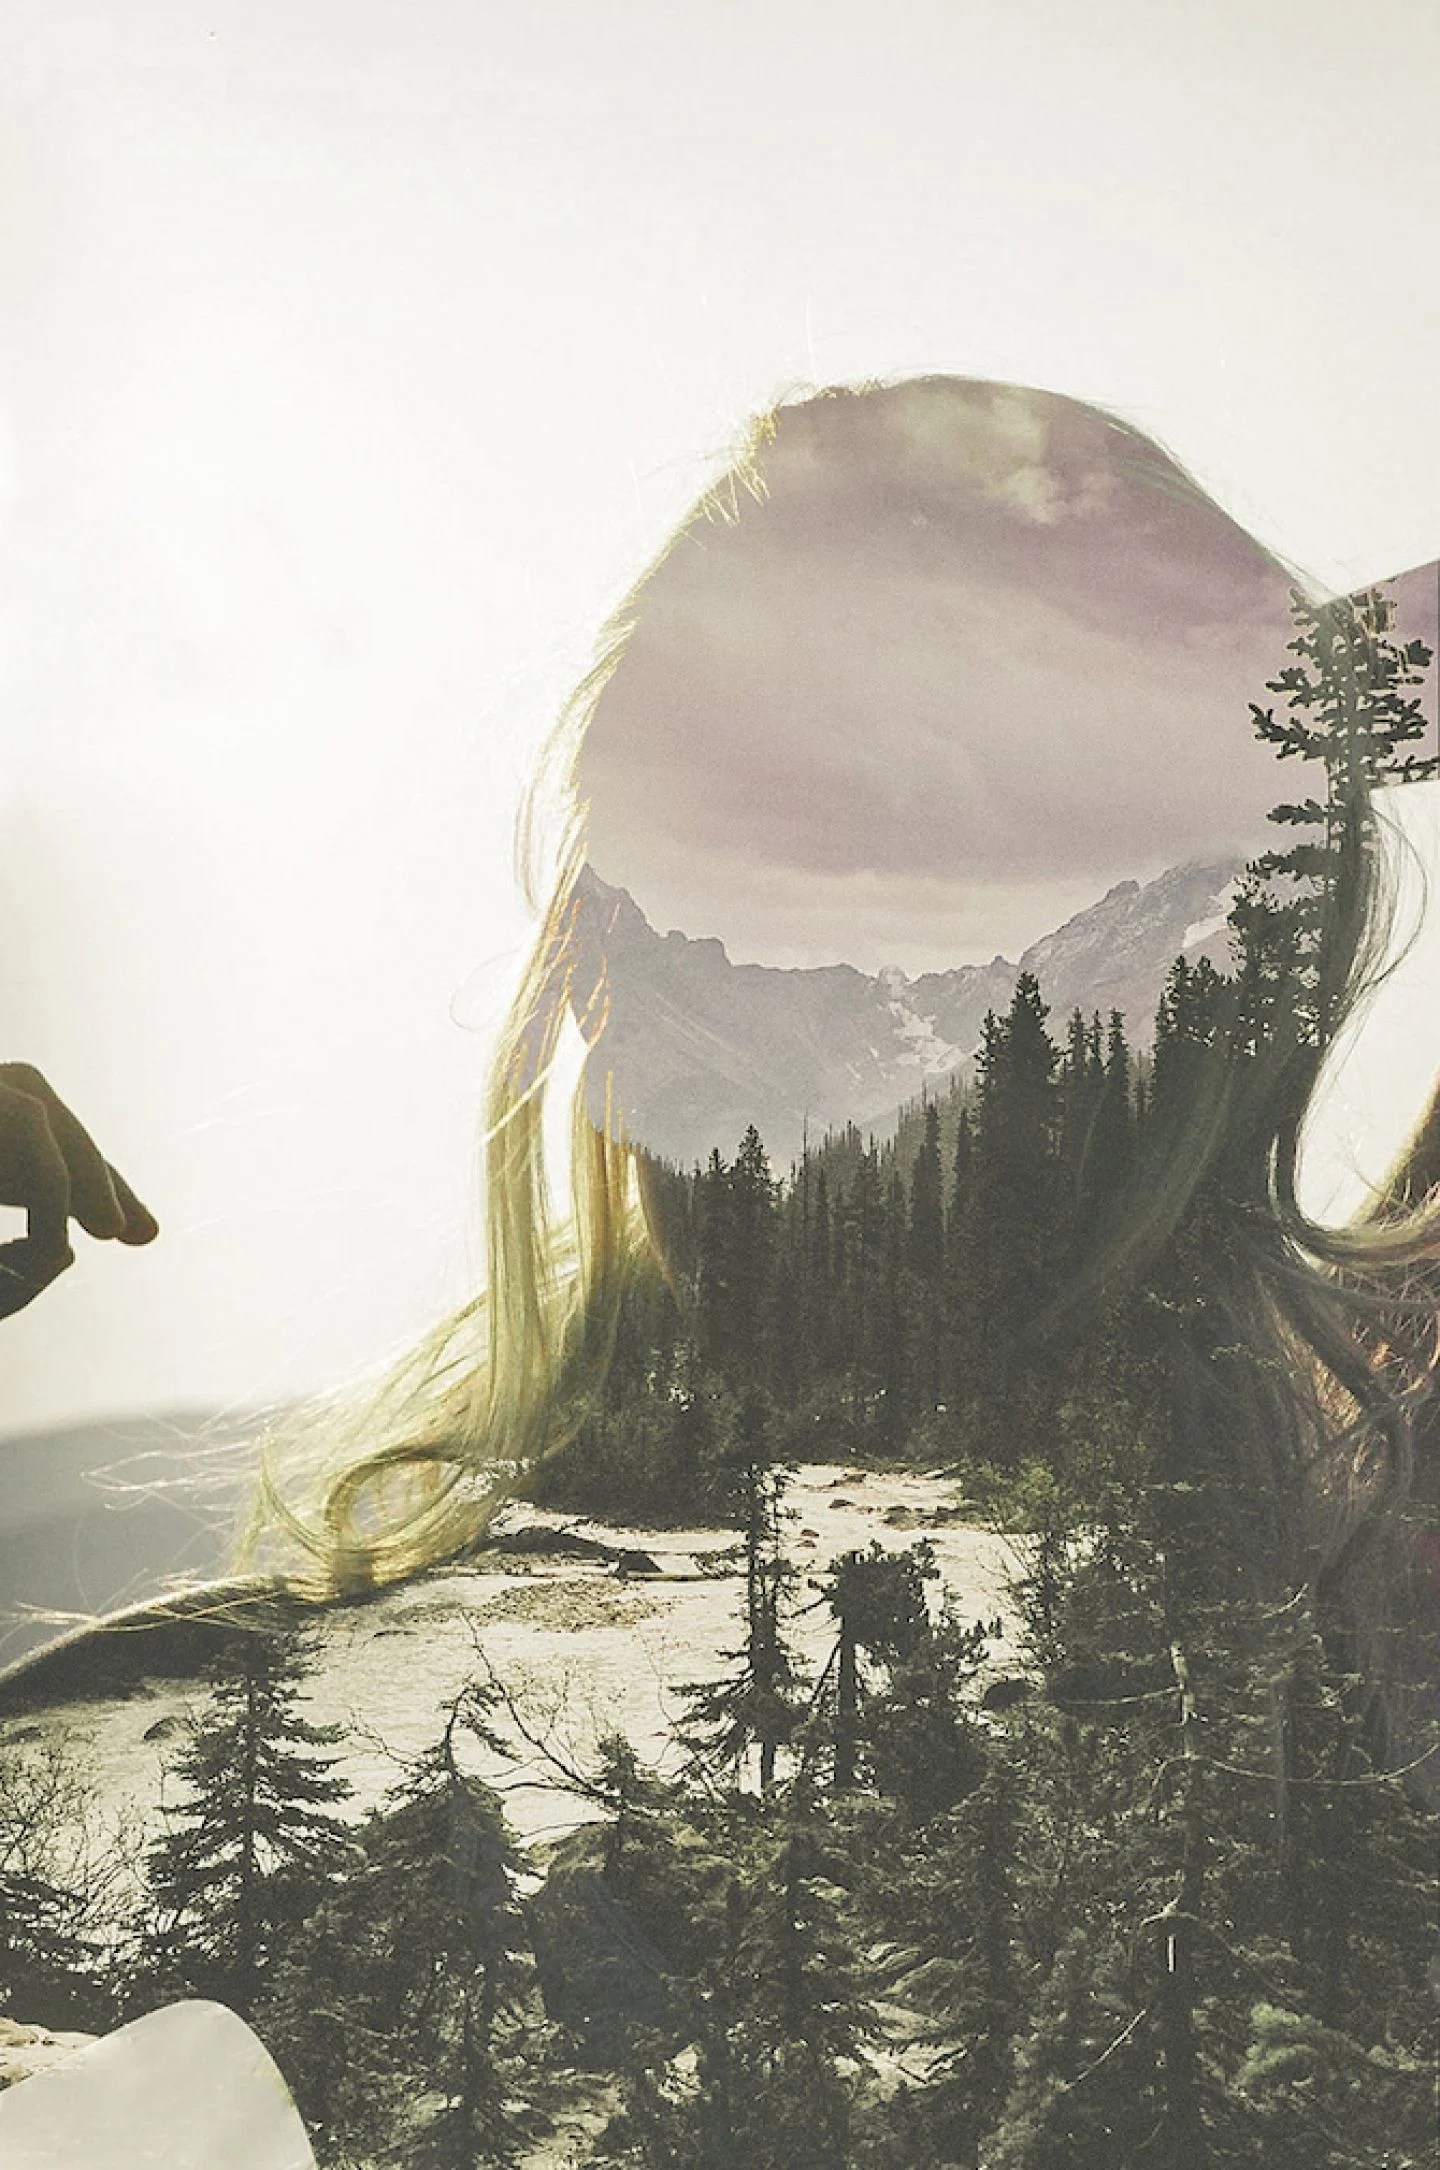
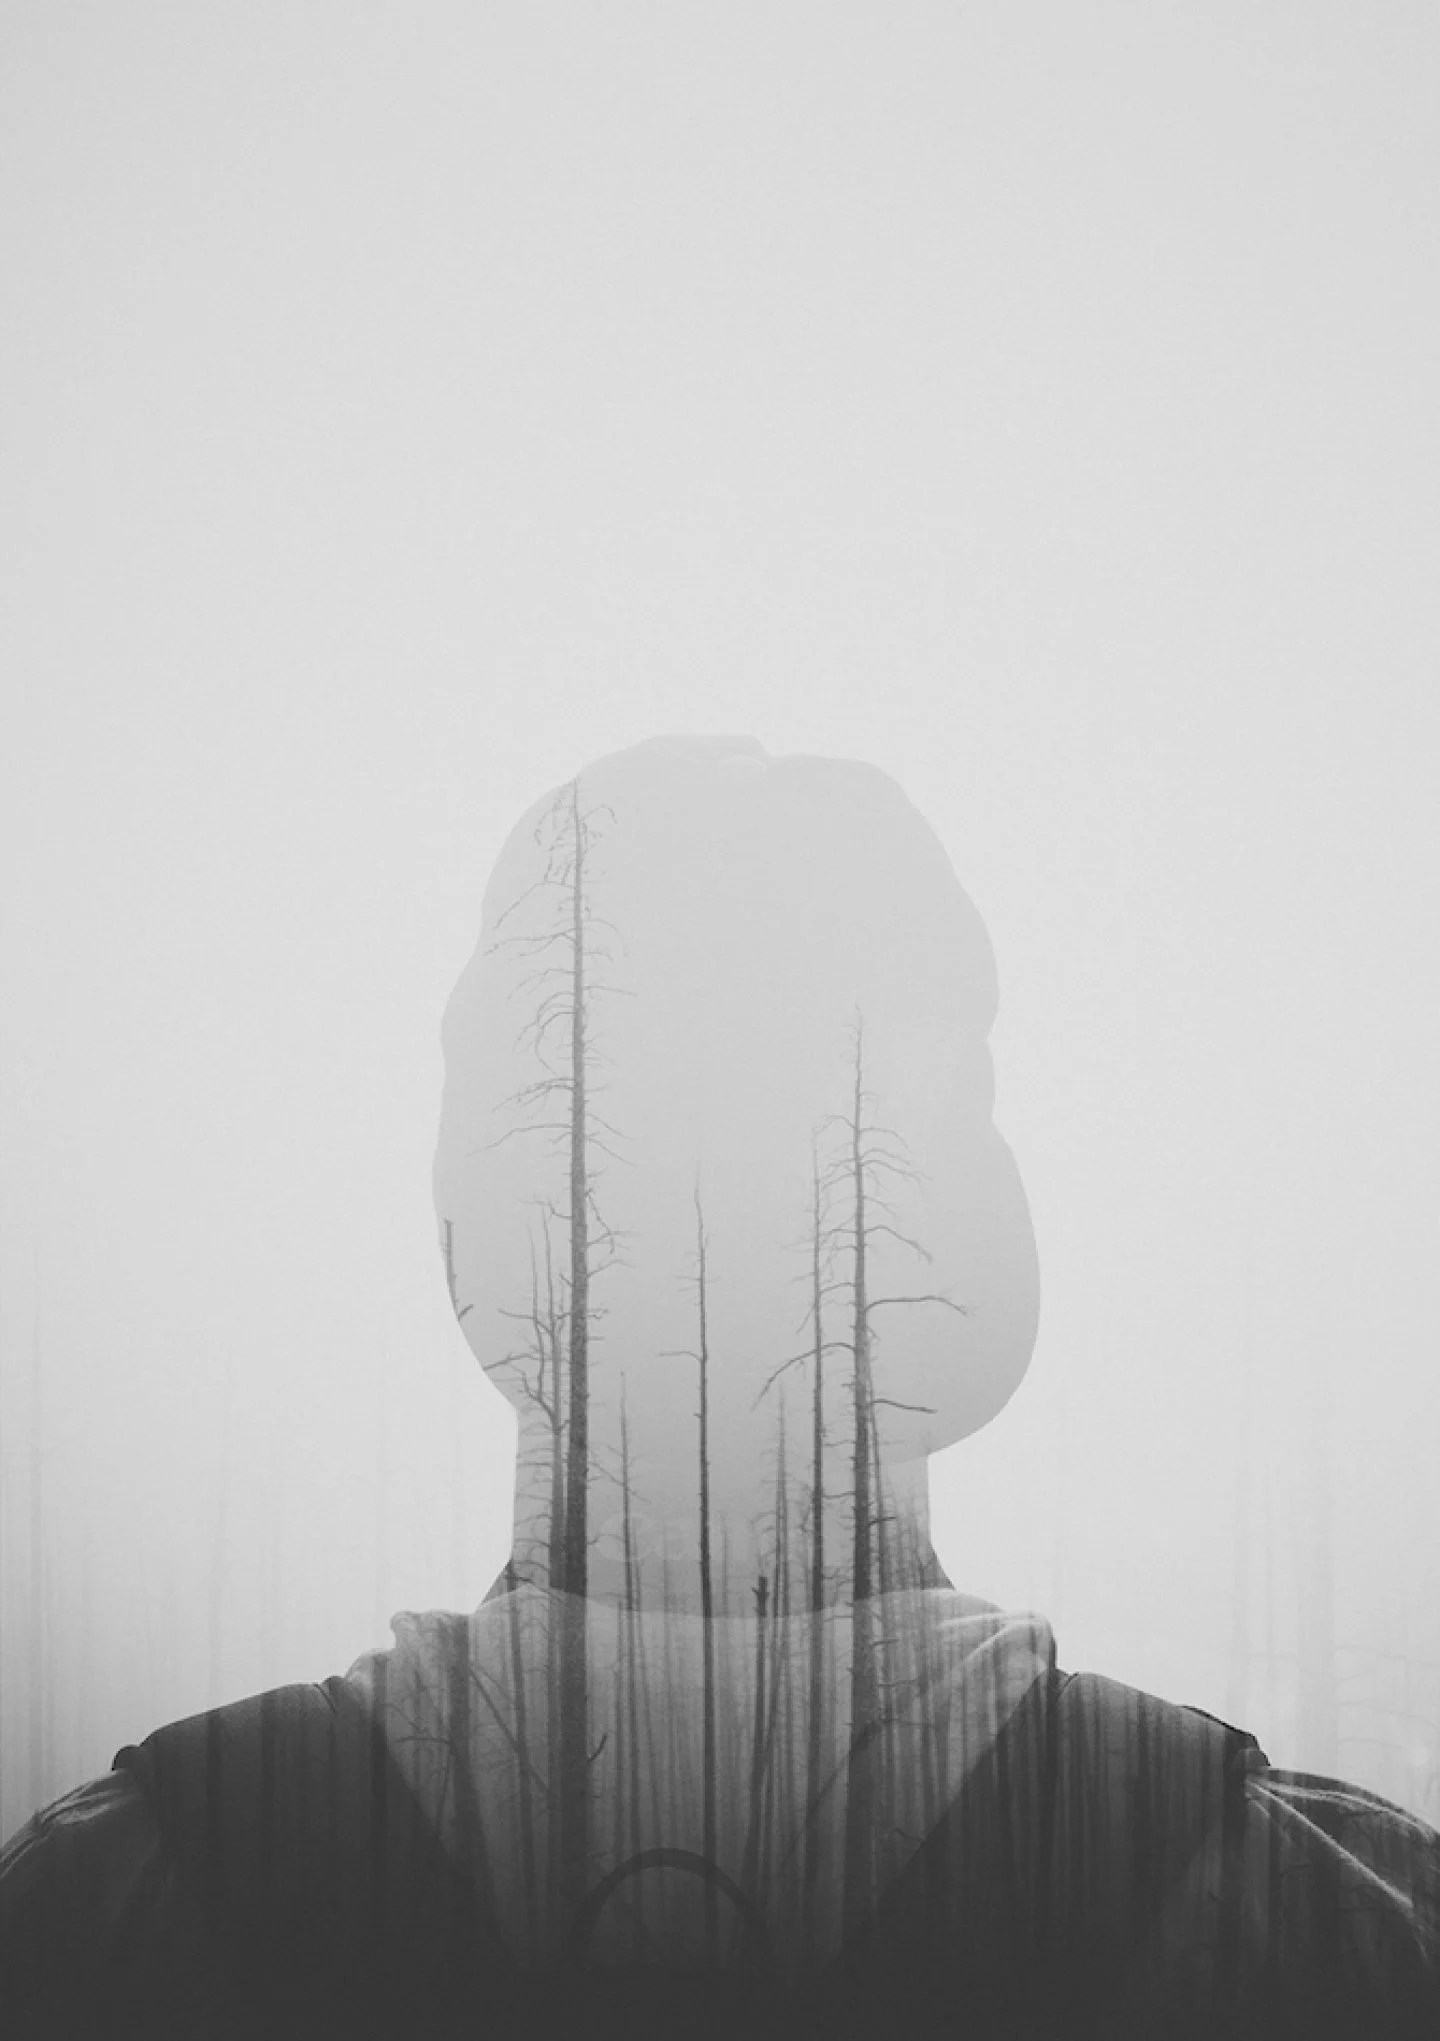
Luke Gram is a photographer who travels around the world to capture whatever he sees as a potential beauty in it, such as landscape, cityscape, and portrait, and then combines them as a double portrait with his digital camera. The way he did it, he achieved a dreamy look that gives the meaning of an artist to his work. Luke gram is a photographer that comes from Canada and he became an Instagram celebrity because of the imagery and dreamy look that he created during his travel around Europe, Africa and many other places. The way gram creates the double exposure is by stacking a silhouette image and a landscape picture in his camera to create the art.
Luke Gram’s Works

- Lina Bessonova (Primary research)
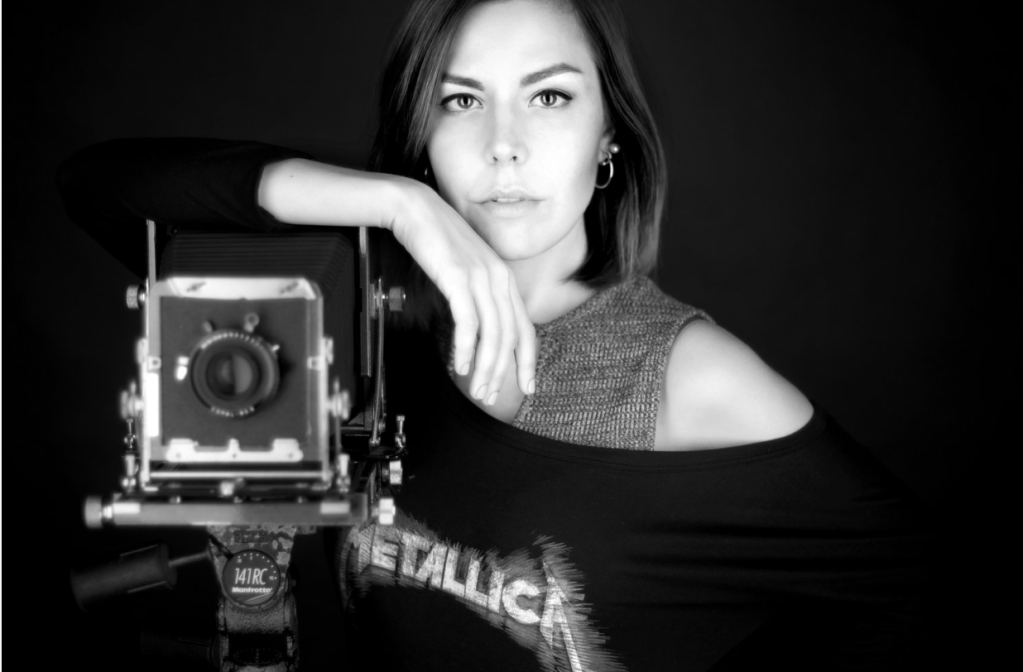
Russian-born analogue photographer and printer Lina Bessonova. She has a background in public relations and media communications, but she decided to follow her love for film, earning an MFA in photography in 2017 and publishing her first book, “At Home,” in the same year.
Currently, she is opening an analogue darkroom at Florence with four enlargers to take students in practising analogue development and processing.
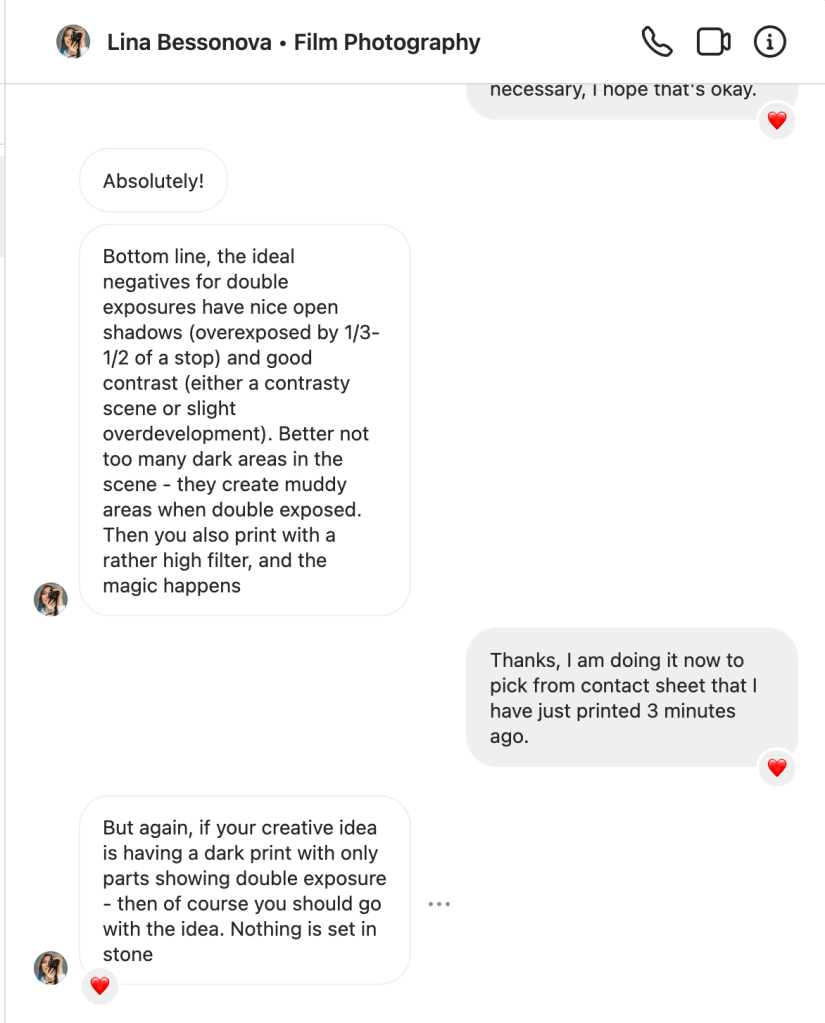
In order to do an interview with her on double exposure in the darkroom with two images, I approached her on my own by sending her a DM from Instagram last week and I got a response from her this week regarding my research.
To answer my questions, she replied that contrast is a more significant impact than exposure. If one of the negatives is flat, the print will be flat as well; otherwise, I will stress myself out trying to make it seem decent when it turns out another way.
and it is confirmed also by Nat Bevins, the technician of City of Bristol College media that expert in the Darkroom and also shoot
- Nat Bevins (Primary research)
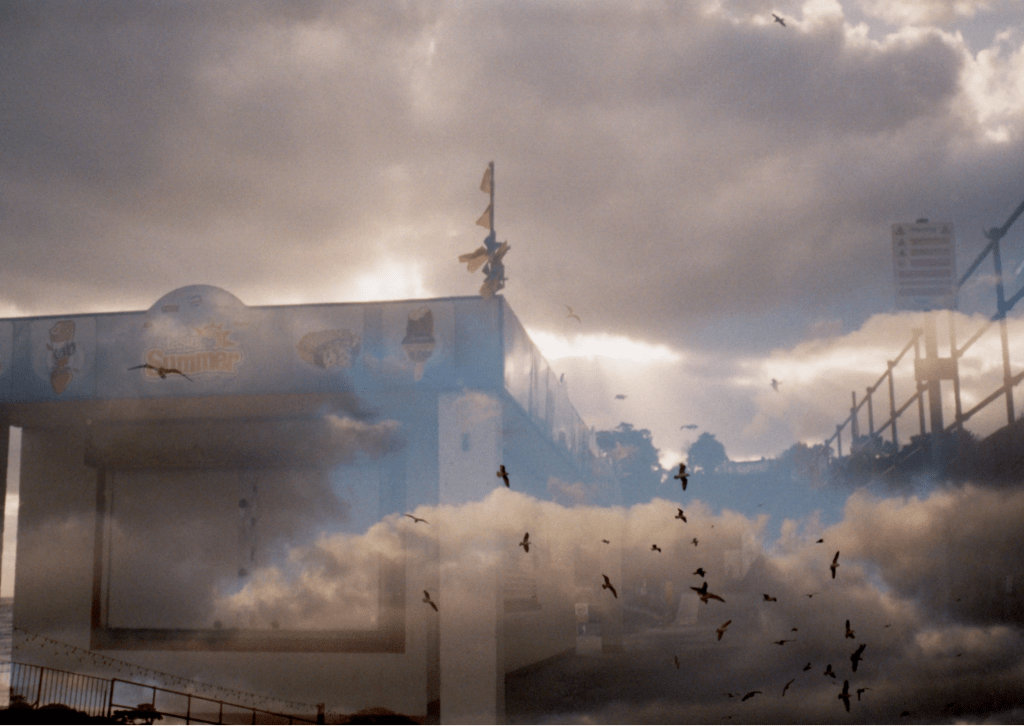
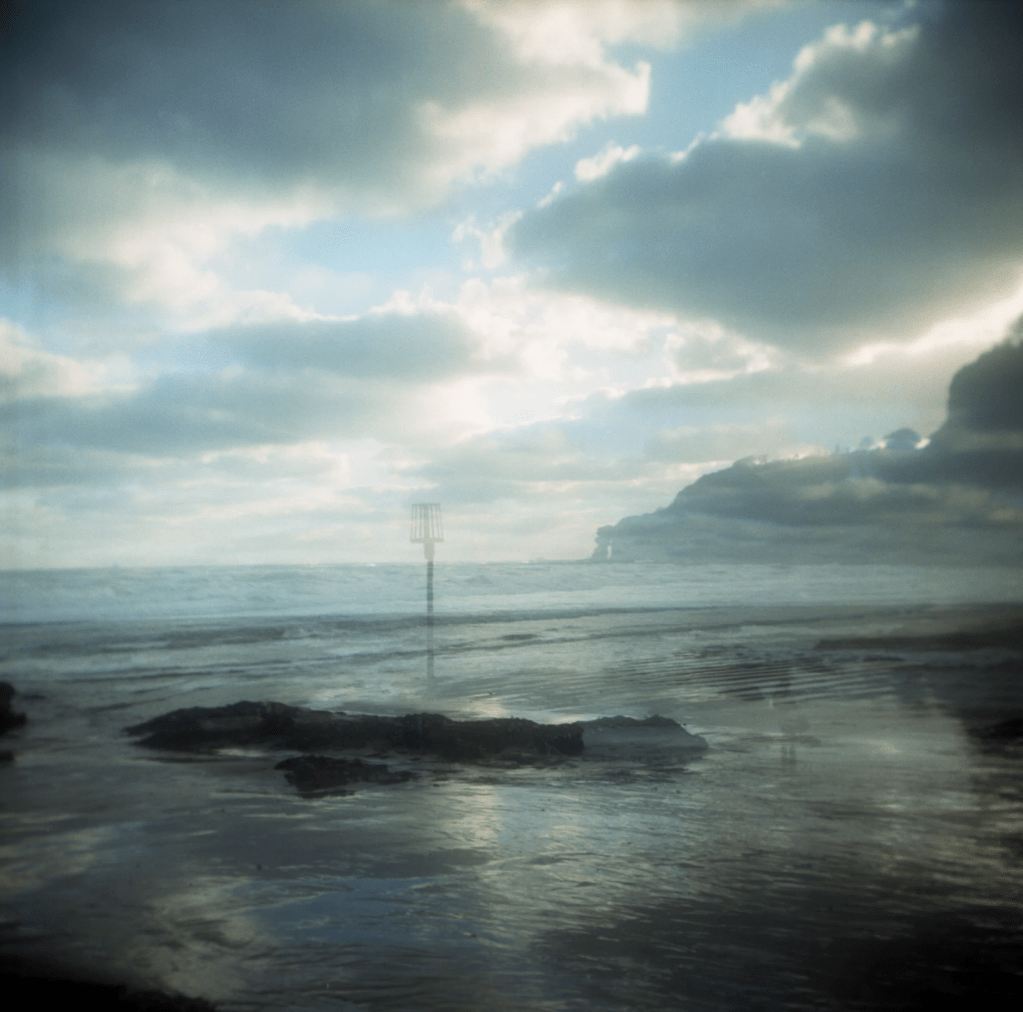
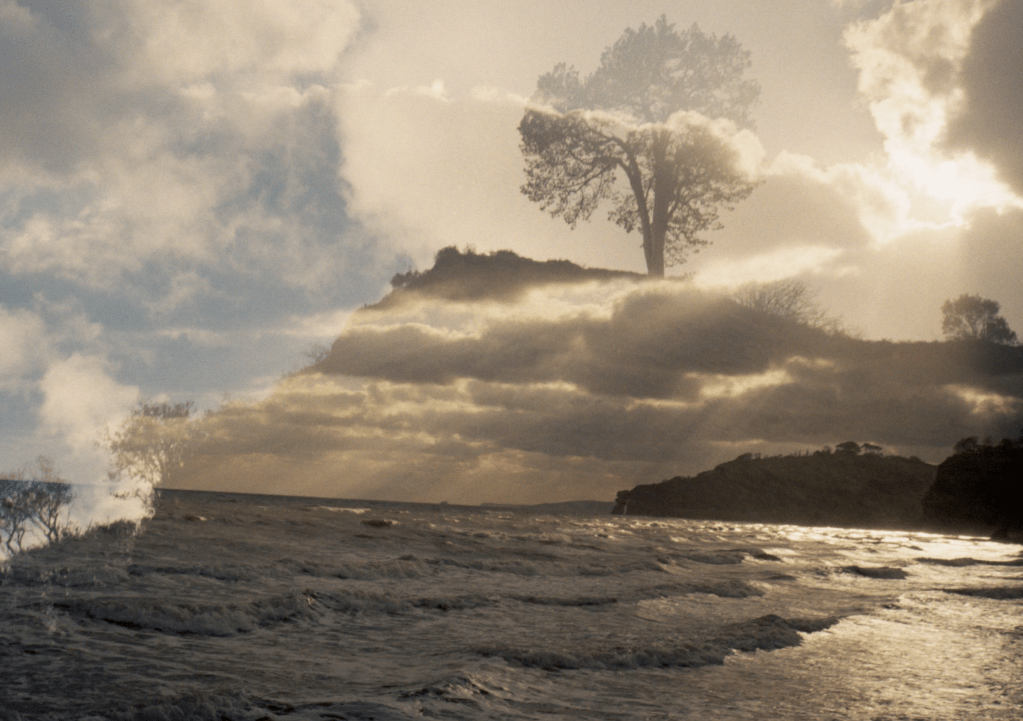
Nat Bevins is a landscape photographer with a focus on examining human interaction with the natural world. She is located in Bristol. Most photos are taken on 35mm film about nature with the double exposure technique.
One thing that Nat mentioned to me earlier this week was” to get double exposure, you have to shoot black contrast against a white background like clouds.
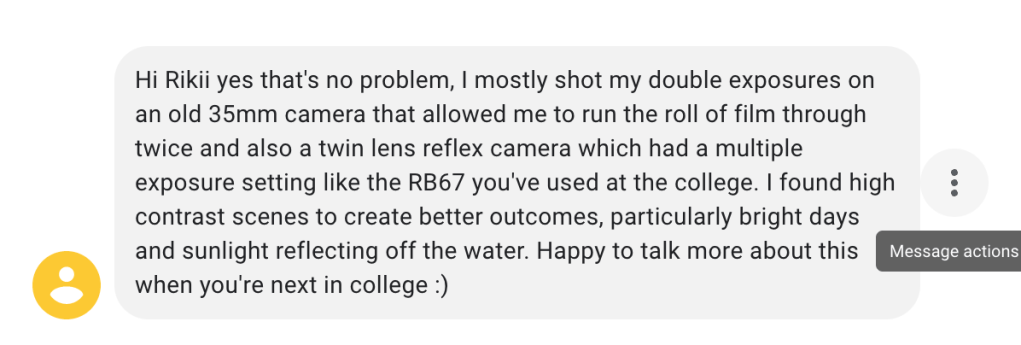
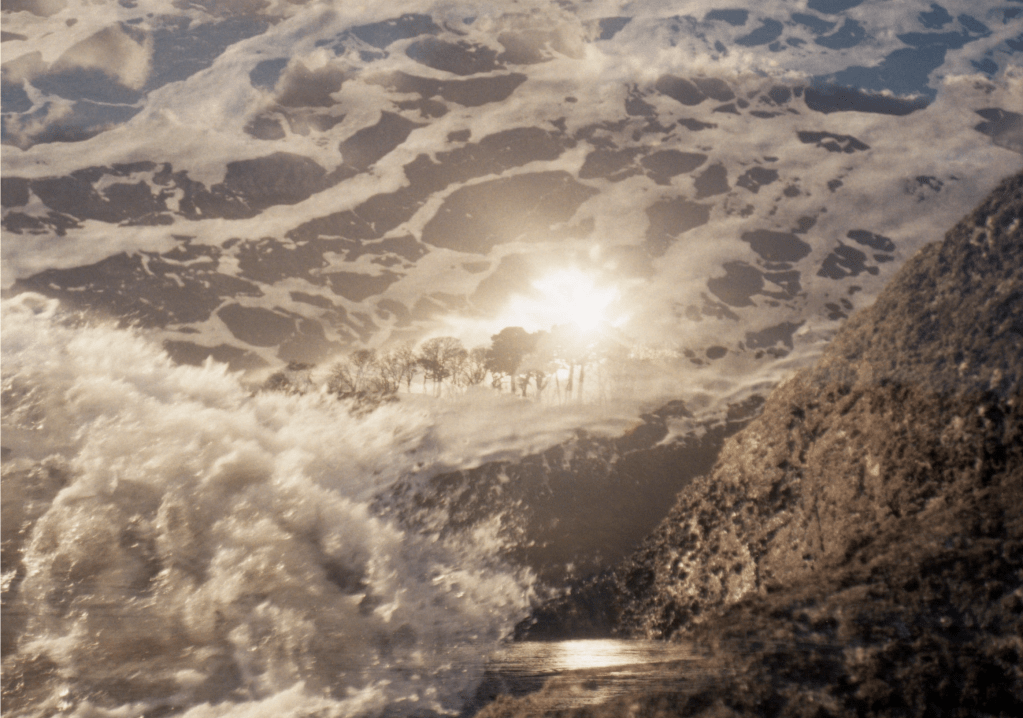
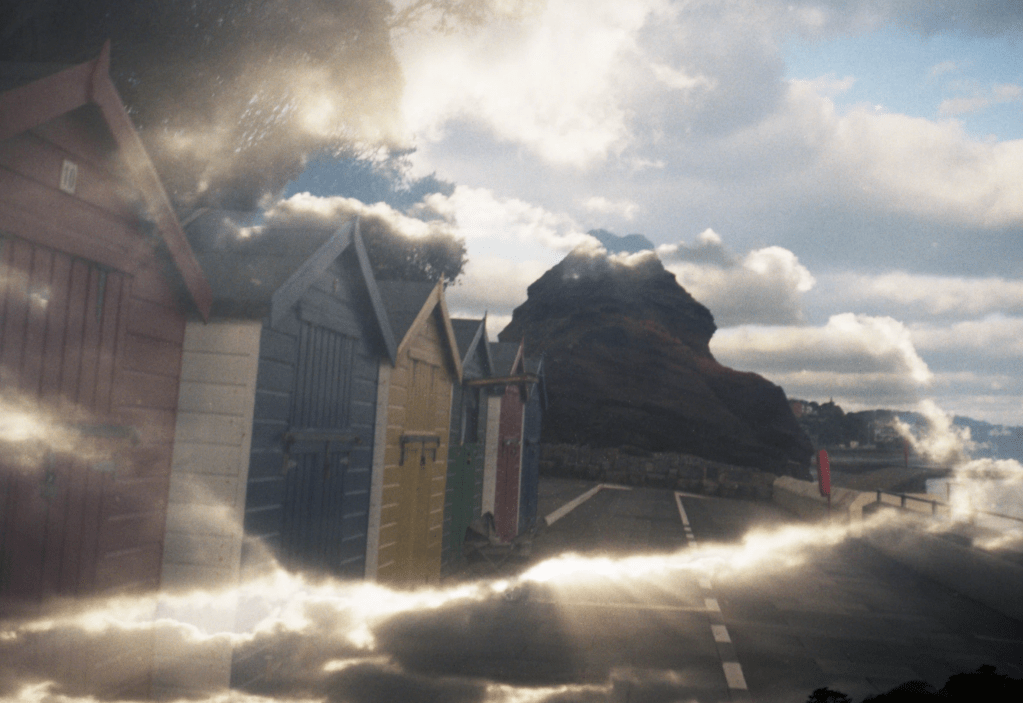
In the project half in half out of the photographs series, she utilizes standard angles and combines them with creative methods (double exposure in camera) to generate fresh perspectives on the traditionally British coastal landscape.
Nat Bevins’s works

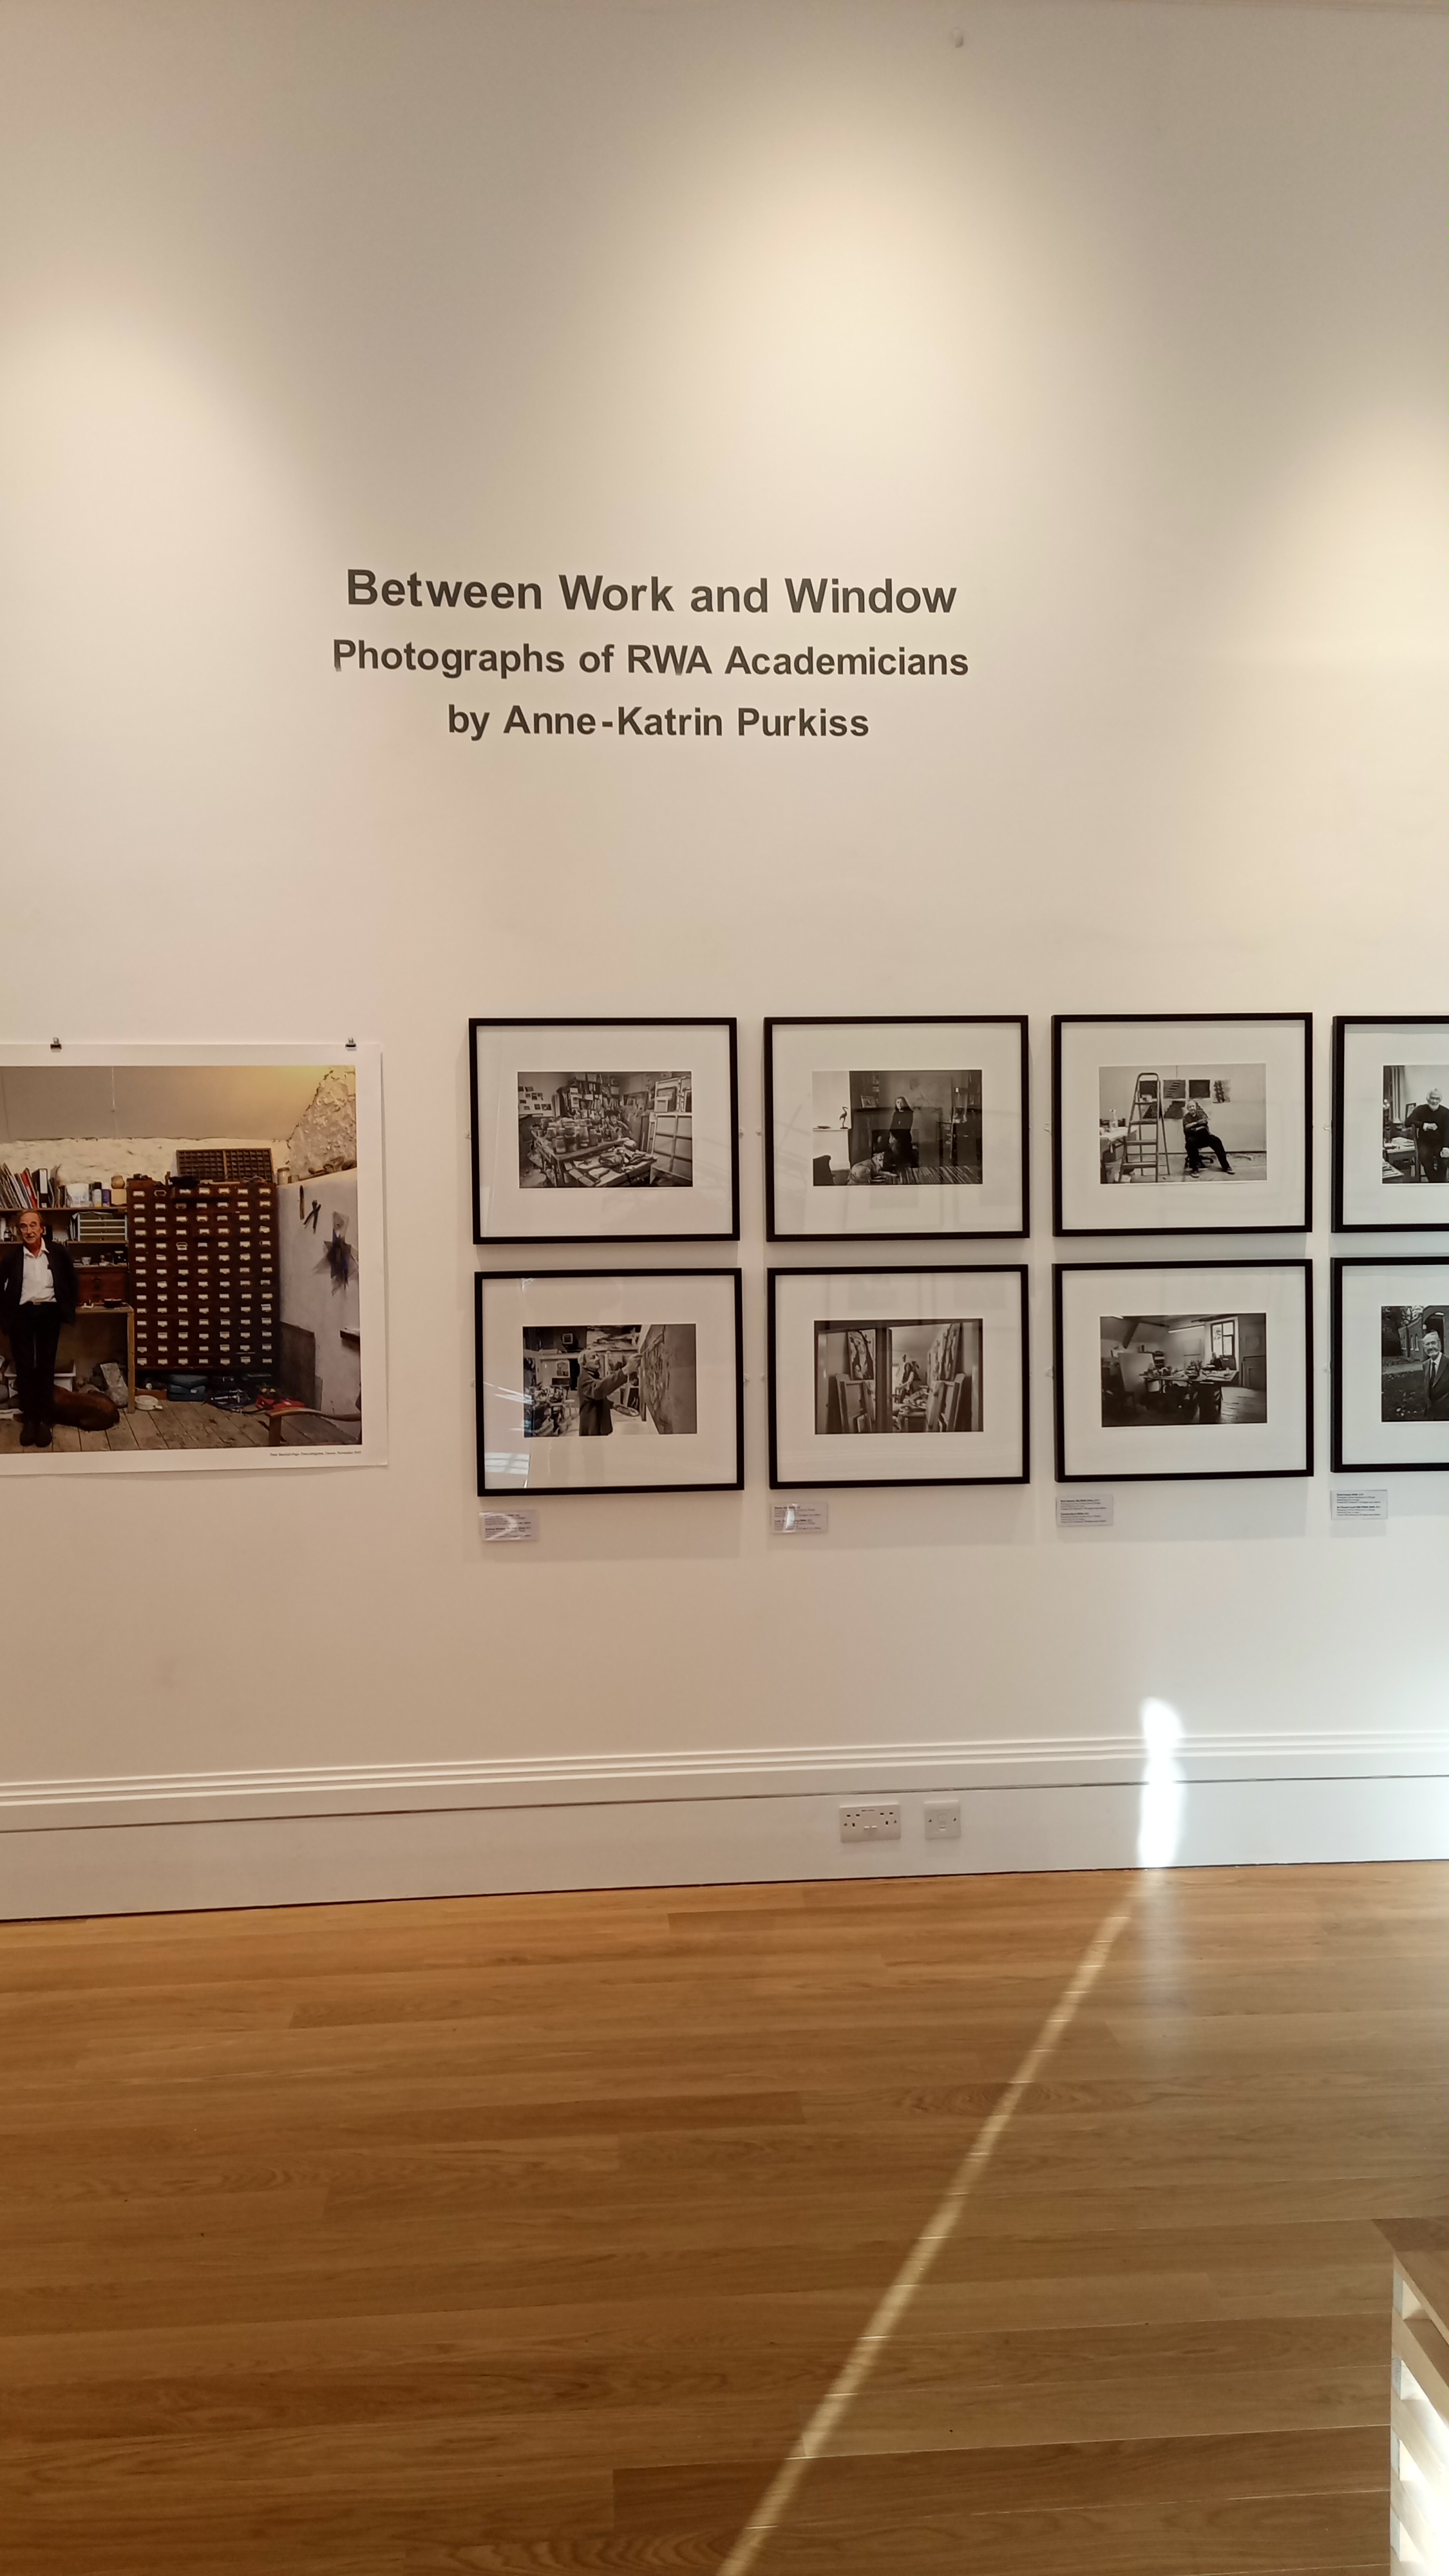
- Anne-Katrin Purkiss (Primary Research)

England-based freelance photographer Anne-Katrin Purkiss focuses on the arts and environment.
She studied journalism and photography at Leipzig University. She moved to England in 1984 from an advertising firm. She became a freelance photographer after four years at Associated Press London.
She enjoys photographing individuals in their environments and jobs. Her thirty-year British portrait collection features inspiring individuals and their work.
Her work has been published by The Guardian, New York Times, Die Zeit, and Nature has featured her photos. Purkiss exhibits in England, Germany, Italy, and Switzerland.
Her Collections:

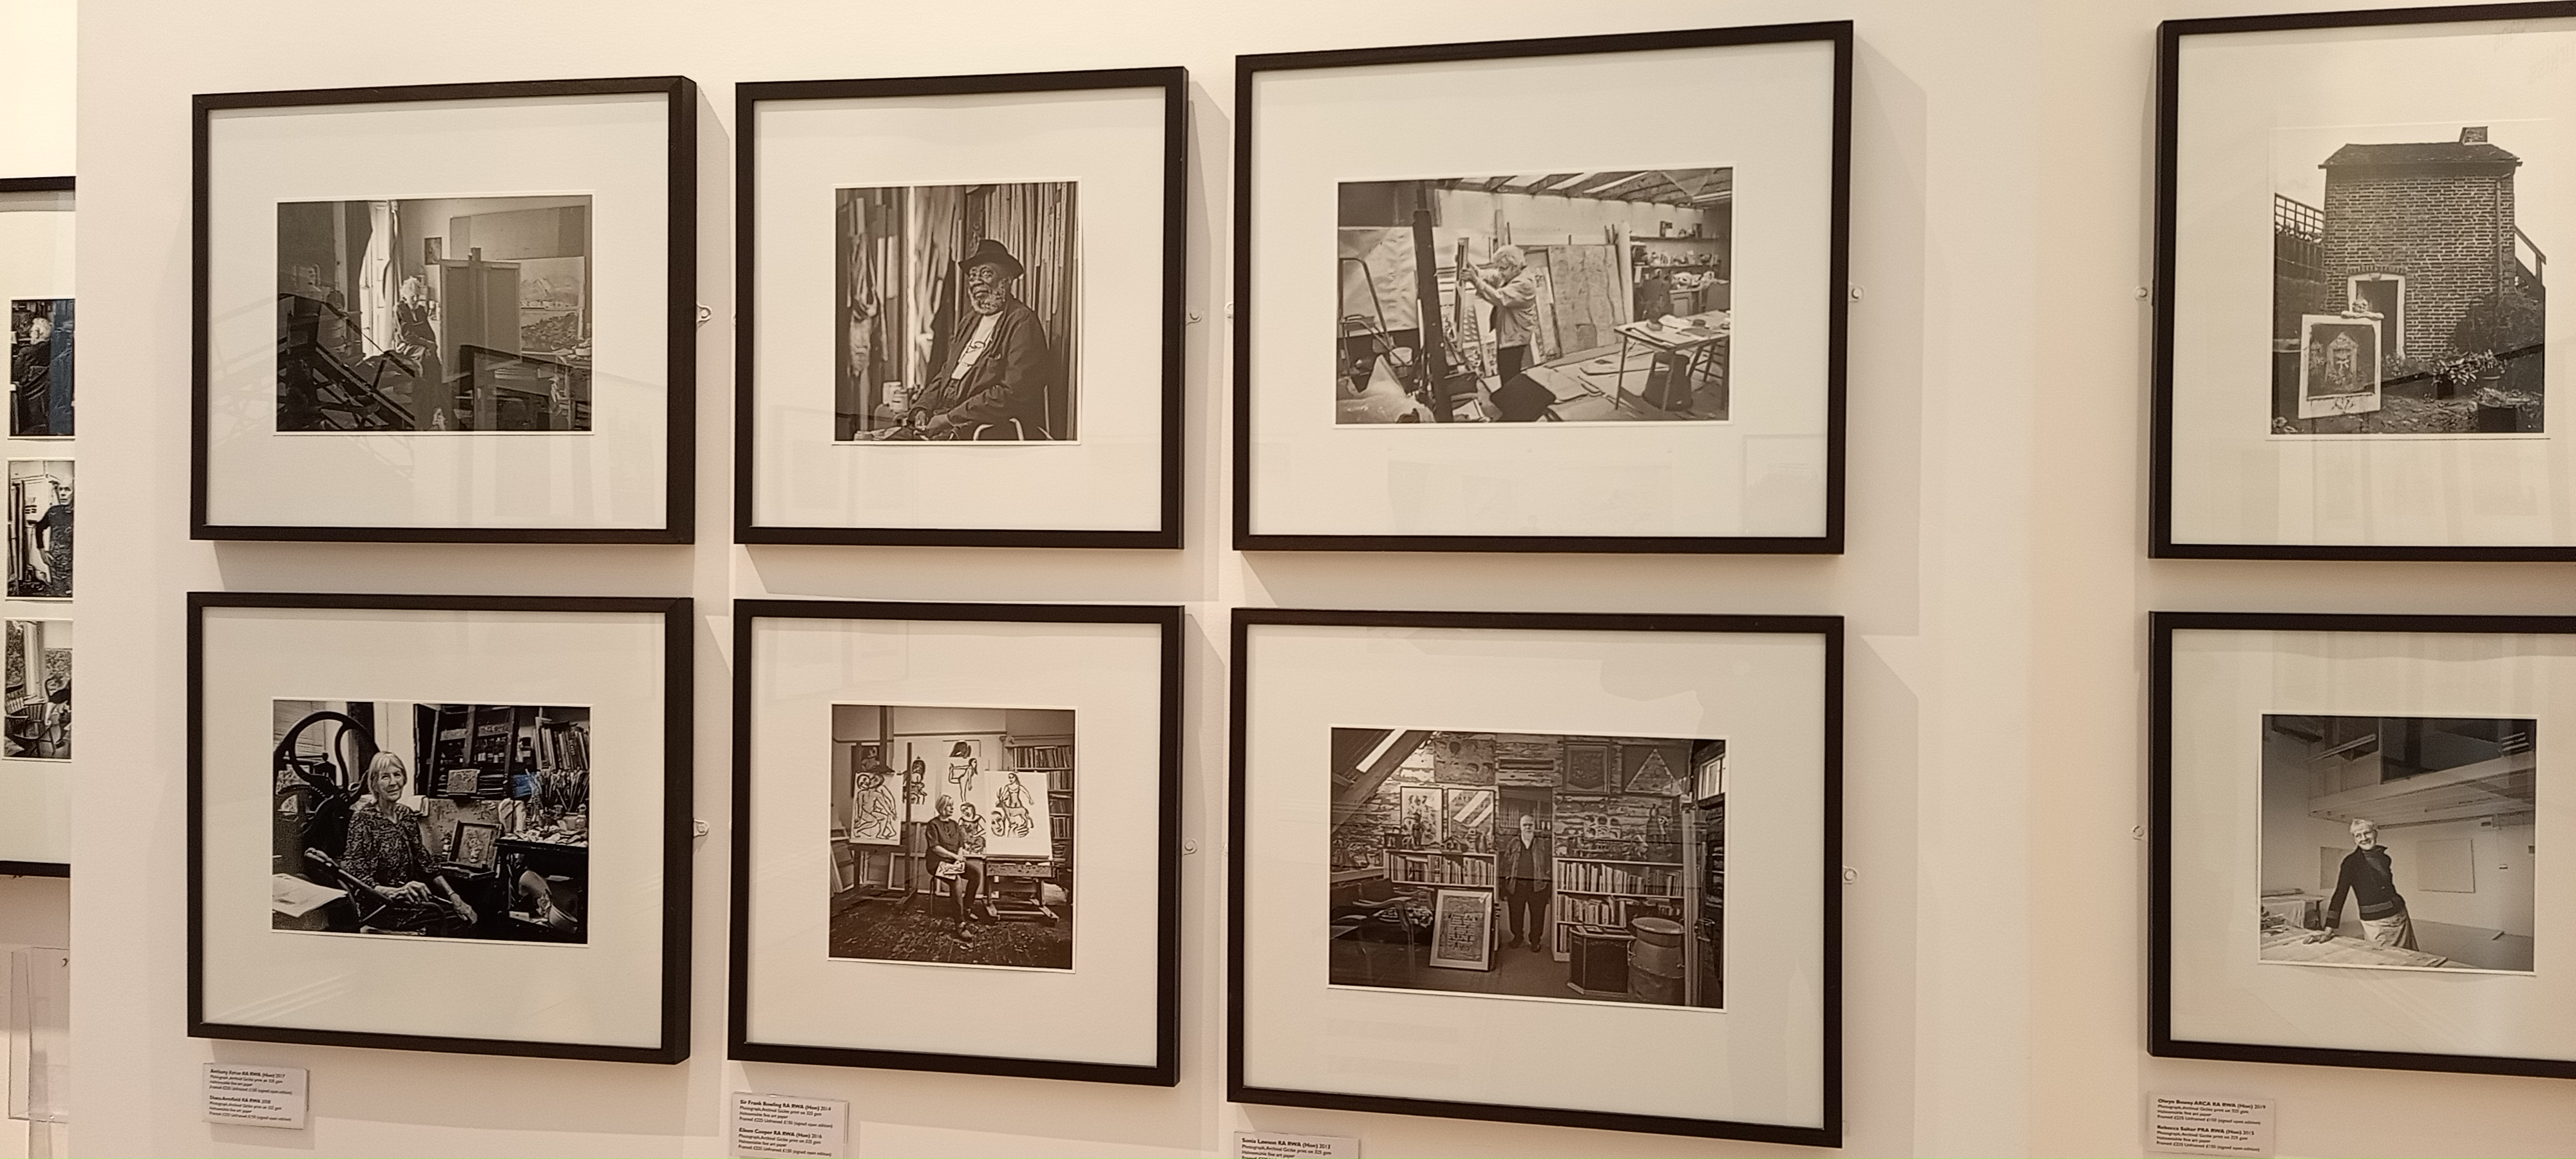

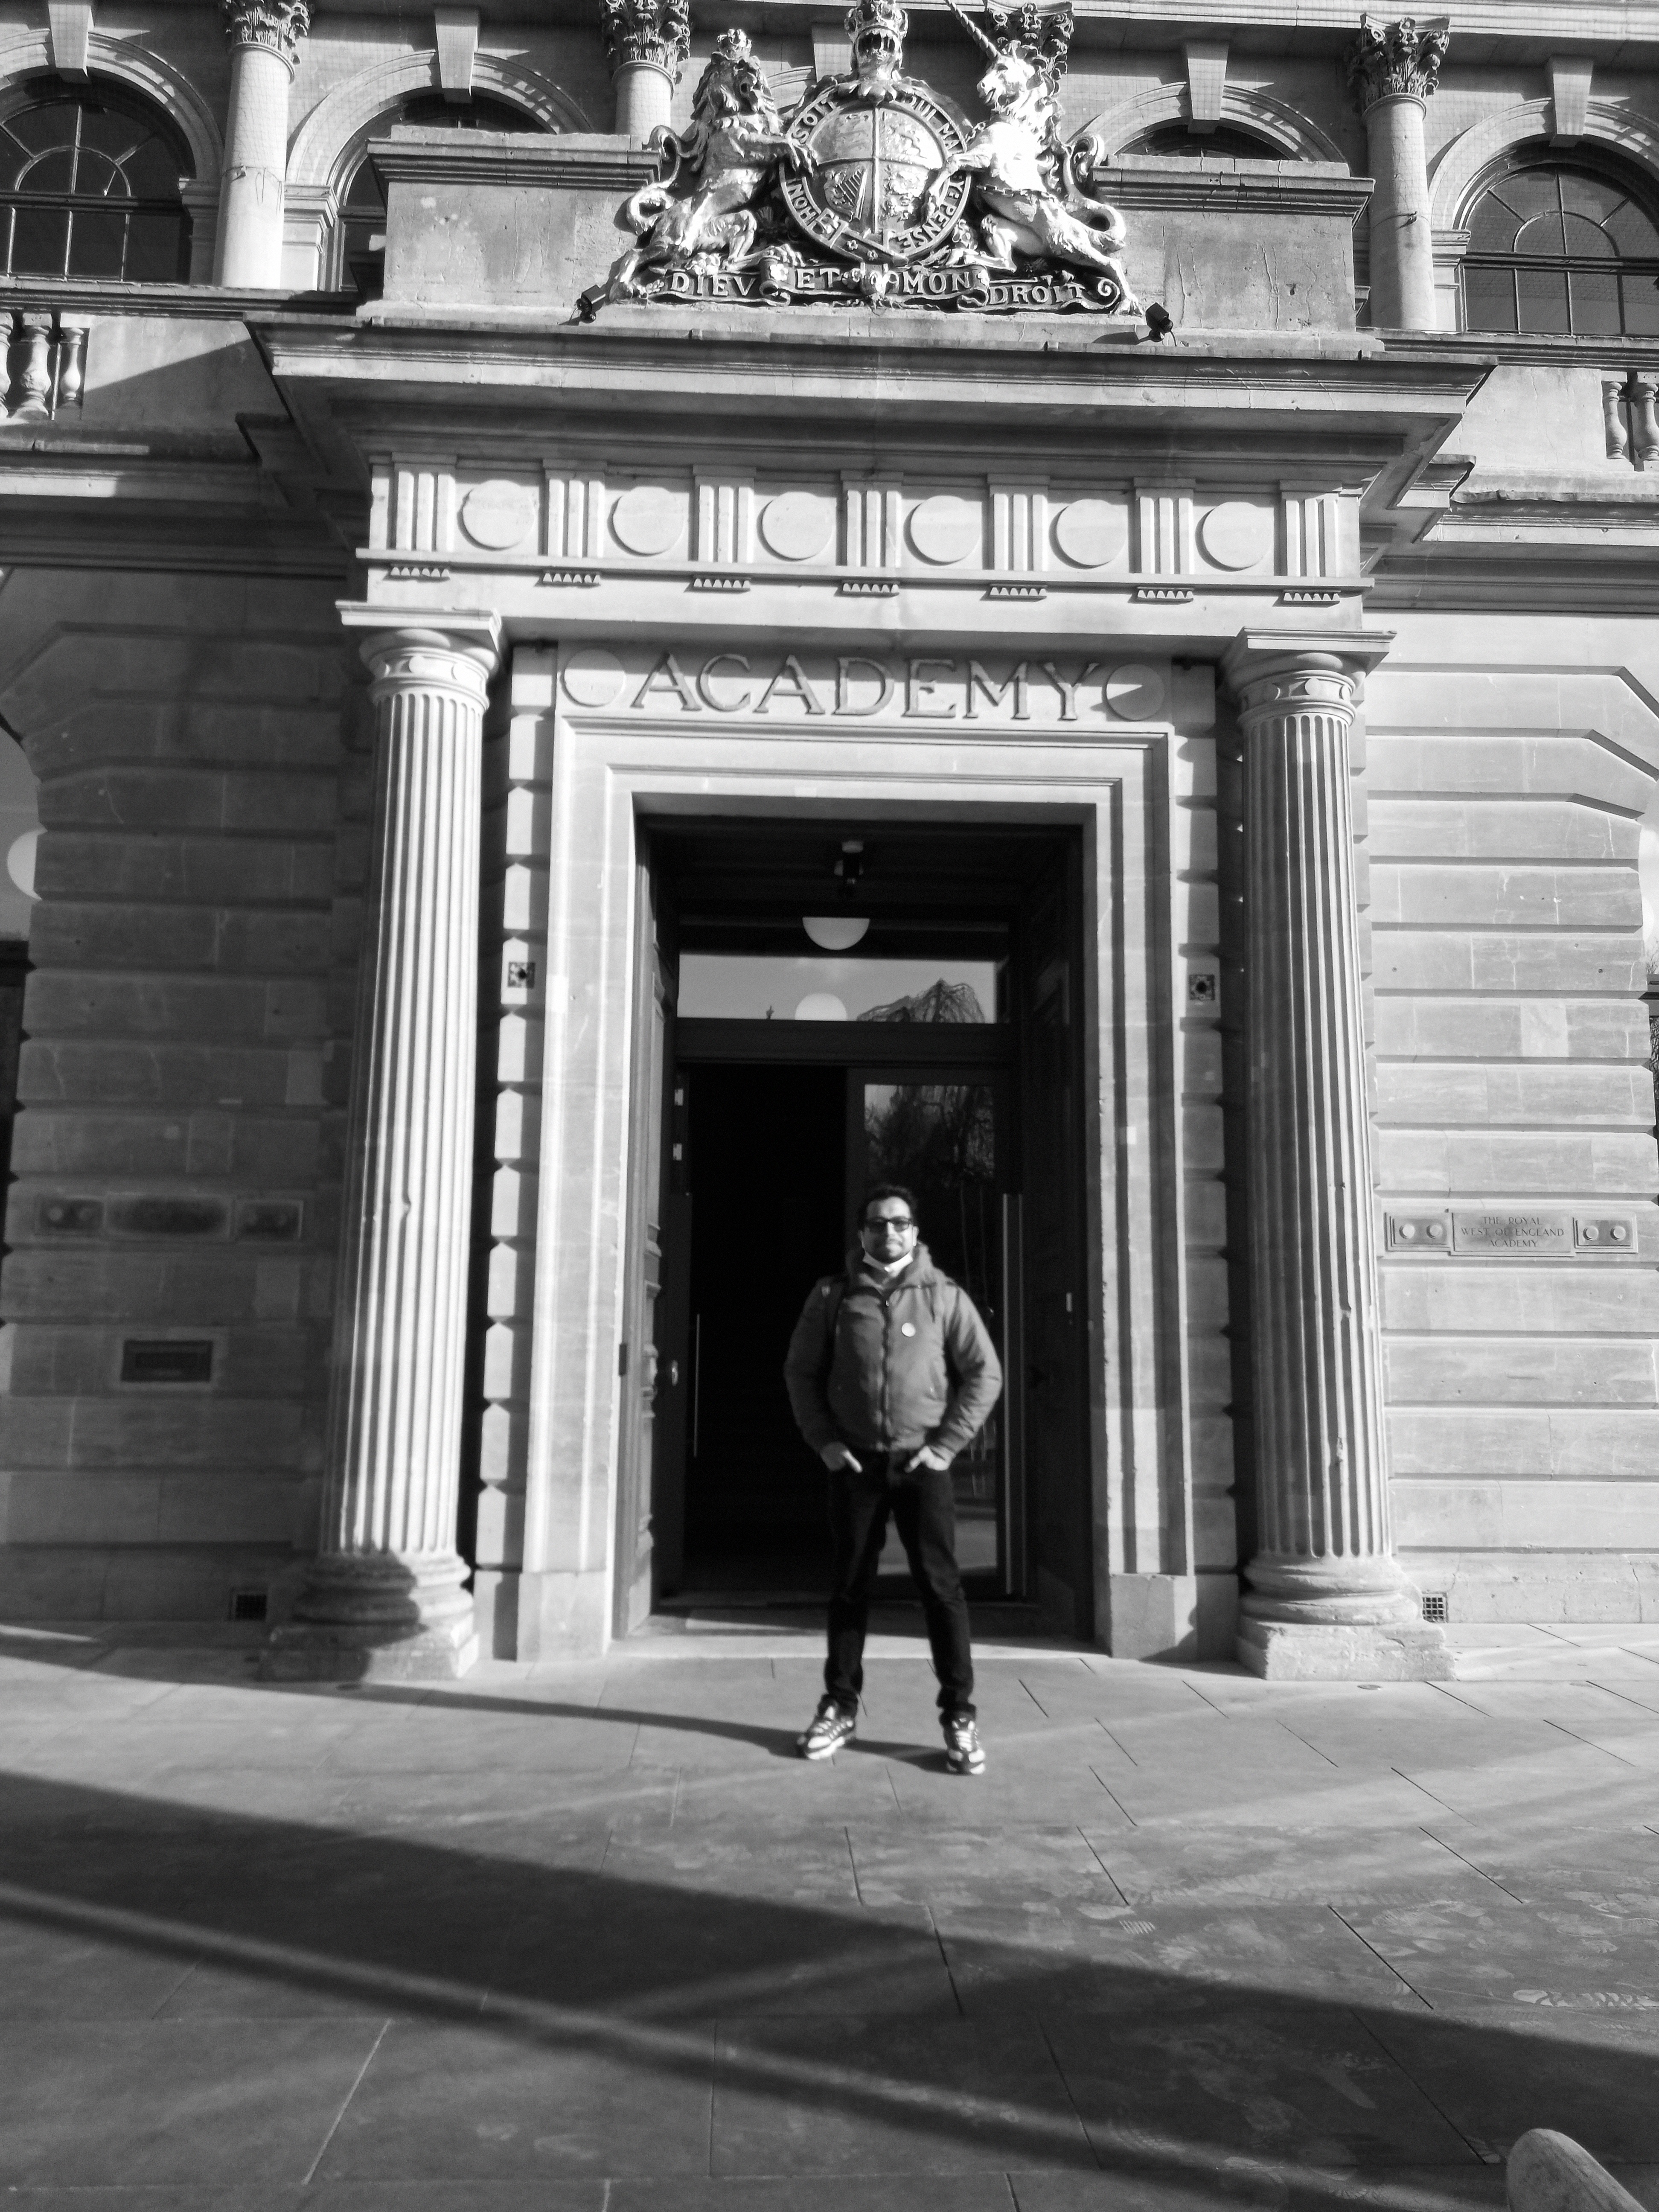
Royal West Academy (RWA) 2023
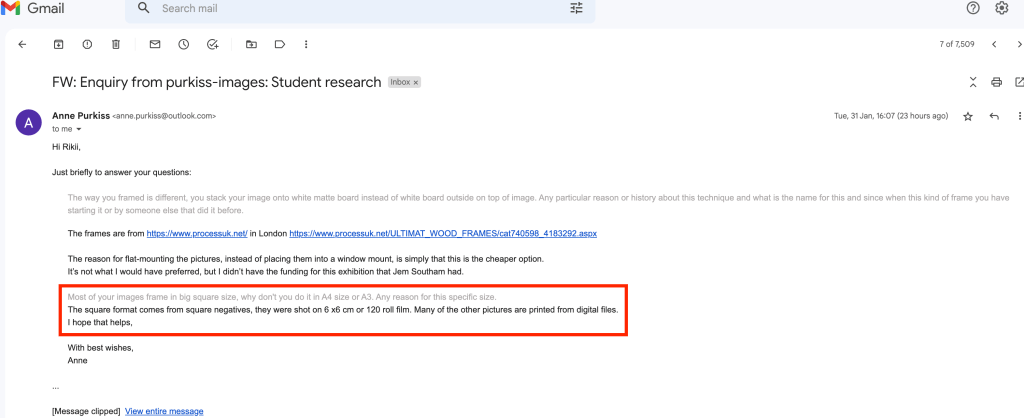
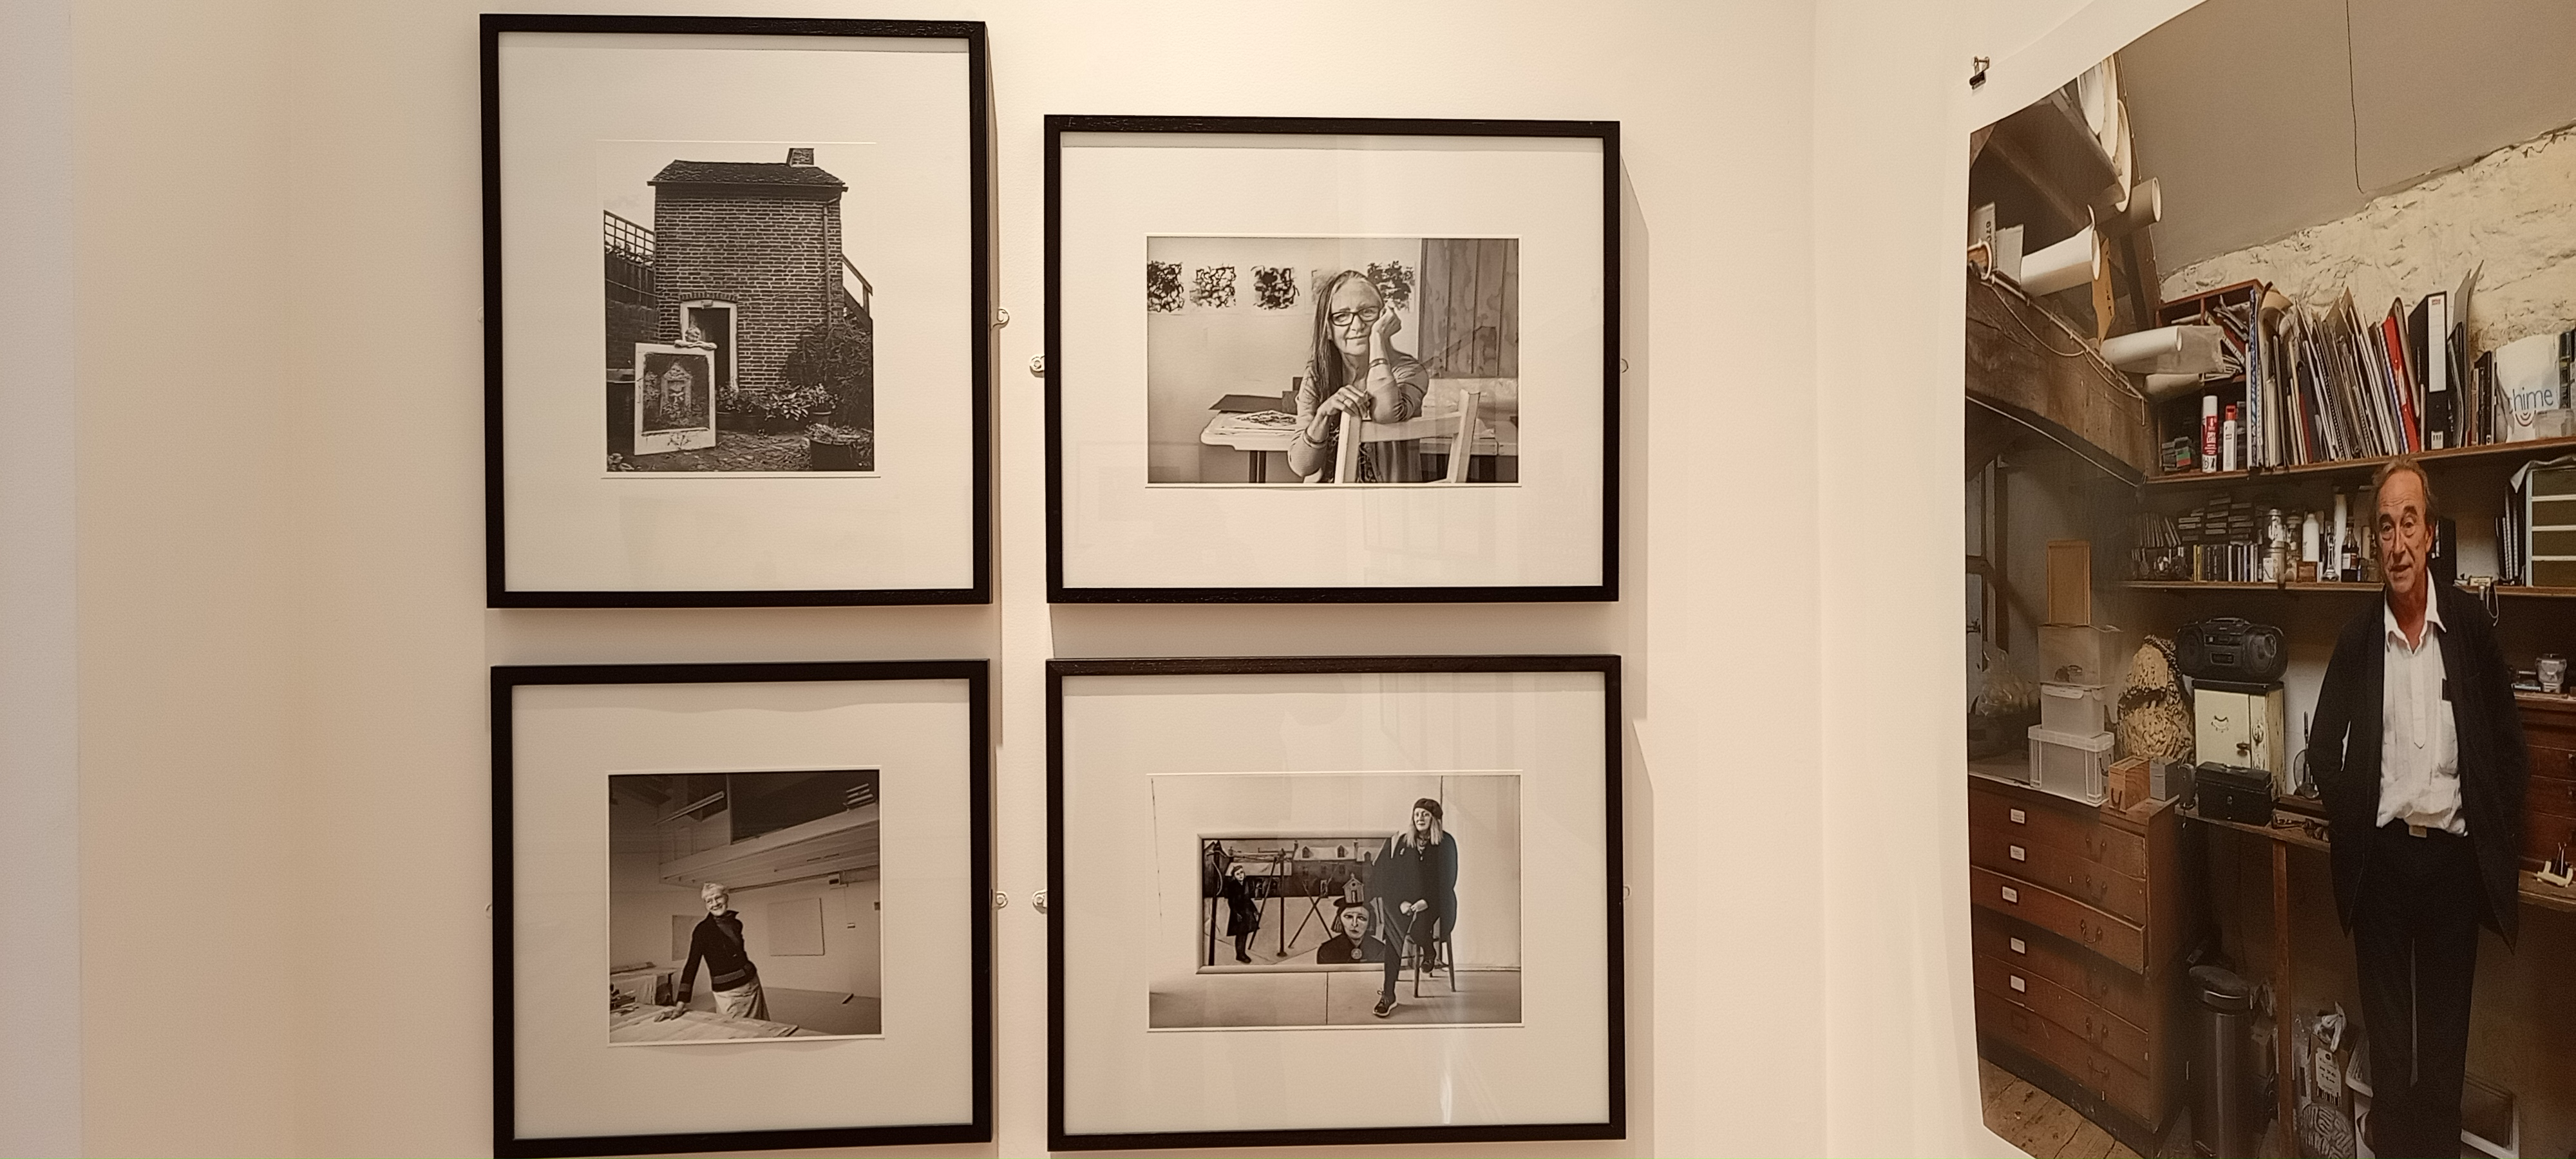
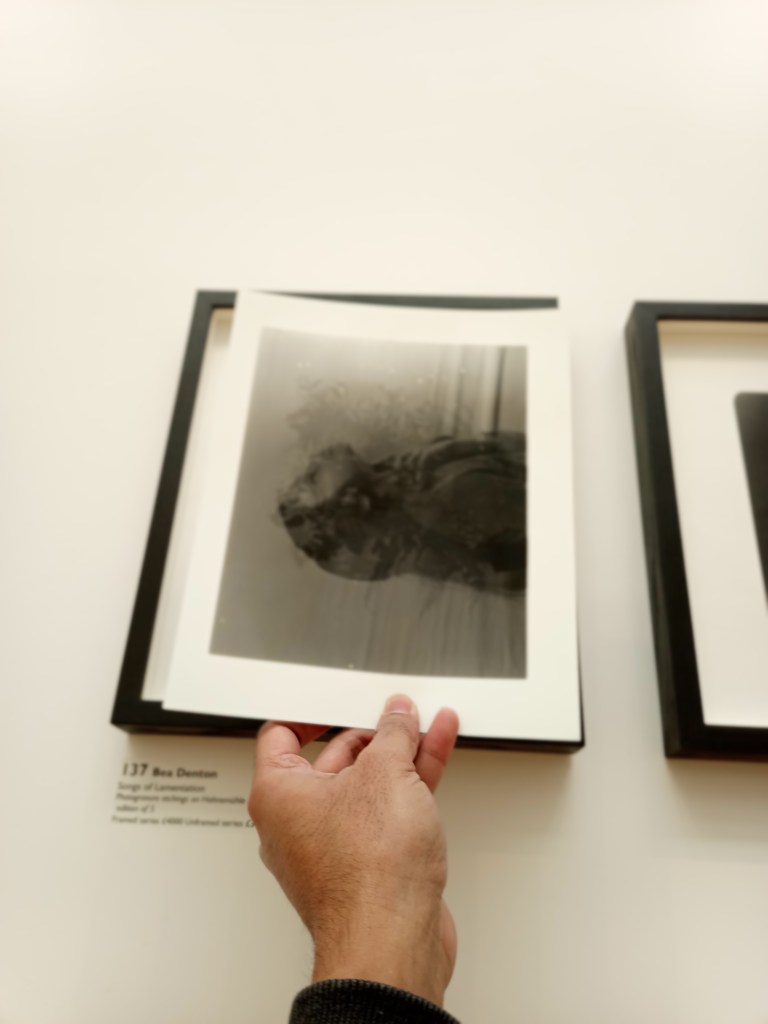
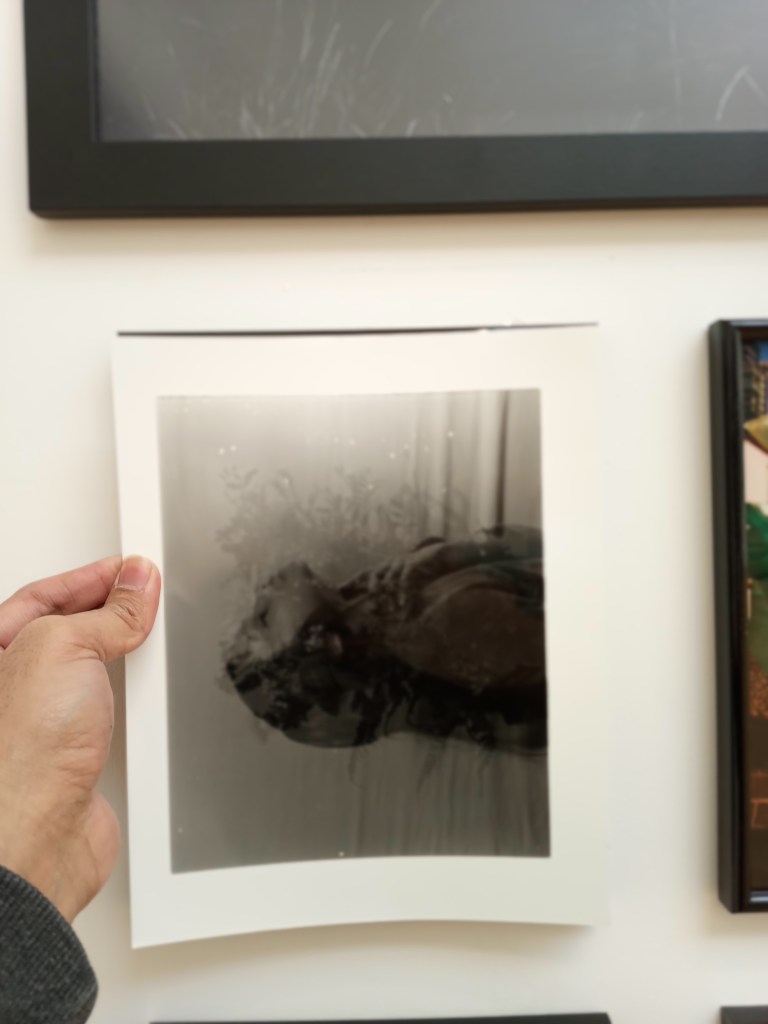
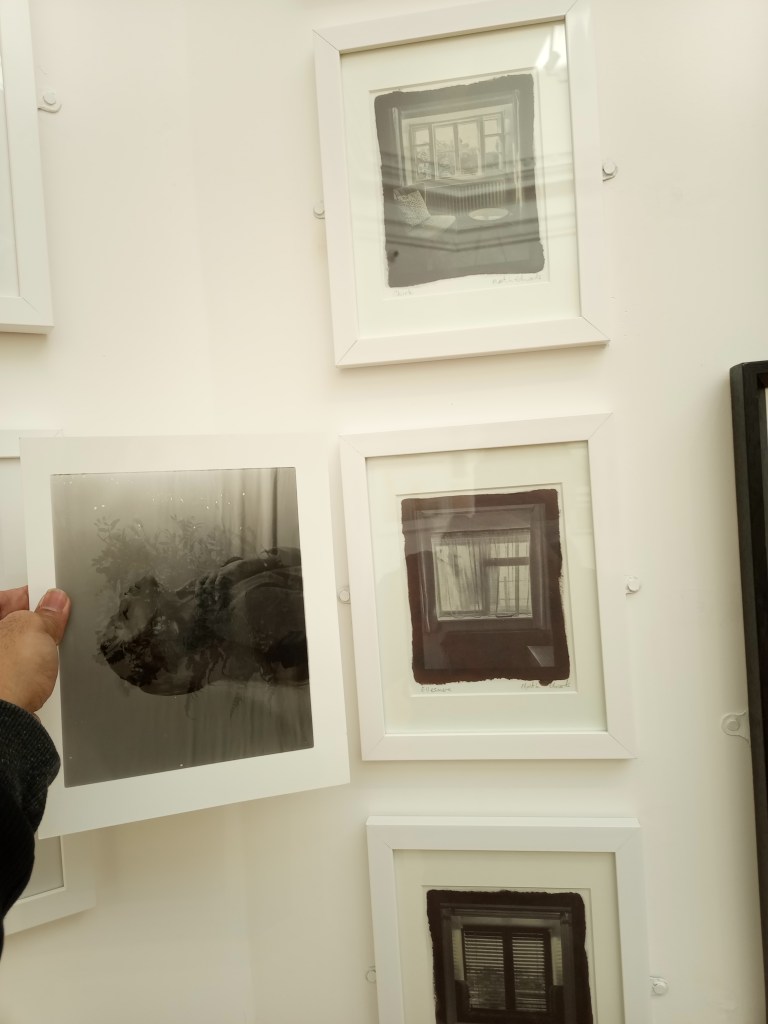
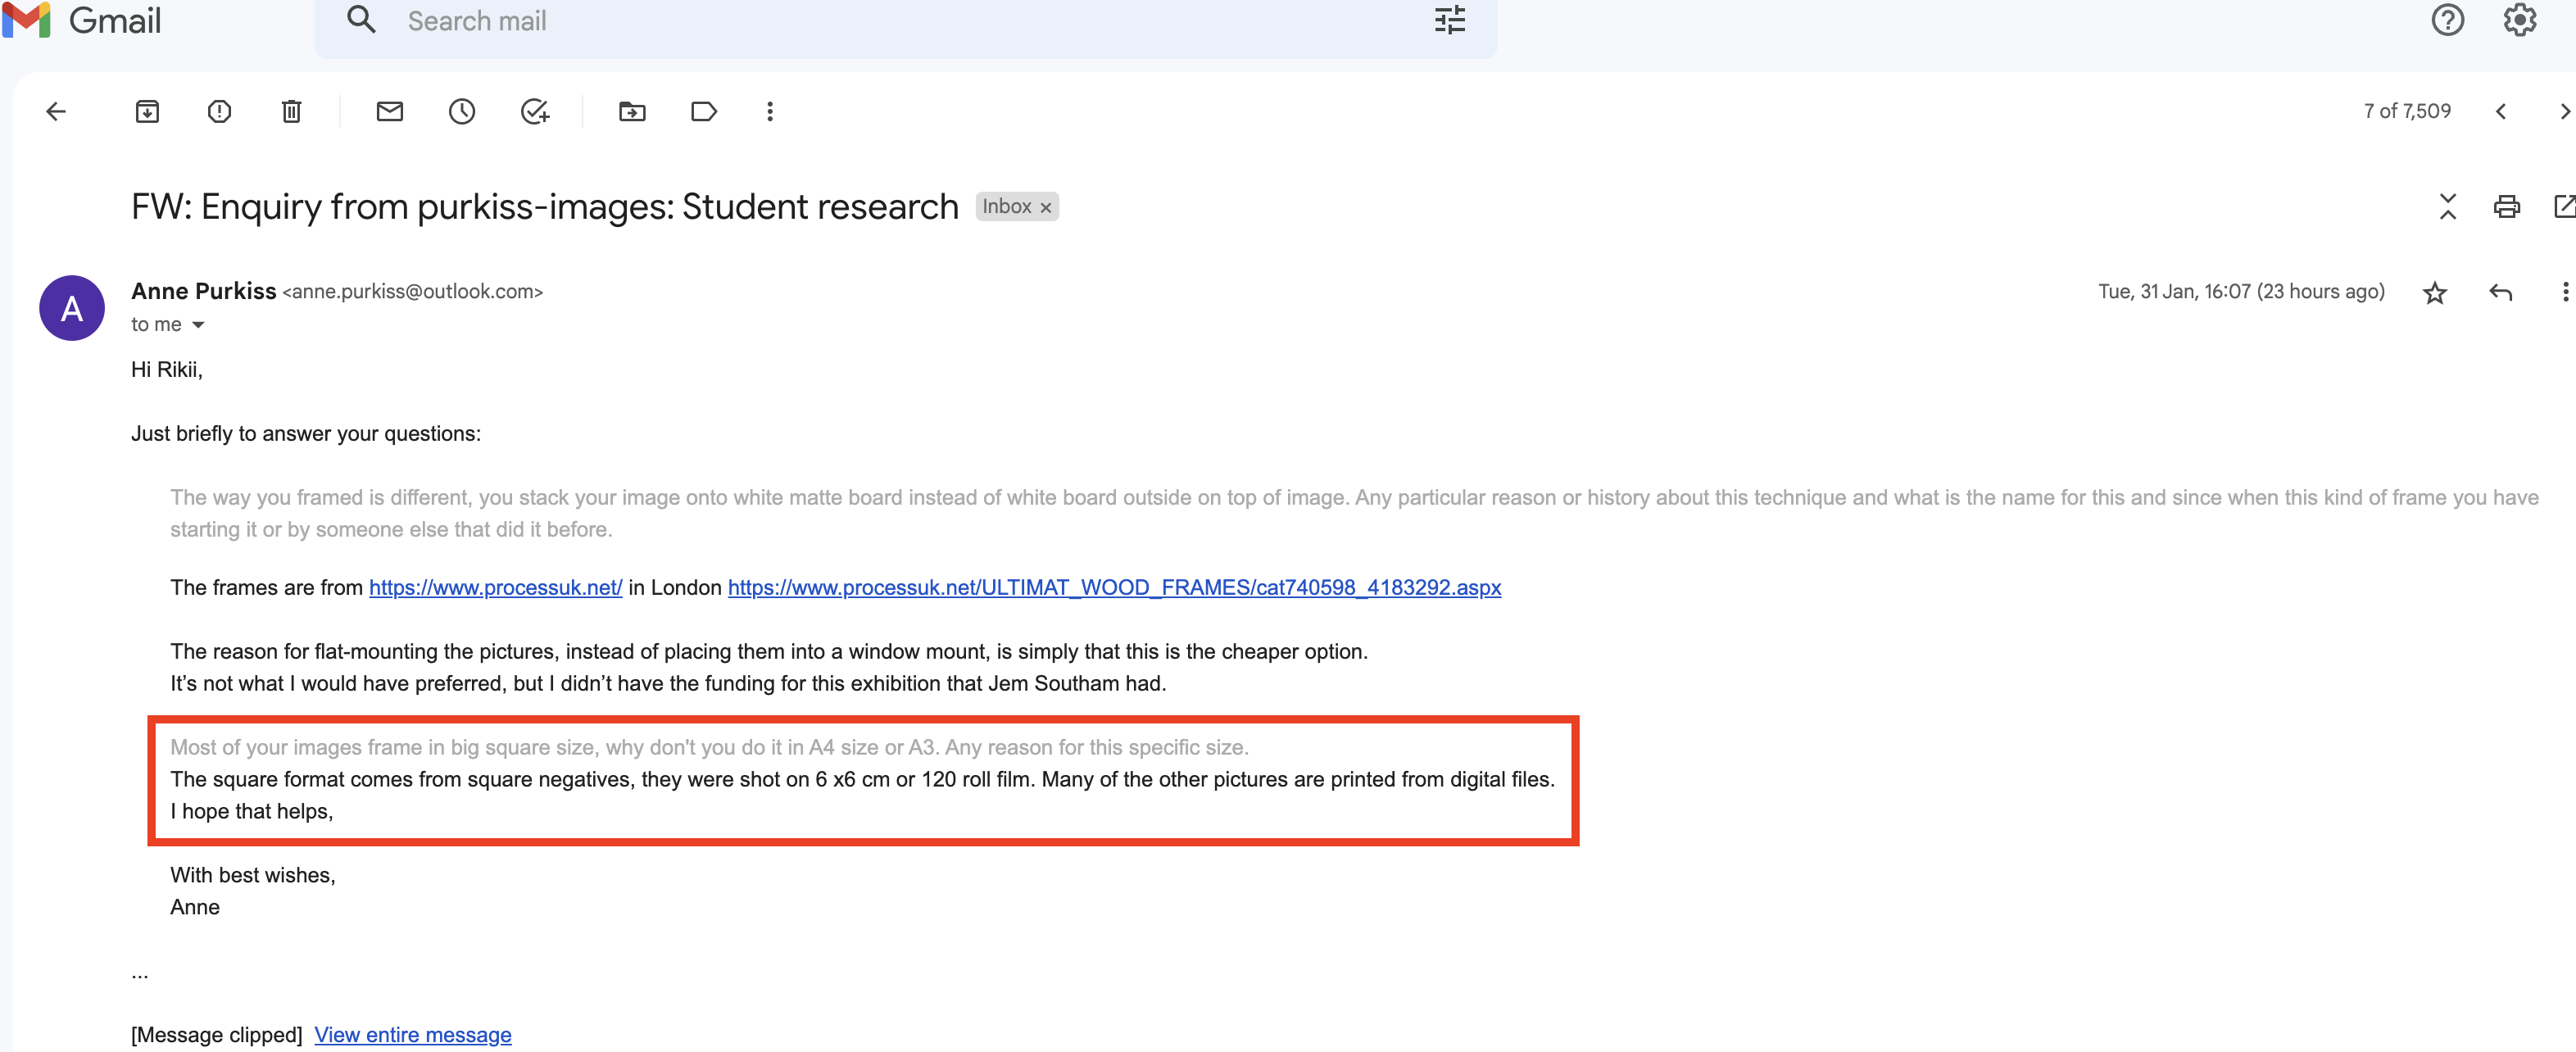
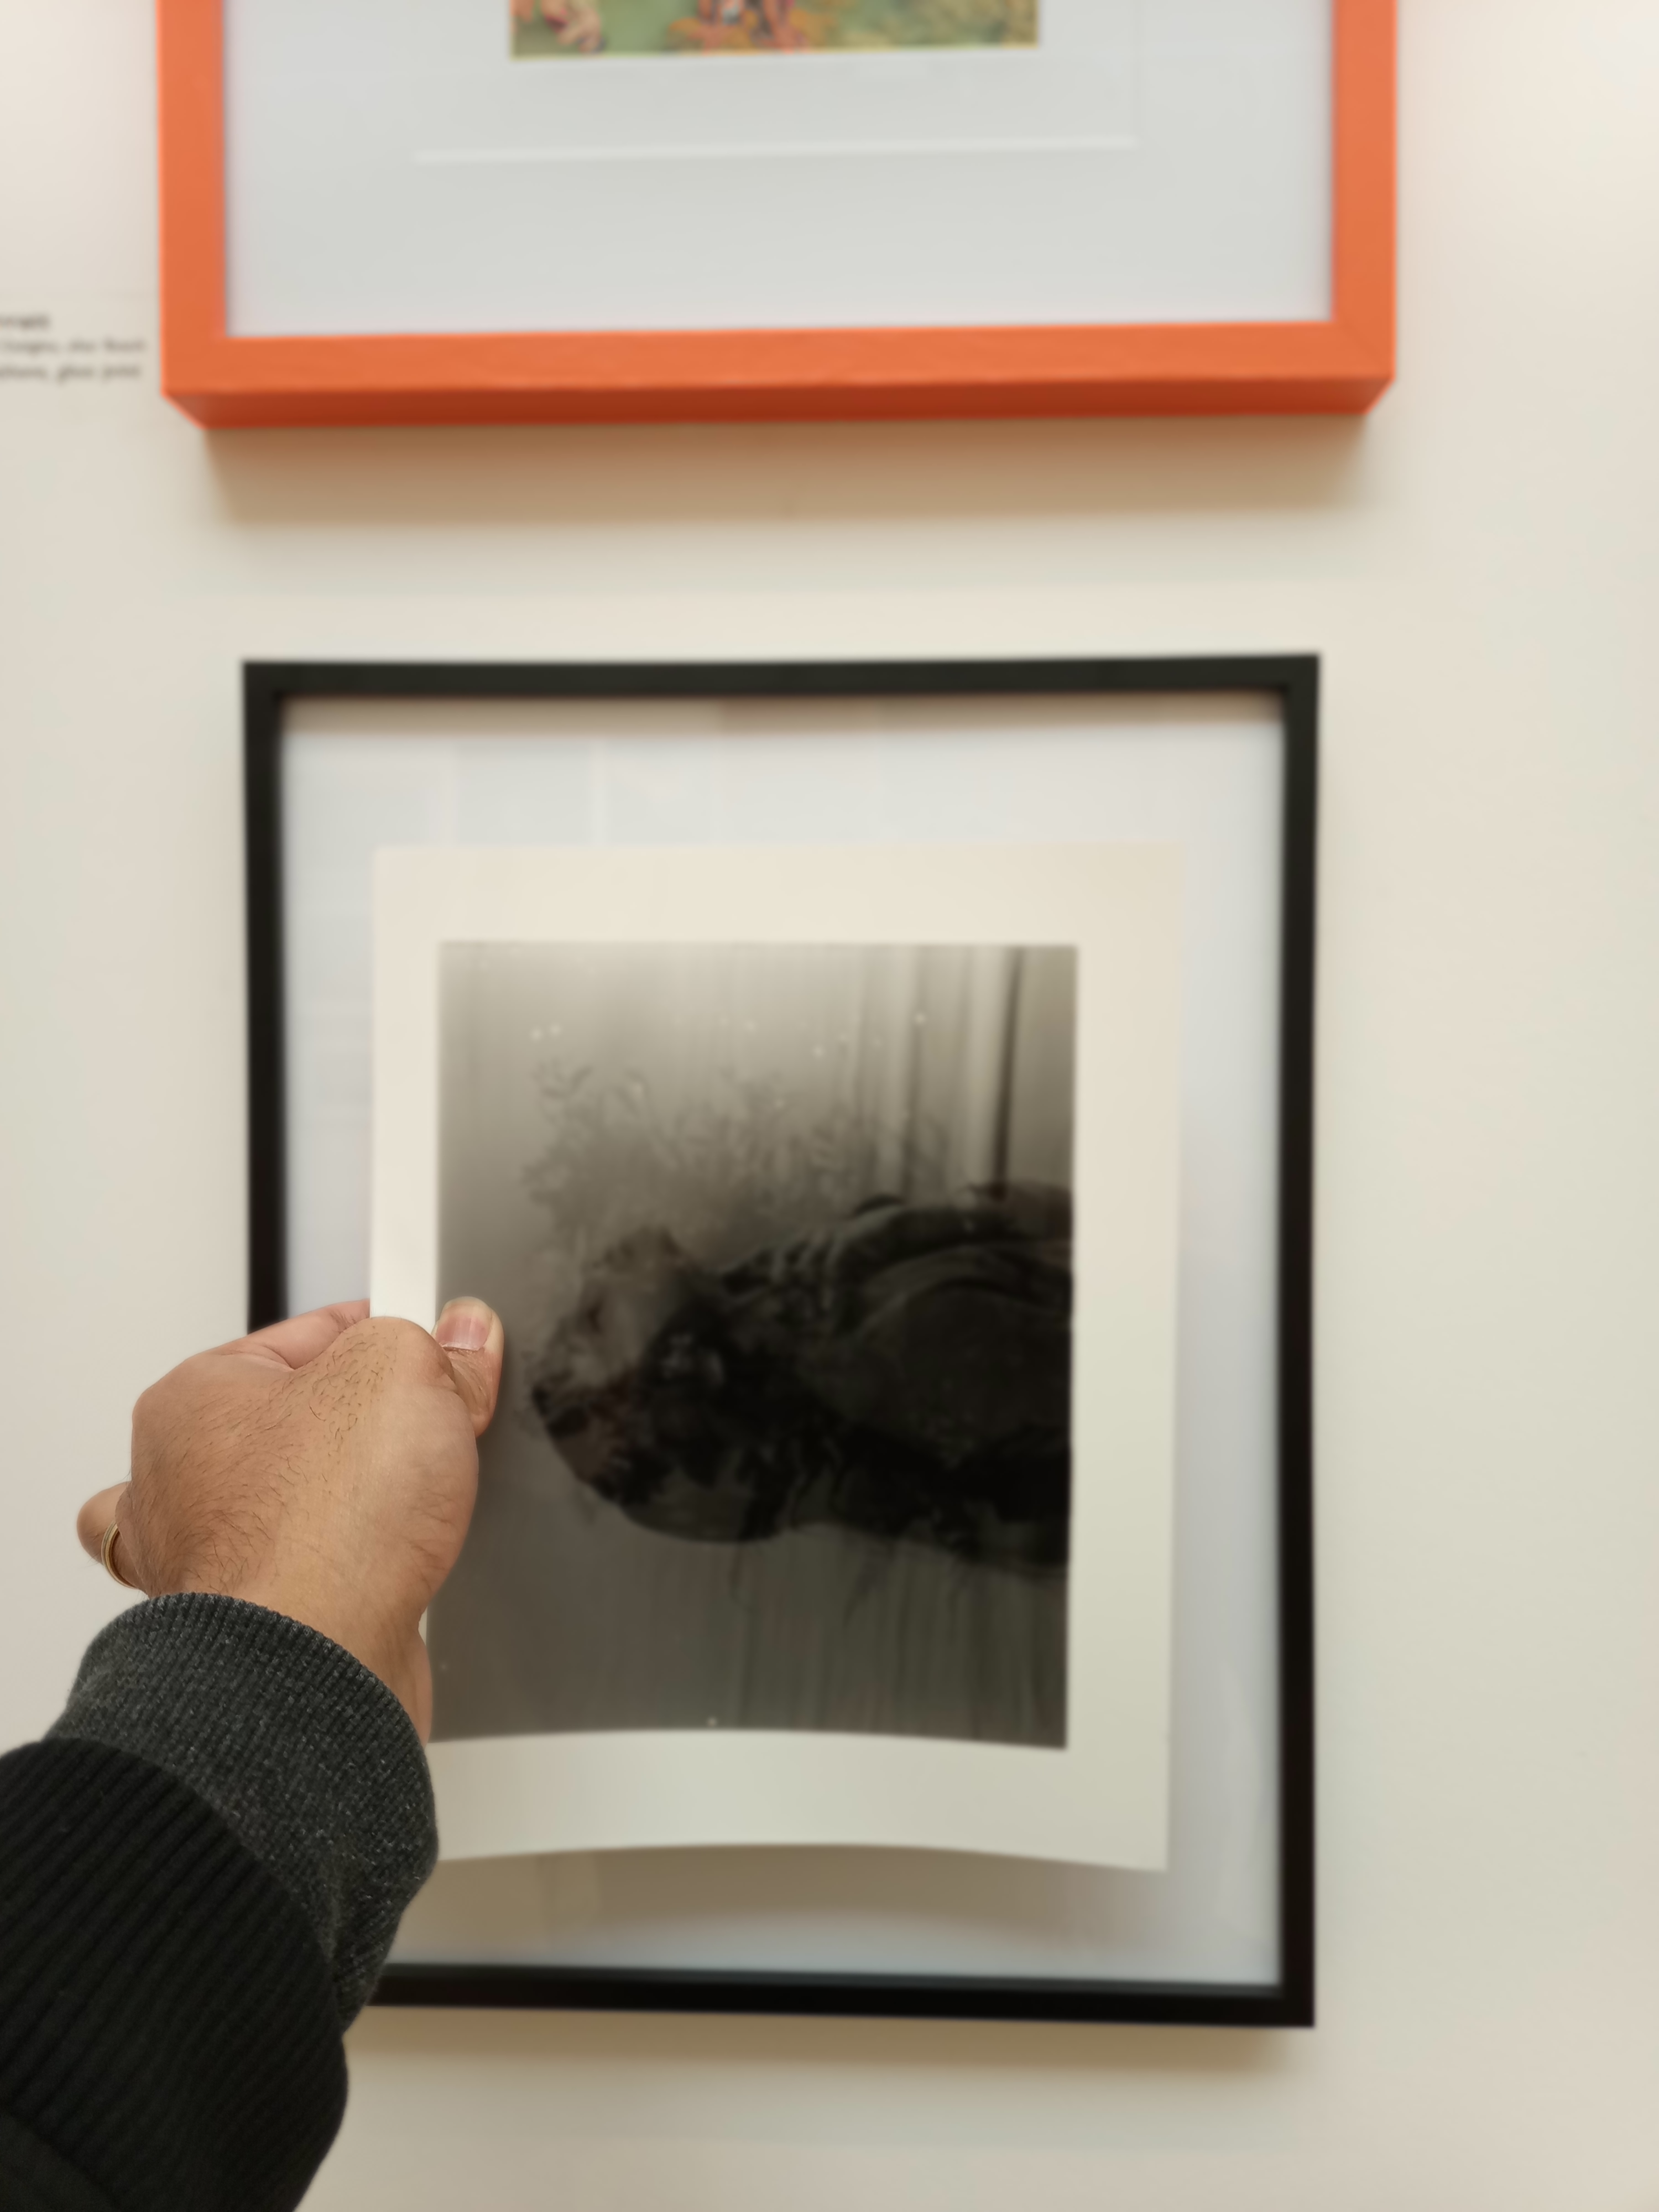
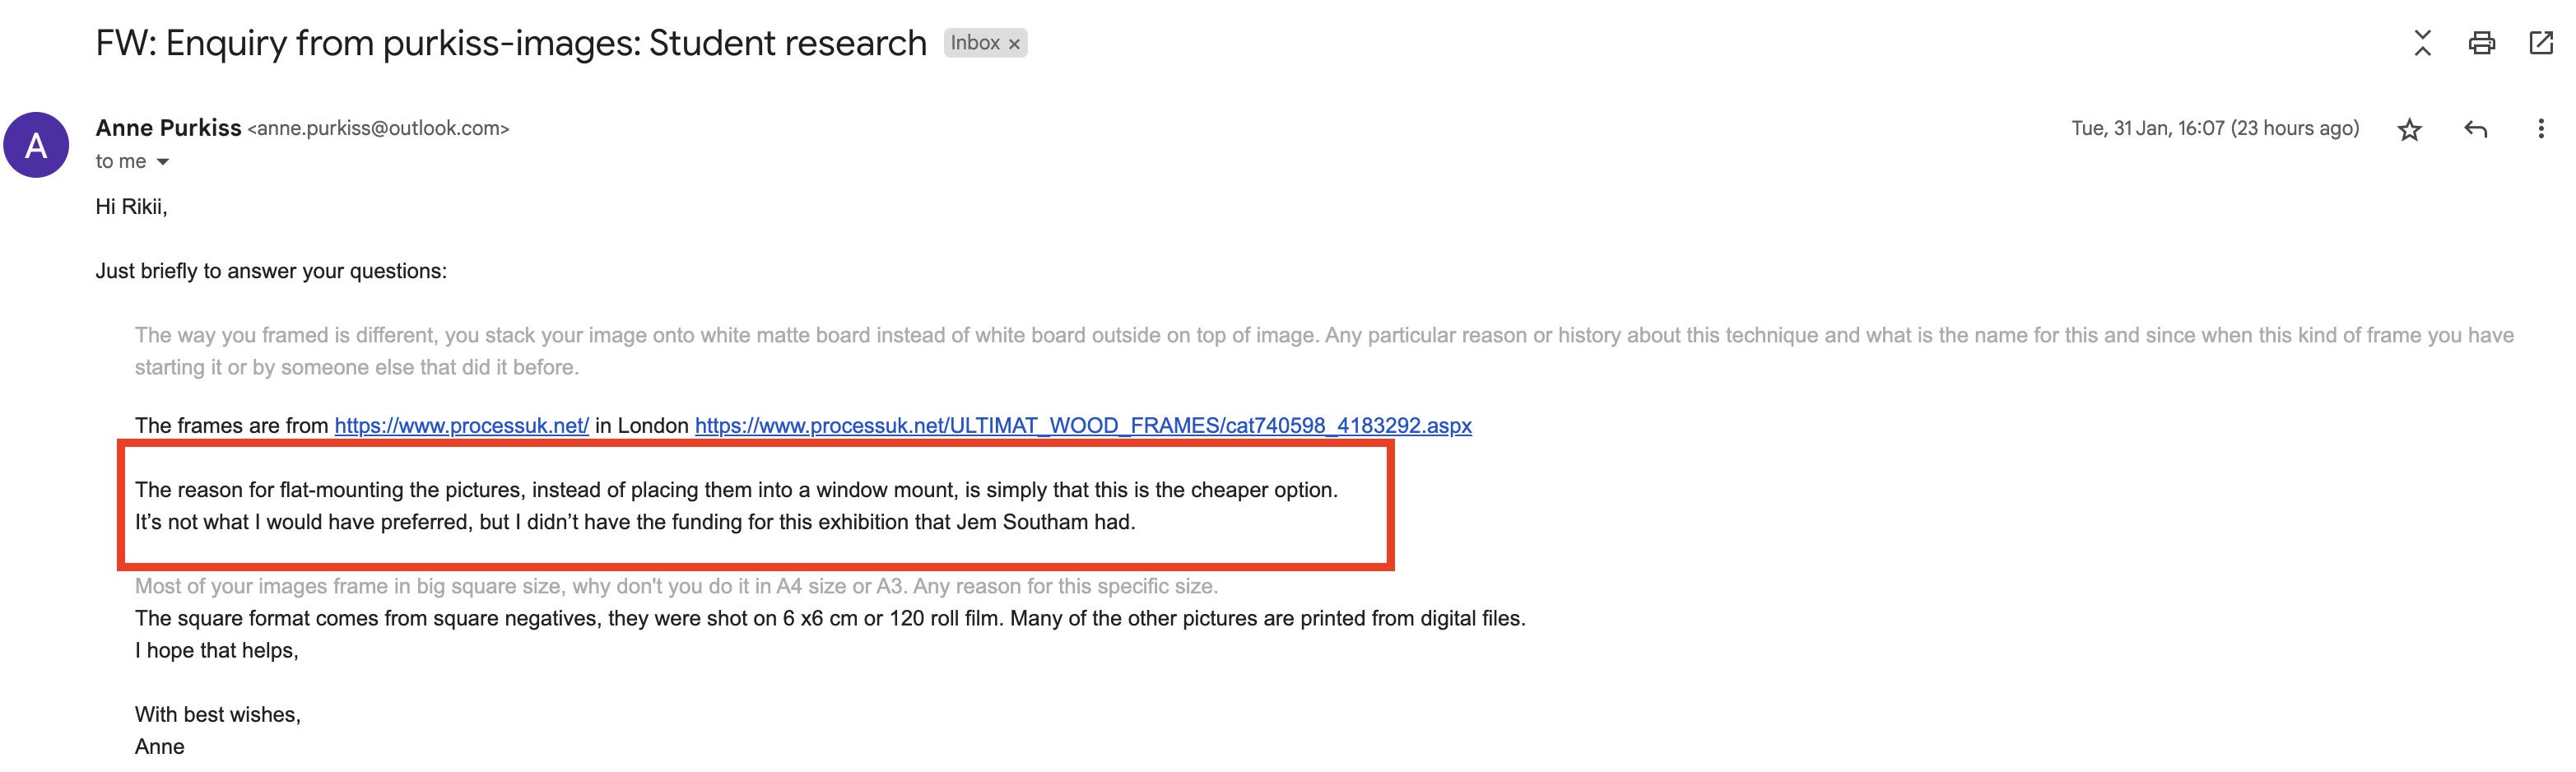
I noticed her collection of “Between Work and Window” at the Royal West Academy (RWA) photography show on January 31, 2023. I was quite surprised by the framing method she used.
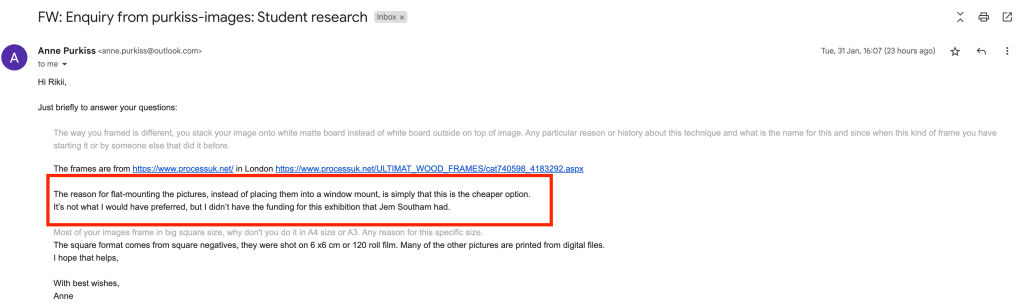
Instead of utilising the conventional picture arrangement with the image underneath the mat board, she used one with the image on top of the mat board. She clarified that it has nothing to do with the process and is just a way to reduce manufacturing costs with the frame through email.
On the other hand, I was curious as well about her work, most of her collections were printed in square size, I think it is something that has to deal with the artistic side, but she pointed out that it is because she is using the medium format camera 6×6.
- Method Comparison between Digital and Film Photography
I would like to look at Lina Bessonova and Luke Gram, they are both good at what they are doing. However, Luke uses a digital camera to make double exposure, and LinaBessonova shoots with a film camera image per image and finished the double exposure technique in the darkroom. to do double exposure in the darkroom is giving the photographer free will on how the outcome image will look but it takes time to master it.
On other hand John Deakin and contemporary photographer Nat Beavins, they are both executed the double exposure inside the film camera straight away when they decide to do it.
In relation to my work, I would like to use Nat Beavins as a reference to my work (Human and Nature) double exposure from the camera but I will also try to work out how to do double exposure in the darkroom like Lima Bessonova.
For the scene, I will try to replicate Luke Gram’s work where he used humans as the base image and then overlay it with nature such as trees and flowers.
I will frame it in black frame just like Anne Purkiss’s collection of “Between Work and Window” at RWA 20223.
INTENDED AUDIENCE (Primary research)
Since my project involves creating fine art using an analogue camera, I visited the RWA photography exhibition gallery to learn more about how my project may also be included there.
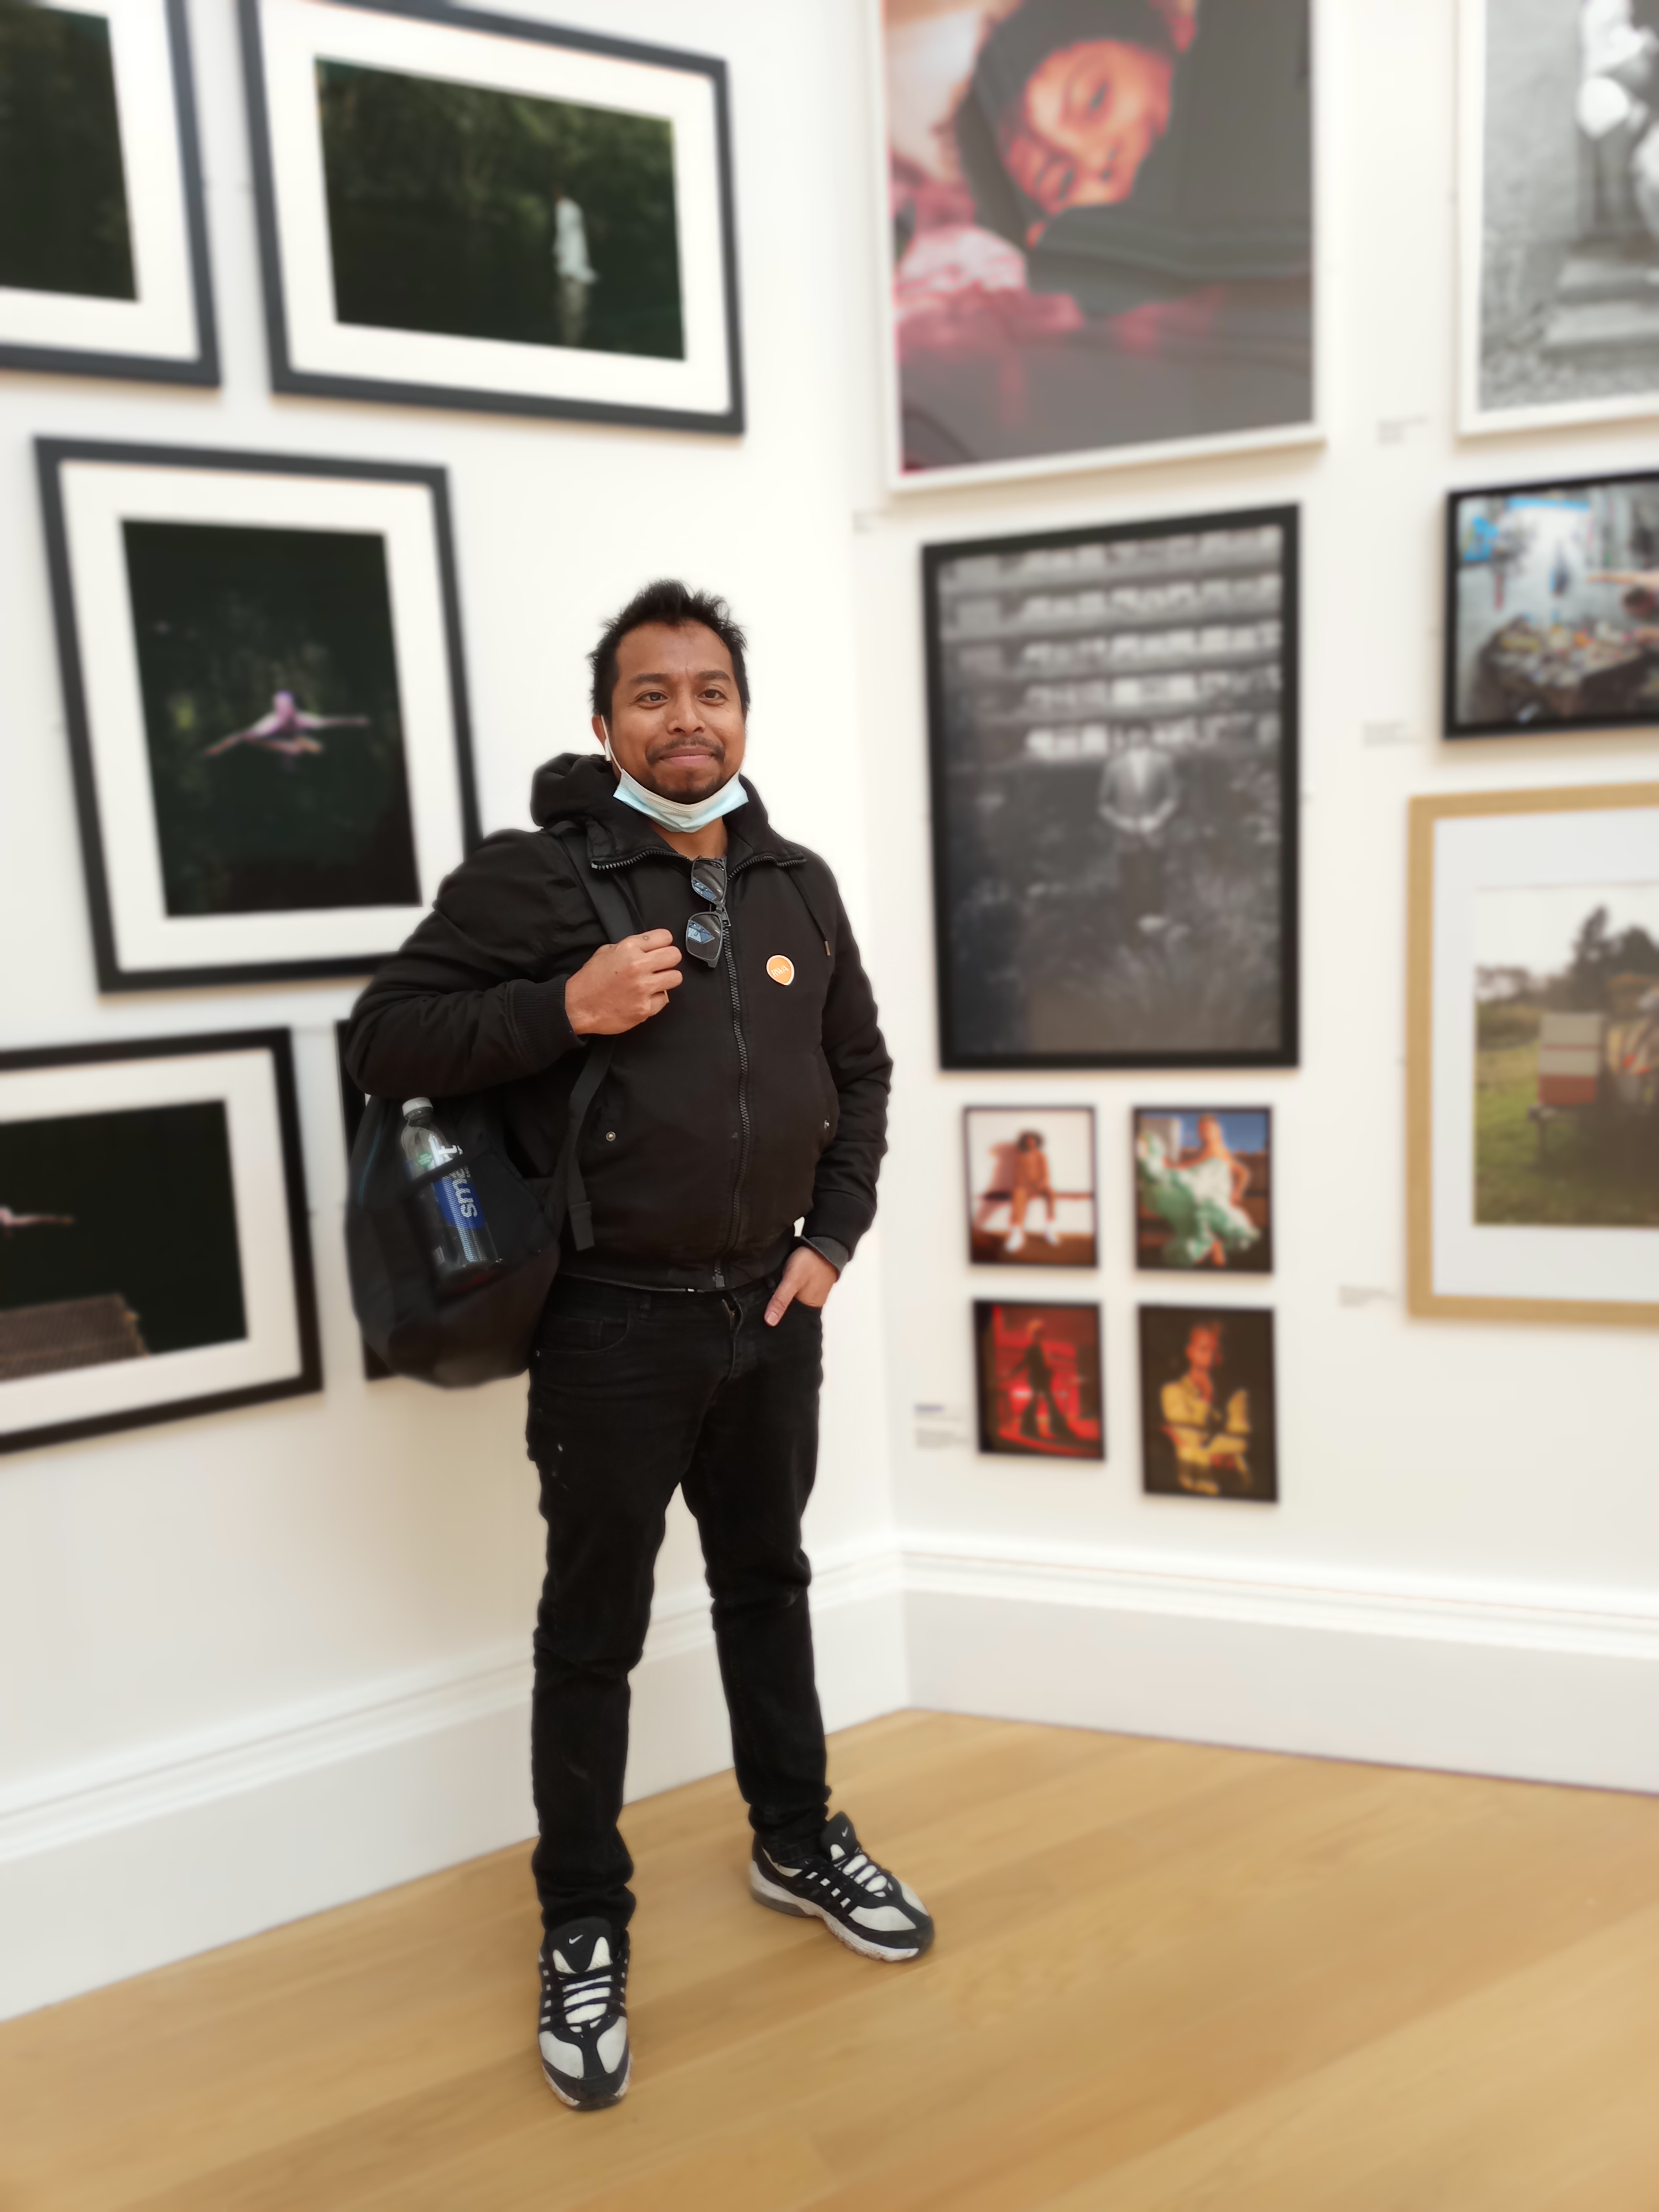
I was inspired to engage after seeing the wide variety of photography genres on display in the gallery. I, therefore, made the decision to measure and frame my artwork as what I discovered in my own size because I shot in 35mm and 6×7 medium format.

I was attempting to determine the appropriate size for my project and how it would appear when framed and hanging on the wall.
My double exposure series will be presented as a project intended for an art exhibition.
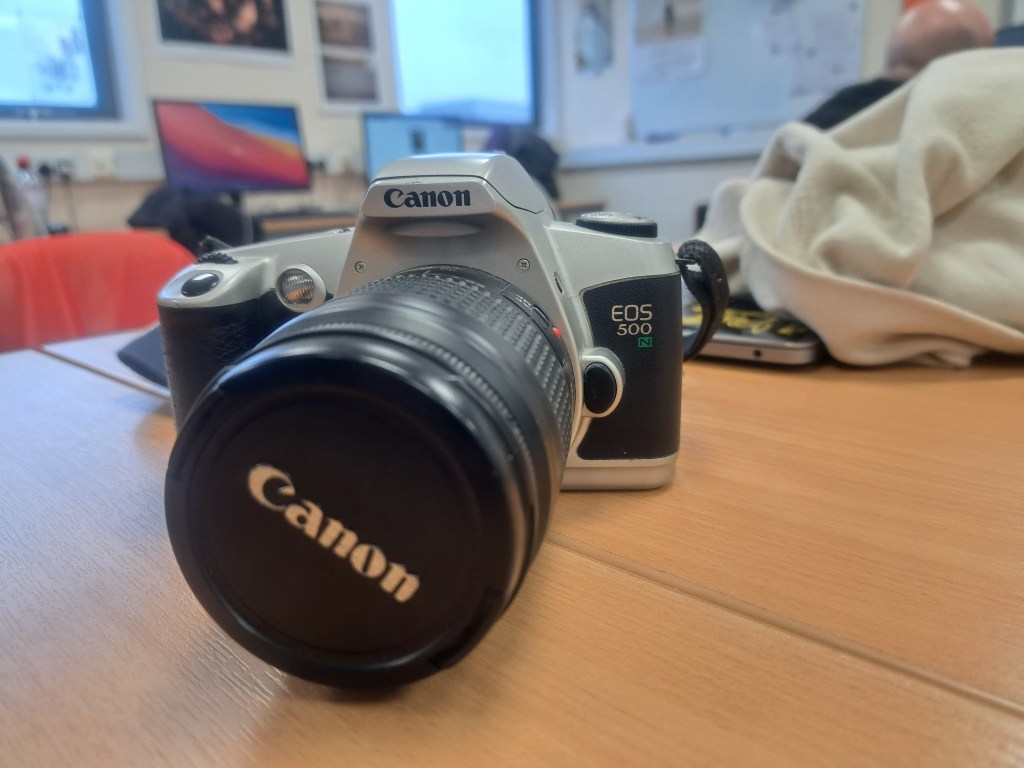
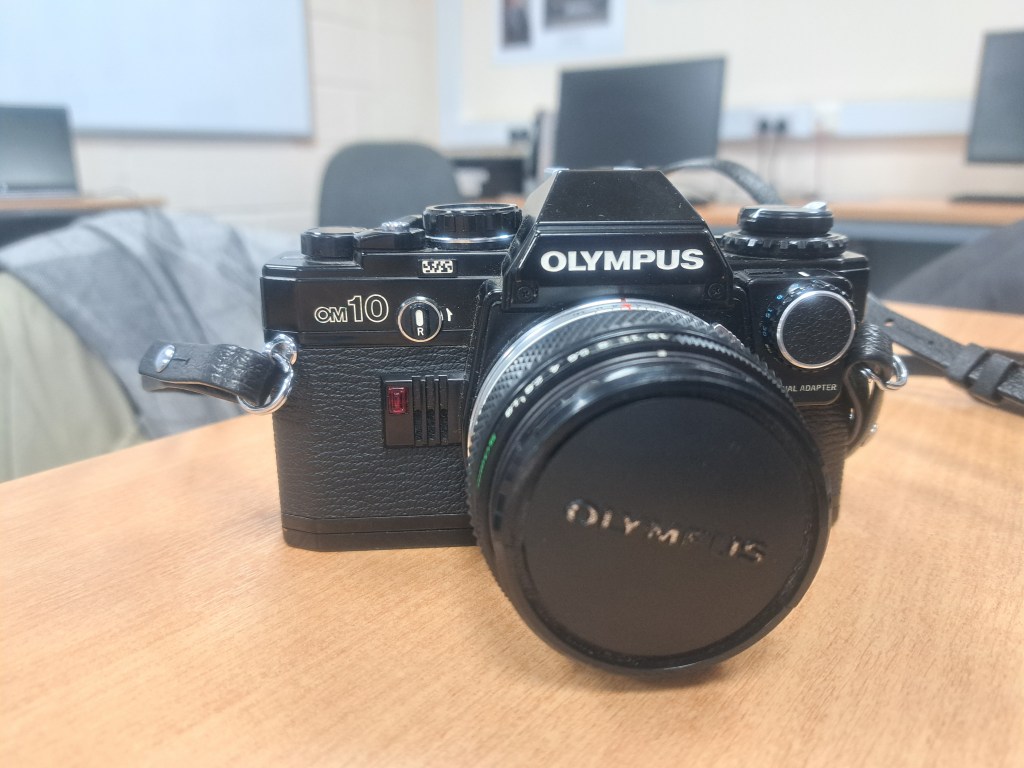
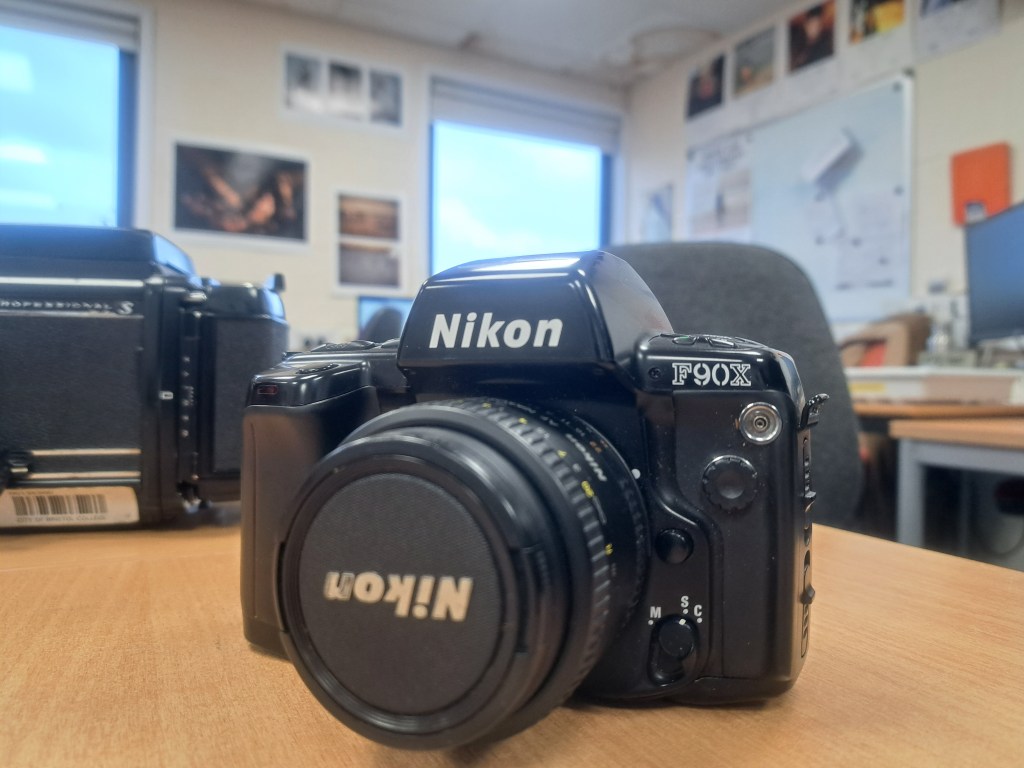
Film Cameras
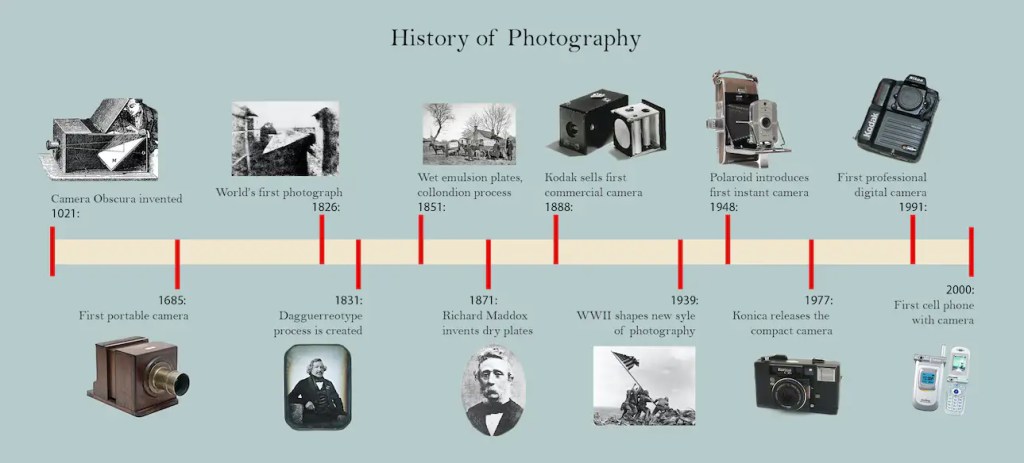
Historically, people have known photography since the first camera obscure was invented in 1021 by the Iraqi scientist Alhazen and described in his book of optics, and then it is develop over and over till this day we all know that a phone has a camera to photograph as well.
What is analogue photography?
It is the art and science of taking images using a device known as film, which is a thin, transparent strip, known as film photography. The strip is covered on one side with such a silk exposure that includes minute silver halide crystals. These crystals are one of the factors that influence the contrast and sharpness of an image, among other attributes.
Patience, tenacity, purpose, and the ability to wait for satisfaction are all essential components of the film photography technique. Film photography, as opposed to digital photography, gives photographers the opportunity to take their time, resulting in photographs that have a deeper sense of meaning, intention, and purpose. Every photographer has the ability to keep their finger on the shutter button without giving any attention to the photograph’s composition or framing, but film photography requires the artist to be more thoughtful and deliberate with each image that they take.
There are three types of film cameras that still exist and are usable:
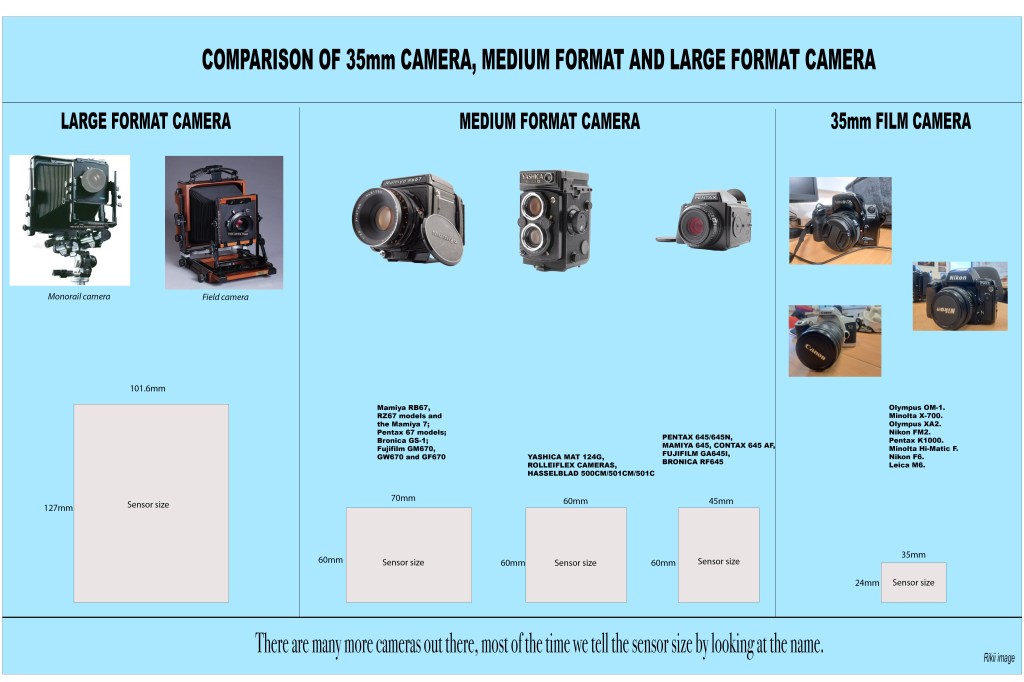
Large Format Camera, Medium Format Camera and 35mm Film Camera. All of them use film strips as a medium to record the image but they are using different size films to record depending on the choices of the photographer.
Because for my project I am going to utilize the medium format camera and 35 mm film camera, let’s talk about them and get familiar with them.
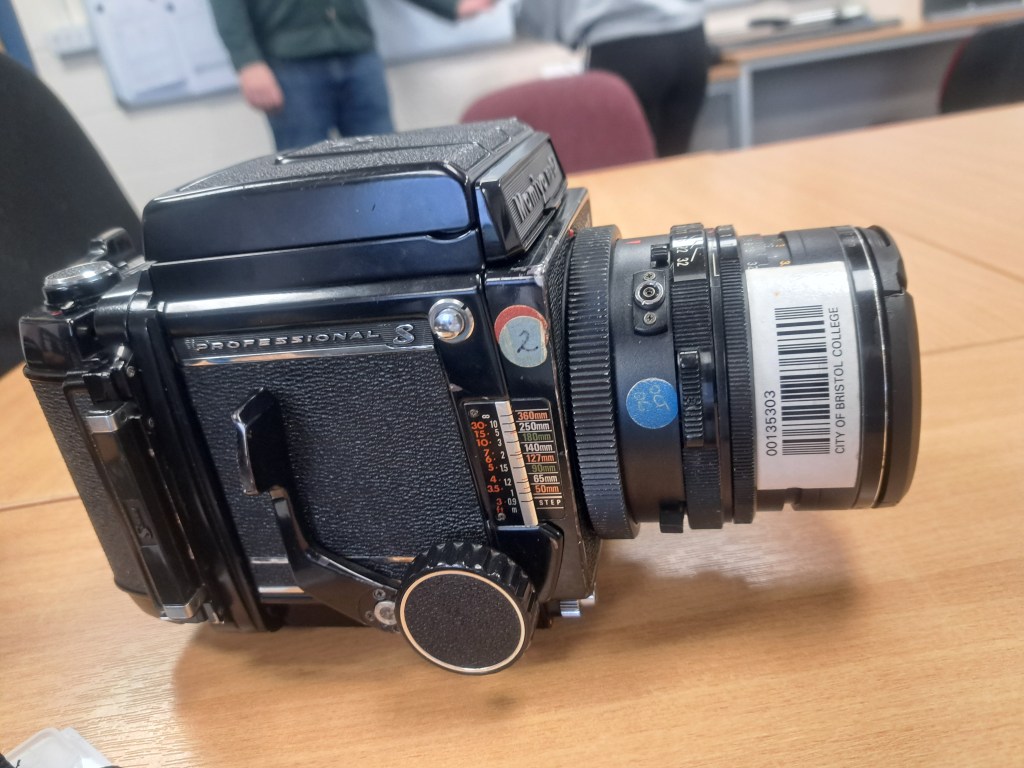
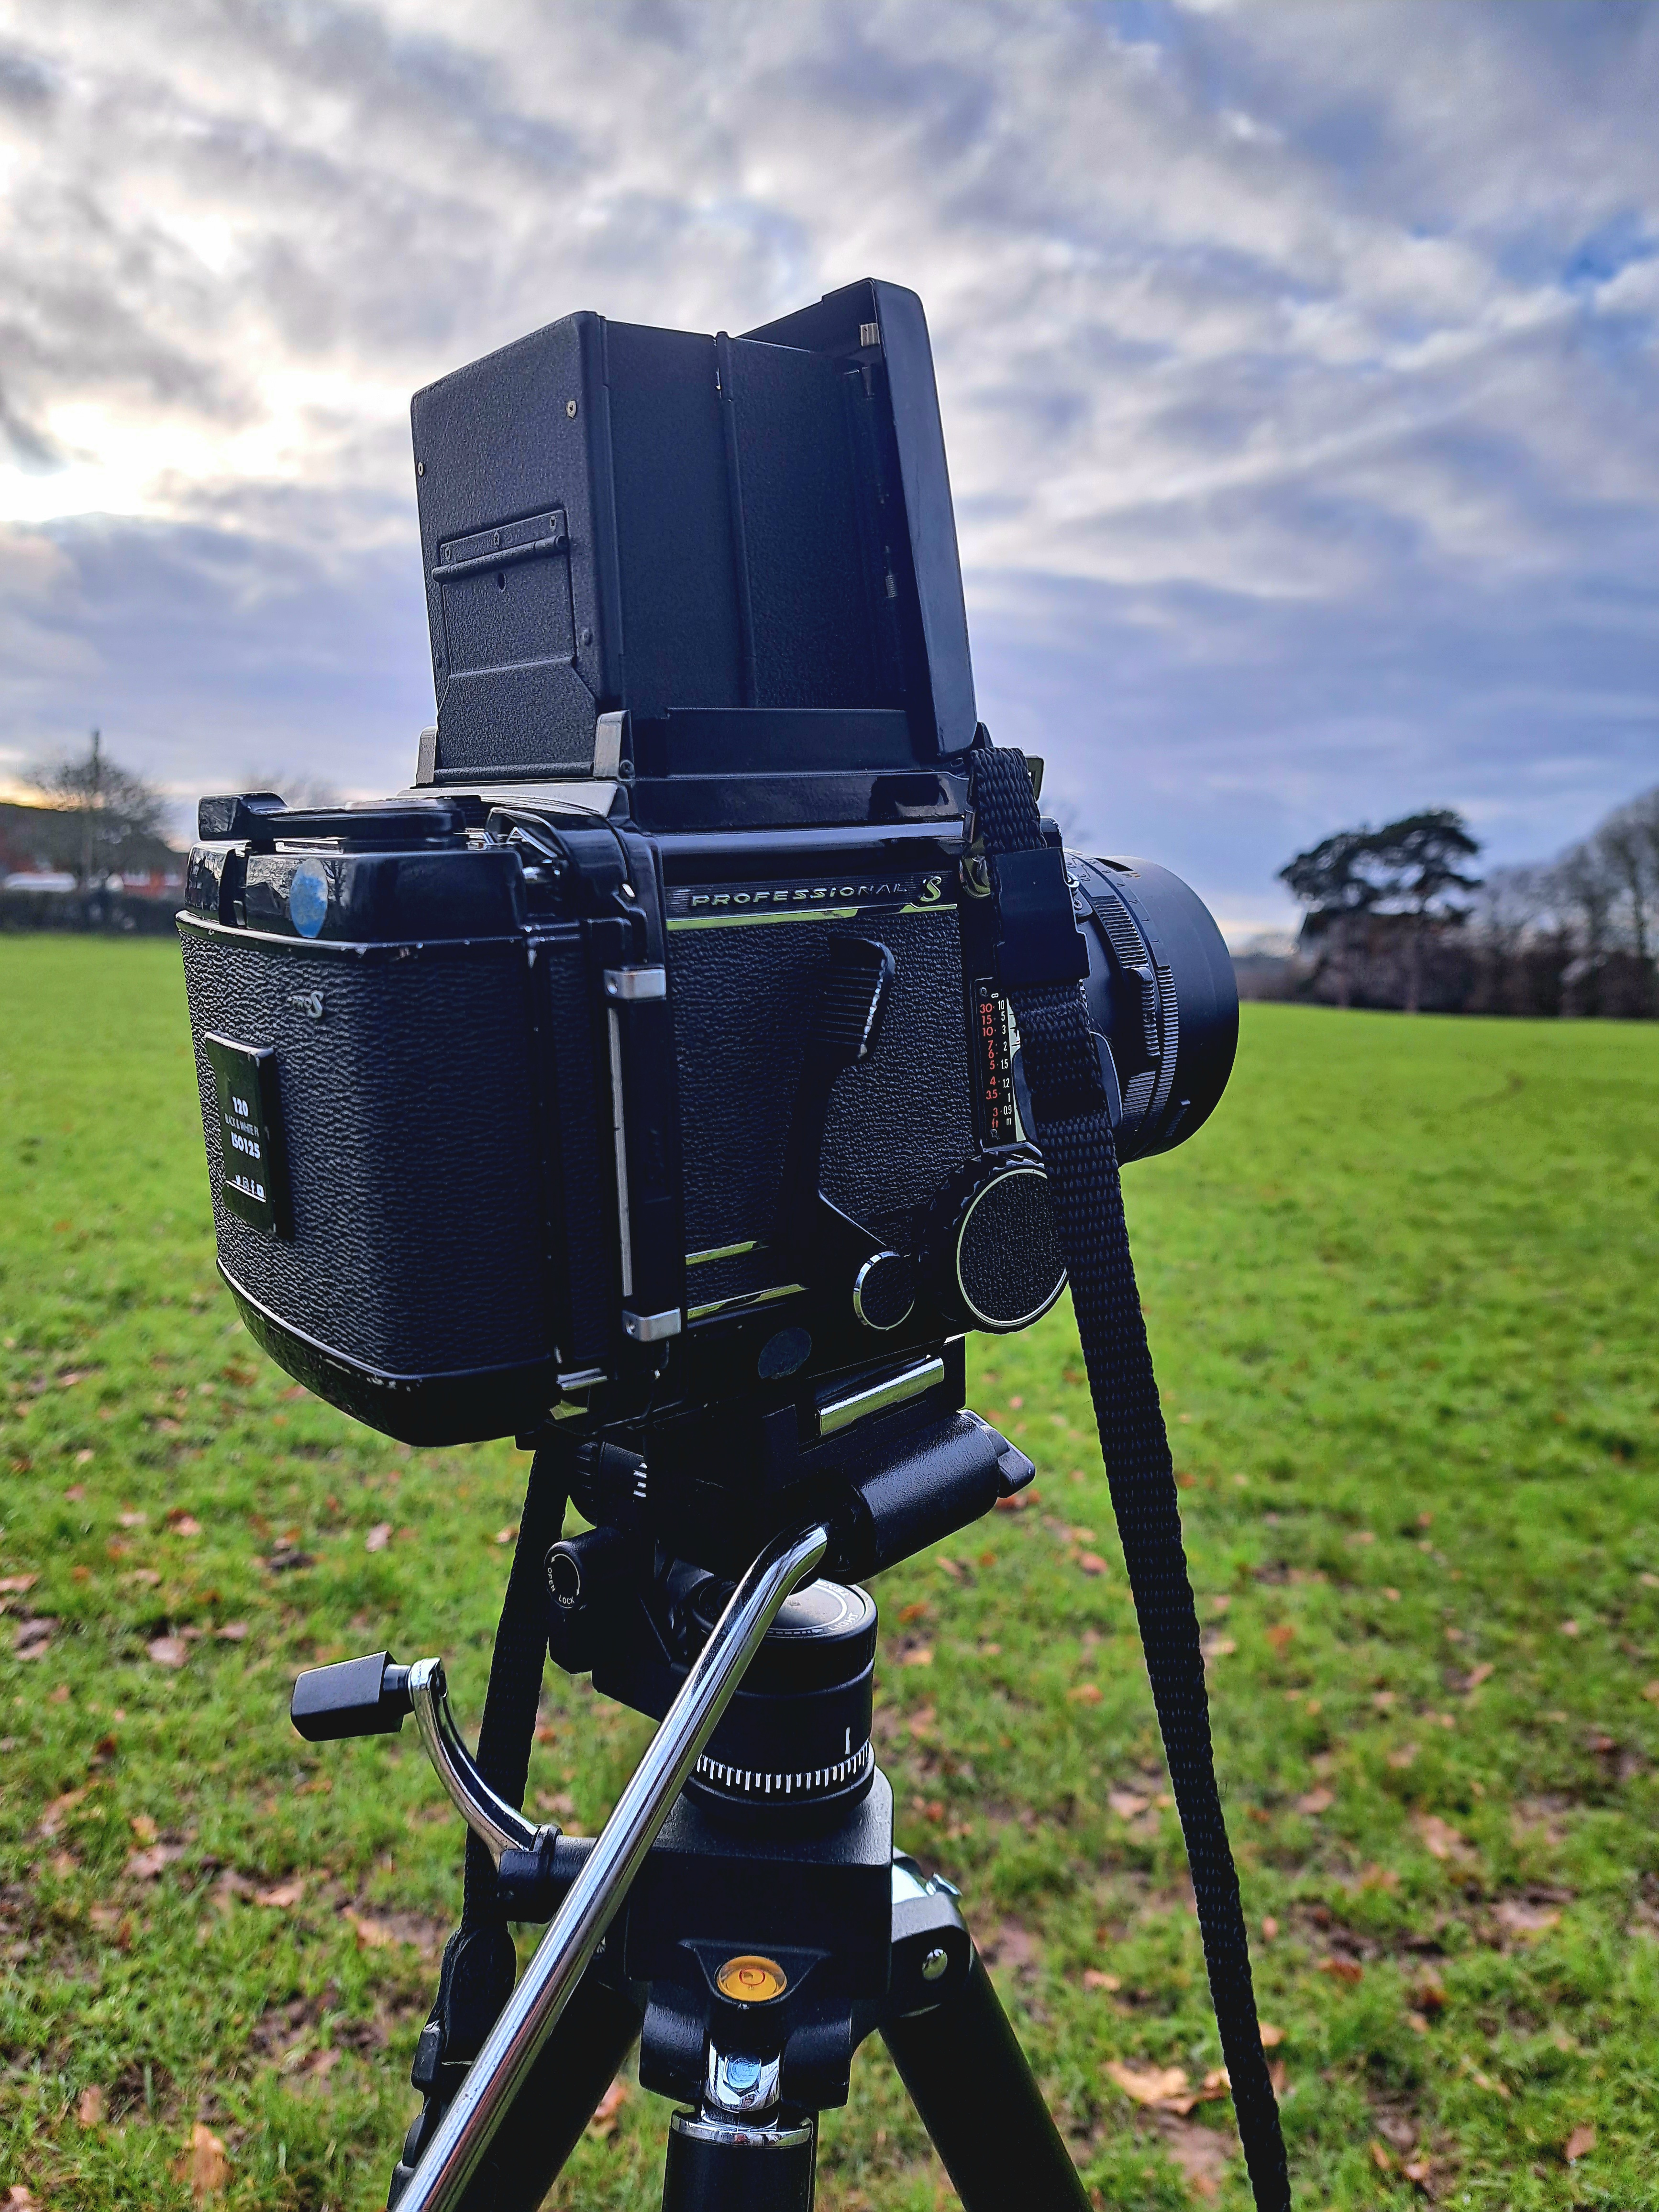
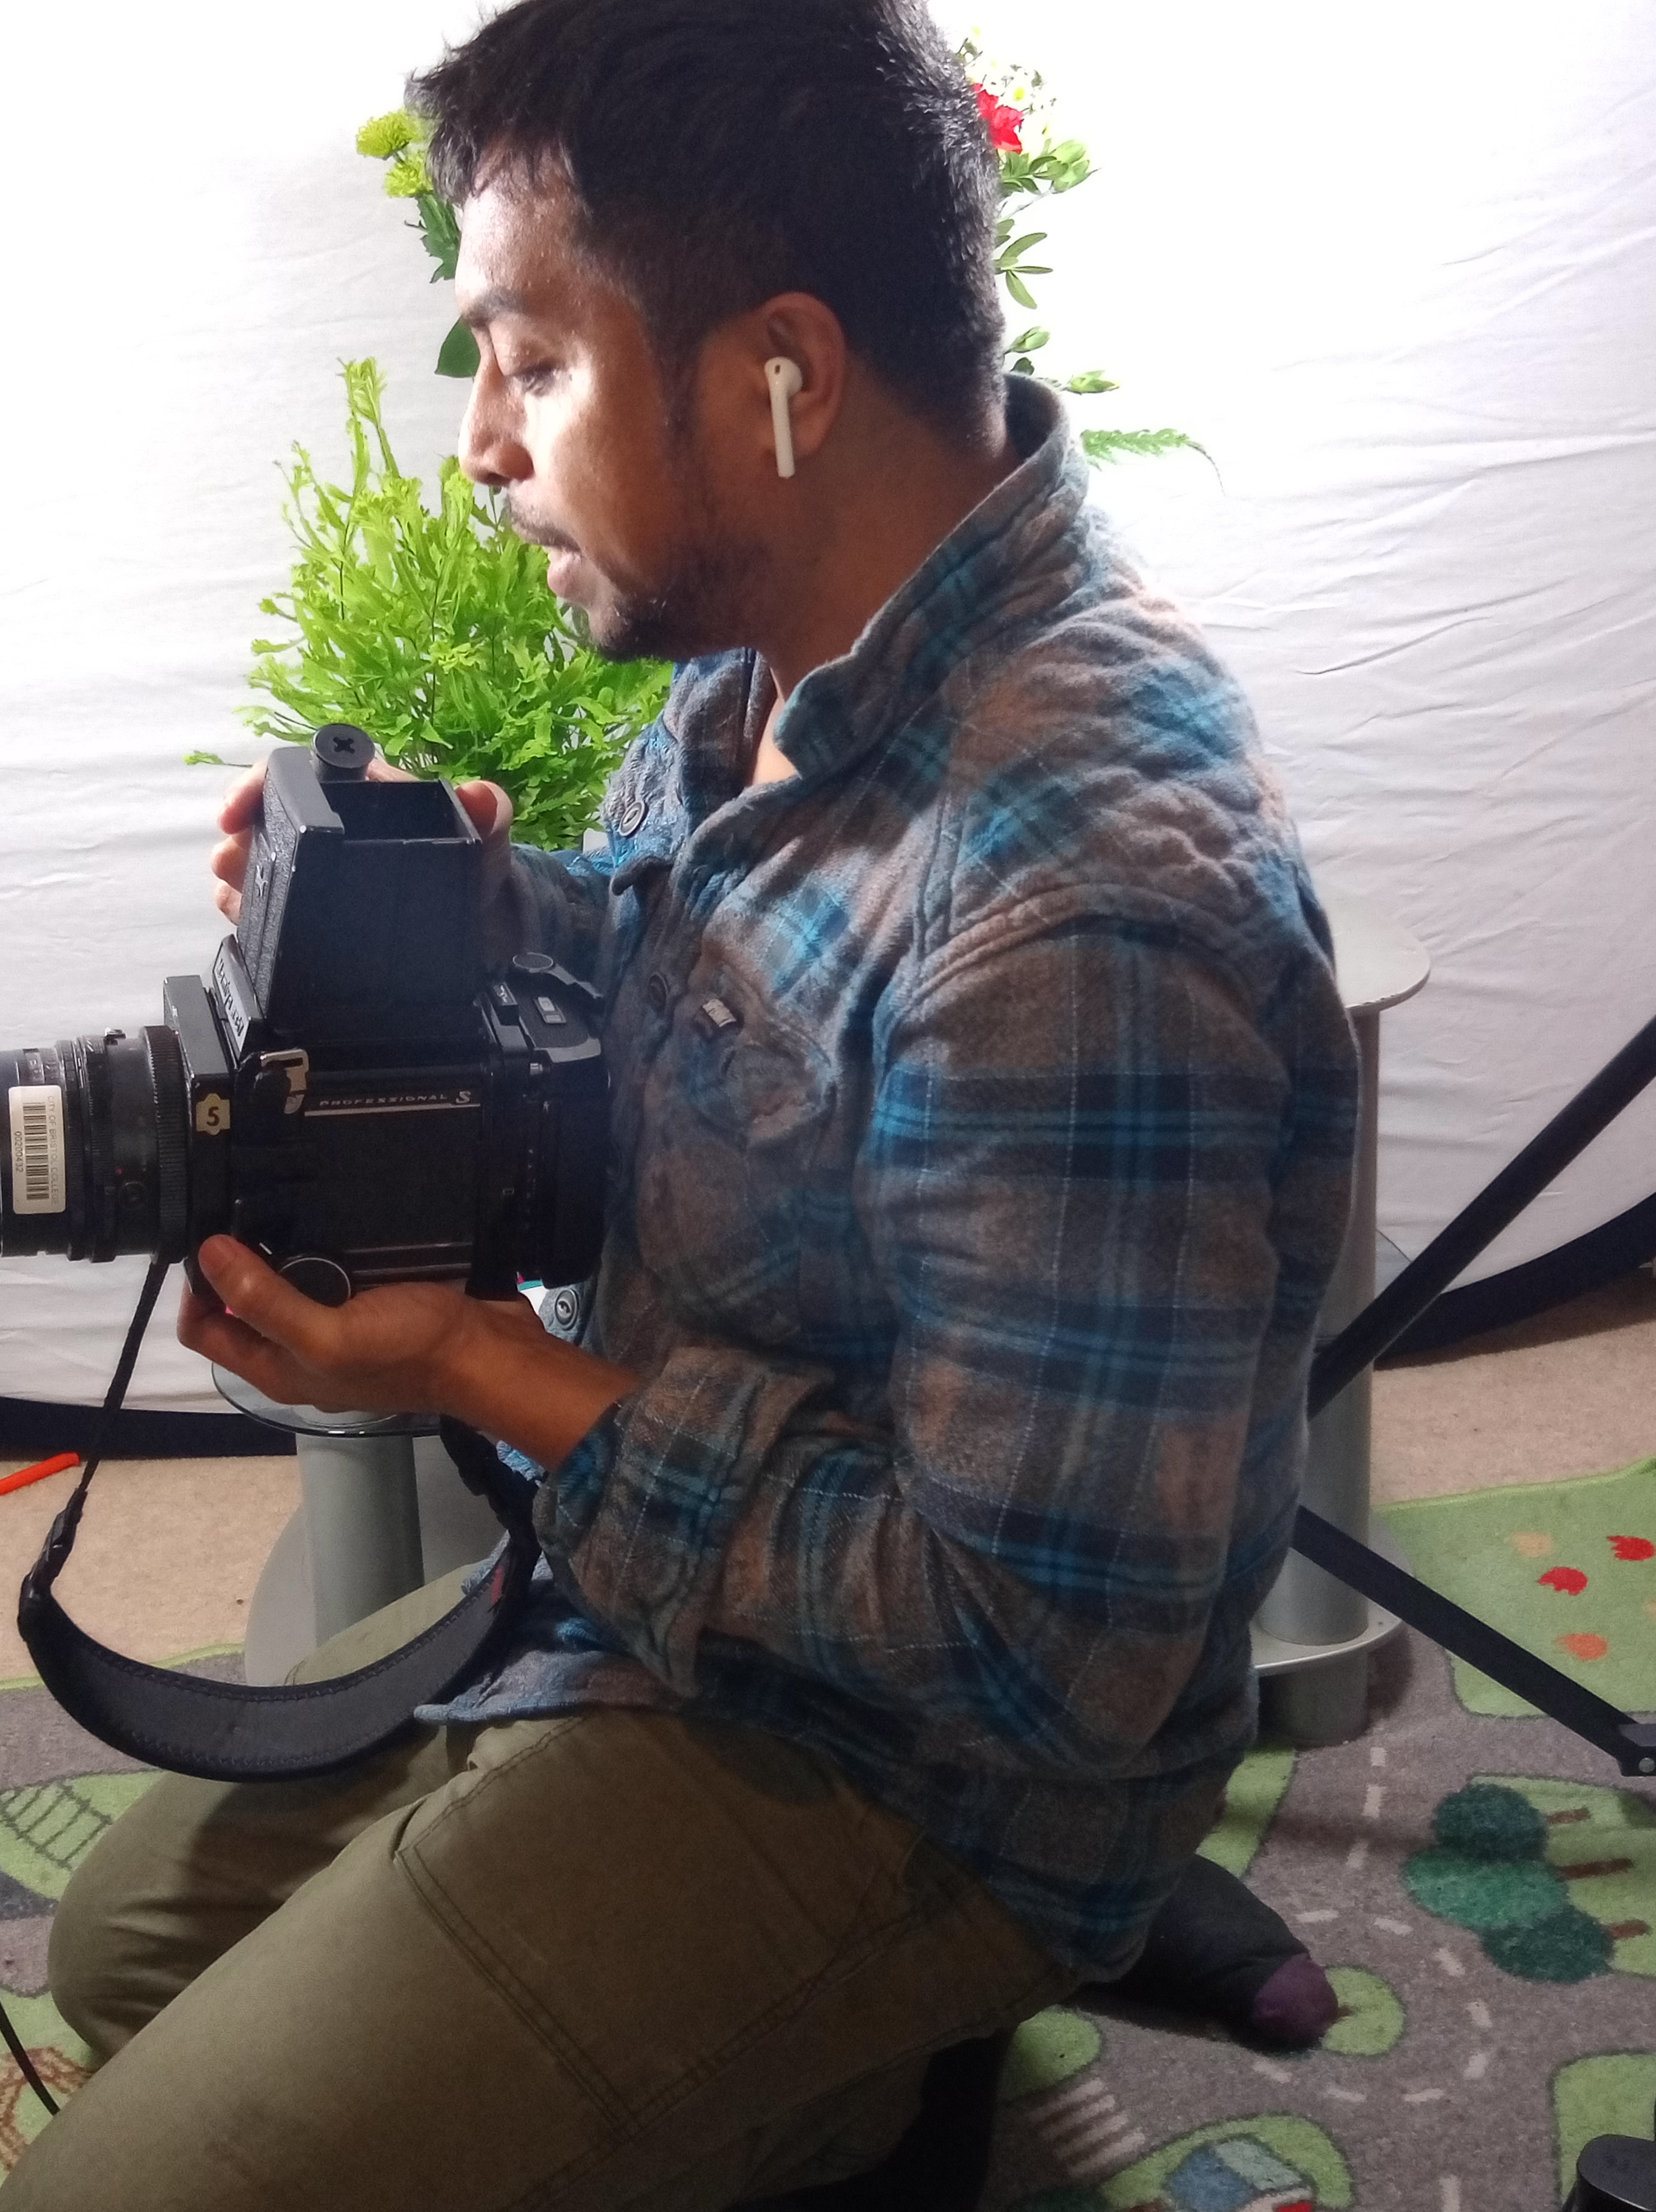
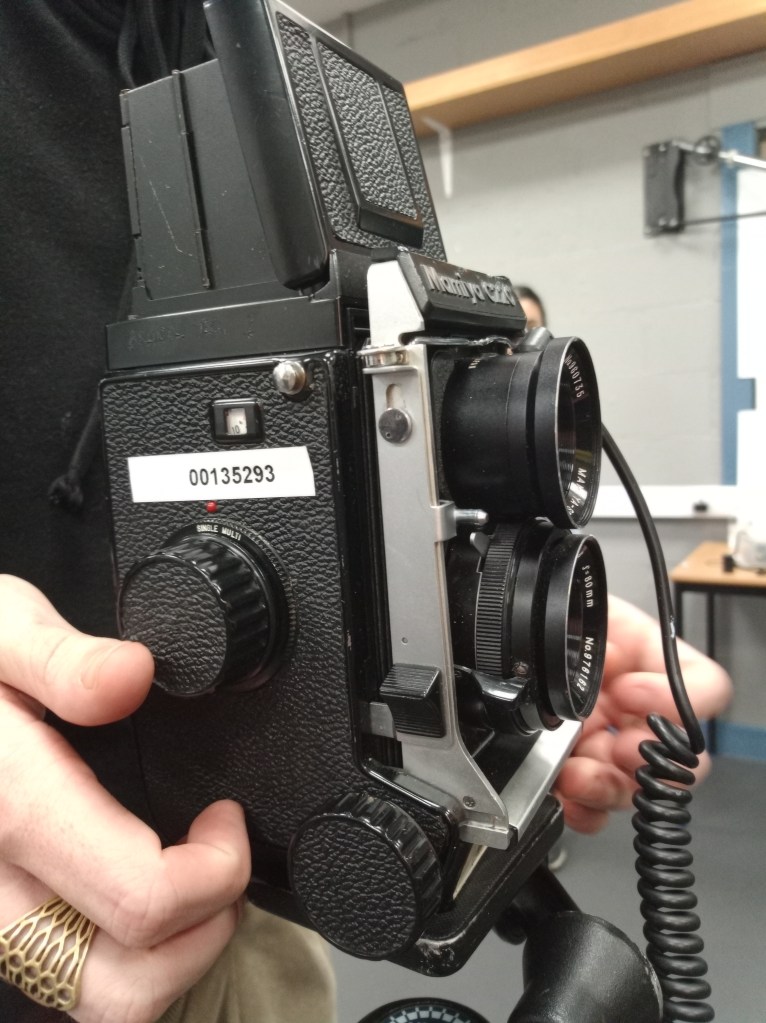
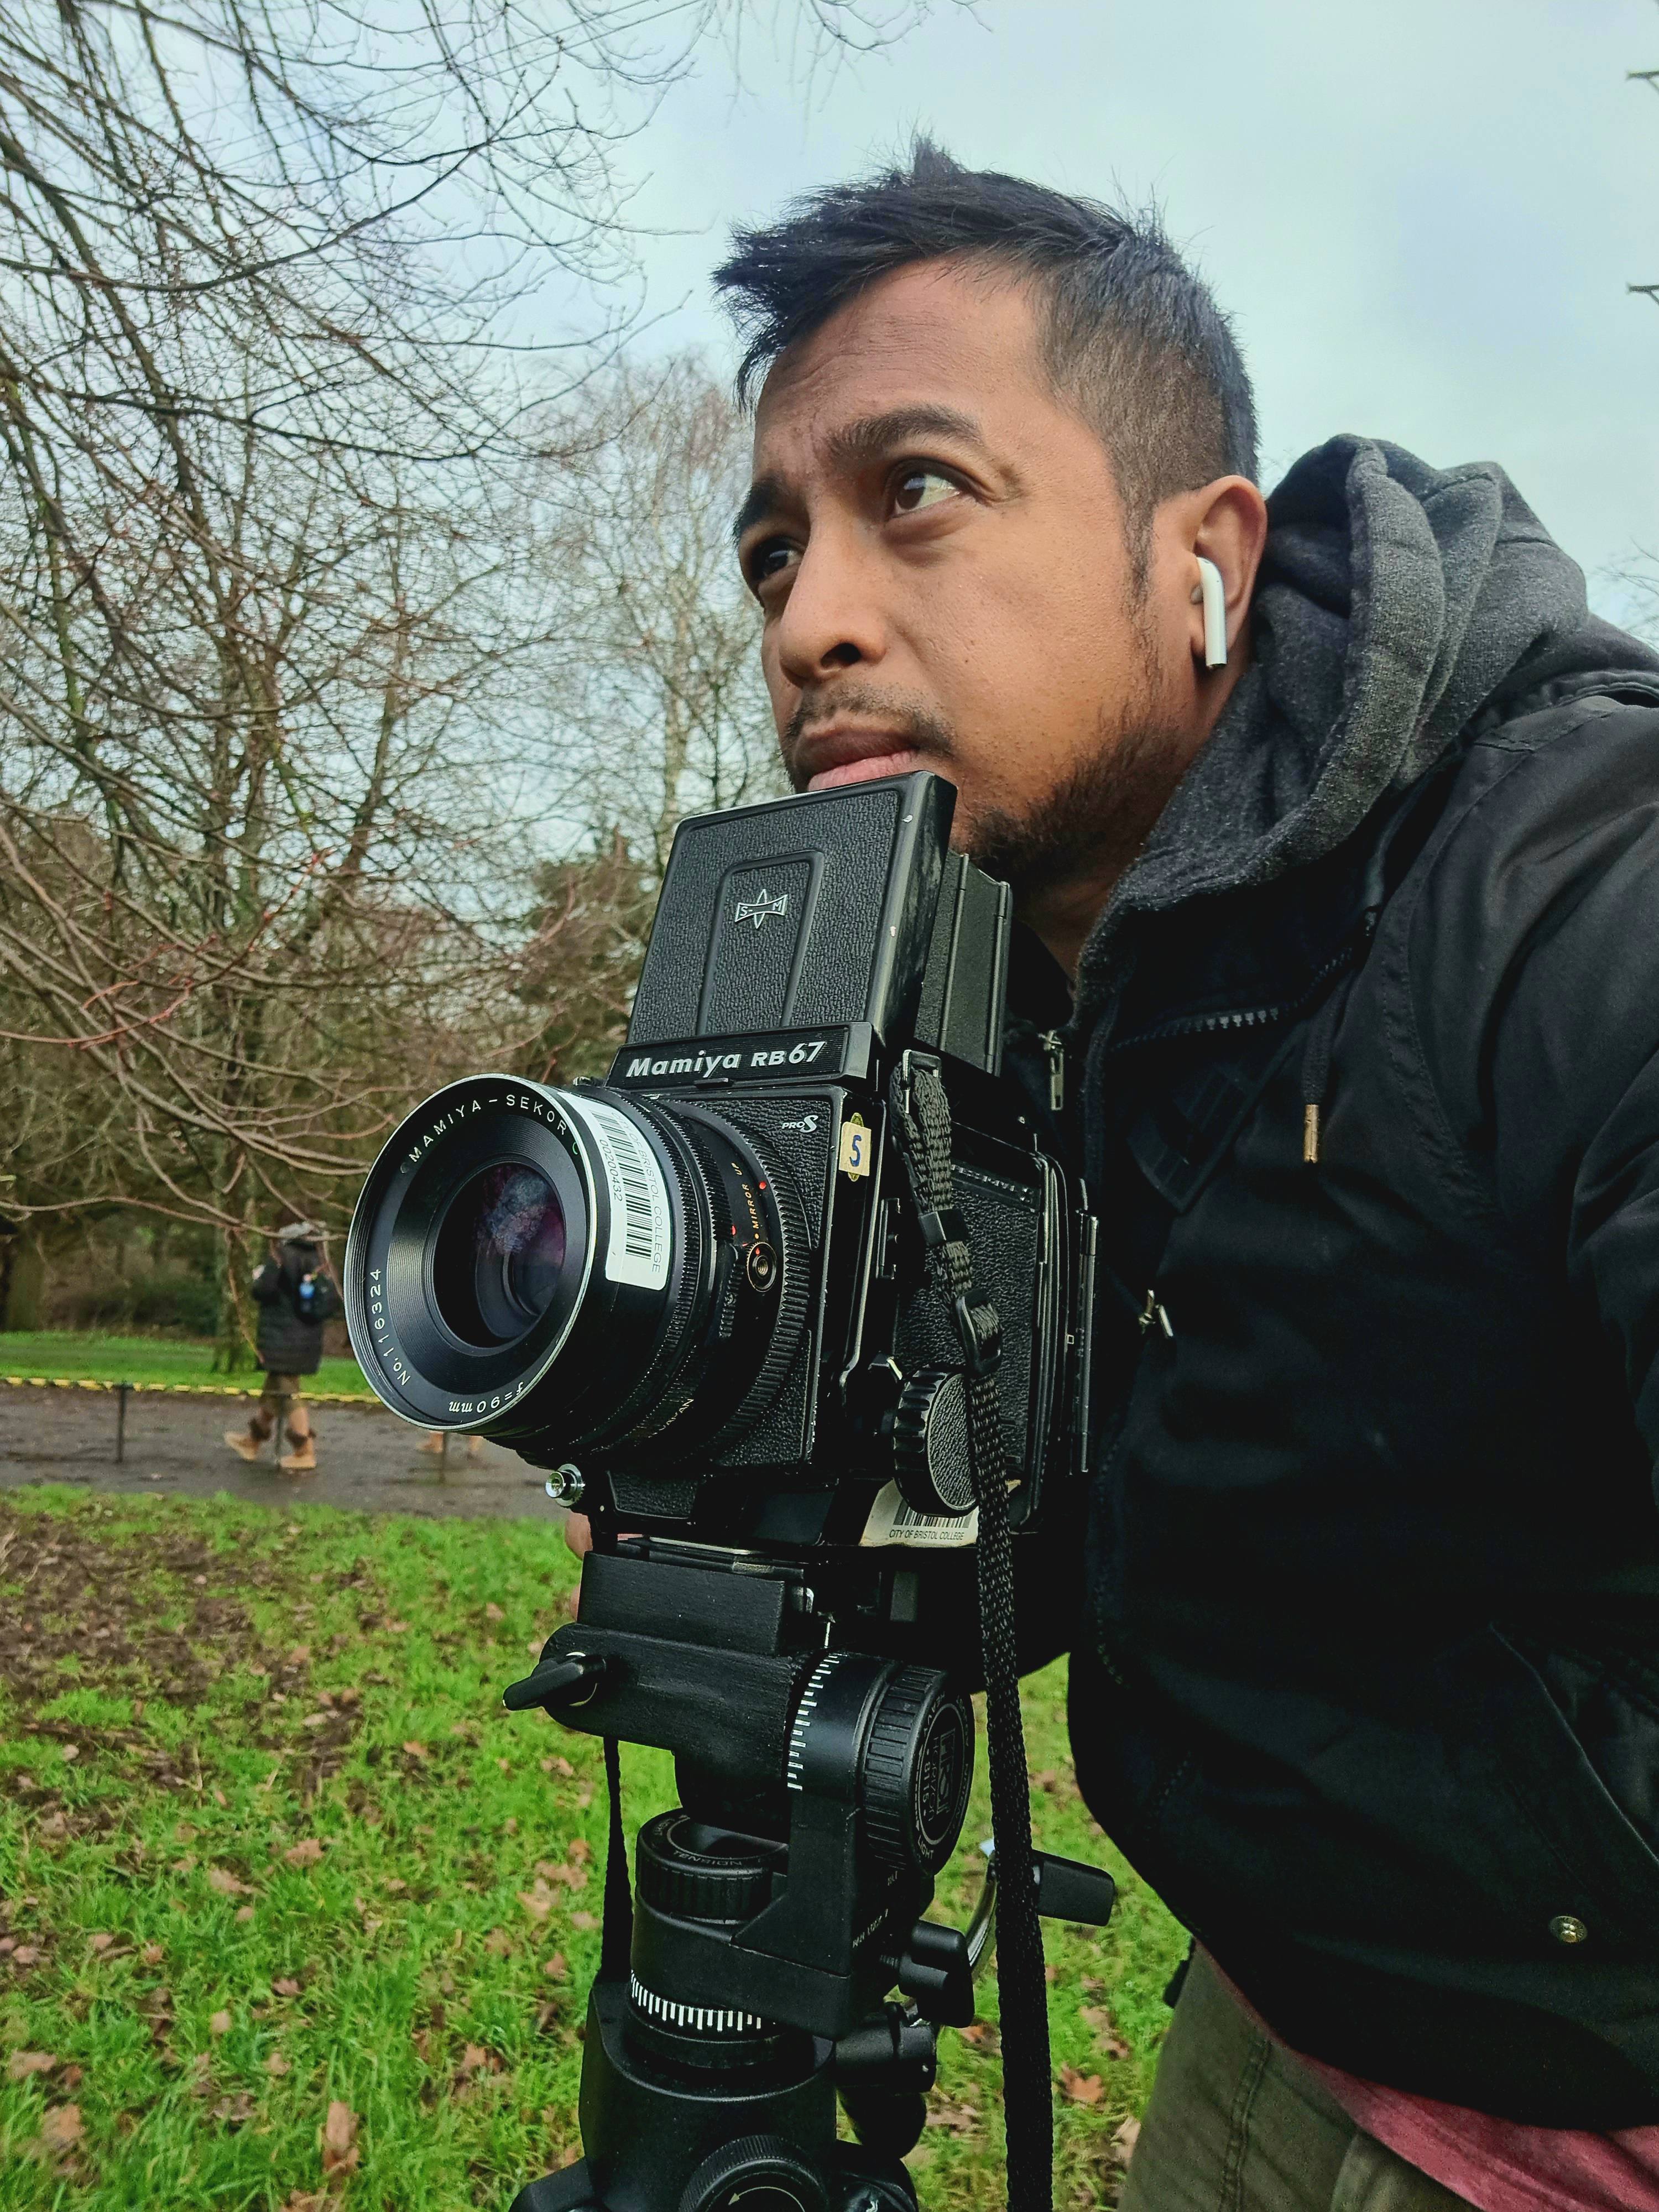
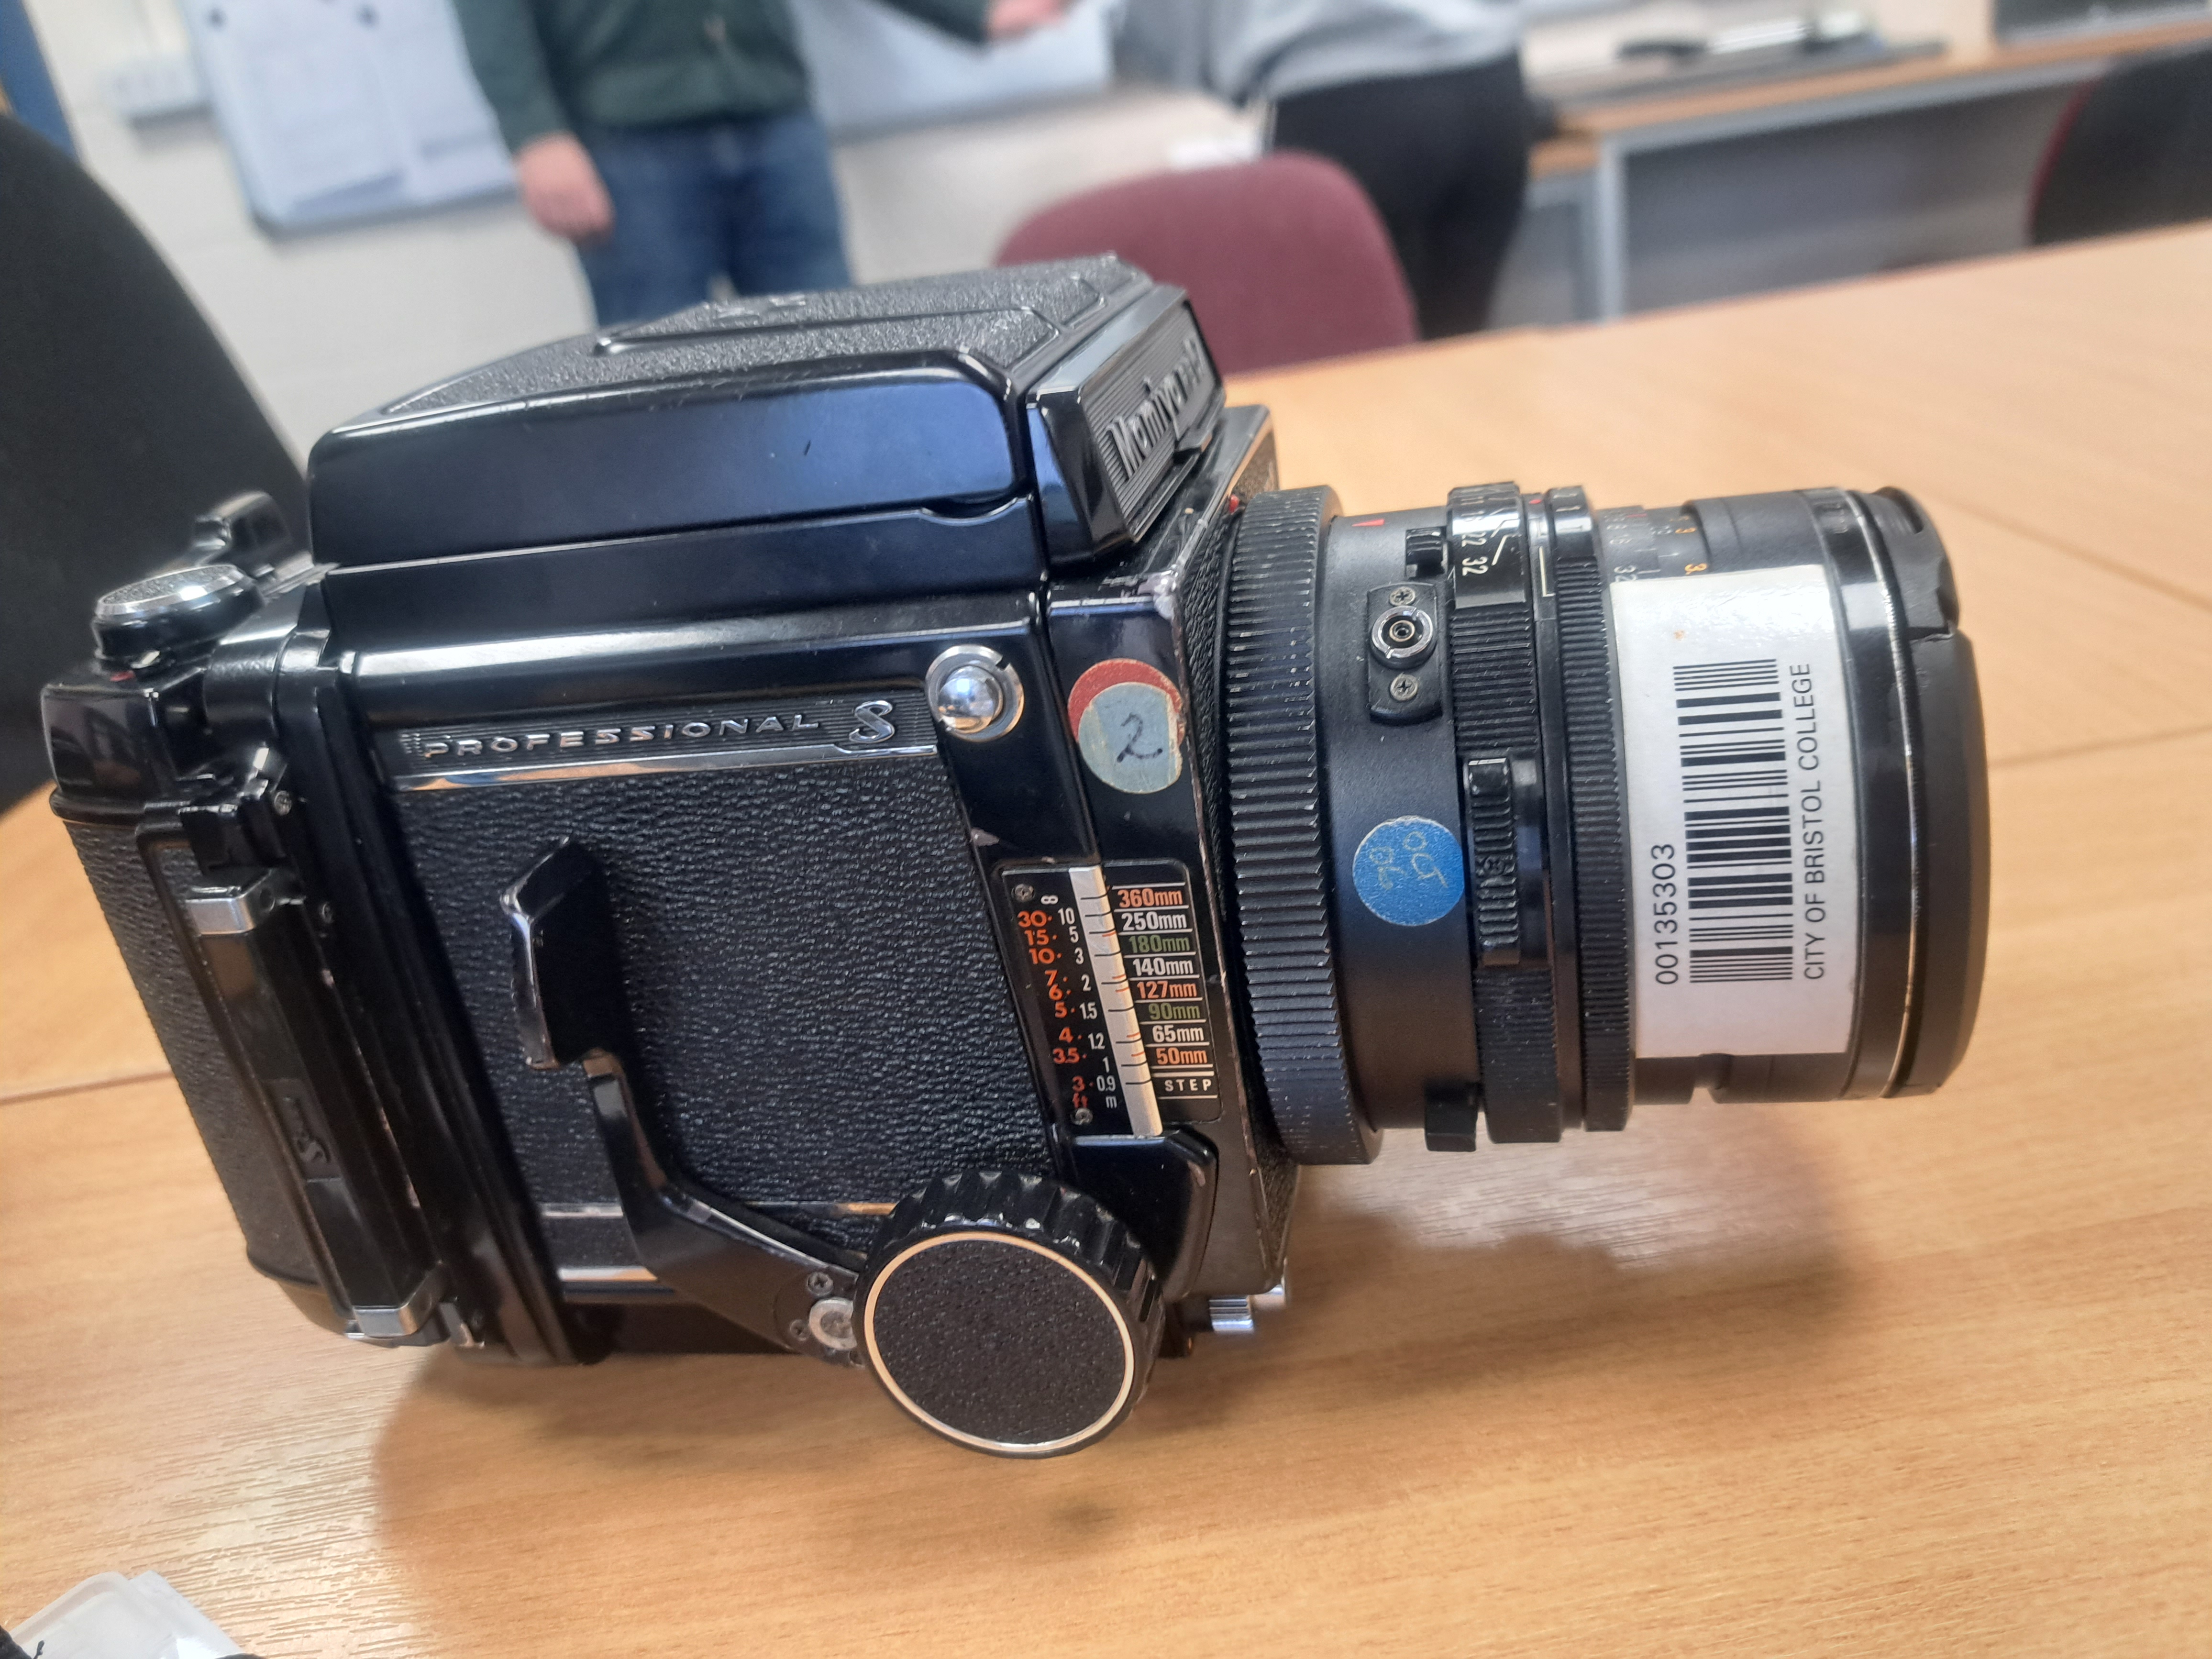
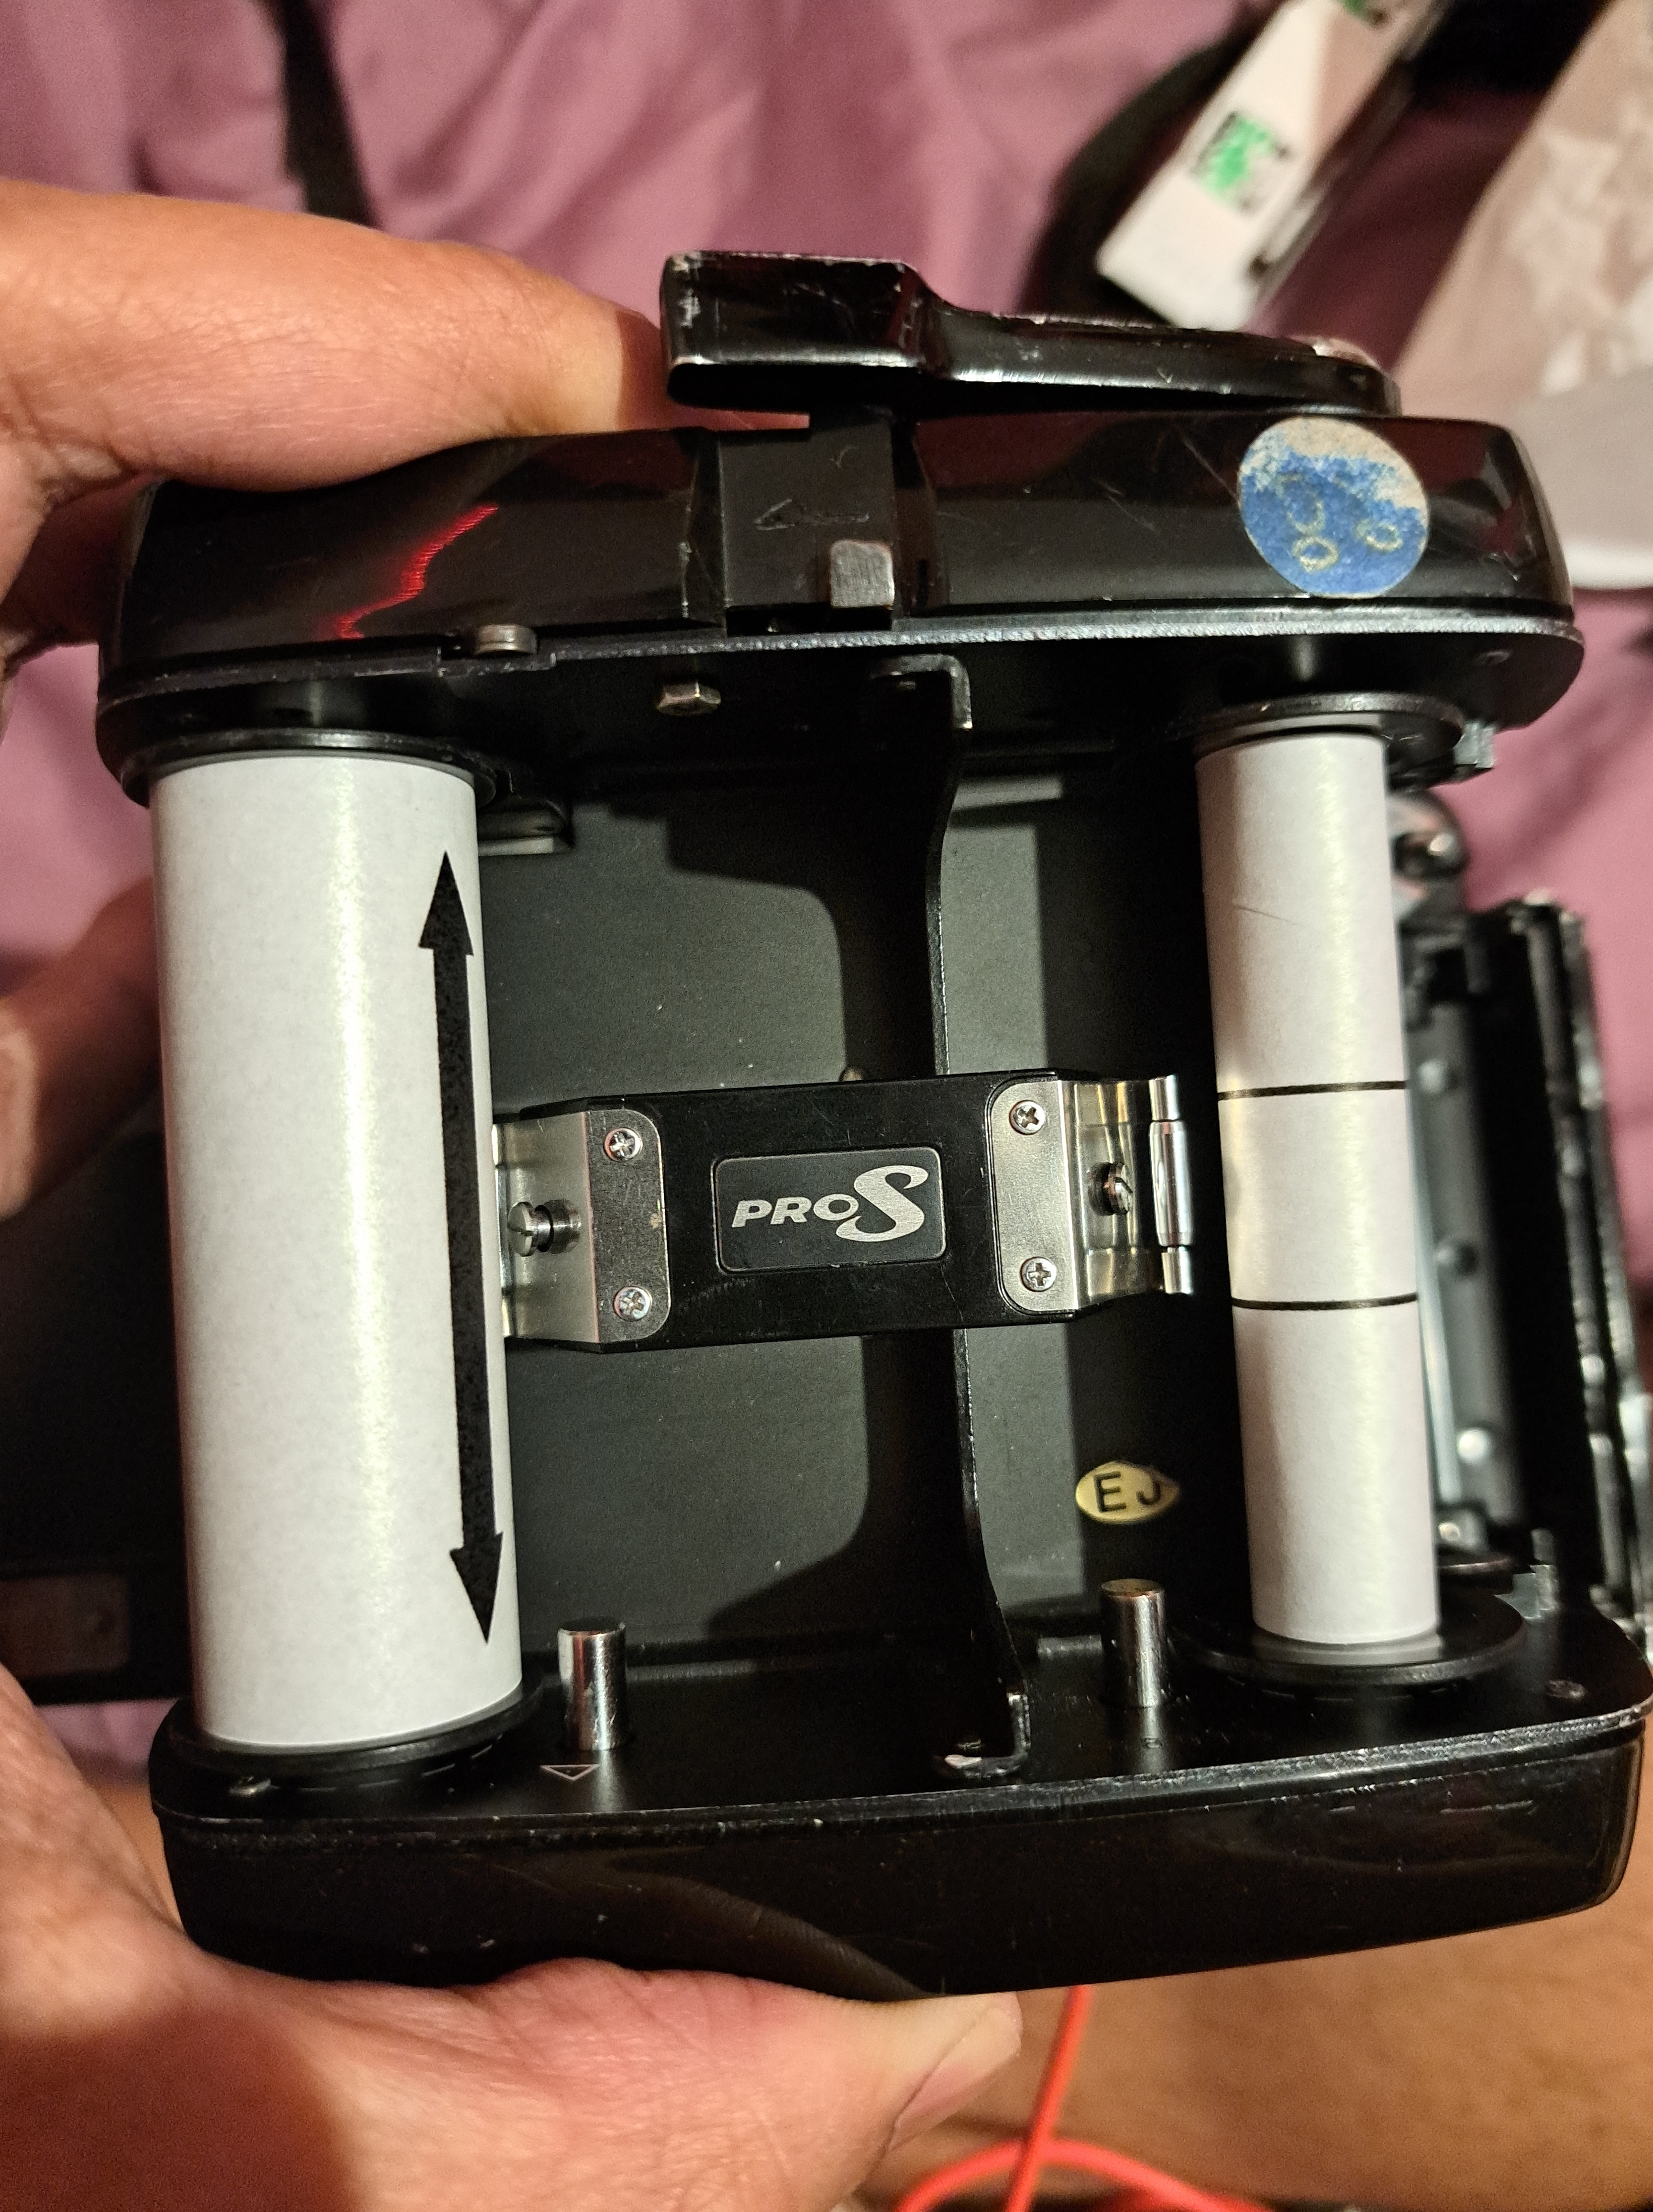
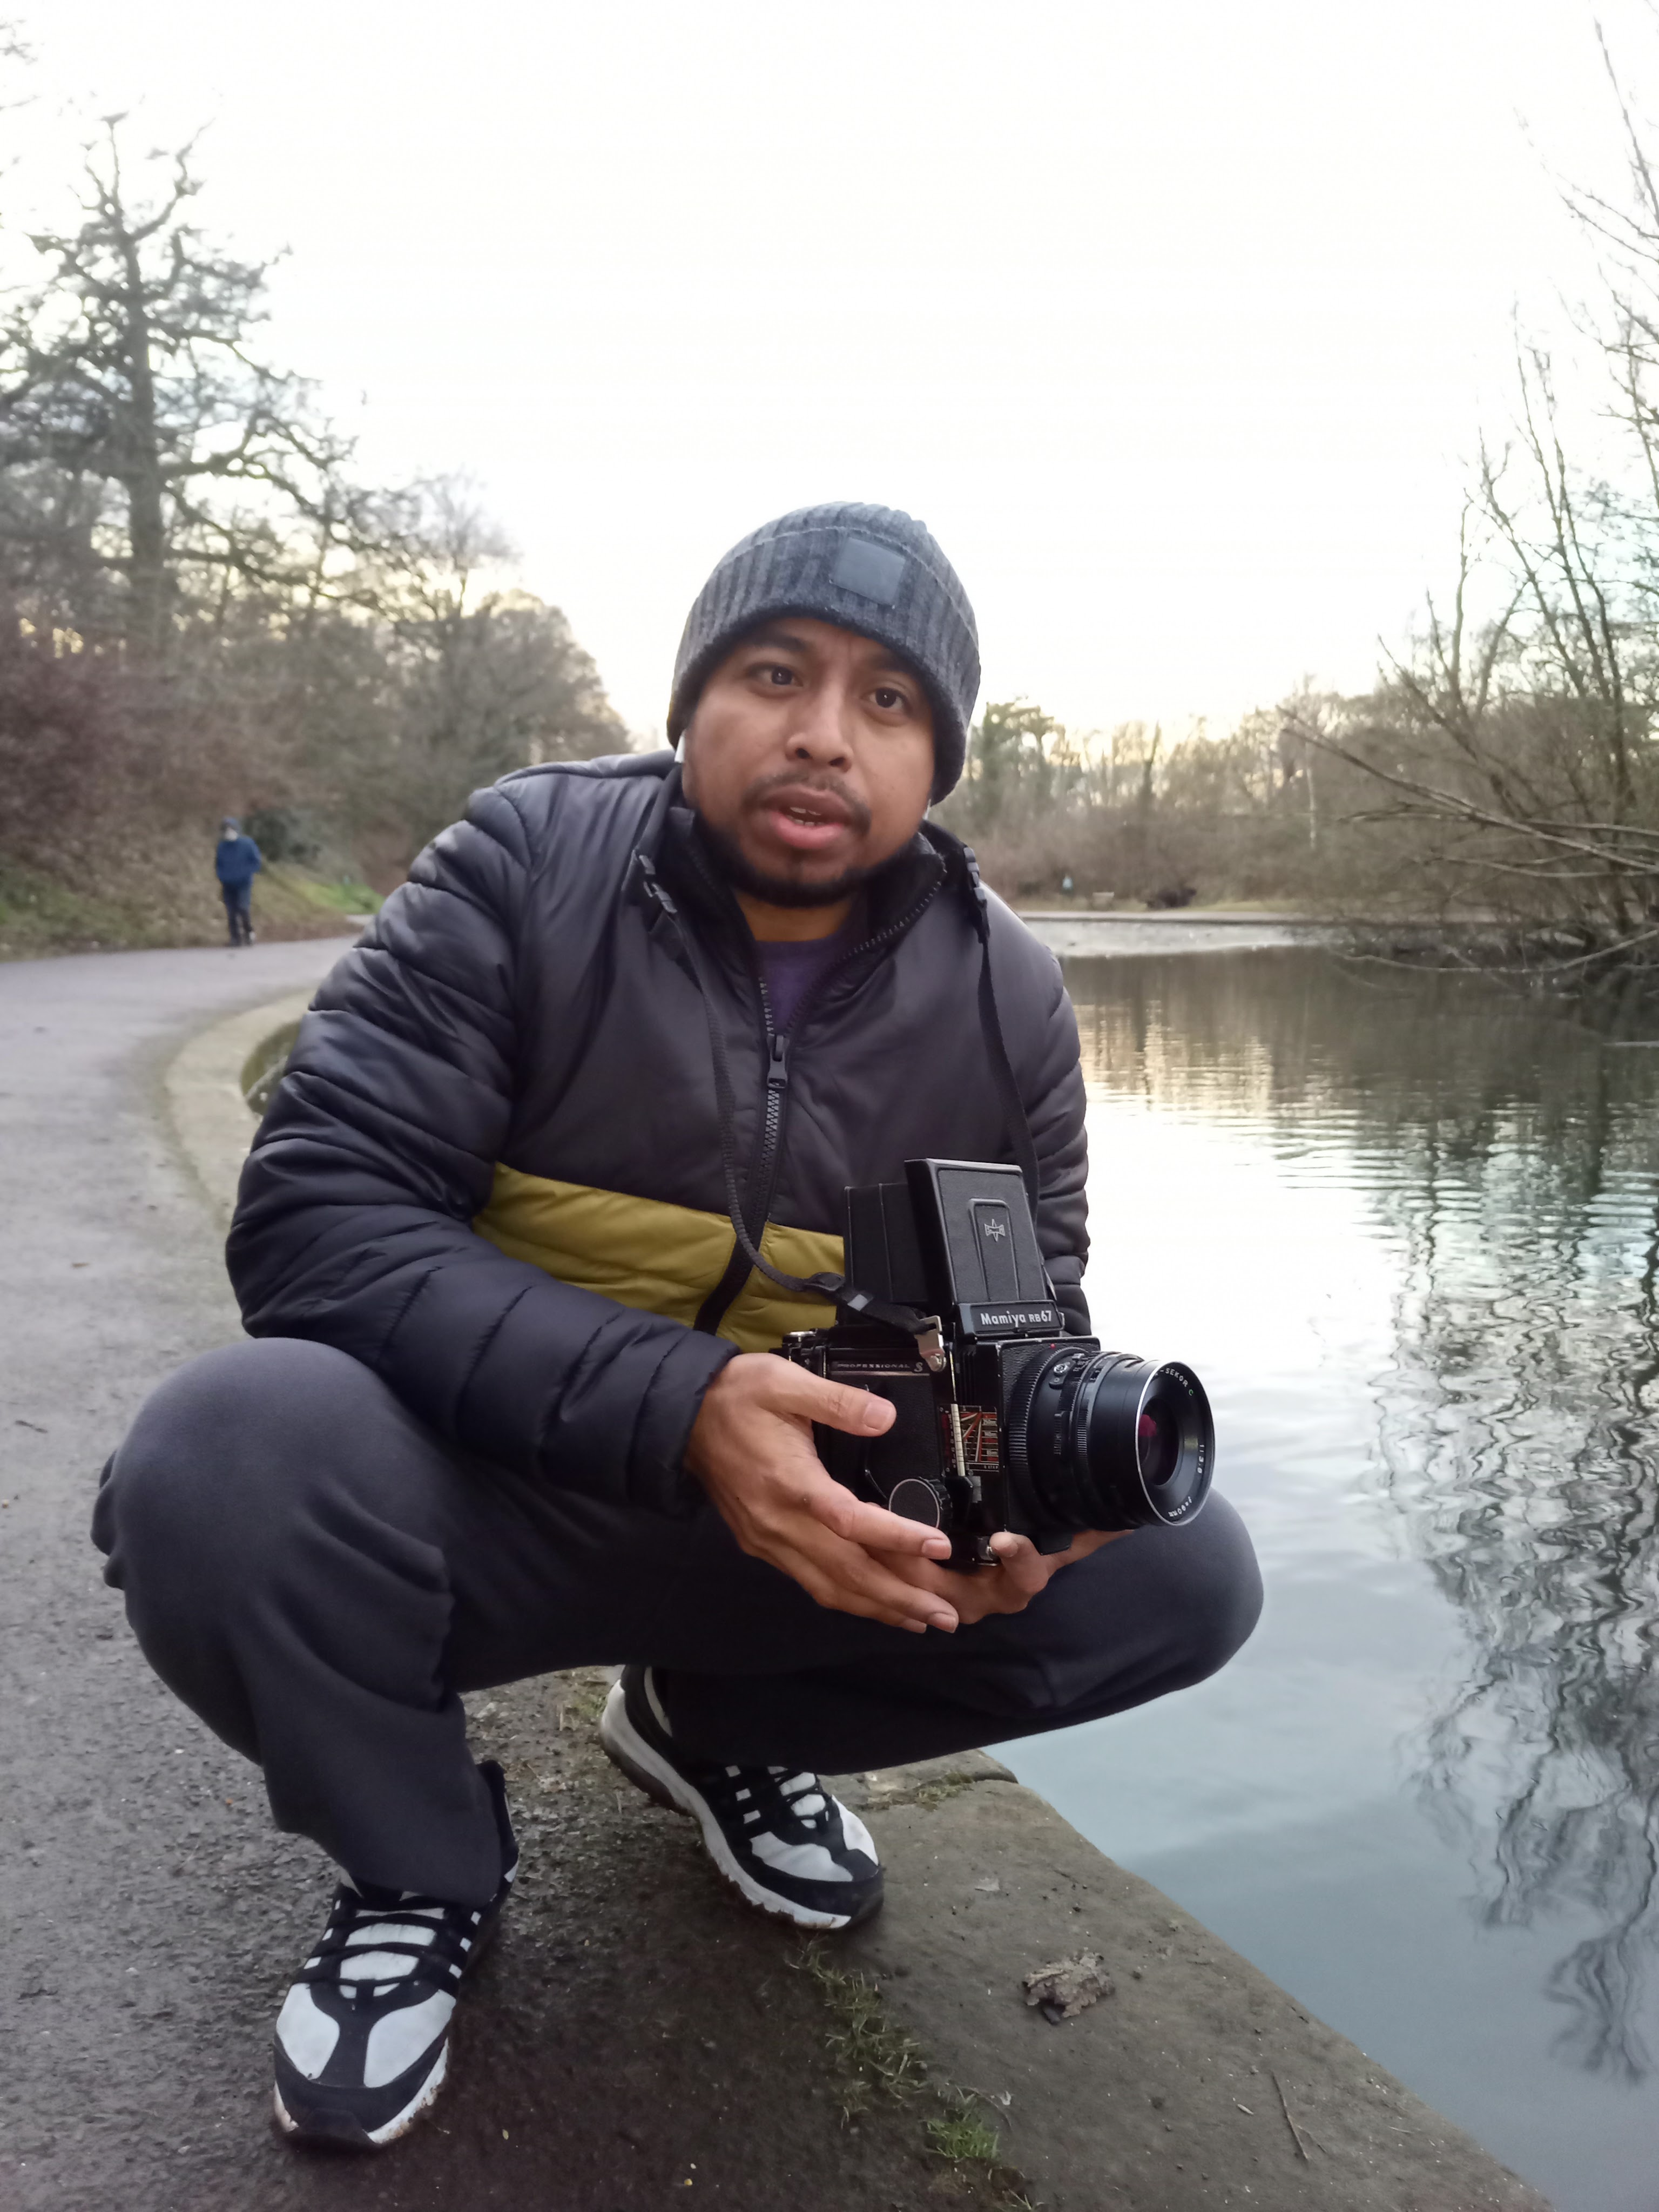
- Mamiya RB67
Mamiya RB67 Pro S is a 6×7 medium format film camera . RB67 stands for Rotating Back 6×7, and this camera became popular in the 1970s. The camera has a film rollback, a dark slide, and a waist-level viewfinder. The Mamiya camera, which turns 53 this year, remains popular. Landscape, product, and studio photographers that utilise tripods employ this bulky camera (approximately 2.5 kg with lens, depending on the lens). We can use the Mamiya without a tripod, but make sure your shutter speed is quick enough to prevent camera movement blur. the camera film size is 120 and 10 negatives film in a roll. The RB67 Pro is sturdy and battery-free.
According to Martijn Roos
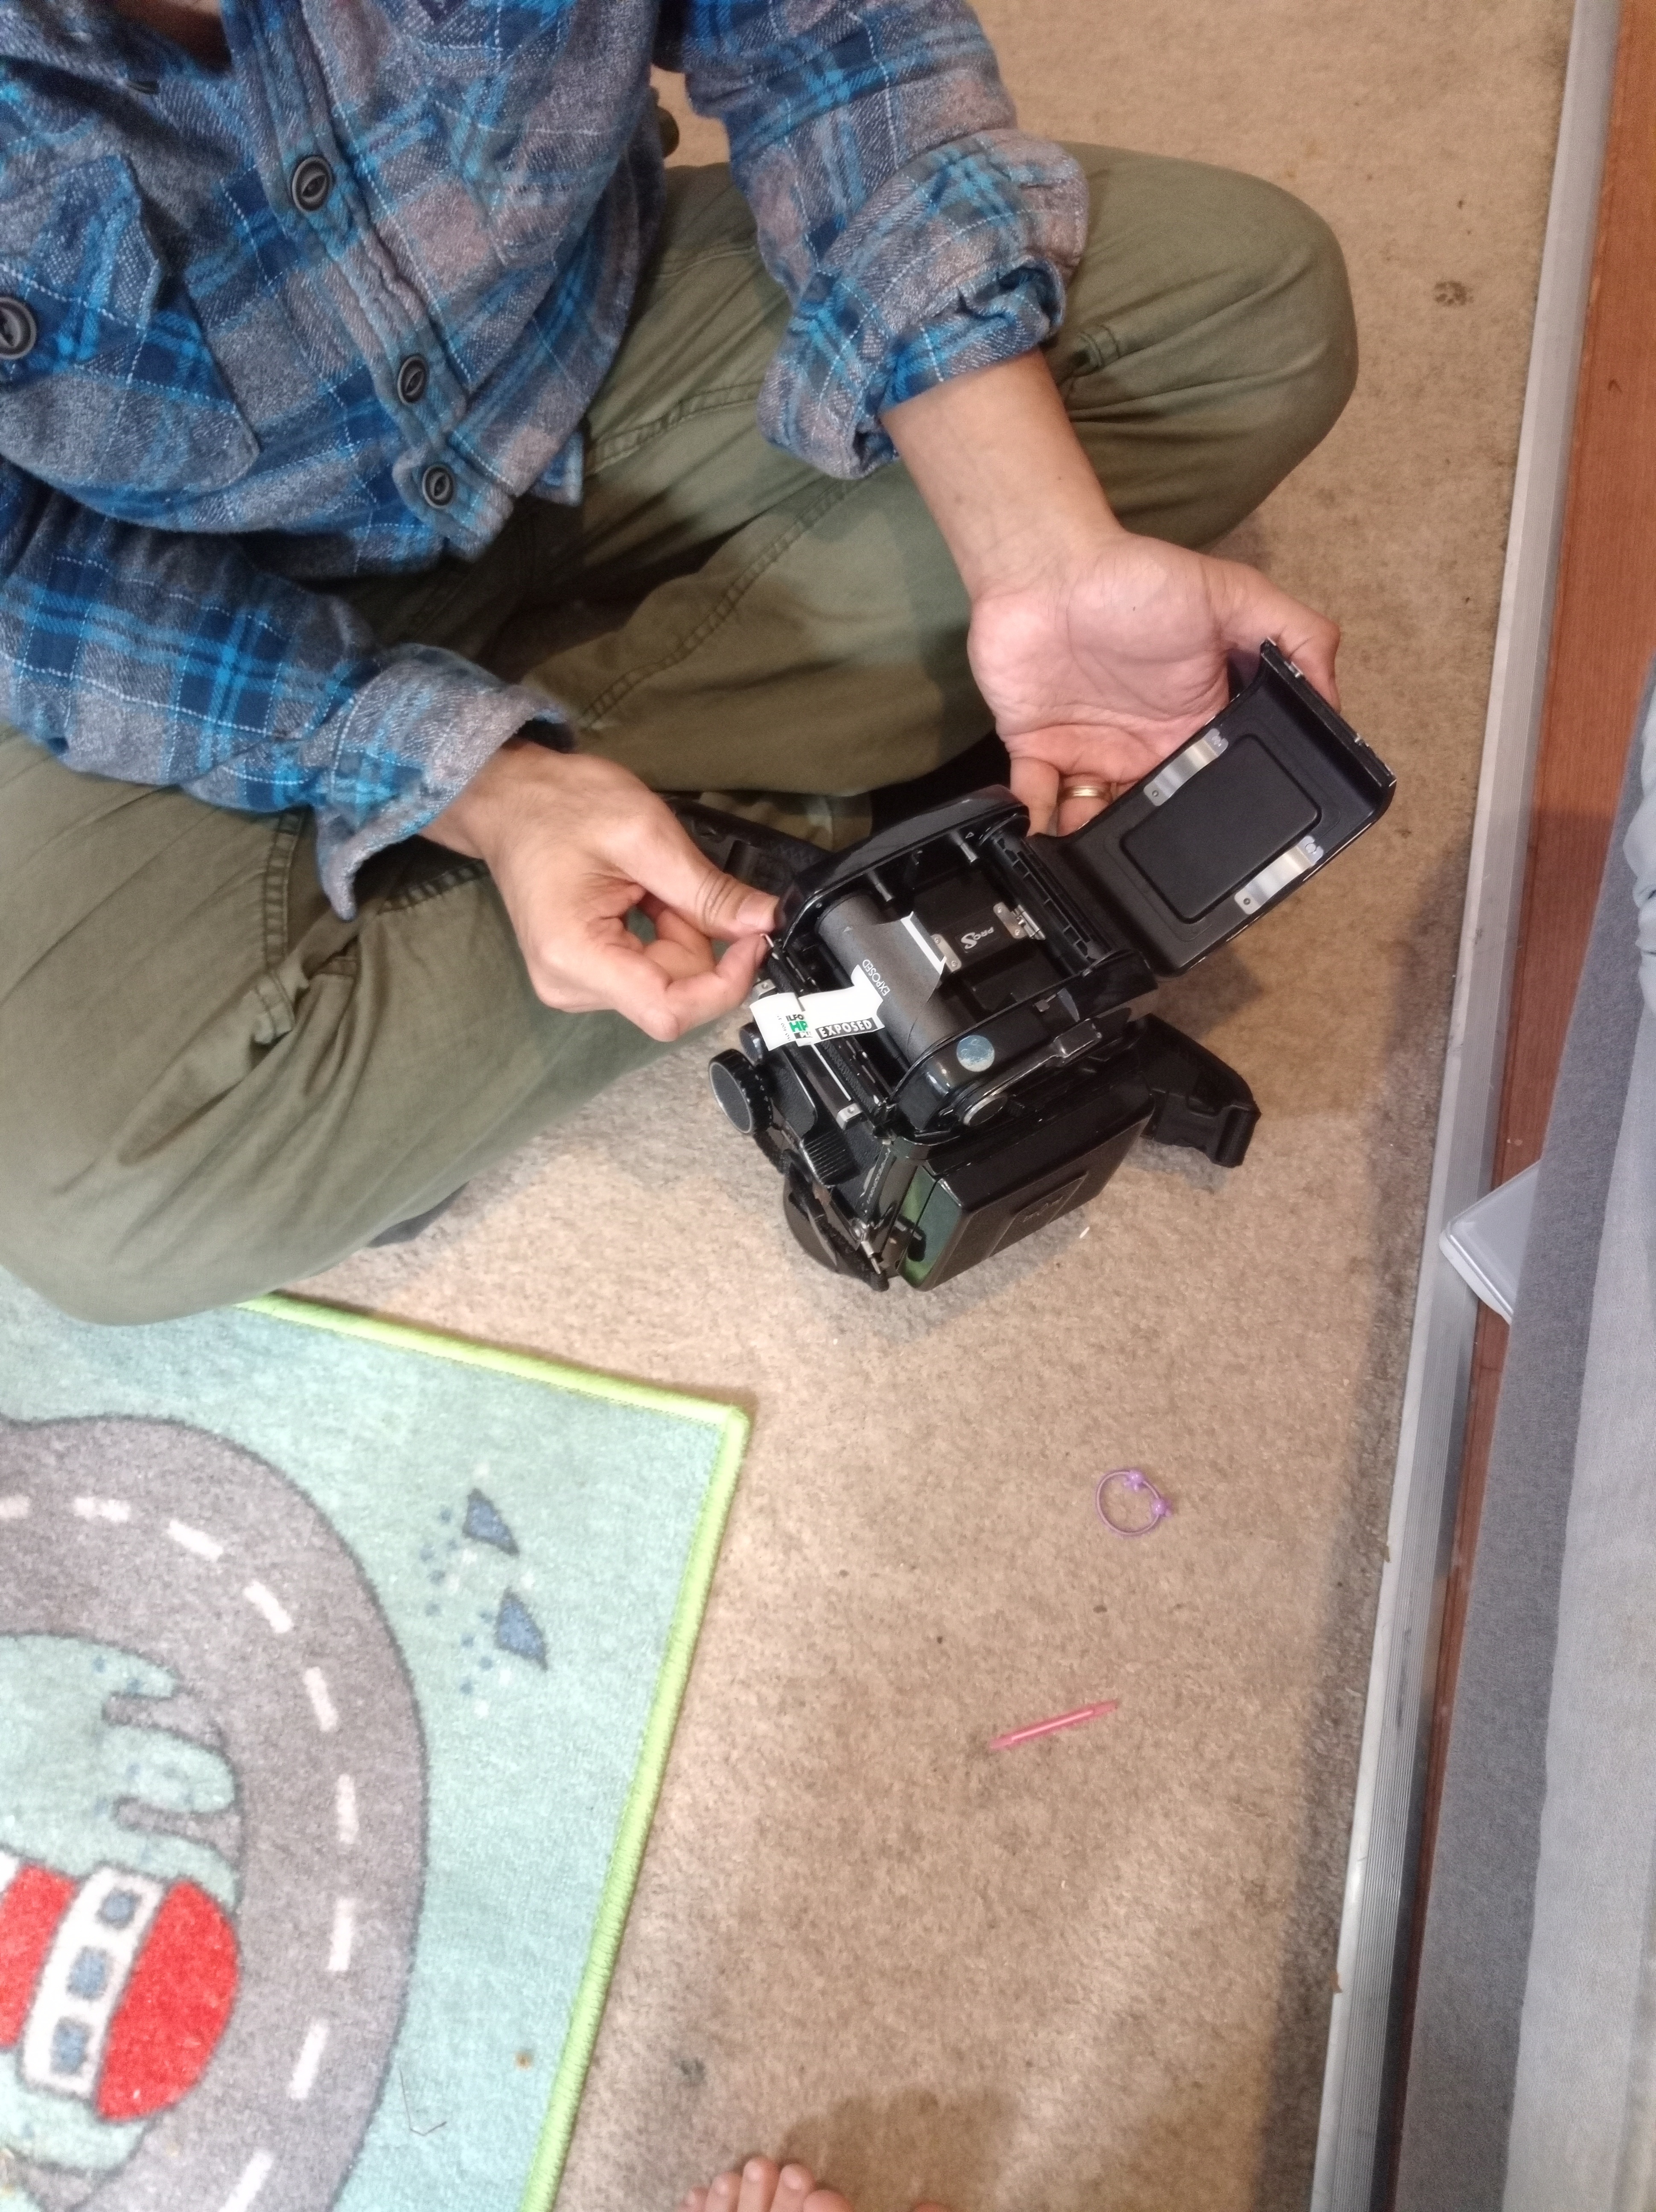
These are step by step to use the camera in a fully operational as follows:
- Take out the dark slide that’s stuck between the film rollback and the body of the camera. Do not hesitate; light will not enter the camera until you manually release the shutter.
- Adjust the lens so that it has the appropriate settings, both for the aperture and the shutter speed. If you want to acquire a better knowledge of the light in the picture, you may use a light meter or another digital camera. Both of these options are available to you. My general guideline is to overexpose film since film normally manages overexposure considerably better than underexposure, and the film handles overexposure much better than digital cameras do. His reasoning for this is that film can tolerate overexposure much better than digital cameras. This is a process of trial and error, and it is also a matter of individual preference.
- You may focus the lens by using the wheels that are located on each side of the camera’s front face. If necessary, make use of the magnification that is included inside the viewfinder; otherwise, you may just push back on it lightly, and it will remain in its current position.
- Make sure that the orientation of the film rollback is precise as you want it, and check to see that the composition that you see in the viewfinder aligns with the orientation of the picture, whether it be portrait or landscape.
- Put the lever on the right side of the camera all the way down, and then check the composition, the focus, and the exposure settings again.
- Make sure you press the button.
- Wind the film back up and start the procedure all over again for the next picture.
To create double exposure with Mamiya RB67, there are also a few steps by step that have been summarised by Karl.leonard4444 from the Flickr discussion group regarding any topic with Mamiya RB67.
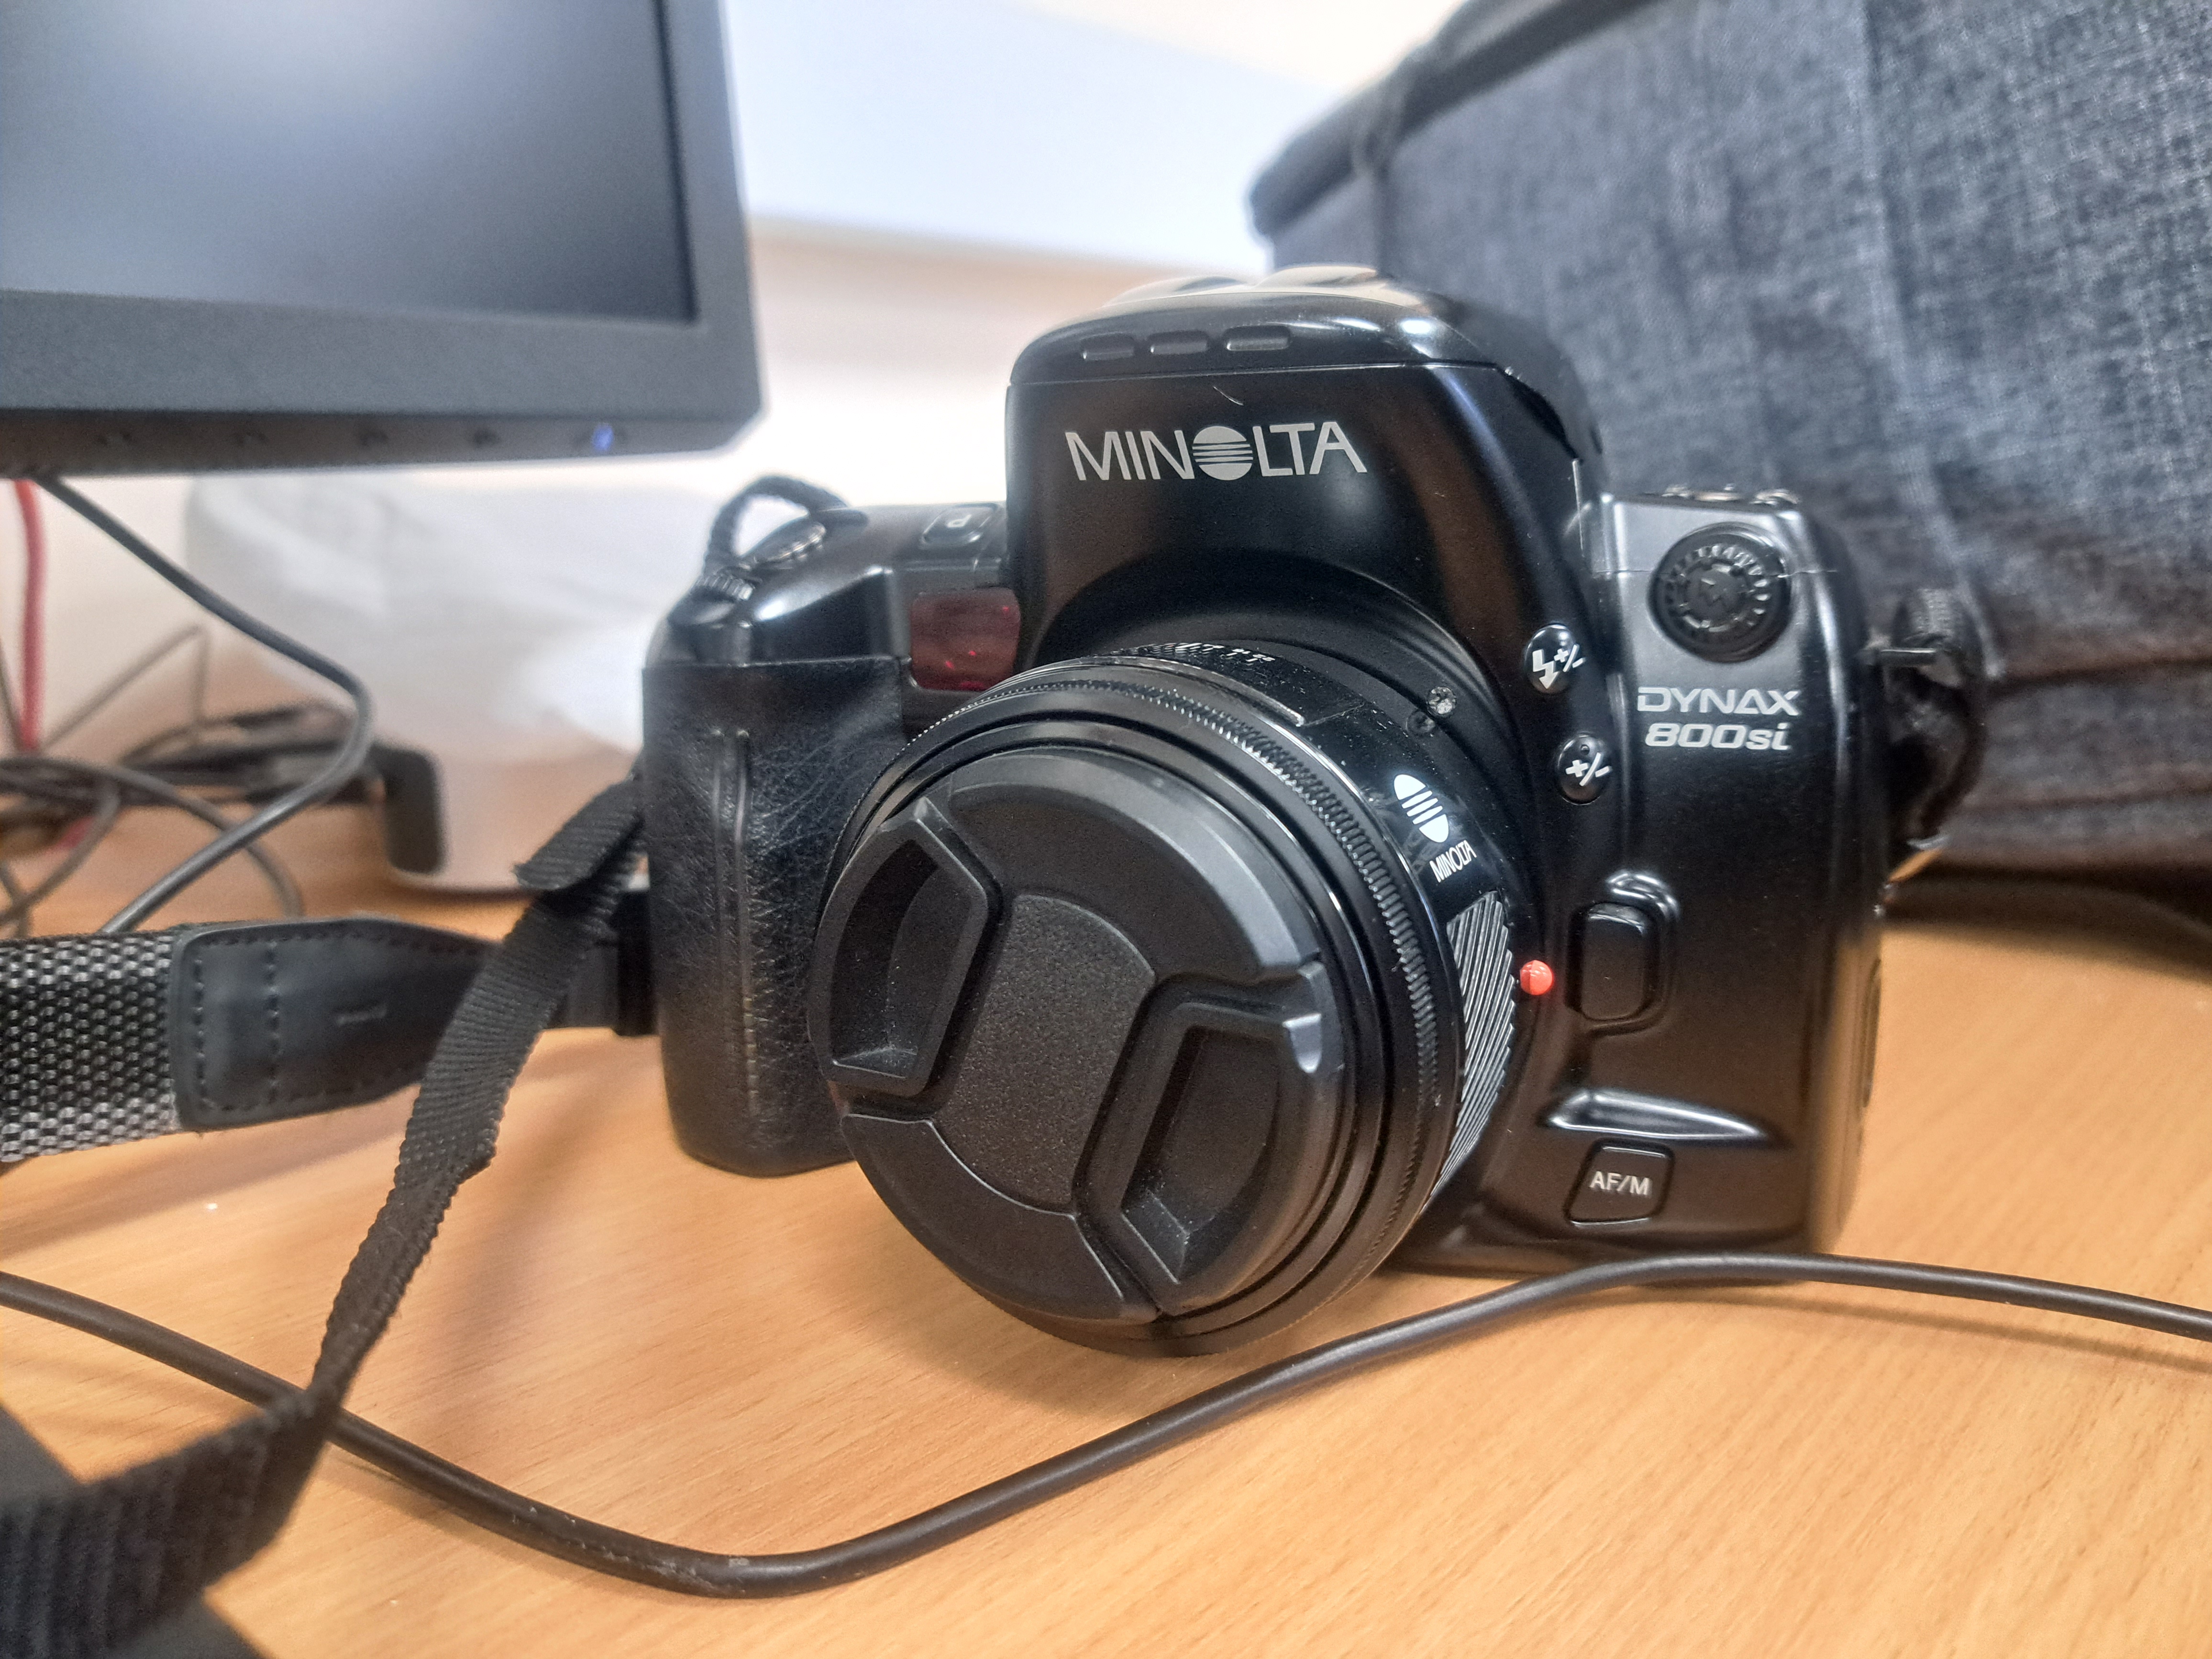
- 35mm Film Camera
The word “35mm in photography” may apply to a wide variety of things; however, the majority of the time, it will be used to relate to either a specific kind of depth of field on a lens or a format of film used in photography.

Film in photography sometimes referred to as analogue photography, is typically meant to be referred to as 35mm photography whenever the word “35mm photography” occurs in a format context.
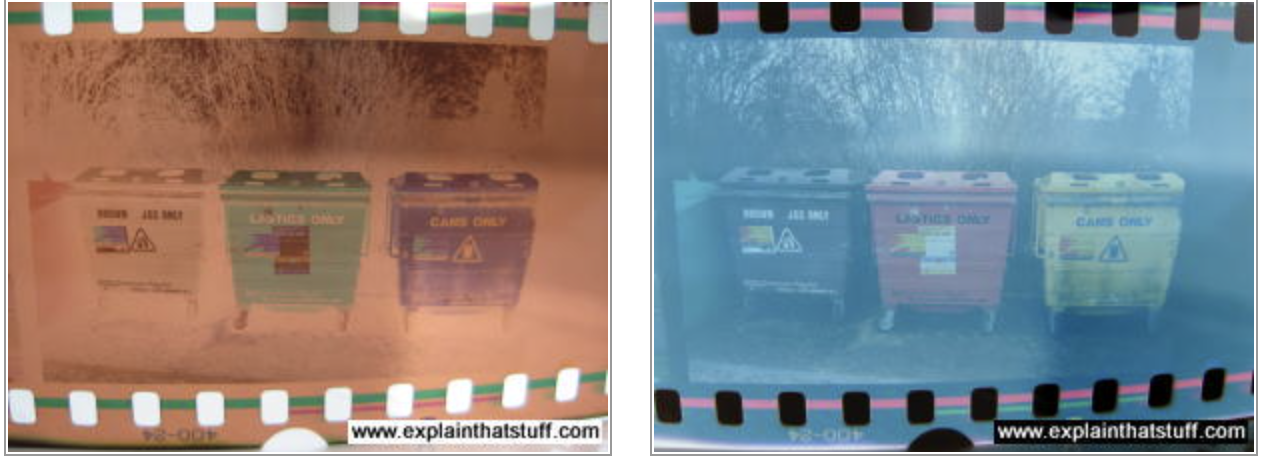
Film photography makes use of light-sensitive film that is placed inside of the camera to take pictures; an imprint is taken of the scene anytime the film is confronted with light.


The term “35mm format” refers to a typical kind of image sensor format that is used in film photography. This format is simply referred to as “35mm.” The basic rule is that the resolution of the film will improve proportionately with its size. When reproduced, images captured using smaller sizes, such as 35mm, will have a grainier appearance; yet, this effect is often prized in film photography.
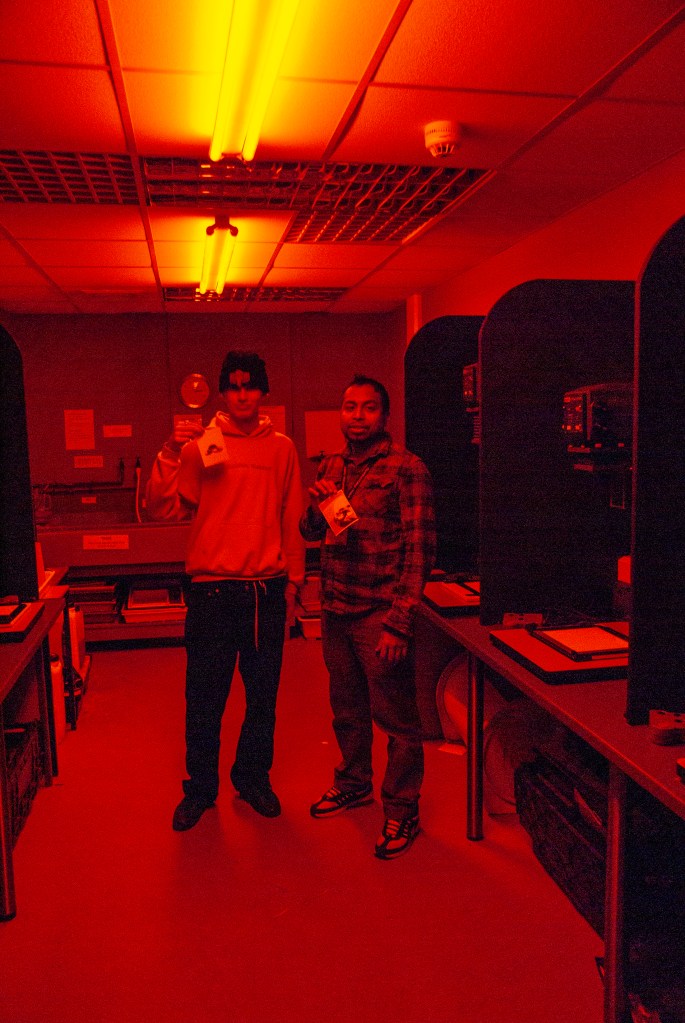
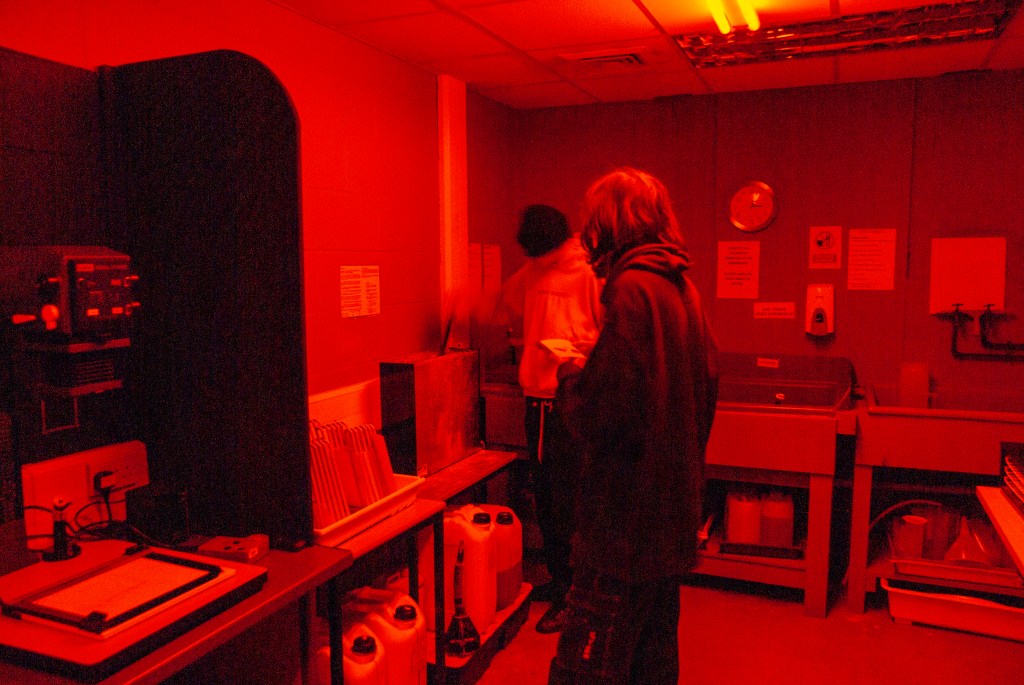
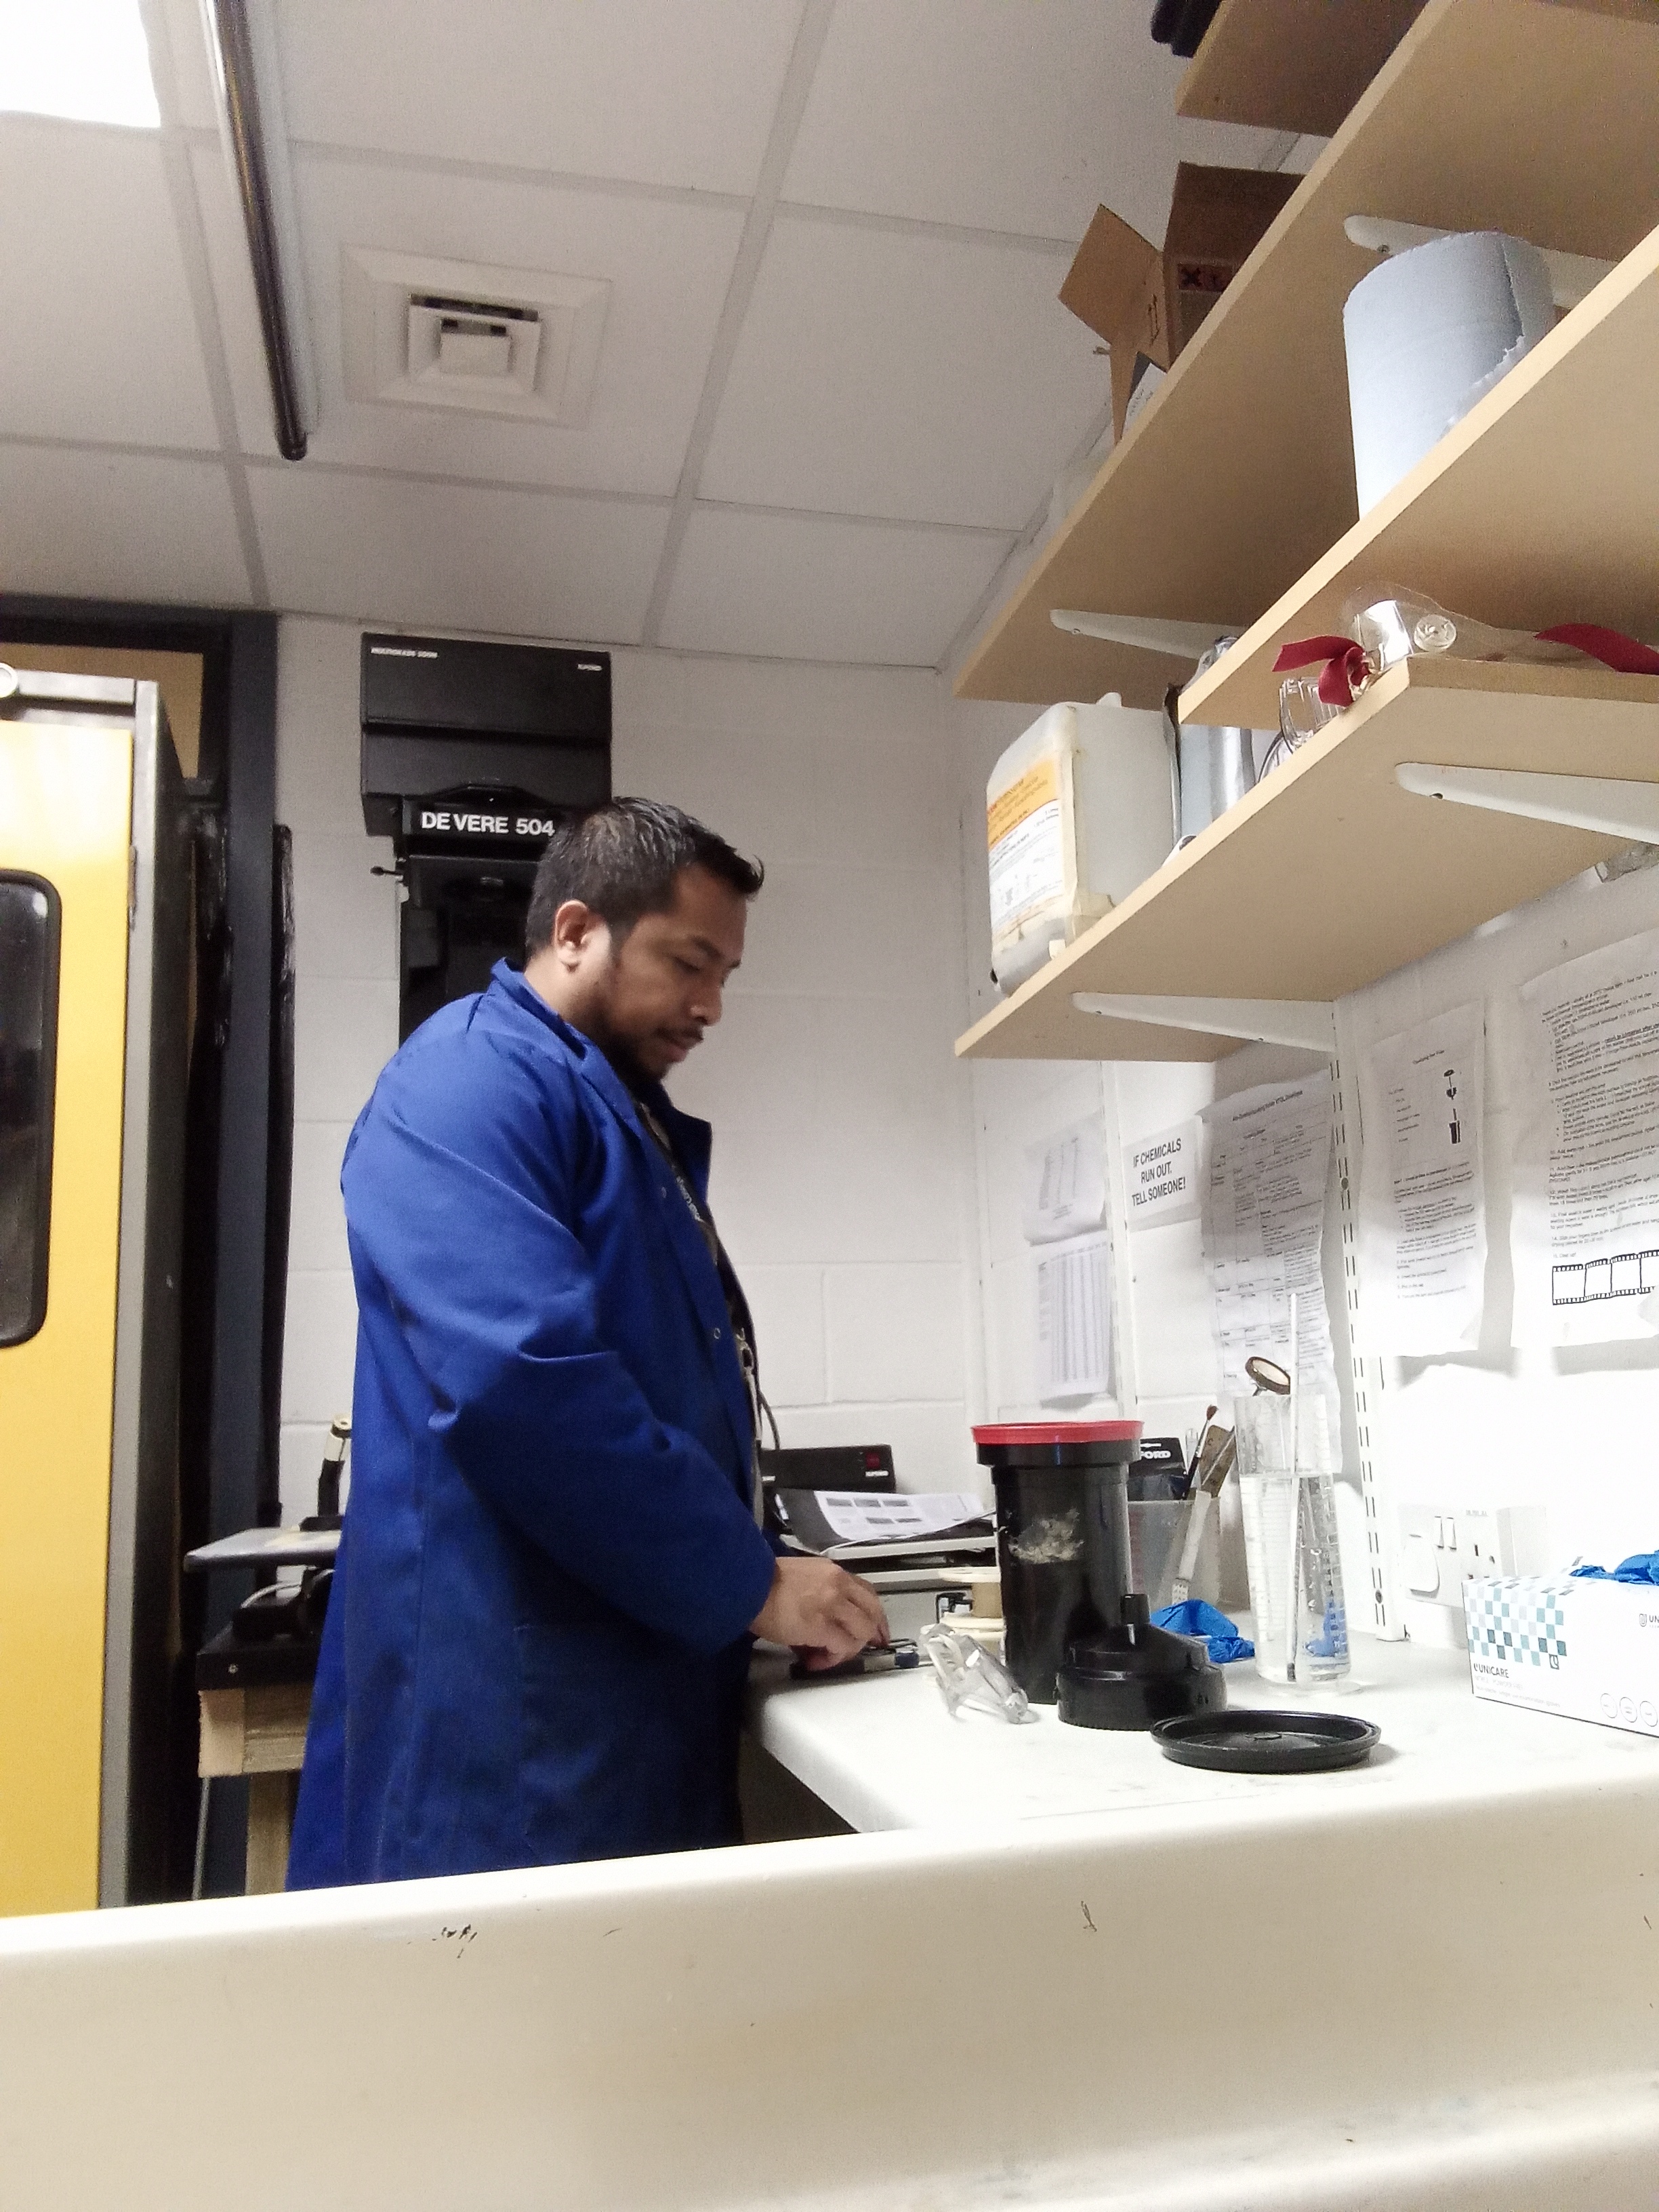
DARKROOM LAB

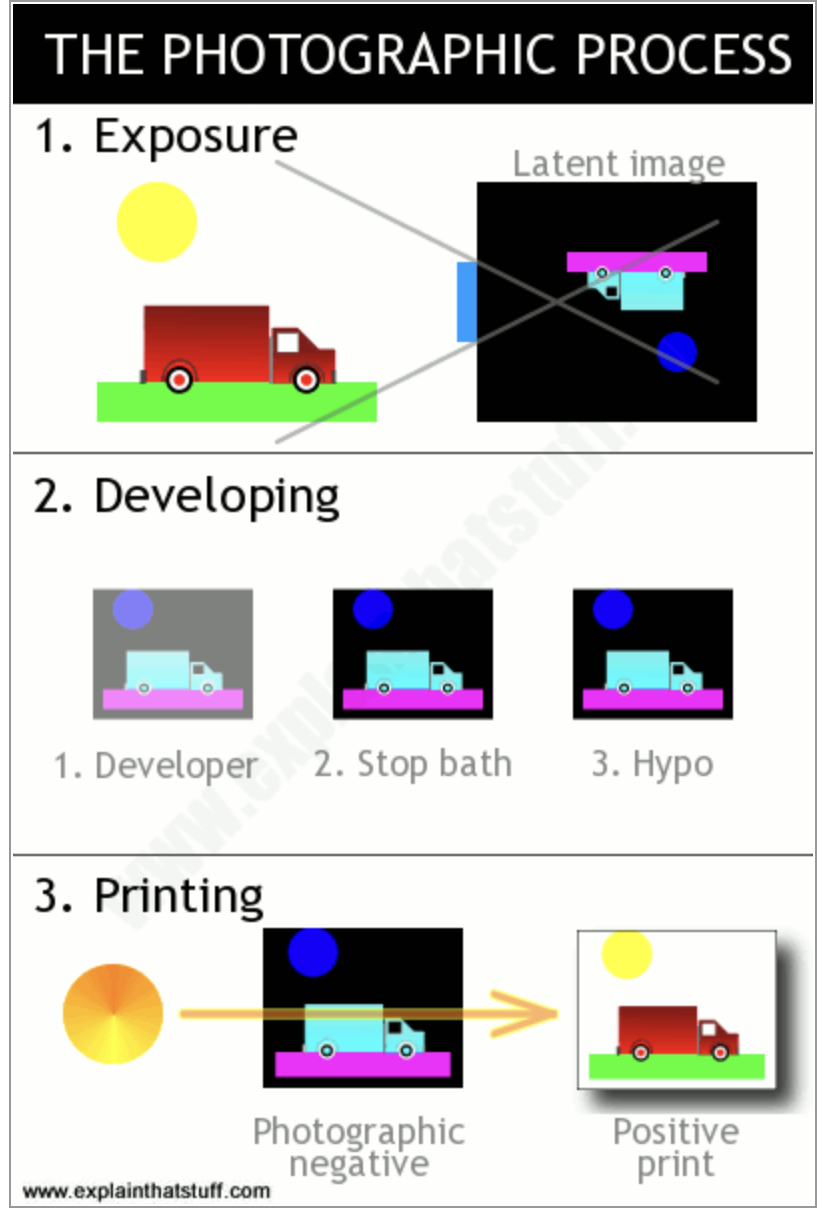
The development of photographic film, the creation of prints, and other activities related to photography all take place in a darkroom. It is a room that has the capability of being totally darkened in order to facilitate the processing of light-sensitive photographic materials such as film and photographic paper.
Since the beginning of the 19th century, the development of images from film has been done in darkrooms. The darkroom method allows the photographer entire control over the medium, beginning with the processing of the film and continuing through the making of prints.
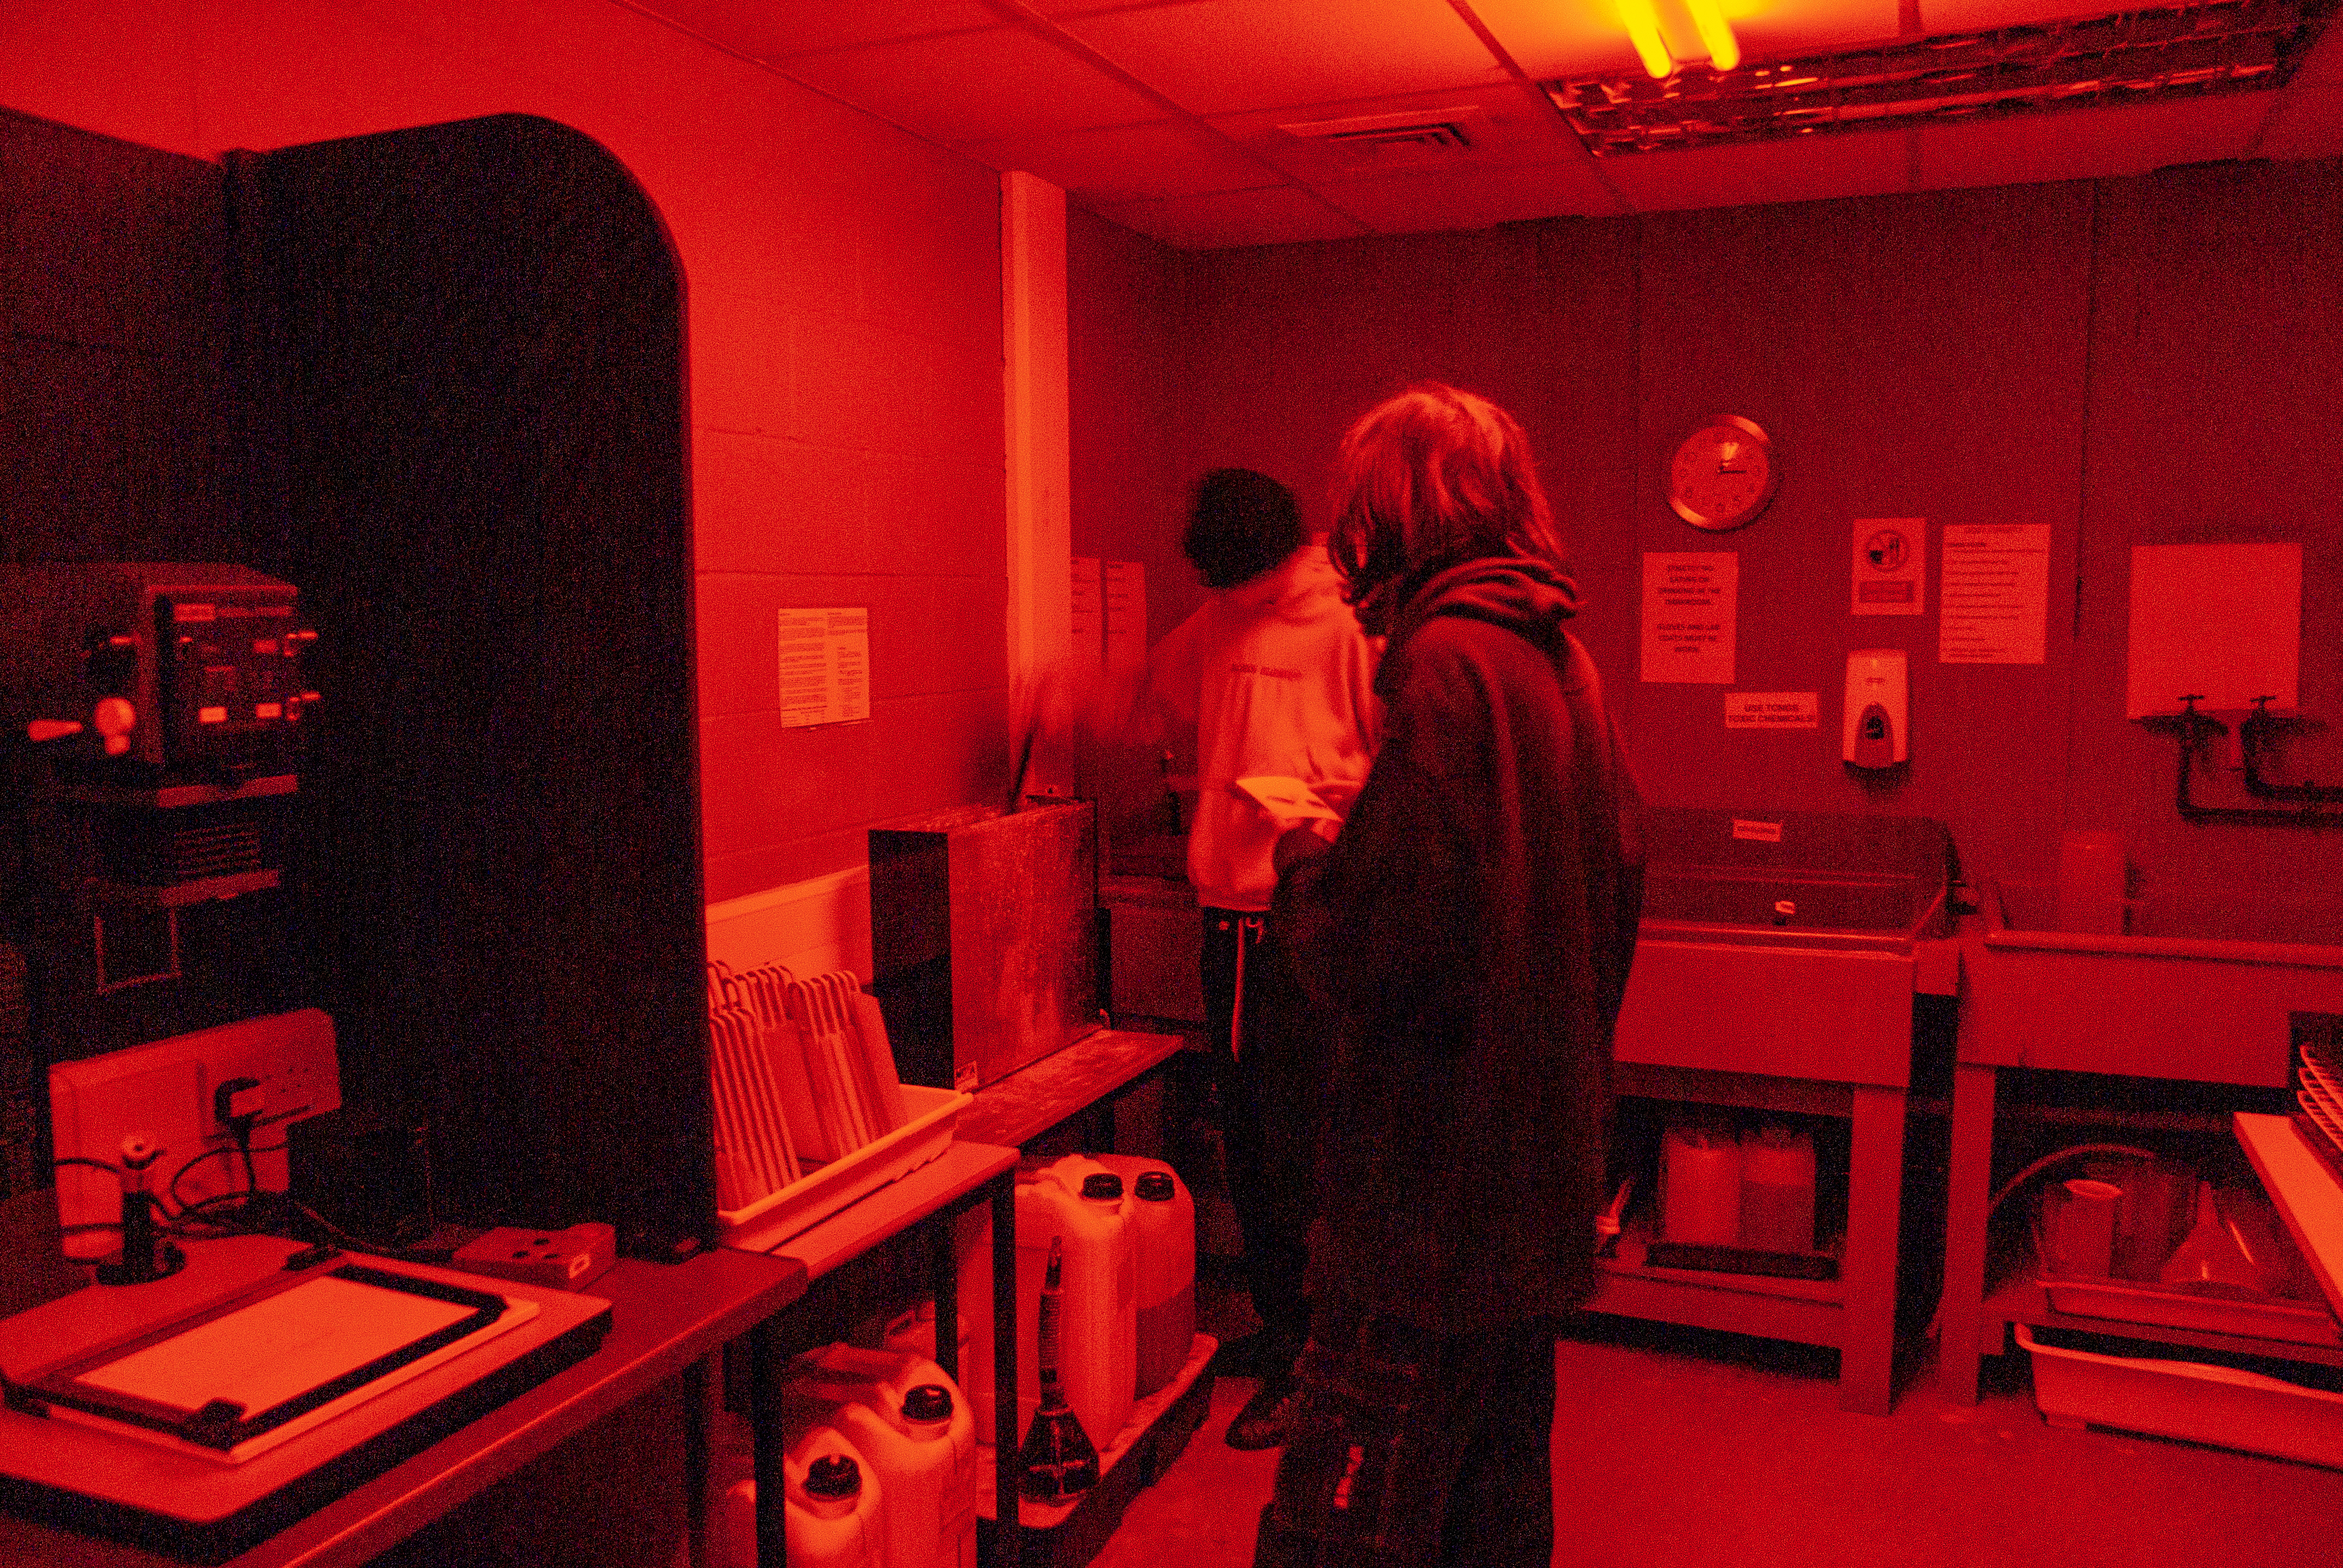
Why it is called darkroom because it is completely dark except for the red light.
The darkroom is equipped with tools as follows:
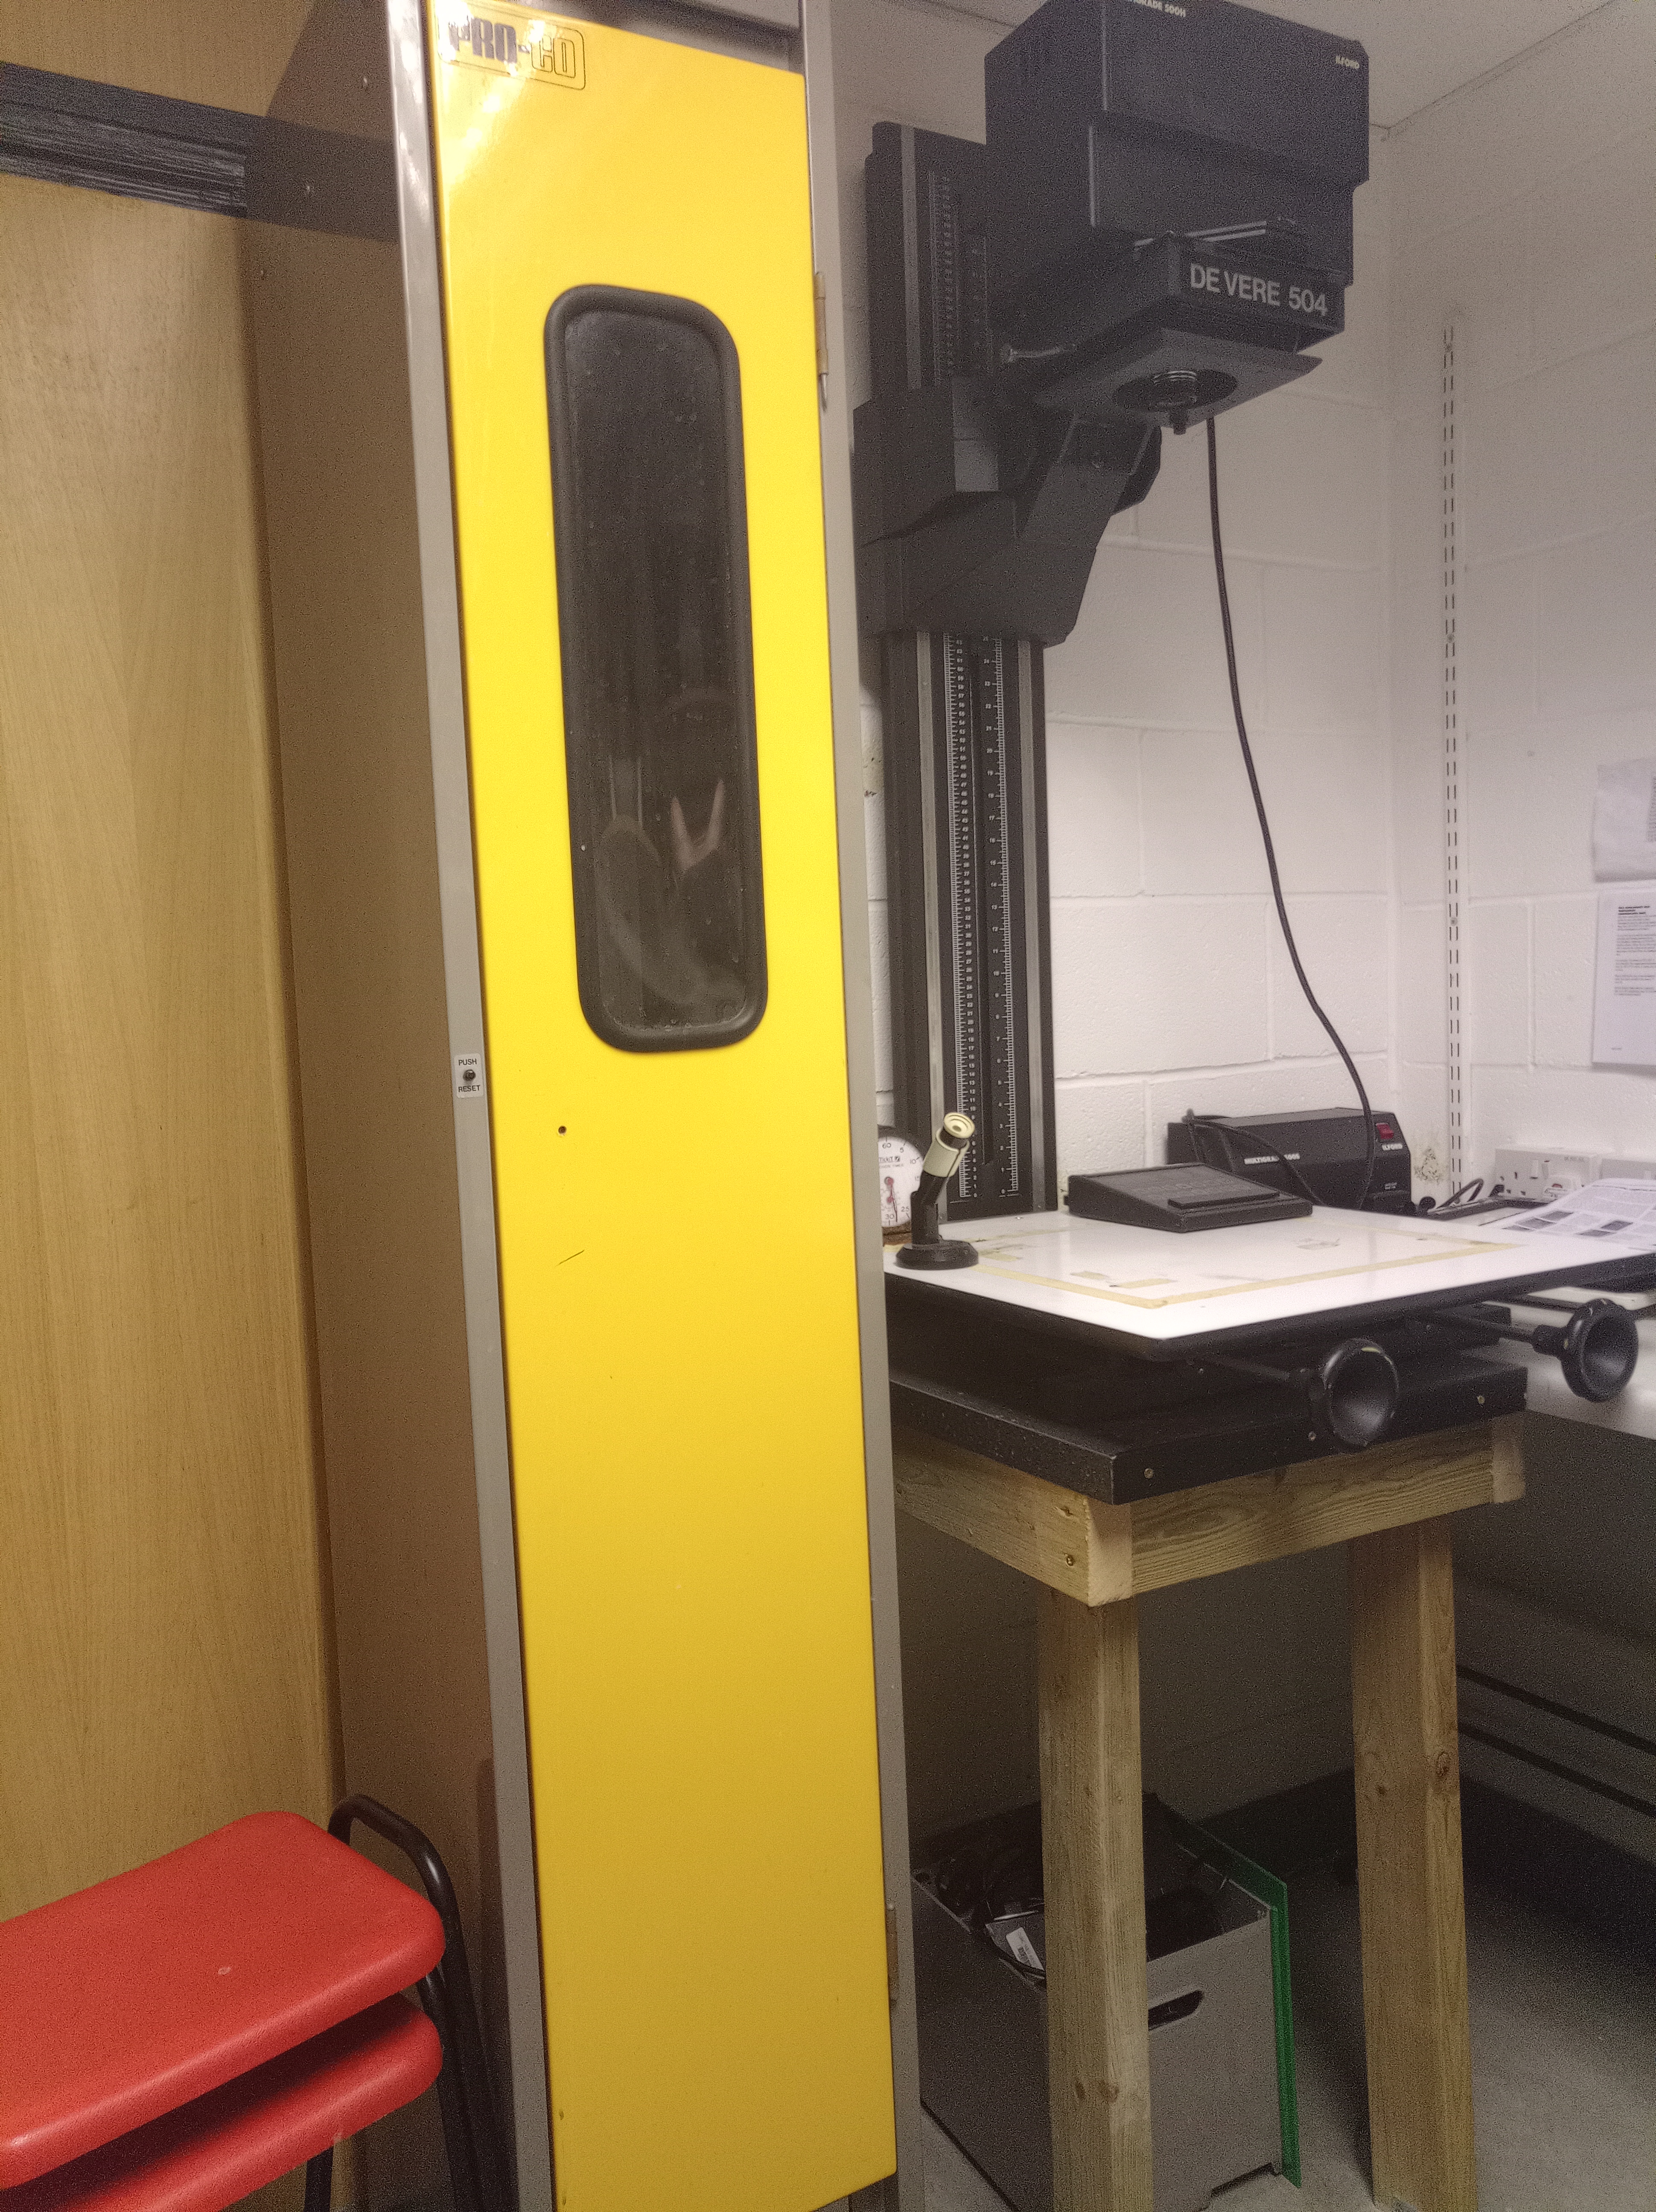
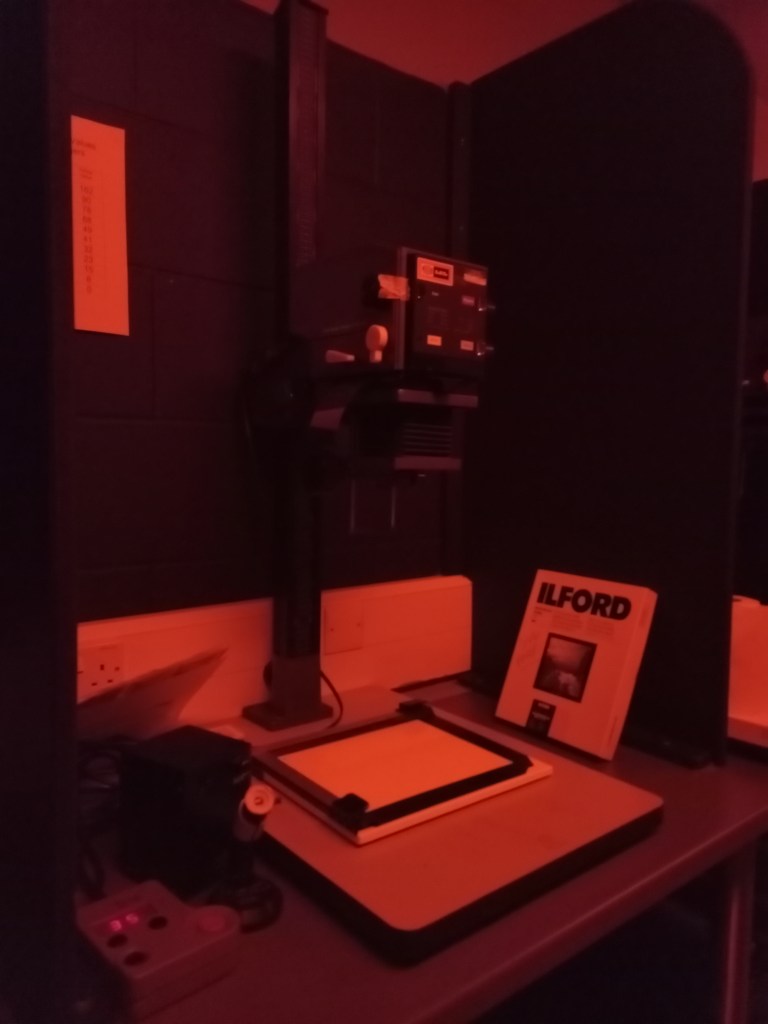
- The Enlarger
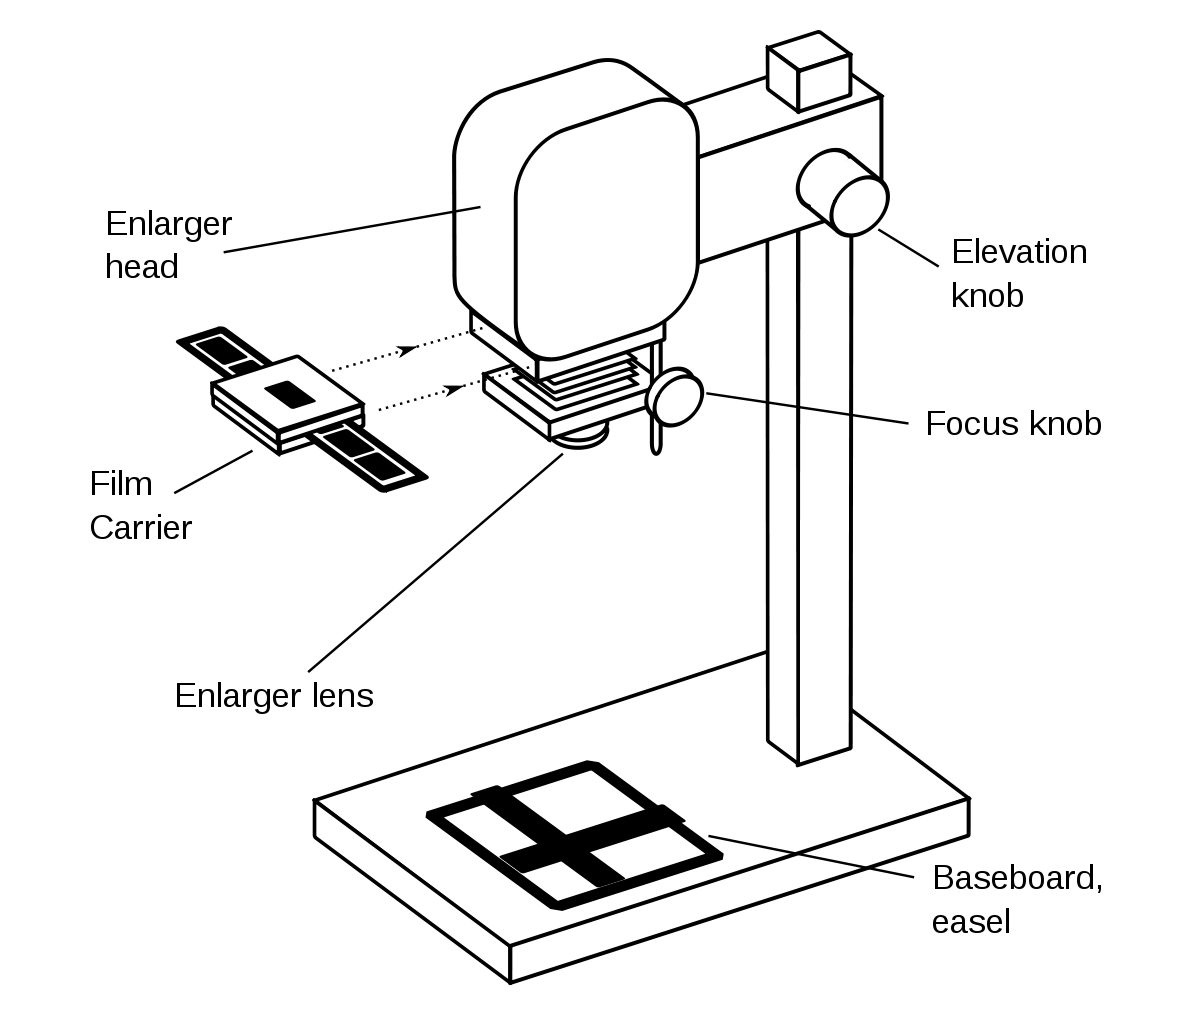

A particular sort of projector called an enlarger is used to develop your photographic prints. It transfers your picture from the little negatives and enlarges it onto your paper by shining light through the negative. It is by far the most crucial piece of gear in the darkroom.
- Safelight

Your dark room is transformed into a red-lit studio by a safelight. Since almost all darkroom papers are orthochromatic, or partially blind to red light, you may use this red light without worrying about damaging your paper. As a result, handling them in low red light won’t expose them or damage the paper.
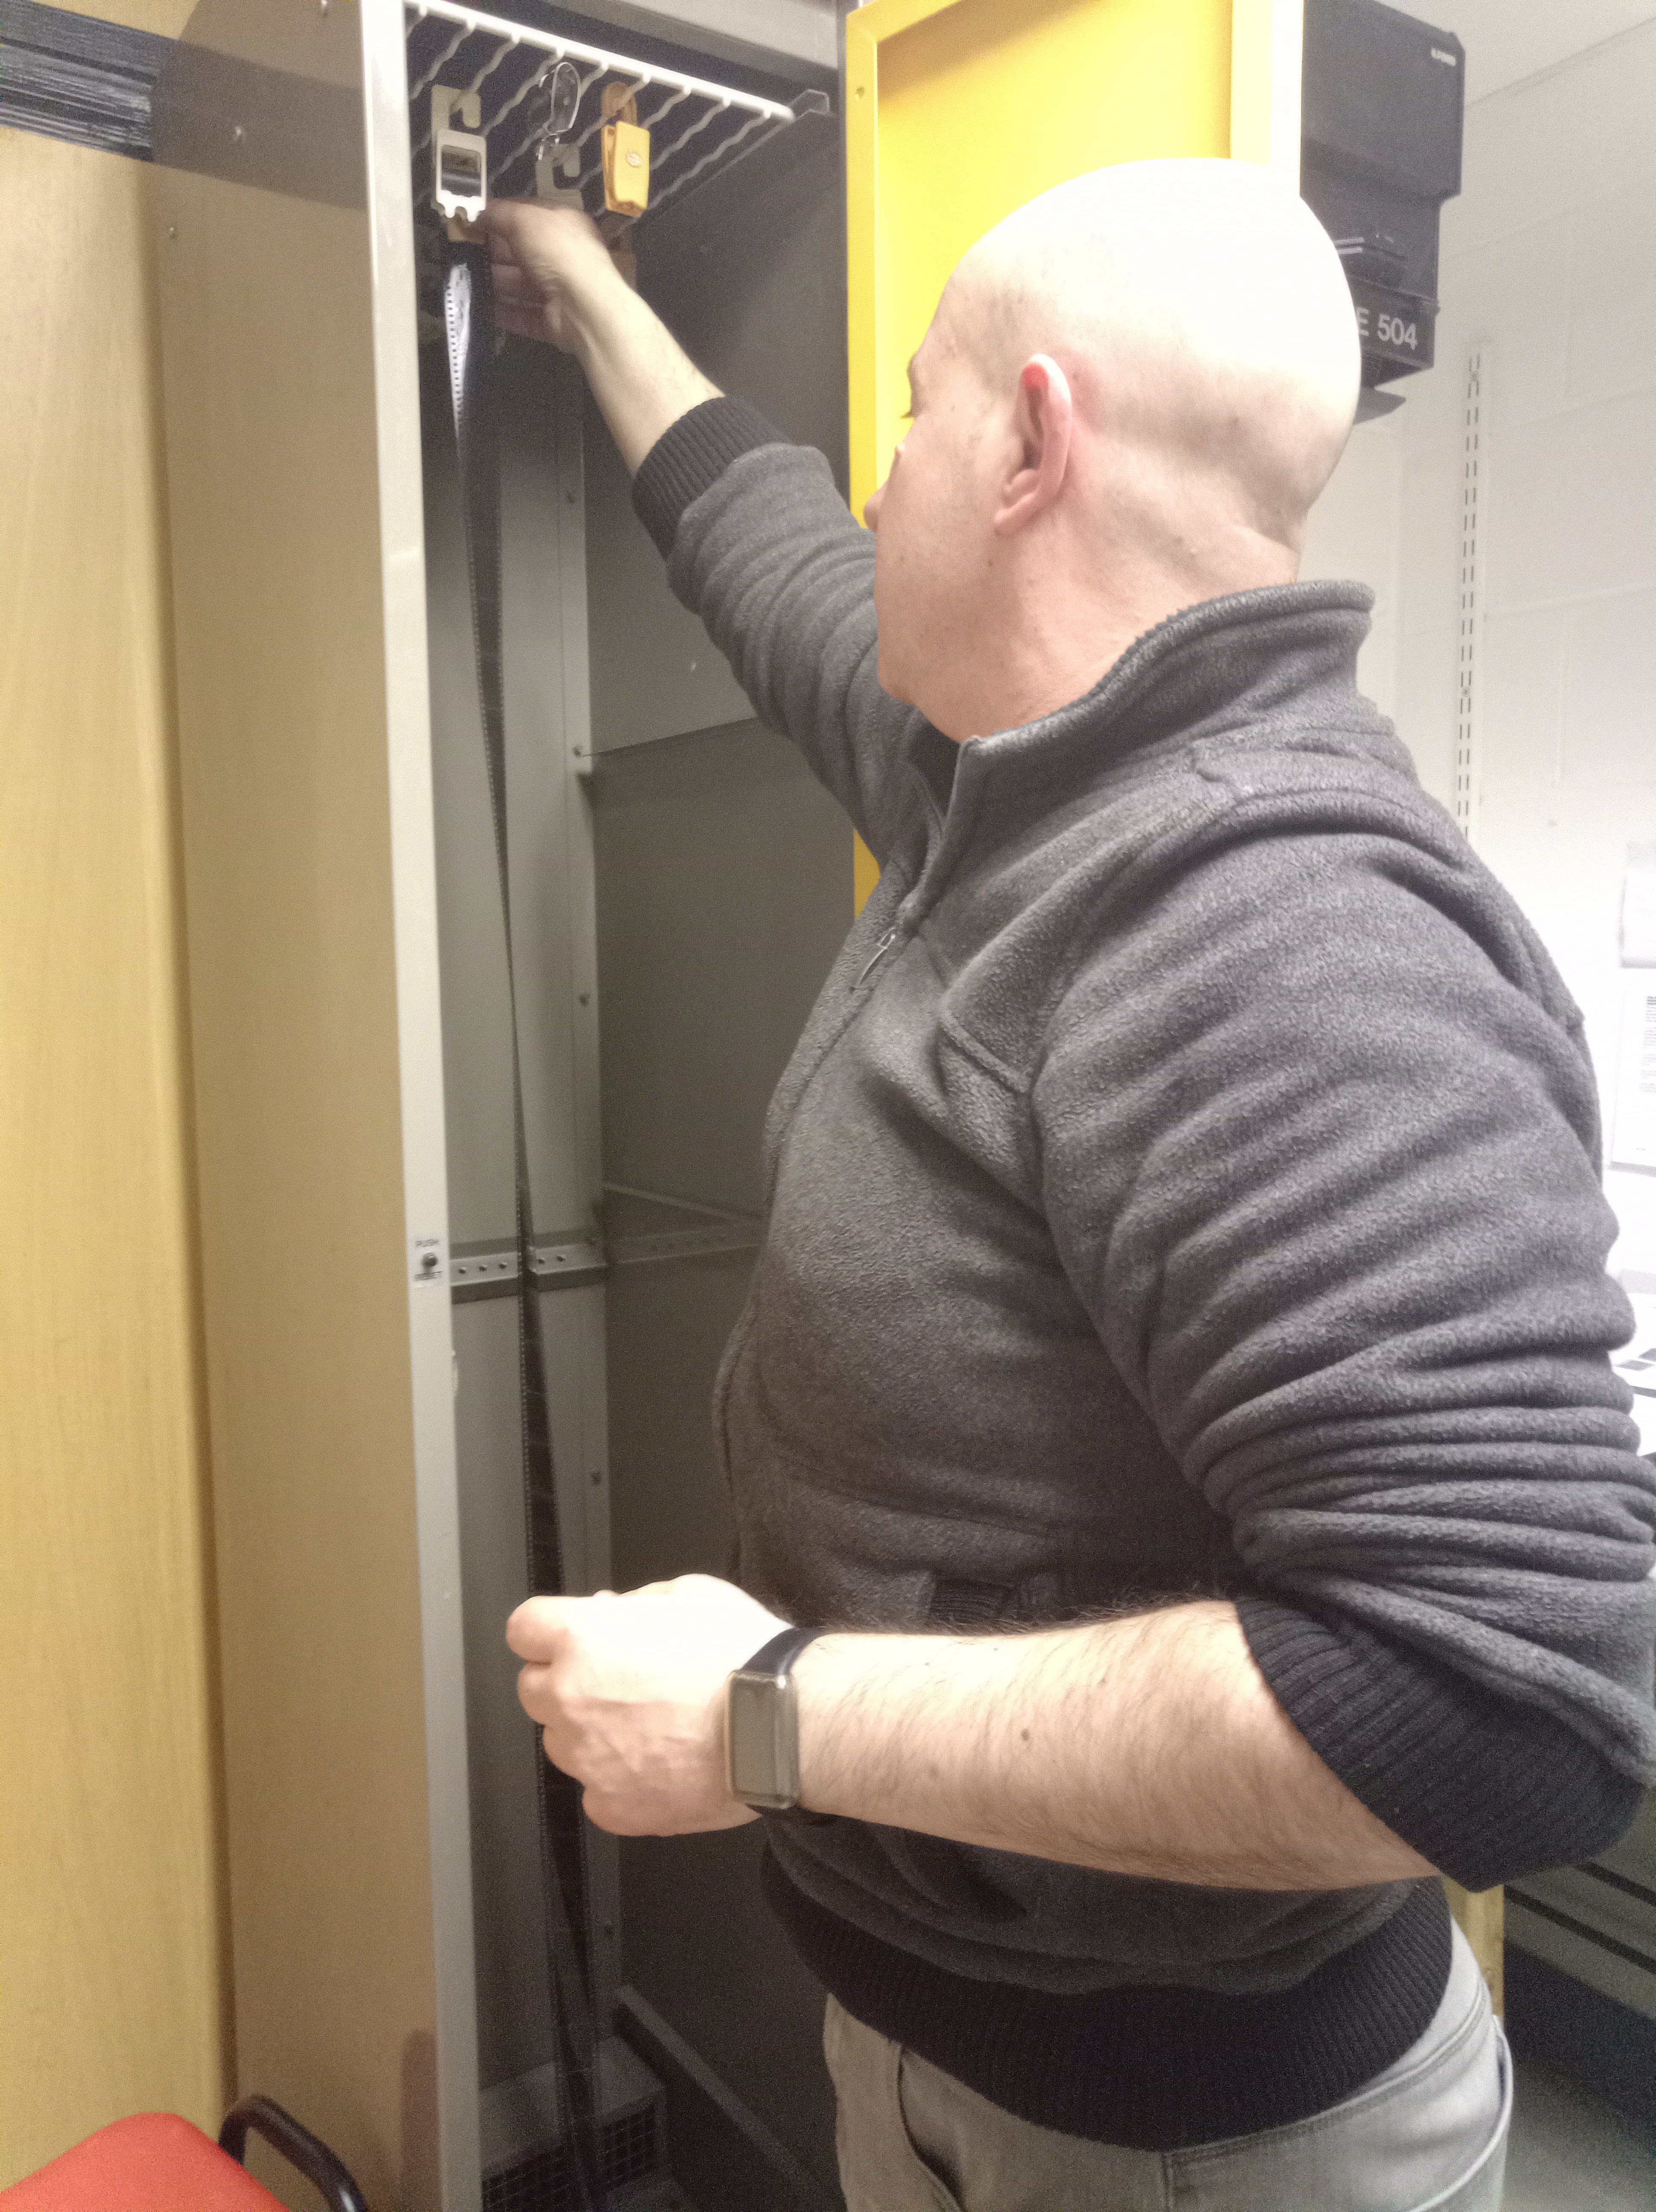
- Finder Focus
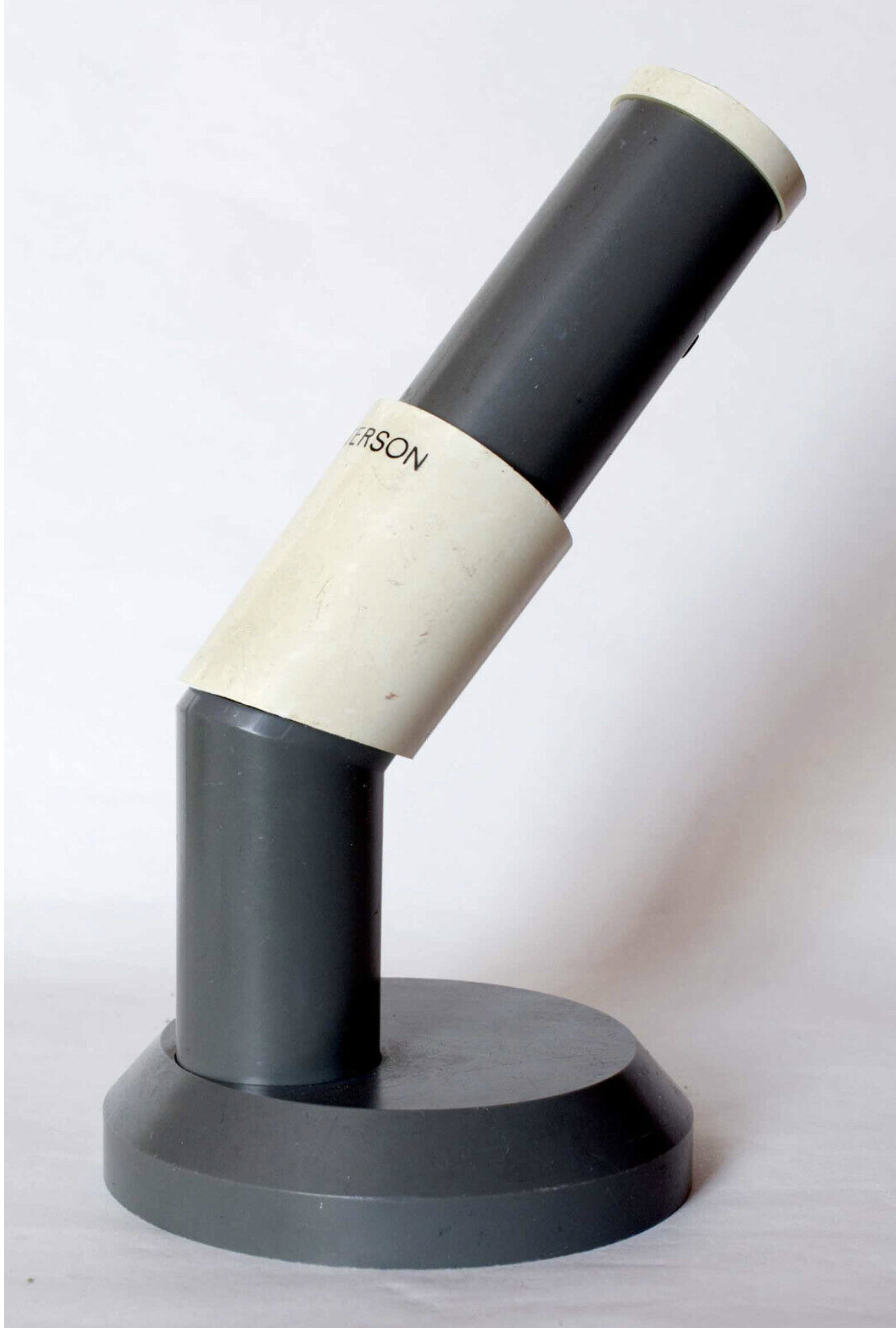
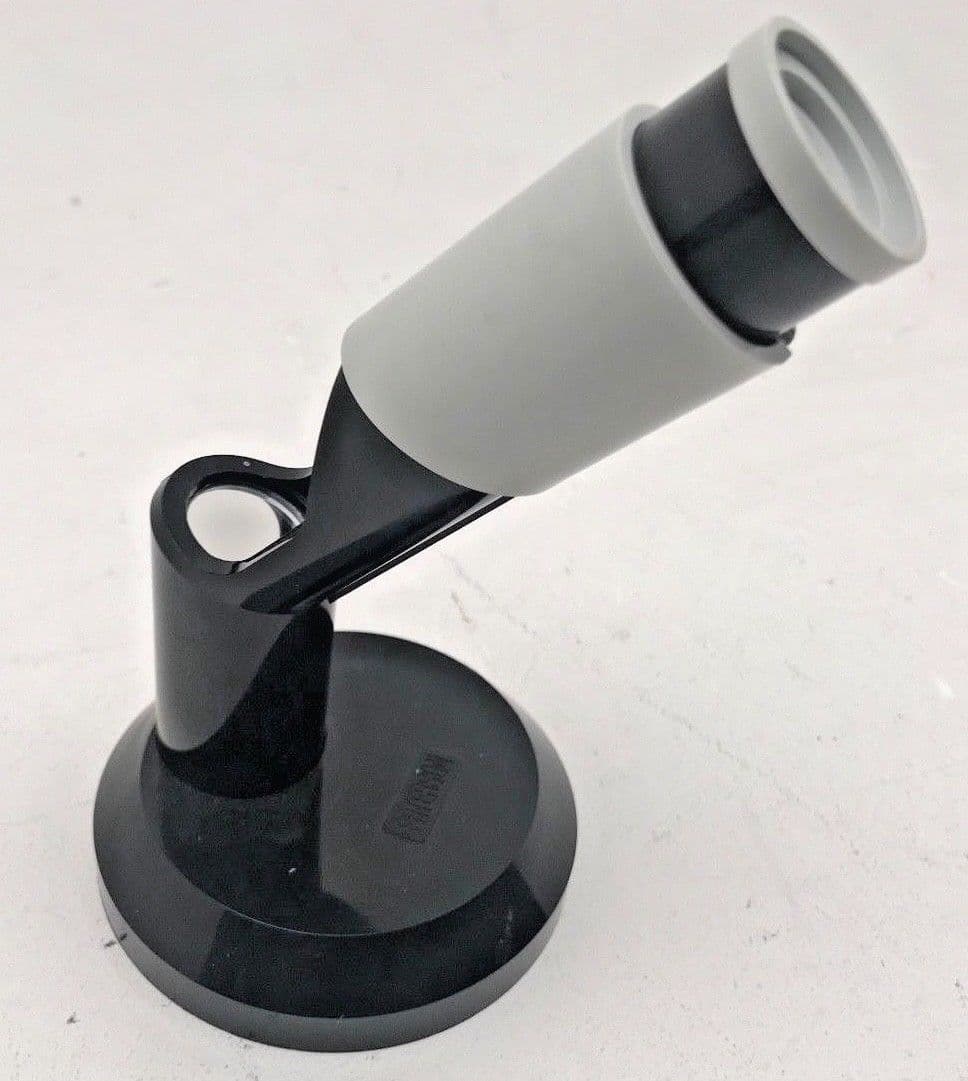
You may concentrate on the enlarger with the aid of a focus finder. It is crucial since blurry prints will result from improper focusing, much as when shooting pictures. It enhances your picture when you look through it, allowing you to see the real grain of the negative you are printing. This makes it easier to see when a picture is sharply focused.
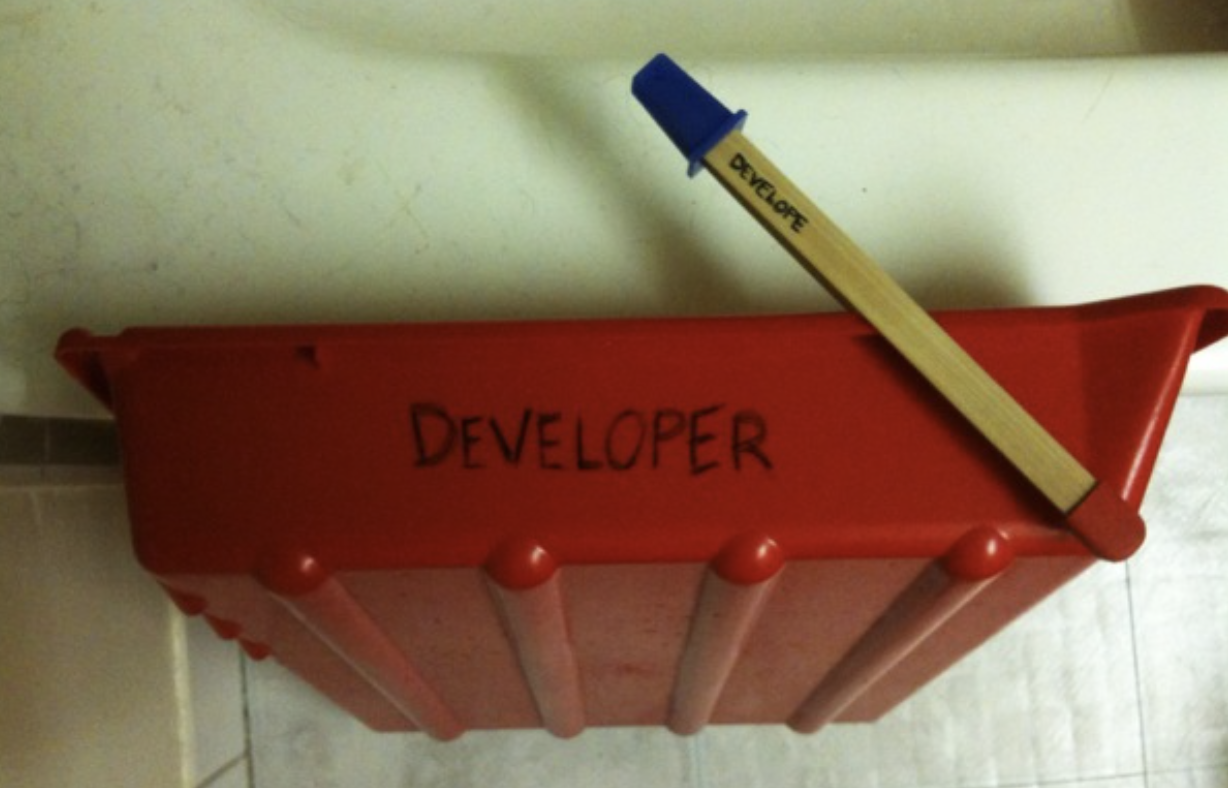
- Trays
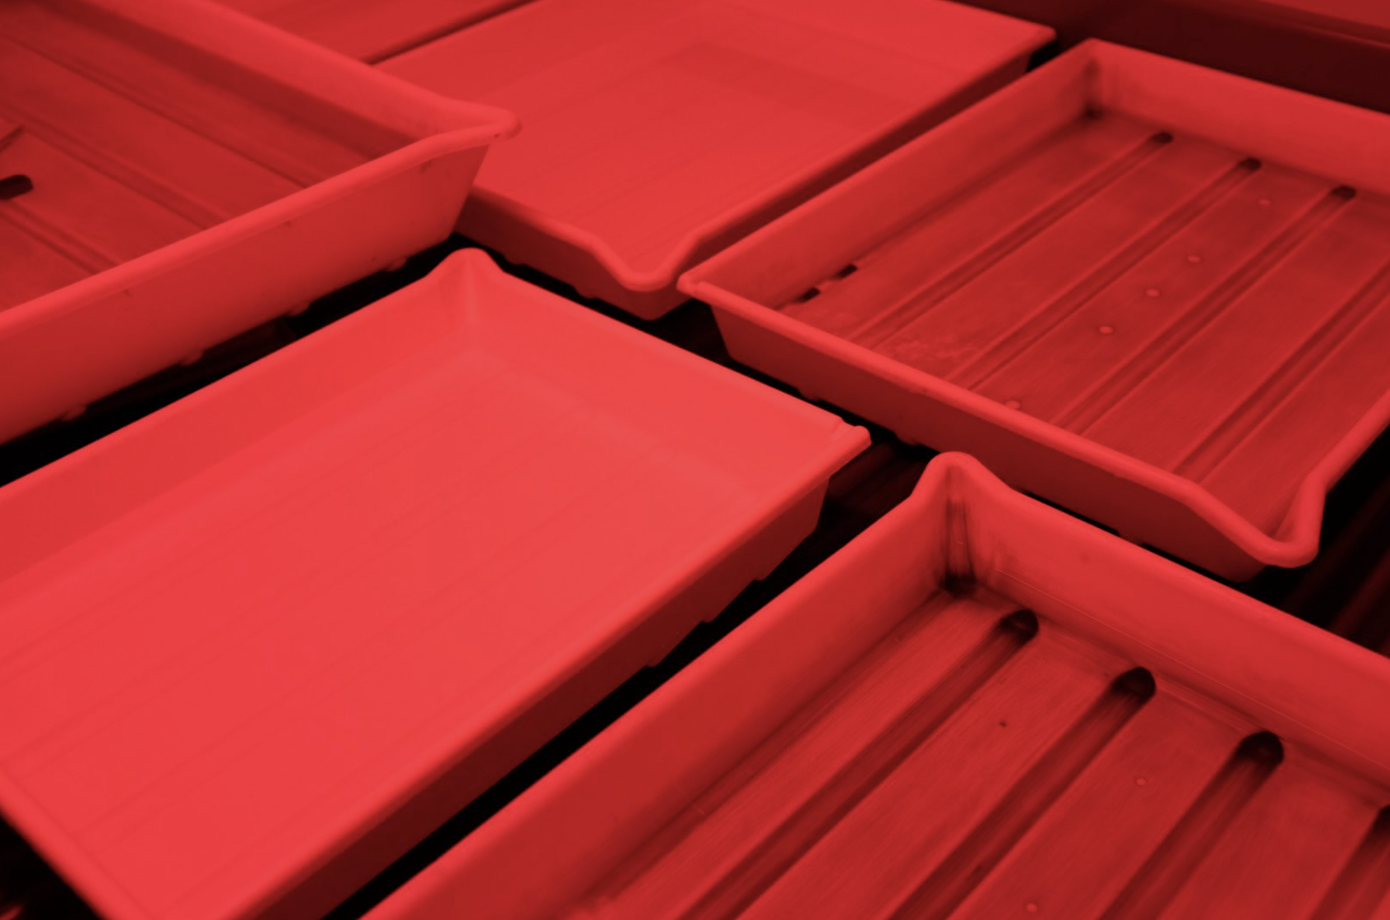
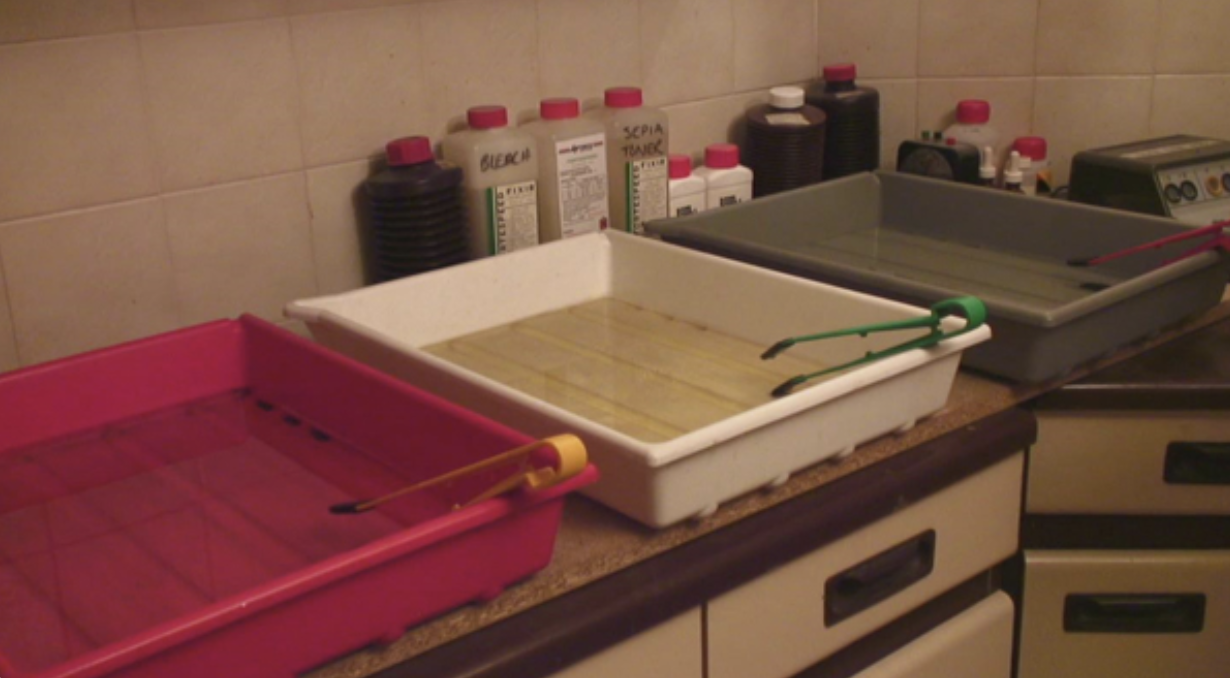
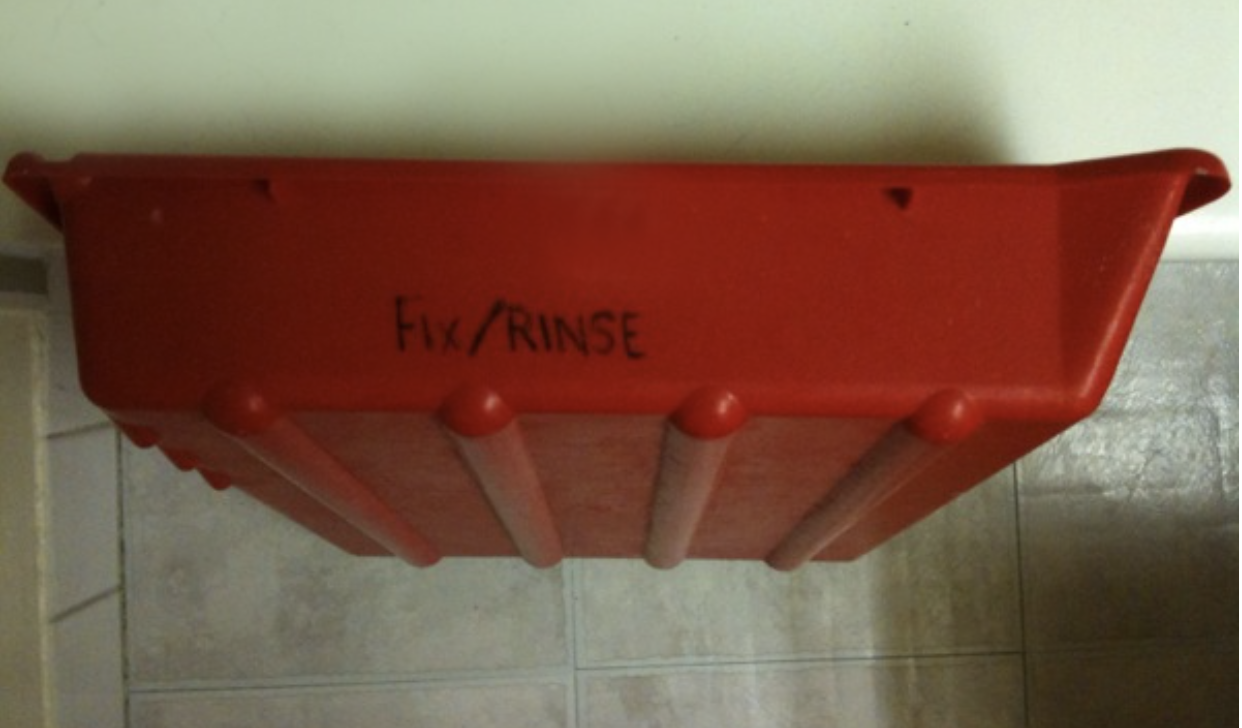
Most darkrooms will be set up with at least three trays. When printing, they are used to halt, fix, and hold the developer. A washroom will also be available. Throughout the developing process, you will be shifting your paper from one tray to another. They’re designed to let chemicals circulate around the print as you gently agitate. When printing in the darkroom, they are simple yet crucial.
- Tongs


Print tongs make it possible to process your paper in the developer, stop, and fix trays while using a darkroom. As your prints are readily harmed by handling when wet, they help limit the danger of scratches, and flaws. A trio of tongs also allows you to allocate one pair to each processing tray, so minimising cross-contamination.
- Chemicals
The chemicals that are required for black and white paper are developer, stop bath, and fixer in order to complete this project.
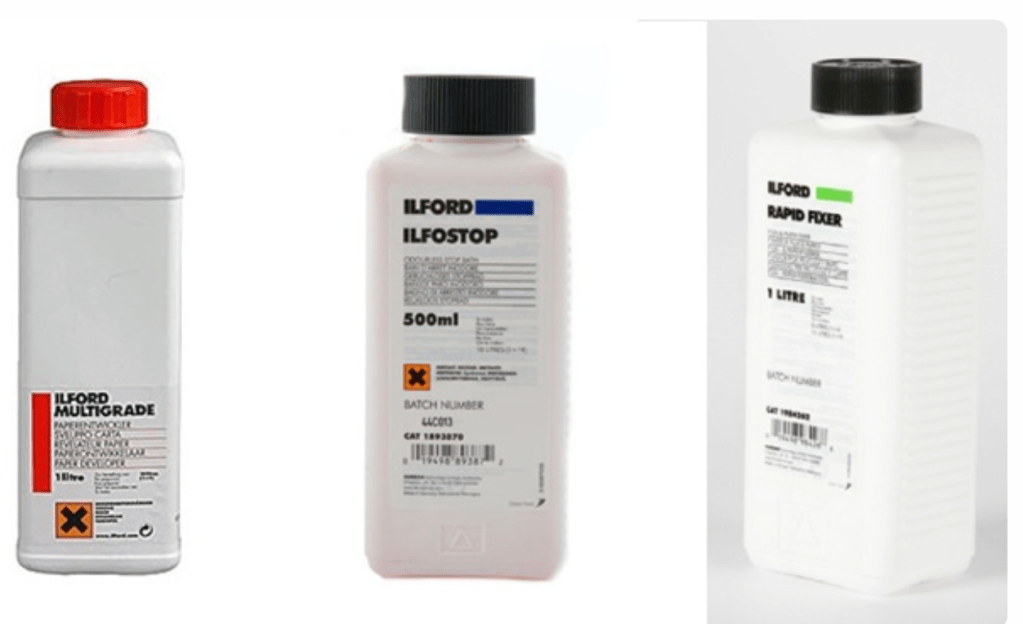
Developer: Place the paper that has been exposed from the film strip with enlarge into the developer and move it about very gently for approximately one and a half minutes to two minutes, and the image will appear.
Stop Bath/water: This bath stop is intended to prevent the picture from developing any farther or further than necessary.
Fixer: Fixer is utilized to make sure that the picture maintains its high quality and long-term durability.
Papers
FB or RC.
Resin-coated (RC) This resin-coated paper is great for beginning printers since you can estimate exposure while it’s still wet and it’s easy to wash. It also dries flat.
FB stands for fibre-based. If properly cleansed, the emulsion on archival paper should endure forever. FB papers are black. It “dries down” and requires plenty of washing. Dryness darkens blacks, making exposures tougher.
Graded or multi-grade?
Graded and Variable (multi-contrast) papers are about contrast.
Papers are graded 5-way. Start with middle grades if unsure.
Variable or multi-contrast sheets are simpler but need filters to change grades. Photographers sell them inexpensively. A multi-grade colour enlarger with colour settings may modify contrast. This feature lets me easily “dial in” contrast while burning in.
Rapid Dryer
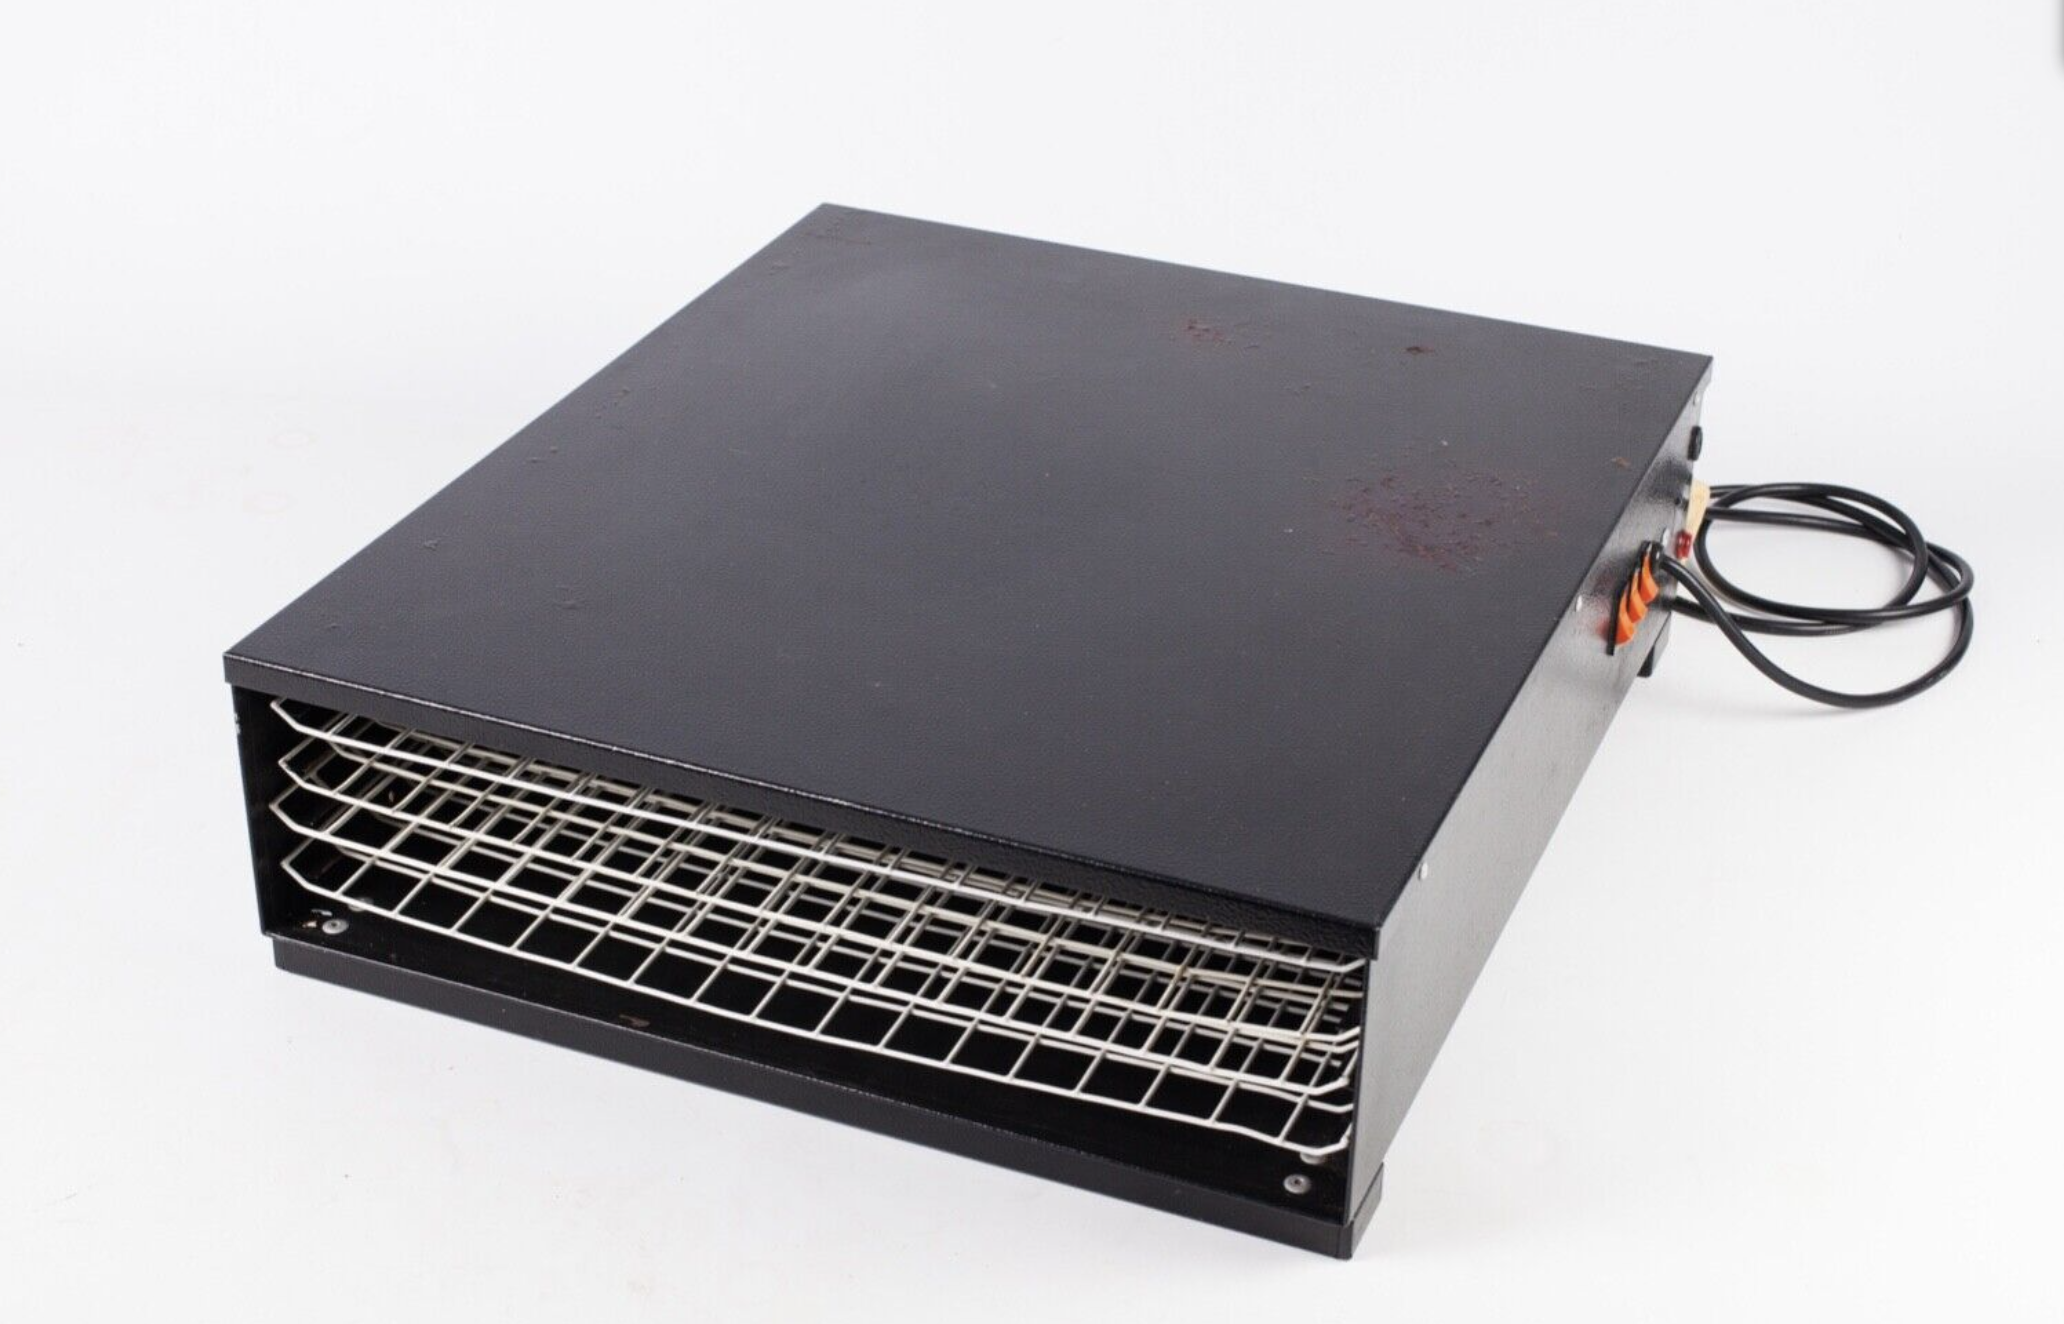
These tools are the tools to help dry the result of printed paper or the filmstrip in 2-5 minutes.
FILM PROCESSING 35mm NEGATIVE AND 120 NEGATIVE MEDIUM FORMAT
The processing of negative film is very similar from one 35mm camera to the 120 medium format camera in terms of the steps involved, the amount of time spent on each step, and the chemicals that are used, with the exception of large format cameras, which have a paper insert that goes directly into the back of the camera. These cameras do not require a film negative because they use sheet film instead.
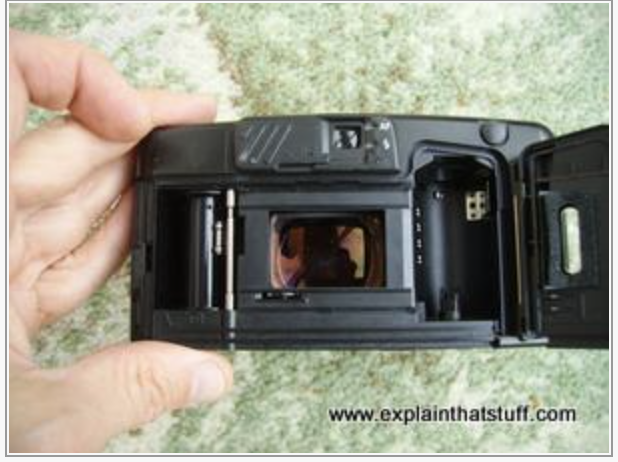
35mm film negative
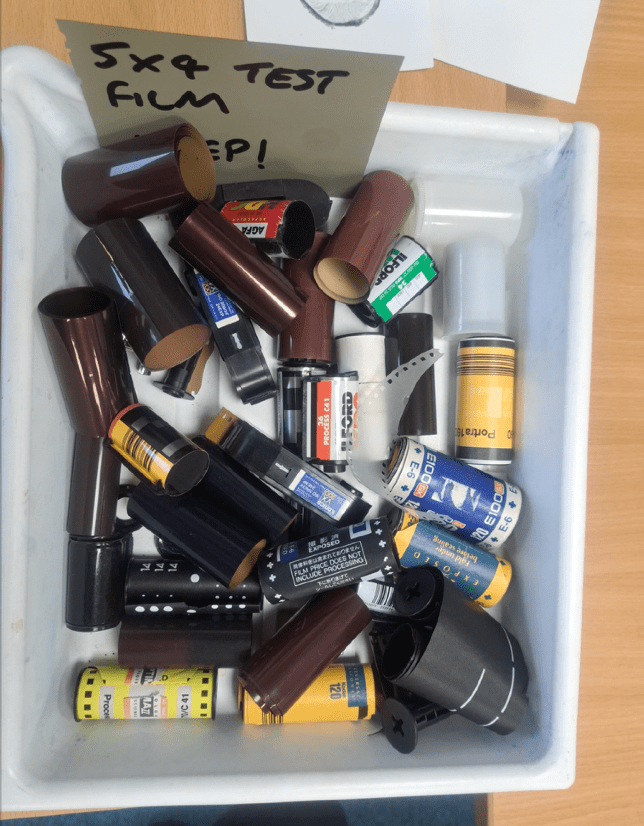
The 35mm film camera is the most fundamental and compact kind of analogue camera, and it captures an image by inserting a roll of 36 negative films. It has both colour and black & white film in its inventory. This negative film roll is available in many iso settings from various company brands, the choice of which iso setting to use is up to the photographer.
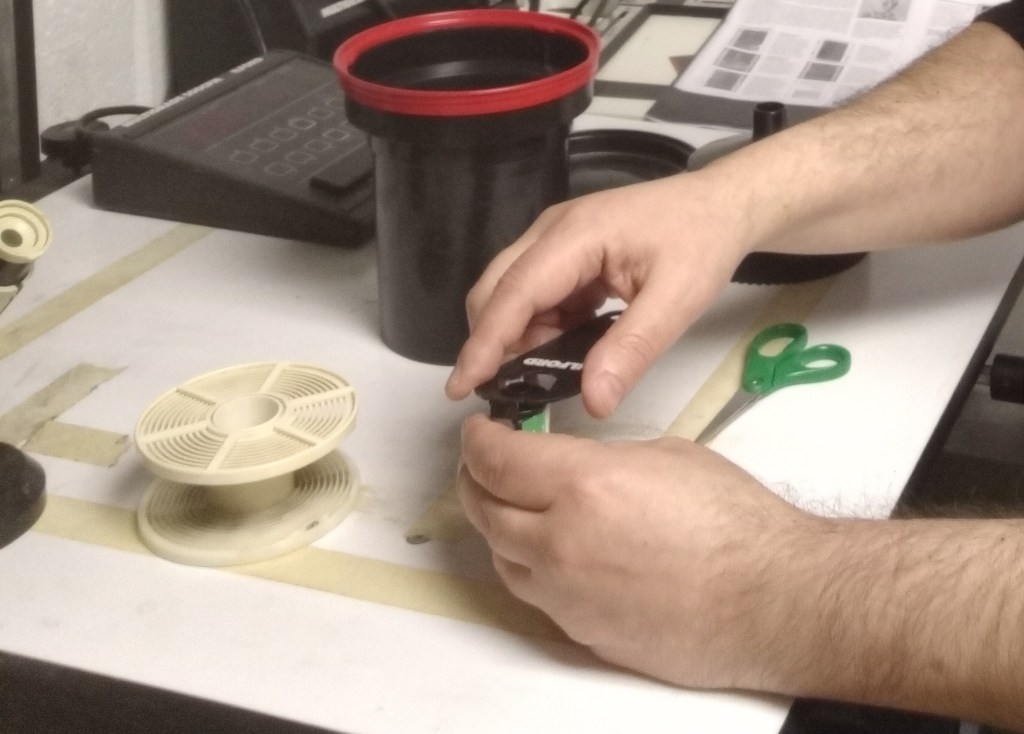
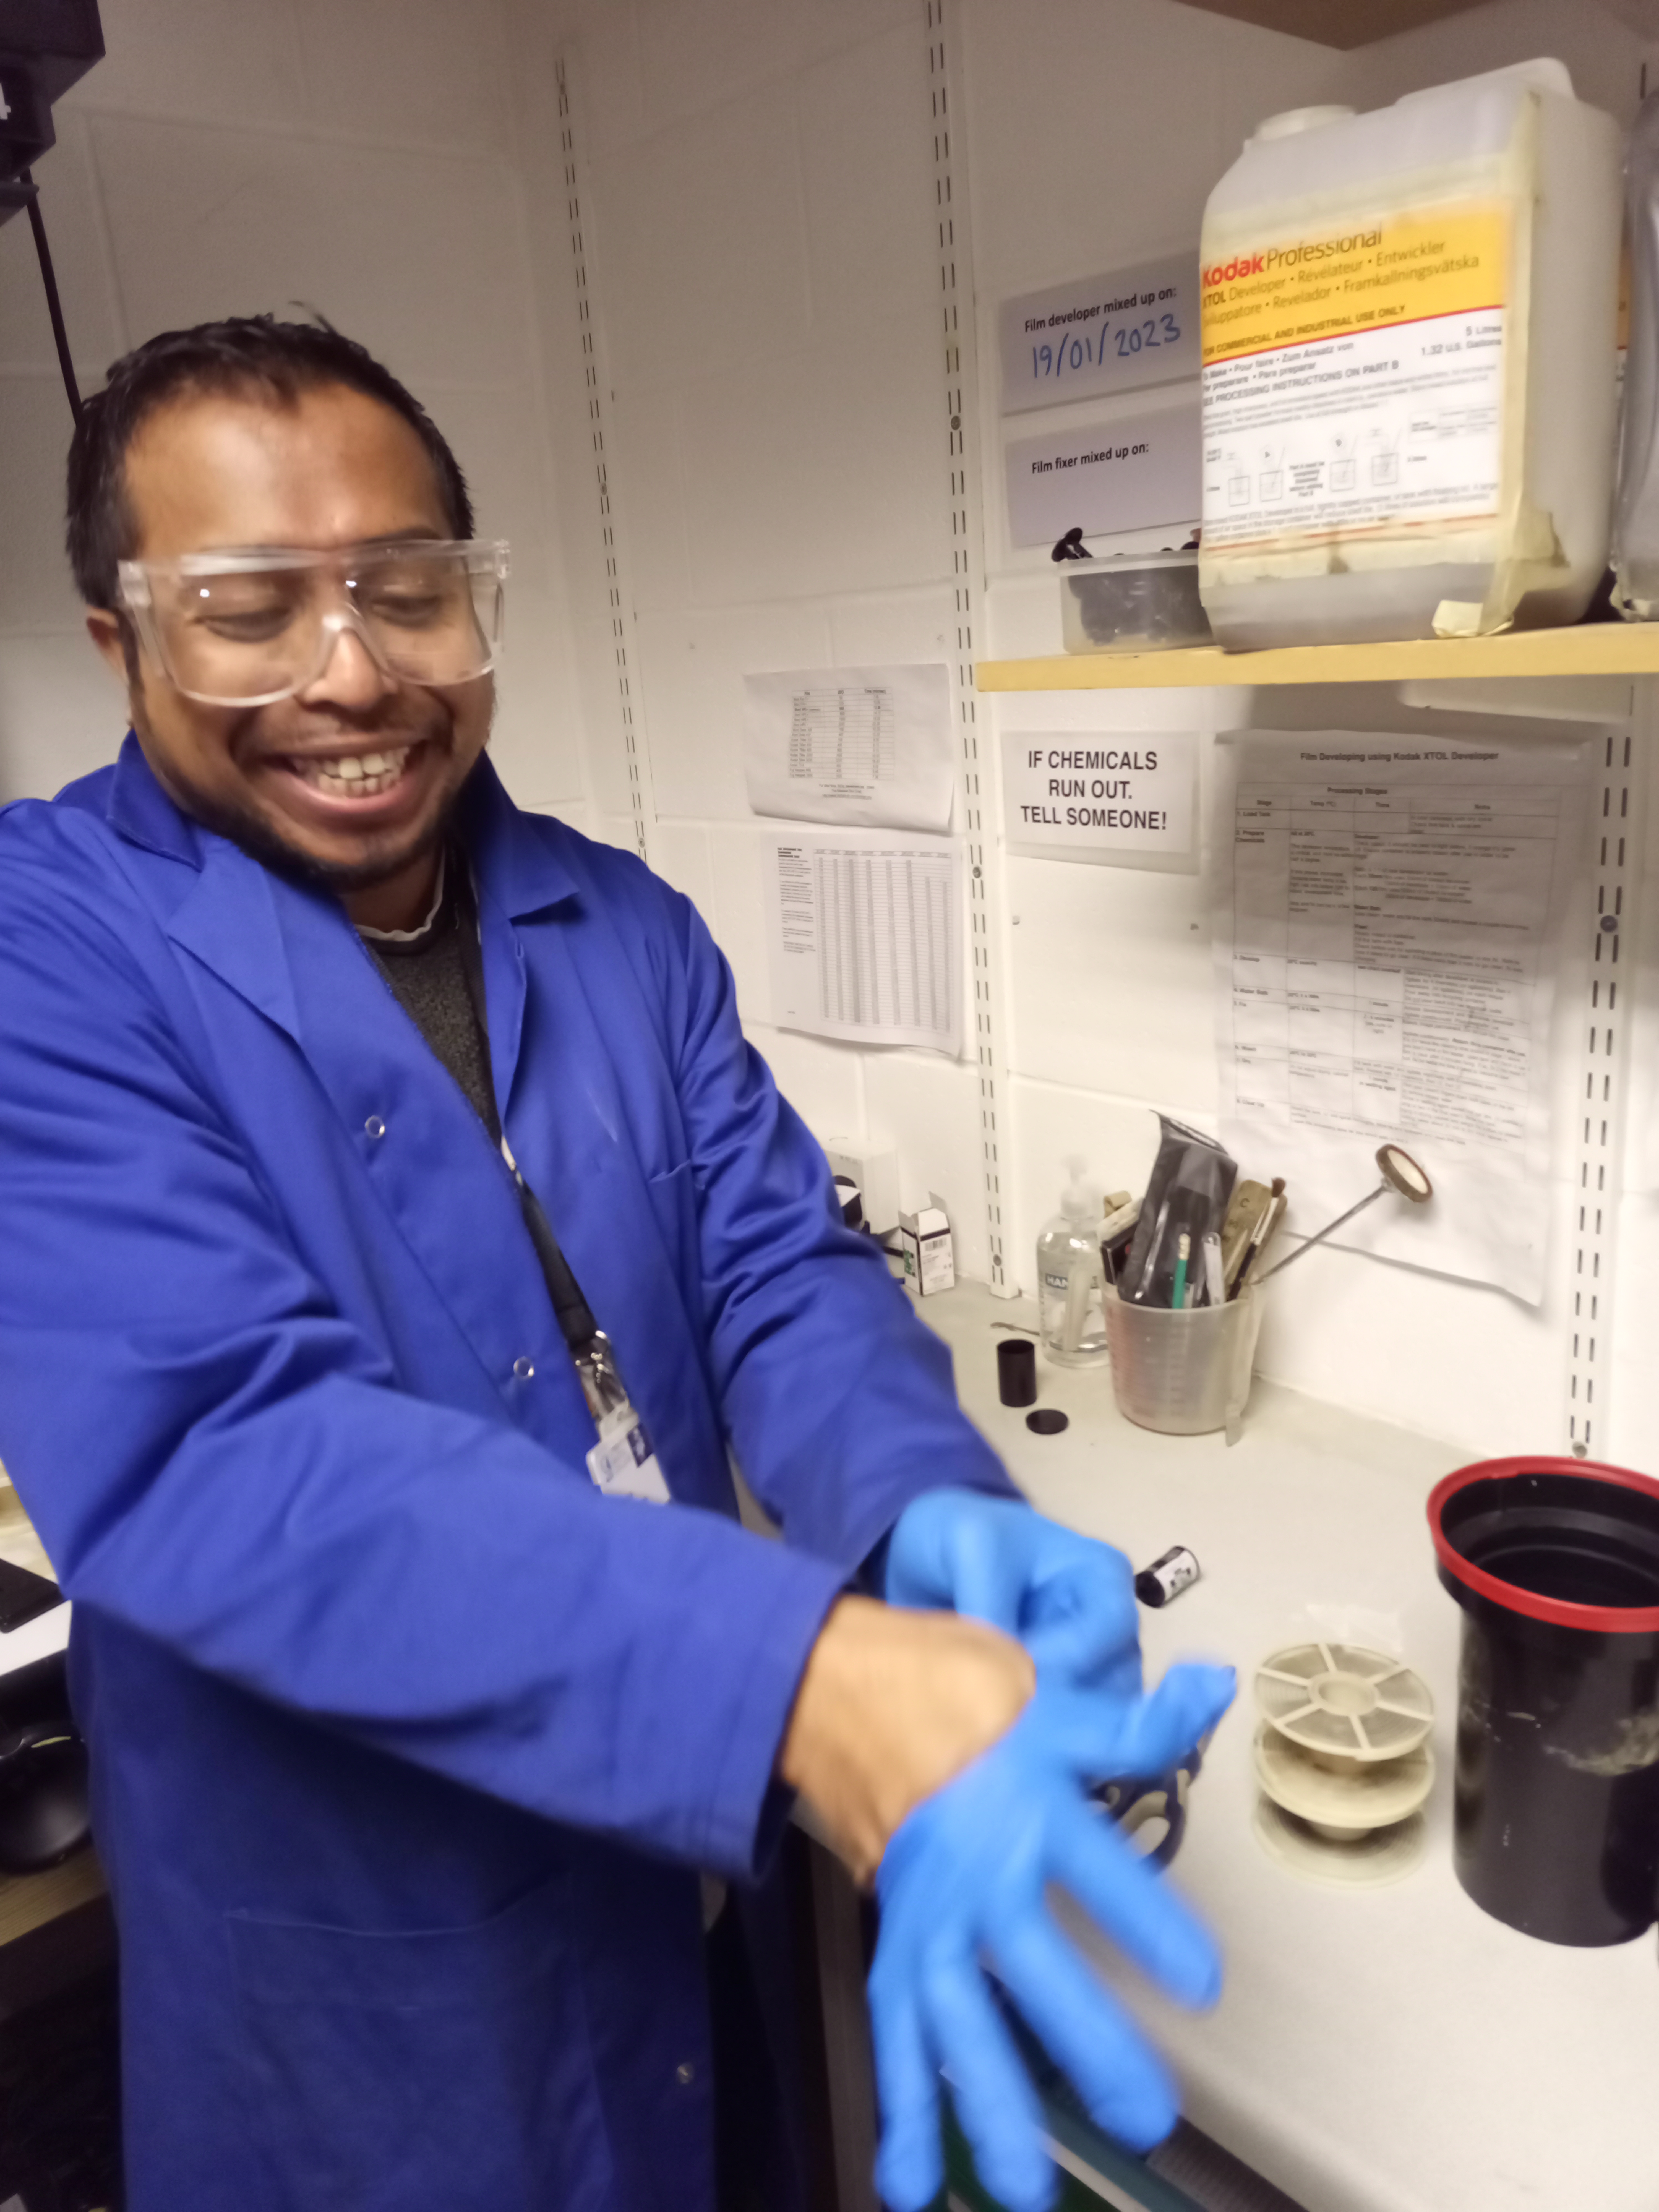
Step by step, developing the film as follows:
- Developing Your Film
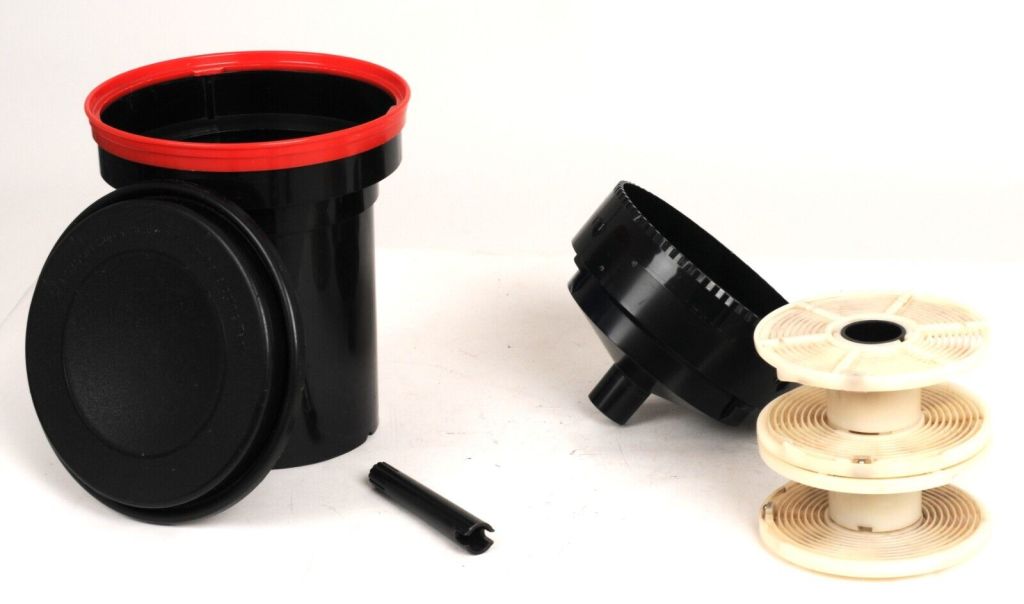
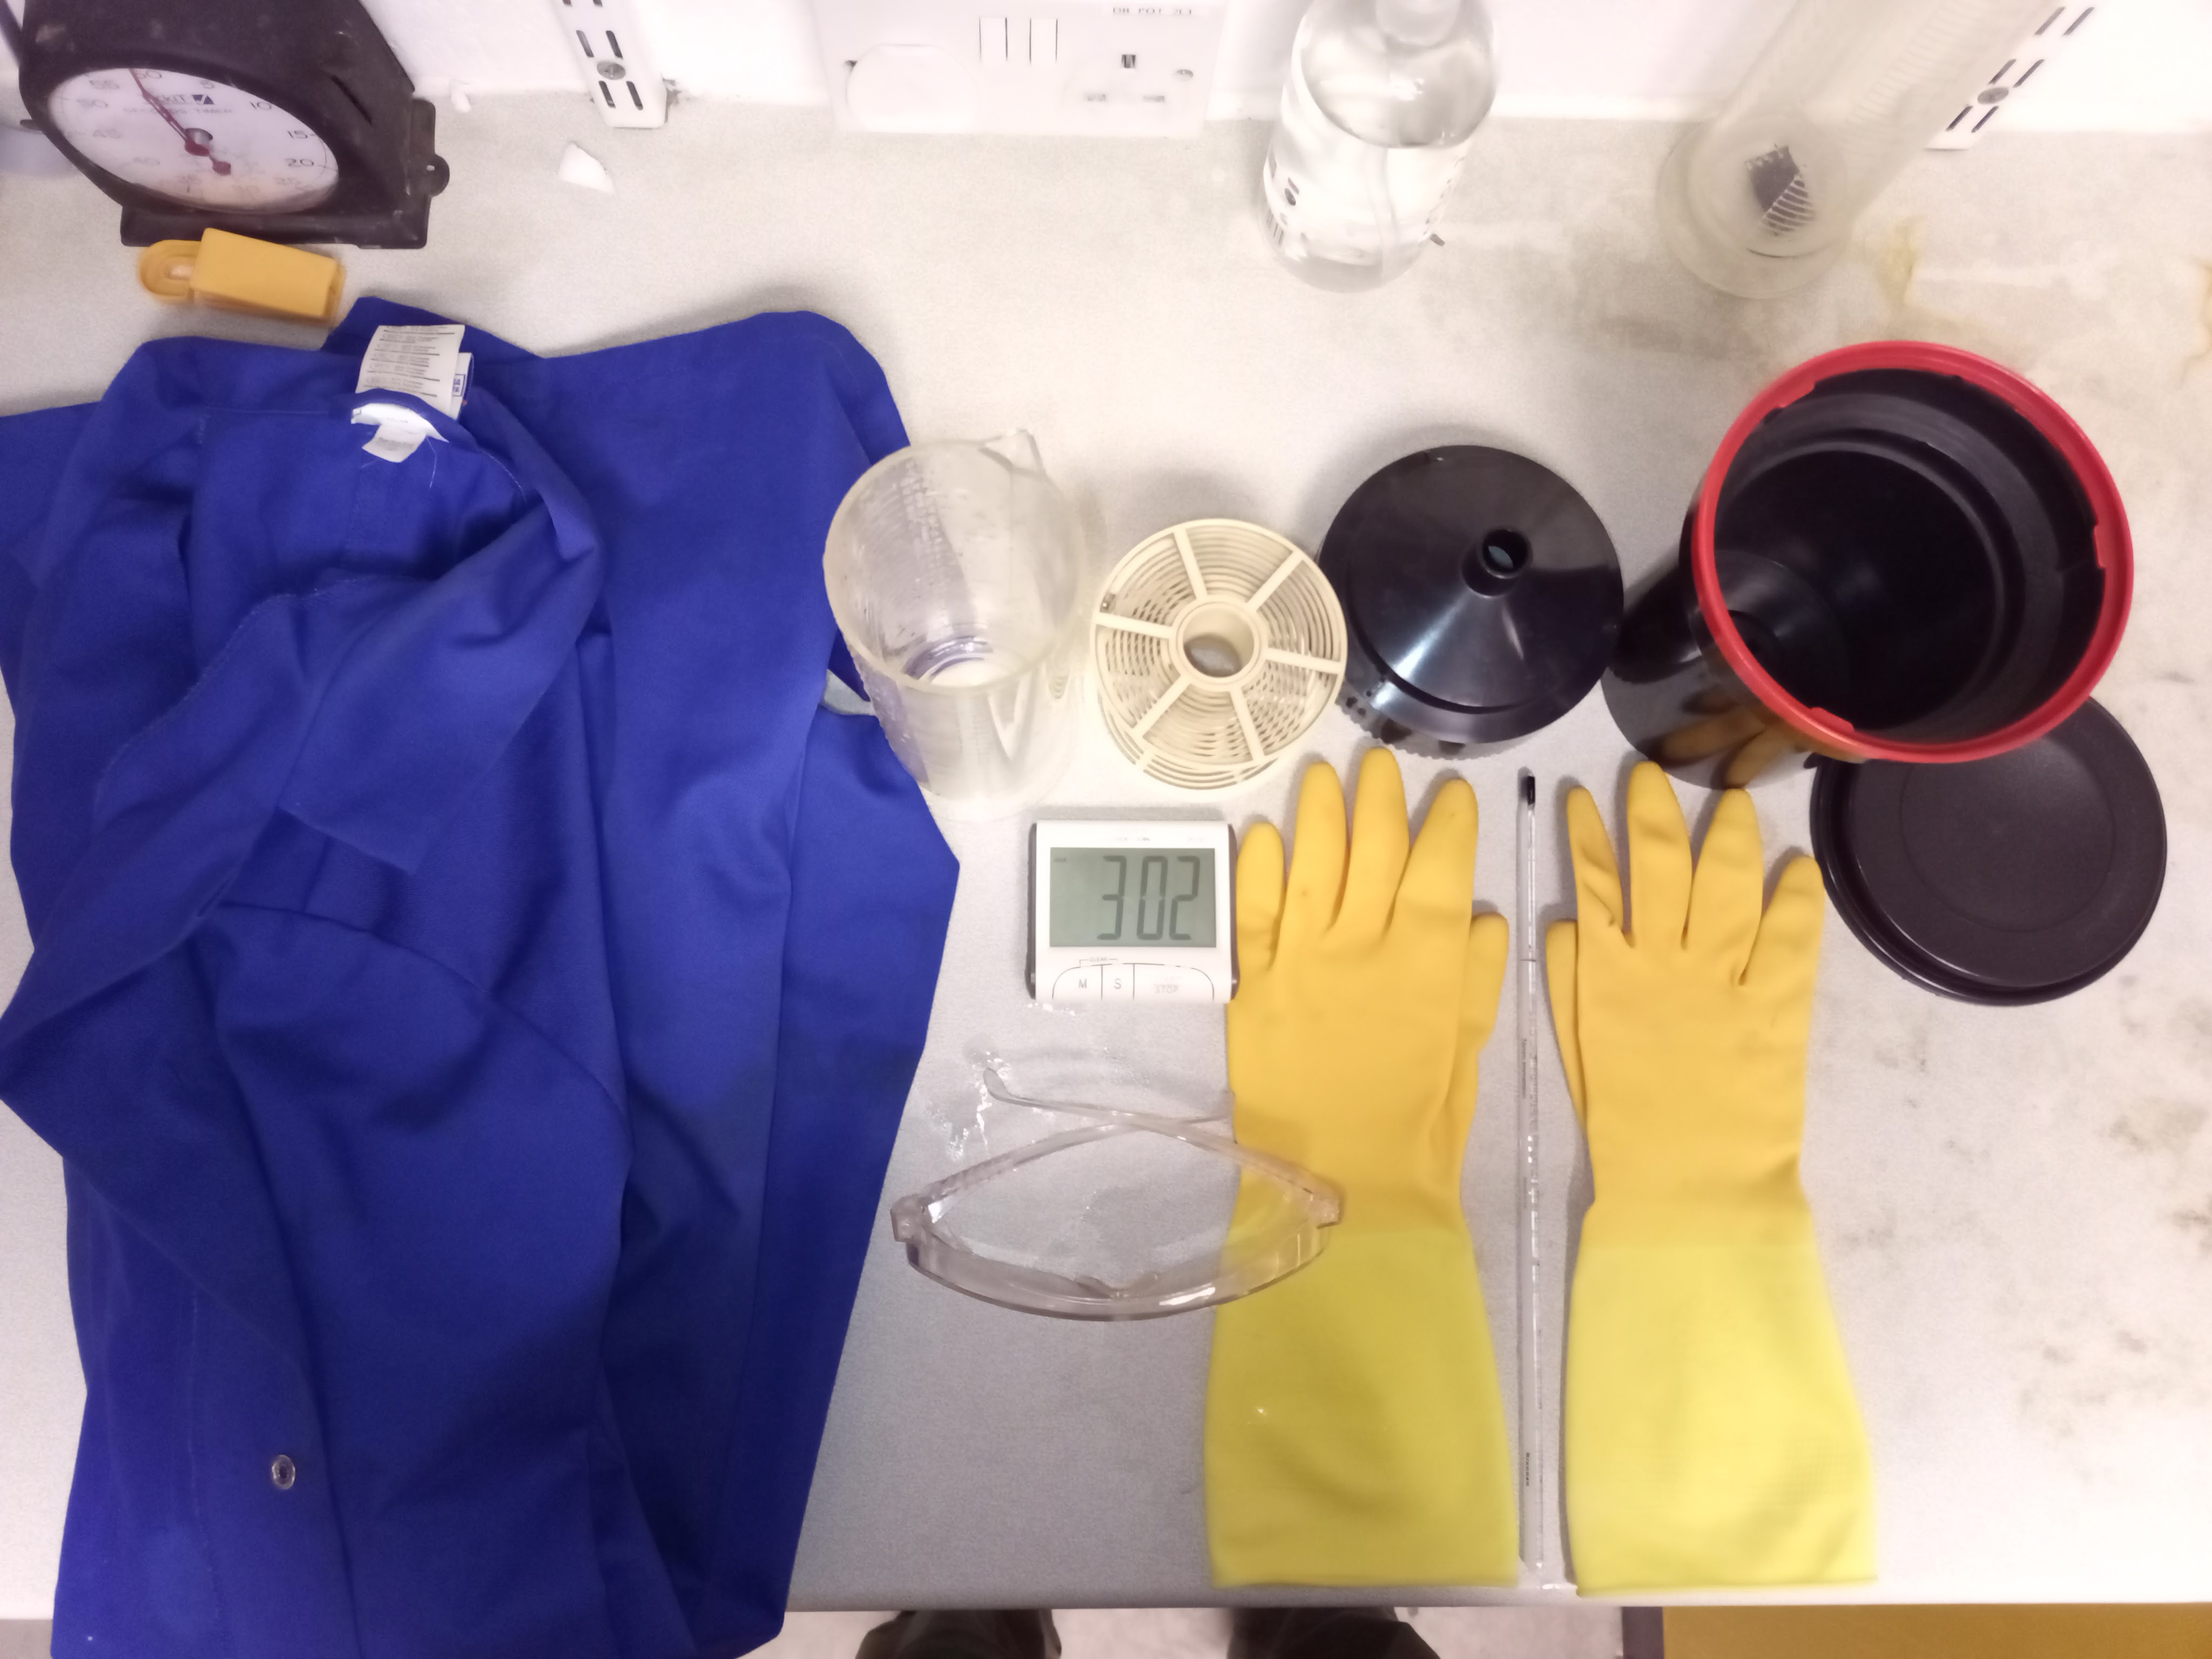
- You will need):
- the cap
- the conical lid
- the spiral(s) or reels,
- the central spindle
- the tank
- Steps 1-5 must be done in total darkness (or in a changing bag).
- Organise your work area – you will need scissors, a film canister opener and the components of the daylight developing tank (see above) arranged in front of you.
- Unload the film in total darkness (or in a changing bag). Remove the flat end cap of the film canister.
Push the film out from the other end and remove it from the canister.
Trim off the narrow leader part of the film – don’t cut across sprocket
holes if you can help it. - Load onto Spiral in total darkness (or in a changing bag). If the film jams or
Snags either take it off + start again or move the spiral in small increments – this often un-jams it. Cut off the plastic film spindle attached to the end of the film. - Put spiral (loaded with film) into daylight developing tank (on the central
spindle) - Insert the conical lid (pointing down!)
- Put on the cap
- Turn on the light and ensure all components are in the tank.
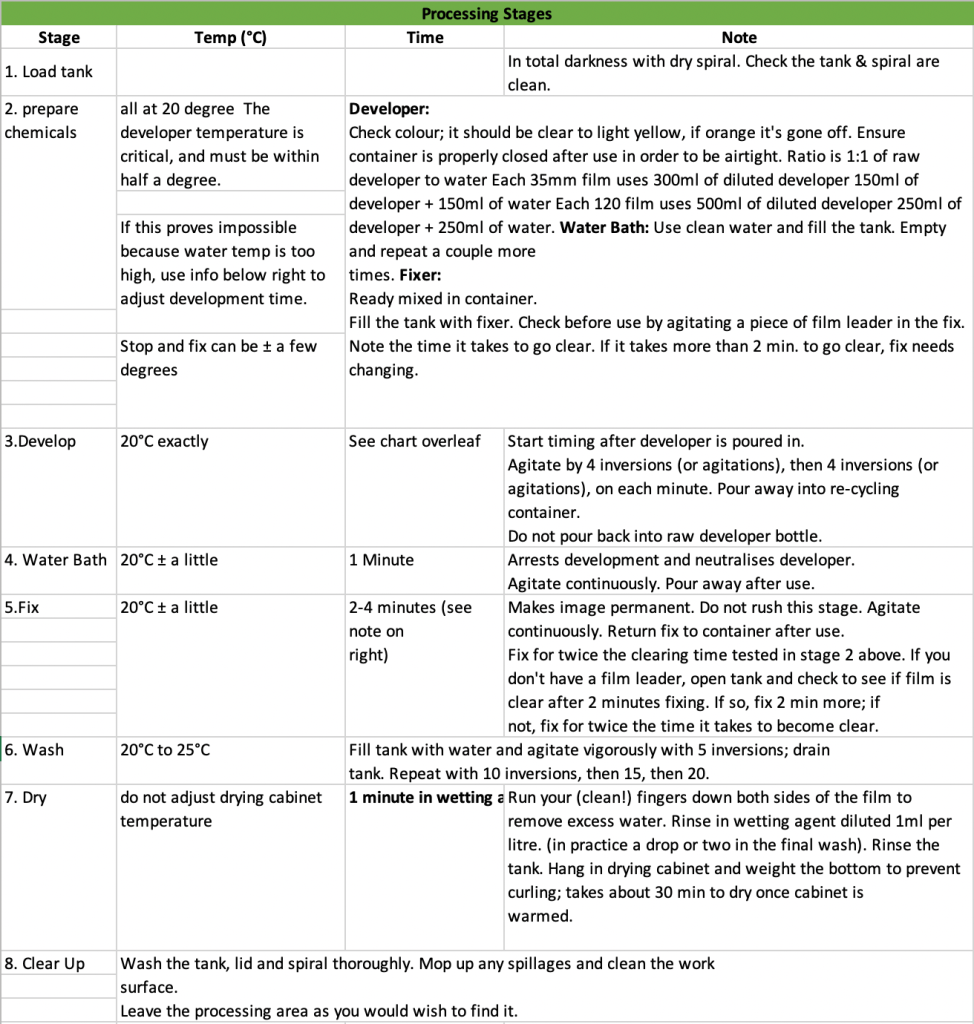
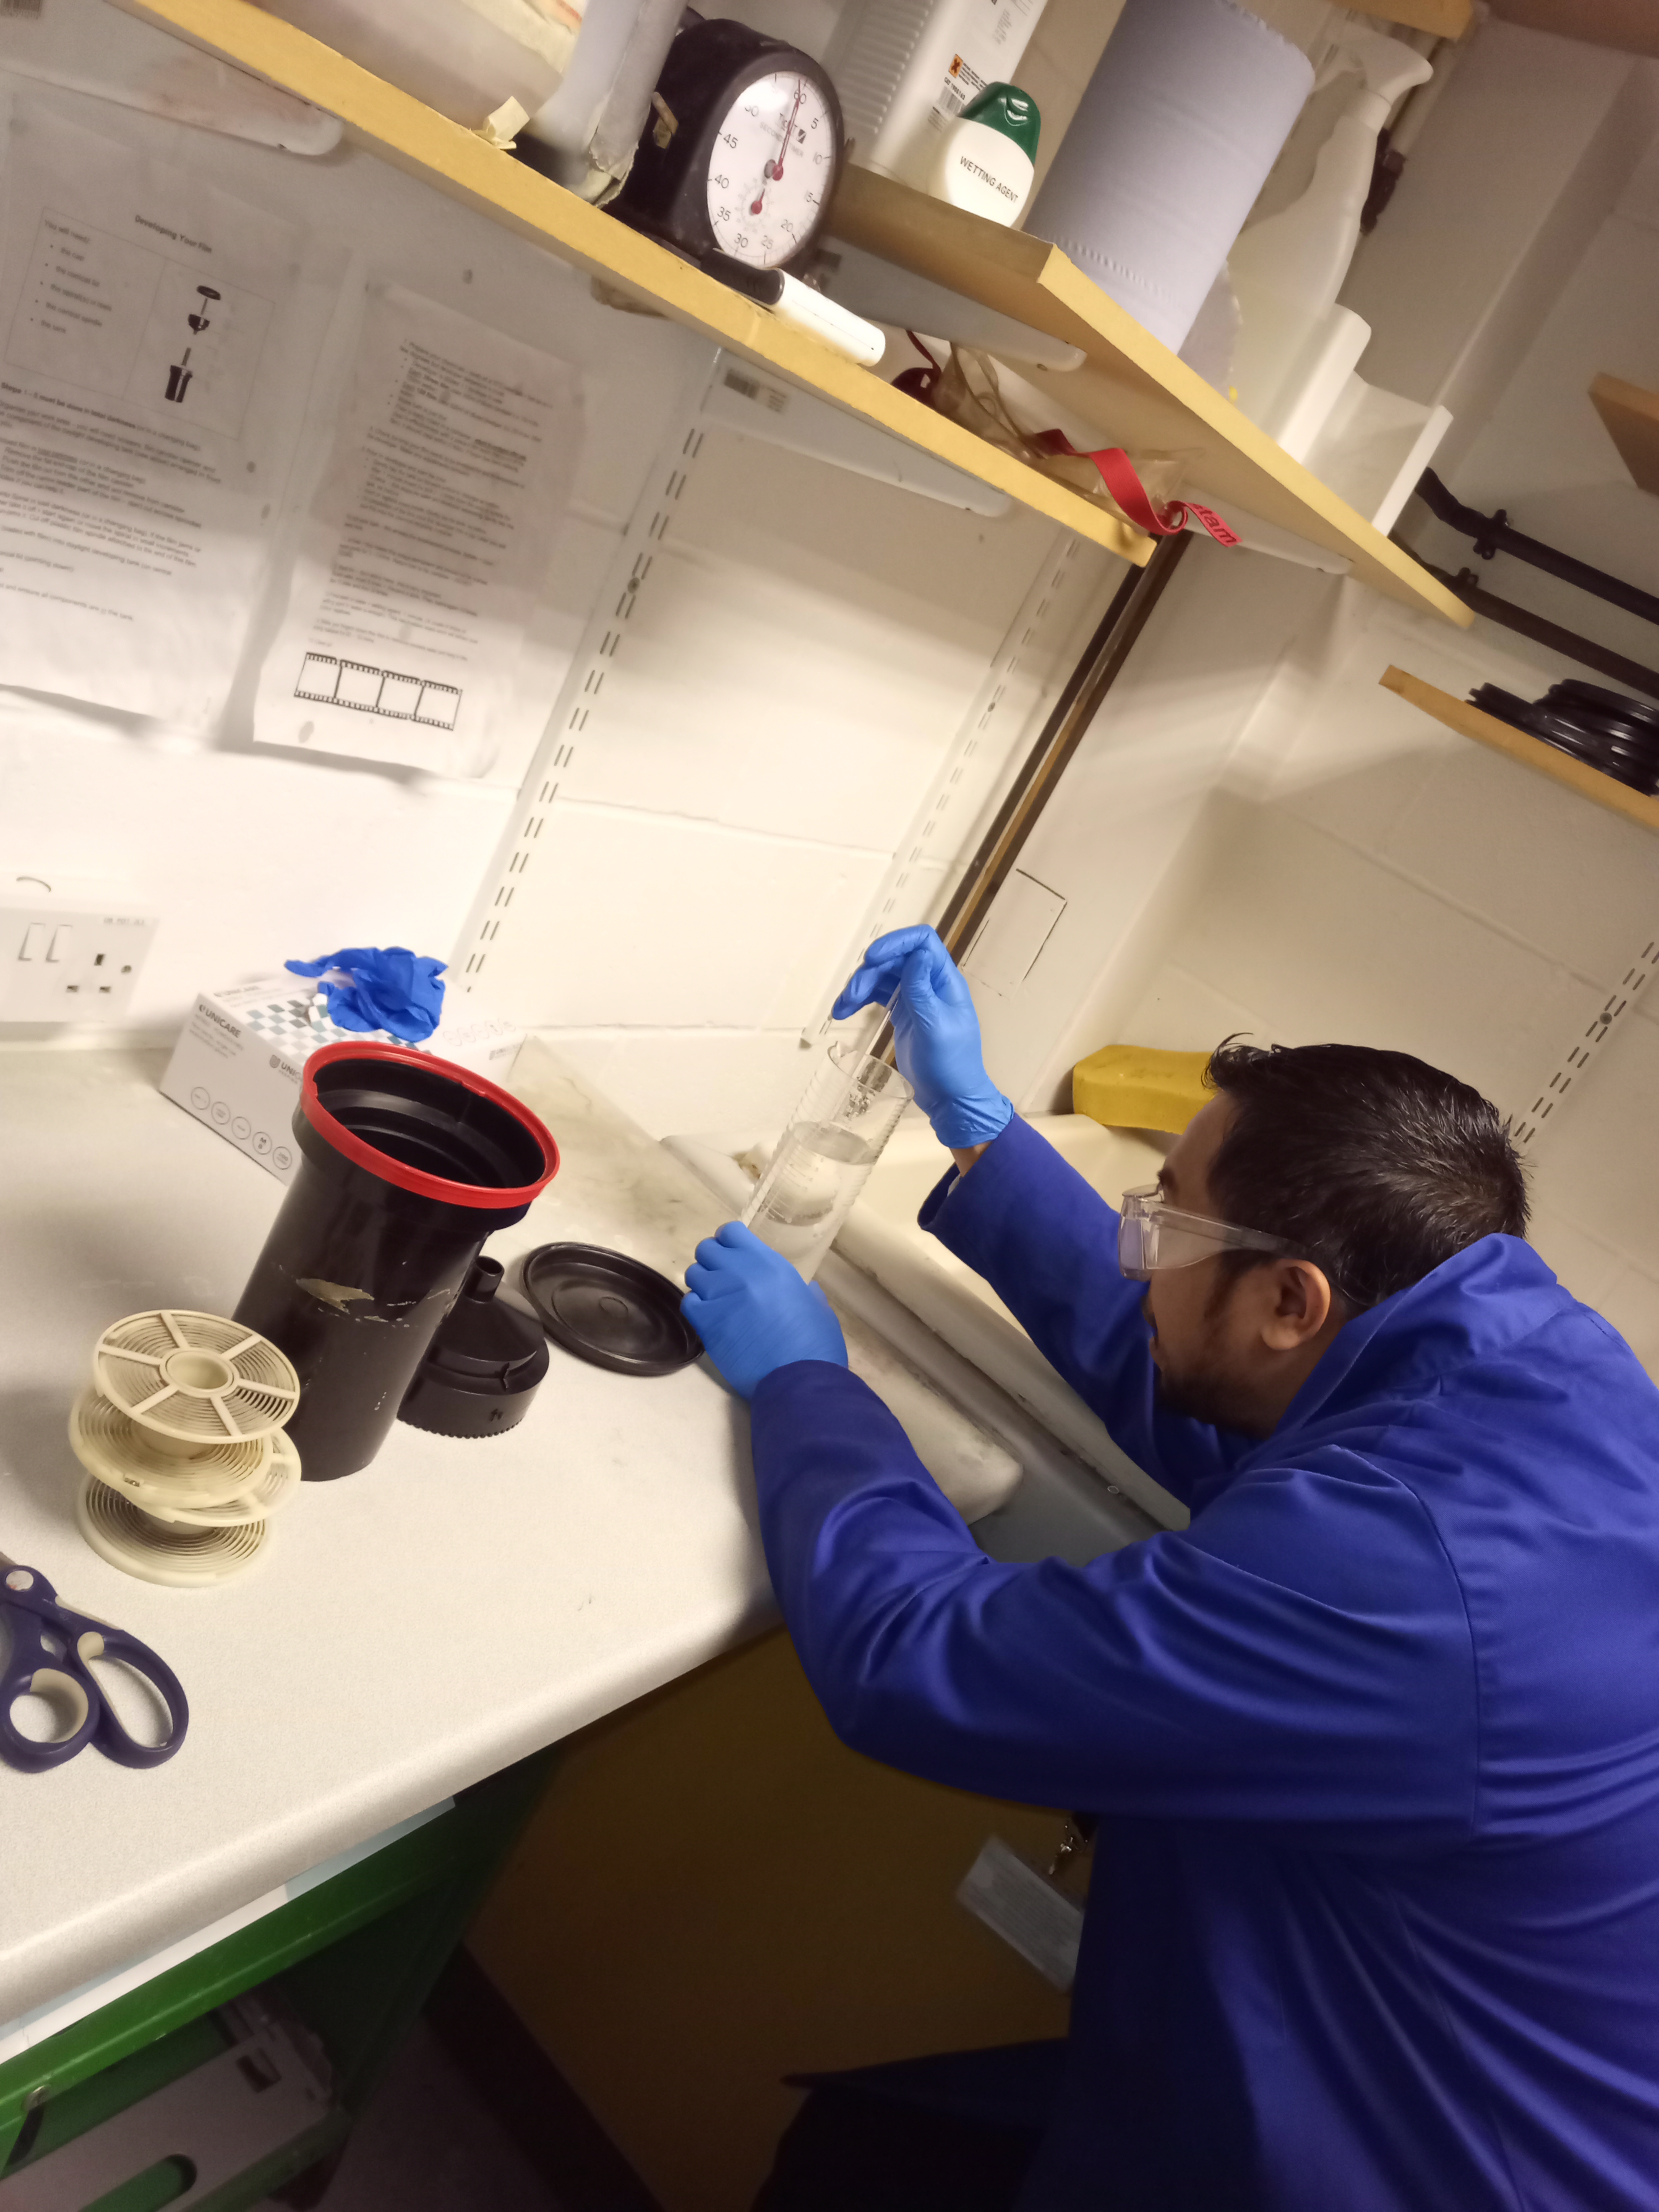
7. Prepare your chemicals – ideally all at 20°C (water bath + fixer can be + a few degrees but developer temperature is crucial.
- The developer has diluted 1:1 developer to water
- Each 35mm film uses 300ml of diluted developer (i.e. 150 ml dev, 150ml water)
- Each 120 film uses 500ml of diluted developer (i.e. 250 ml dev, 250ml
water)
- The water bath is just that.
- Fixer is ready mixed in a container – return to the container after use. (test its effectiveness with a piece of film leader (that you cut off the film). It should clear within 2 mins – if the longer fixer needs replacing
8. Check the time your film needs to be developed for and the temperature of the developer. Make any adjustments necessary
9. Pour in the developer and start the timer.
gently tap the tank on the work surface to dislodge air bubbles.
- After 1 minute invert the tank 2 – 3 times (over the sink) or agitate for 10 secs – this stops the water and developer from separating. Gently tap the tank, as before
- Invert or agitate every minute. Gently tap the tank, as before
- On completion of the time, pour the developer into a jug. Later you will pour this into the chemical recycling container.
10. Add a water bath – this arrests the development process. Agitate + pour away, twice.
11. Add fixer – this makes the image permanent and should not be rushed, agitate gently for 3 – 5 mins. Return the fixer to its container – DO NOT DISCARD
12. Wash film – don’t skimp here, this is very important.
Fill with water, invert 5 times + discard in the sink. Then, the same again 10 times, then 15 times and then 20 times.
13. A final wash in water + wetting agent. 1 minute. (A couple of drops of wetting agent in water is enough). This neutralises static which will attract dust to your negatives.
14. Slide your fingers down the film to remove excess water and hang it in the drying cabinet for 20 – 30 mins.
15. Clear up!
Data Processing for 35mm negative film camera and 120 medium formats negative film
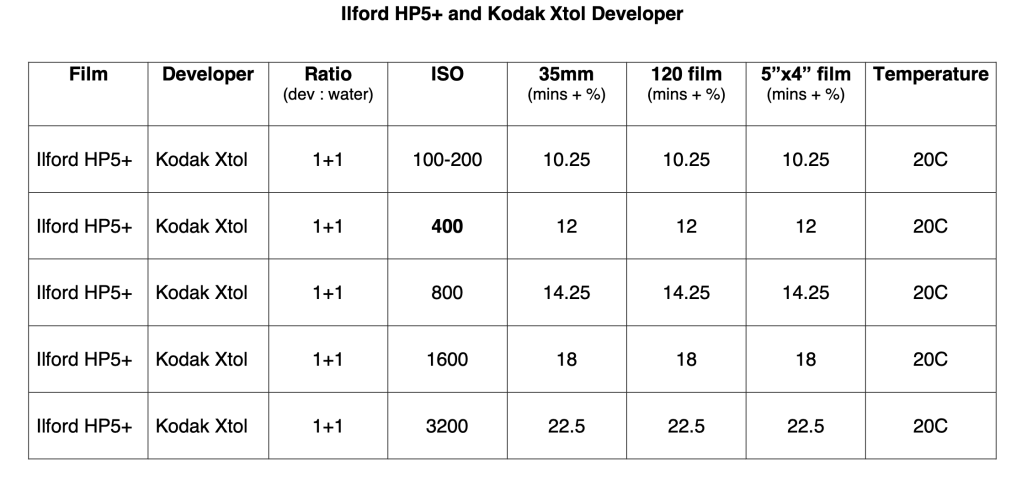
Film Developing using Kodak XTOL Developer (there are other options of brand available in the market)
As follows, I will include a few negative films brand according to the size and iso that produces B&W pictures.
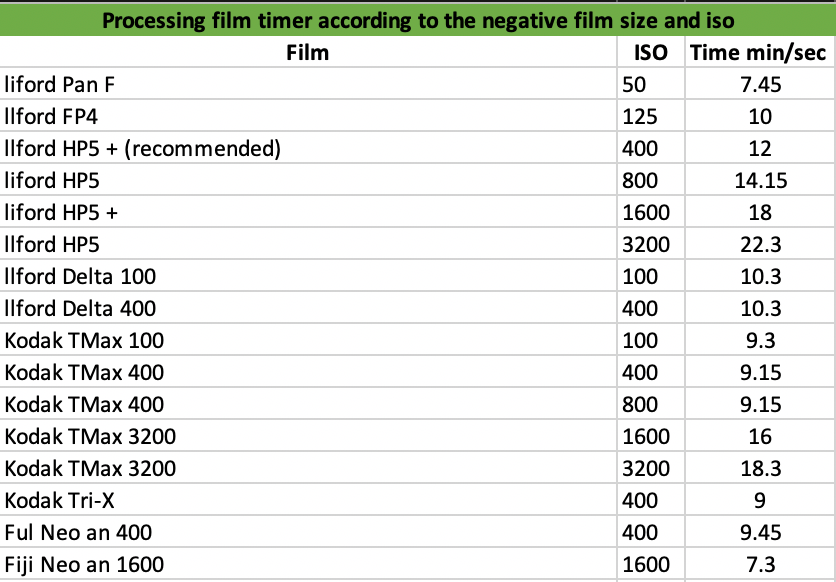
For other films, ISOs, developers and more, please click here The Massive Dev Chart
ANALOGUE PRINTING METHODS
There are various options for printing that have been developed over the past years. All of those methods are used to get the best result possible and also based on the knowledge over the periods. Lets us talk about a few methods of film printing and examples.
Salt Print Method
The salt print procedure was invented by Joseph Nicéphore Niépce (1765–1833) and Thomas Wedgwood (1771–1805), both of whom were British. Wedgwood did it before 1802 and Niépce in 1816, although neither offered a method for repairing or stabilising the test pictures they used. There are currently no known test subjects from their investigations or well-supported, verifiable photos. Hercules Florence, a Frenchman who was born in 1804 and lived in Brazil, invented the idea of silver- and gold-based photography in 1832–1834 as well as a crude technique for picture correction using a urine-based mixture. Although only copy sampling is still available, his usage of a camera is well-known in the literature. William Henry Fox Talbot, a British inventor who lived from 1800 to 1877, created an innovative idea for photography on paper in 1834–1835 as well as a technique for stabilising both two different processes and camera pictures using a sodium chloride solution. Talbot eventually used John Frederick William Herschel’s technique for using sodium thiosulfate to repair photographic pictures, as Herschel had suggested (hypo).
Publication dates T. Wedgwood and H. Davy (1802) and W. H. F. Talbot (1839 and later)
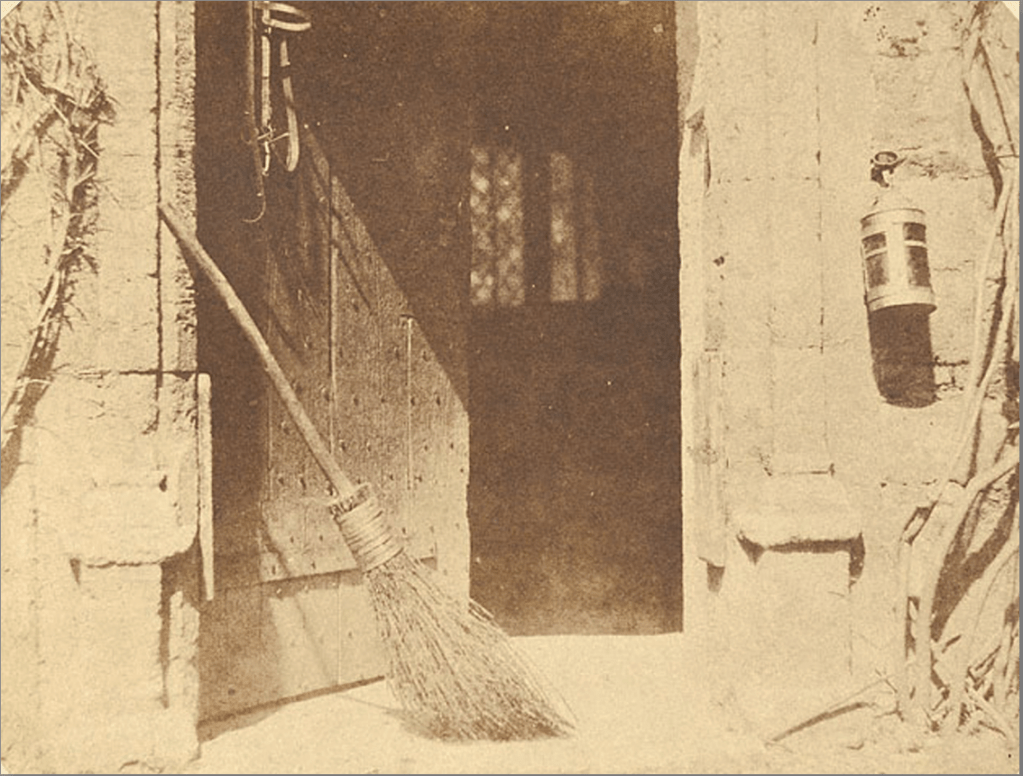
Collodion Plates (Primary research)
The collodion method, sometimes known as the “collodion wet plate technique,” is said to have been developed in 1851 nearly simultaneously by two men: Englishman Frederick Scott Archer and Frenchman Gustave Le Gray. The plates employed an emulsion method rather than a straightforward coating, which led to a much shorter exposure period of only a few seconds. The usage of a portable darkroom was essential since the collodion plates had to be coated, sensitised, and developed in under fifteen minutes. Ambrotype, which was created on plates, and tintype, which was created on tin plates, were the two most common emulsion plates.
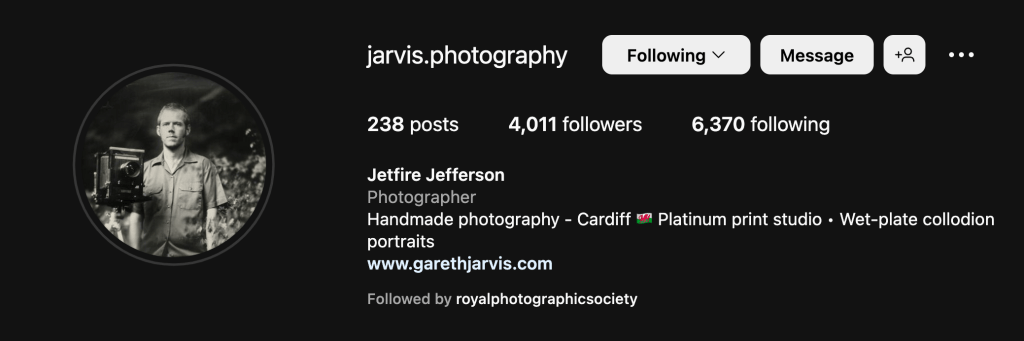
There is an artist that I met once at Martin Parr Foundation, while he was conducting the printing for the customer, his name is Jetfire Jefferson based in Cardiff.
I went to him and ask a couple of questions and kindly he answers me regarding the process of it.
With this method, it is quickly can produce the image because it is mobility that requires only a small box to create a darkroom.
My conversation with Jetfire Jefferson, the collodion artist below:
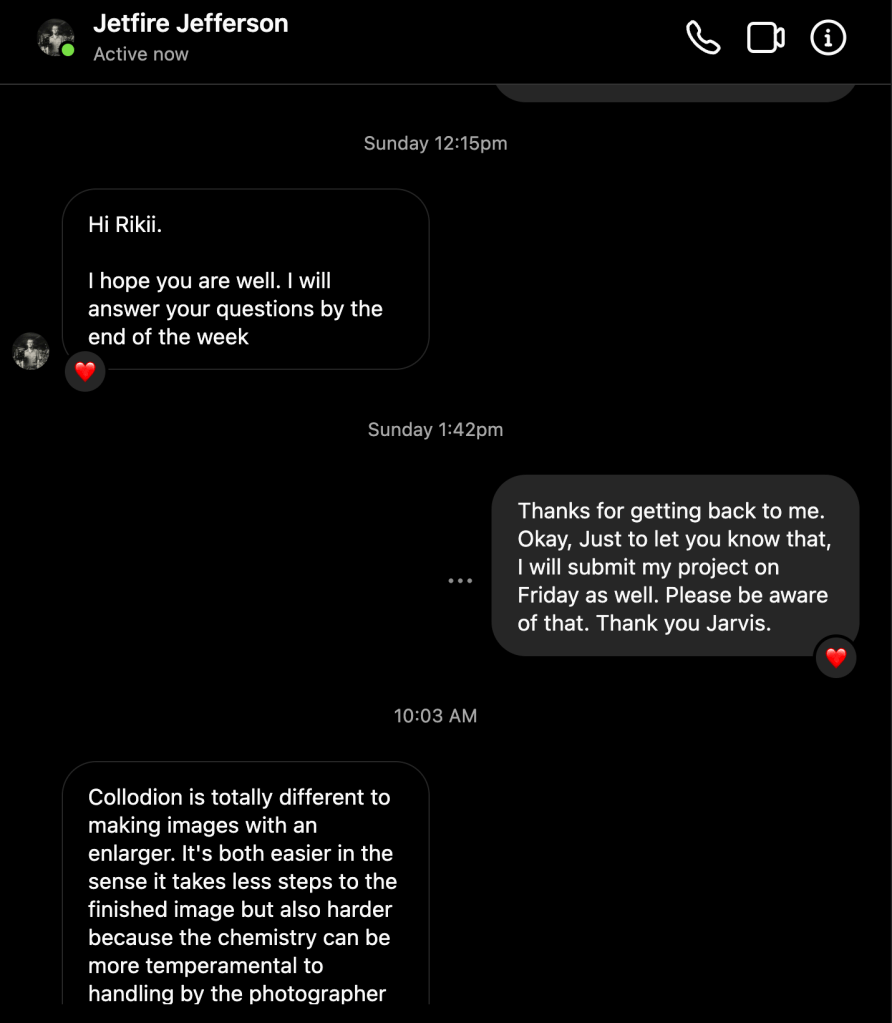
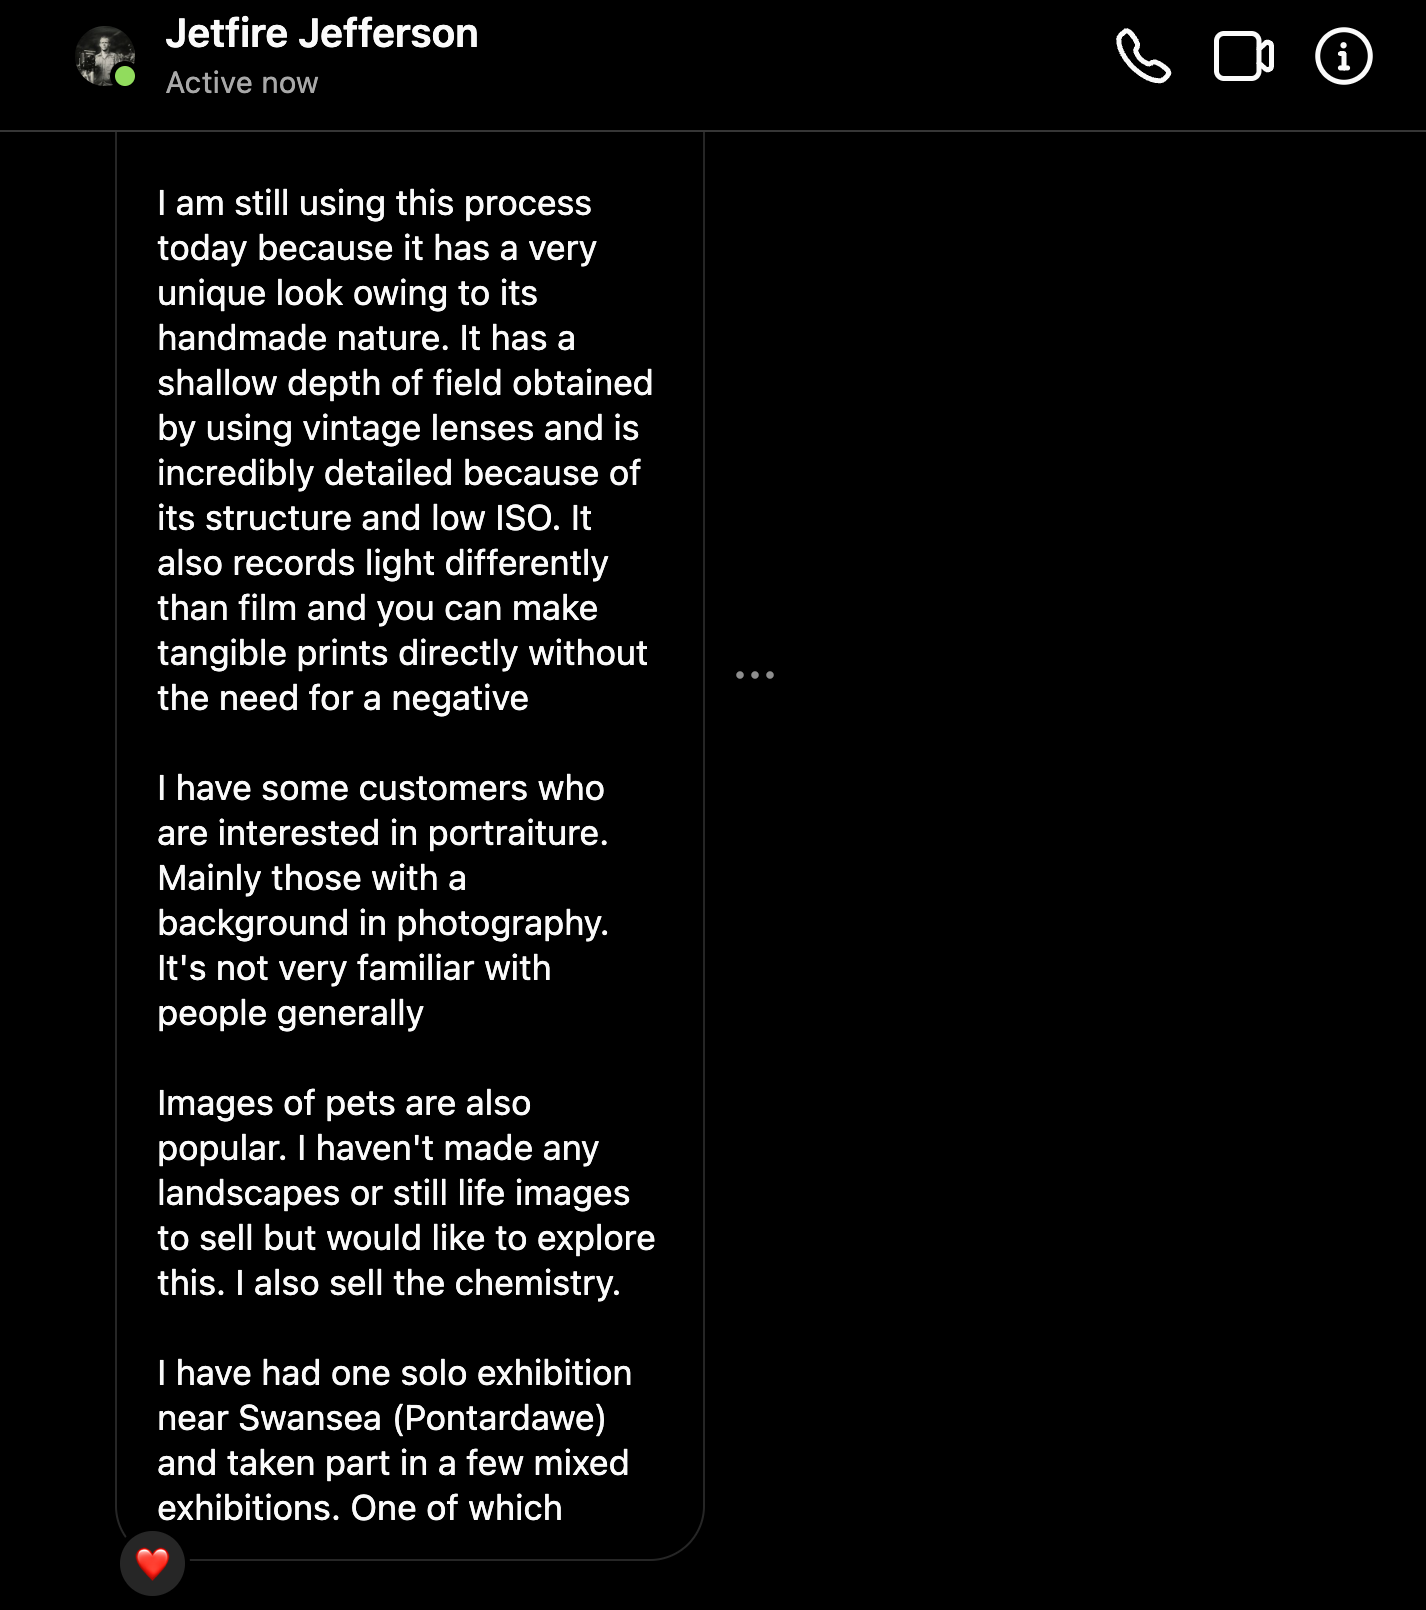

It could be easy and also harder depending on the photographer handling the temperamental of the chemicals.
His works with the collodion print:
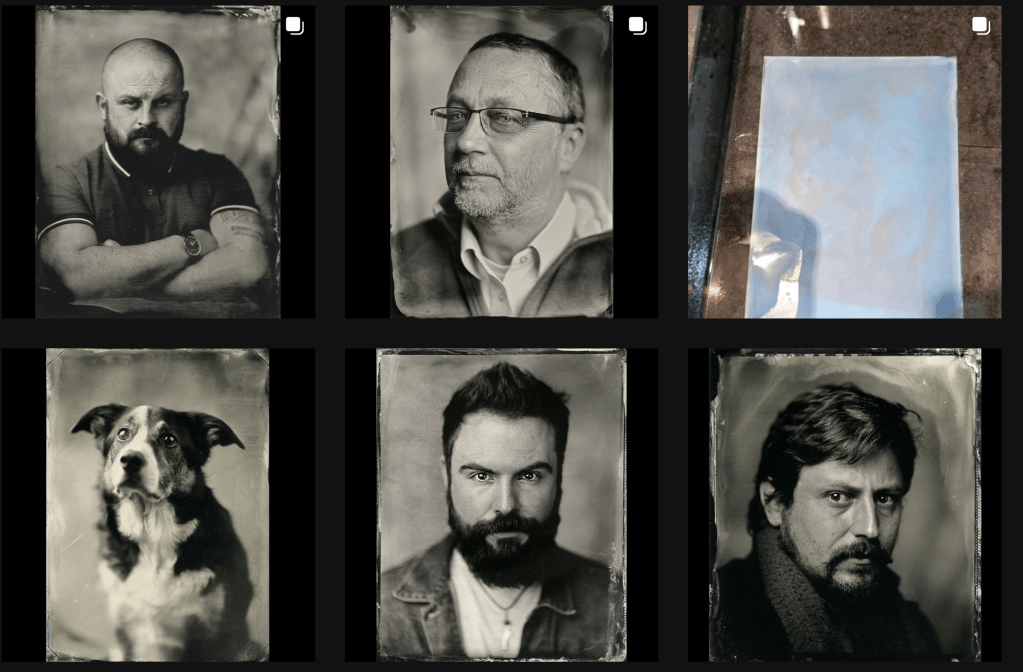
To see more please visit: https://www.instagram.com/jarvis.photography/
The process that he showed me:
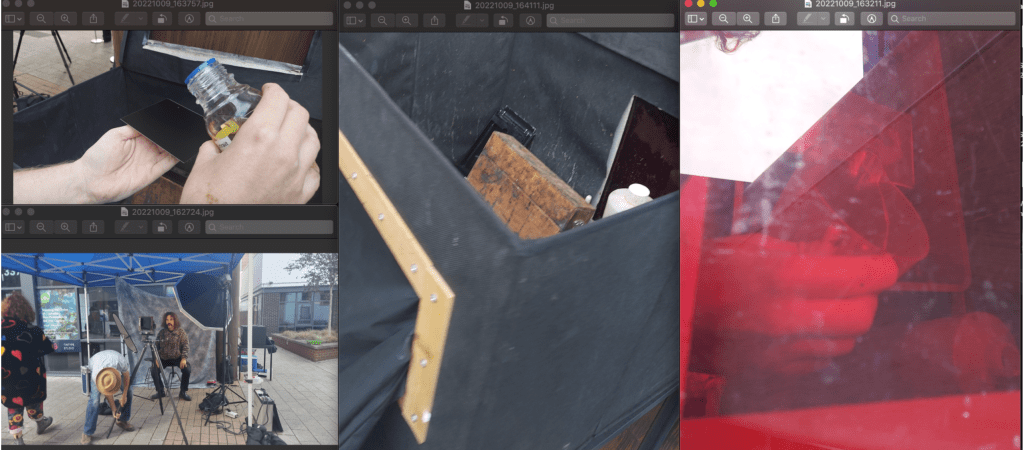
Step 1: Apply collodion.
Making a collodion negative starts with collodion.
Photographic collodion is ether, alcohol, iodide and bromide dissolved in raw cotton treated with nitric and sulfuric acids. Pre-mixed in 1880, it doesn’t matter what it’s composed of. This solution must be straightforward and adhere to most things.
Pour collodion onto a plate and tilt it until the solution covers it.
Return extra collodion to its bottle.
Step 2: Silver Nitrate dip.
Now enter the darkroom (or dark tent, if you’re in the field, mini dark box)
Dip the plate into a silver nitrate solution. Silver nitrate, iodide, and bromide form a light-sensitive silver halide coating.
Clean the plate’s back with a towel.
Step 3: Plate-to-Camera
In the darkroom, place the plate in a camera-compatible light-proof holder.
Put the holder in the camera.
Even in the camera, the holder drips silver nitrate solution. Normal.
The holder’s slide covers the glass plate. Remove the slide. Expose the collodion plate.
Step 4: Expose.
Removing the lens cover exposes the plate. The camera’s light-sensitive collodion will be exposed.
The 20s–5 minutes. (Exposure duration depends on how rapidly silver halides respond to light, how much light enters the lens, and how much light hits the target.) Replace the lens cover to cease exposure.
Insert the slide. The holder may be securely withdrawn from the camera and returned to the darkroom or dark tent.
Step 5: Pour Developer
Take out the glass plate.
Pour the developer over the plate over a tray. The developer is acetic acid and iron sulphate. Light-struck silver-halide grains become metallic silver.
Remove the developer by rinsing the plate.
Remove the plate from the darkroom.
Plate Installation
Metallic silver and unlit silver halide grains remain on the plate.
Step 6: Fix the plate in sodium thiosulfate to remove the unexposed silver halide.
Step 7: Wash and Varnish
To remove the fixing agent, wash the plate again and dry it.
Varnishing the plate protects the delicate picture. The collodion is applied similarly to the plate.
Heat the varnish bottle over a flame. Heat the glass plate over the flames. When both are blood warm, pour the varnish over the emulsion side of the plate, tilt it to cover it, and pour the excess back into the container.
The negative picture on the plate. The plate is clear where it was not exposed to light and dark silver where it was.
Step 8: Print
Float a sheet of paper over a chloride-containing albumen (egg white) solution to produce an albumen print from a collodion negative. Dry.
Float paper in silver nitrate. Silver chloride coats it. Dry.
Align the negative over the paper in a printing frame and set it in direct sunlight. Sunprints.
Tone the print with gold chloride after washing. Rewash.
Then wash the print with sodium thiosulfate.
Mount your print.
Cyanotype Print Method
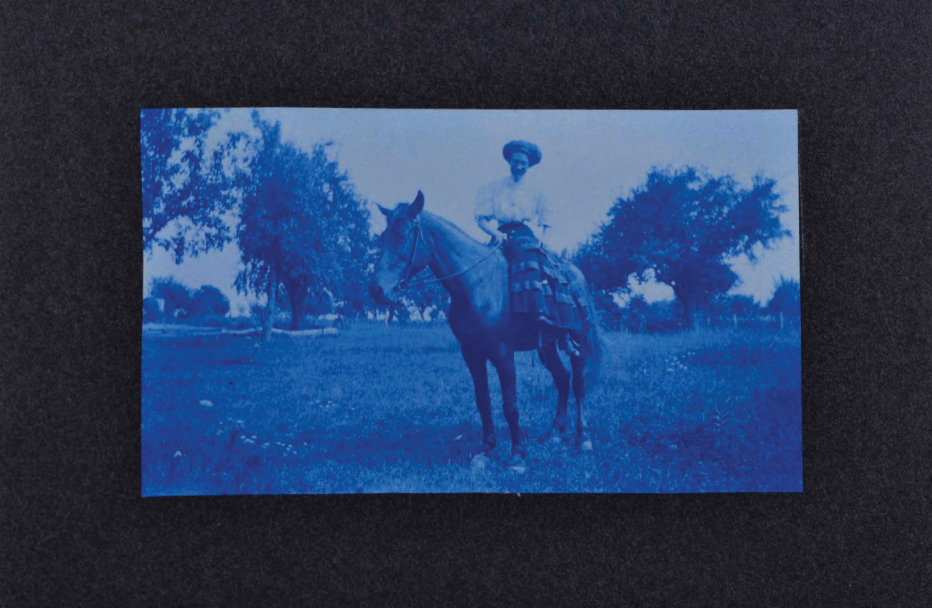
The cyanotype technique was invented by British astronomer and chemist John Frederick William Herschel (1792–1871) and delivered to the Royal Society of London on June 16, 1842.
The word “cyanotype” comes from the Greek word “cyan,” meaning “dark-blue imprint.”
Count Bestuscheff observed colour changes in iron salt solutions in 1725, and Johann Wolfgang Doebereiner characterised them in 1831. (1780–1849). The image-forming substance of cyanotypes, Prussian blue (hydrated iron hexacyano ferret complex), was initially synthesised by Heinrich Diesbach in Berlin between 1704 and 1710 and employed in oil paintings and watercolours around 1730. In the 1840s, Herschel encouraged Anna Atkins, daughter of Dr John Children, to use cyanotype photograms to show her botanical research. The first photogenically illustrated books were her three volumes of photographs of British Algae: Cyanotype Impressions (1843–53).
In the 1880s, the cyanotype method was used to confirm collodion, dry gelatin plates, and gelatin roll film before printing using silver- or platinum-based photographic processes. From the 1870s through the 1950s, engineers and architects employed the cyanotype method and its modifications to duplicate designs.
Marion and Cie in Paris manufactured the first commercial cyanotype paper, paper ferro-prussiate, in 1872. Since 1875, Massachusetts Institute of Technology students have learned to utilise cyanotype for designs. At the 1876 Philadelphia Centennial Exposition, Switzerland’s first commercial blueprint machine was brought to the US. Today, students may use and play with sensitised cyanotype paper. Also available are cyanotype kits.
Contemporary photographers rediscovered the cyanotype method in the 1960s. Using commercial photography material, the earlier techniques were alternatives to silver gelatin. The silver gelatin method may soon be regarded as an alternative photographic process as digital photography replaces all uses of old “chemical” photography.
Rayograph method
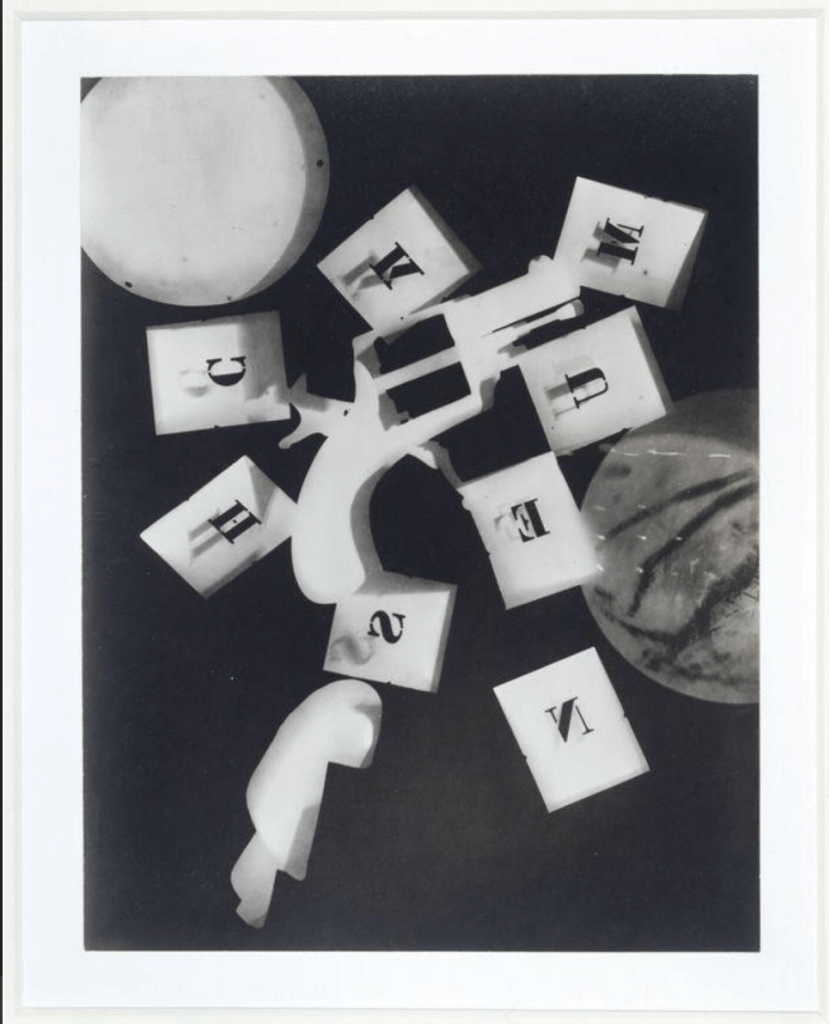
Man Ray was a world-renowned photographer and artist. In 1921, he started making rayographs in Paris. Man Ray called photograms rayographs. Exposing items to light on light-sensitive paper creates photograms. Where things have laid on the paper and blocked light, the print is light.
Man Ray liked this approach since it was automatic and surrealist. It depicts common items by capturing their shapes and shadows rather than their structure or texture. The shadow of virtually flat items, like the matchbox, makes them harder to recognise. Focusing on light and shadow transforms even the most mundane items. Photogram or ‘rayograph’ printed ca. 1964 from an original made between 1921-1928.
Materials used in rayographs are
- Photographic Paper
- Gelatin Silver
- Photogram
Darkroom printing method
Darkrooms have processed film photos since the early 19th century. Darkrooms provide total control over the media of film processing through printmaking.
A darkroom processes film, prints, and does other activities. It may be darkened to develop film and photographic paper. The darkroom has an enlarger, chemical baths, and water.
Colour photography, instant photography, and digital photography made darkrooms obsolete. Since the late 1800s, Ilford Photo, Kodak, Agfa, and Fuji have supplied darkroom supplies. Ilford Photo supplies most materials.
Black-and-white printing involves exposing the light-sensitive paper to a negative and employing chemicals to expose the picture.
The enlarger projects light through the negative onto its baseboard.
Light from the negative’s lighter parts darkens the paper. Darker neg regions block light, keeping the paper white.
In photographic darkroom printing, paper with an emulsion (typically silver salts) coating on one side is responsive to light but not red light.
The chemical developer develops latent images from light exposure.
A stop bath chemical stops this development. Fixer and water clean up the chemicals after the chemical procedure and maintain the durability of the printing. Normal light illuminates the page.
The darkroom film process in the video is as follows:
DODGE AND BURN
The Burn allows you to darken areas of your image. The Dodge (where are you covering a few seconds) allows you to lighten an area.
Example:
Let us say your exposure timer is five (5) seconds, the first two (2) seconds let the exposure light hit all the paper surface and the next three (3) seconds is where you would bring the dodge tool such as a piece of black paper or your hand to move around the area where you want the exposure not to hit it a lot on it.
How to do it: Place a card in the light path during print exposure to burn and dodge. Light “burns in” the card’s edge. The card’s shadow “dodges” the region beneath it. There should be no noticeable dodging and burning in the picture.
Tips on how to do it properly, in general, are as follows:
- Make use of an ongoing, soft, oscillating action. During print exposure, move your burning dodge tool forward and backwards.
- Utilize the penumbra! For a gentler transition edge, move the burning dodging tool closer to the enlarger lens; for a harsher edge, move it closer to the photographic paper. Consider the penumbra as Photoshop’s feathering.
- Avoid burning in and dodging for little periods of time. Short timeframes lower your repeatability and raise your mistake rate.
- Apply many passes to large areas. Where exposure variations are more than one f-stop, divide your burning and dodging of bigger regions into smaller, graded stages.
- Take notes while you are burning and avoiding. To ensure consistency in the process, record all your procedures, equipment, print area, and exposures.
Here are the videos from Ilford and Lina Bessonova on how to dodge and burn in the darkroom:
DOUBLE EXPOSURE METHODS
In Darkroom Method
I am not sure how many other techniques are out there that photographers have considered, but I am certain that the different methods that I am going to explore will be more than enough for the project that I have to do at this moment.
- First Method
The first method is by tracing and masking by using two enlargers.
1st method video by TheFreedmanCenterForDigitalScholarshiphttps://youtu.be/-LPEqTVeg-Y
- Second Method
This second method is called a sandwich, the sandwich method is where we put two images stacked together to create the double exposure with only one enlarger.
2nd method
Step-by-step example

- In-Camera Method (Medium format 120 negative film camera, Mamiya RB67)
The step-by-step on how to double exposure with Mamiya RB67 is as follows:

- Cock the shutter
- Wind film
- Turn the double exposure lock so the red dot is visible
- Compose 1st shot
- Fire the shutter release button (exposing one stop under)
- Cock shutter again
- Do not wind the film
- Compose 2nd shot
- Fire shutter release button (exposing one stop under again)
- Return double release switch so the red dot is covered
- Cock the shutter
- Wind to the next film and ready to compose.
production
EXPLORES AND COMPARISON
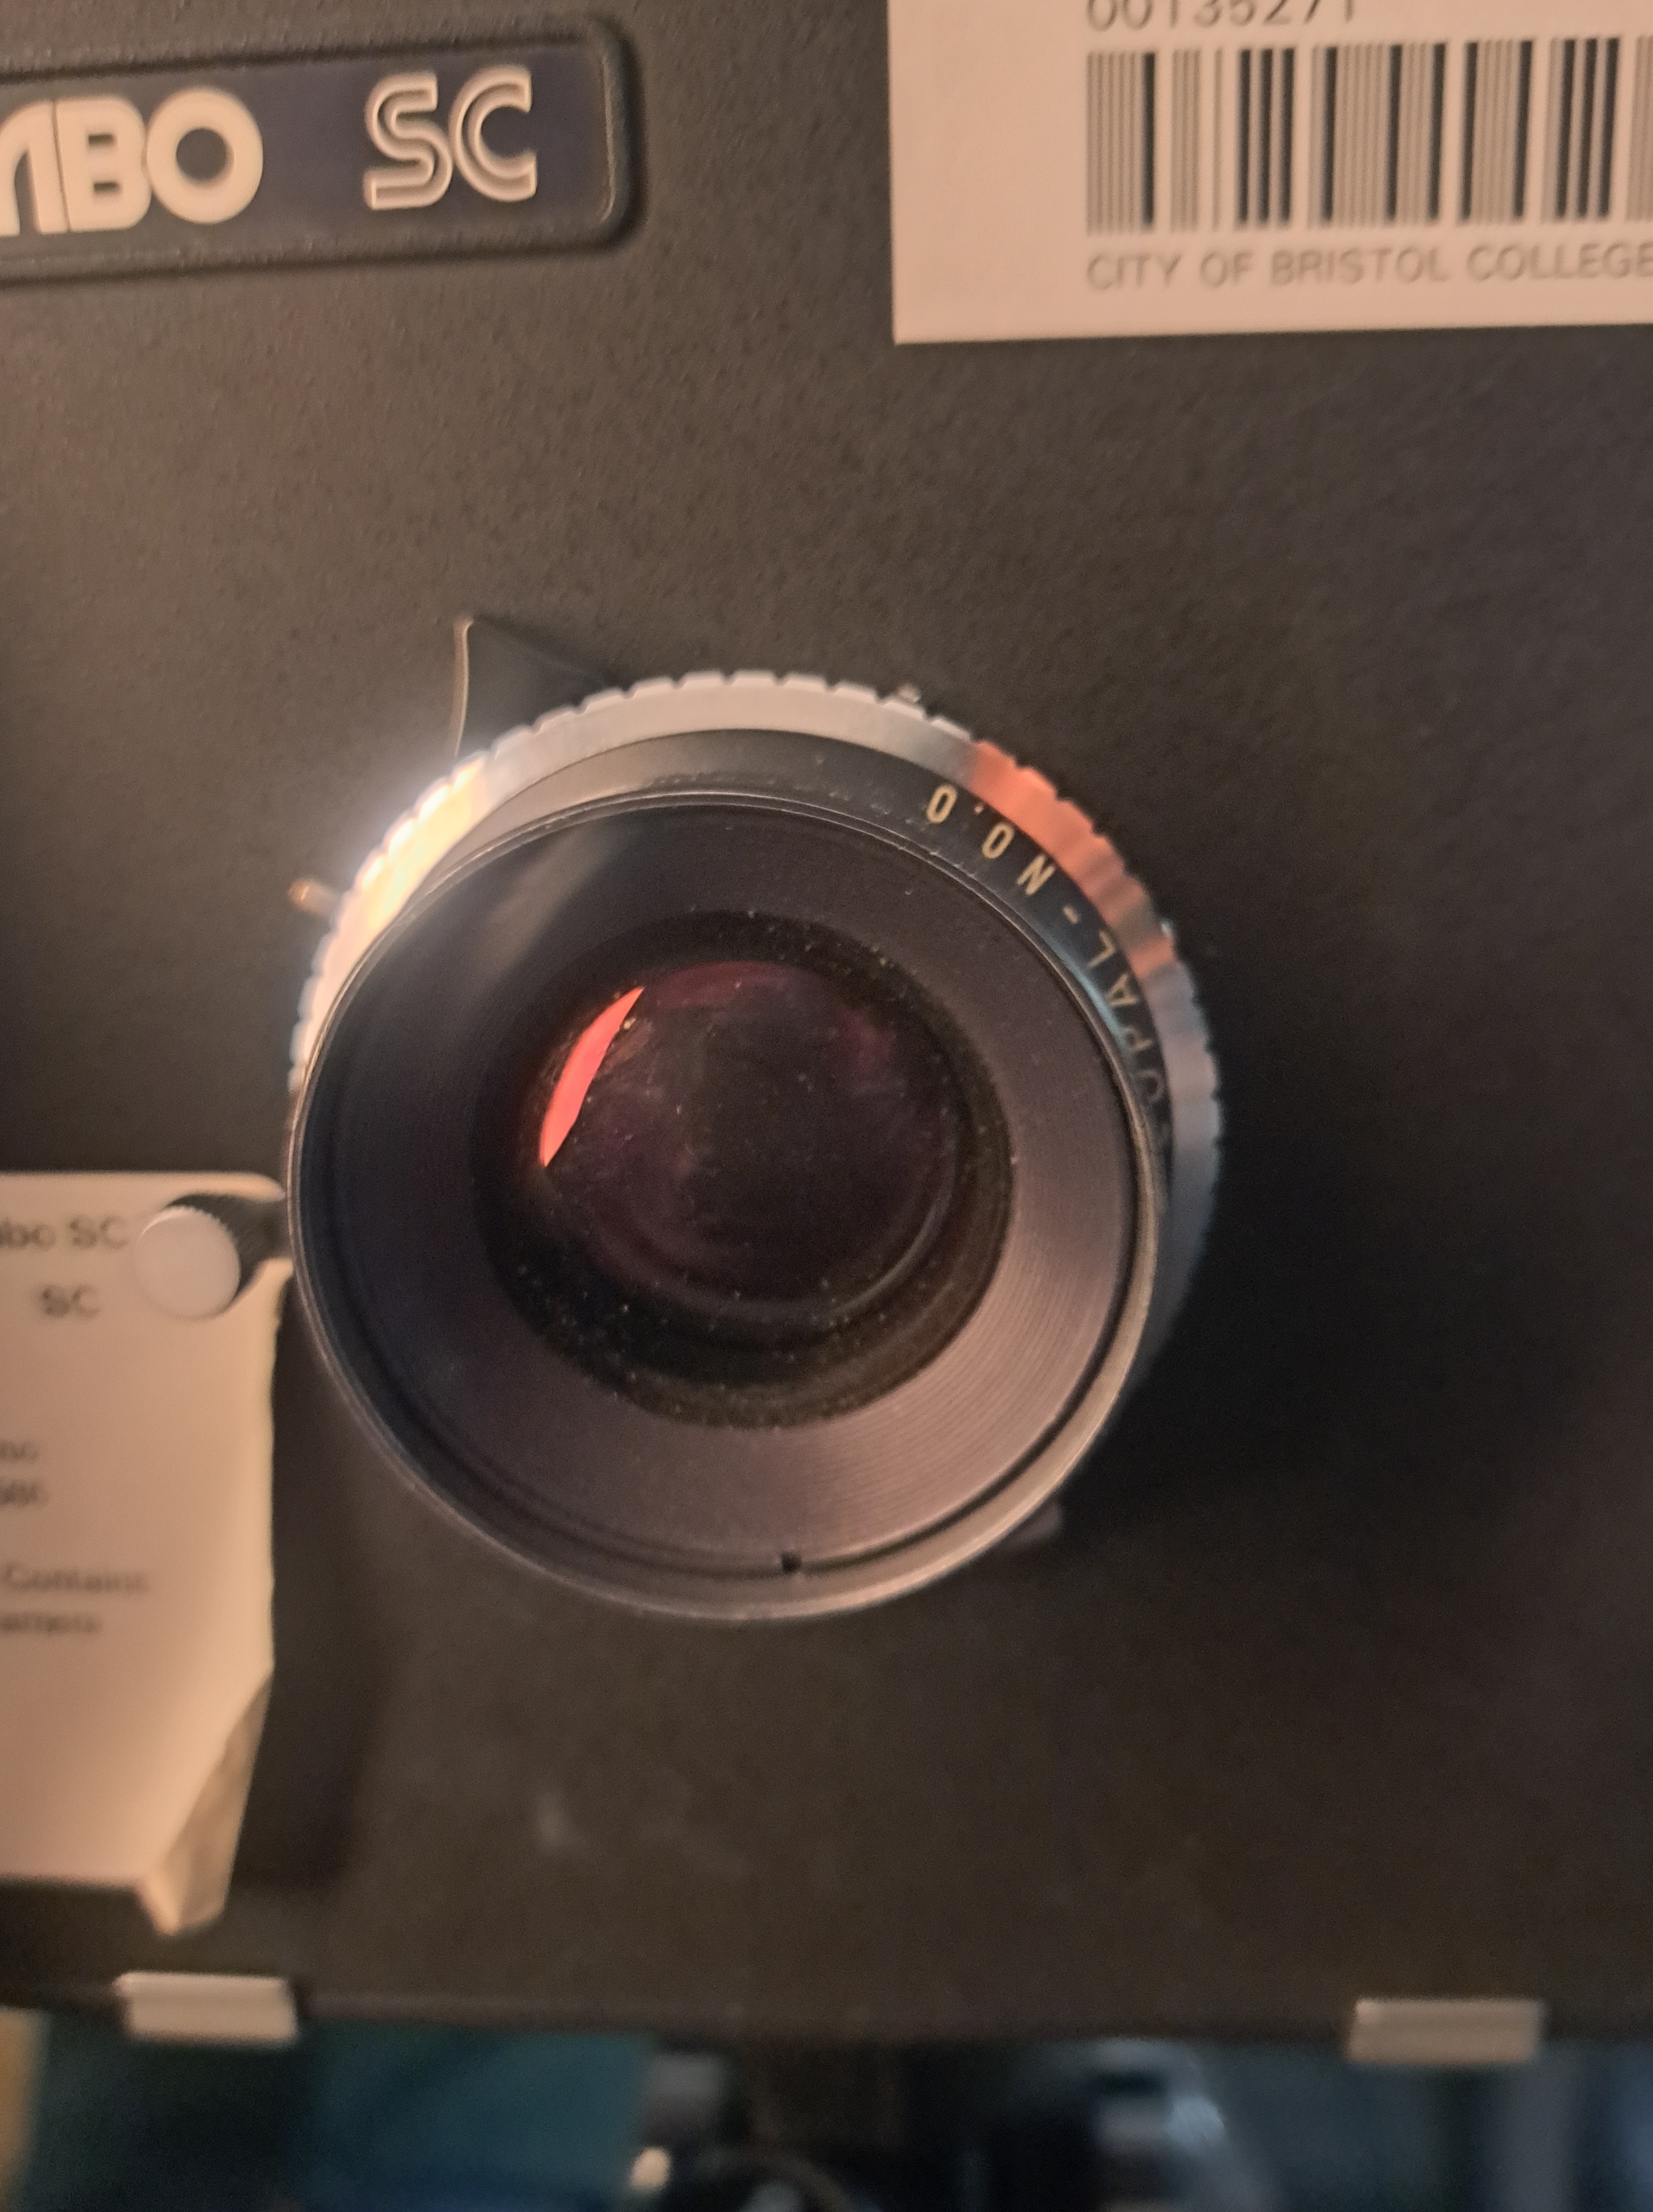
In order to get at the fundamental concept of how to carry out the double exposure, I would first want to experiment with all three versions of the camera in the studio. After that, I will choose which one is the most appropriate and effective for me to make use of. The three cameras that I have practised and explored are Combo SC (Large format), Mamiya RB67 (Medium format) and one of the 35mm compact film cameras.
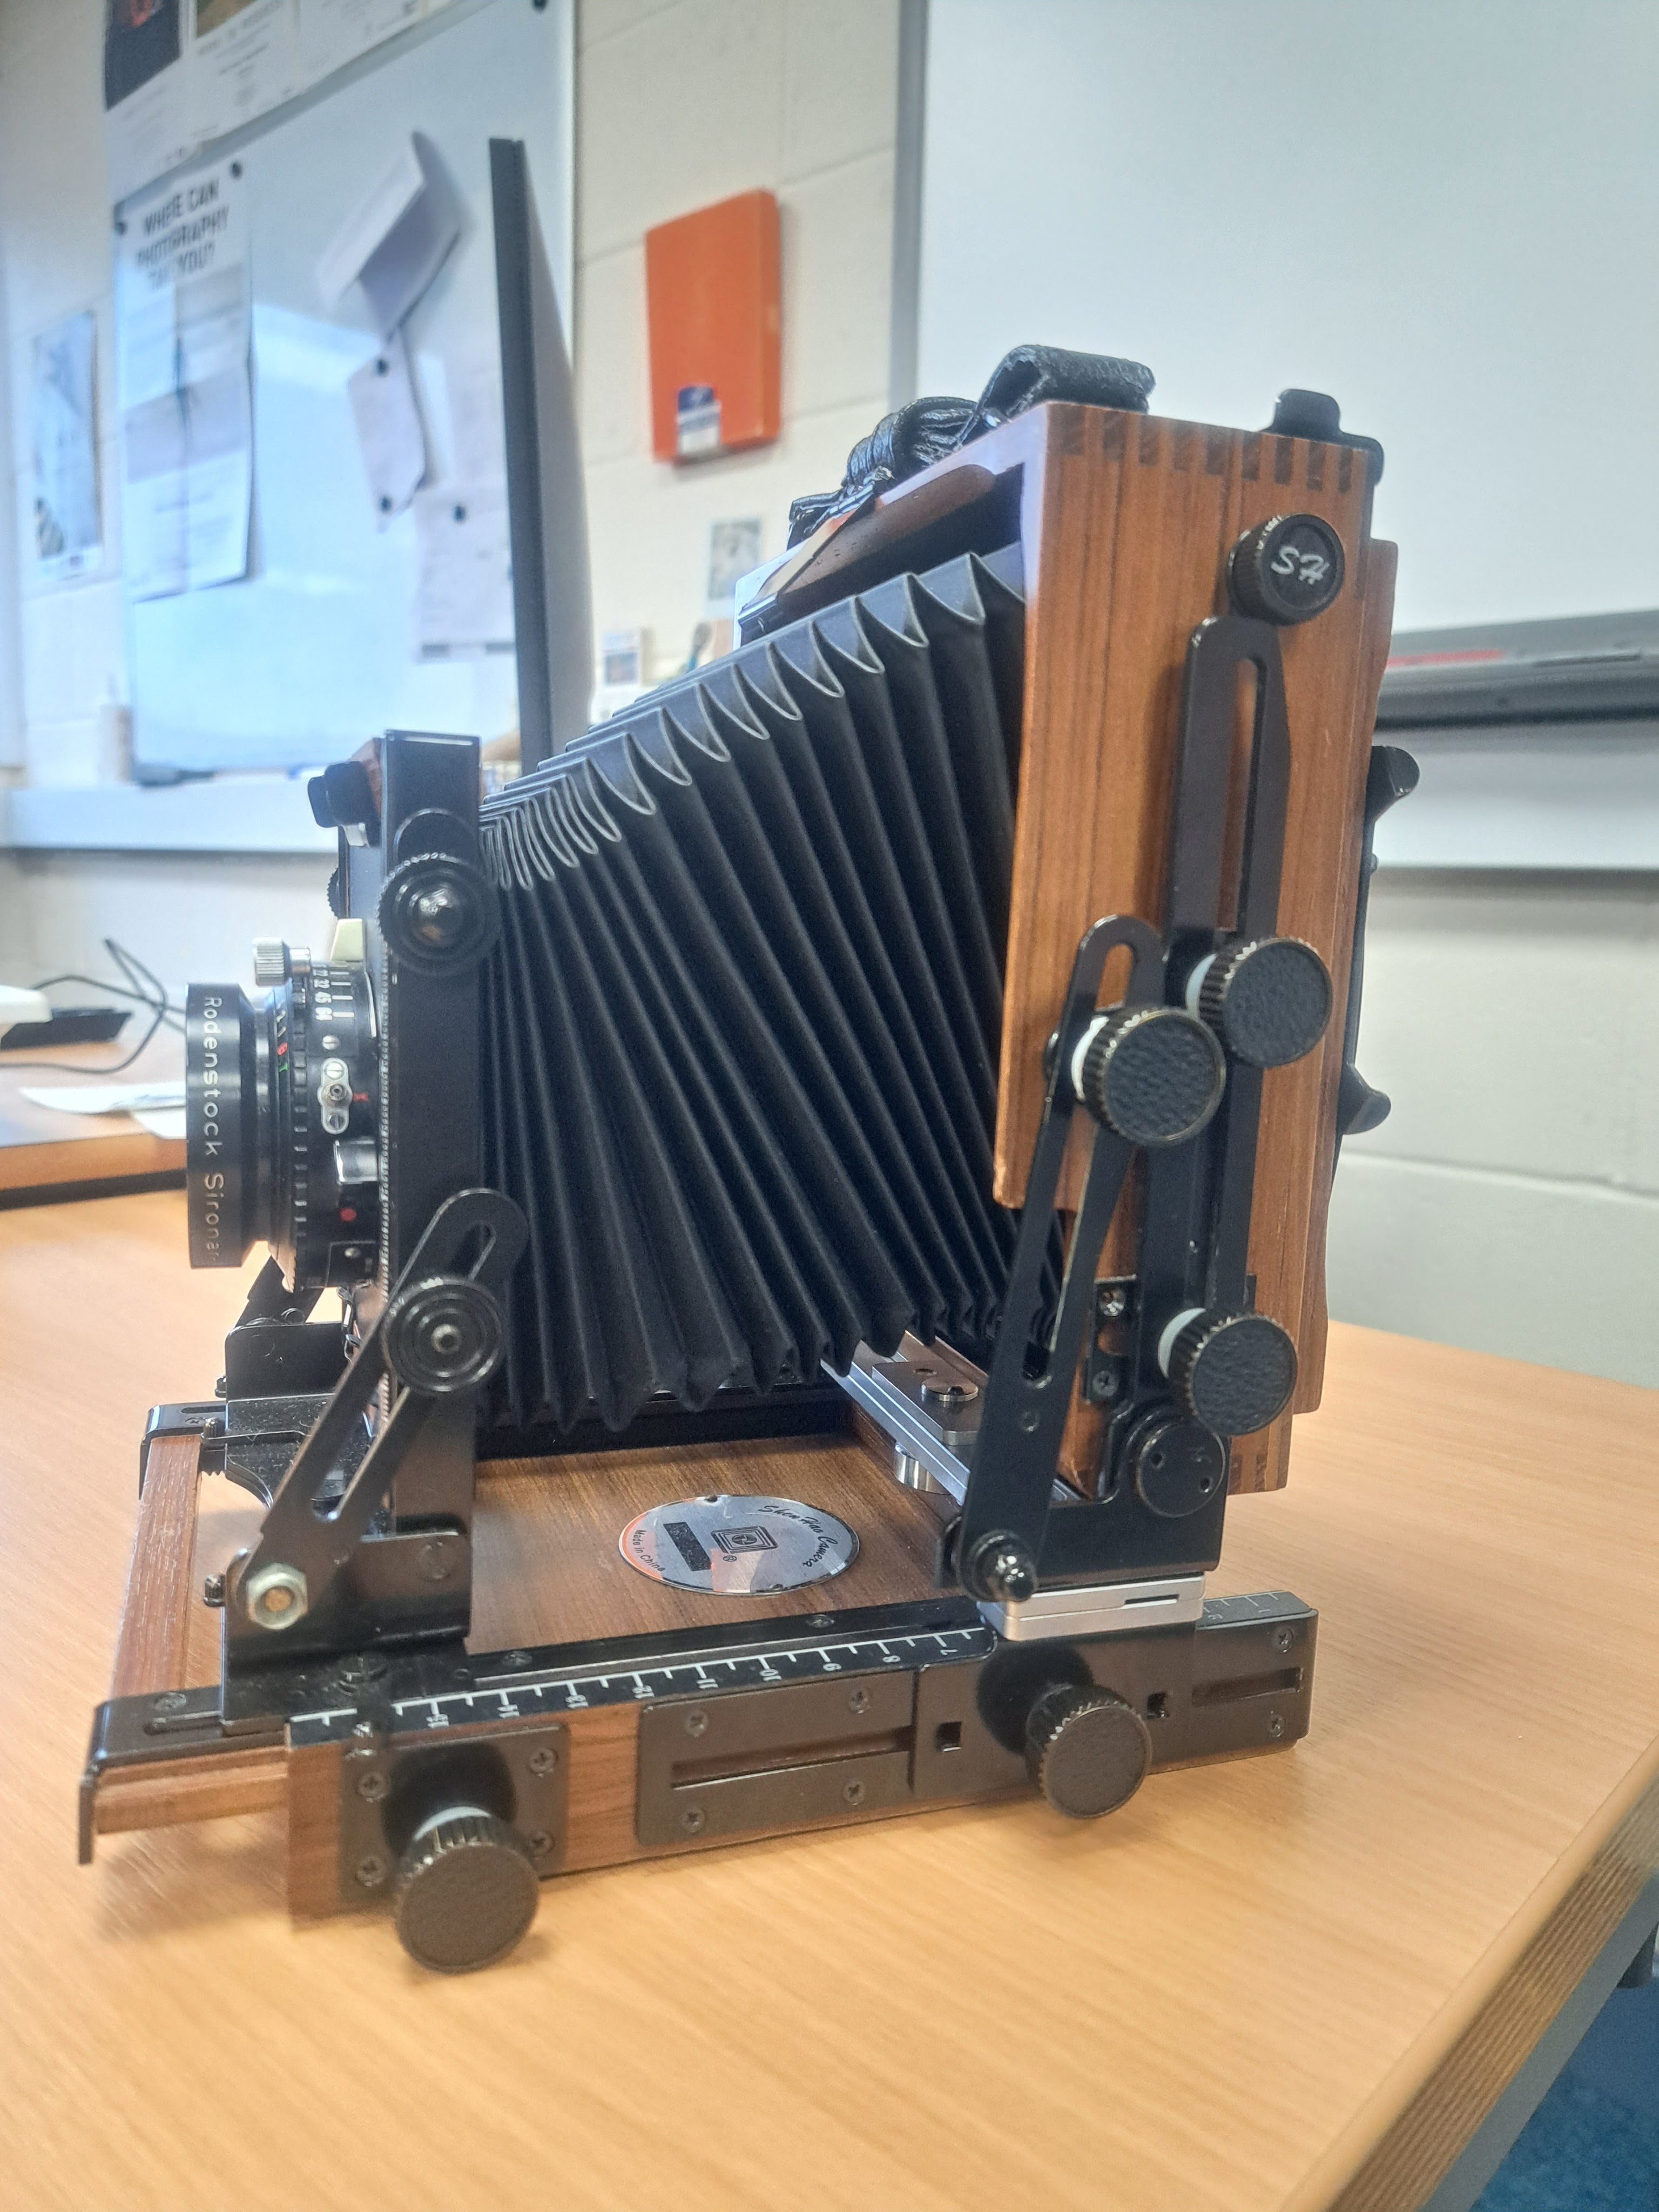
- Large format camera
Large Format Film-What is it?
Sheet film is often used in large-format film photography. Any photographic film that comes in rolls or sheets is referred to as sheet film (as opposed to 35mm, 70mm, 110mm, or other small film formats).
The term “large format” refers to all sheet film formats, ranging from 4″ x 5″ to 20″ x 24″. The phrase “large format” doesn’t provide a precise size.
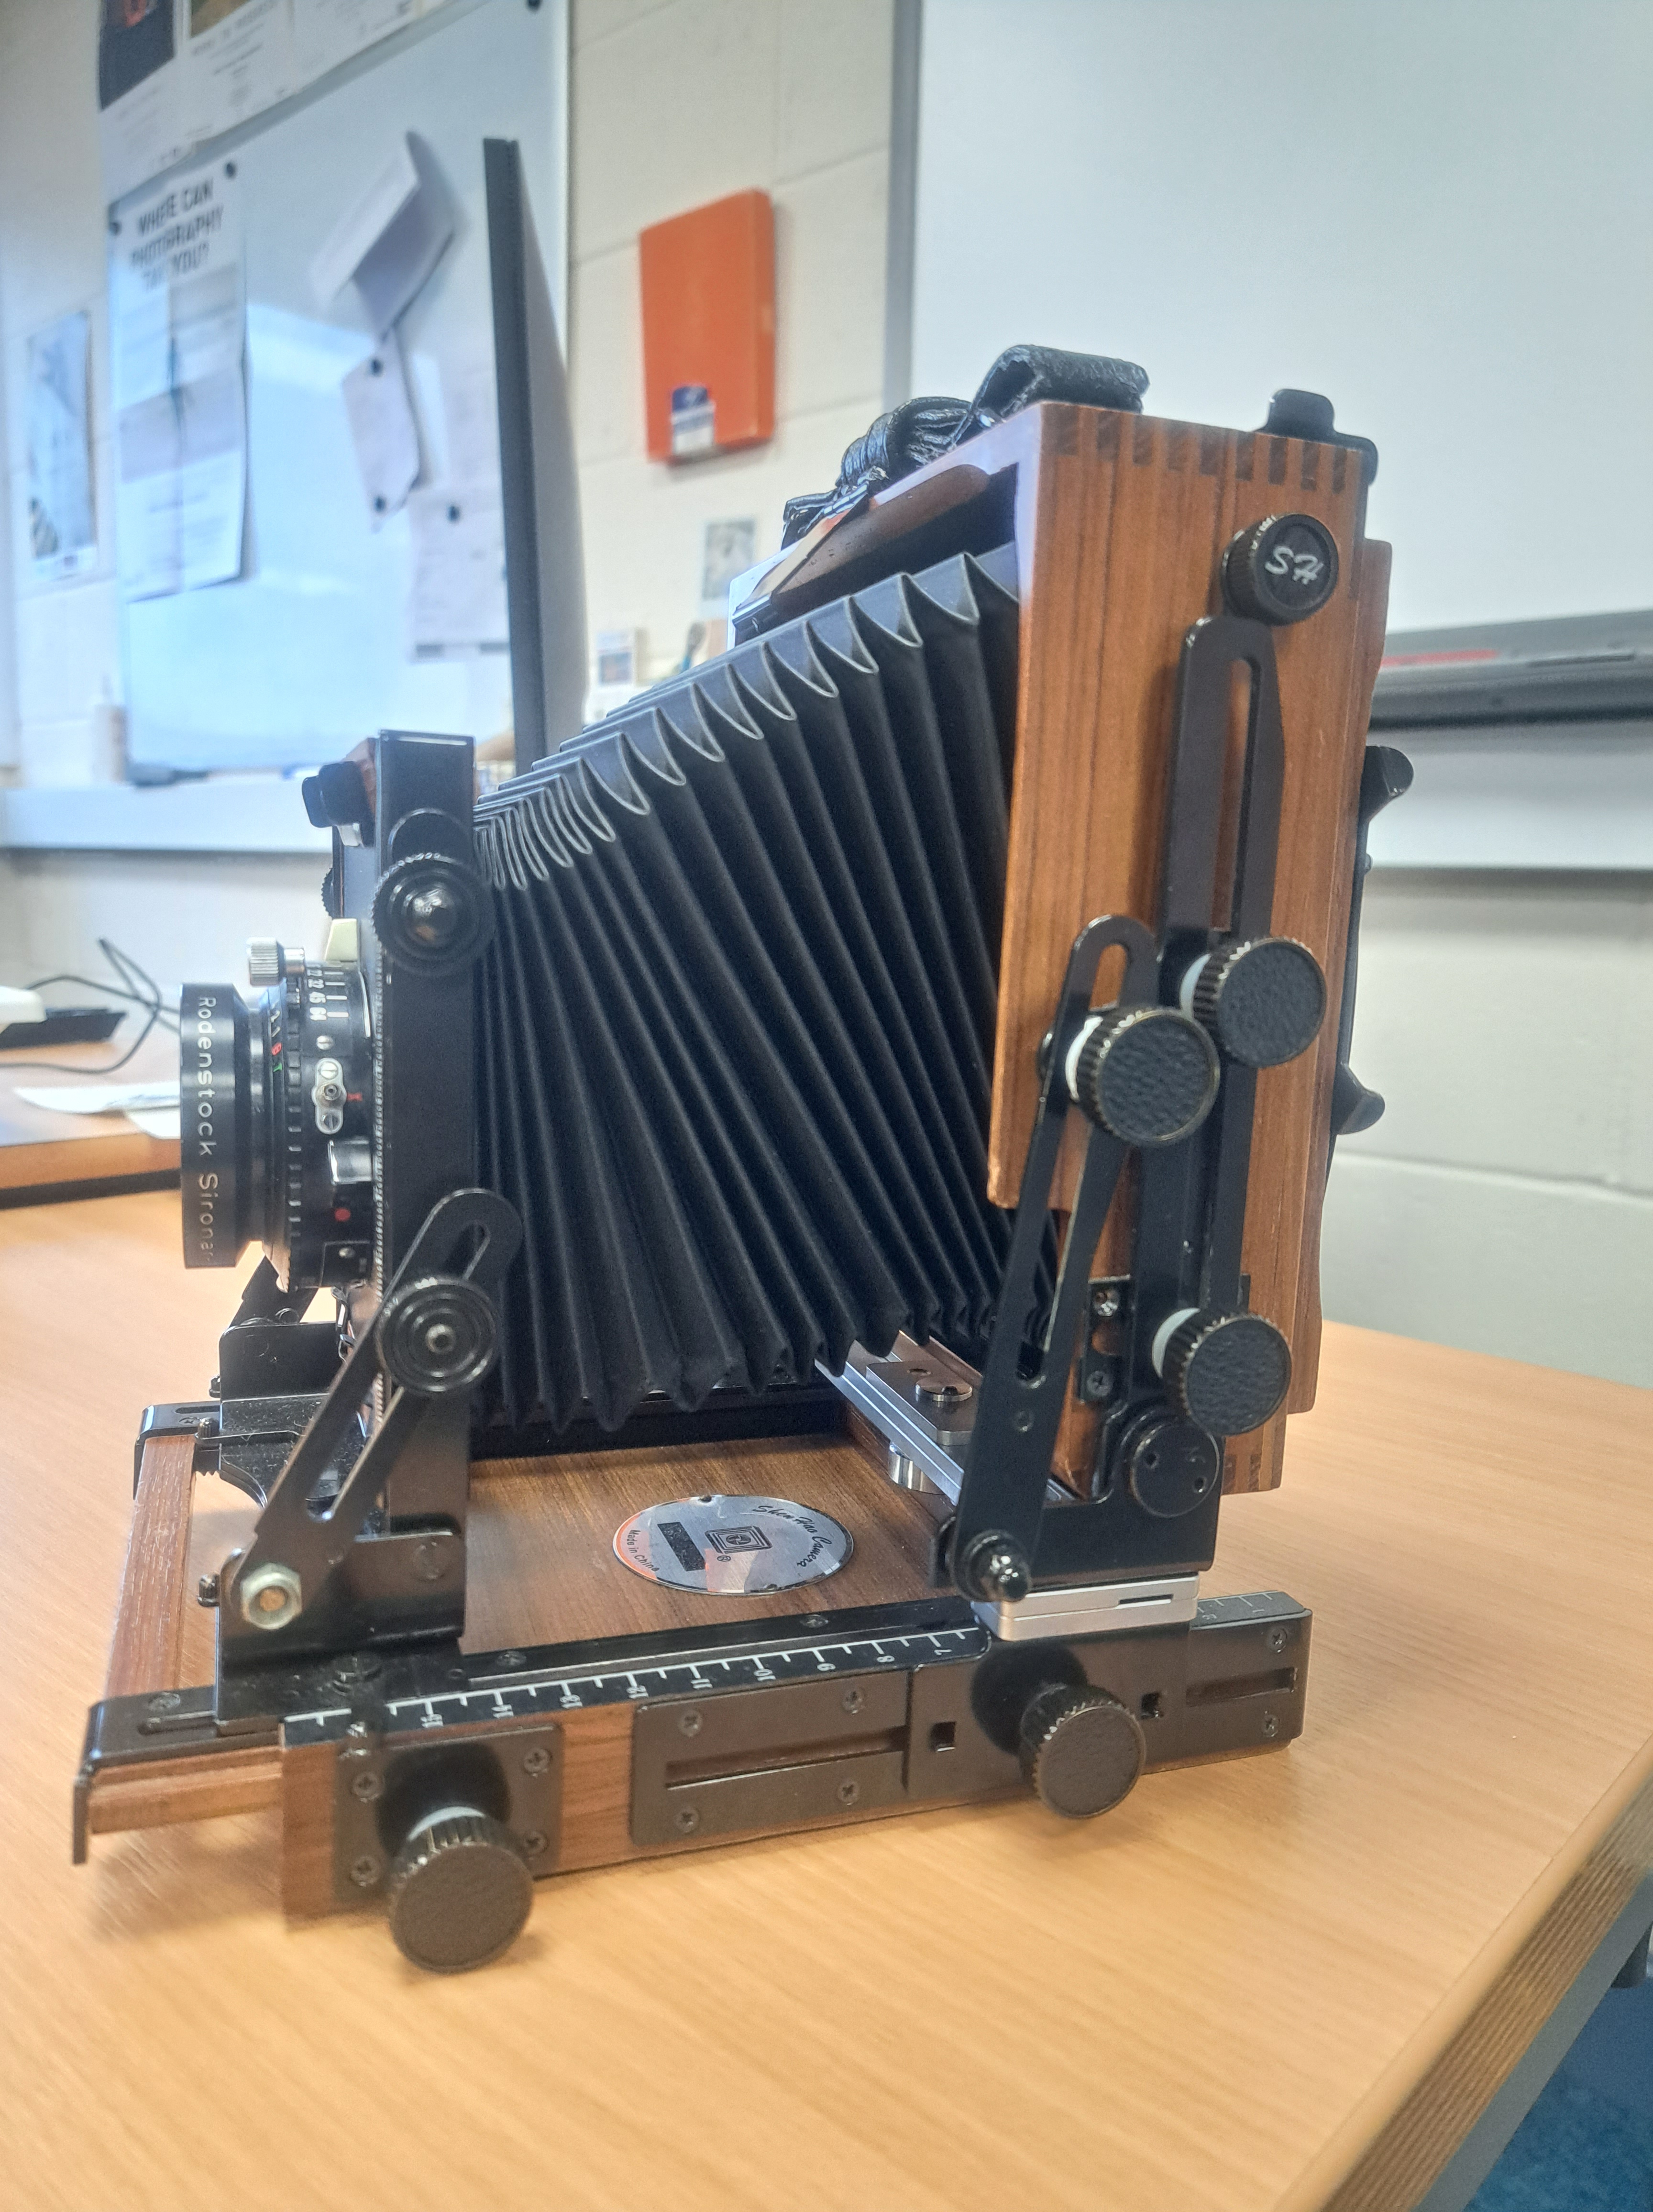
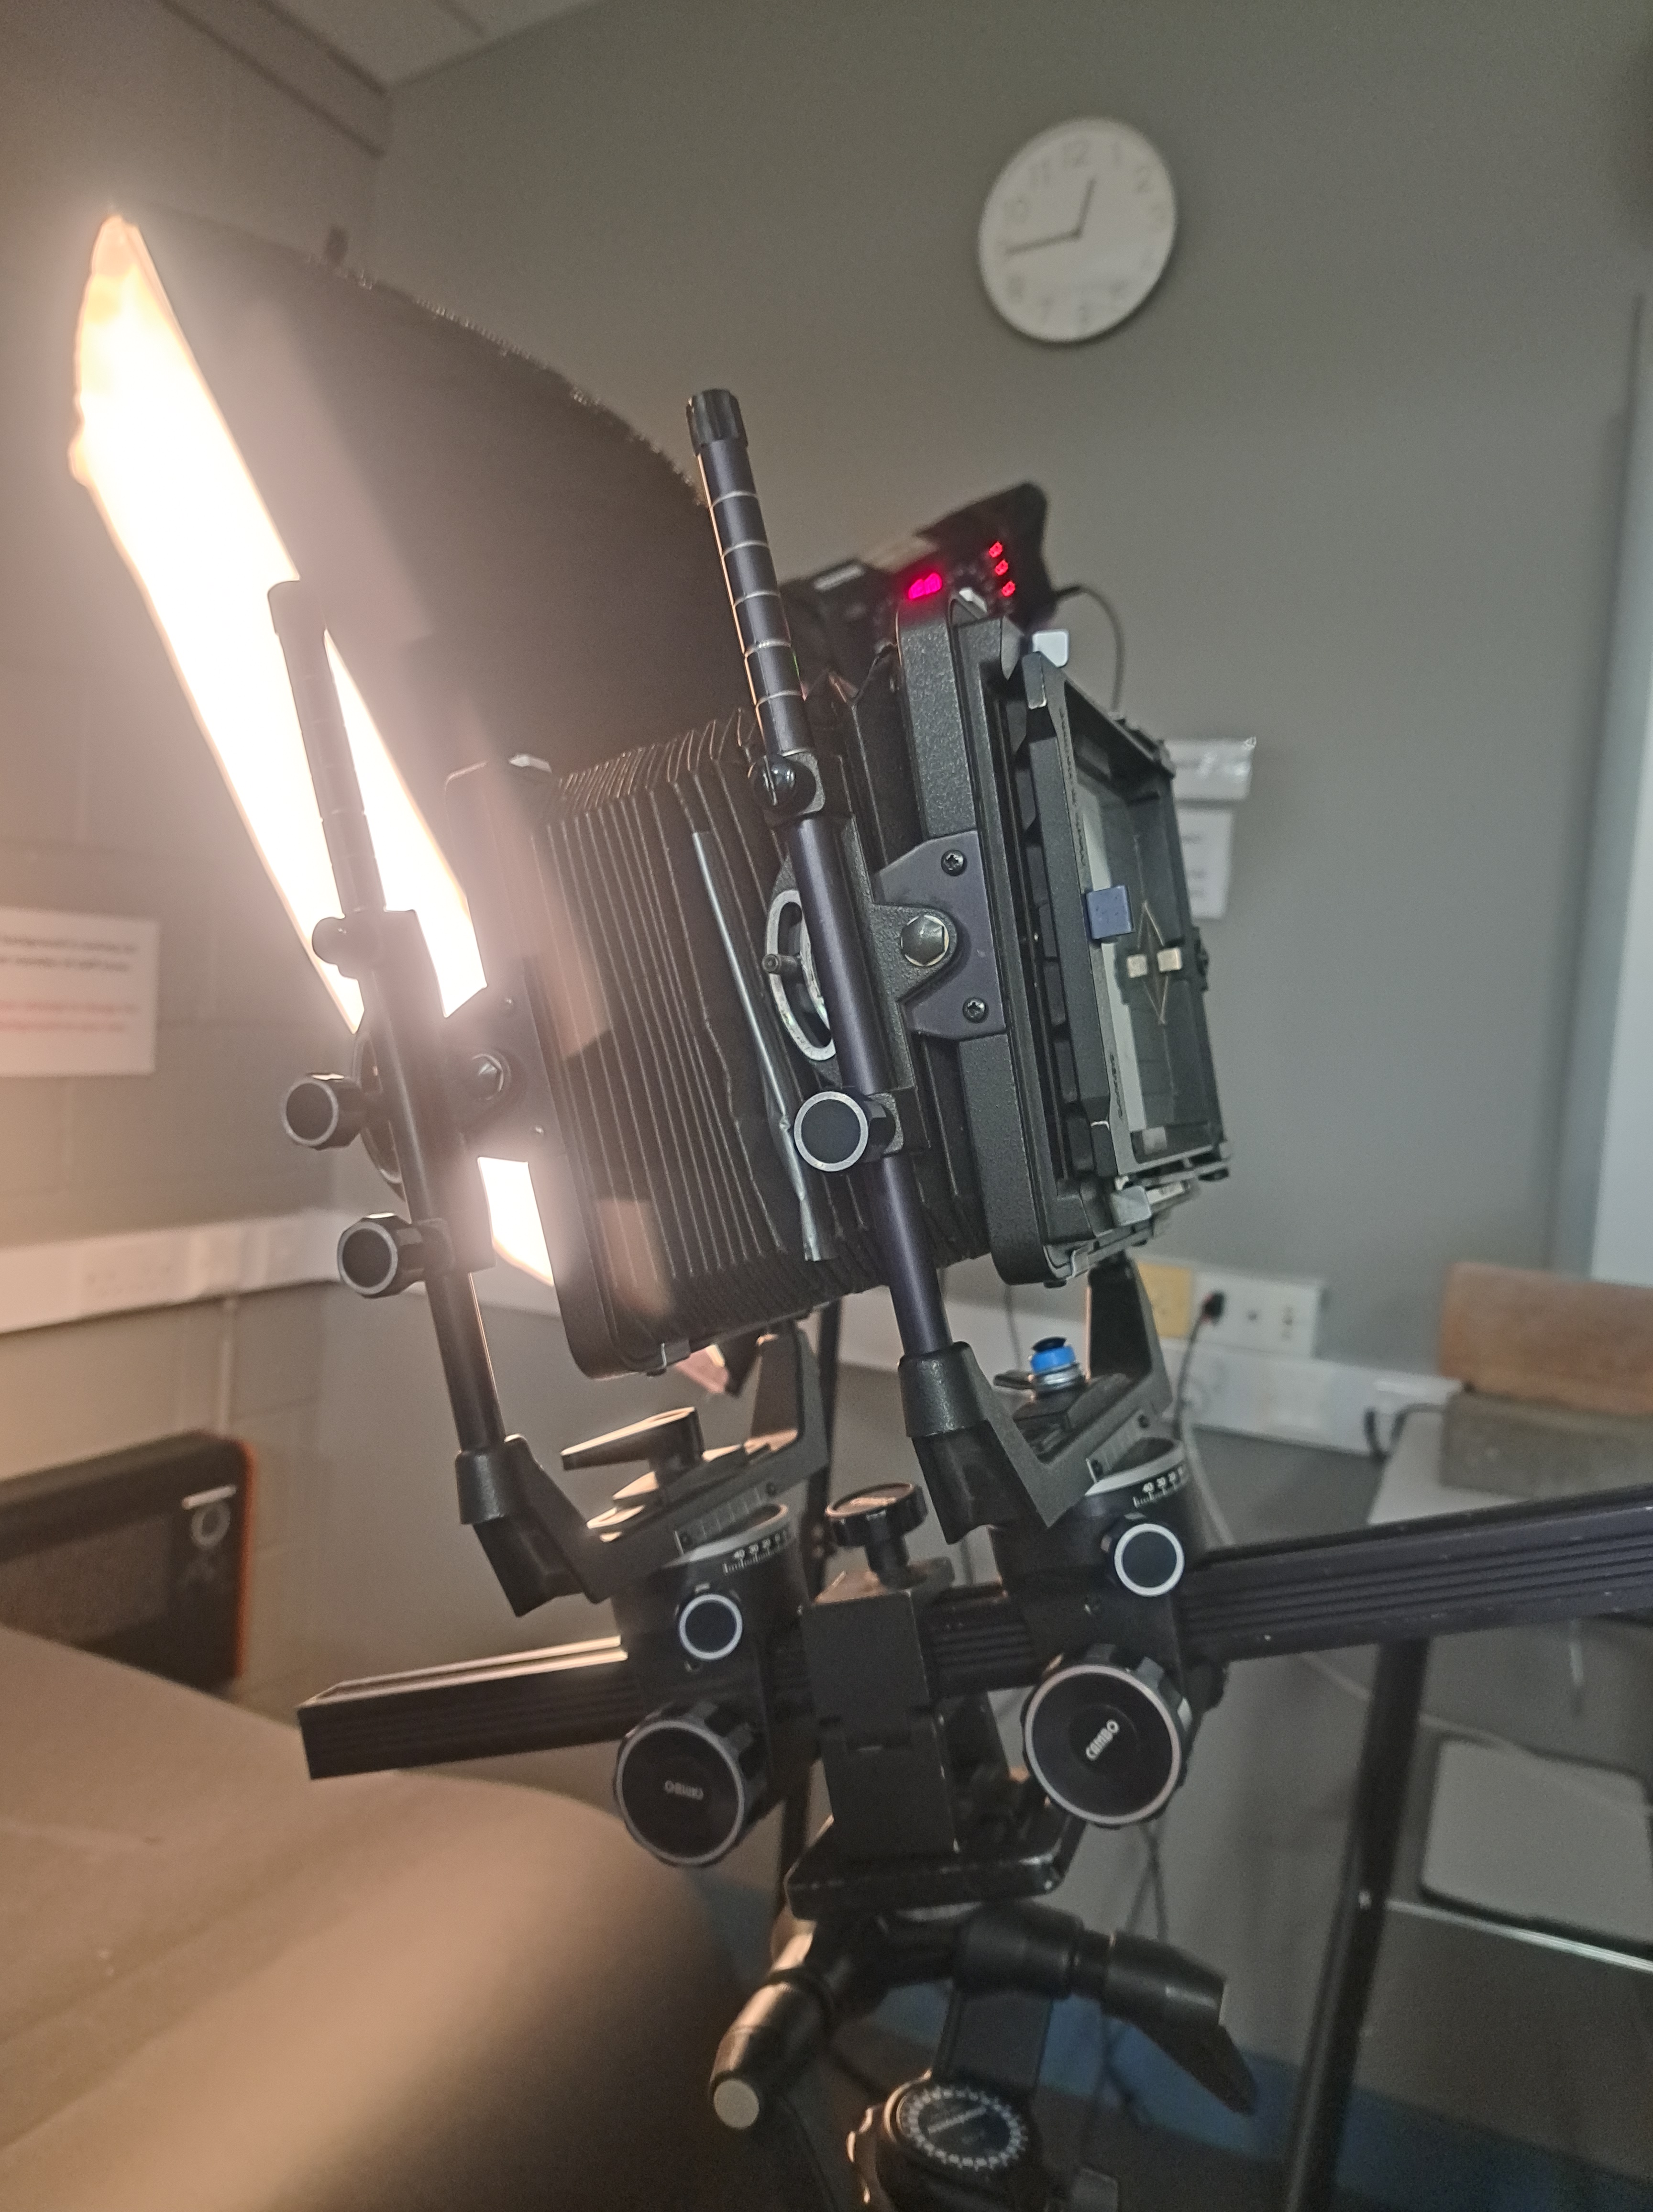
Utilizing specific cameras and film formats that are bigger than the majority of ordinary photographic equipment are known as large-format film photography. Large Format Film, LF Photography, and Large Camera Photography are other names for large format film photography.
There is no reason to think that having more is necessarily better—the first cameras were big format. Larger formats are often more flexible when it comes to focusing, depth of field, and other technical elements.
However, a bigger format is unquestionably superior when you need to produce vast enlargements print from little negatives or require perfect clarity.
My pros and cons:
Pros side: The capacity to adjust perspective by using movements like tilts, swings, and shifts; incredibly sharp pictures with a wide depth of field.
Before as Negative and after inverted to positive with photoshop.
Cons side: It is quite heavy, needs a big, solid tripod to support it, and requires practice before anyone can rapidly get used to using it in a studio or outdoors.
- Medium Format Camera
Medium format cameras use 120 film or digital image sensors that match that size. It takes photos somewhat smaller than large format film (102x127mm). They are larger than full-frame or 135 film photos. Medium-format sizes vary by manufacturer.
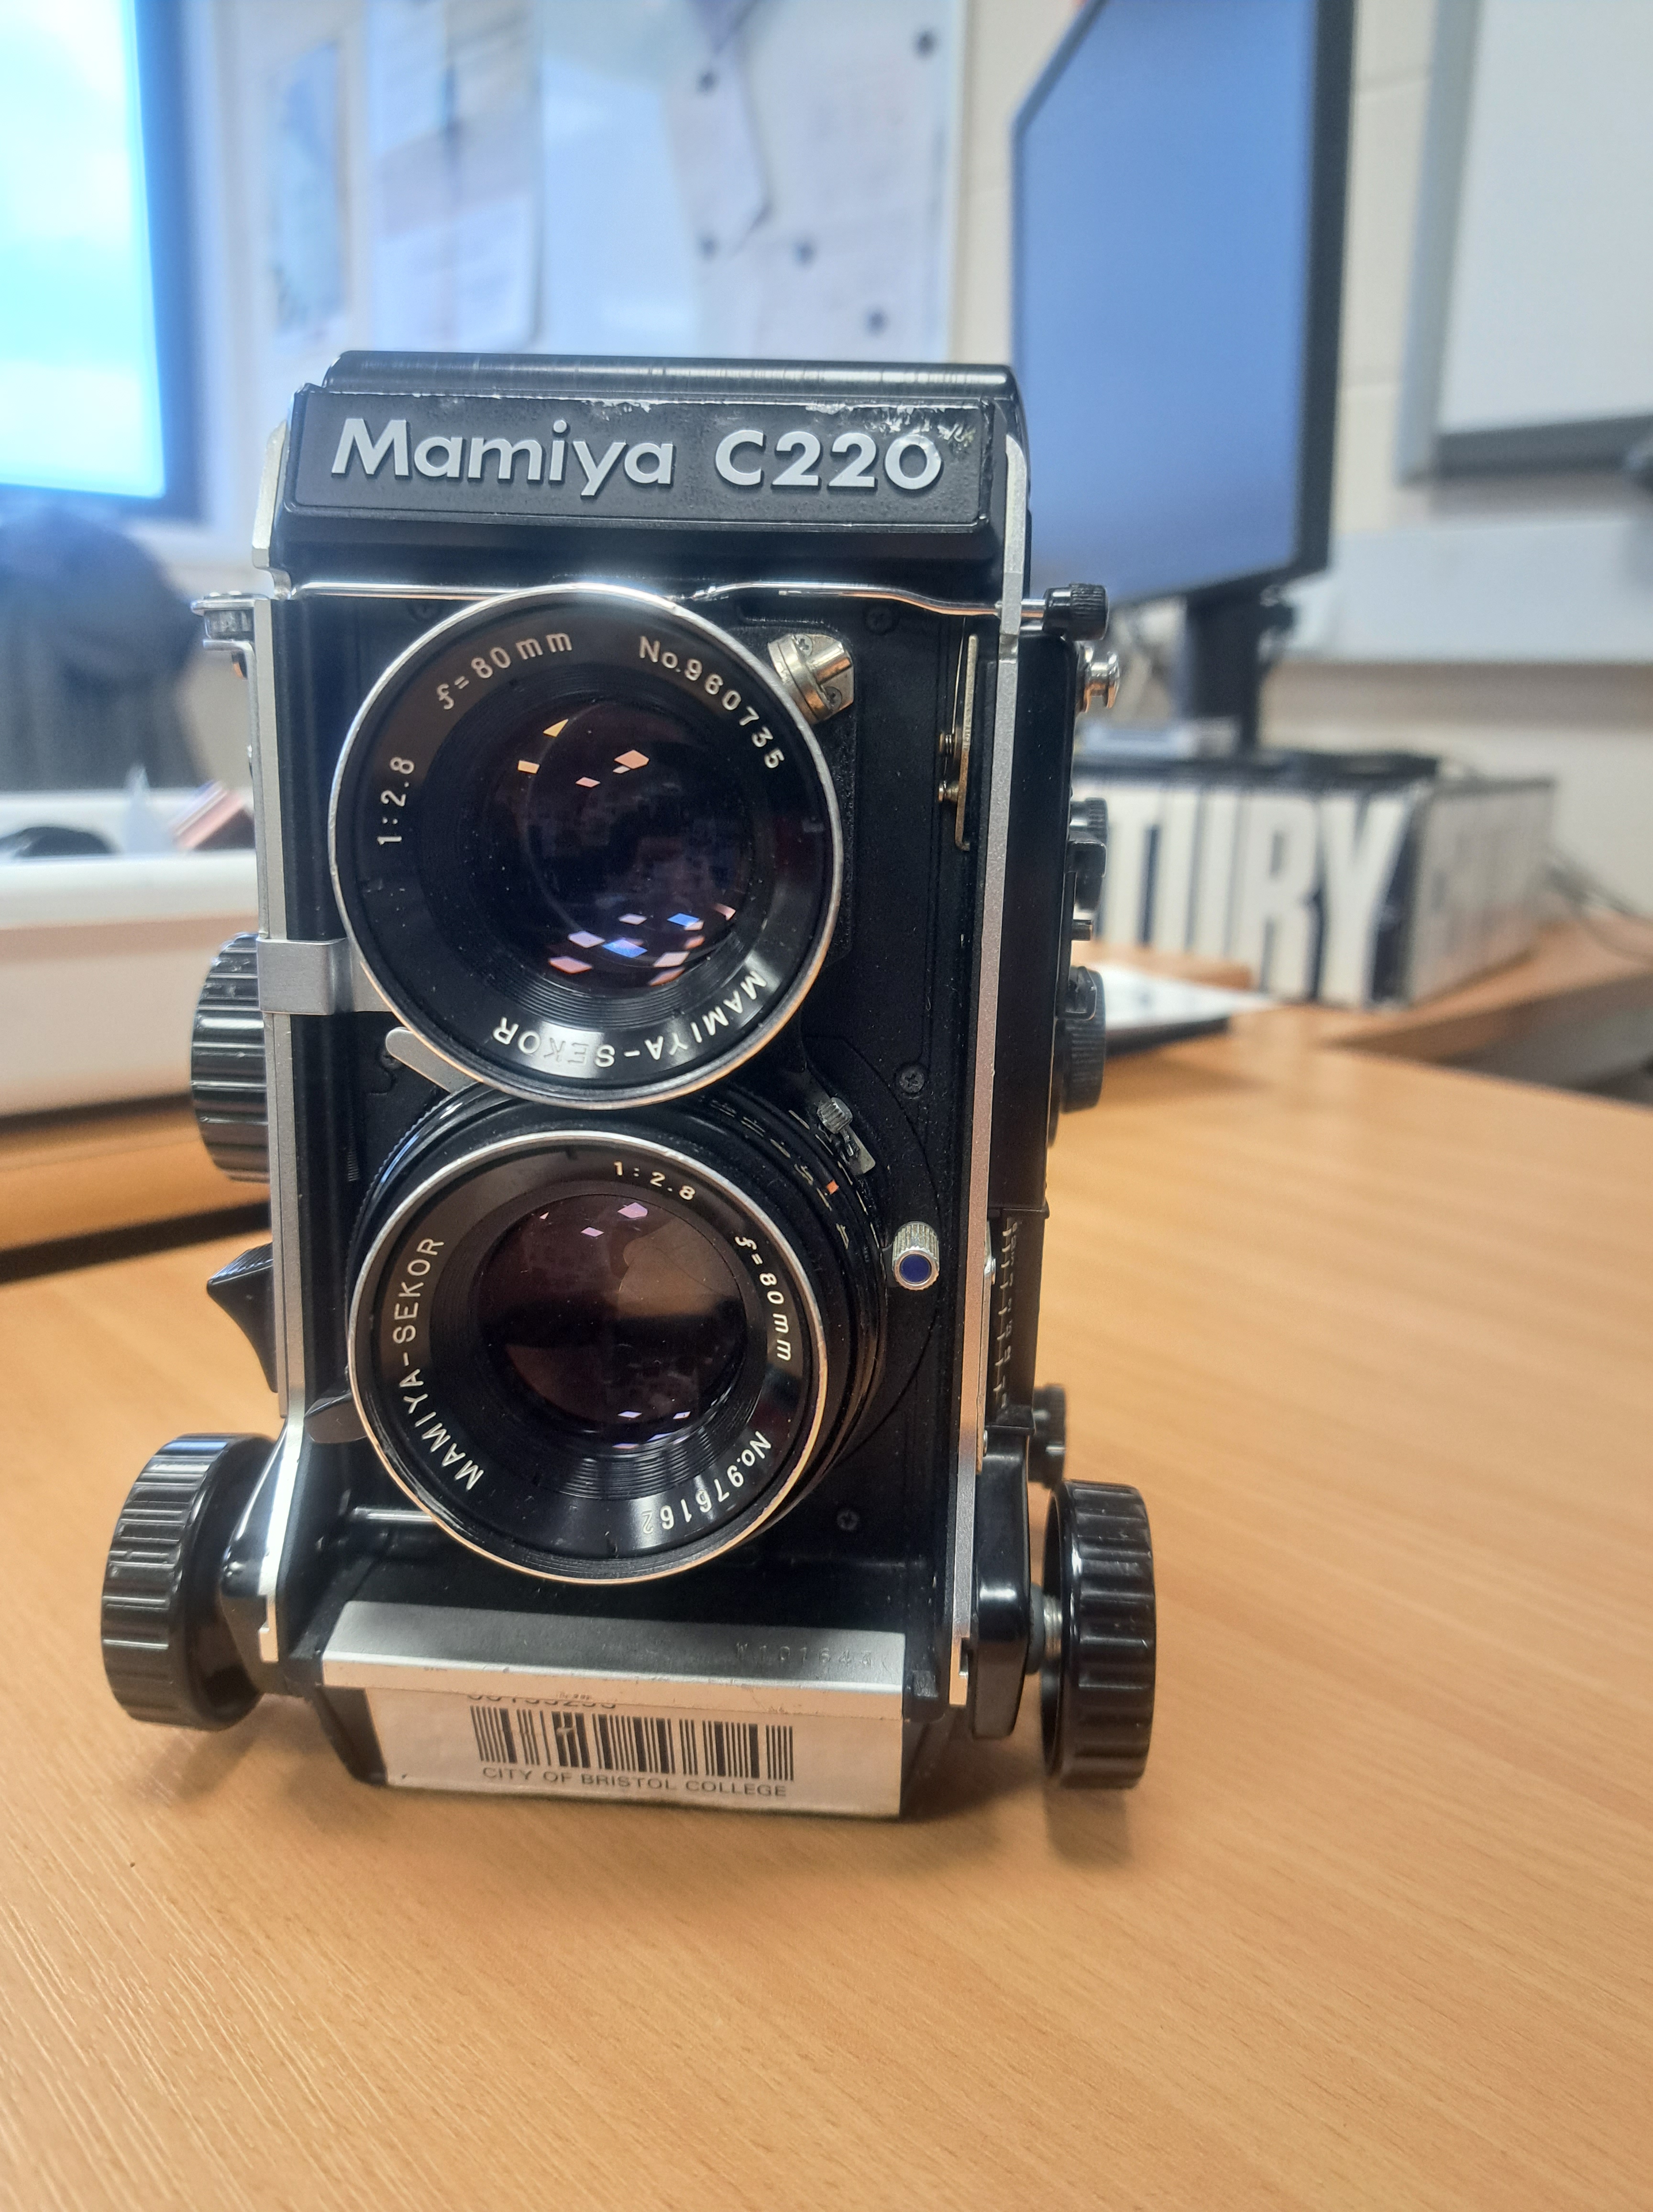

Medium-format cameras provide stunning images and near-perfect colour reproduction. Fashion and advertising photographers utilise this camera because of this. Medium format cameras are ideal for advertising, which demands huge, detailed photographs. Therefore, most magazine cover photoshoots prefer this camera.
Fashion photographers Terry O’Neill and David Bailey both use medium format. These 1960s and 1970s fashion photographers were popular. Both took fashion photographs using a Hasselblad medium format camera.
My Pros and Cons:
Pro side: When photographing inside or outdoors, the image quality is superior to the 35mm film camera, which can be carried in the palm of your hand for a limited amount of time. Additionally, the film is covered in paper to prevent the film from being accidentally exposed to light.
Cons side: It only contains twelve (12) film rolls, therefore you have to give importance to the red dot so that you don’t mix a single photo with a long exposure intention. You have to do the light measurement separately with a light meter because it has no light meter to measure the light.
- 35mm Film Camera
Operational with 35 negative film roll behind the camera. it is smaller than the medium-format camera, and you can carry it out in your everyday life inside your backpack when you needed to photograph something.
Pros and cons:
Pros side: Small, compact, it has 36 negatives film roll and it has a light meter side the viewfinder.
Cons: Double exposure is a little challenging to execute because some of the cameras have no film lever instead automatically advance to the next film once shot the shutter.
According to my research, I have decided to proceed with my project with a medium format camera, Mamiya RB67 and a 35mm film camera.
GENERAL RULES AND RISK ASSESSMENTS
Before starting to produce an image or develop images in the darkroom we are required to understand the general rules of being safe in the darkroom.
RULES IN GENERAL FOR DEVELOPING AND PROCESSING


To understand it well, I have listed the general rules as follows:
- Put on safety lights.
- In the dark, go slowly while holding your hands extended.
- For chemical baths, use tongs.
- Immediately mop up any spillage.
- Keep in mind that the wet area is for development and the dry section is for processing.
- Keep the enlarger lights off.
- Clean up any chemically exposed surfaces.
- Do not use chemicals near the dry bench.
- Do not use moist hands to interact with electrical equipment.
- Put on safety gloves.
- Protect any wounds with a waterproof plaster.
- After you’re done, wash your hands.
- Put sacks beneath seats and away from work areas.
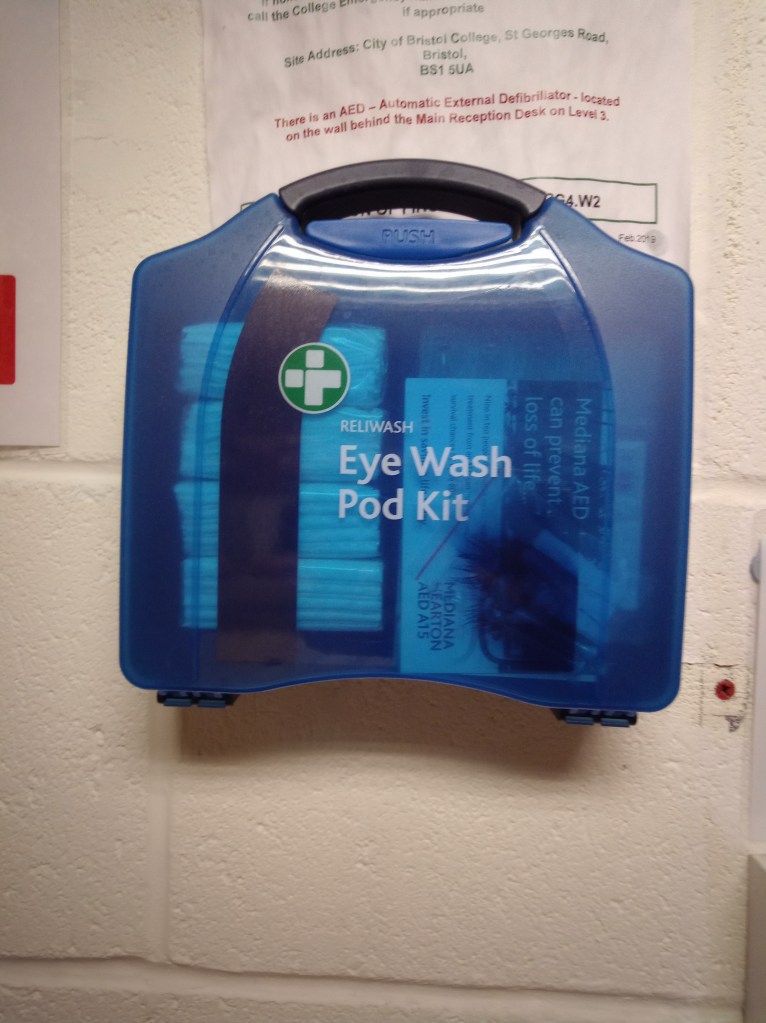
- Never rub your eyes or put your fingers in your mouth.
- Ensure that all equipment is available, dry, and clean.
- Ensure all chemicals are properly measured and ready to use (not dead chemicals)
- Avoid spilling when pouring chemicals
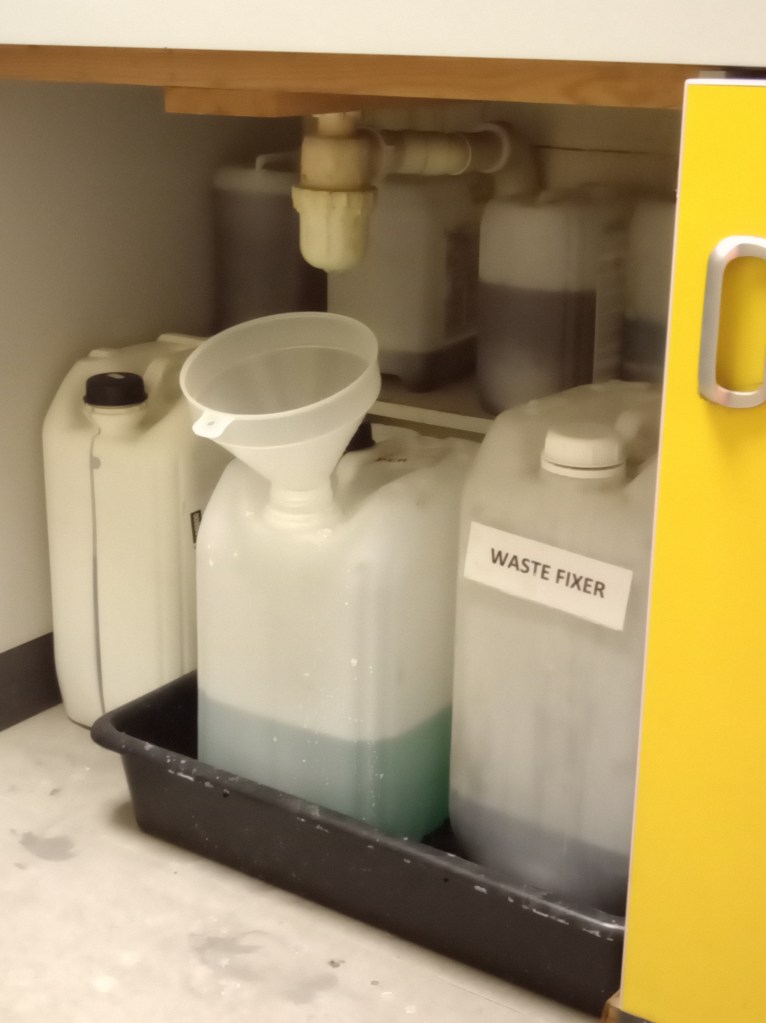
- The Developer pours it into the waste container after use, and the fixer is stored back where it came from as the fixer is reused in some sort of period of time.
- Before turning off the white light, combine all the ingredients and use the proper equipment.
- Before entering the darkroom, knock.
- Avoid prolonged chemical contact.
- Do not eat, drink or smoke in the dark room.
- Negatives and papers that have not been developed or processed should not be exposed to light.
- Display all necessary warning lists in the darkroom and door to remind our-self
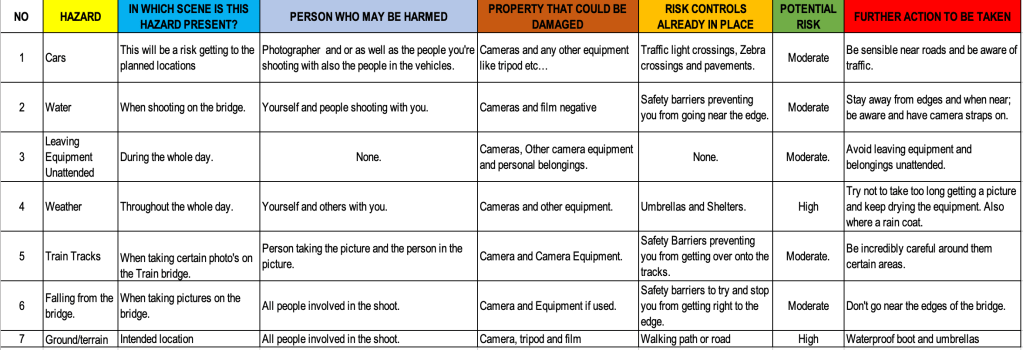
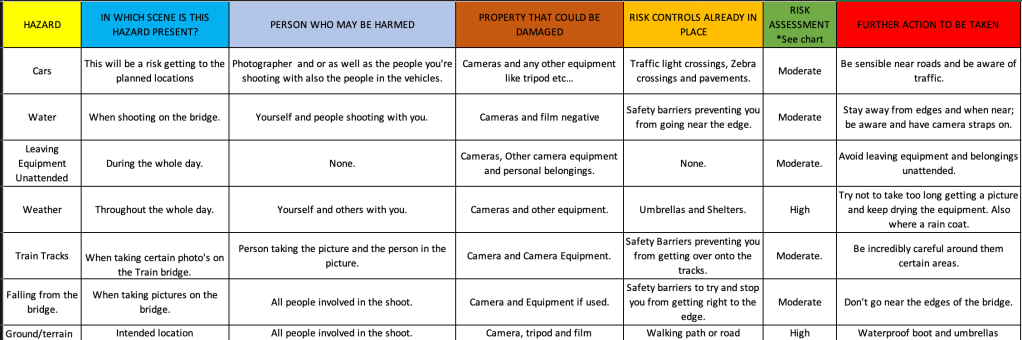
RISK ASSESSMENTS
- Shoot outdoor Risk Assessment
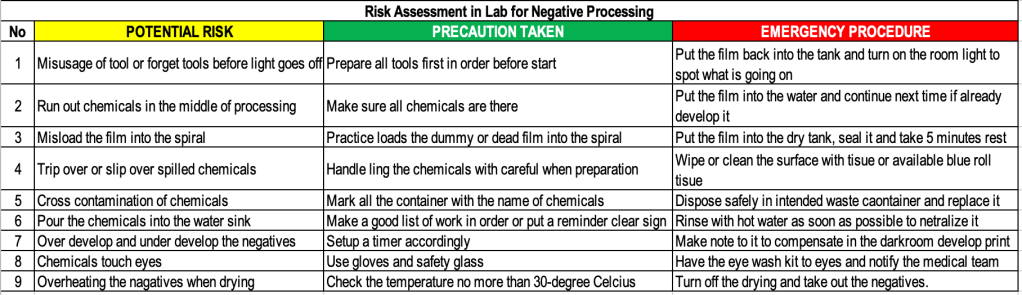
- Processing Negative Risk Assessment
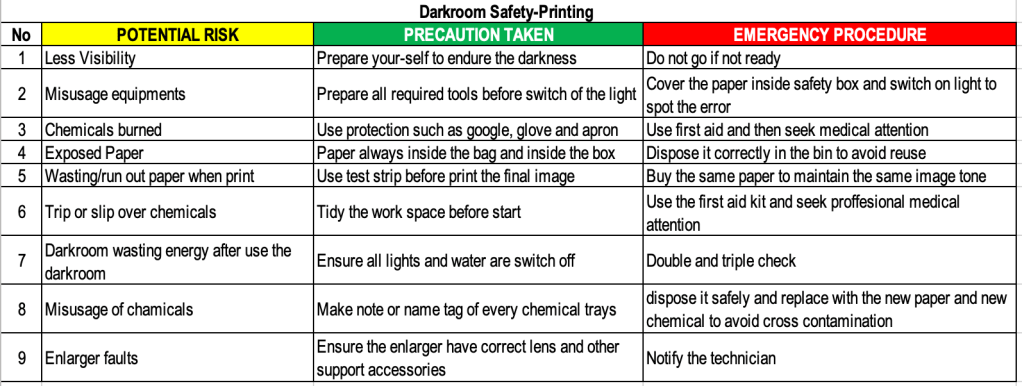
- Develop Print in the Darkroom Risk Assessment
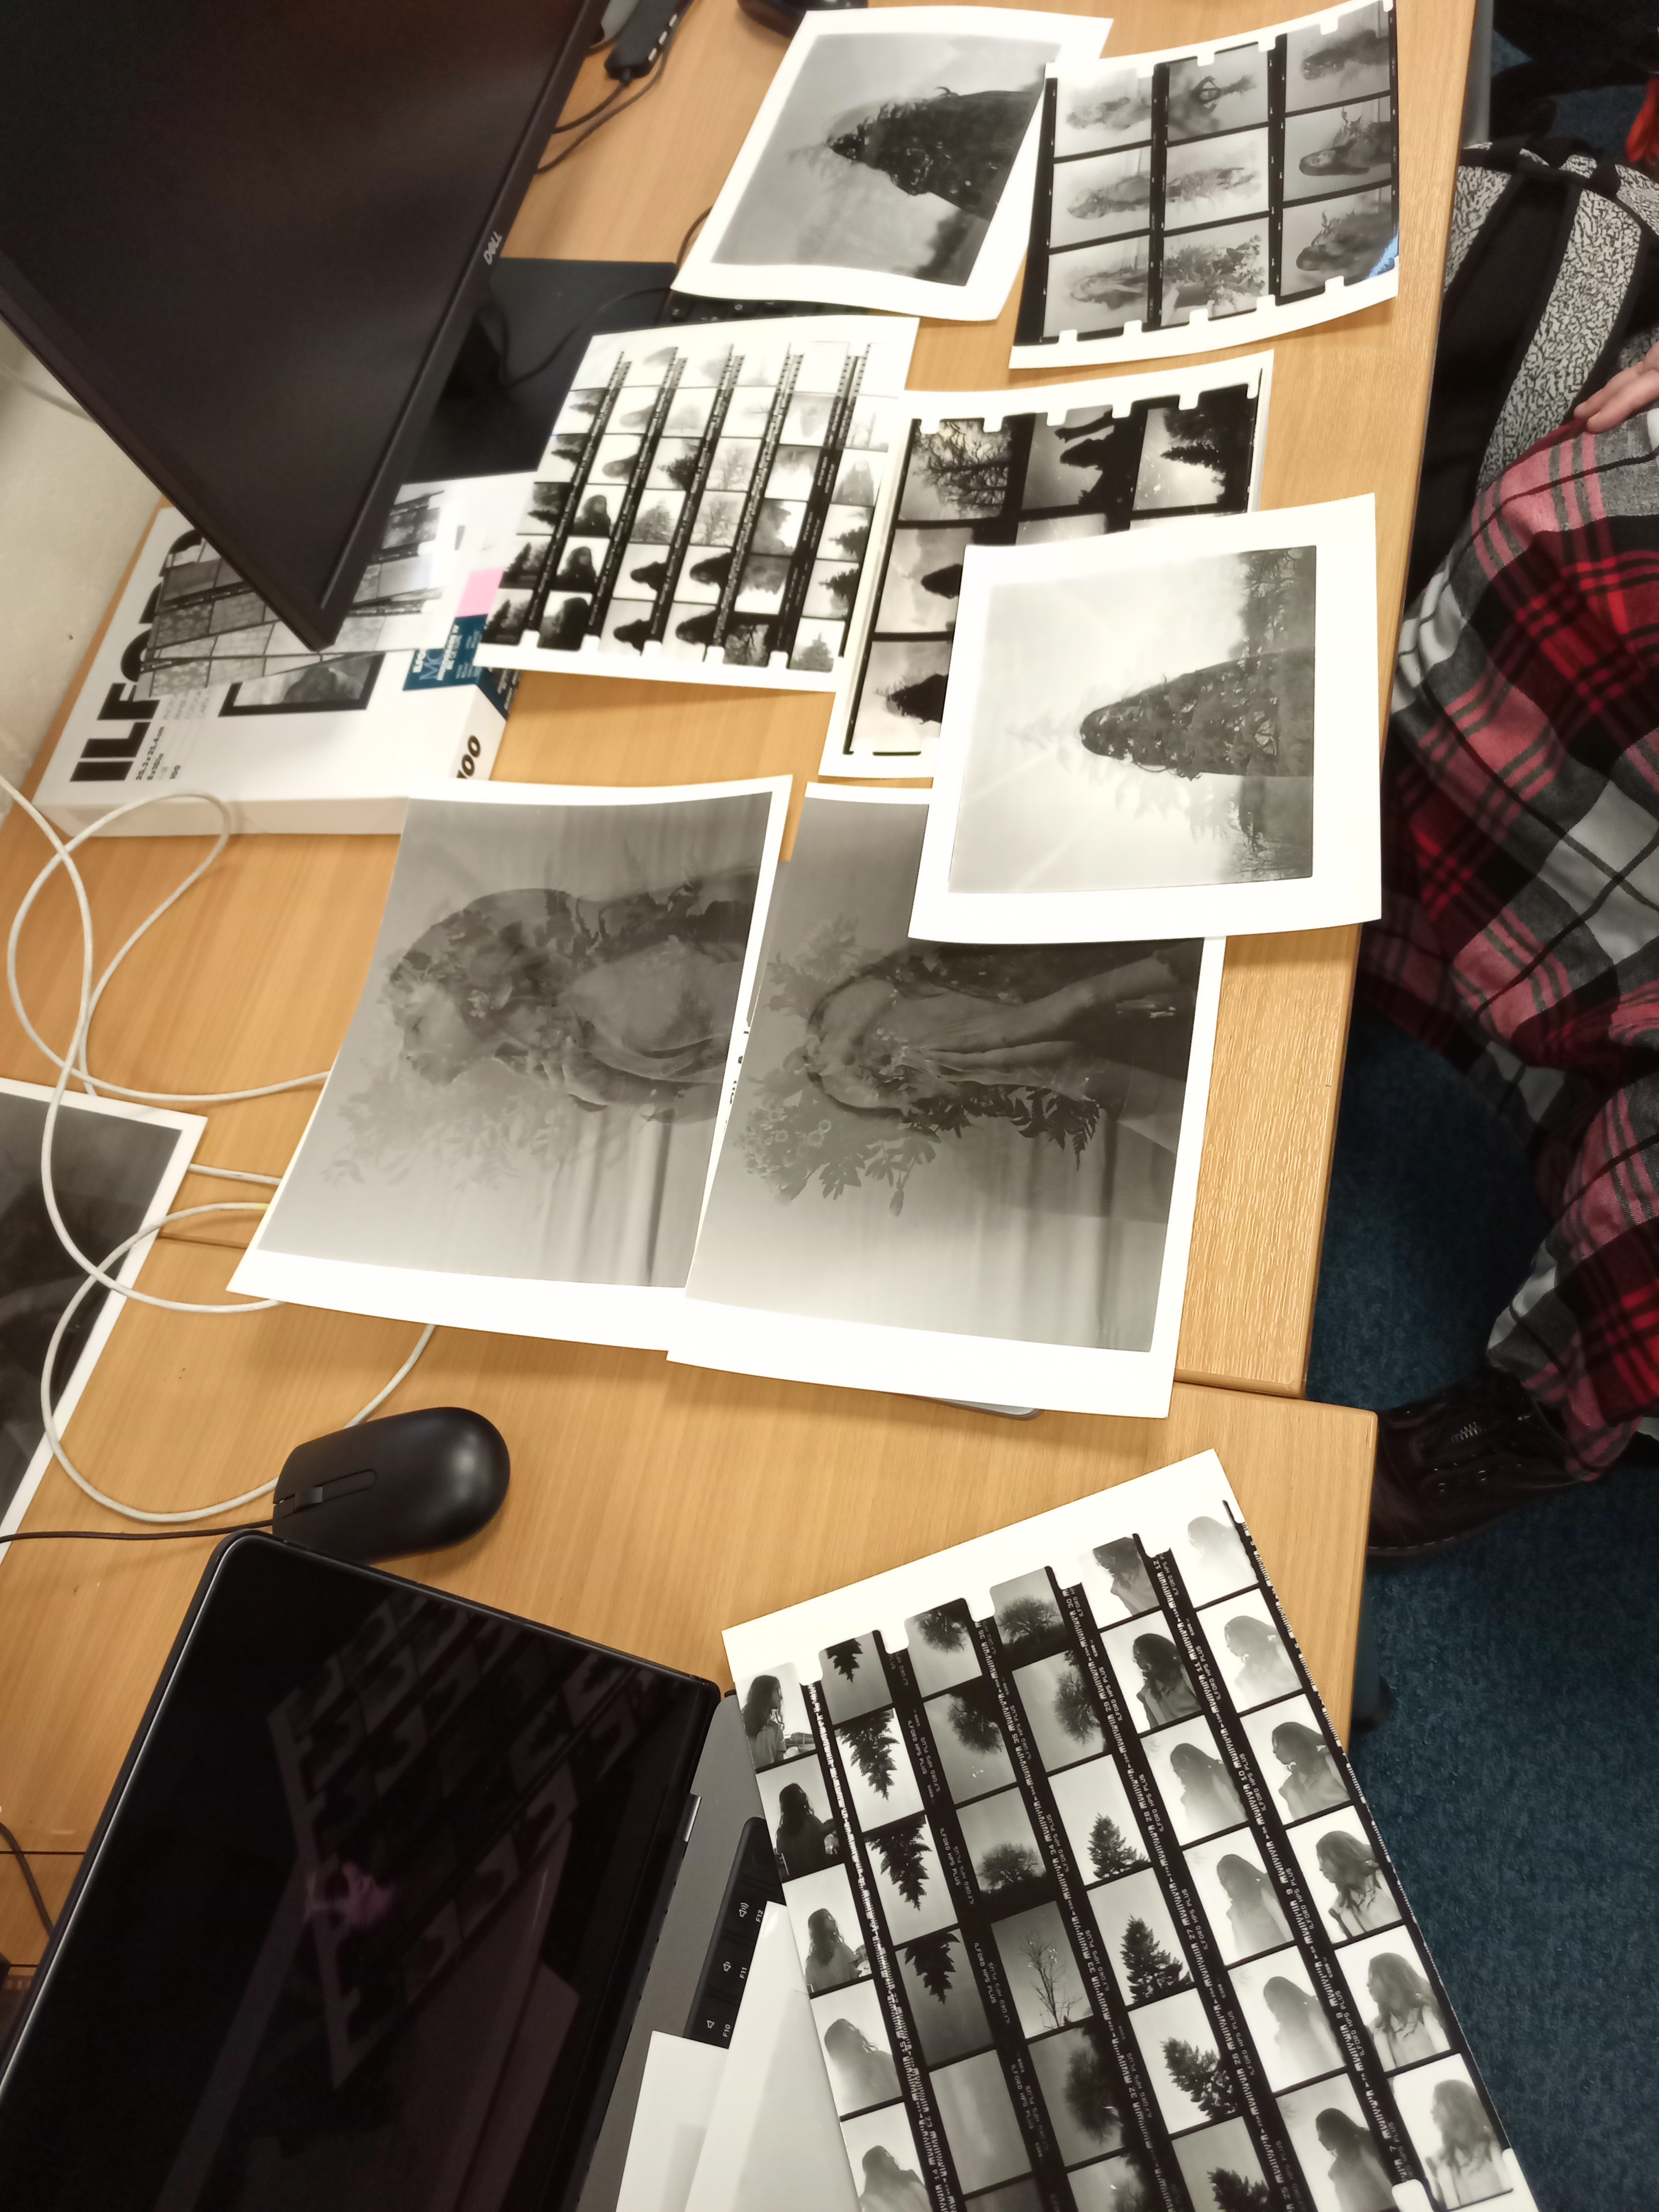
TEST SHOTS 35MM FILM AND 120 MEDIUM FORMAT 6×7 FILM
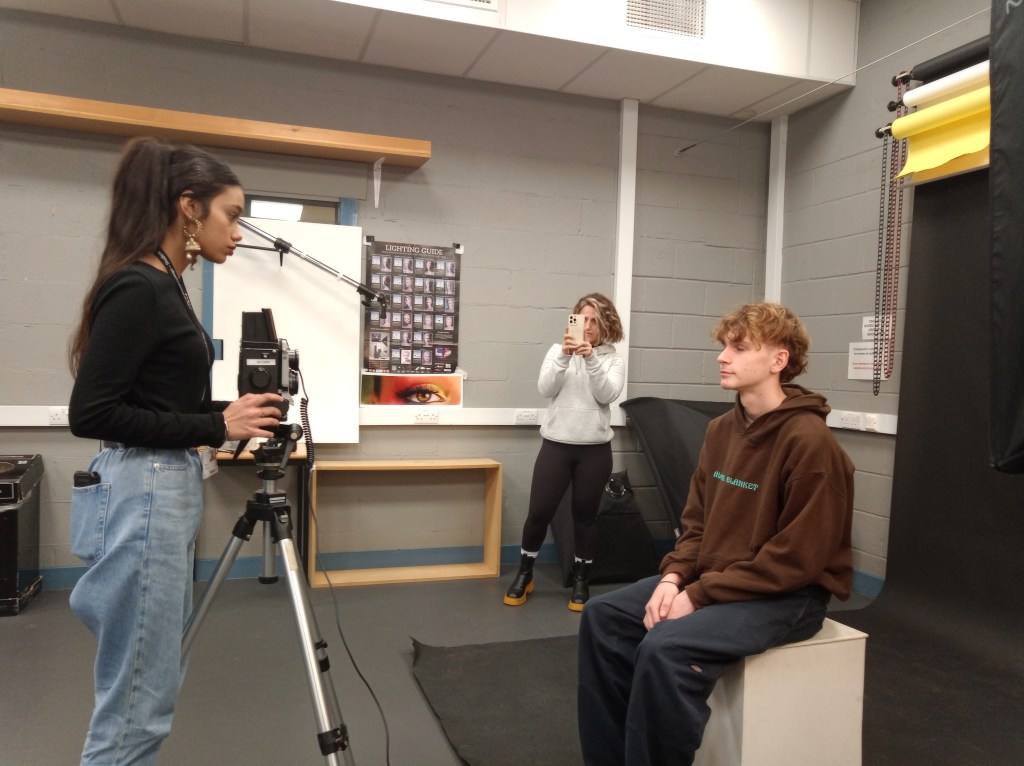
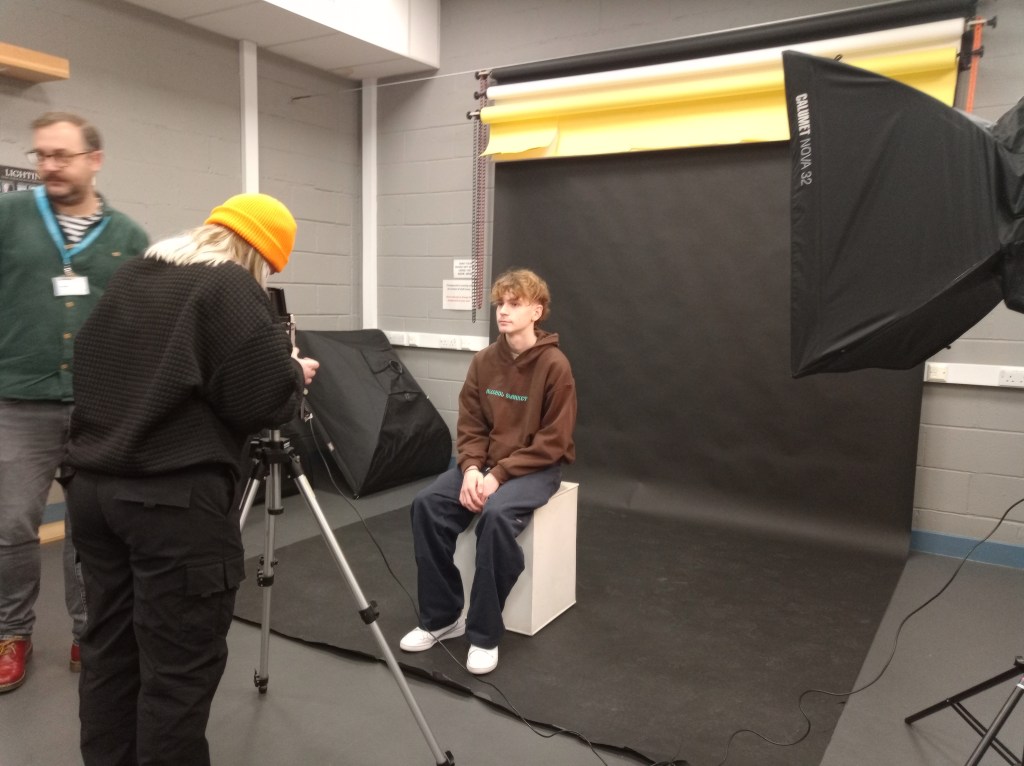
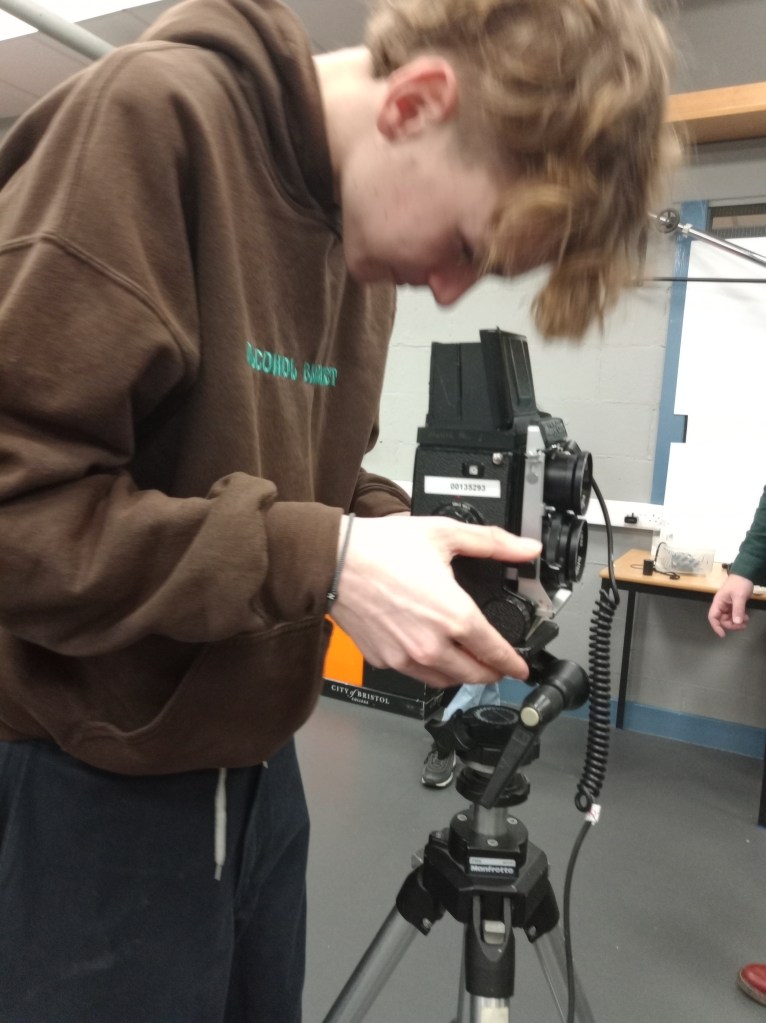
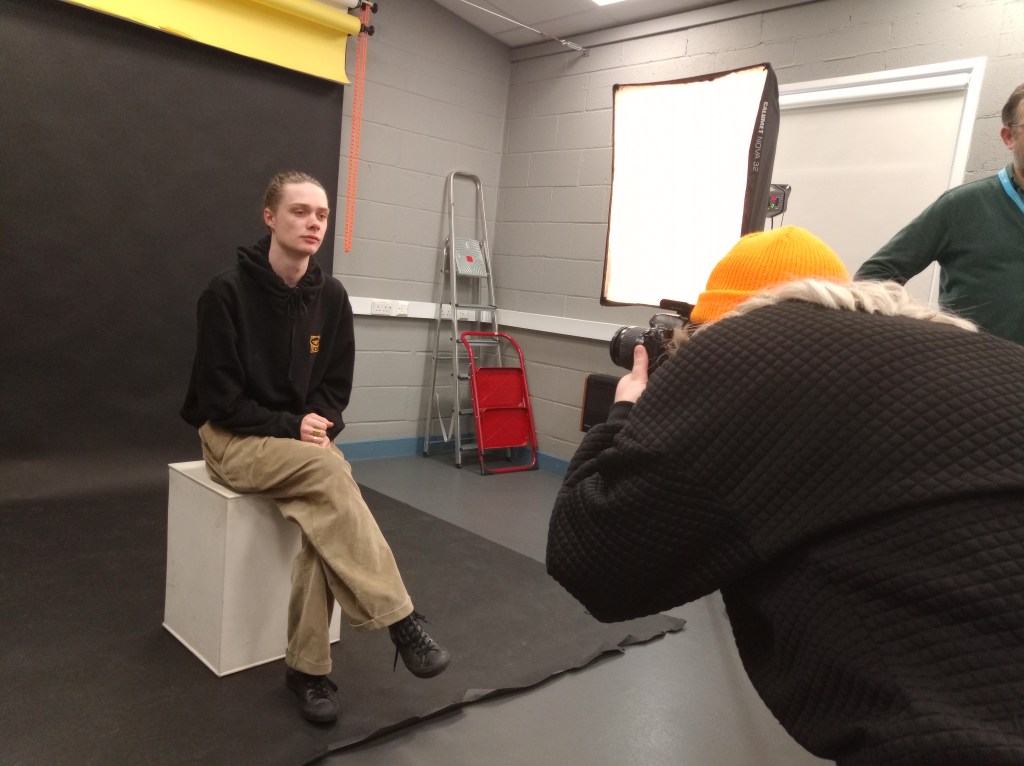
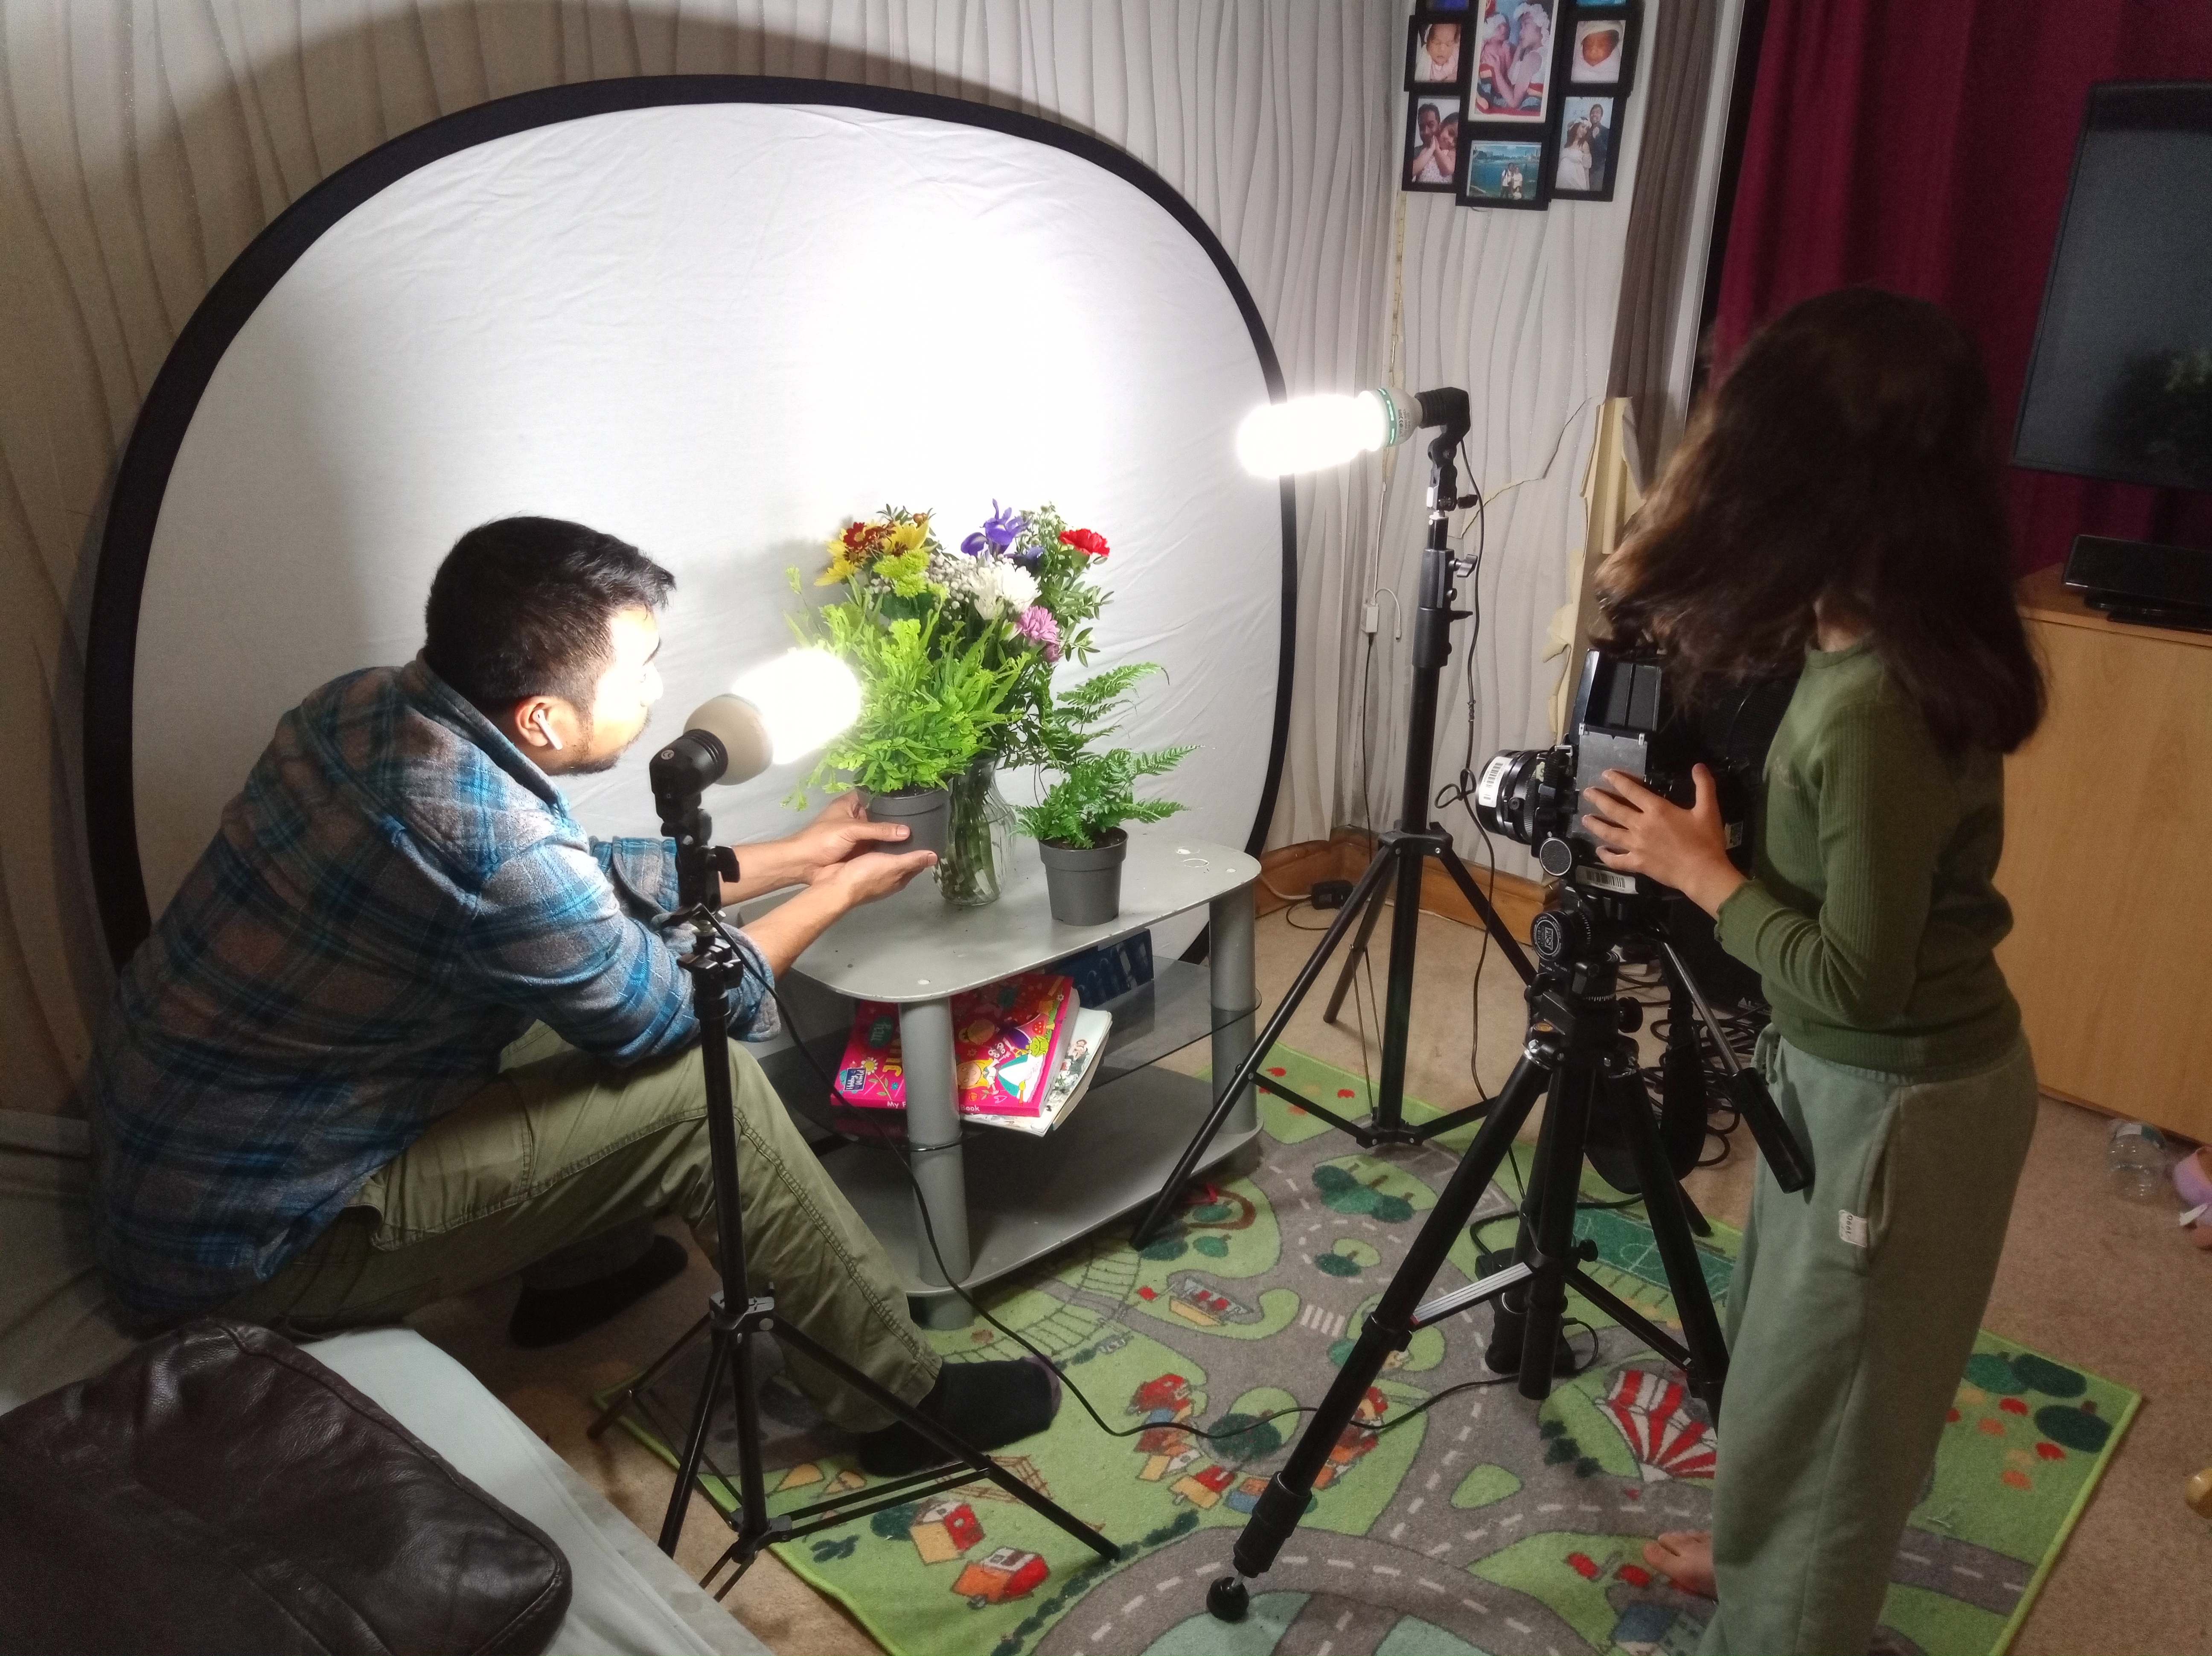
- 1st Test Shot and contact sheet medium format camera 6 by 7
Test Shot 1
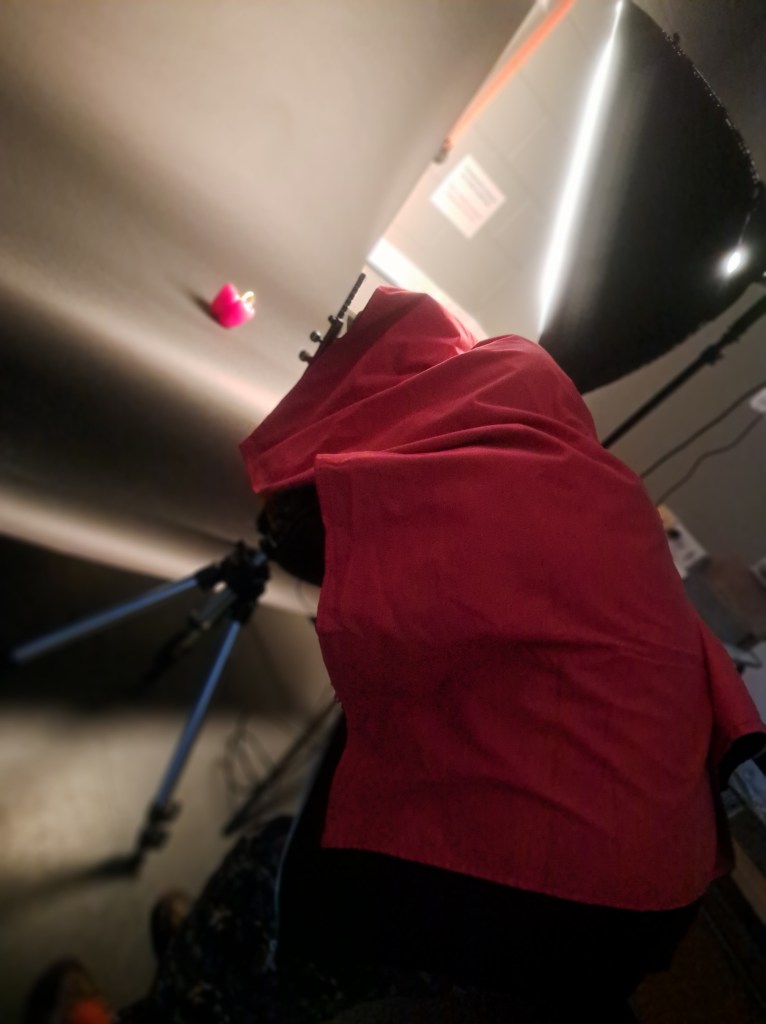
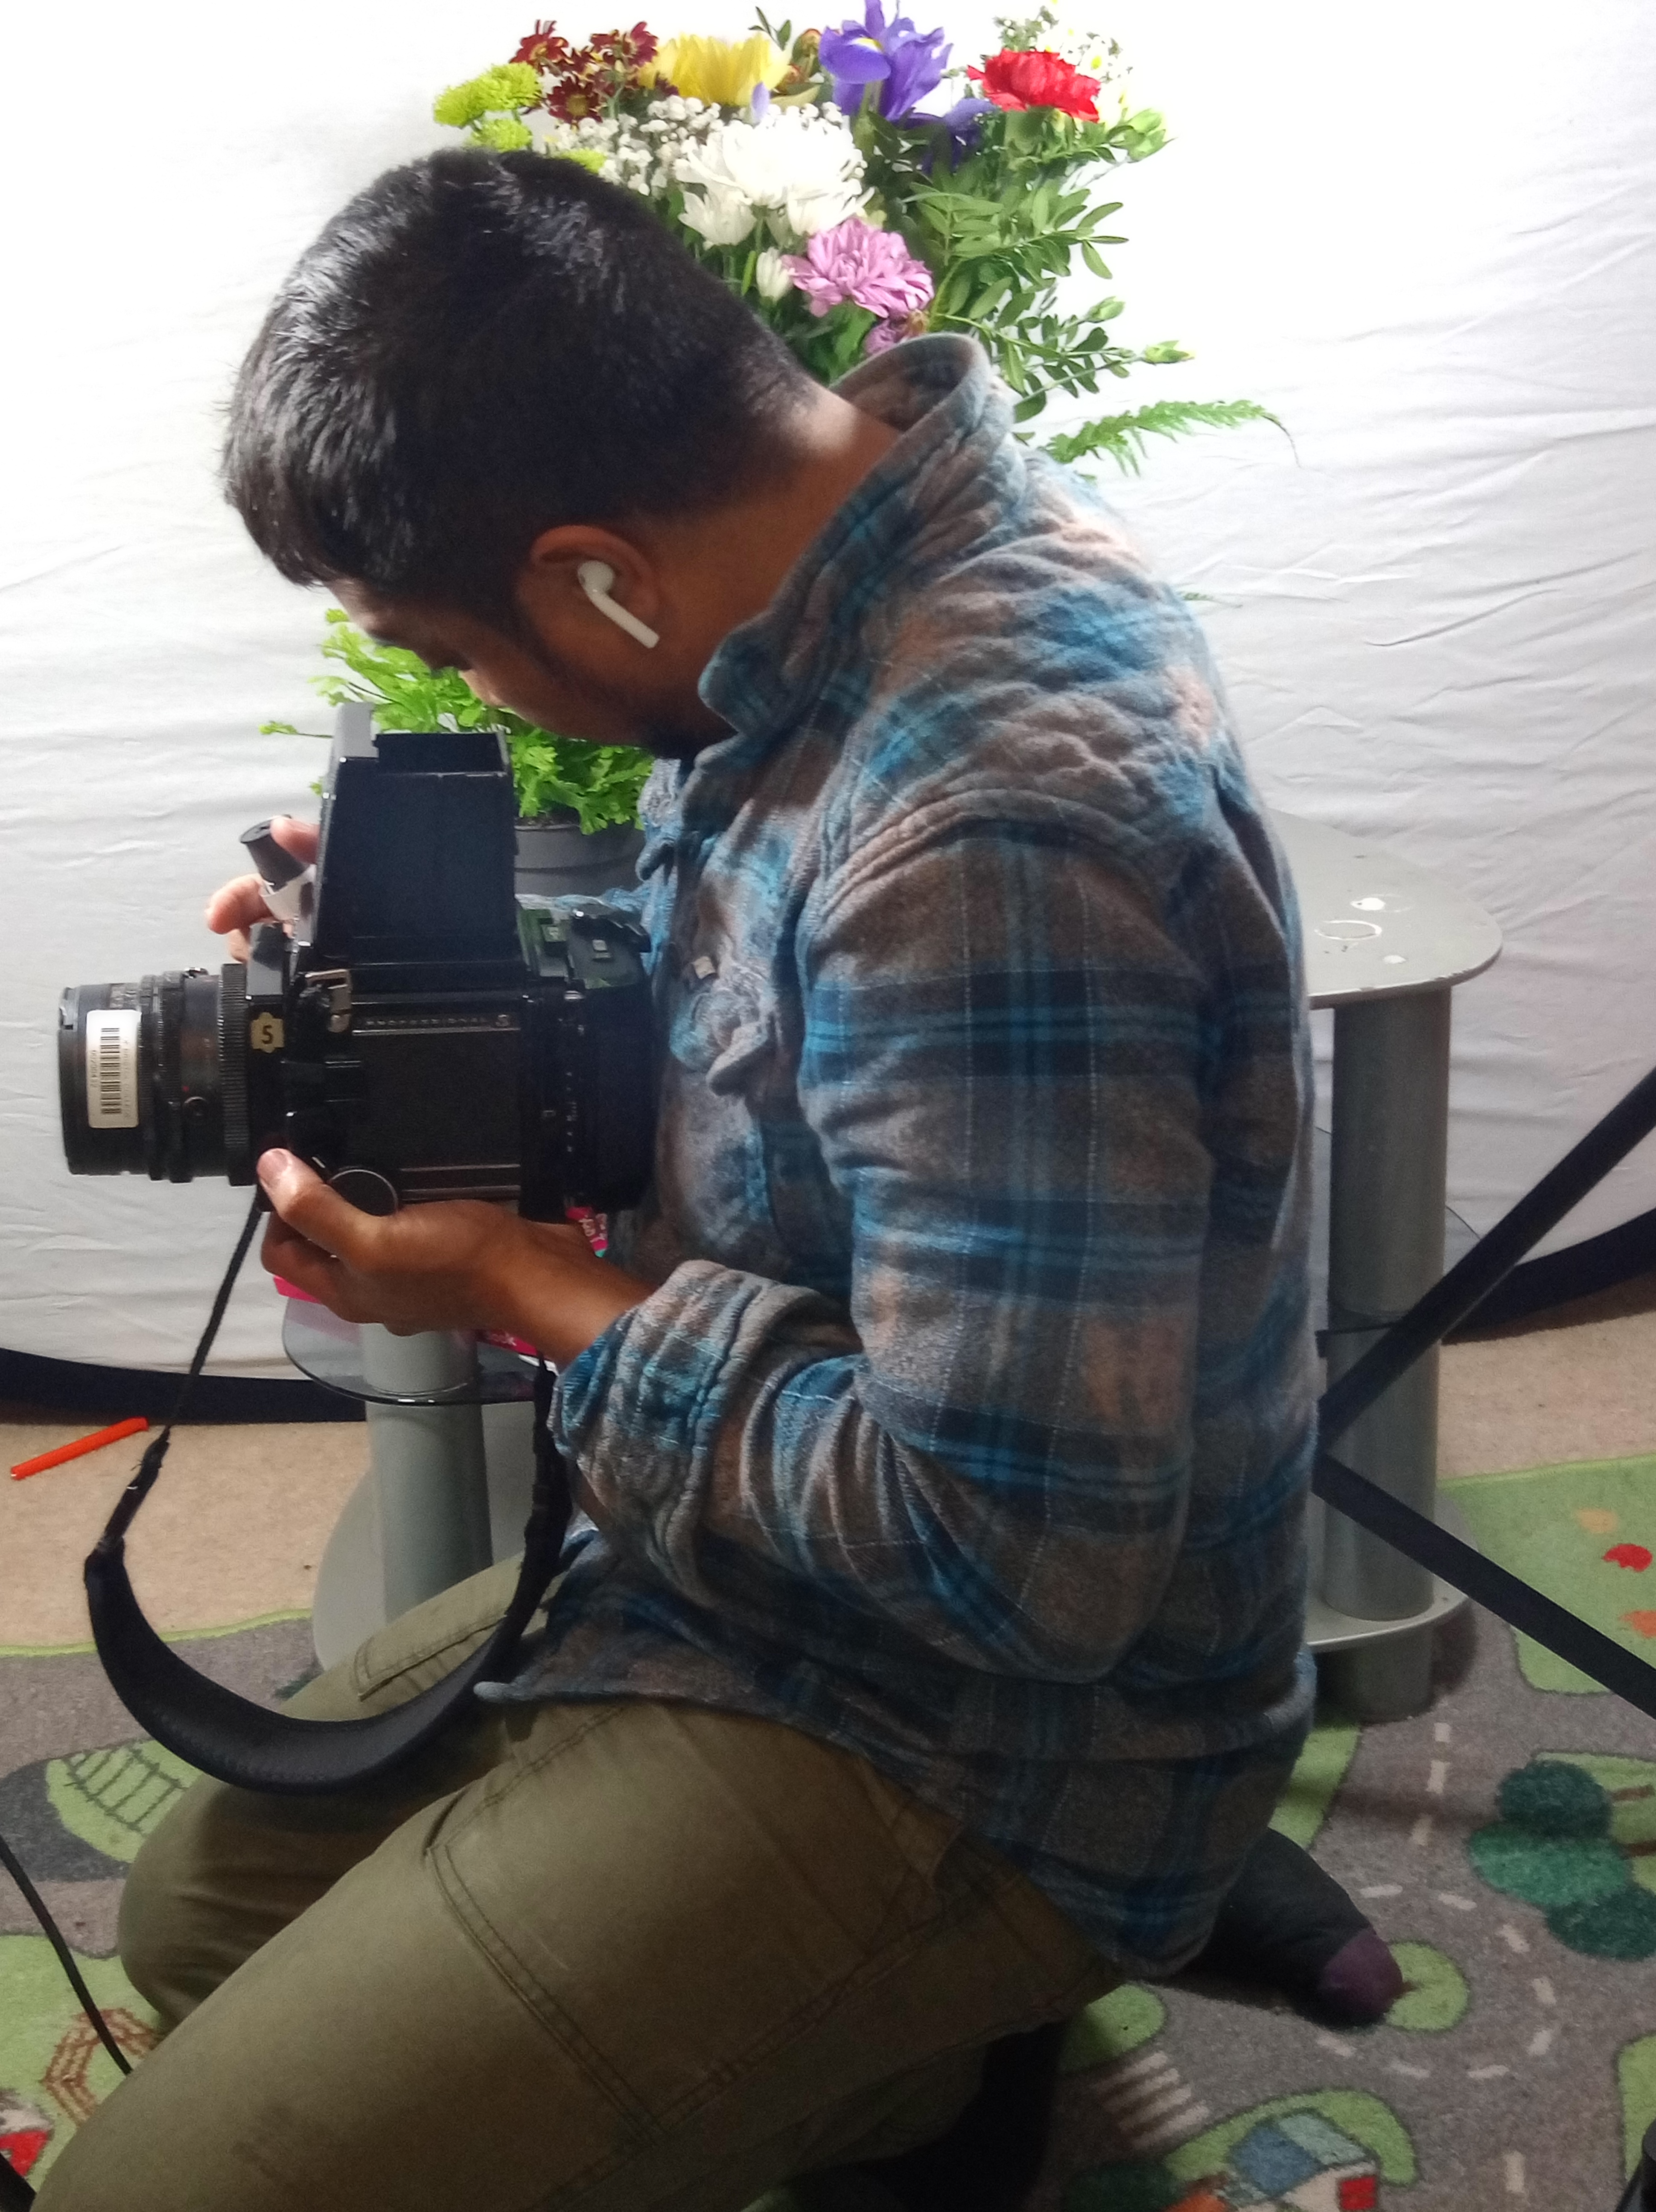
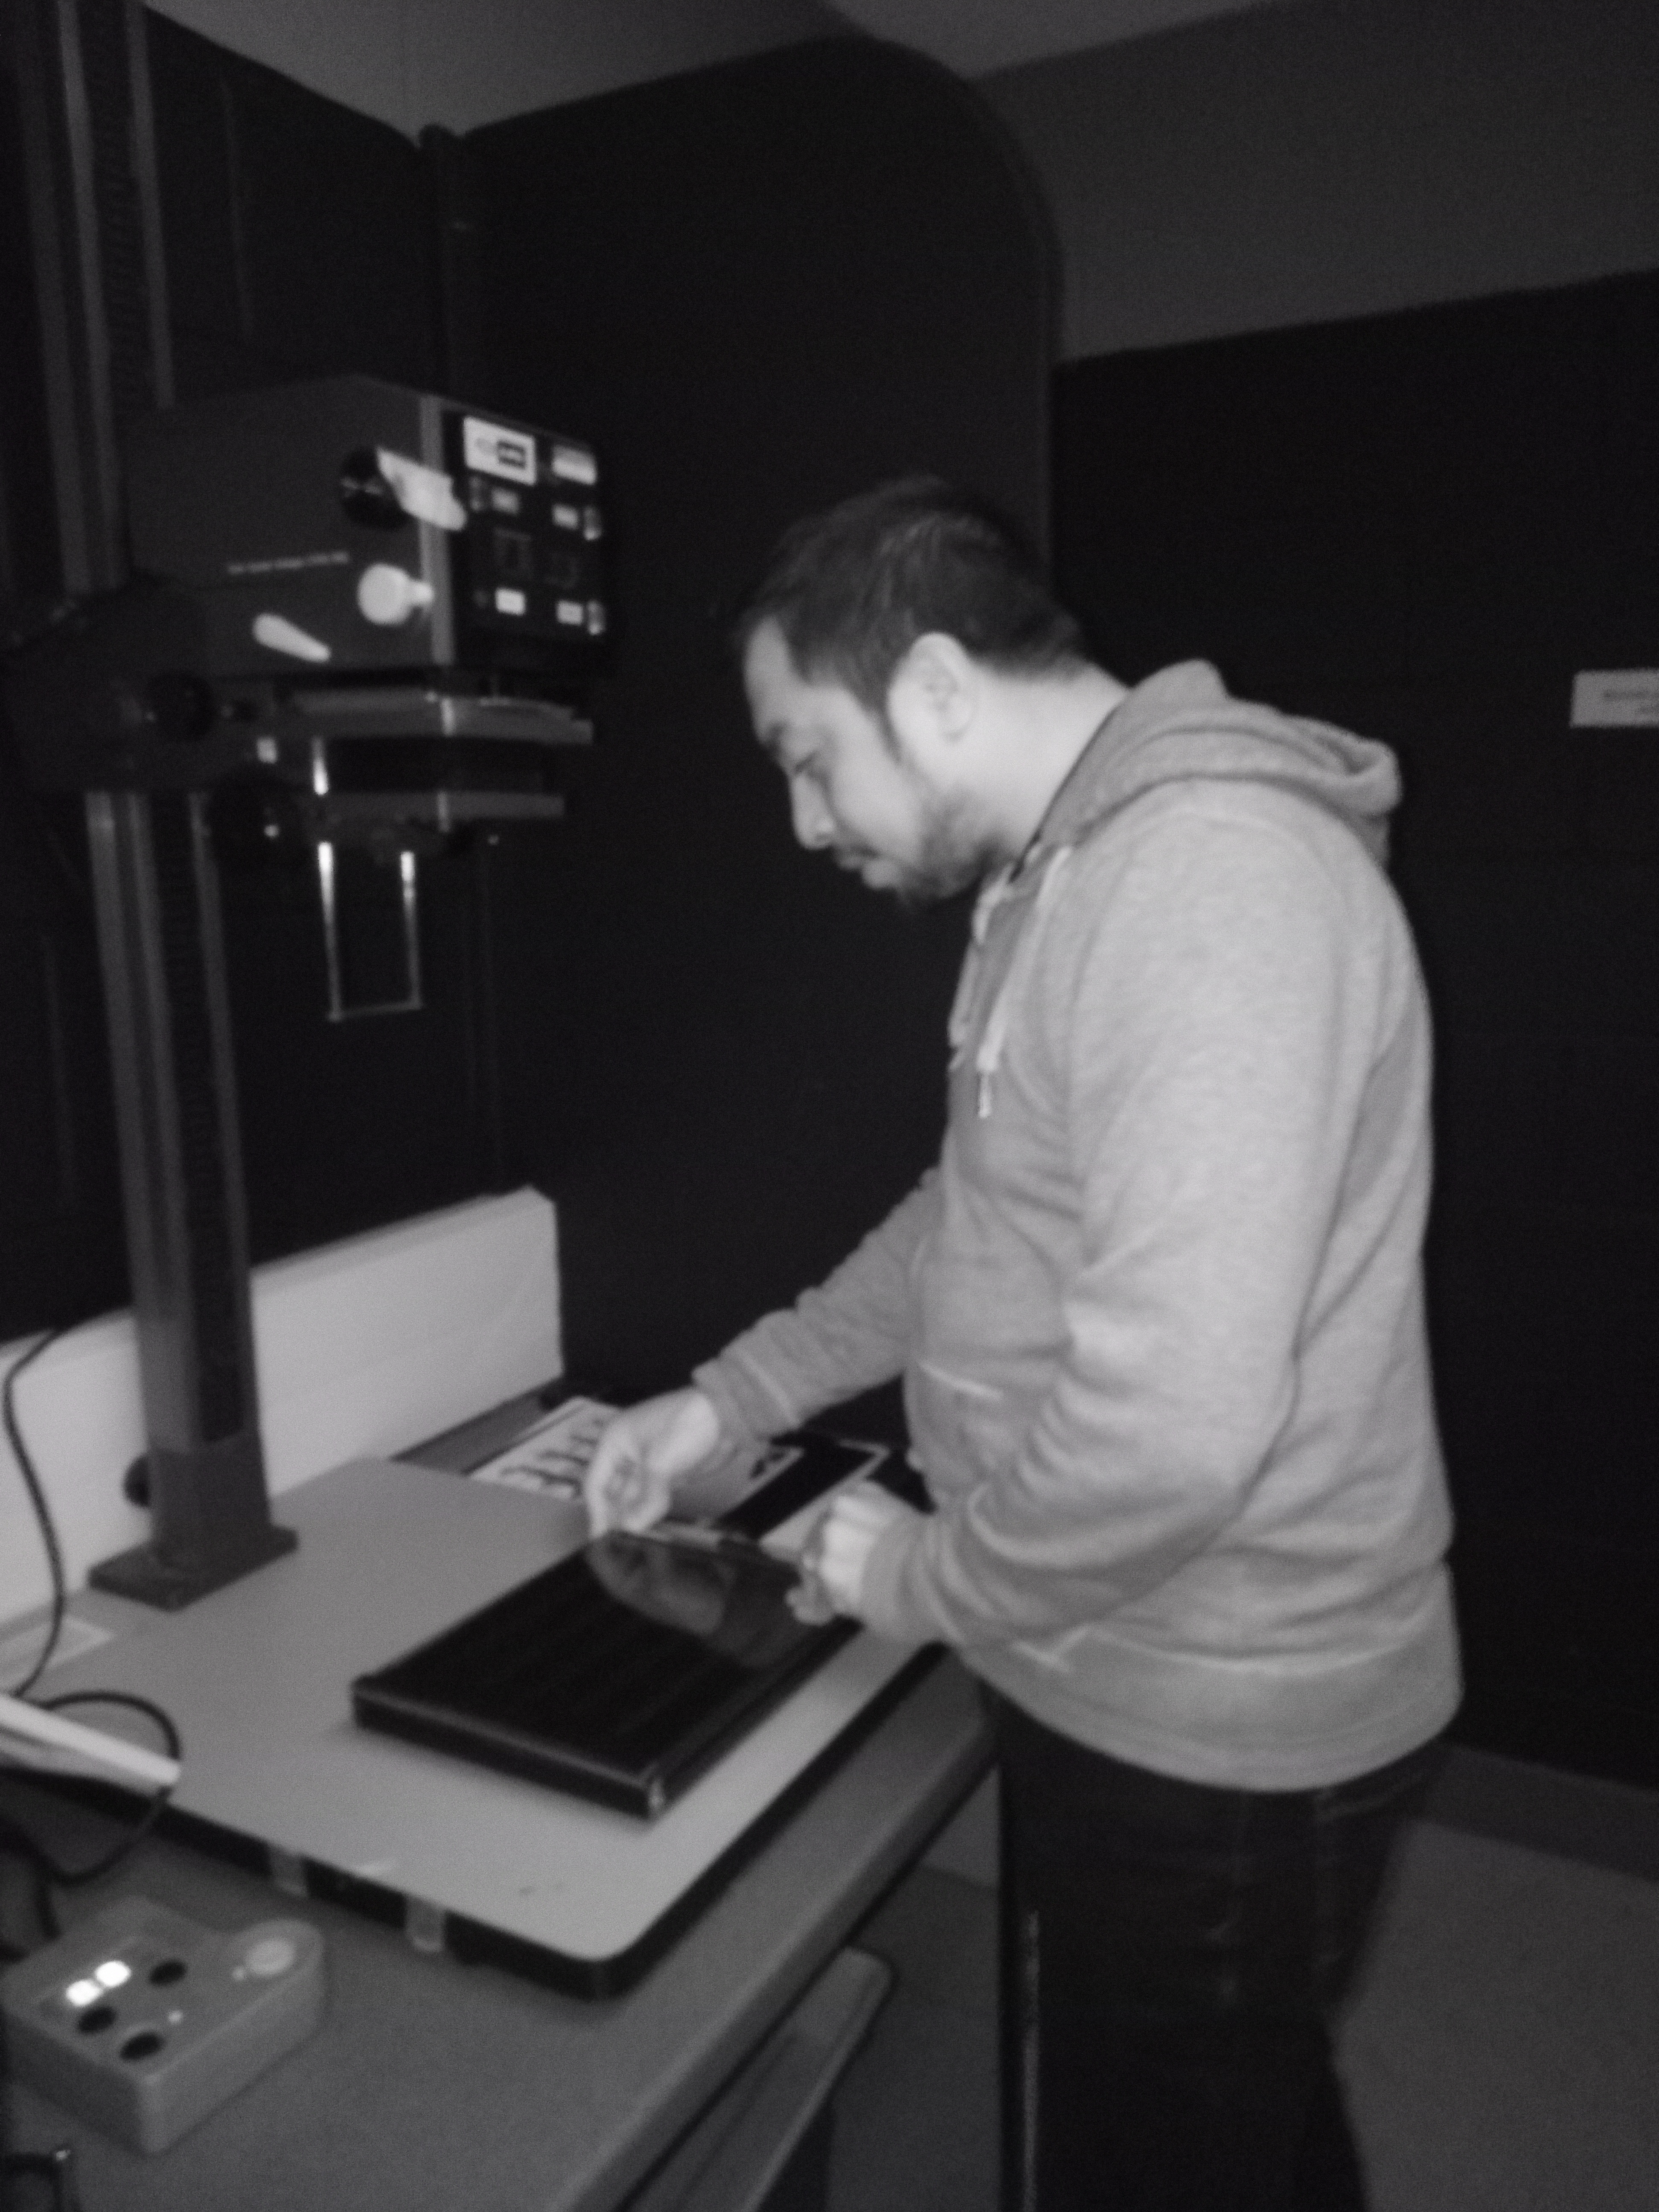
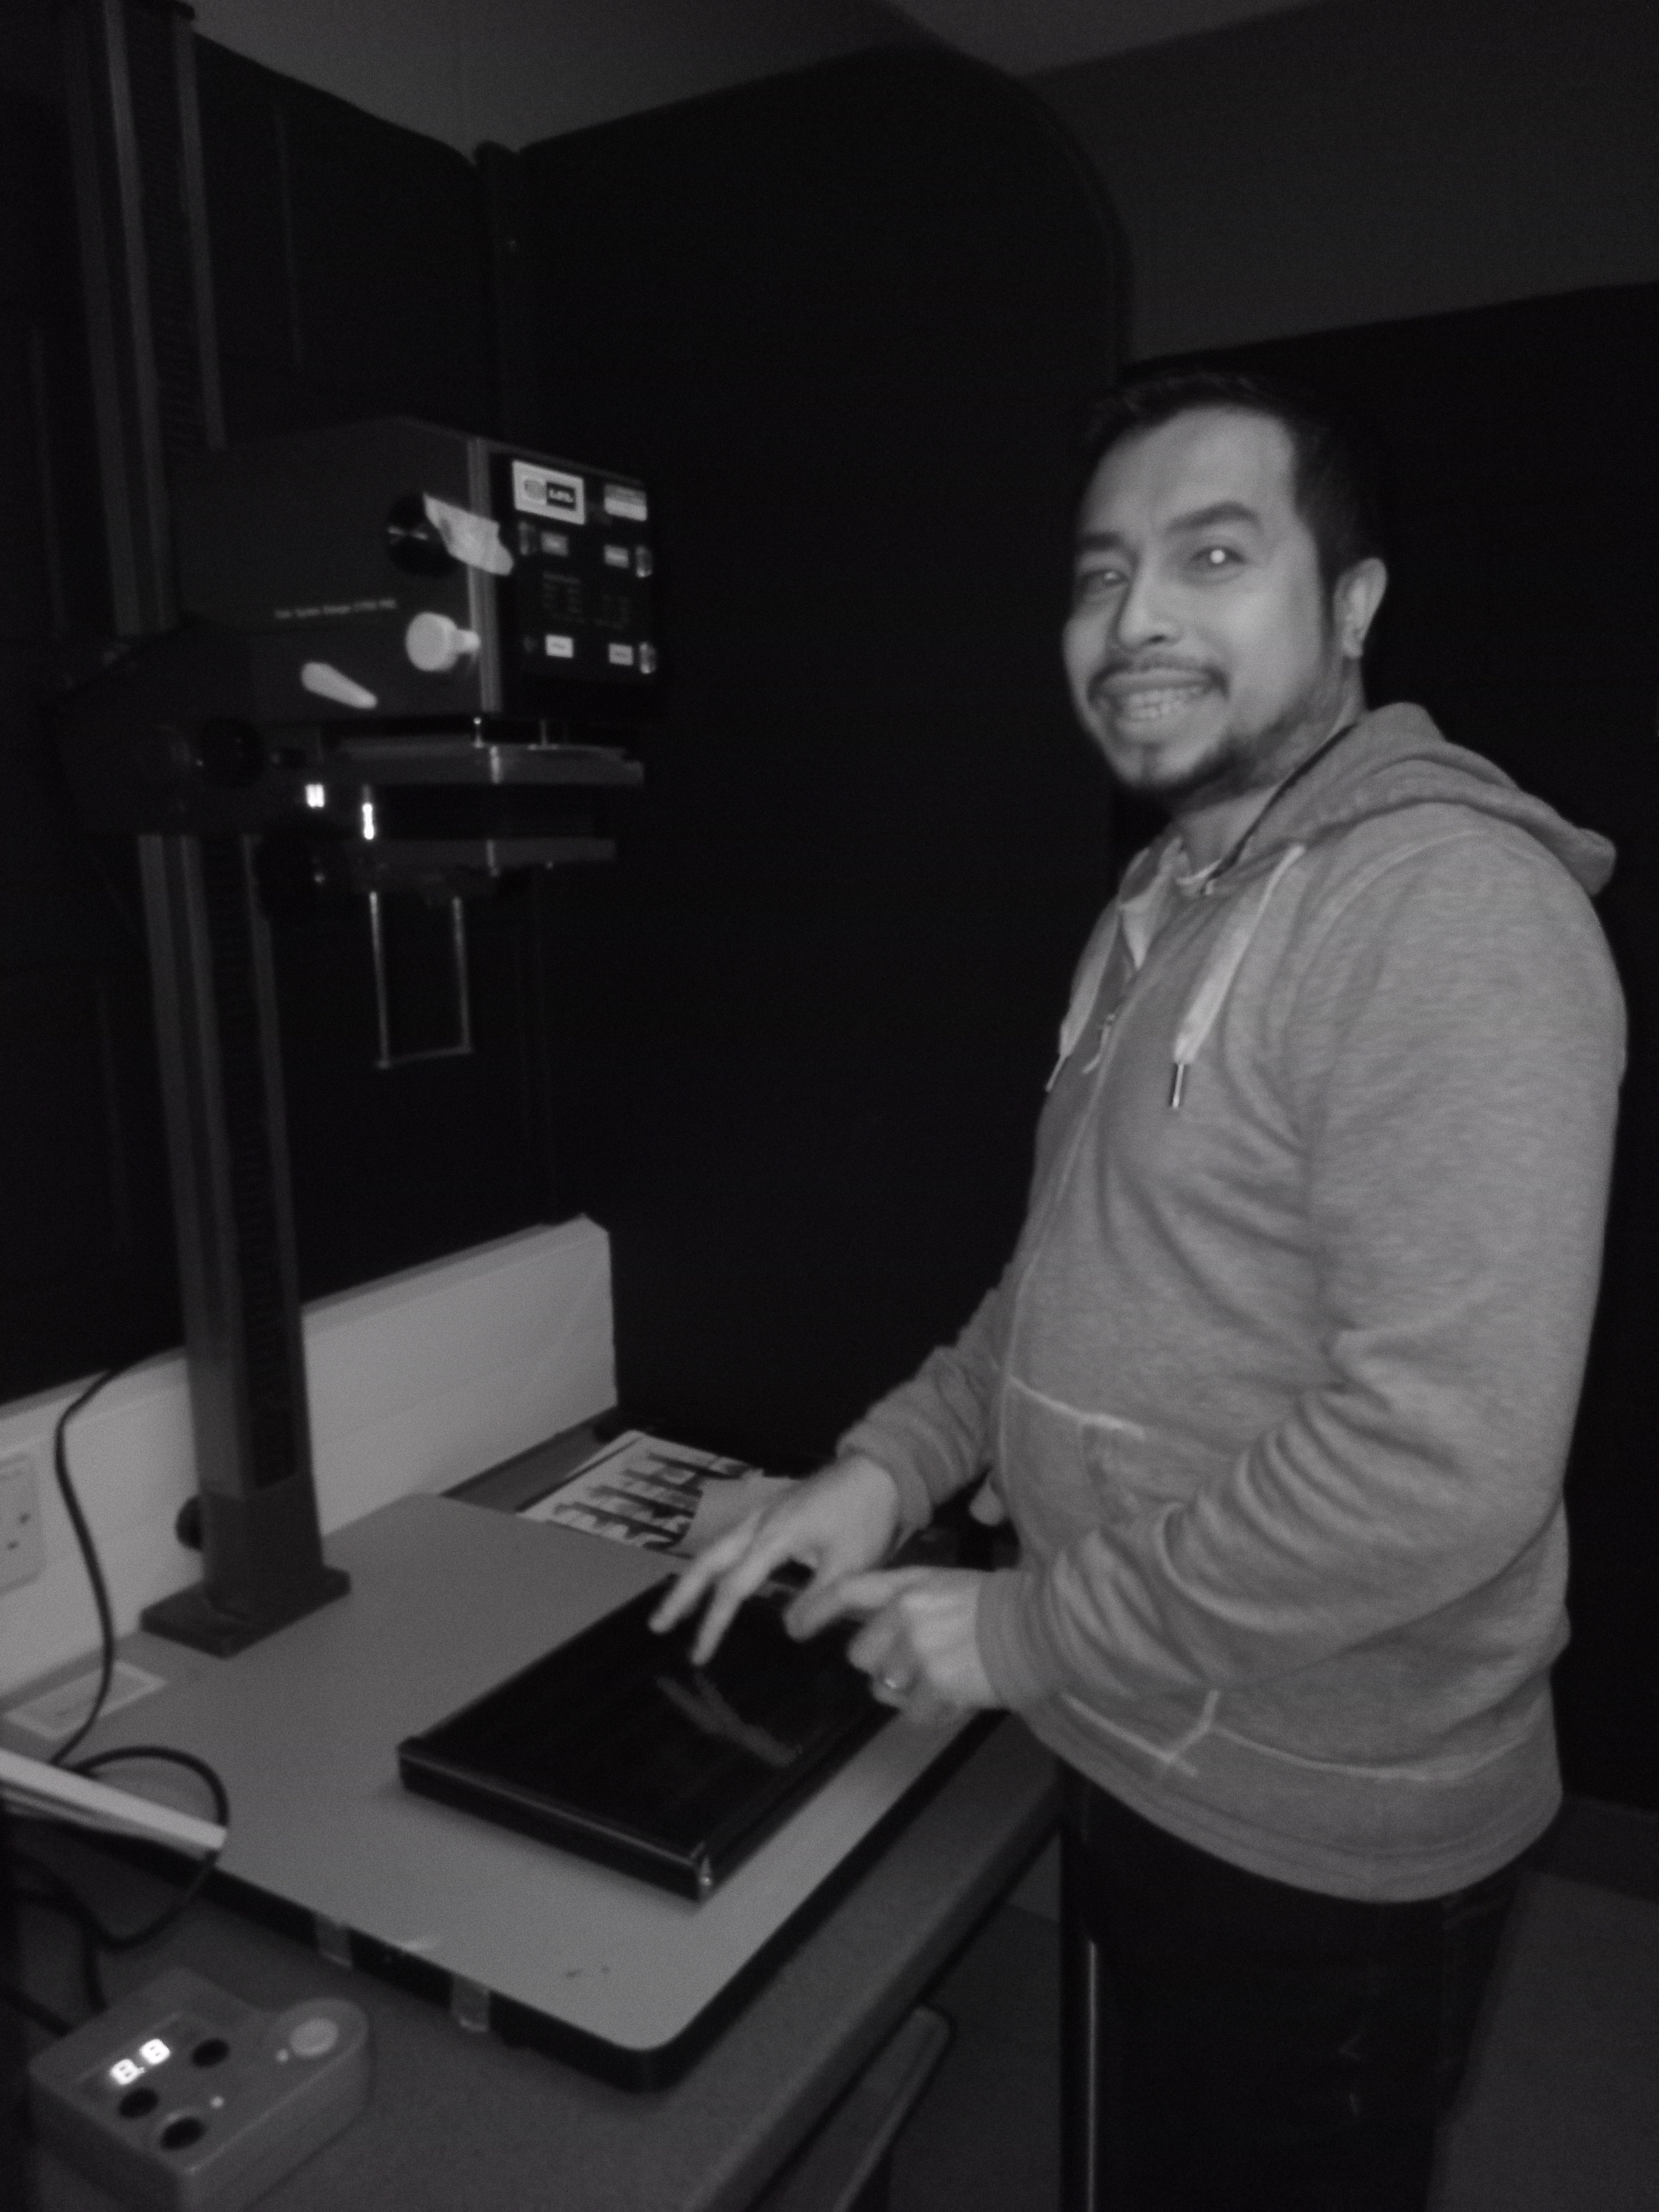
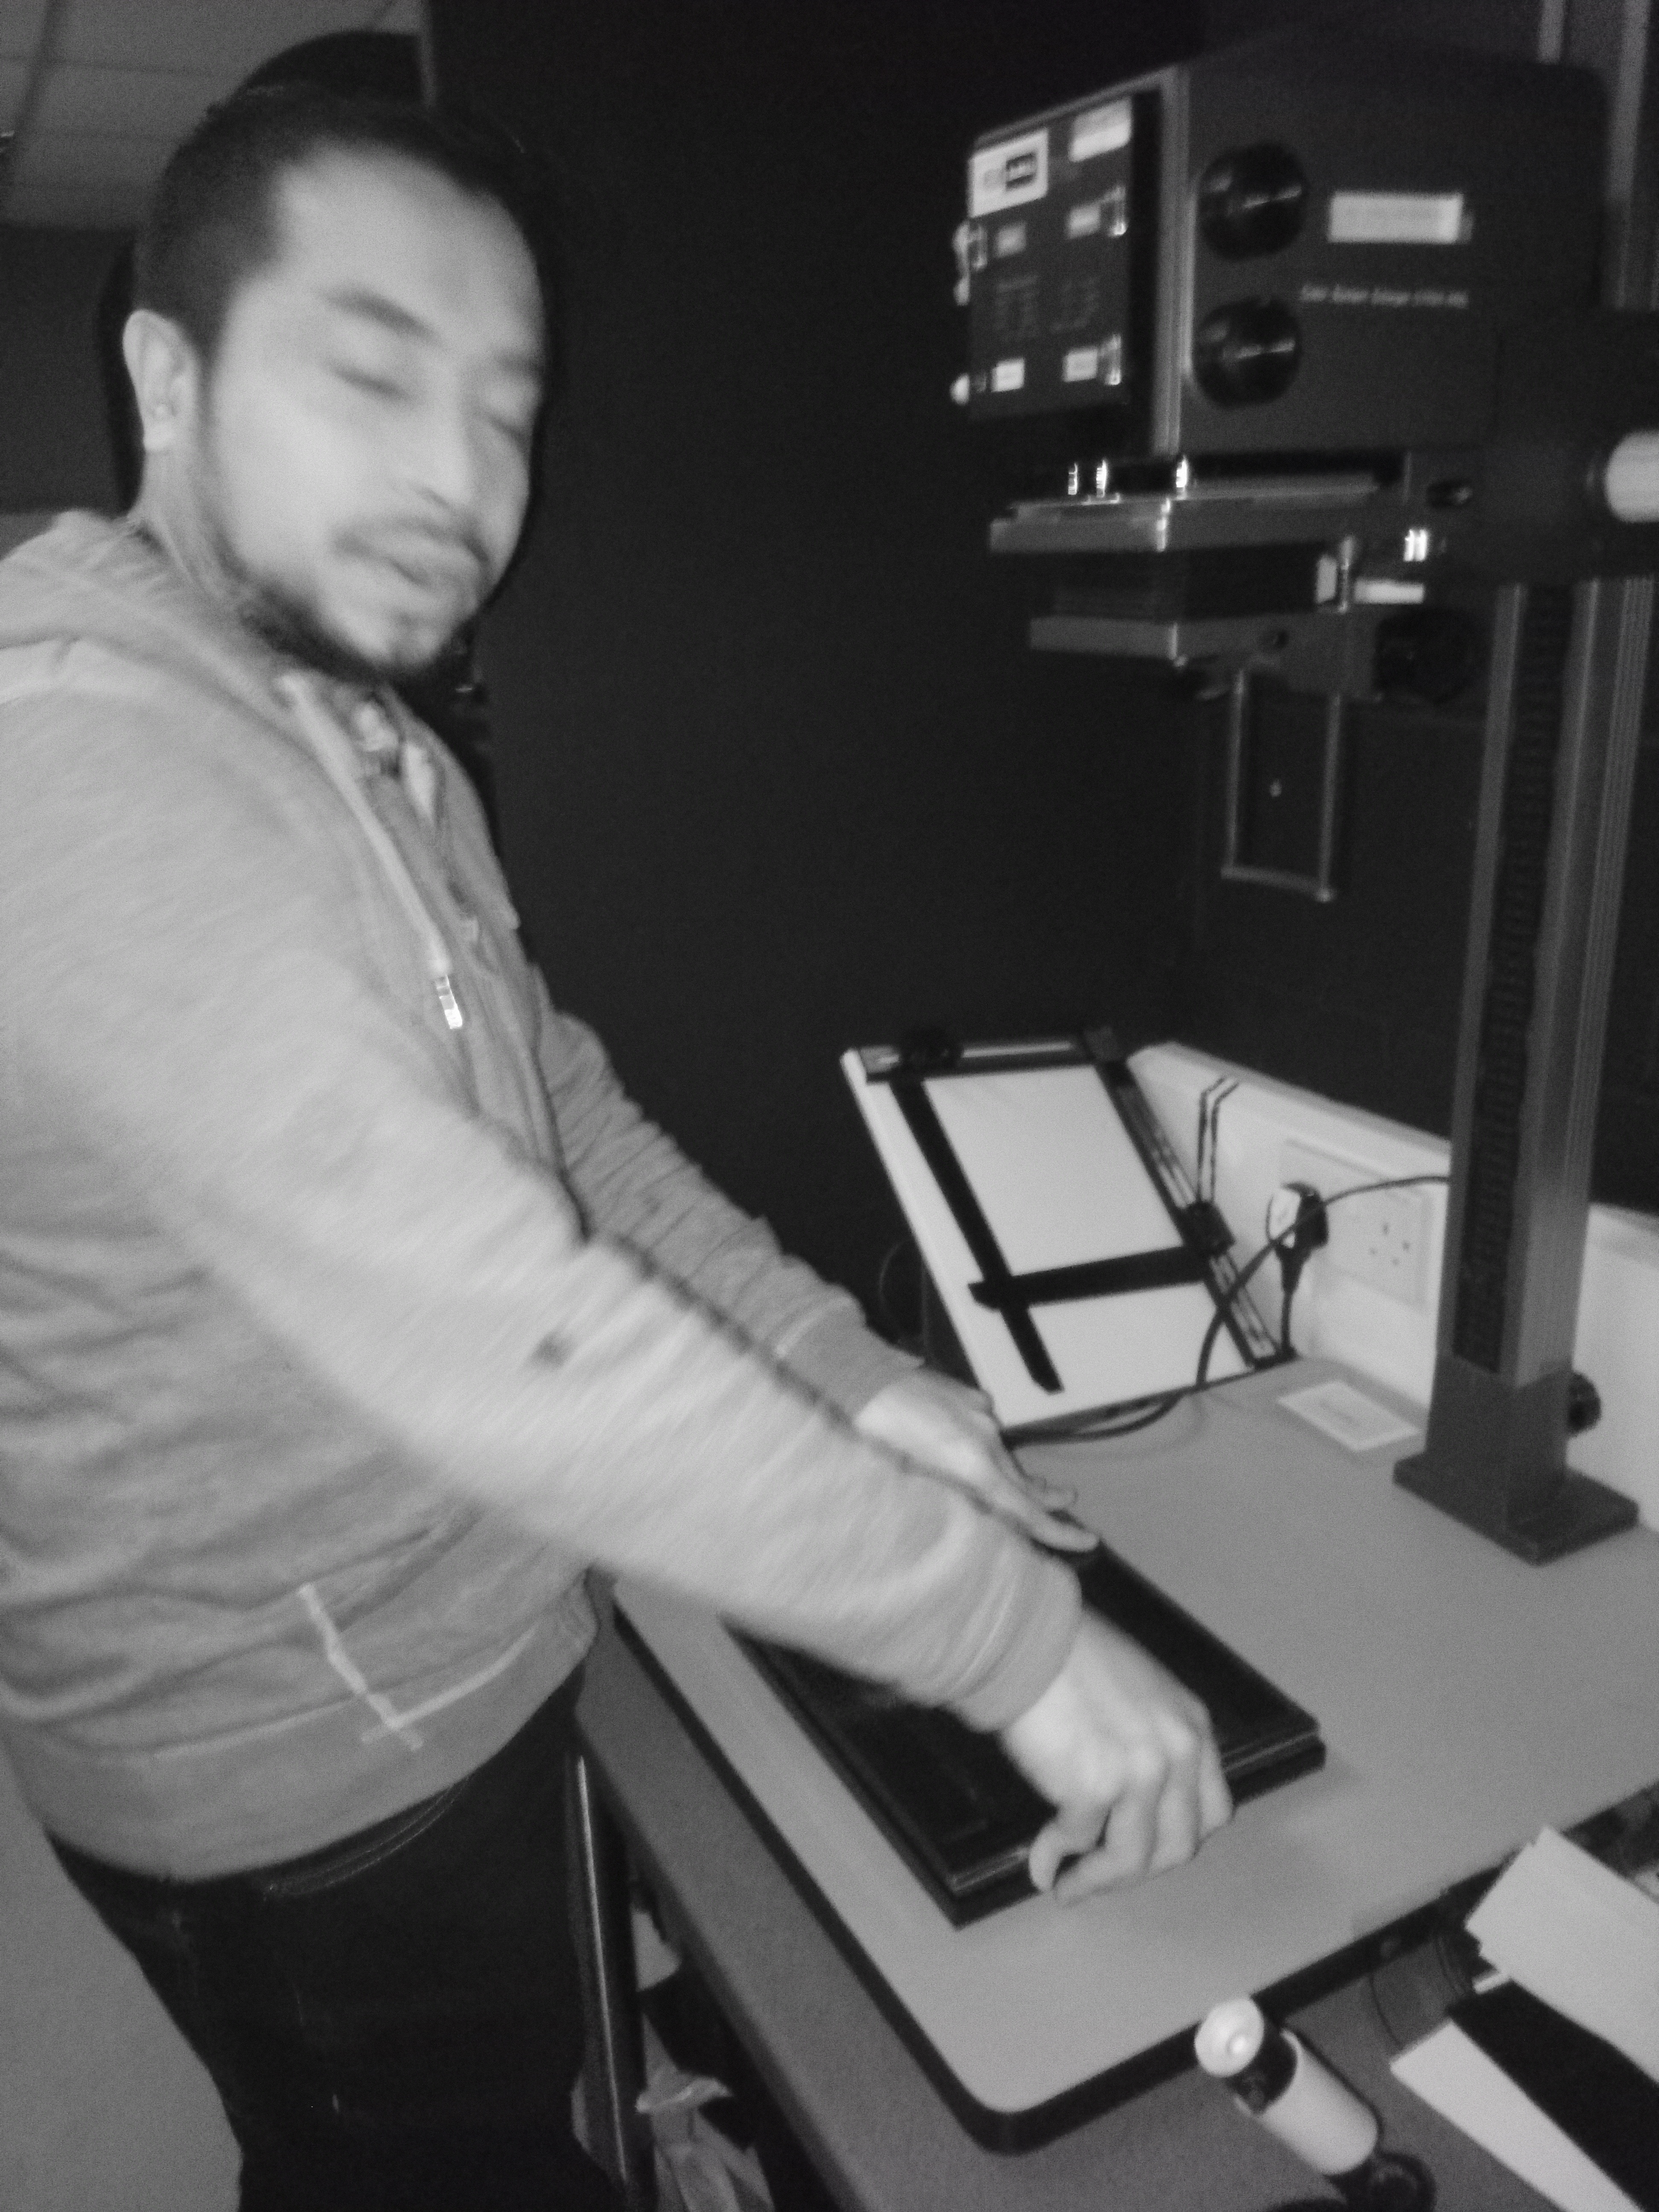
Behind the scene of teamwork to discover how to use the medium format camera properly in the studio.
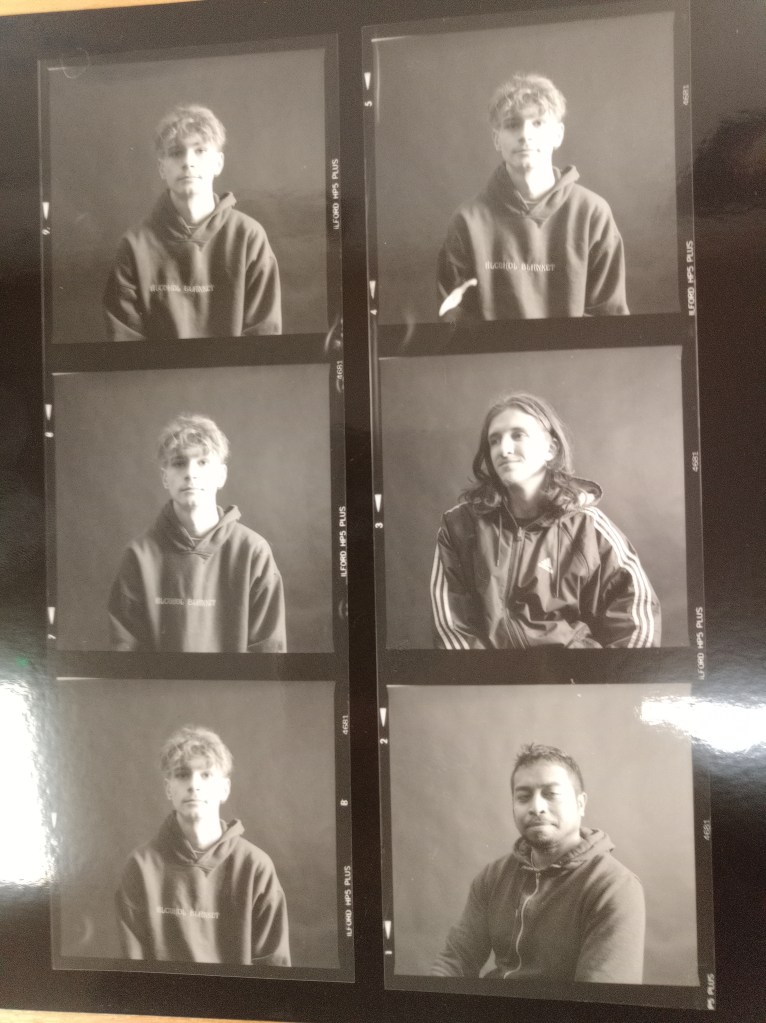
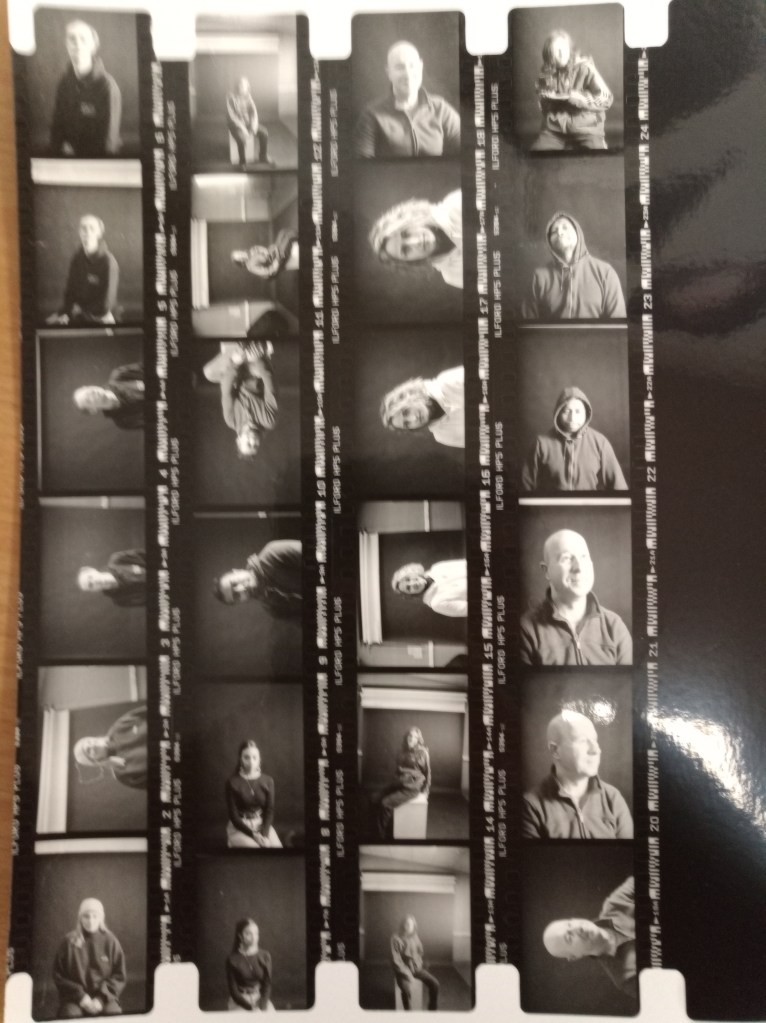
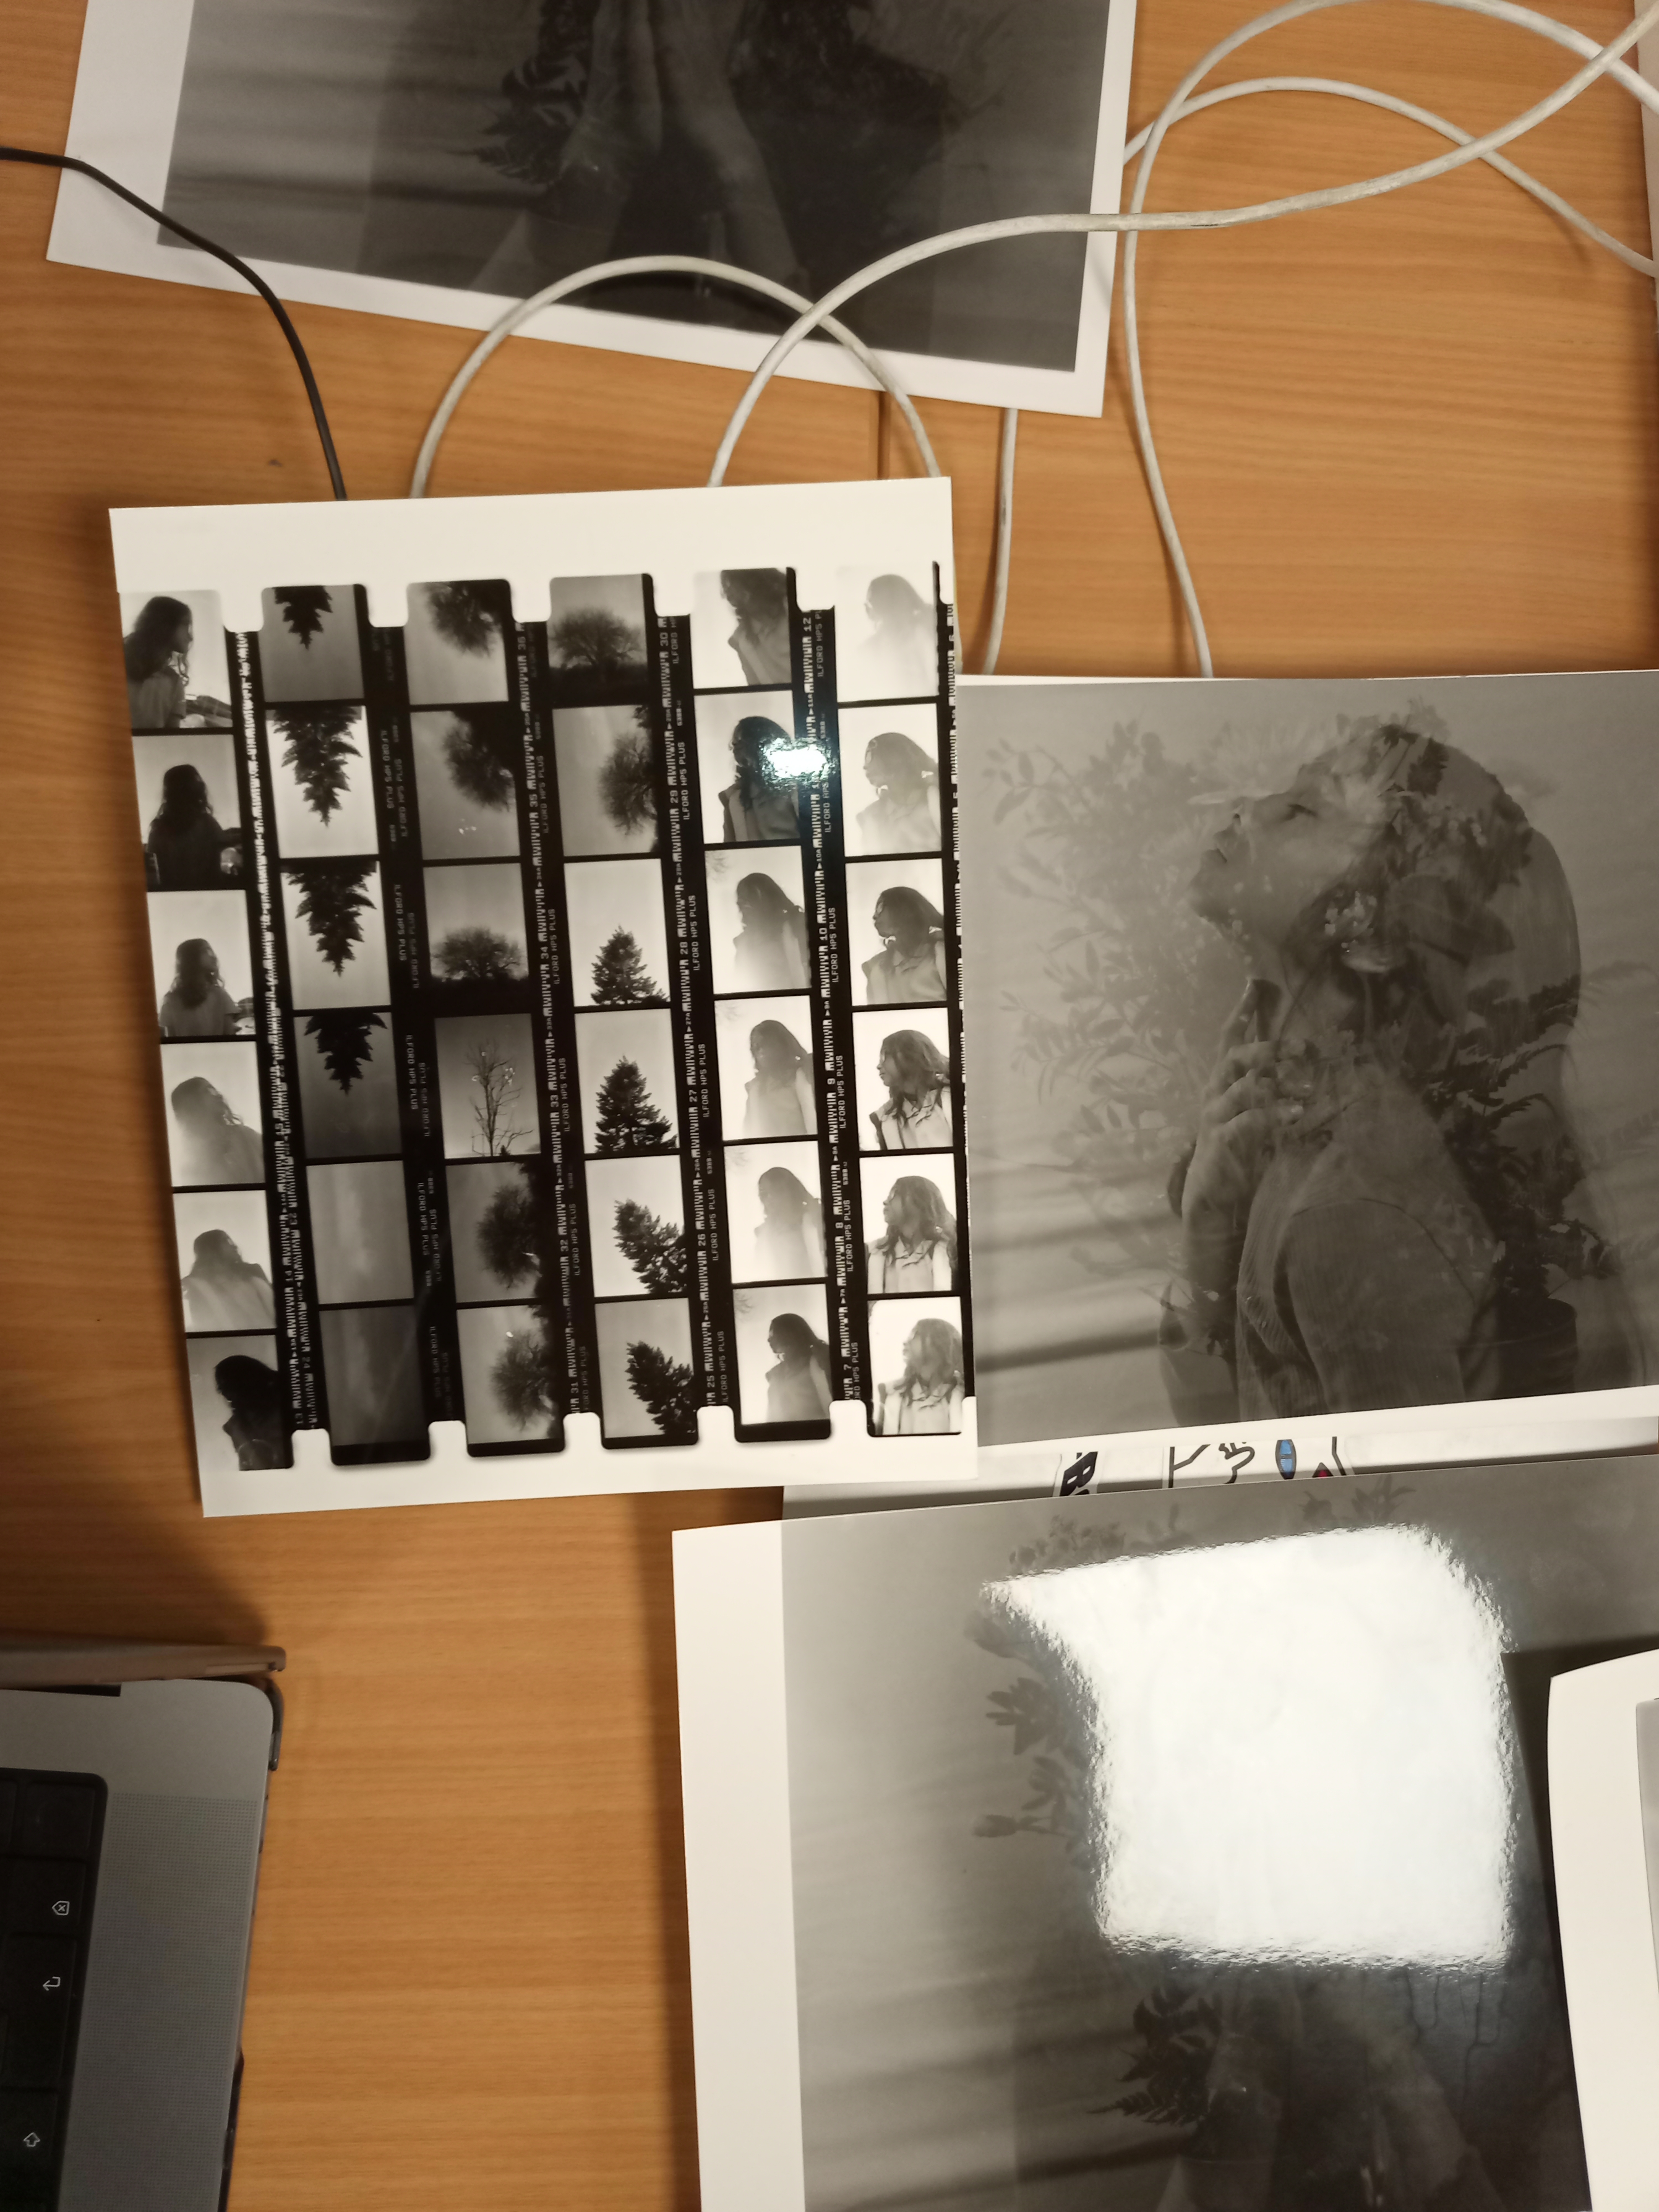
Contact sheet 1
After the shots, we went to the lab and darkroom to process the negatives film and turn it into a contact sheet.
- 2nd Test Shot and contact sheet 35mm Film Camera
All come together to have a tryout with the 35mm film camera and also to develop it in a dark room.
Test Shot 2
Contact sheet 2
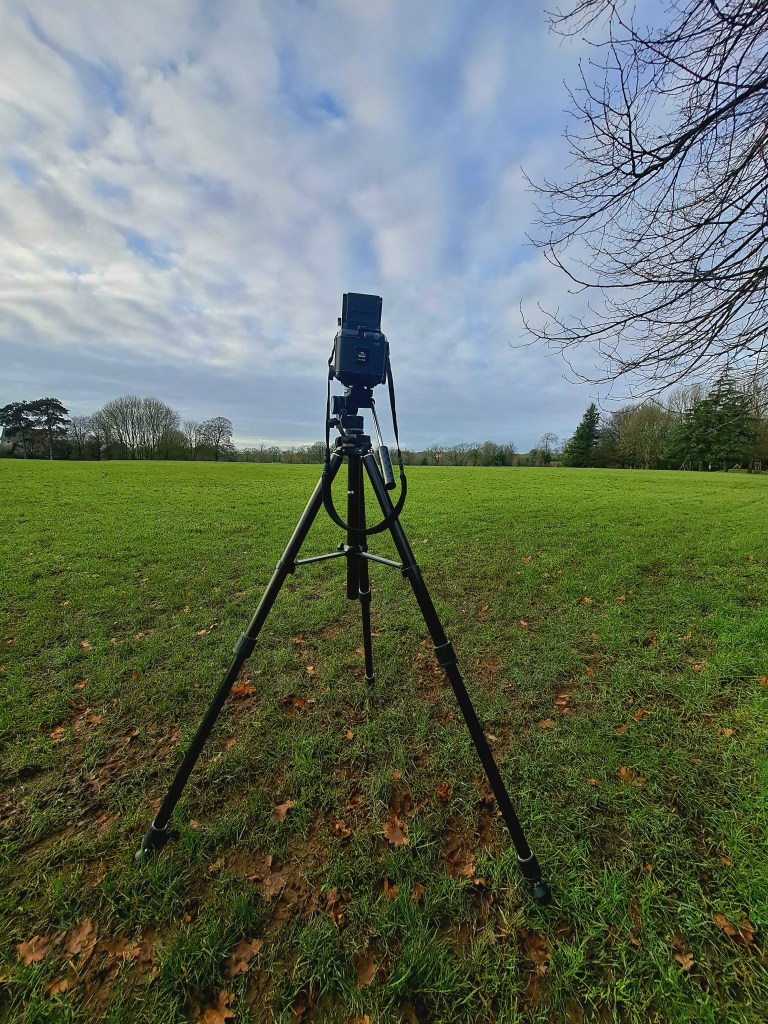
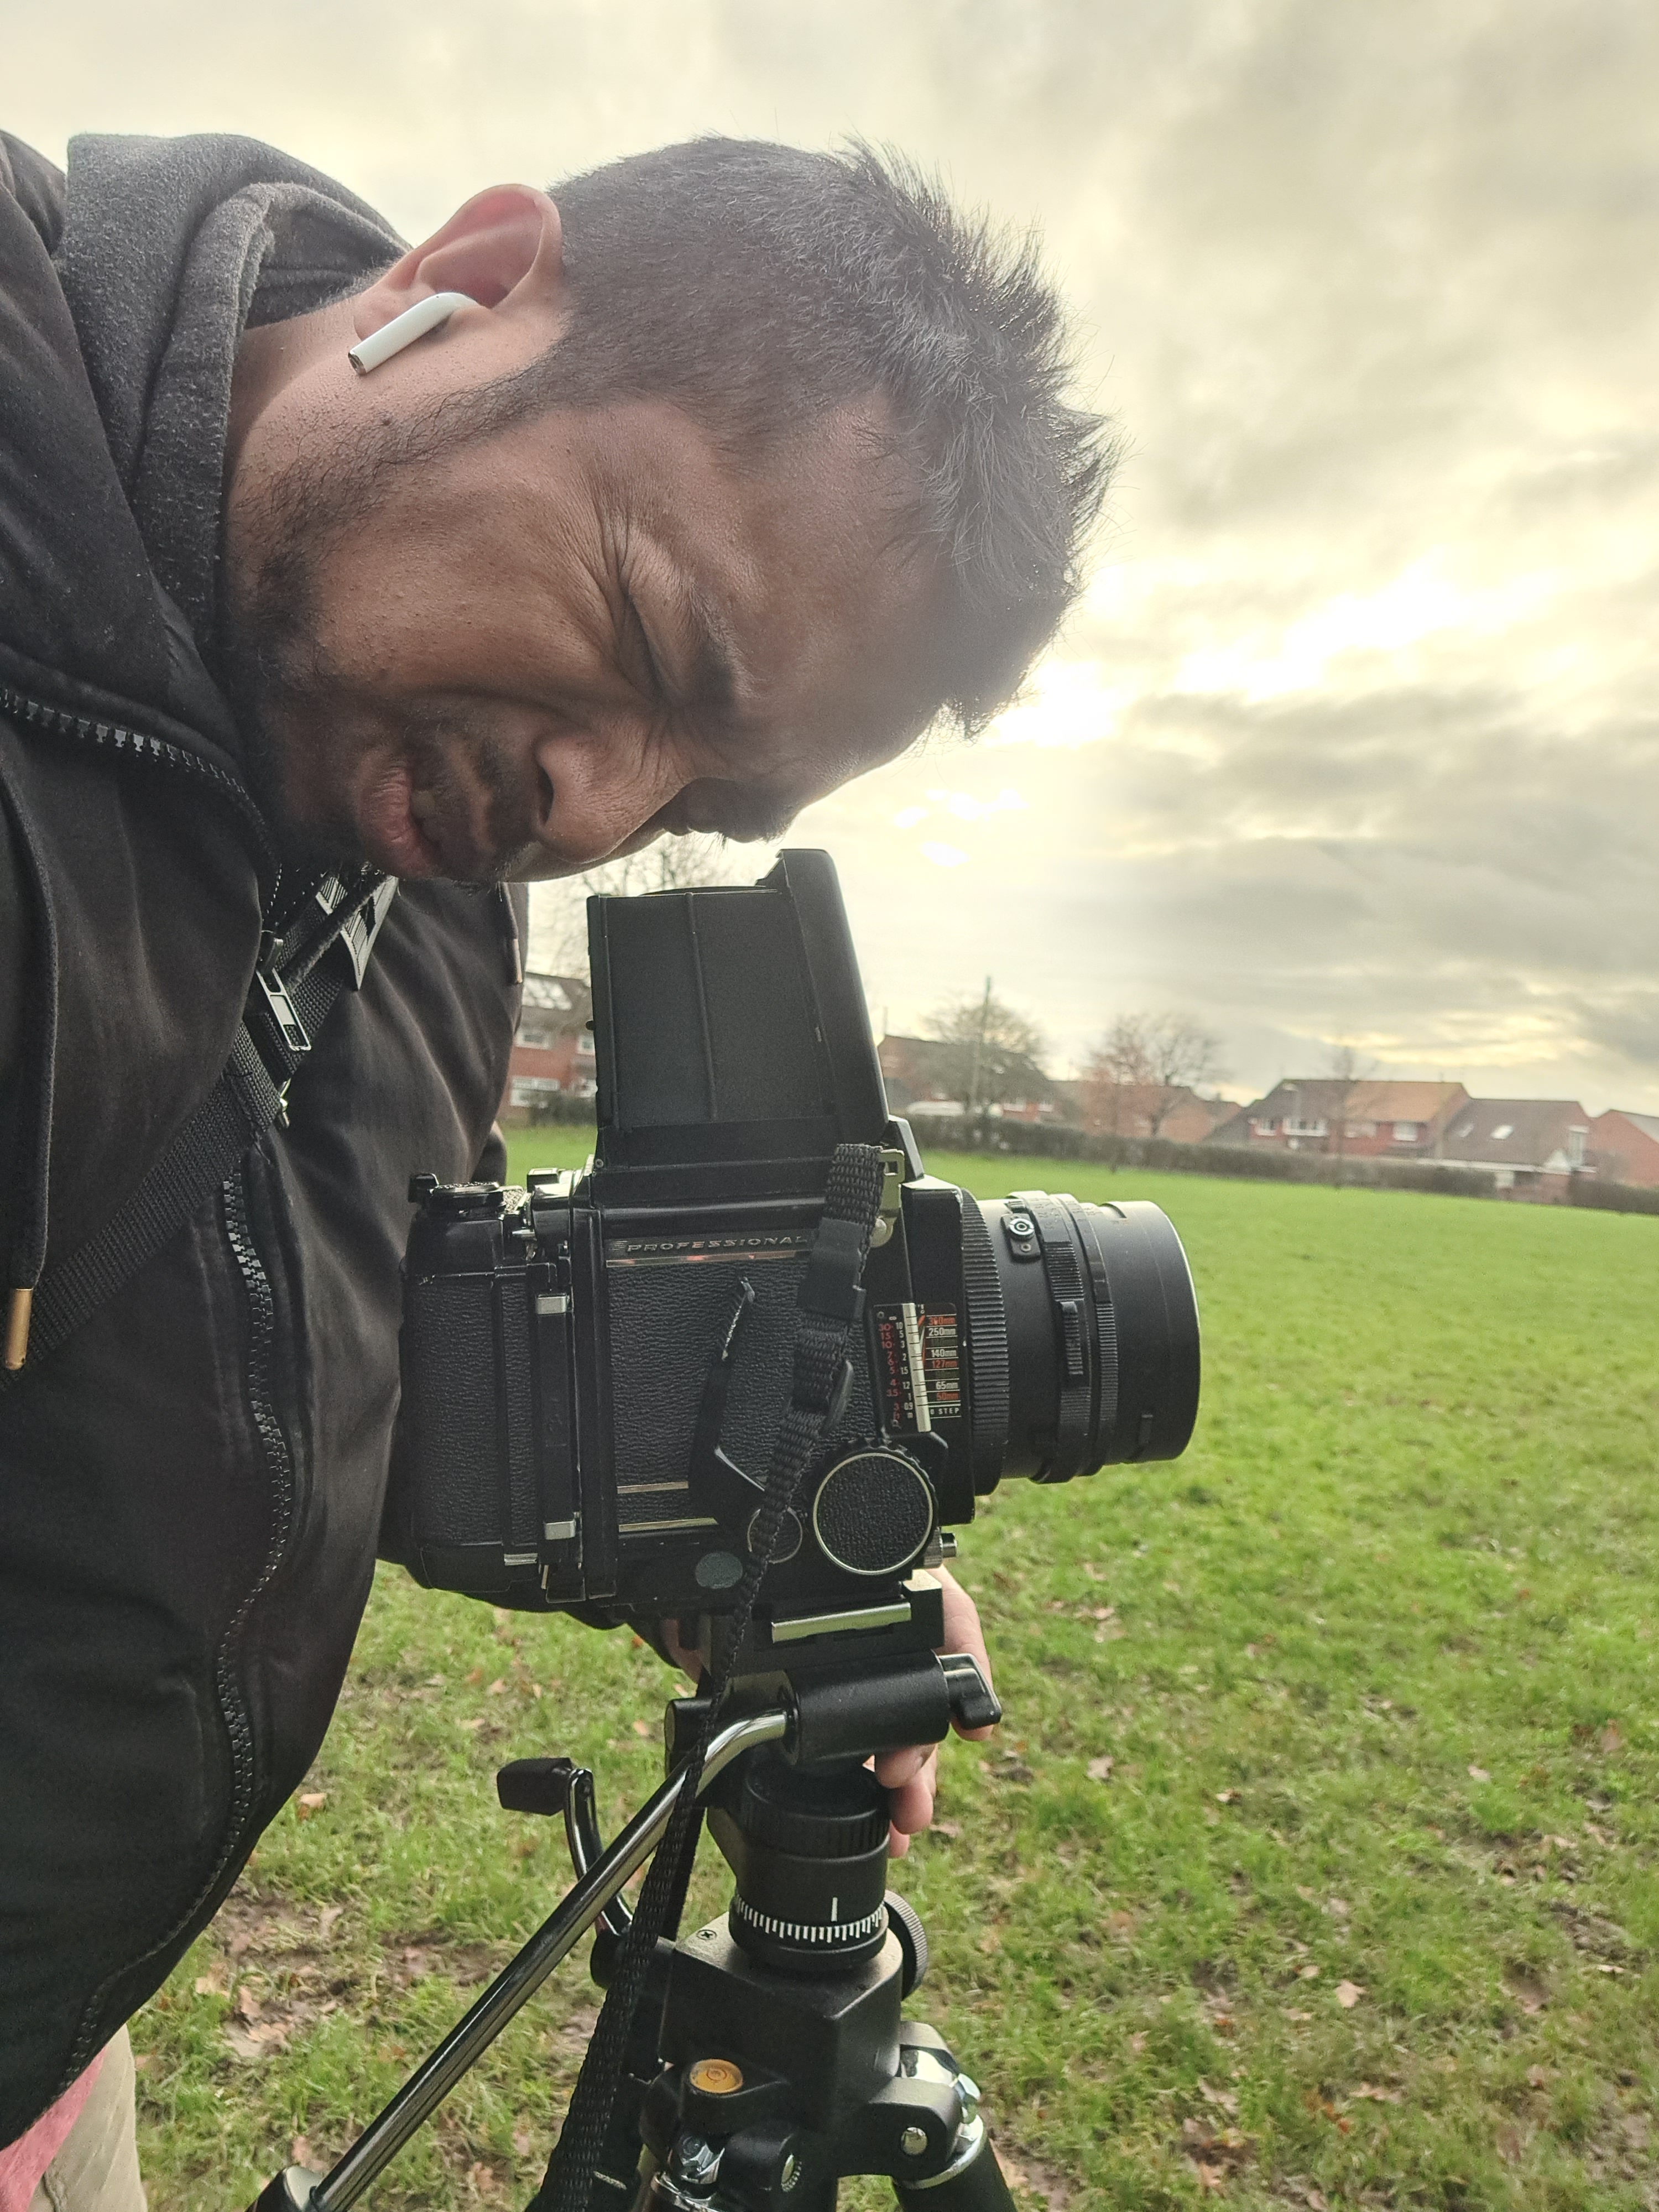
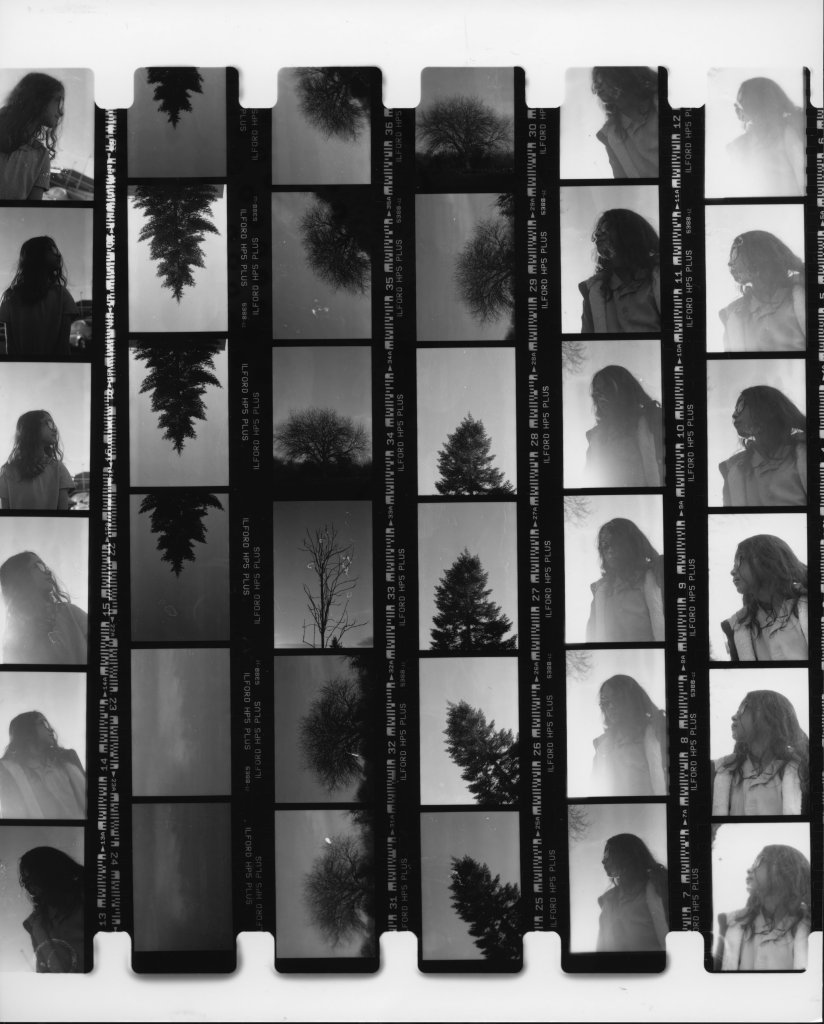
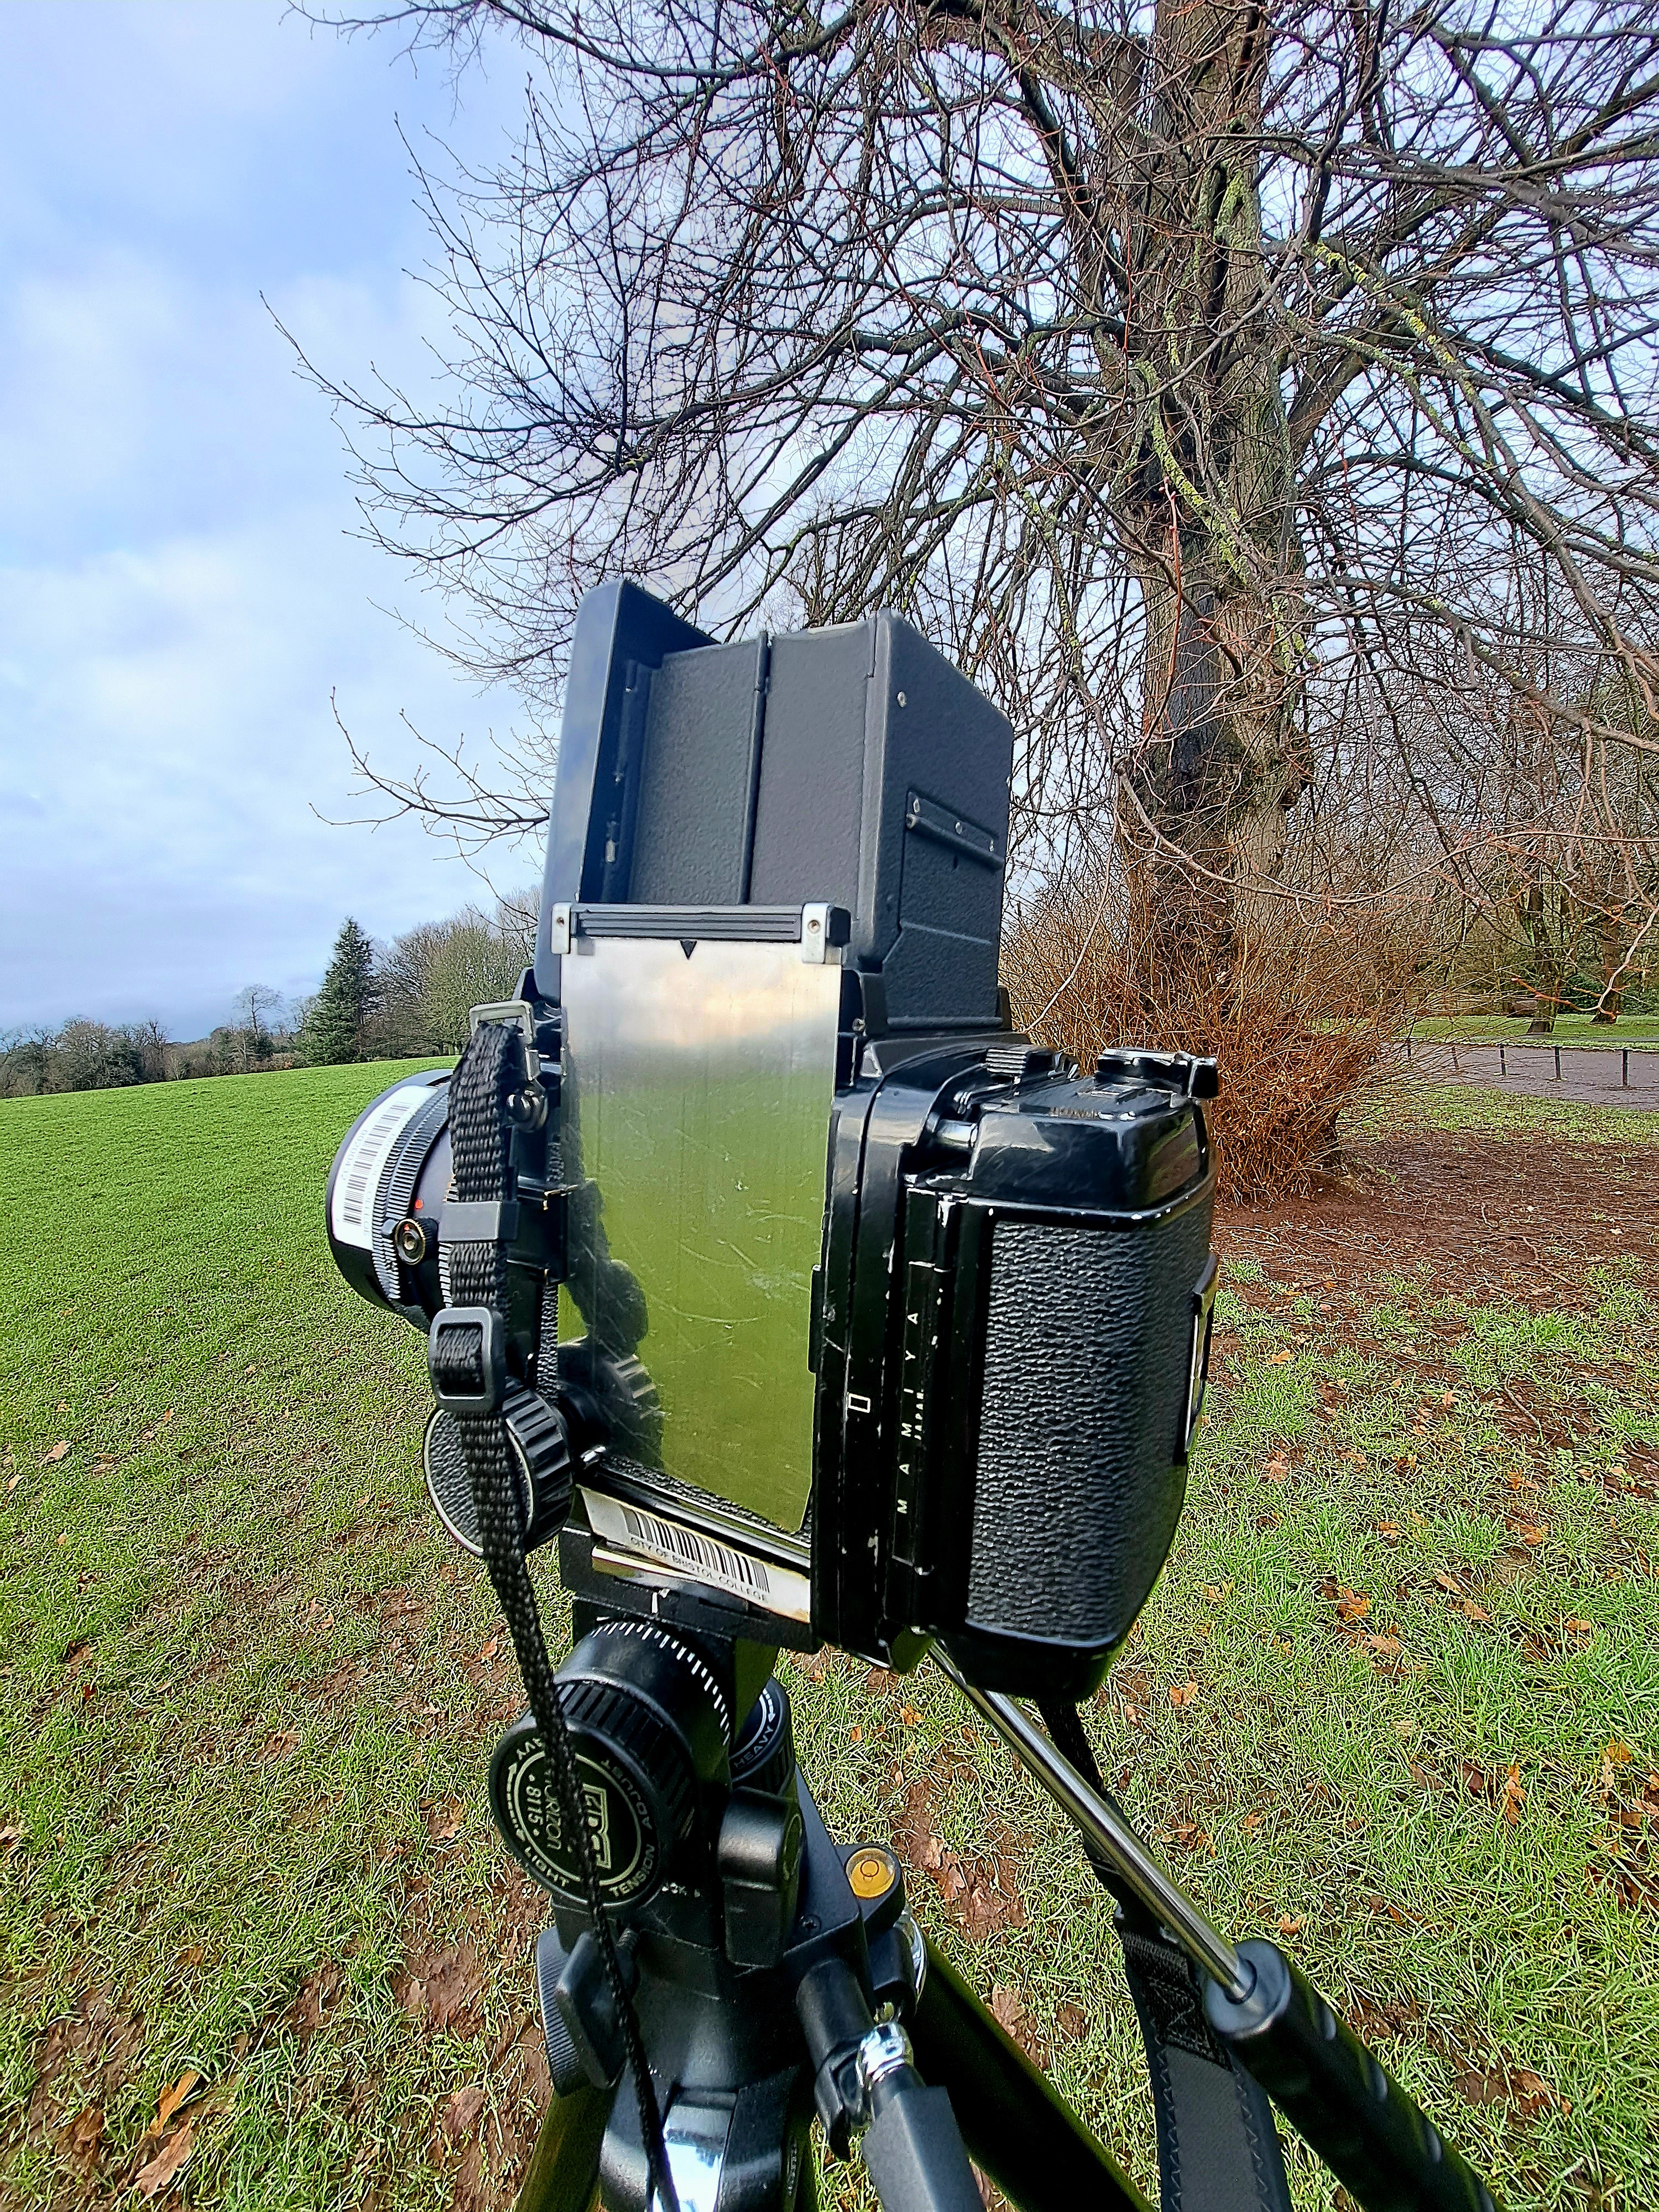
- Third Test shot 3 (by myself) and contact sheet
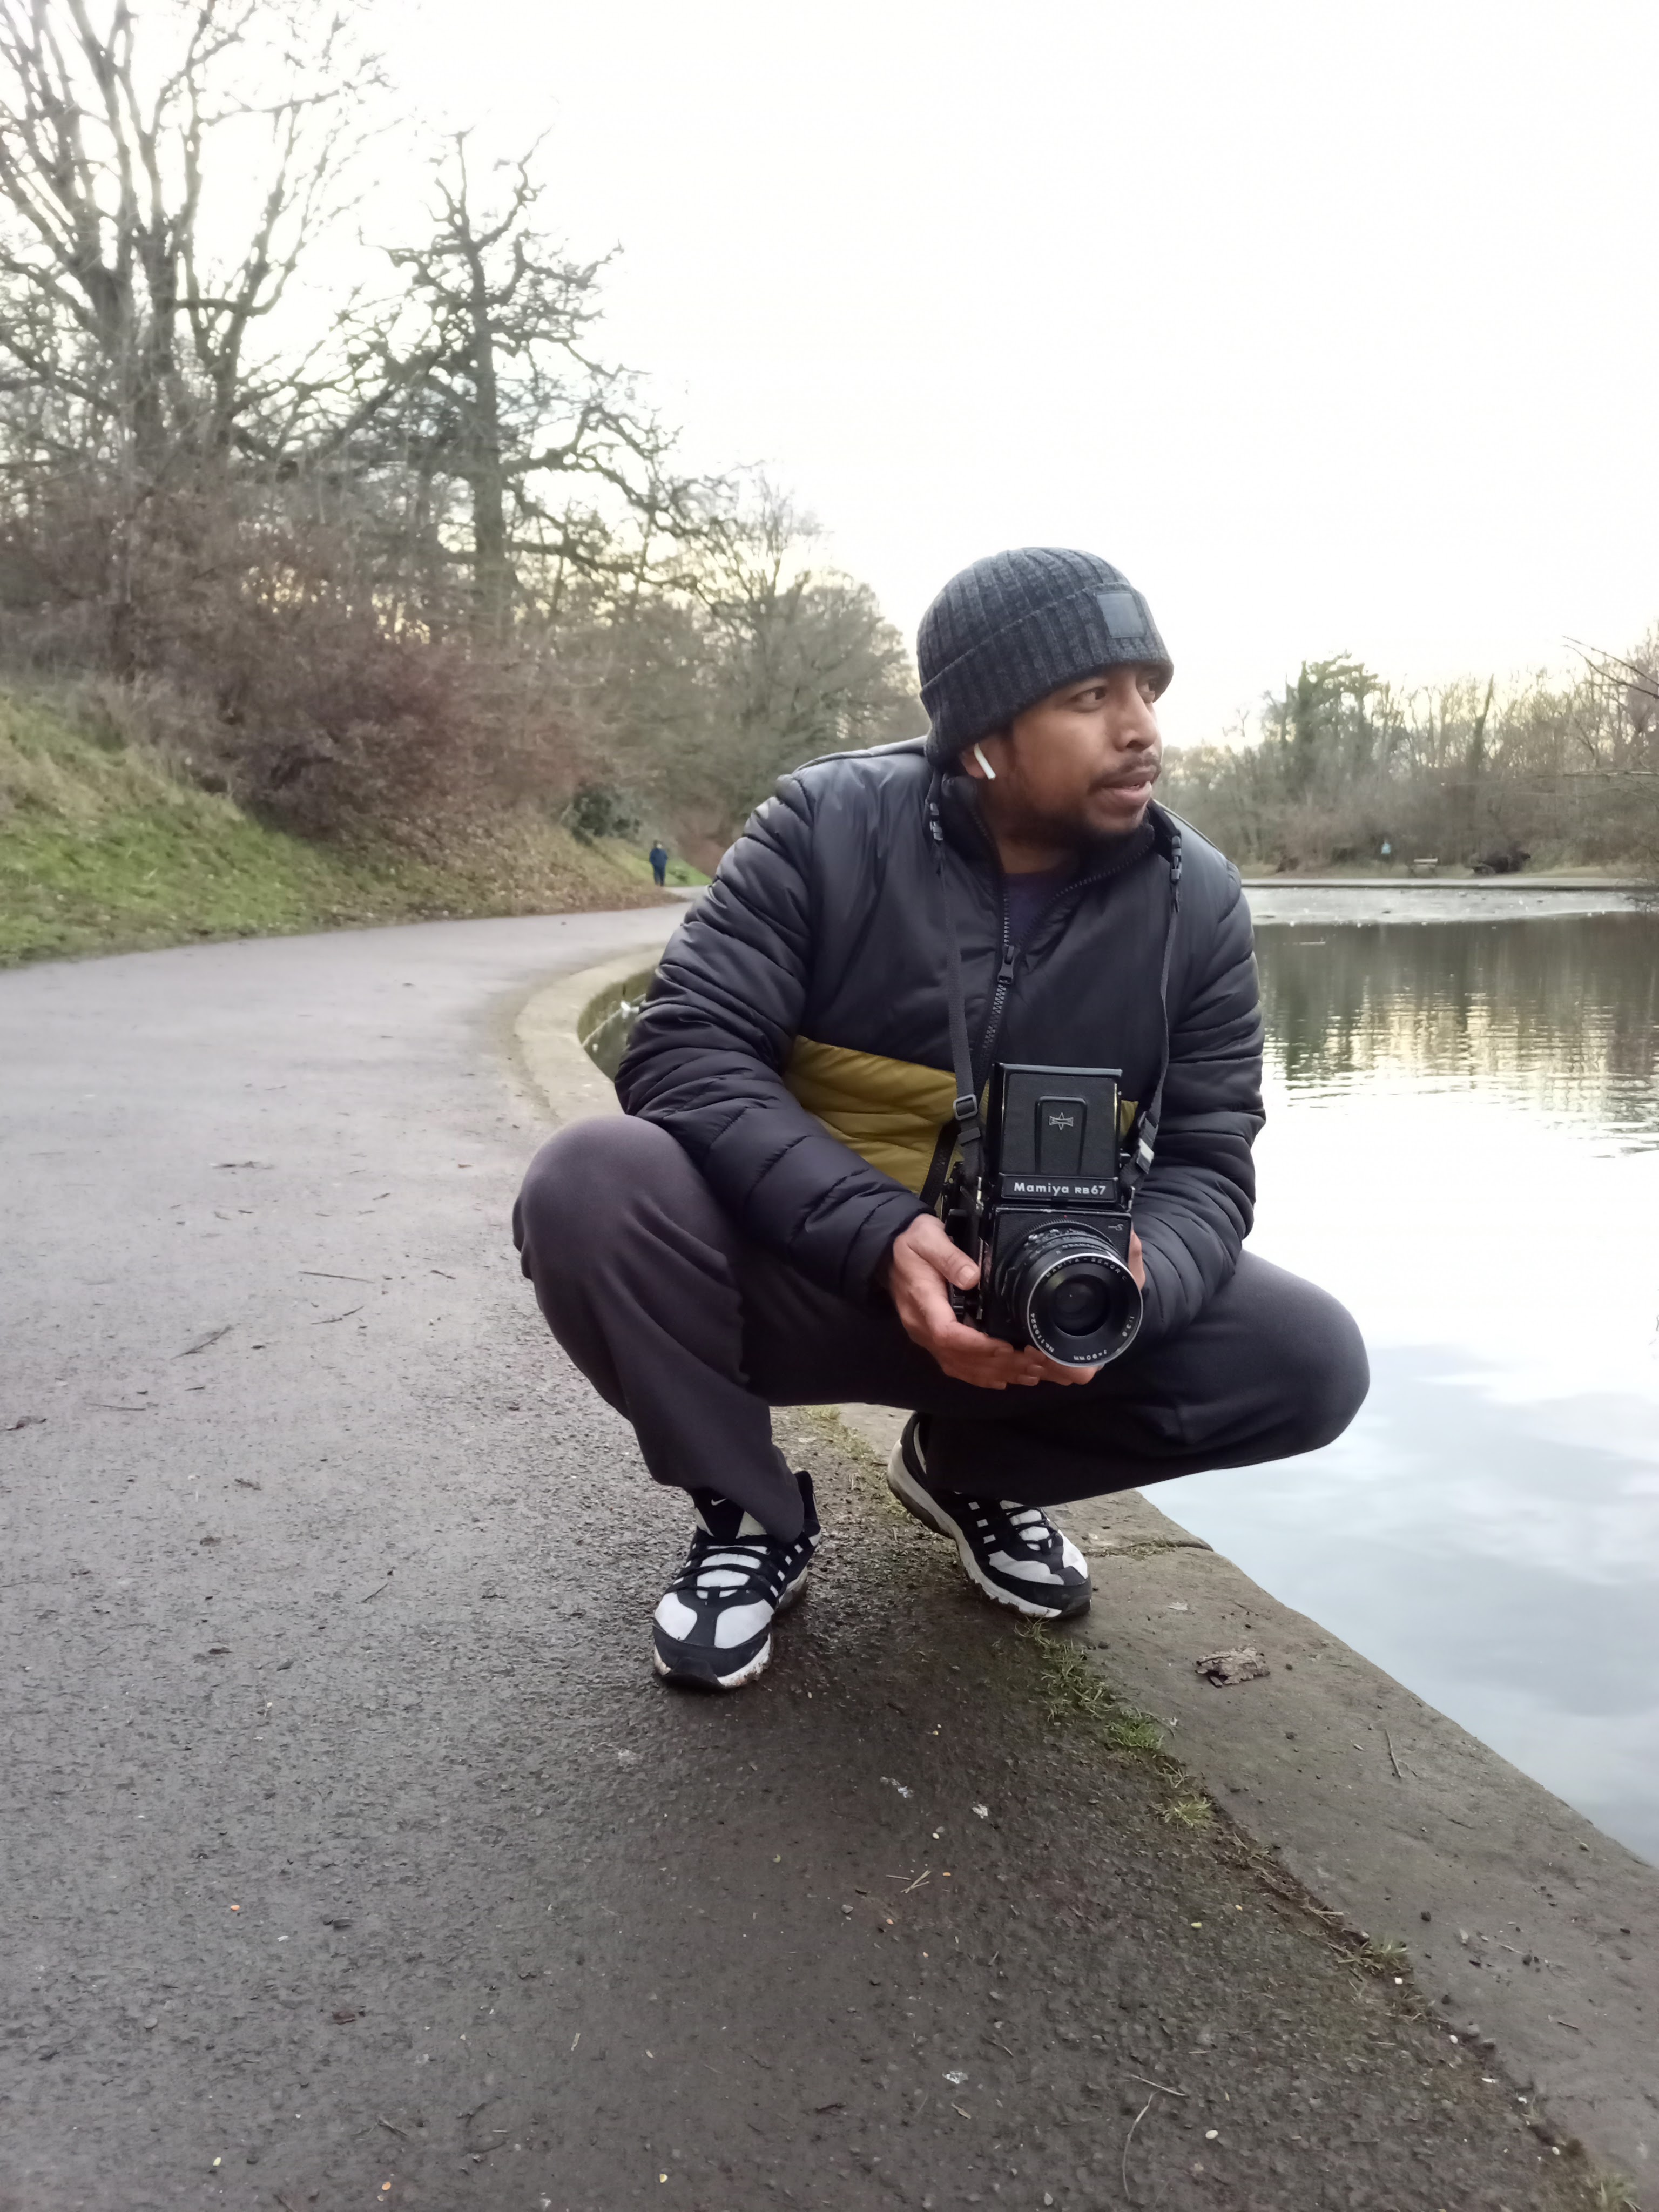
In this session, I work independently with Mamiya RB67 outdoors without a model and also observe the location for preparing the risk assessment.
Contact Sheet 3
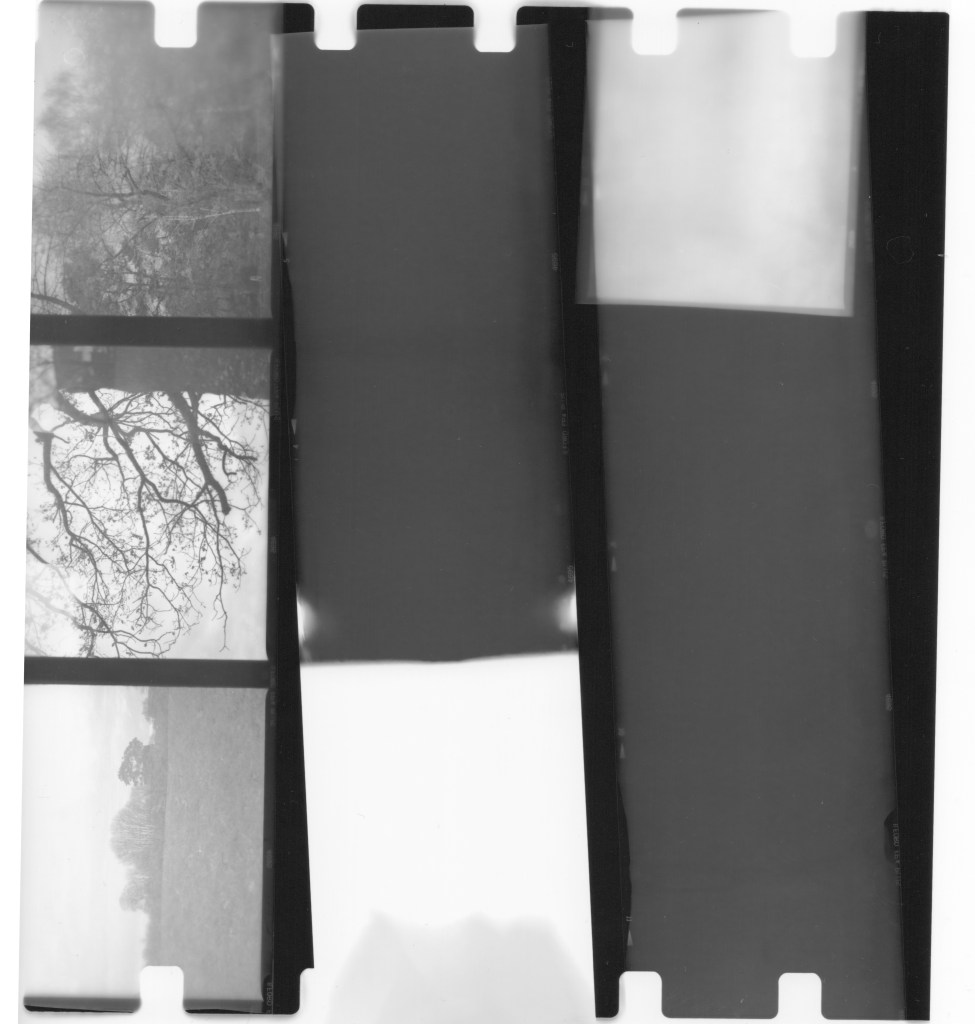
As you can see, the outcome is quite poor since I failed to cock the shutter lever as quickly as possible after capturing the first composition, which allowed the lens to remain open to the light. This was a lesson I learnt from taking this initial shot. (When using the Mamiya RB67 in double exposure mode, the red dot is visible the whole time)
PROJECT PRODUCTION
Project shot (Double Exposure Indoor)
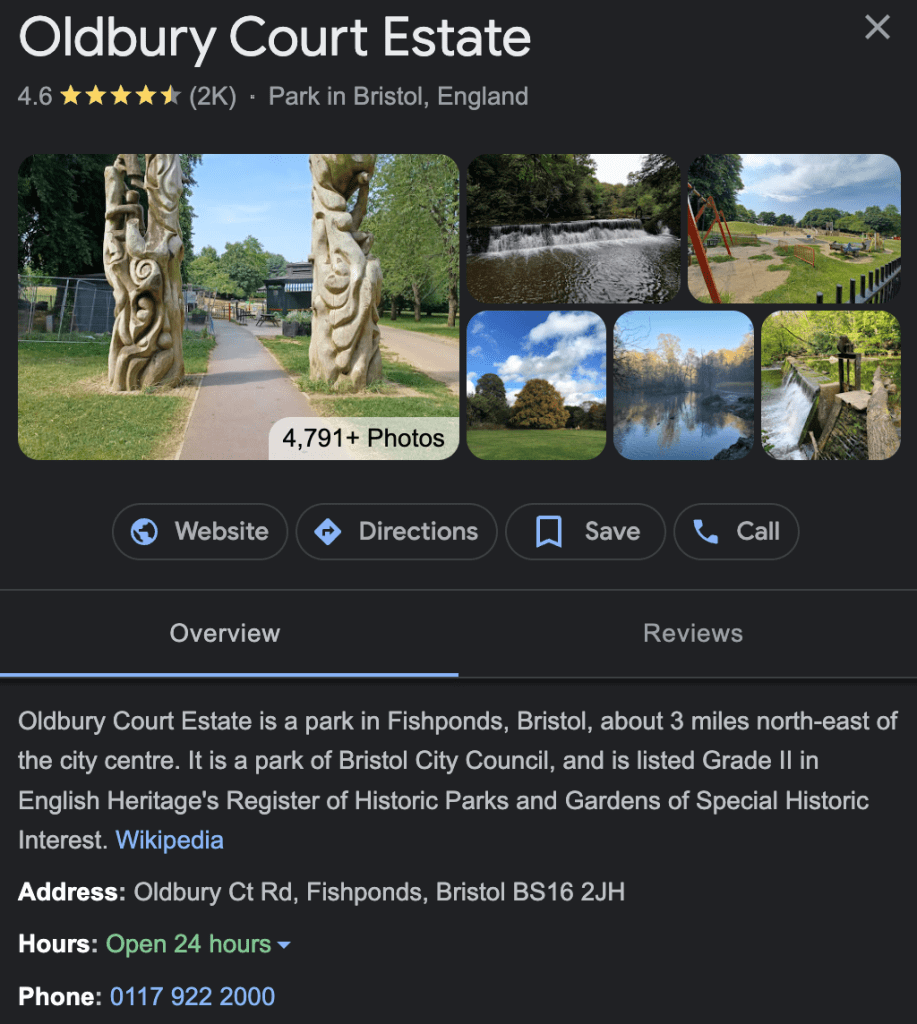
Scene according to the proposal: Locate a large open place that has a lot of trees, a lovely looking environment to wander around in, and the terrain is easy so that you don’t have to worry as much about damaging yourself or falling over as you will travel with a minor. This will allow me to move with less risk of injury.
Location Shot
Public park and accessible:
Survey the location the day or a couple days before the photoshoot.
Risk Assessment
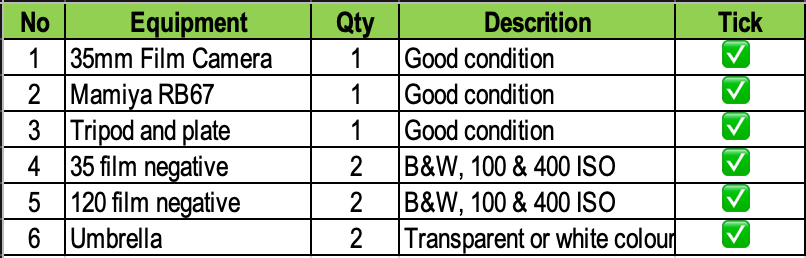
Checklist
Photoshoot Day

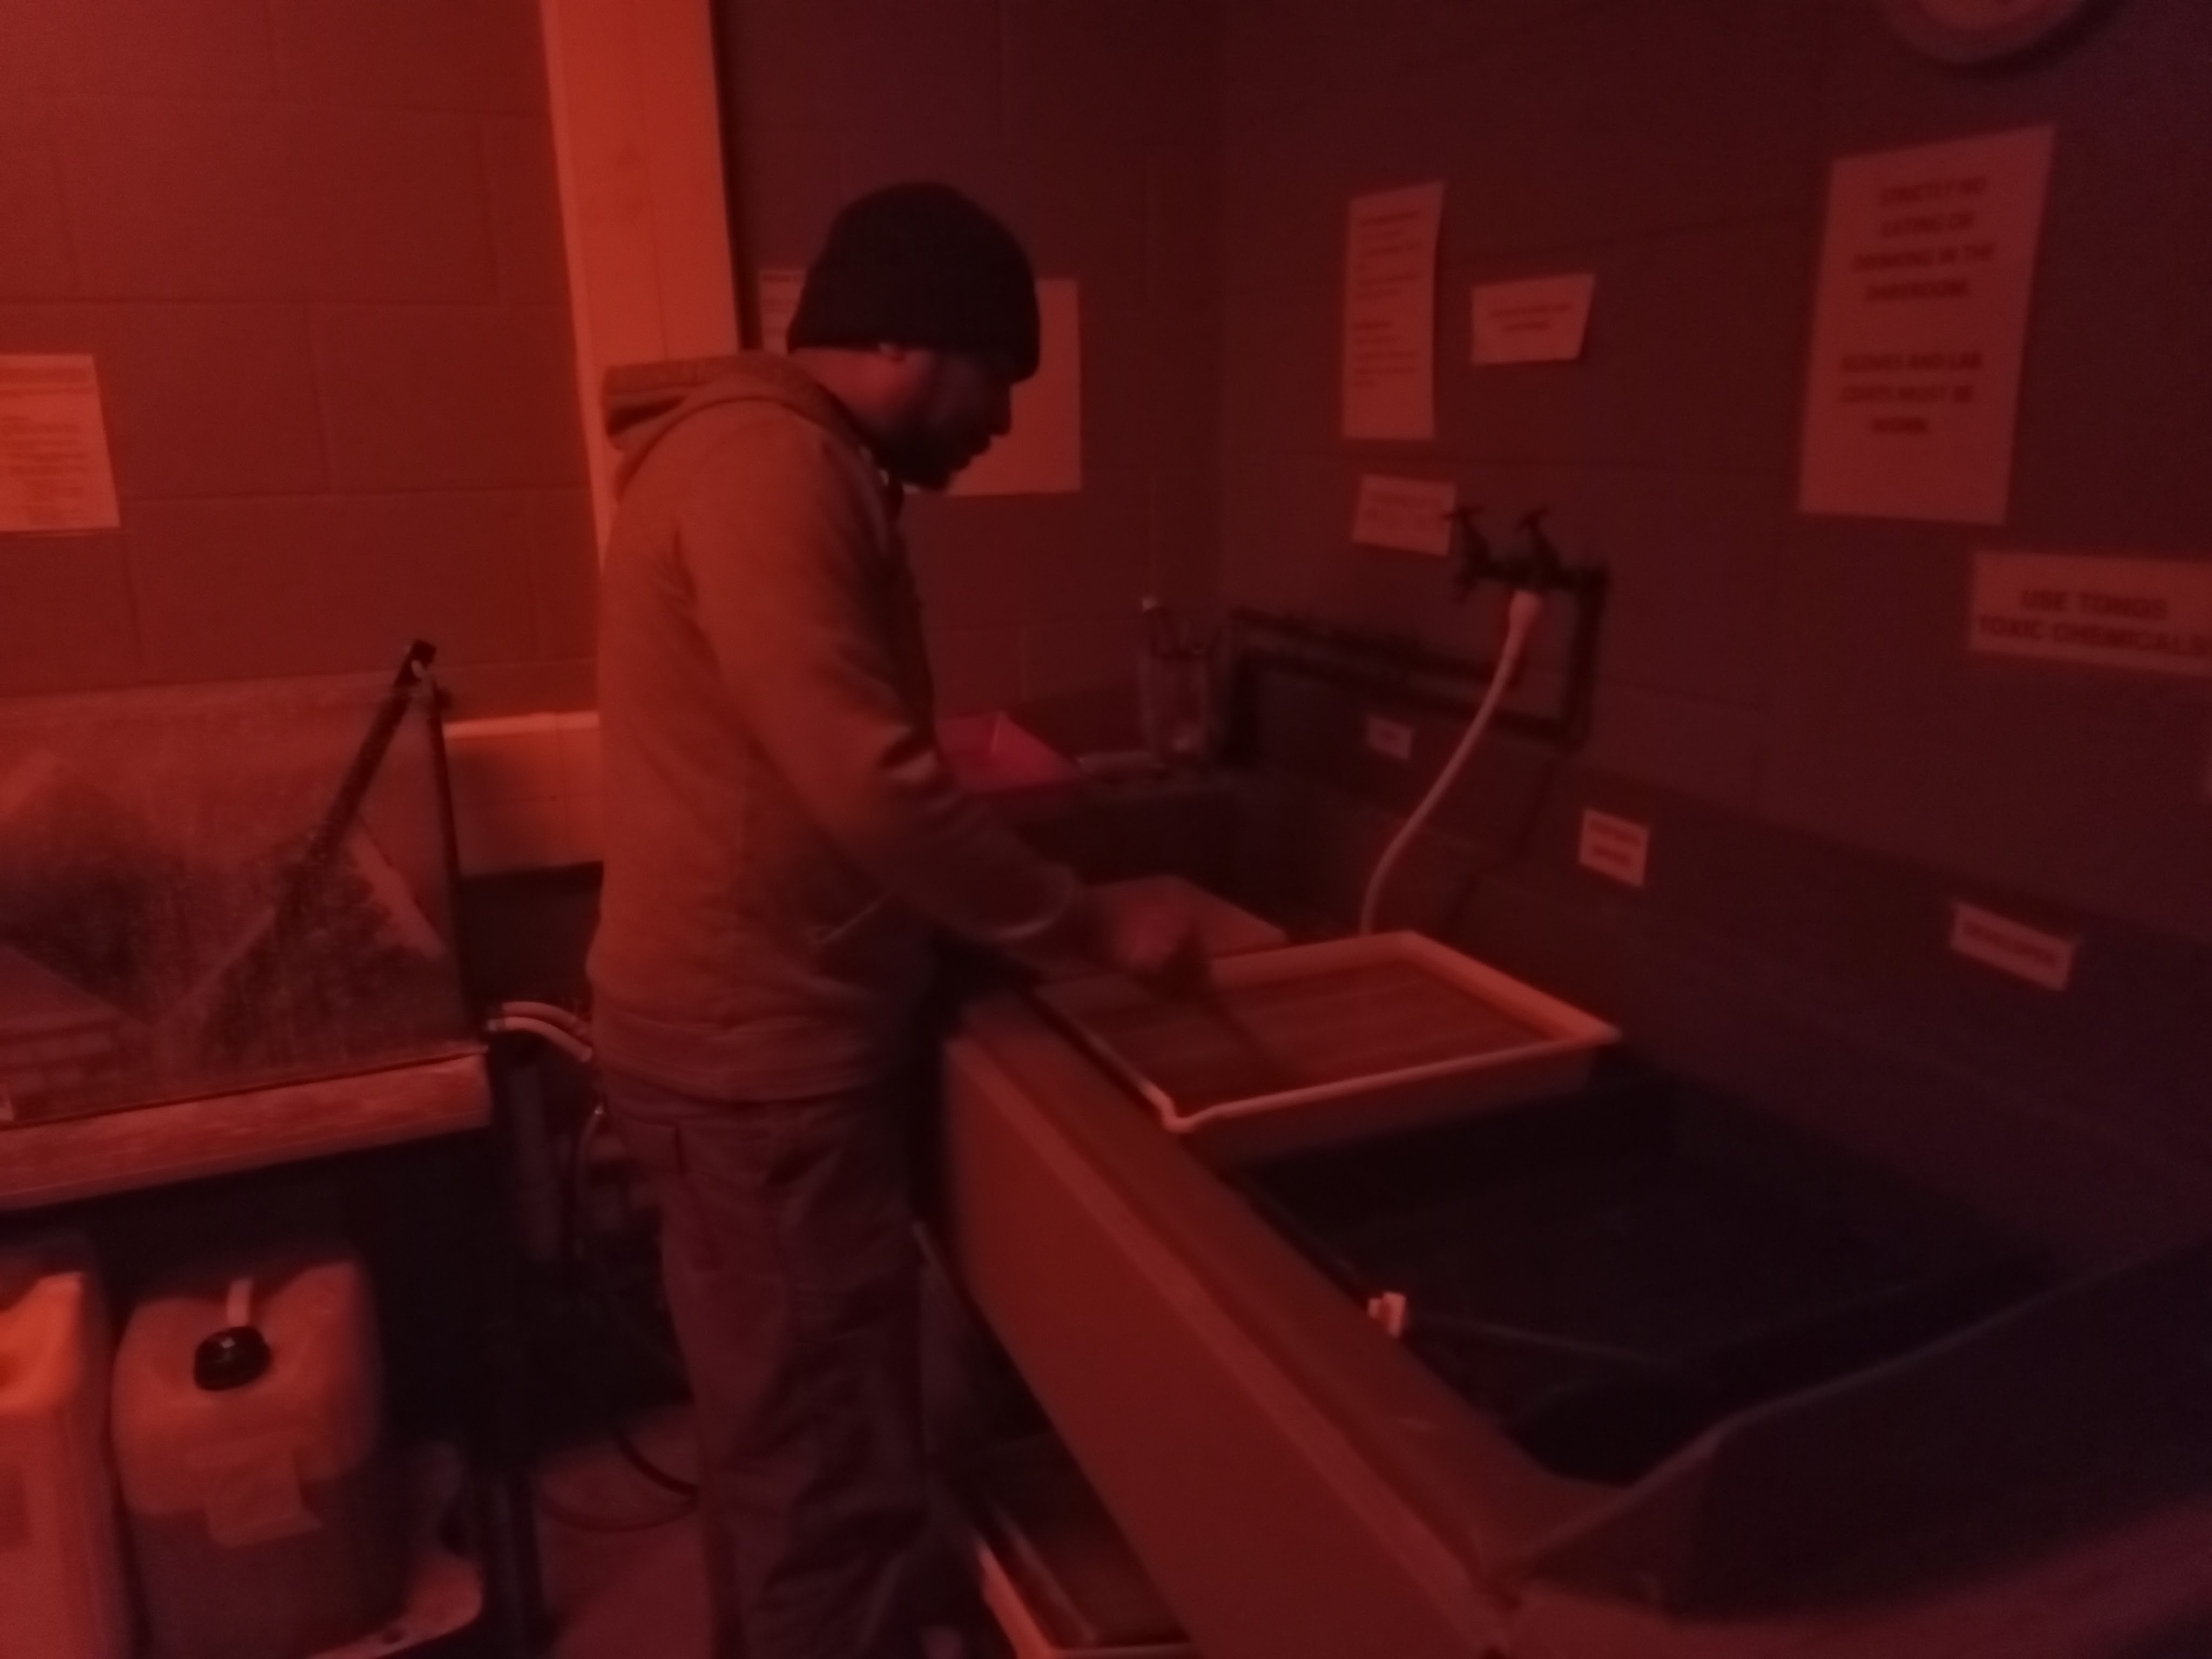
Develop Film Negative


Processing the negatives in the darkroom
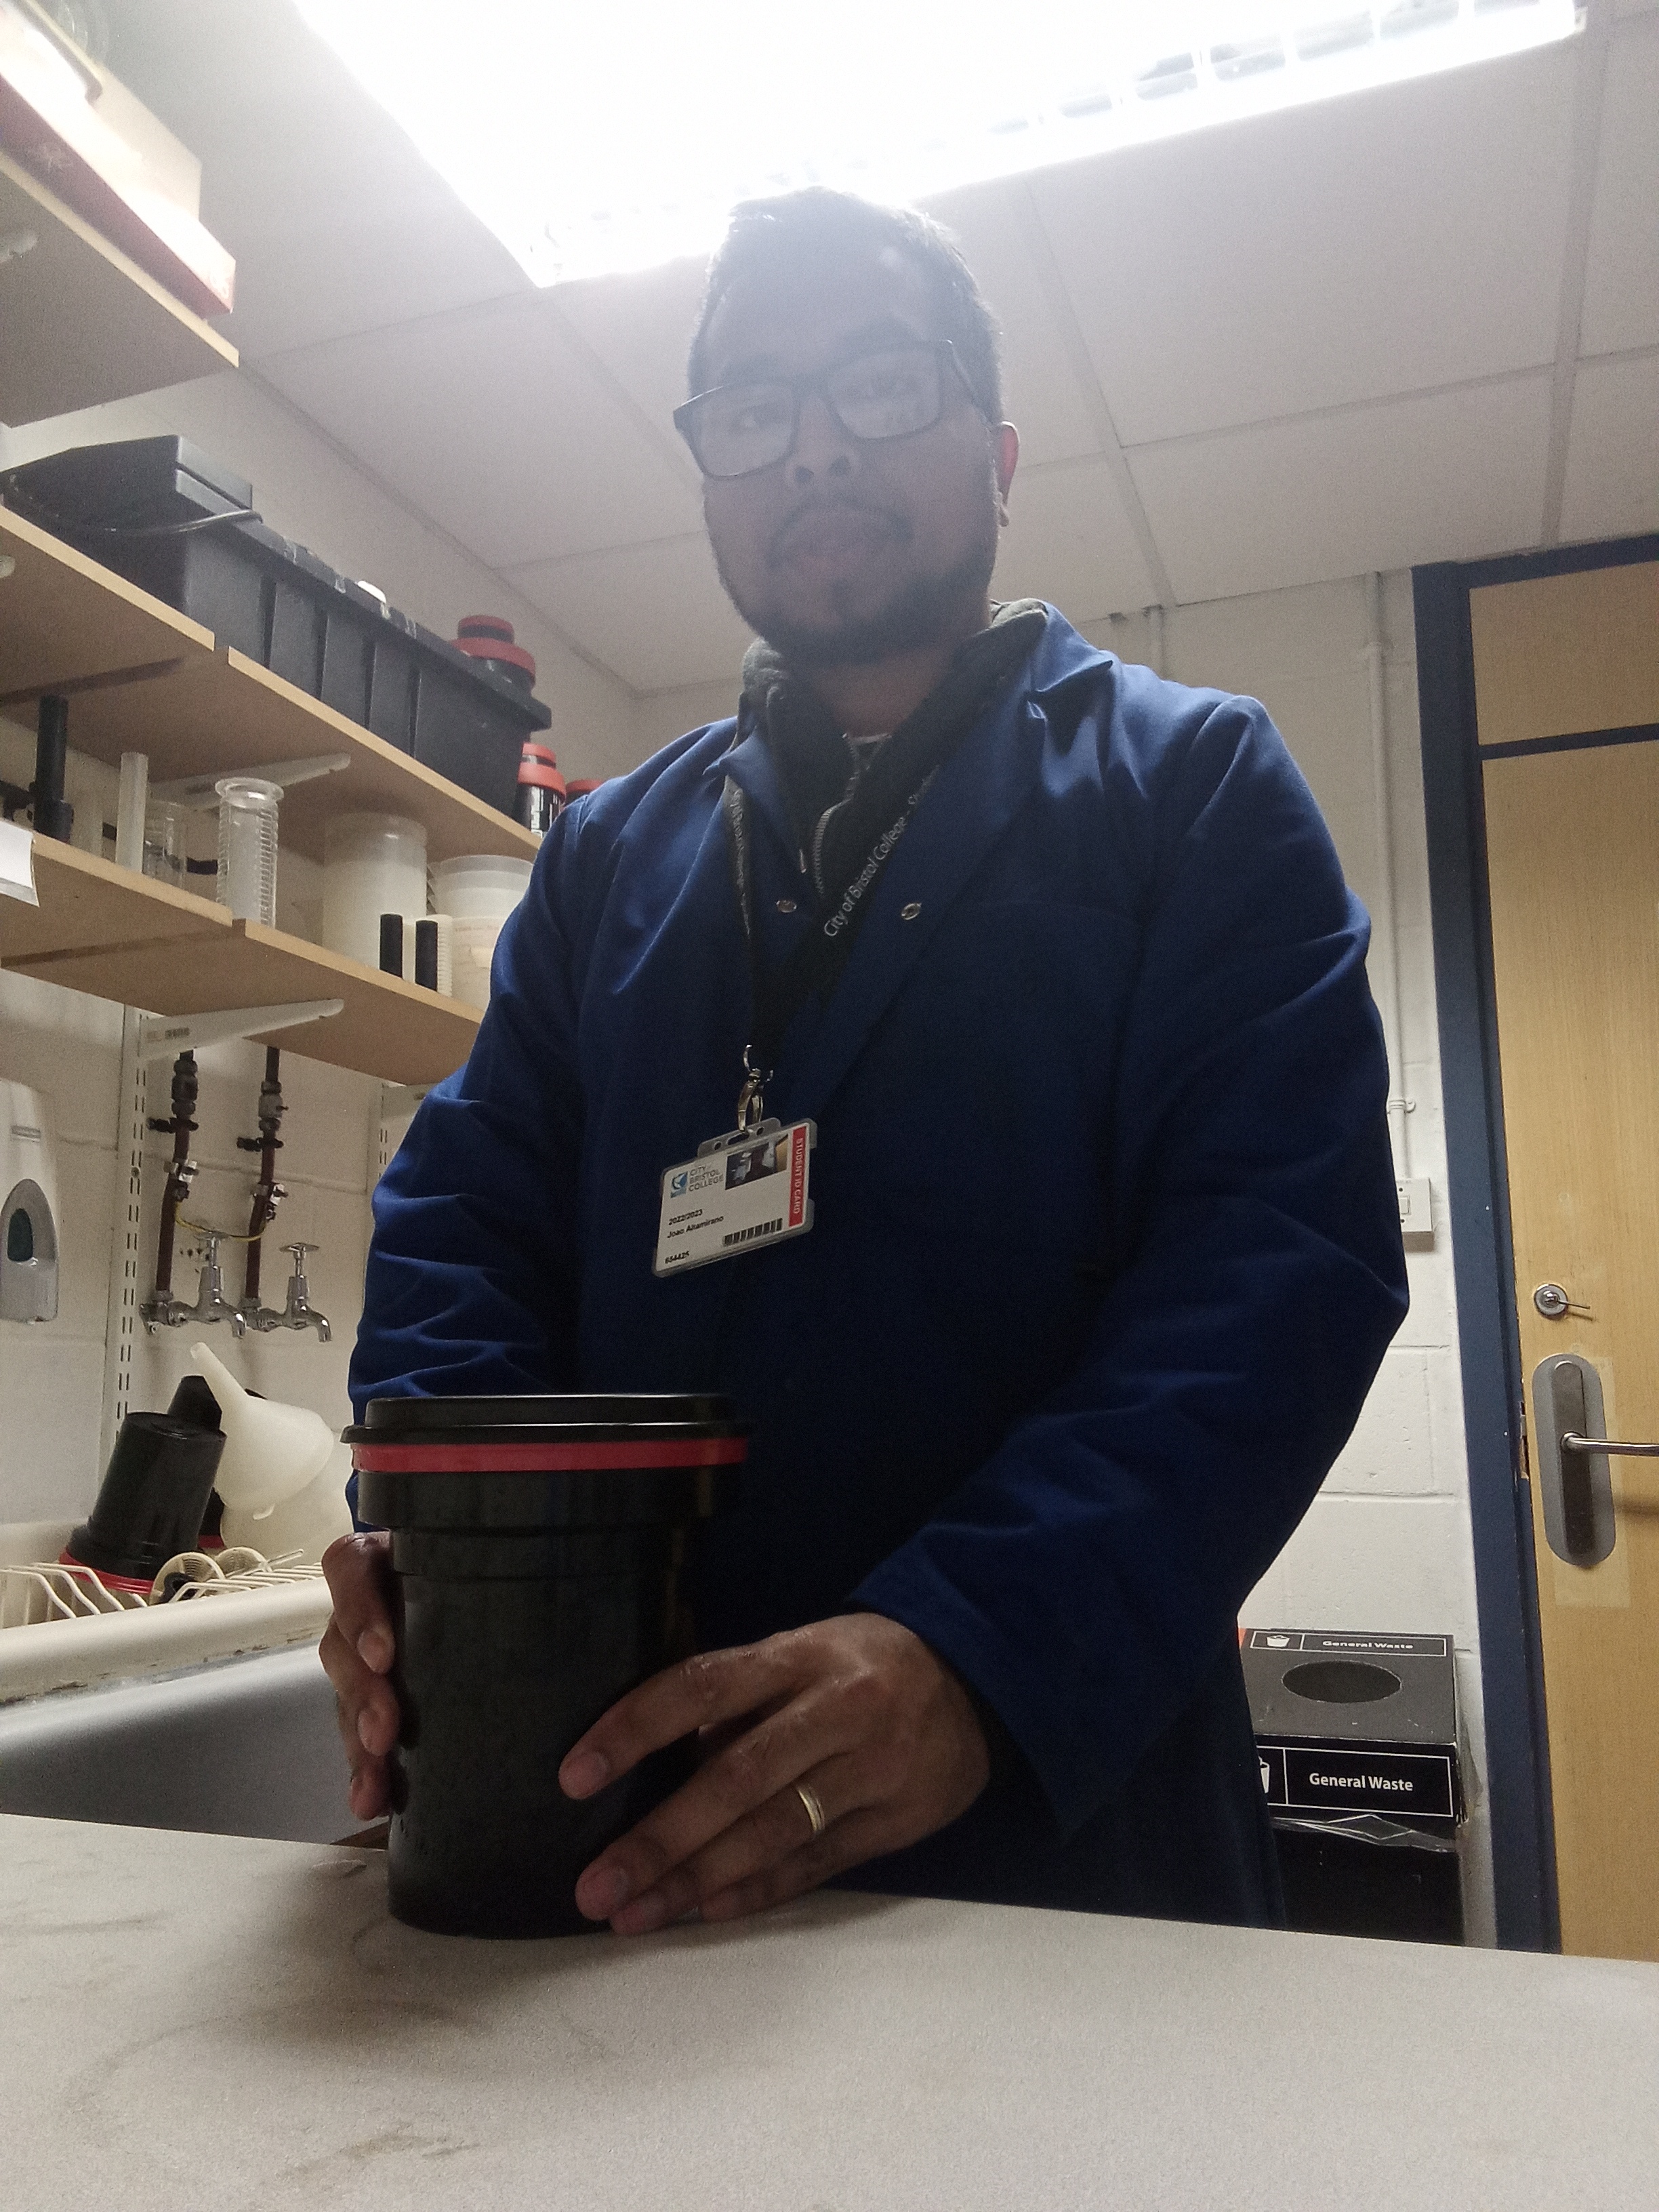
FIRST PROJECT SHOT-120 FILM (MAMIYA RB67)
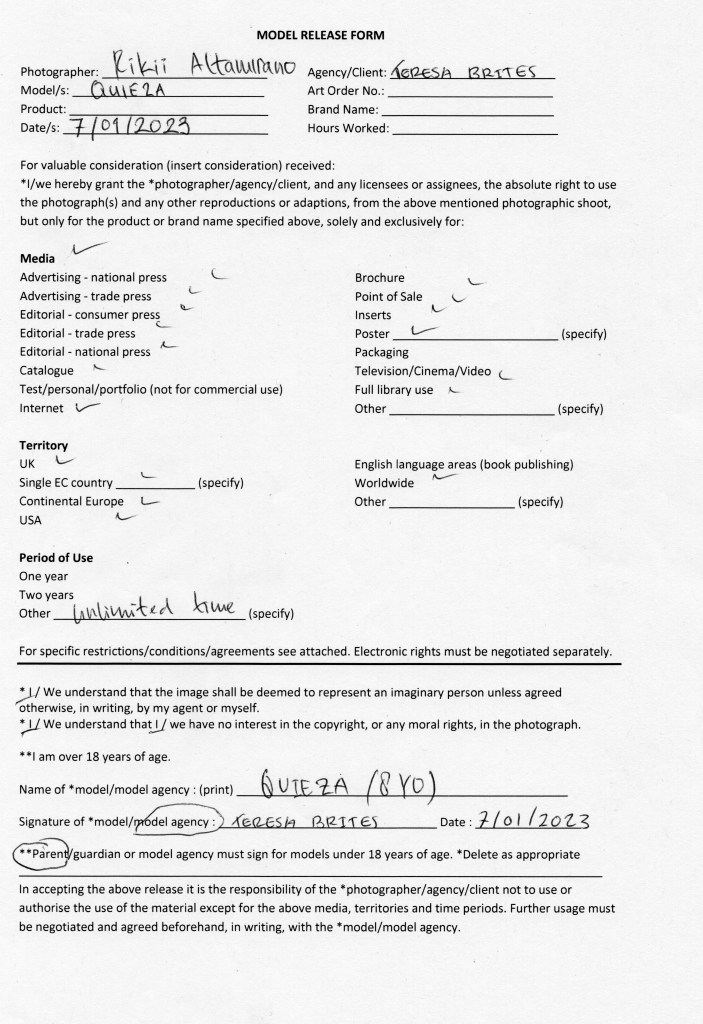
Legal Agreement
This is the first step I have done before beginning the project with the model.
I explained everything to the model and her parent regarding this project and they were all happy to work with me on this specific school project with unlimited use of time to get the required image.
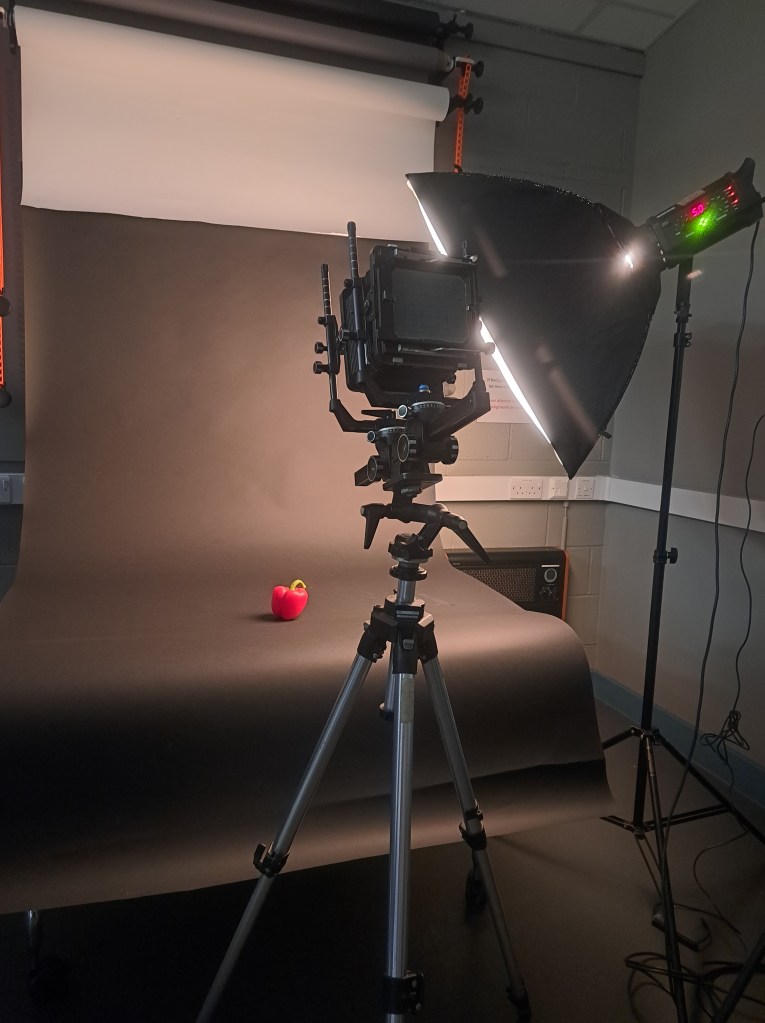
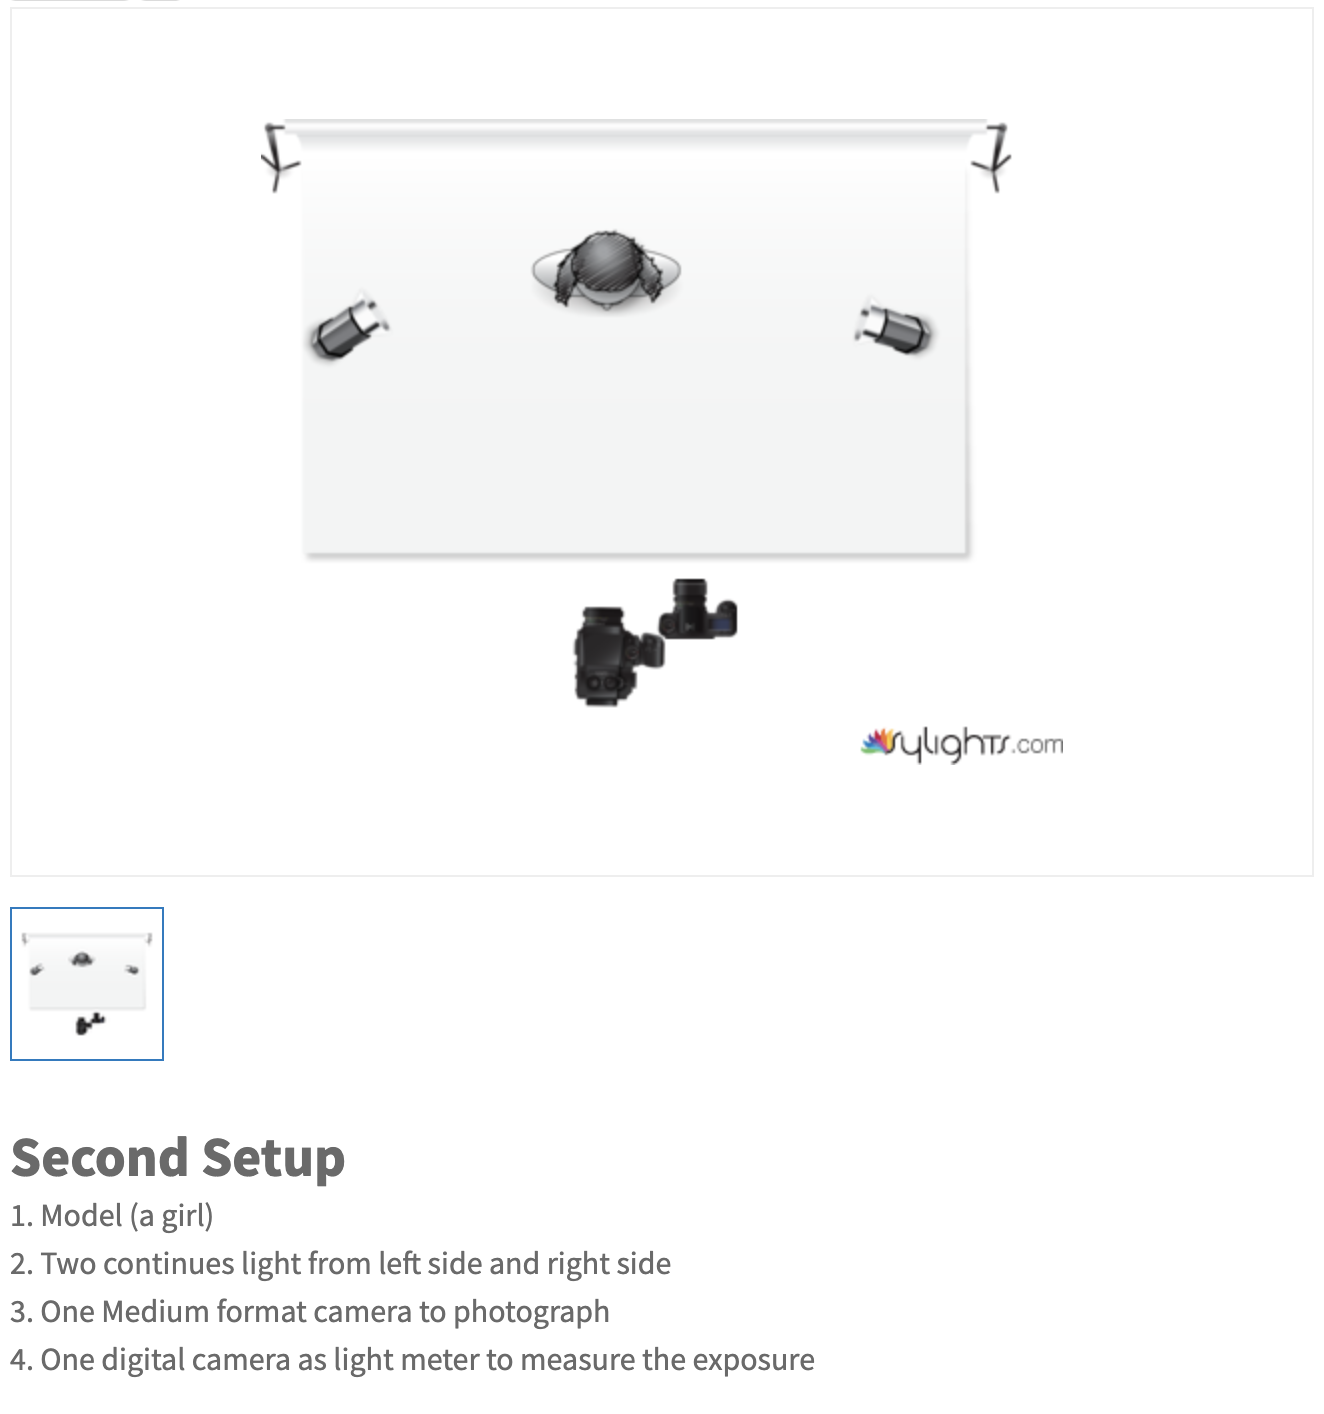
After learning from my earlier test shots, I made the decision to shoot indoors using two continuous lights, one backdrop, and a digital camera to measure the light.
I shot one setup first and then shot the second setup to produce the double exposure as the outcome.
The image below was shot as well with a digital camera to measure the light and also to see the outcome of the setup.
Diagram of setups


Test shot 1 contact sheet (Double Exposure Indoor)
Test Shot 4 (Test Print 1) Exposure tune
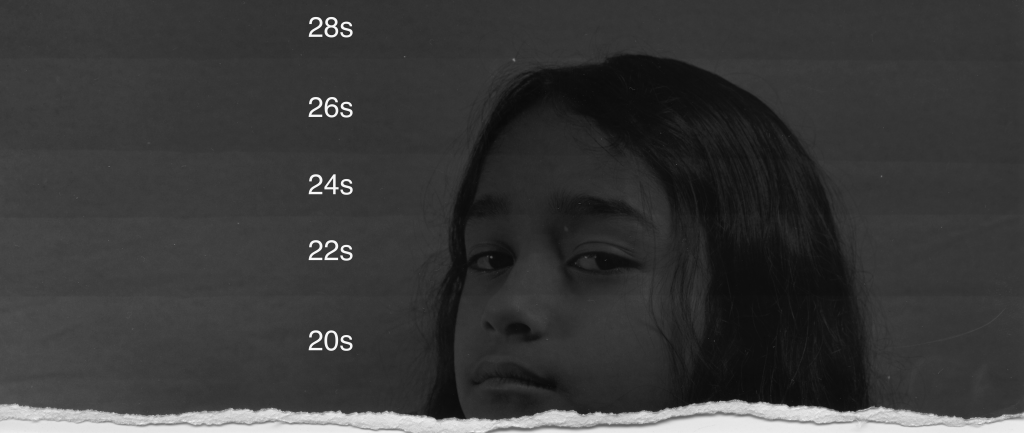
So, the idea is to work out the proper exposure in the darkroom by starting with the setting of:
Grade 1 1/ 2
Lens aperture 7.1
The exposure time of 20 seconds with increments of 2 until 28 (the 20s, 22s, 24s, 26s, and 28s)
Test Shot 1 (Test Print 2)
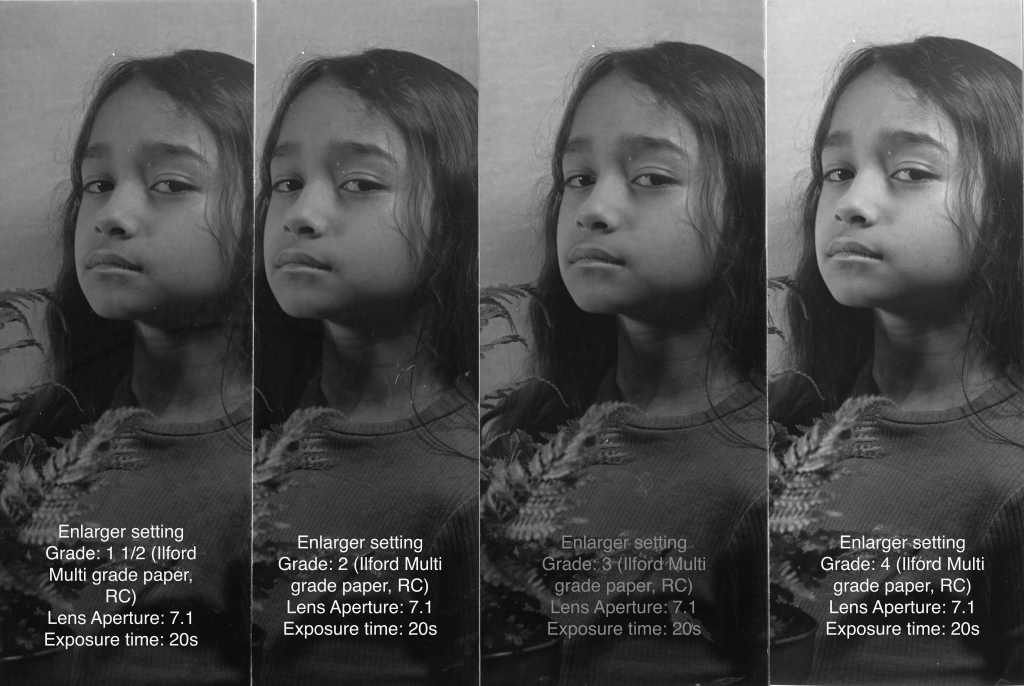
For the second test print, instead of exposure time, I decided to stay at the 20s of exposure time and work around the grade to find the best contracts for my image.
What I decided to print is the grade 3 with the same exposure time.

Because I have found the correct exposure setting with the print, all I have to do is work out the exposure for multi images at one negative film as a double exposure image.
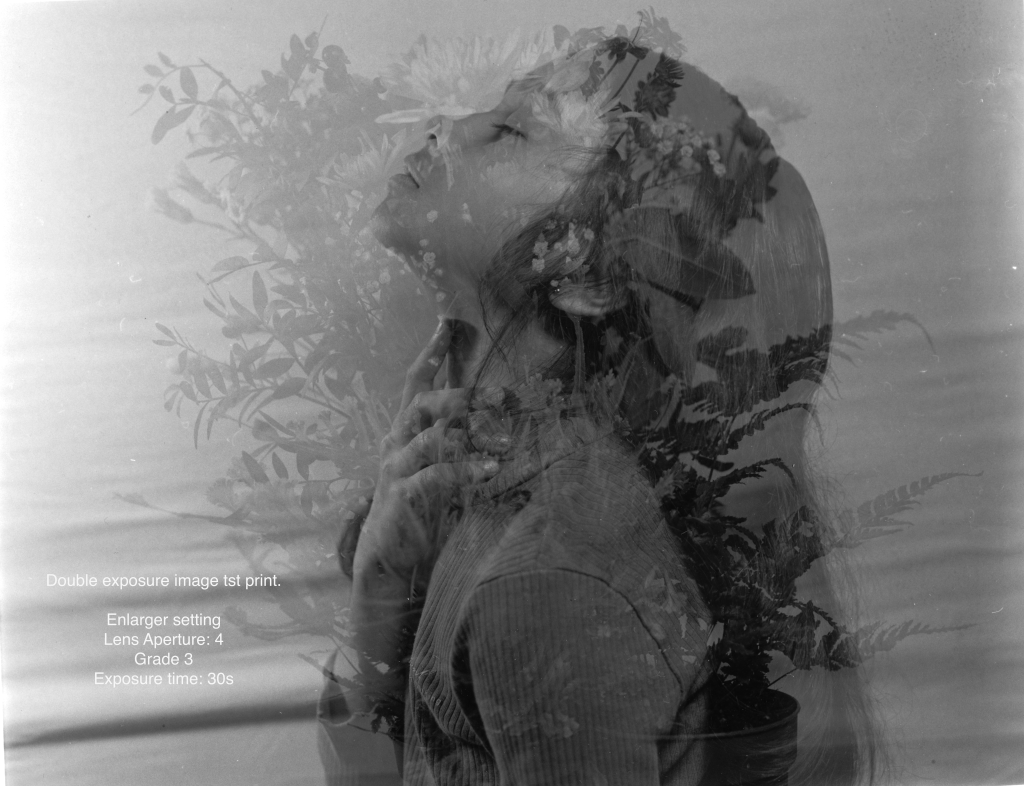
Test shot 1 double exposure ( Test print 1)
I also attempted a double exposure to see how it would turn out, and I can see that the picture is overexposed. According to Zoe, the City of Bristol College’s media technician stated that “to do the double exposure, you have to shoot both images at half exposure”-Zoe.
This statement was confirmed by the YouTuber also a photographer with a youtube channel known as EduardoPaveGoye who is a user of a medium format film camera mentioned “to shoot double exposure, you have to shoot both images stop light less (click to see the video), so when two images combine they will have correct exposure in the film negative.
The same setting at vertical develop
SECOND PROJECT SHOT 120 FILM (MAMIYA RB67)
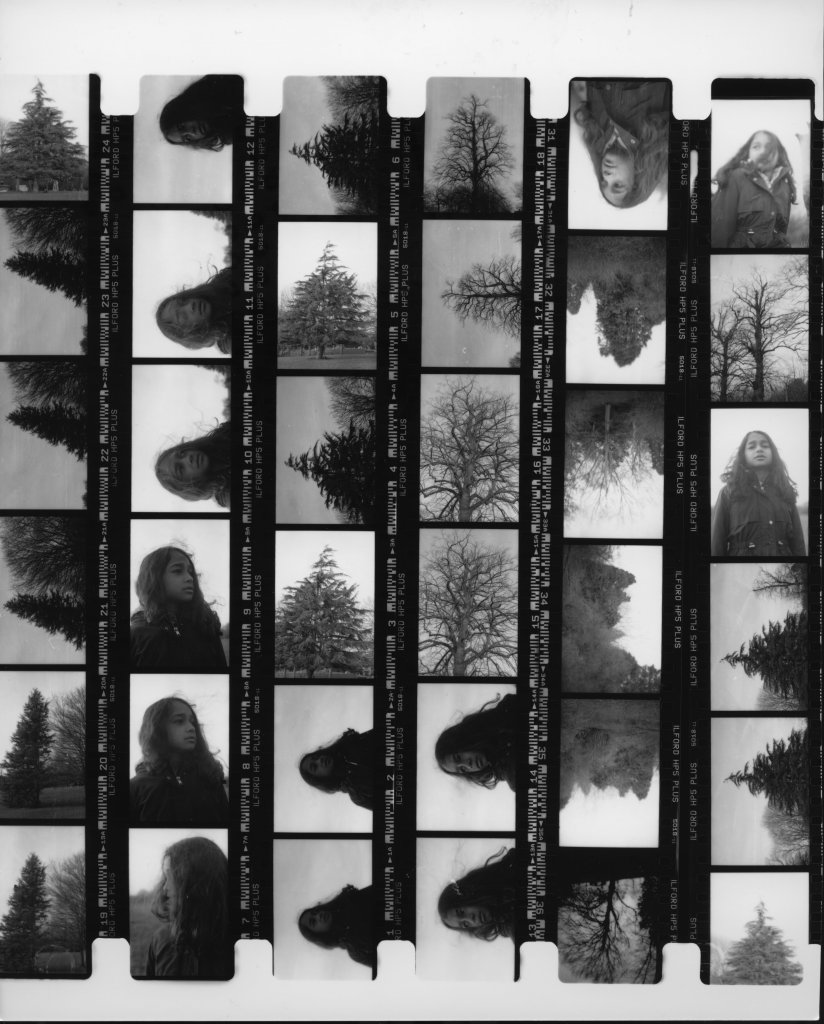
After shots and practices, I made it out and shots images for the project’s outdoor scene.
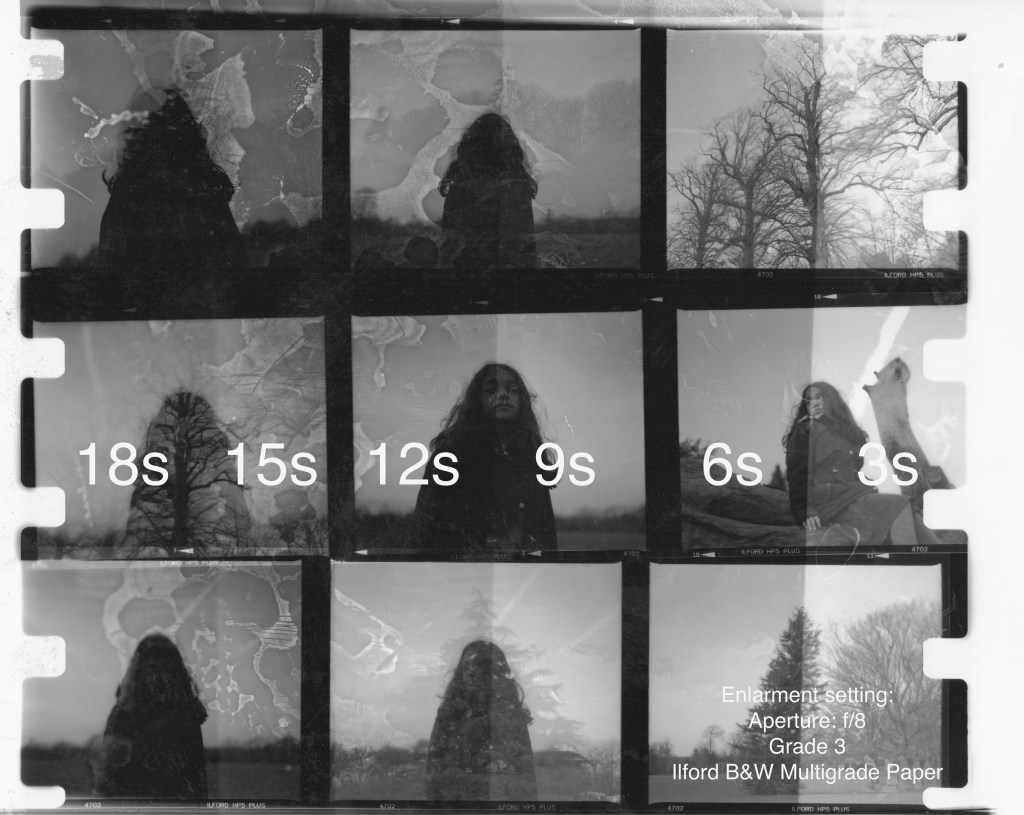
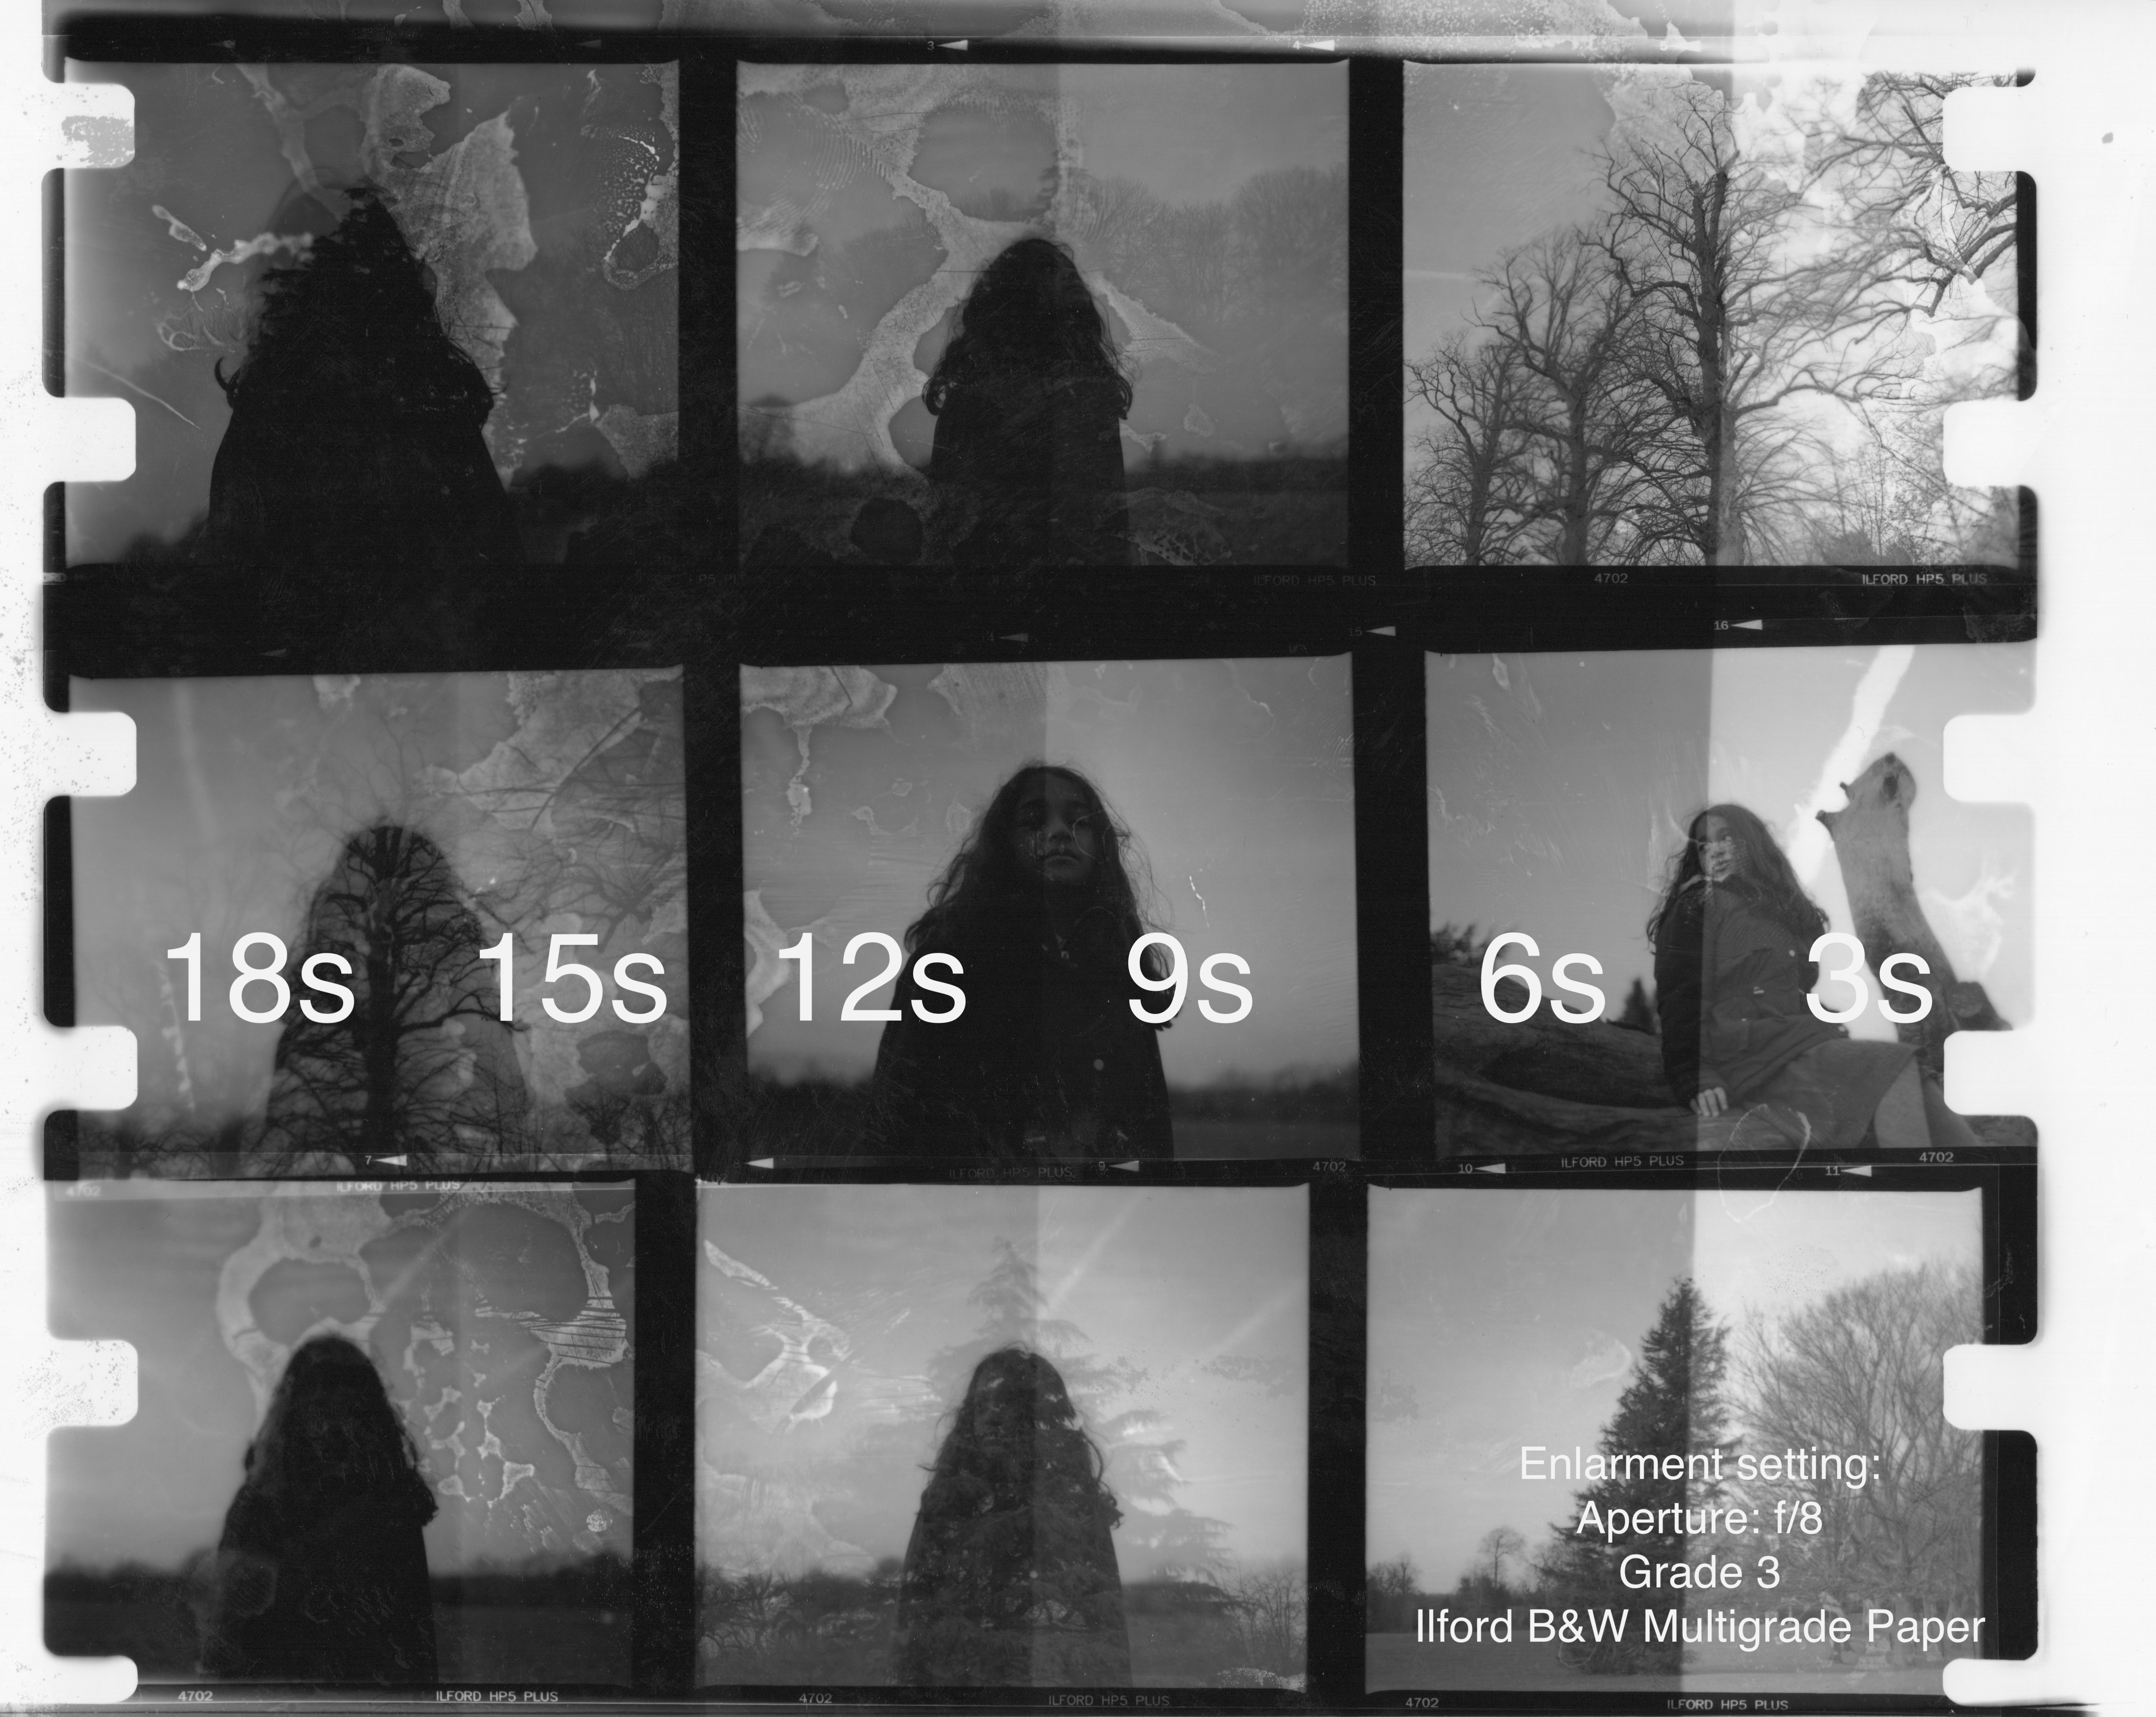
Test print contact sheet ad 3 increments, and I chose number 9 to proceed.
Contact sheet print 1

Technique print test print selected image 1
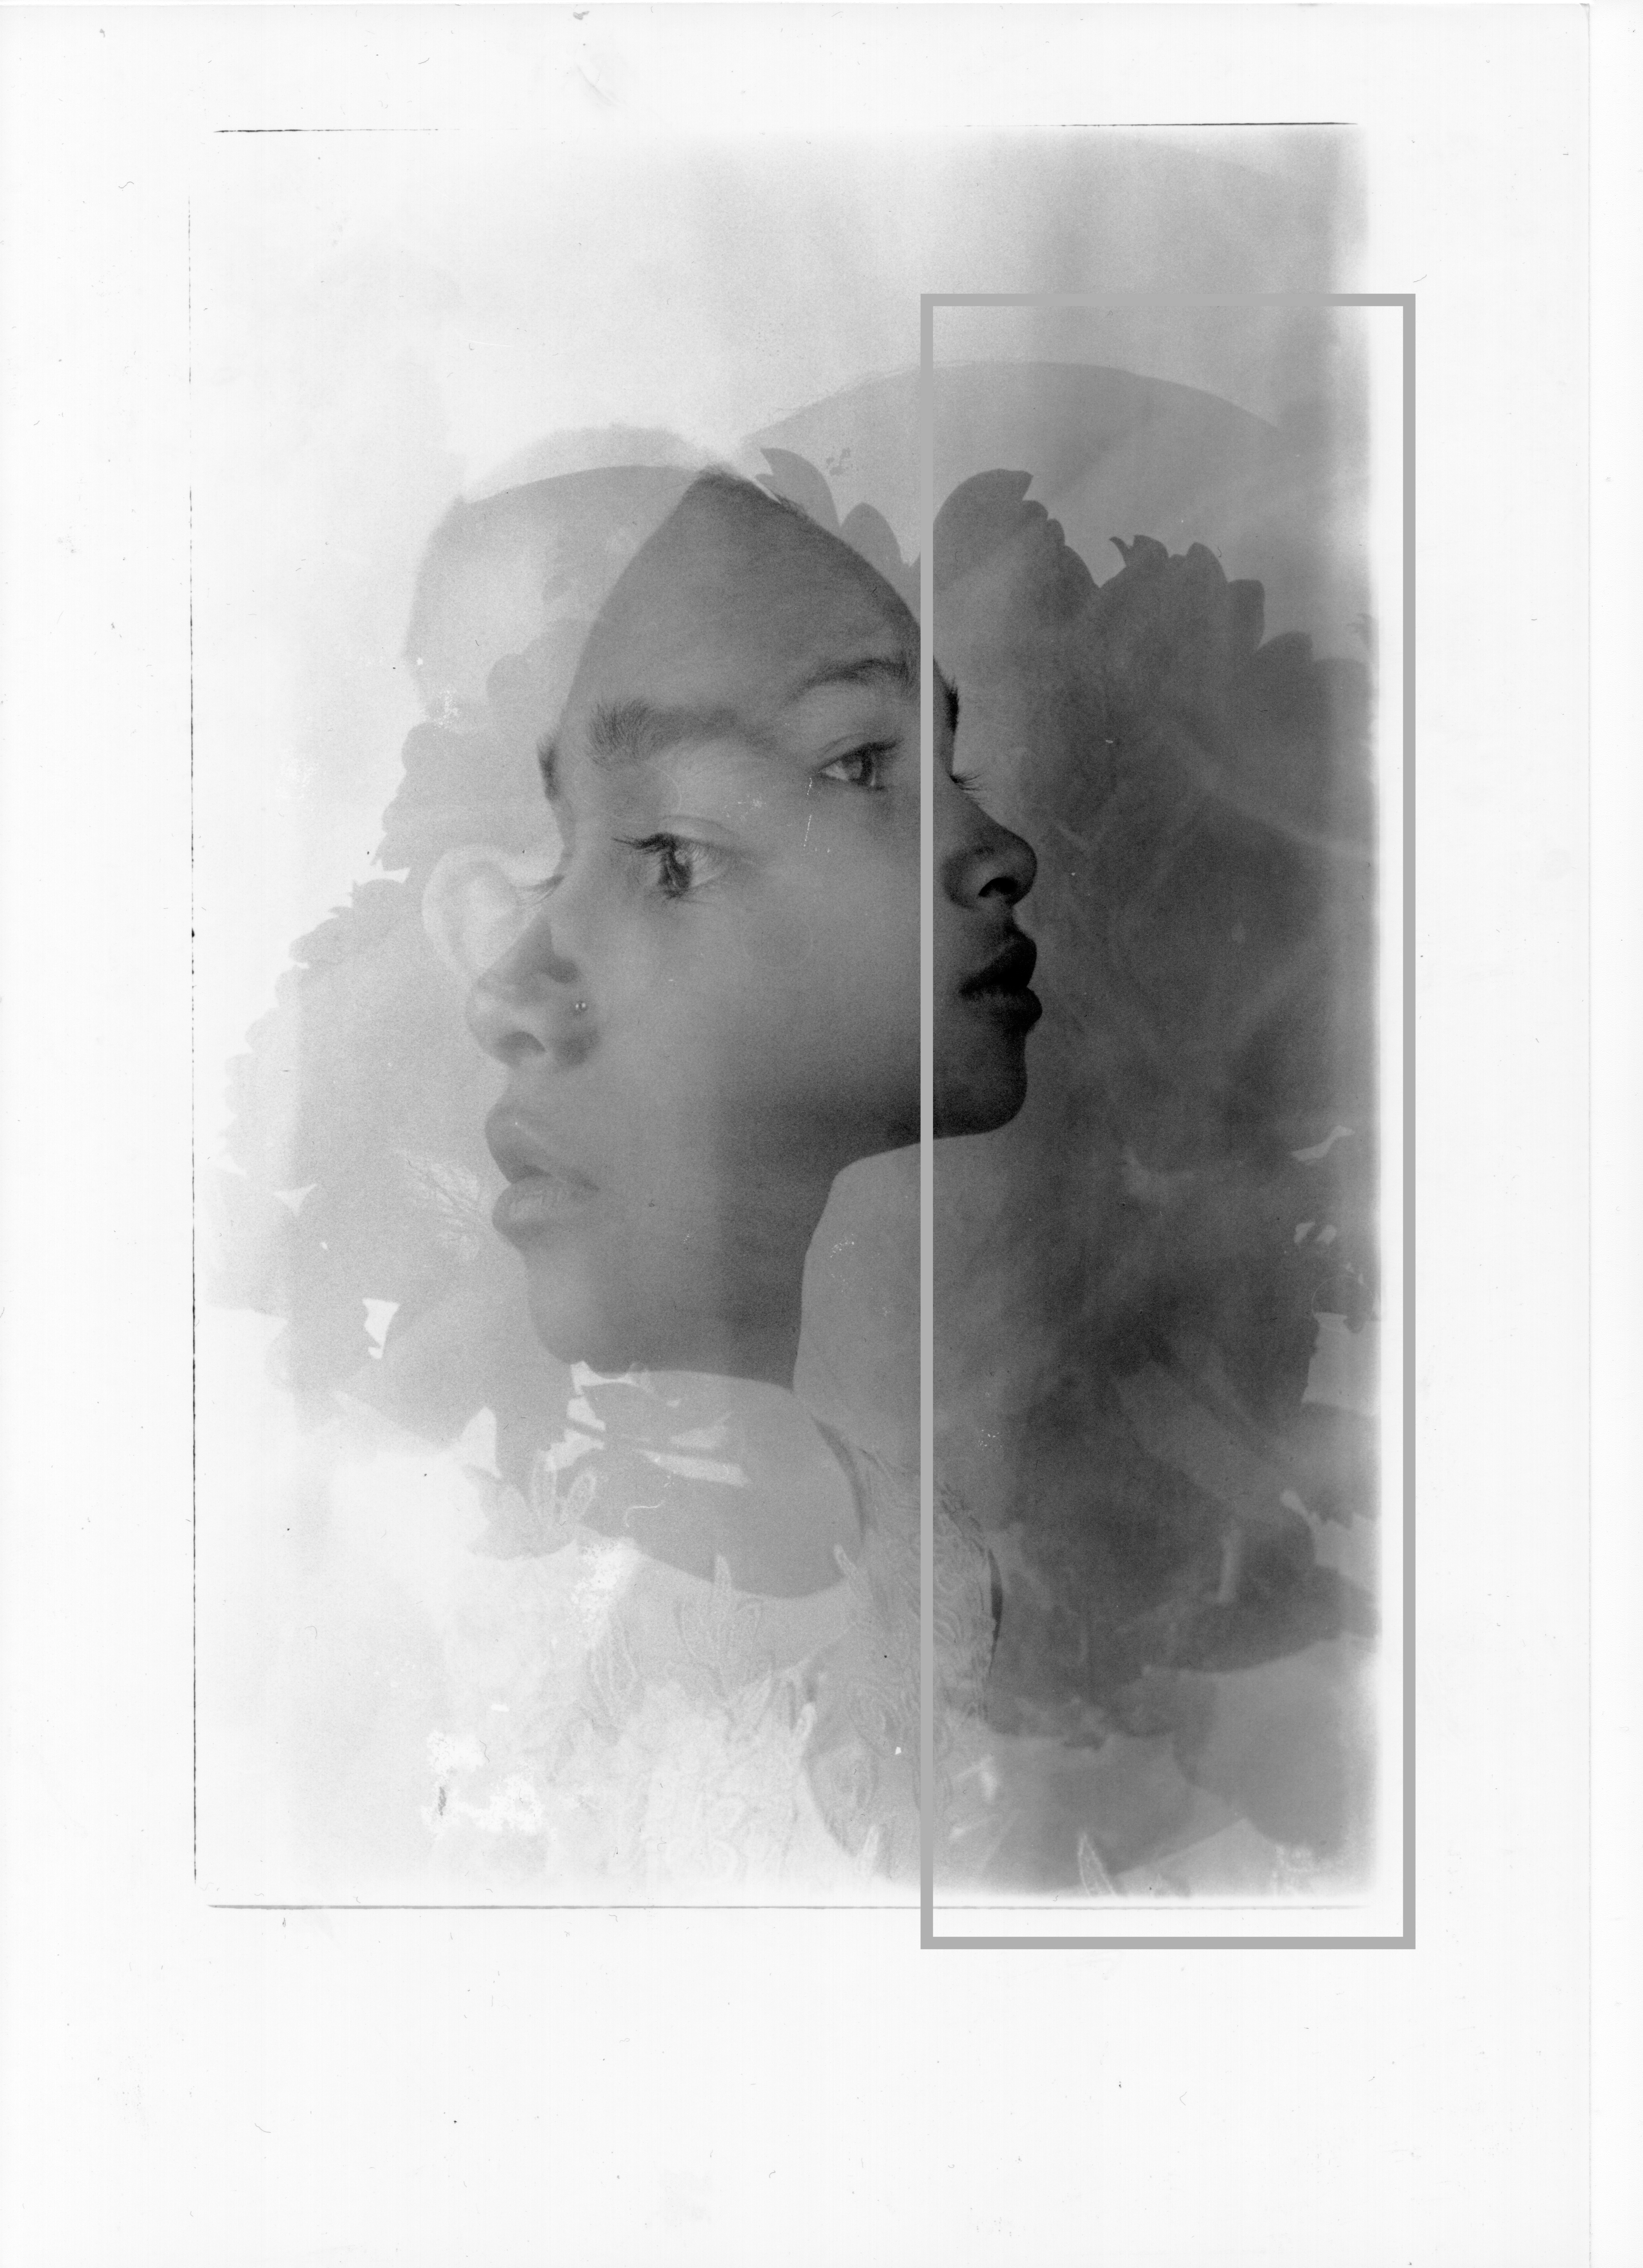
Dodge and Burn (cut out the model)
In this particular image, I am using the dodge and burn technique to bring out more of the details of the image by masking the model in the image using 6 seconds of overall exposure time at first exposure and then adding 3 seconds with dodged the model to avoid more exposure to it.
To do it I had to cut out the model in the middle to use as a mask to dodge the second exposure of 3 seconds.

However, it created some kind of “halo effect” which for this specific picture it does not match.
To find the perfect exposure time for the selected image
4 overall at first exposure and then added 1 second of increment to each strip applied
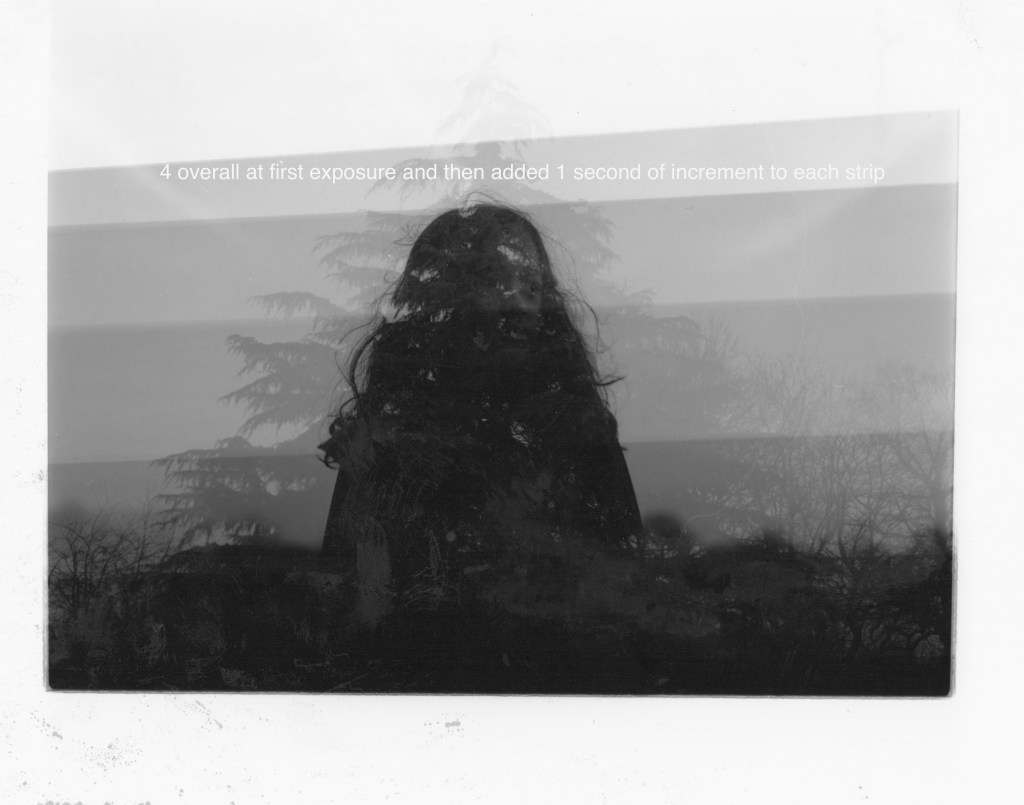
From trial and error, I finally found the setting as follows:
Enlargement setting:
Aperture f/8
Grade 3
Exposure time overall four and added three seconds dodged the model in the middle.

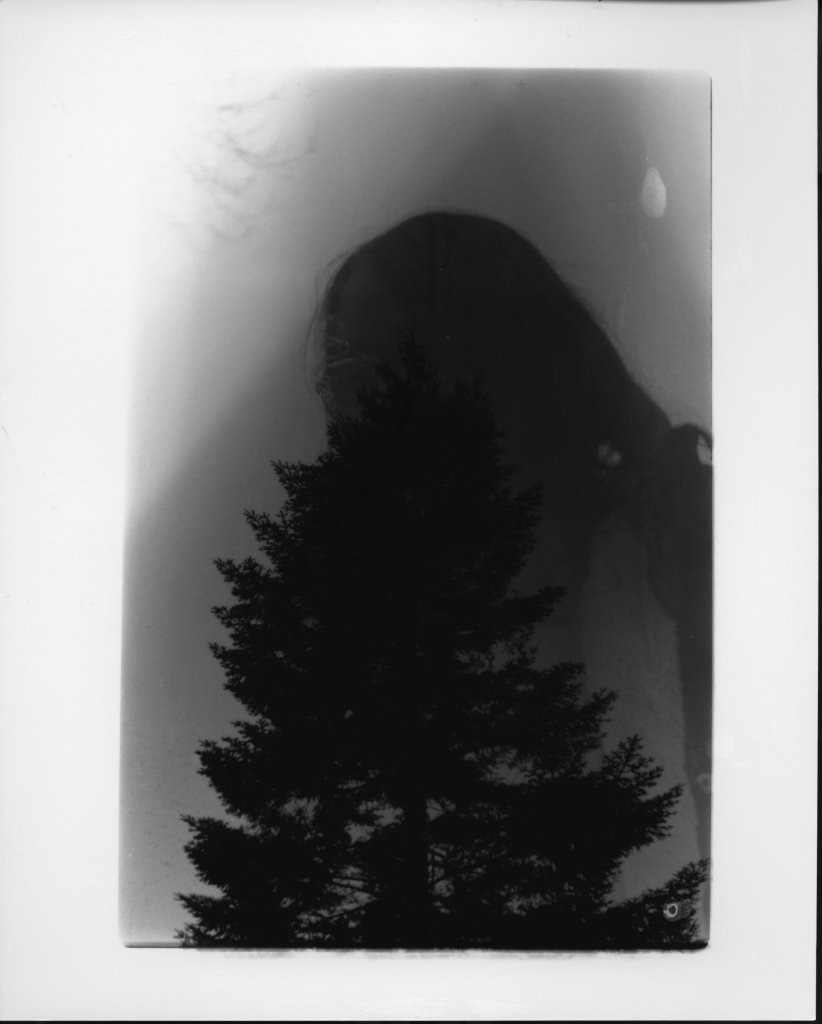
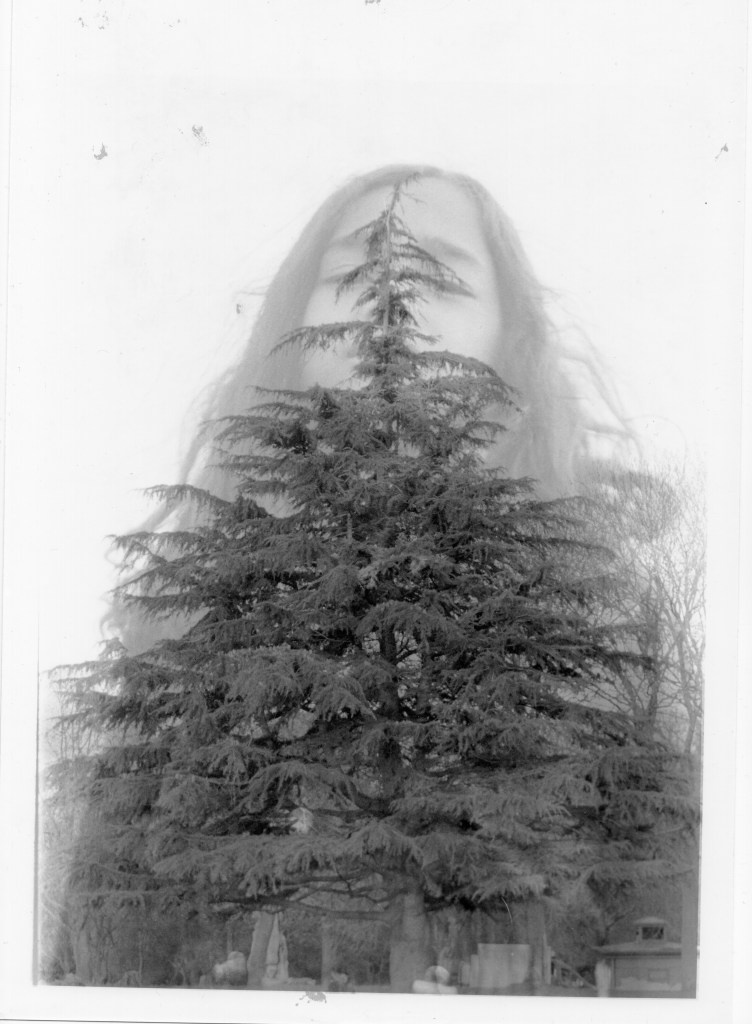
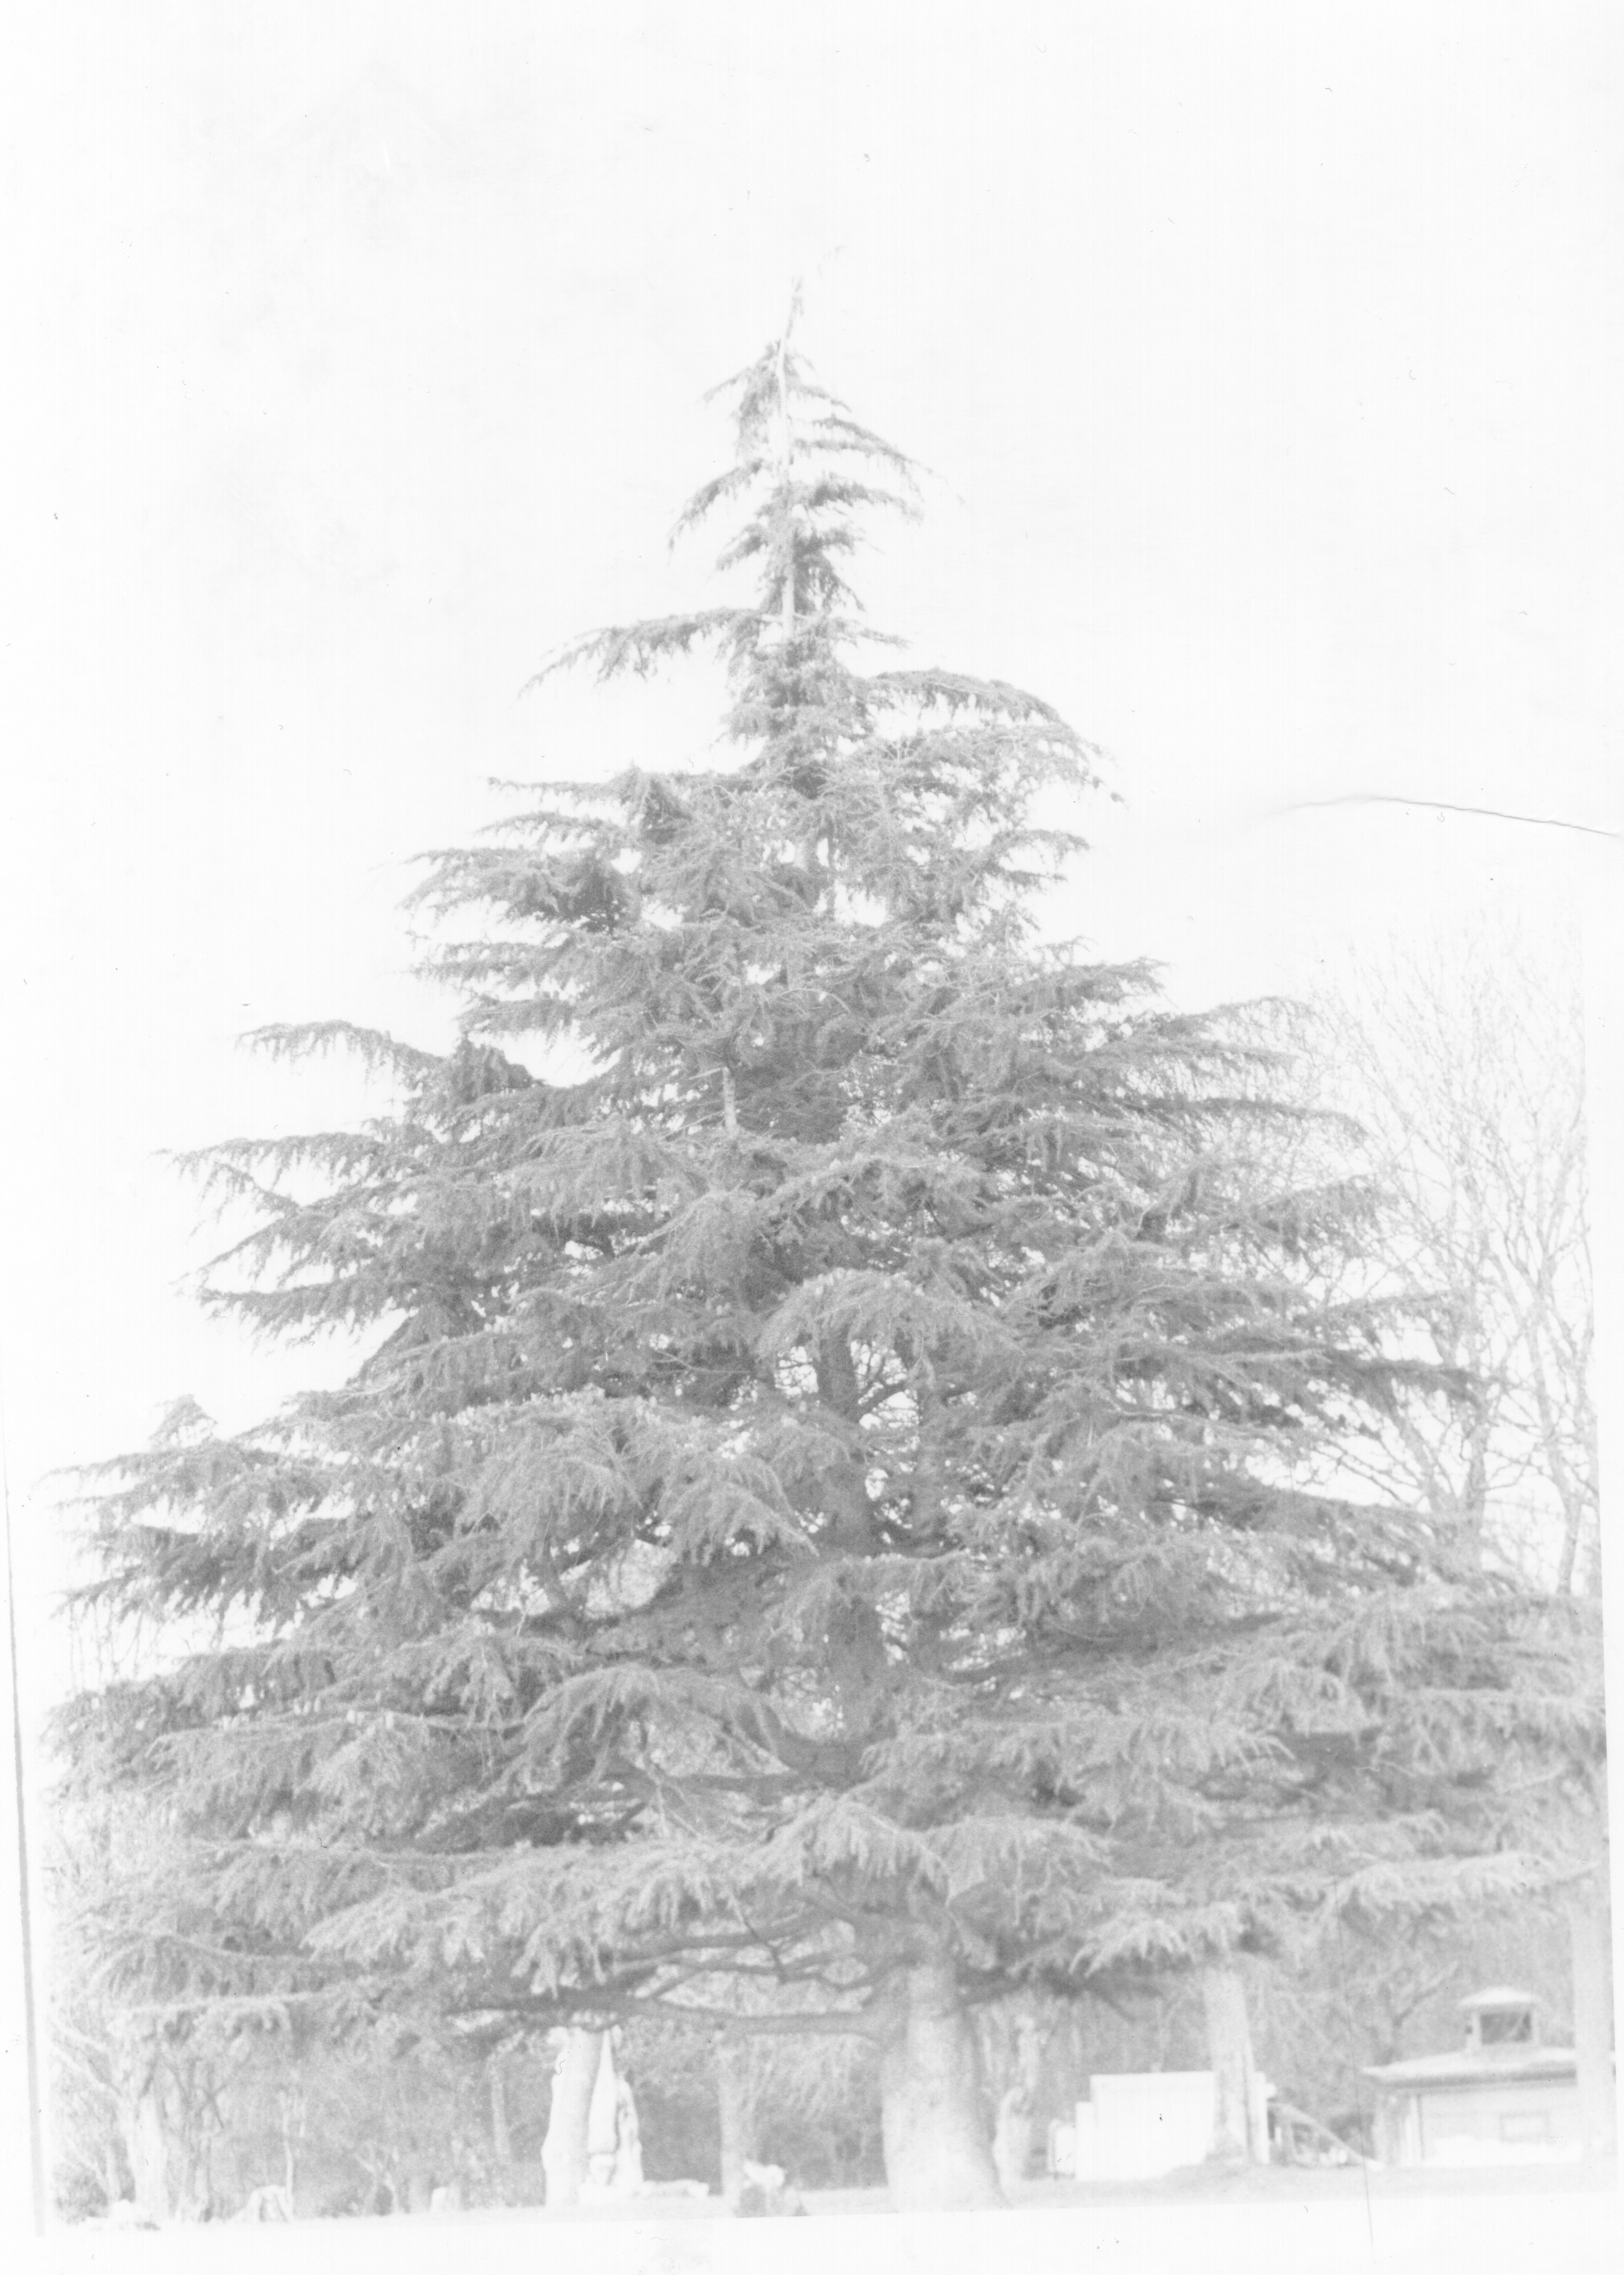
THIRD PROJECT SHOT–35mm Film CANON EOS 5 (DOUBLE EXPOSURE IN THE DARKROOM WITH TWO SEPARATE IMAGES)
35mm Film 2
The location to shoot is at the park that has evergreen trees and deciduous trees at the same location to experiment with the leaves and branches. the location is still at the same Oldbury park near Fishponds BS16.
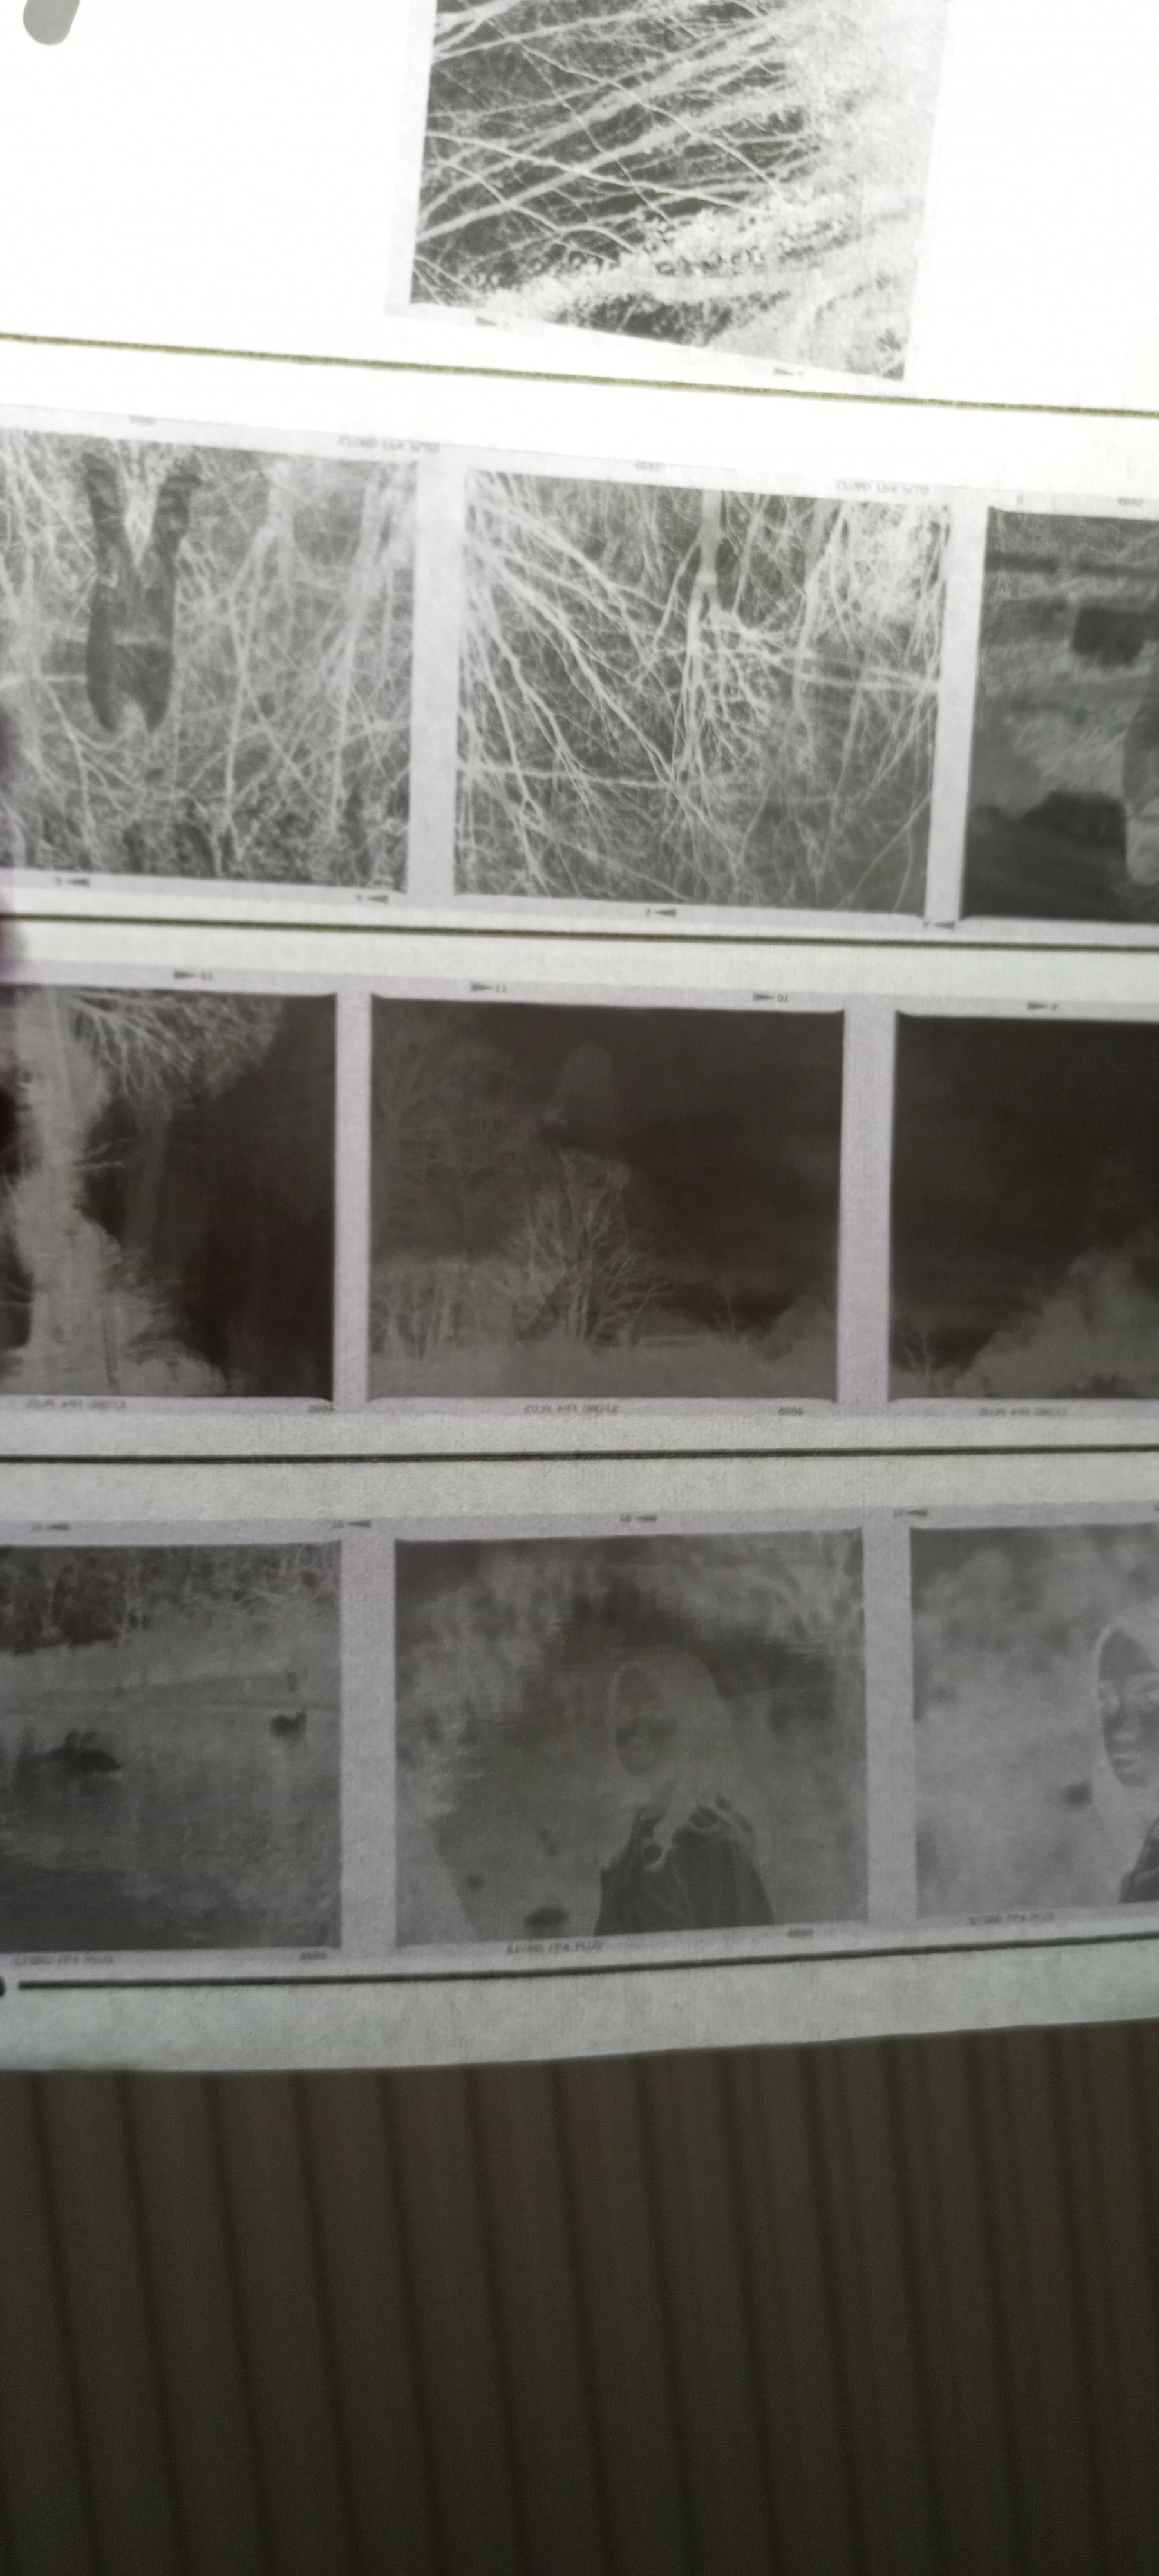
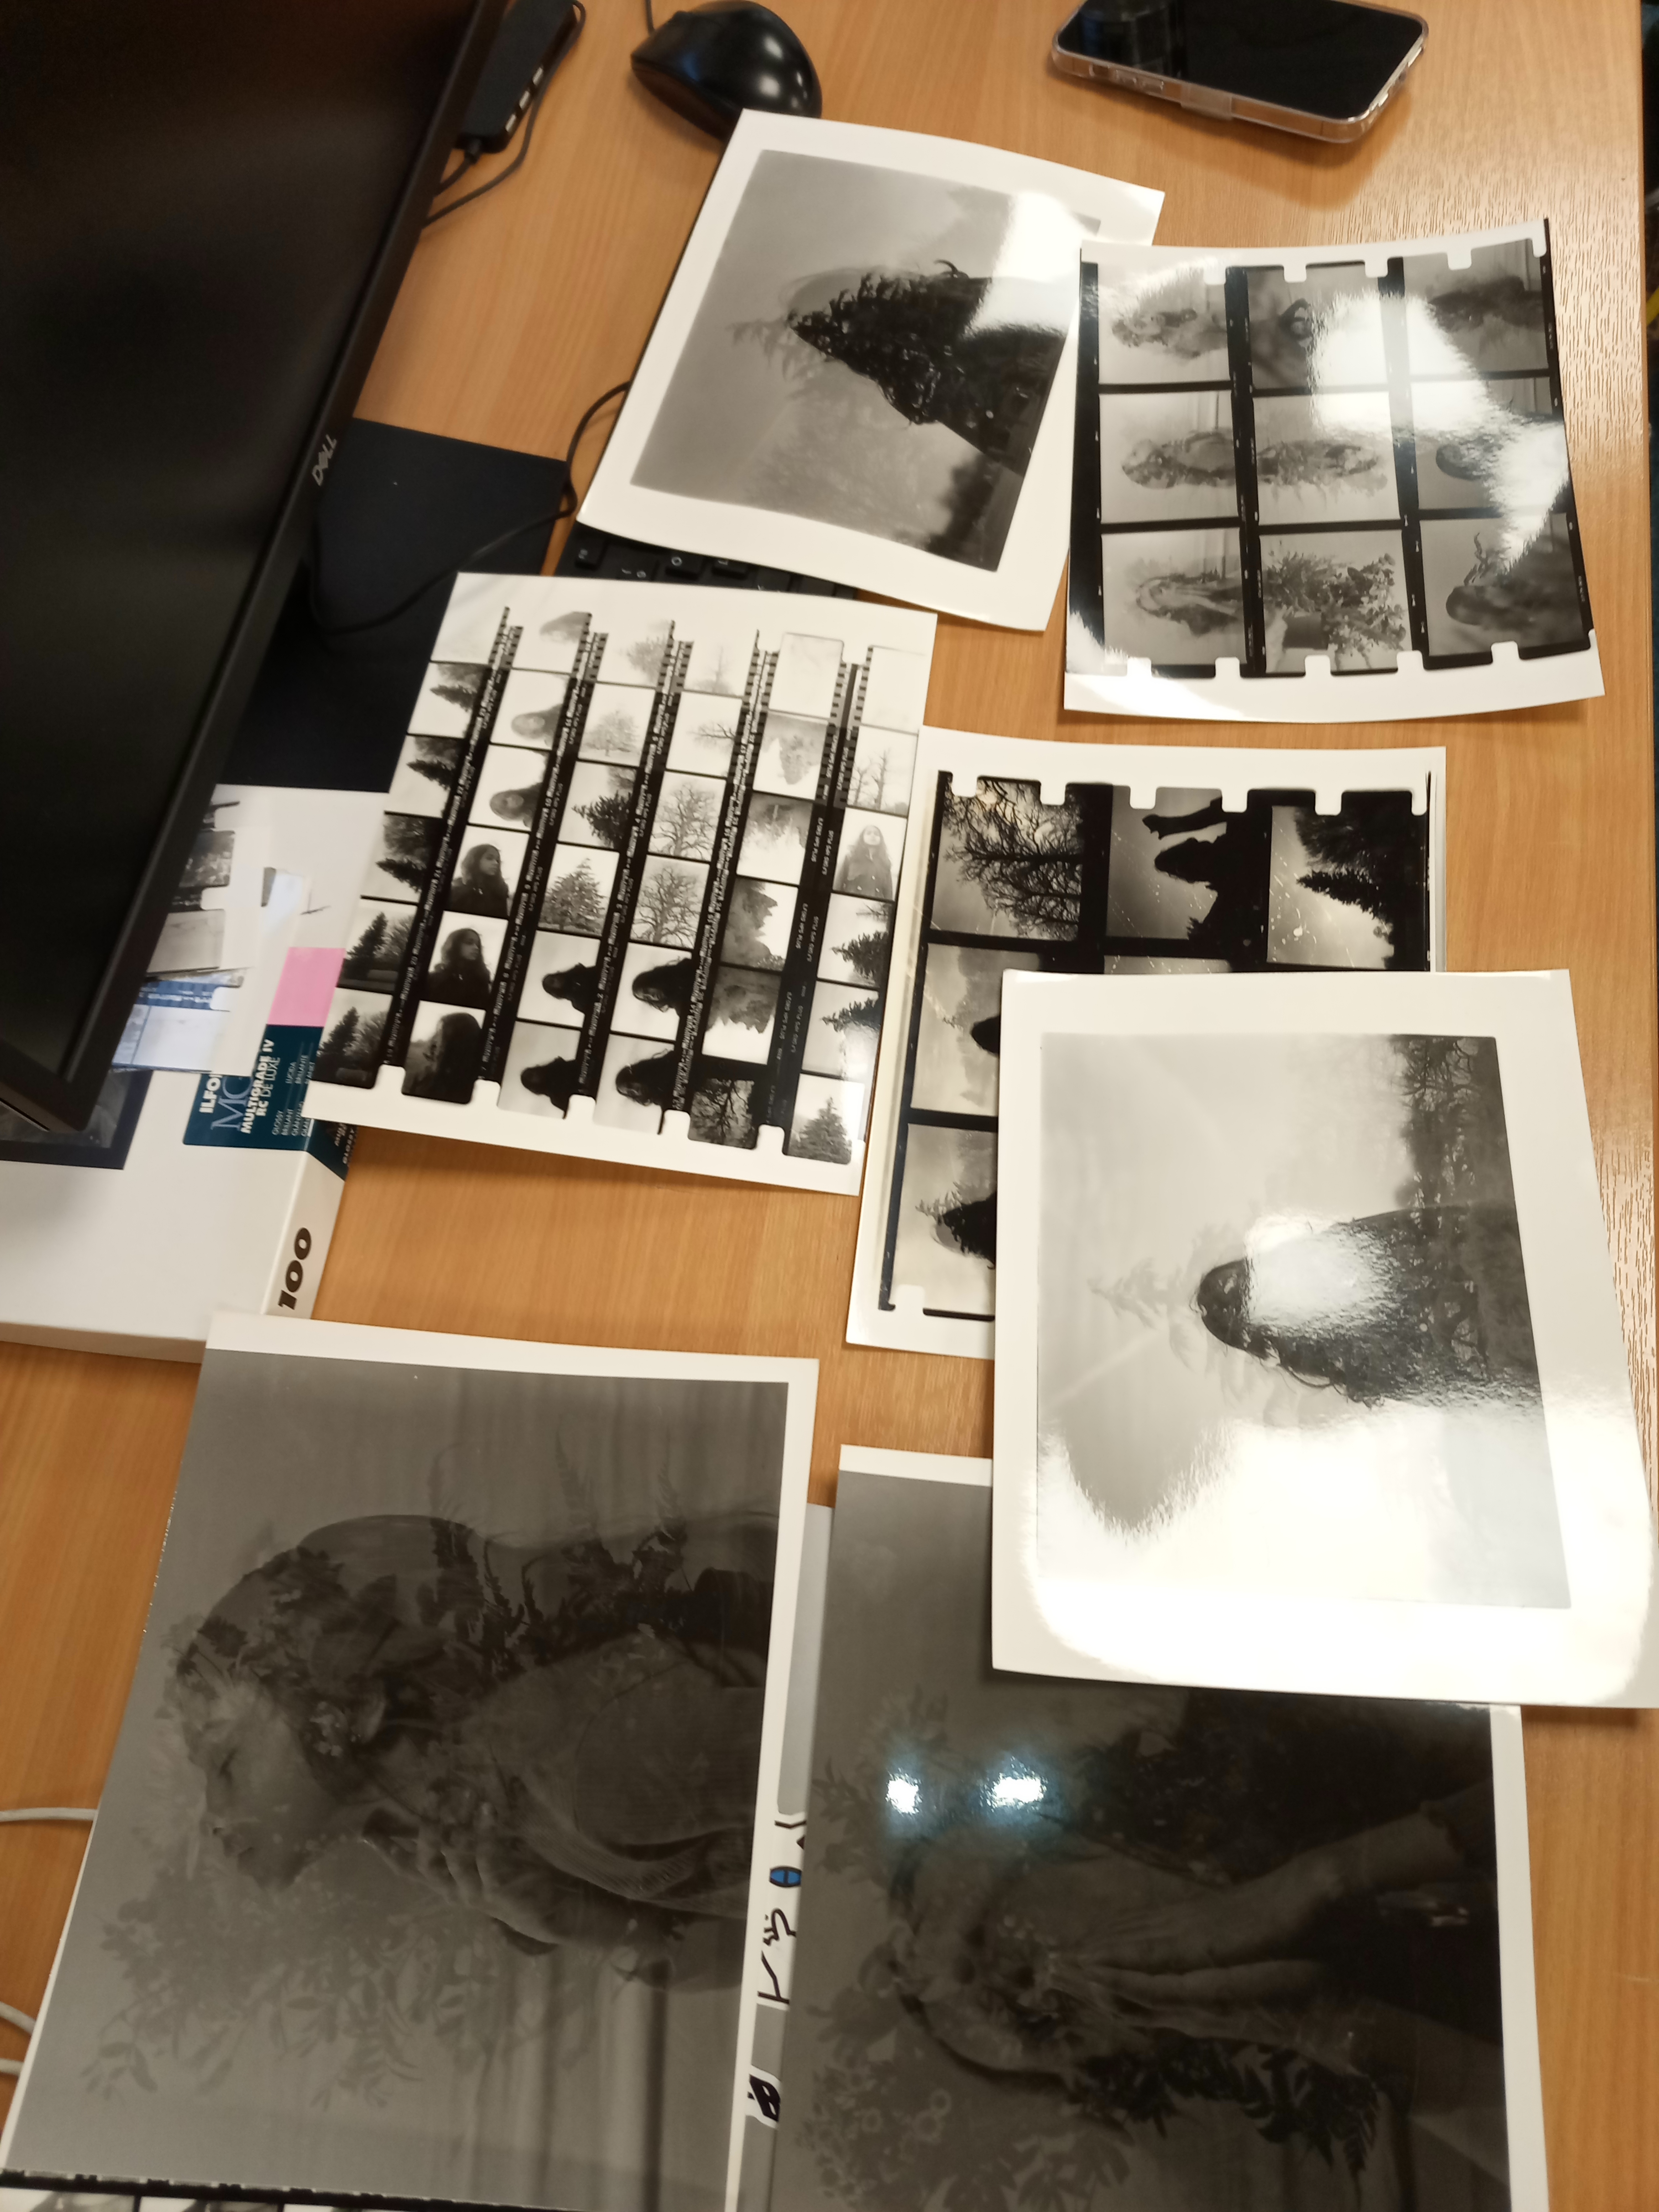
Contact sheet
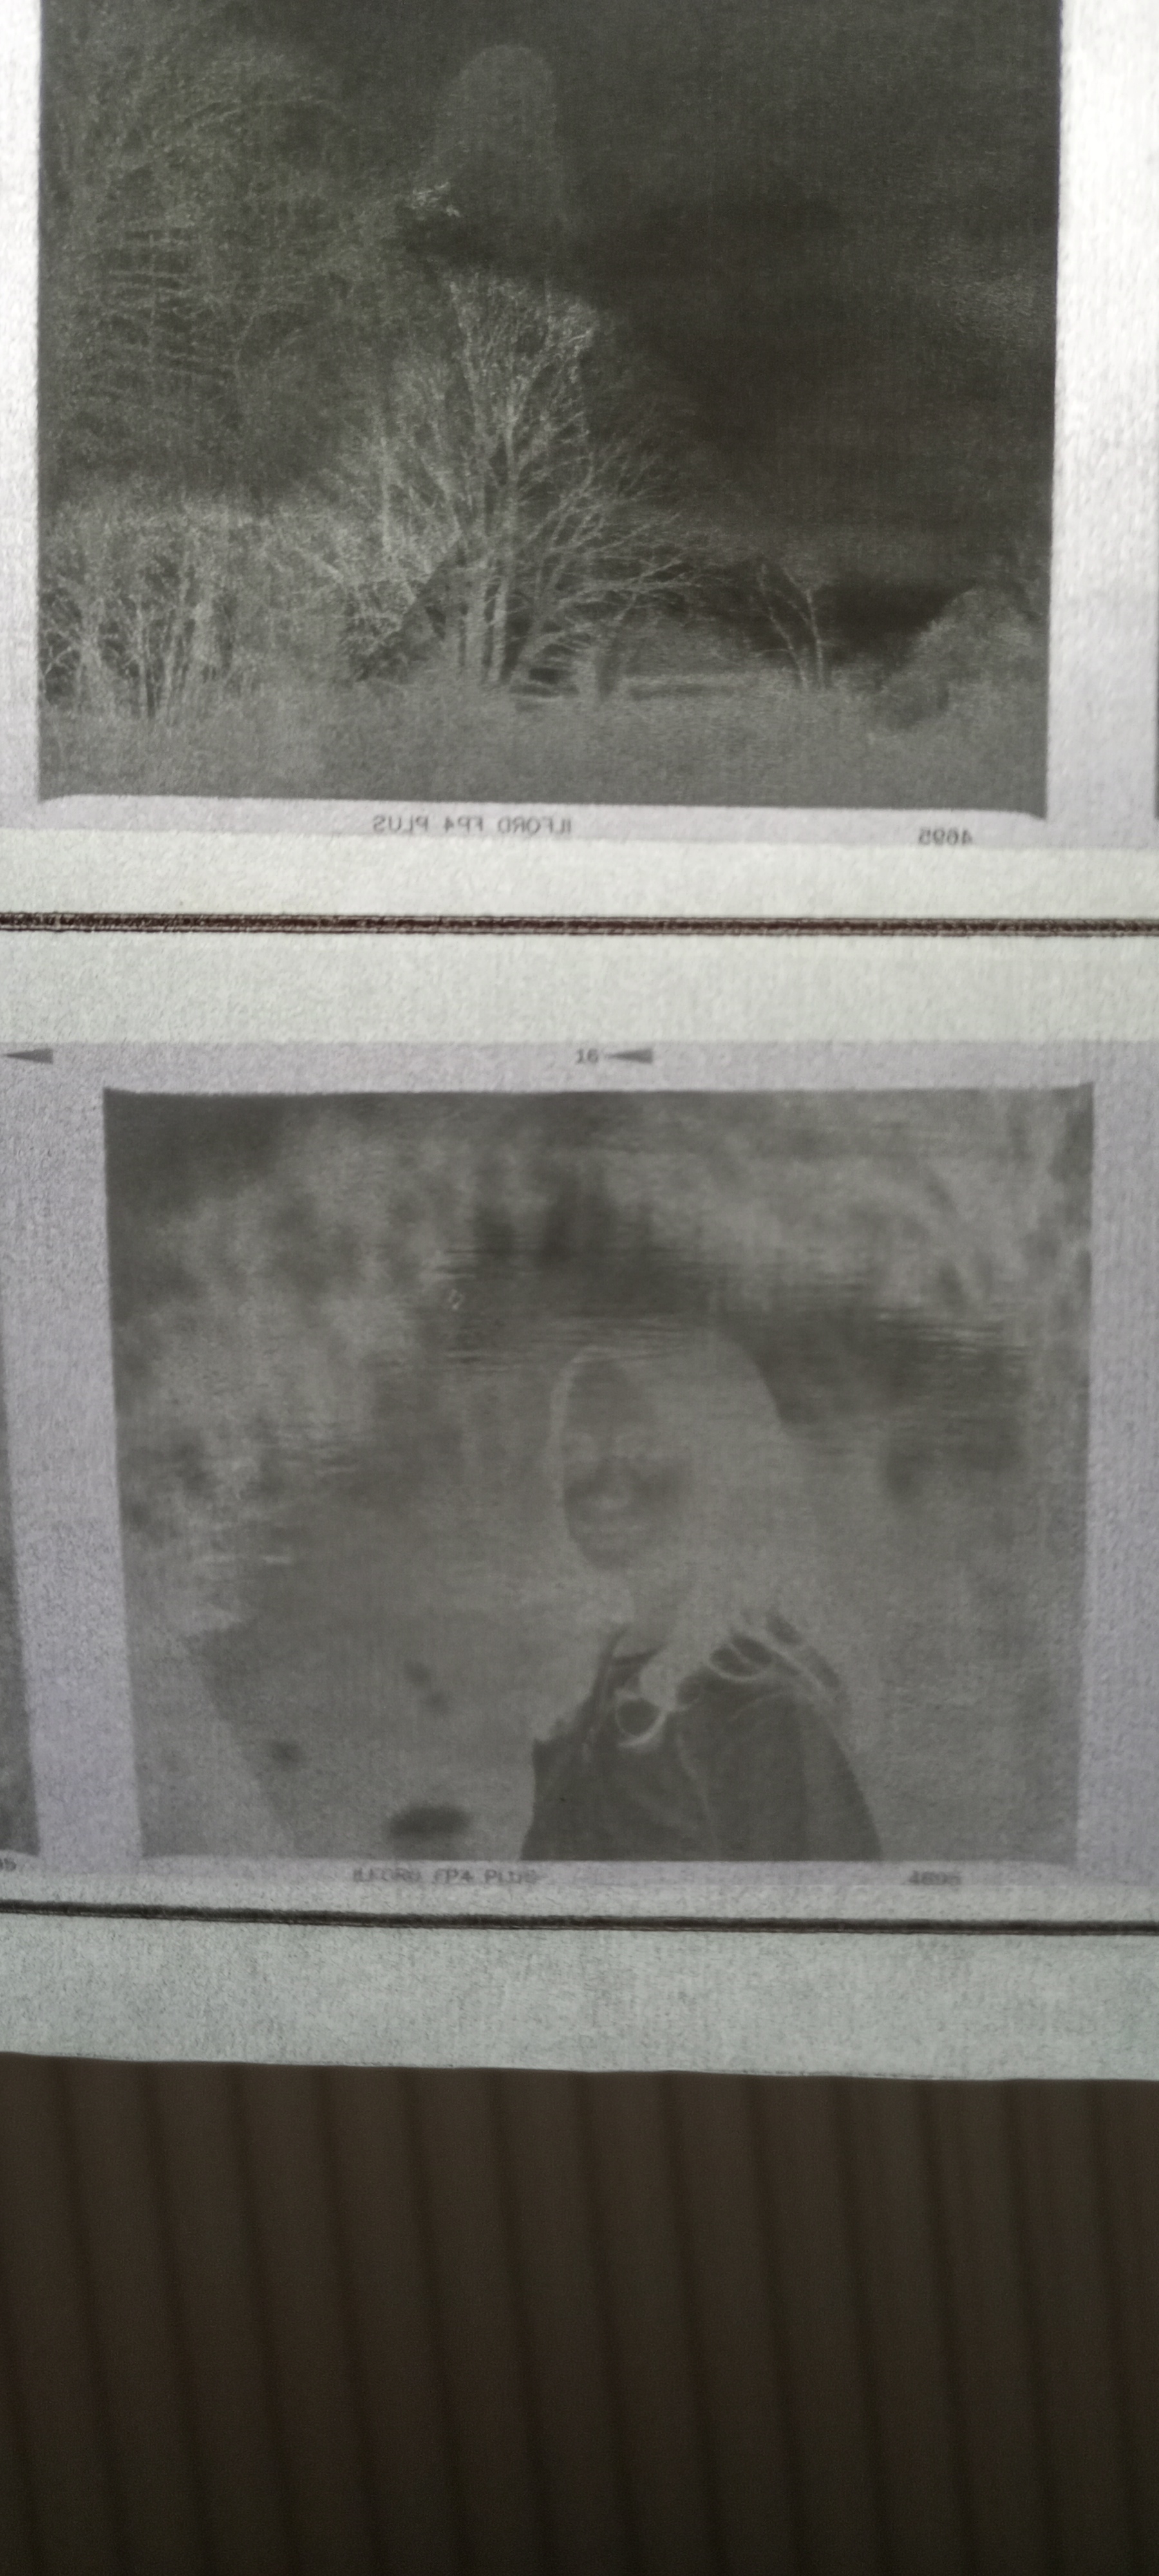
In this specific film roll, I was trying to do double exposure in the darkroom by putting two images together. However, because it is hard to see through, it caused the light hard to penetrate and project onto the paper. Therefore, I am doing is exposing the first negative and then exposing the second image onto the same paper.
First Test
Second test
Third test
In the third test, I tried different images to see if I can improve the grade setup and time exposure setup.
the last setup that I can get was, (Base image{the model}: Aperture enlarger lens f/8, exposure time 36s & Layer image{the three}: Enlarger lens f/8, exposure time 30s.)
Notebook of all my experiment
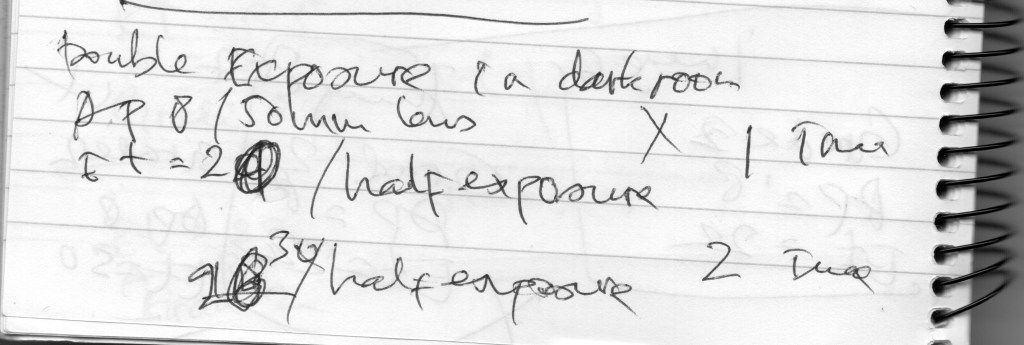
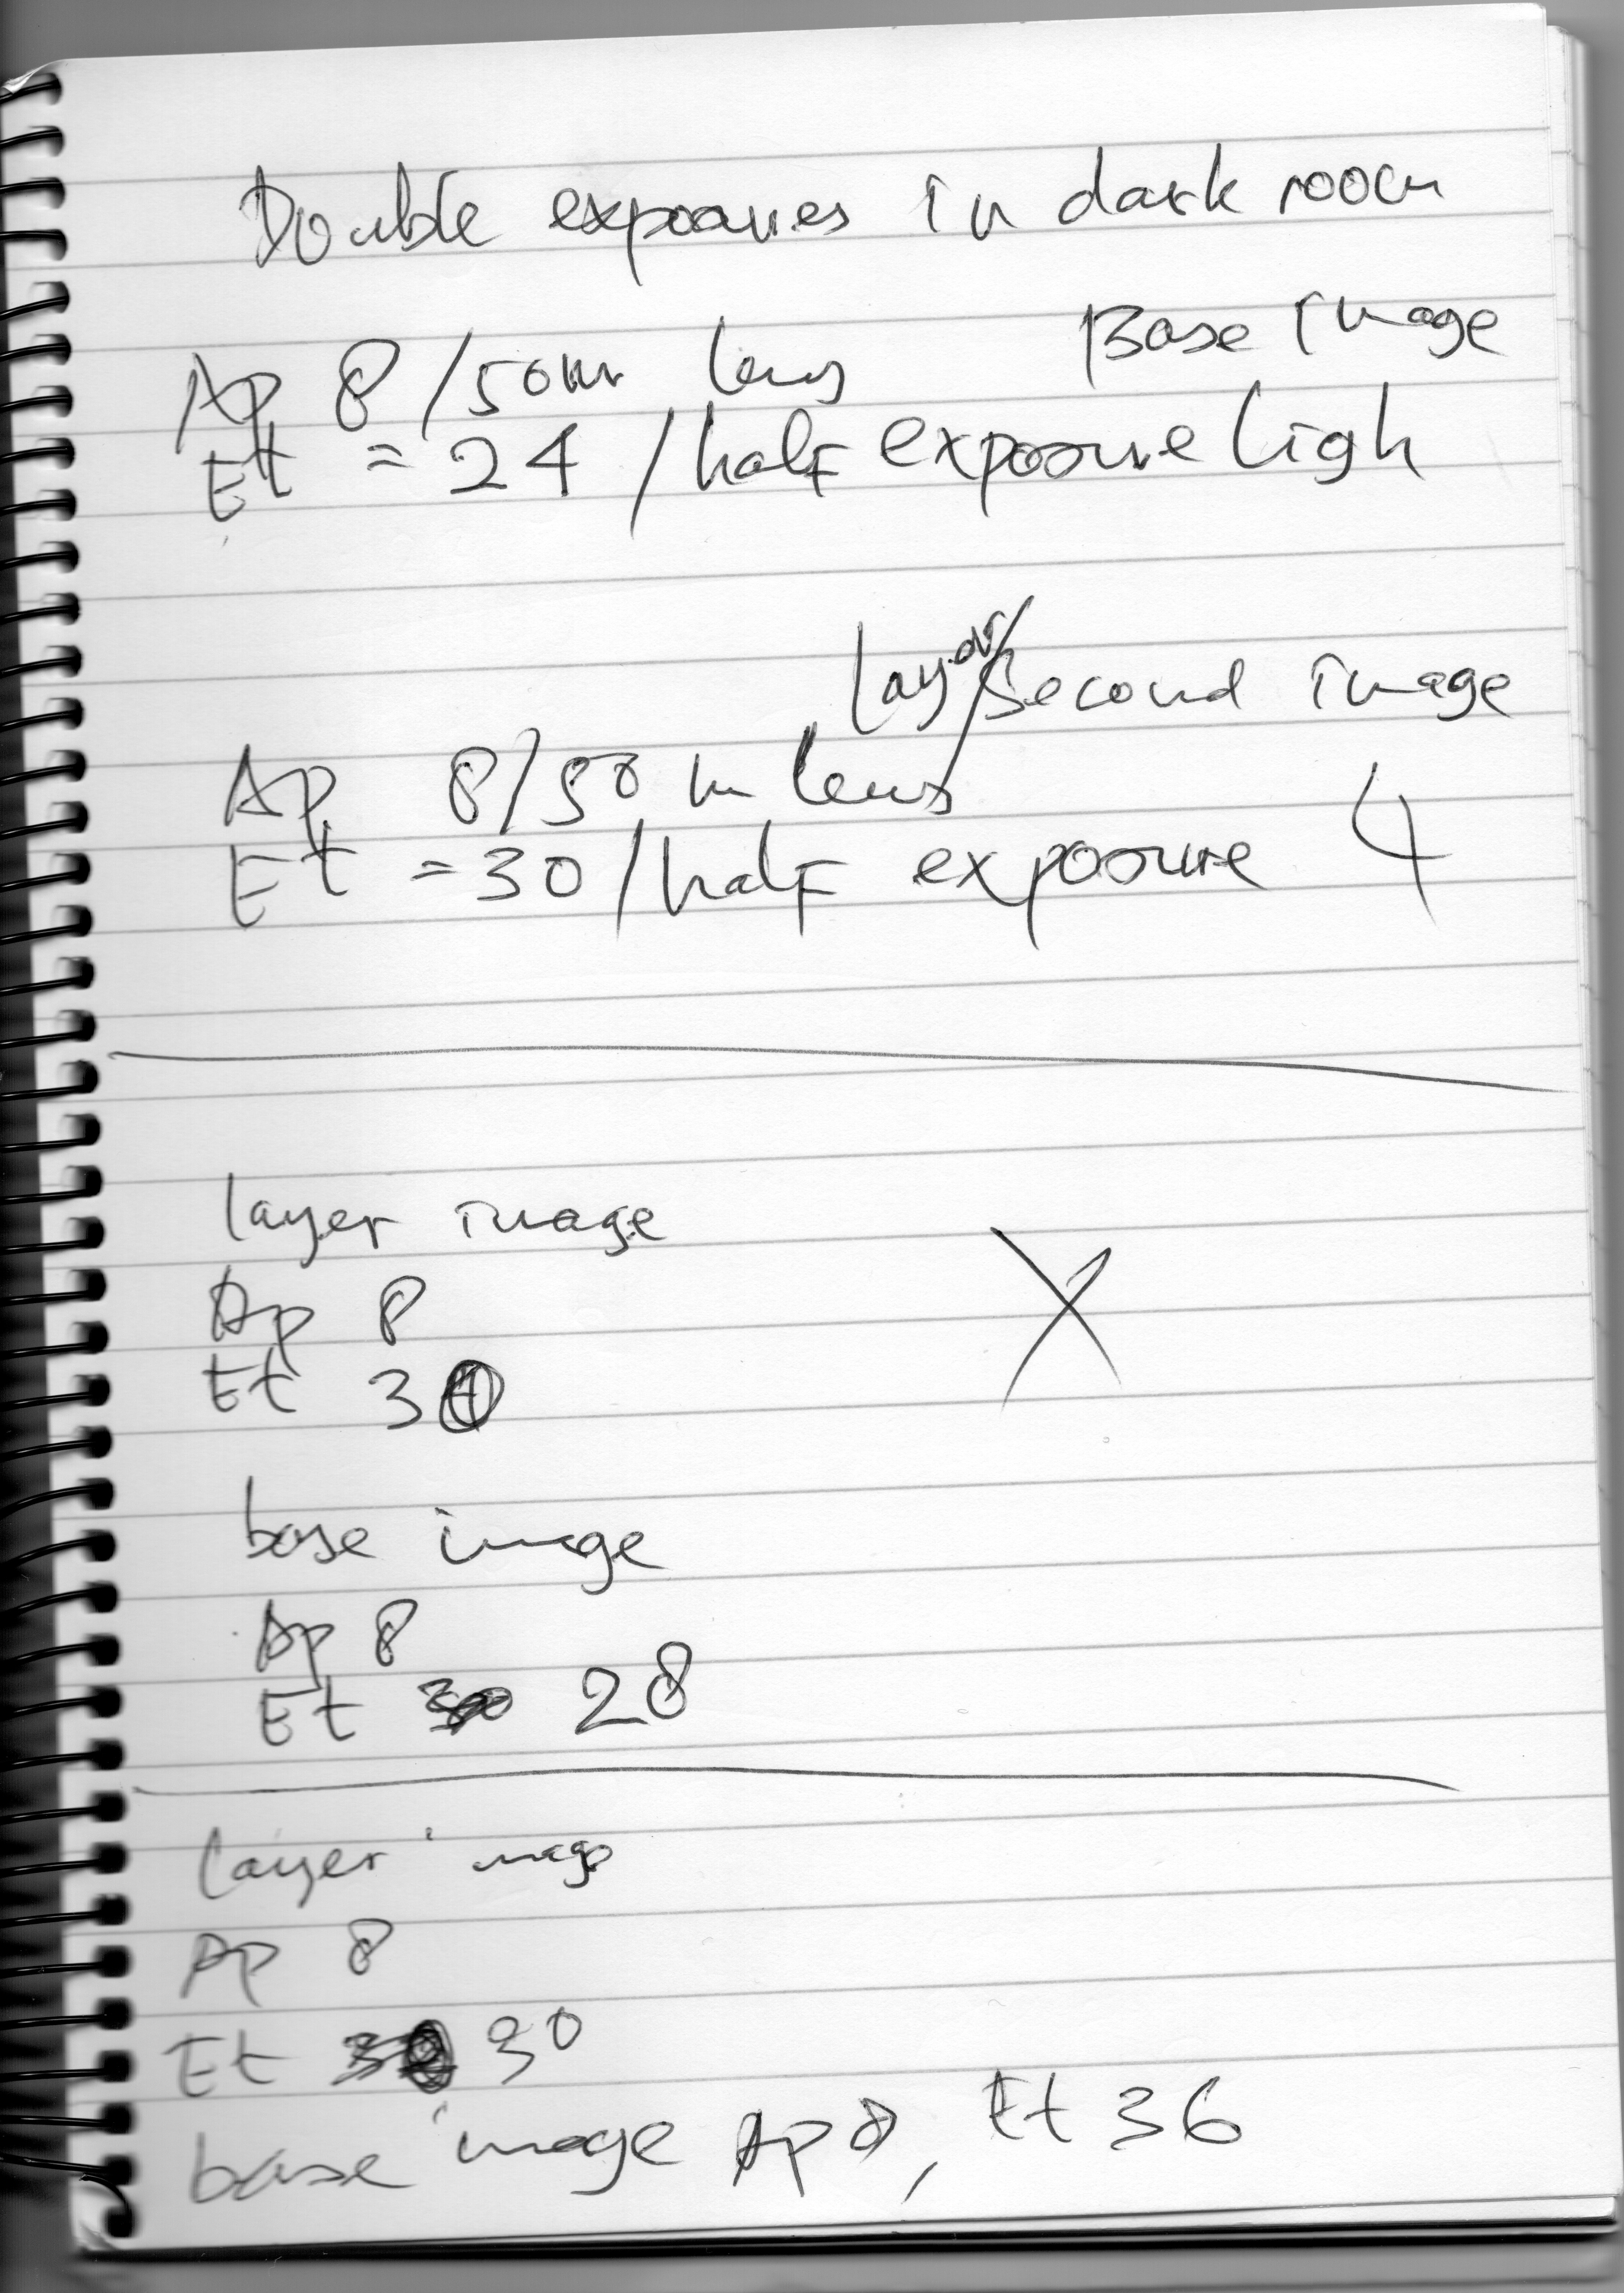
Overall it does not work as well, so I stopped to go more but at least I have the points that, to do that I have to shoot both images in opposite contrast and both half stop light down (like Lina Bessonava mentioned in her note)
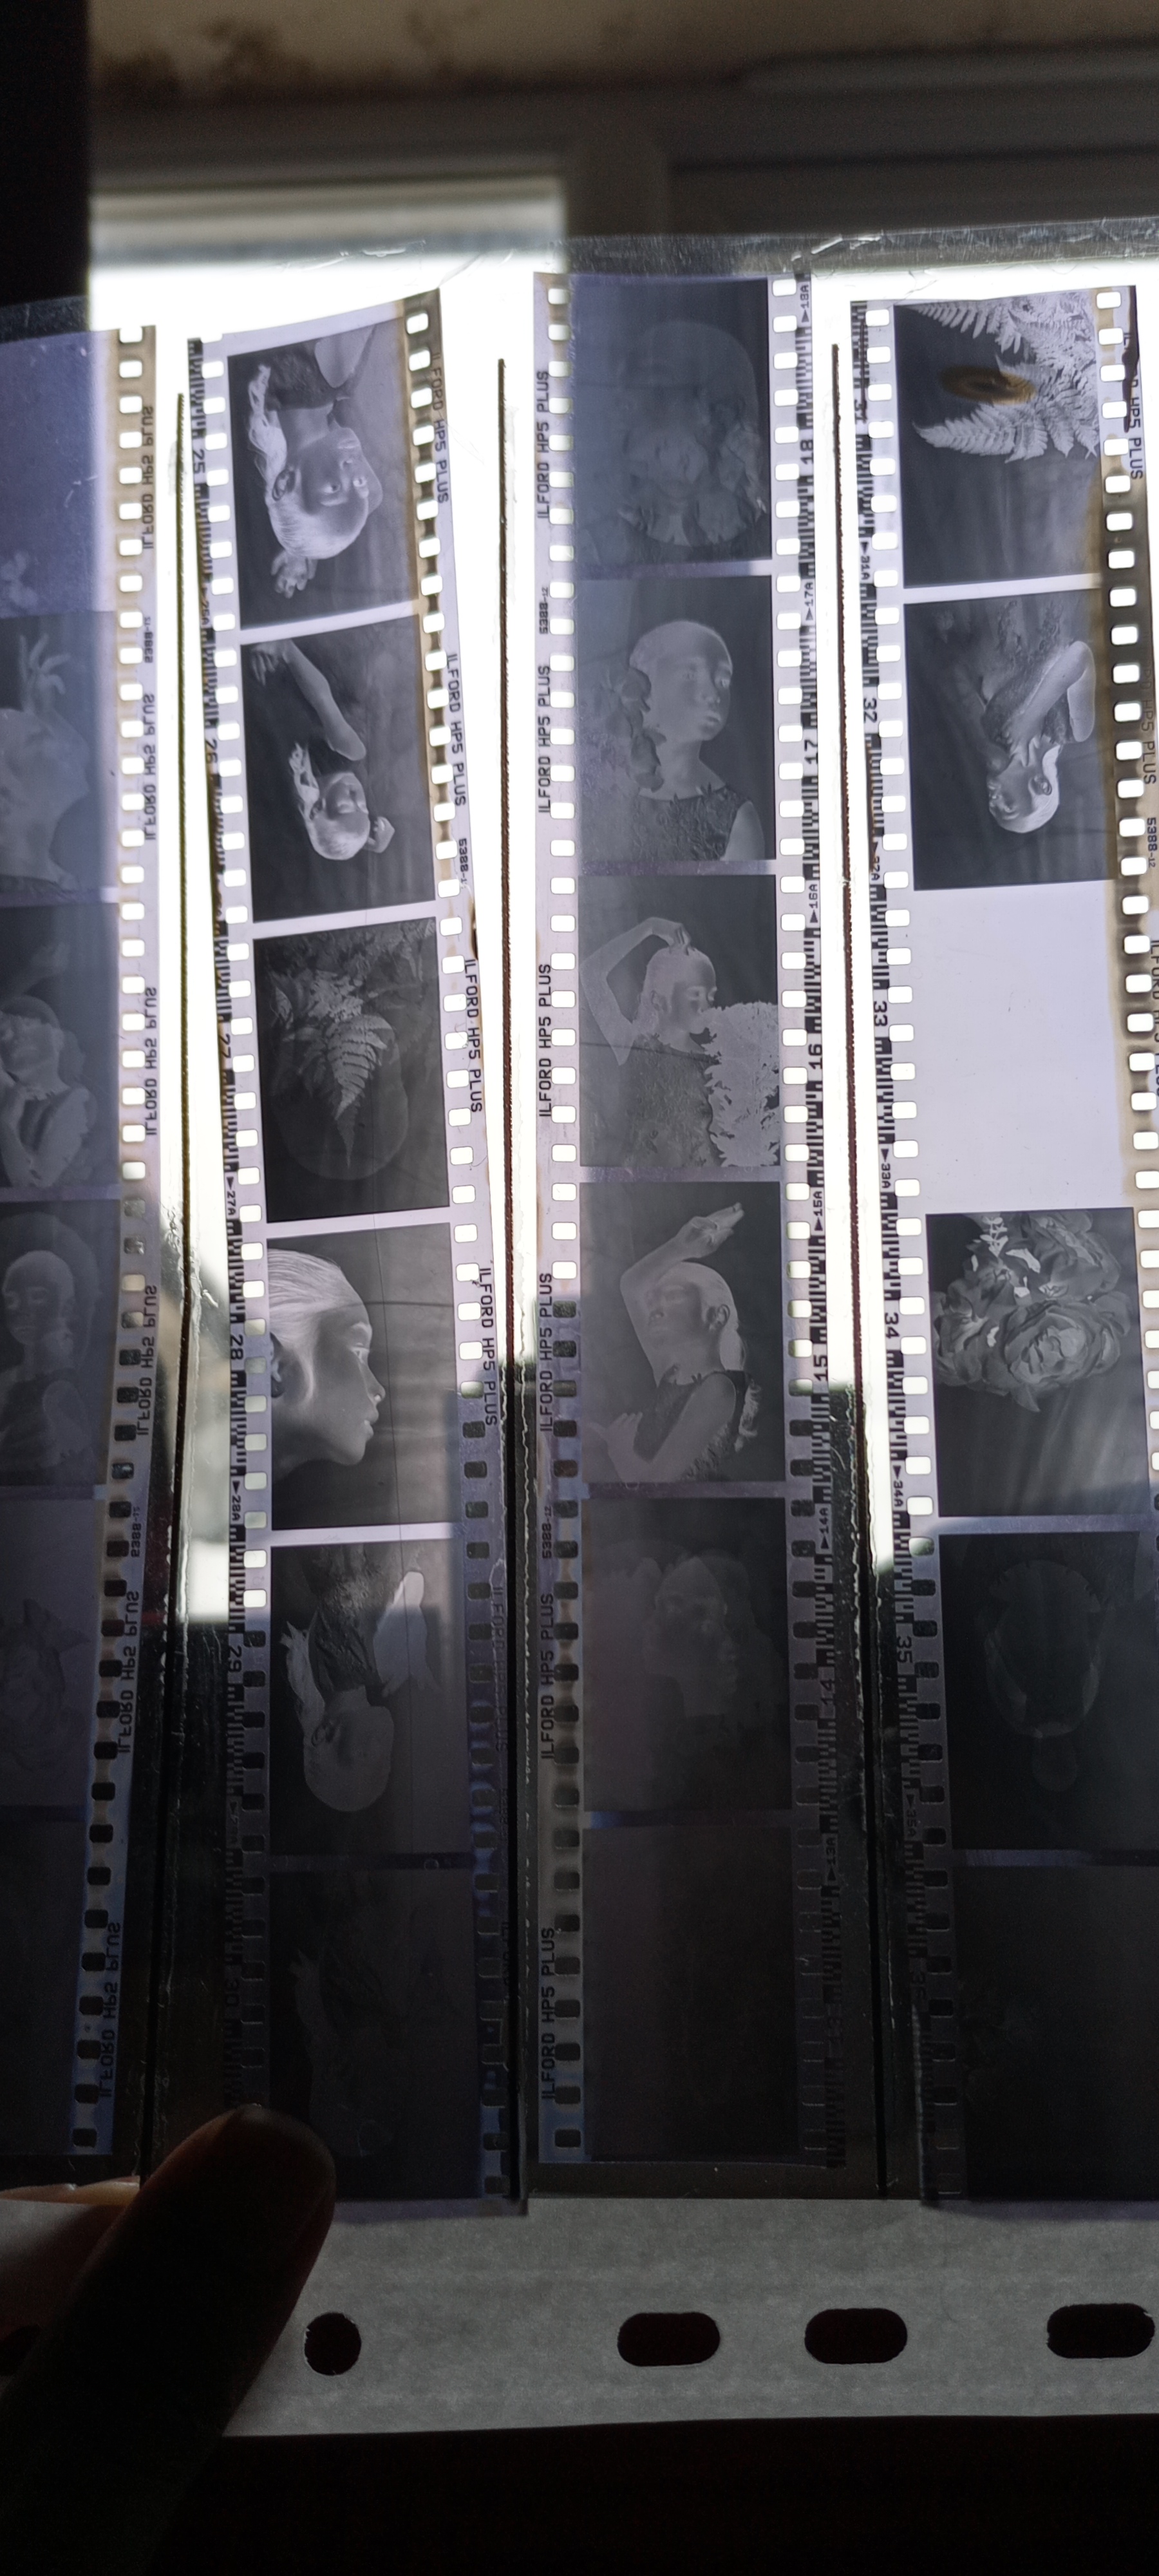
35mm Film 3
In this one, I went out to the UWE location to try out the same technique and I took separate images and will blend them together in the darkroom.
35mm Film 3indoor shoot (mini studio setup)
In this project, I learnt from the first try shot indoor I have done before.
At this time I shot with two Bowens lights and one portable backdrop.
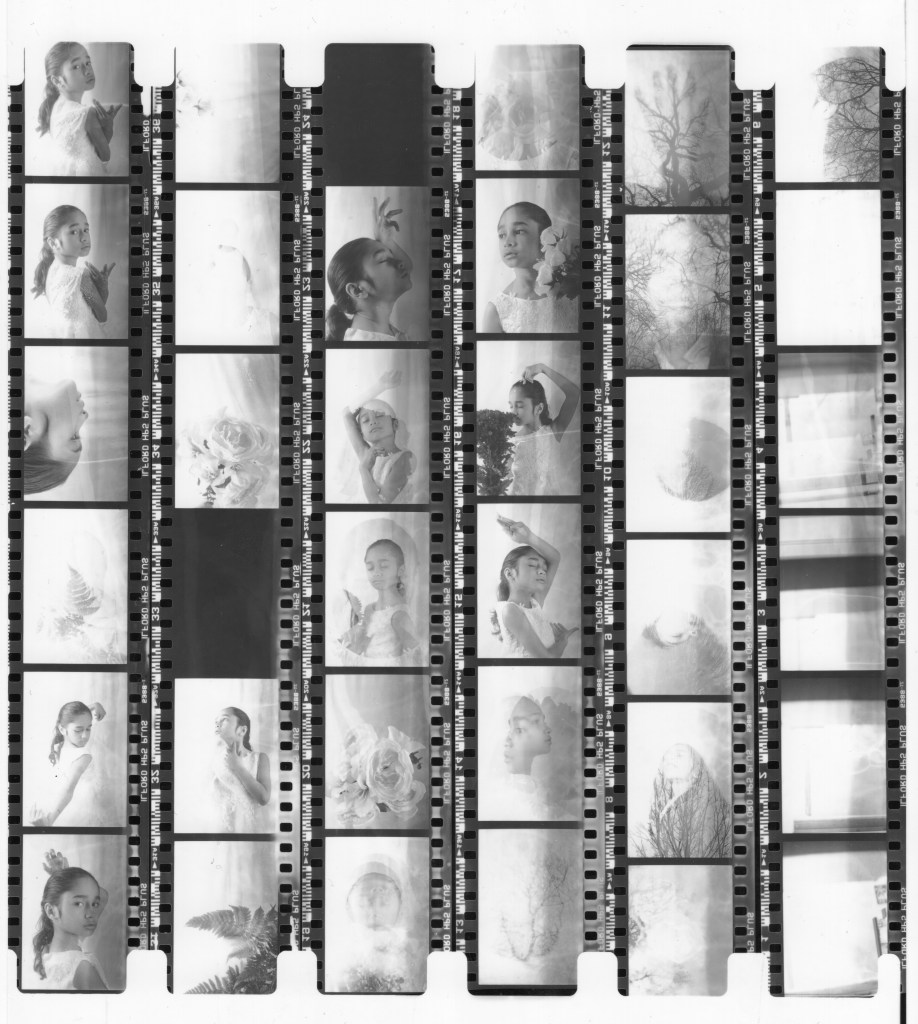
Contact sheet 35mm Film 3
Half of the film I shot at Eastville park and half of the film I shot at my indoor mini studio setup.
Mini studio setup scene
Mini studio setup scene I shot with a digital camera to find what I wanted to do.
What I wanted to create is the one, I created with the digital and try to replicate with a 35mm analogue camera.
images from digital double exposure
35mm film 3 analogue results
Here are the images that I chose to develop more in exposure time, which also will increase the cyan and magenta grade levels.
Enlarger setting for both images was 29 seconds, grade 3 lens aperture f/8.

Park scene
For the park scene what I did was replicate the shot (of the UWE scene) again from the discussion between me and Alice about how to utilize the branches to double expose with the model itself.

As a result of the discussion, I went out there to Eastville park to create the scene that required branches as discussed.
Image of the double exposure results in the park with branches.
Double exposure in the darkroom with two images
For the park scene, I ended up not chosen because the quality of the 35mm film camera to mix with the Mamiya RB67 is simply out of the league in terms of image quality and mostly I went out to shoot with 35mm film camera did not produce good image quality because of lack of light condition.
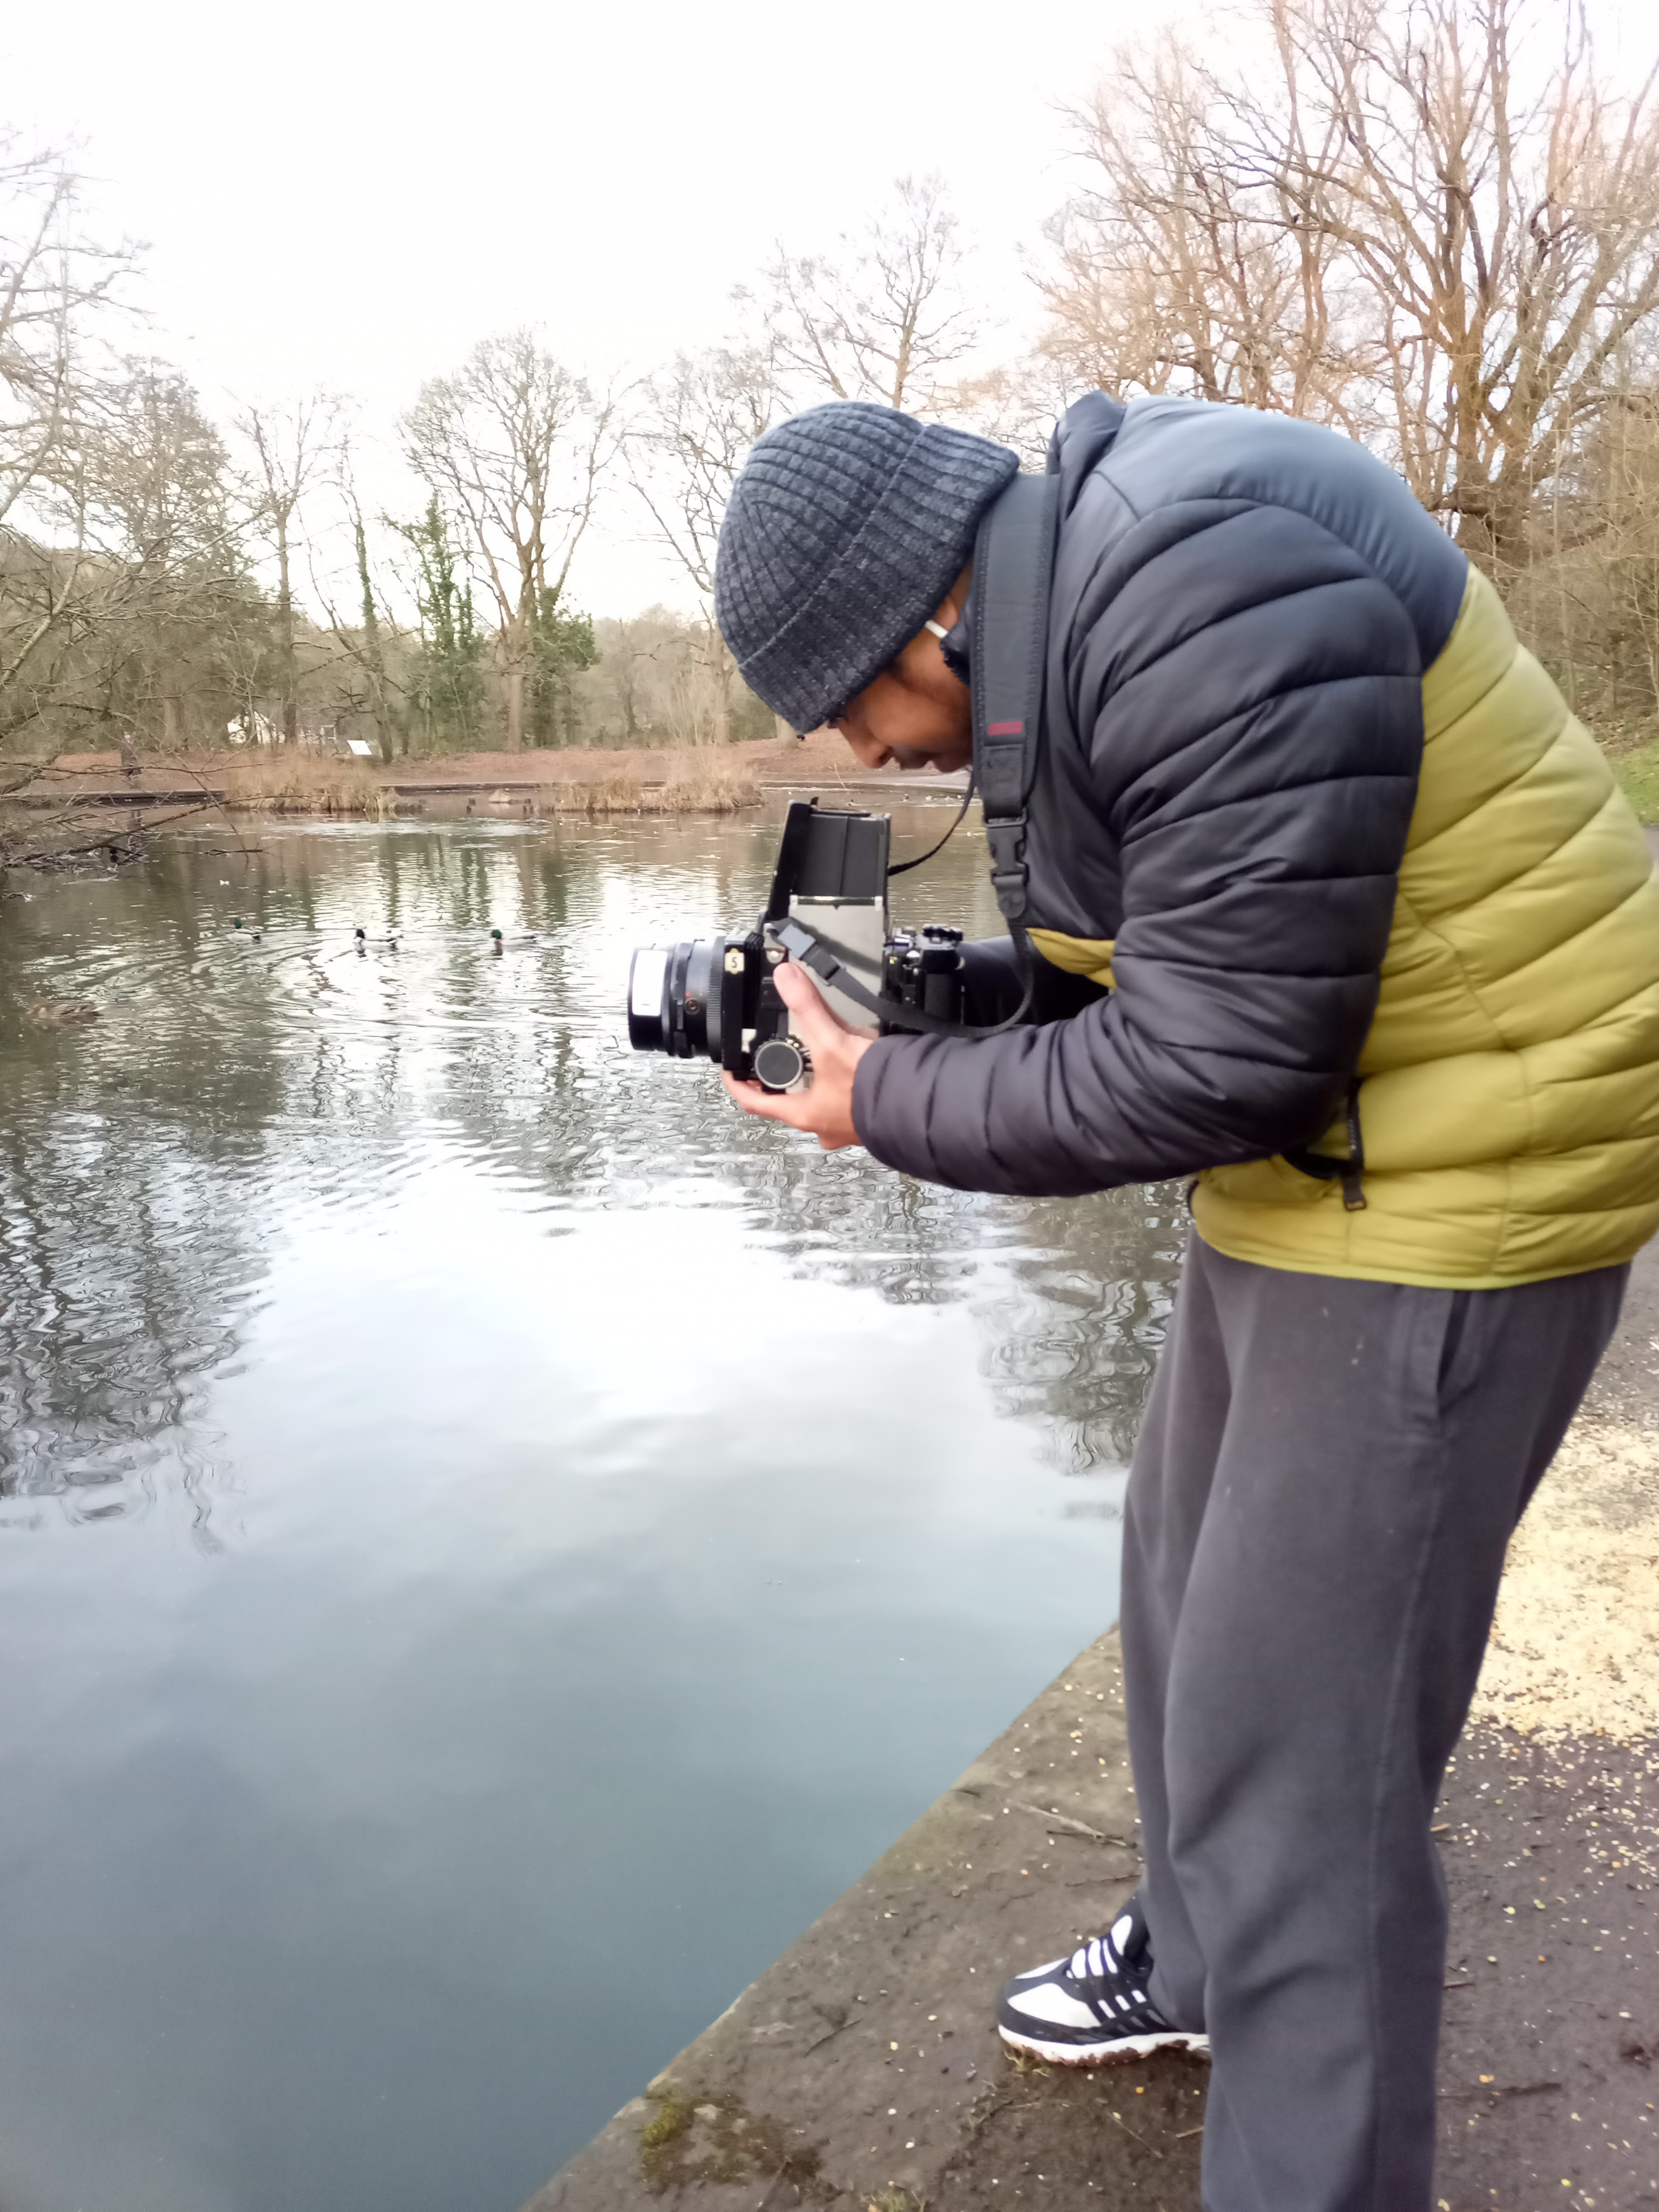
FOURTH PROJECT SHOT 120 FILM (MAMIYA RB67)
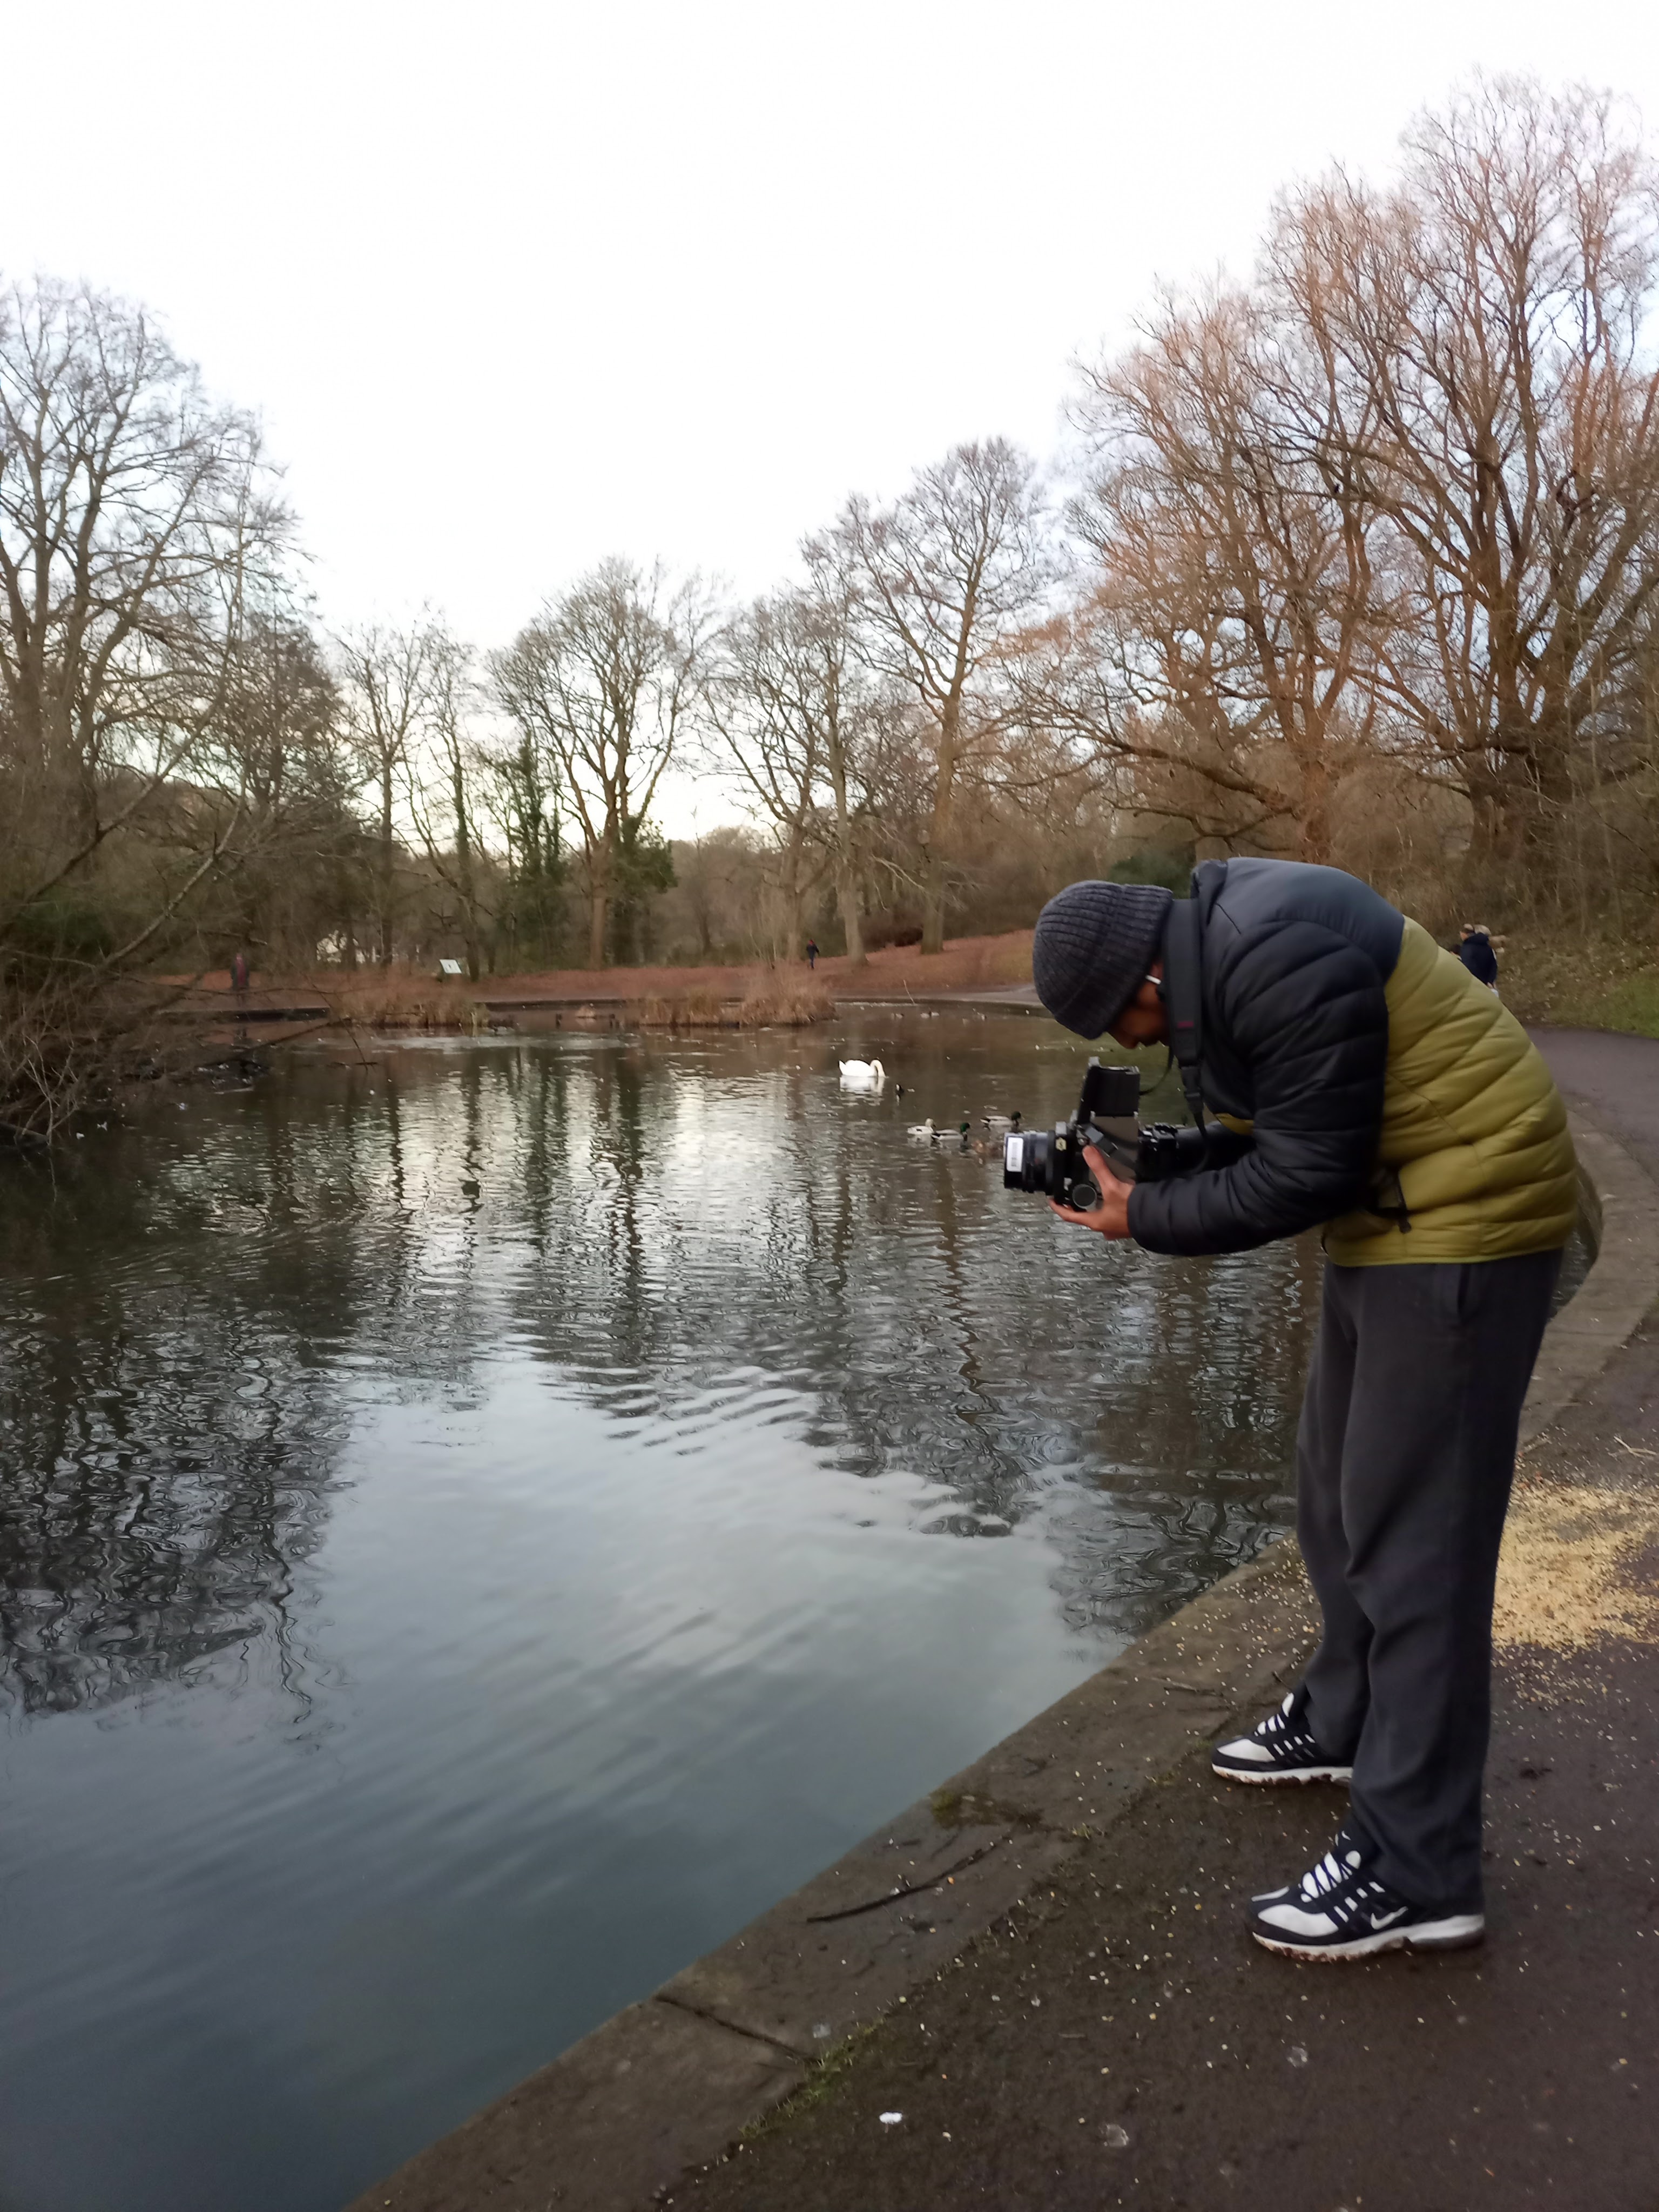
For the last time, I went out to shoot again with the Mamiya RB67 to shoot double exposure between model and water (pound). but still, I utilised the eos 5 film as a light meter to guide Mamiya RB67 in proper exposure.
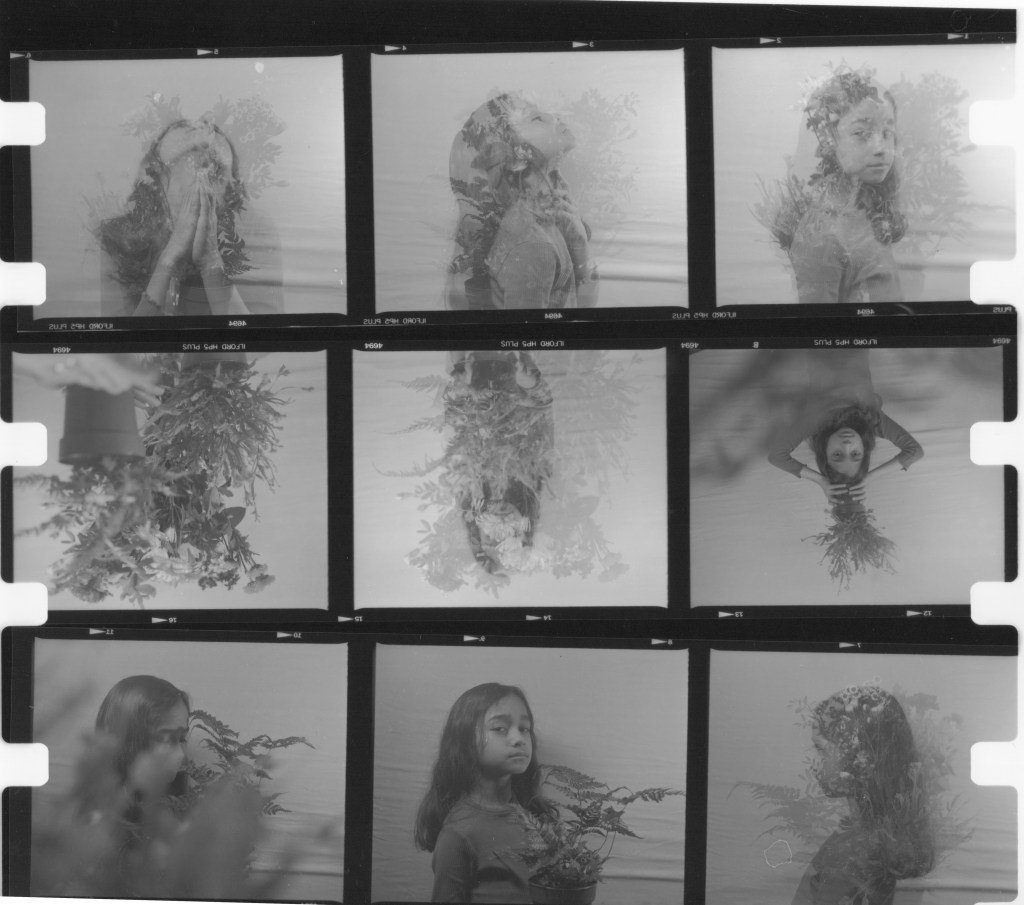
Contact sheet 120 film, outdoor double exposure with water

From this shot, I finally get the image that I wanted with the water.
Here is the image I picked to develop more to get it professionally printed.
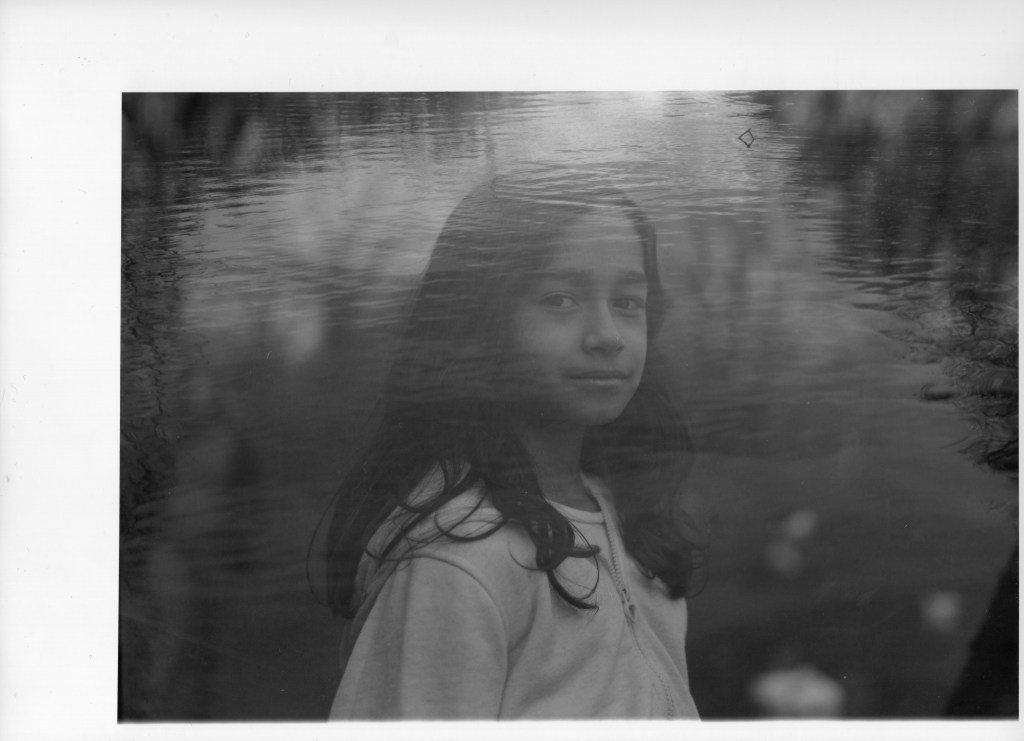
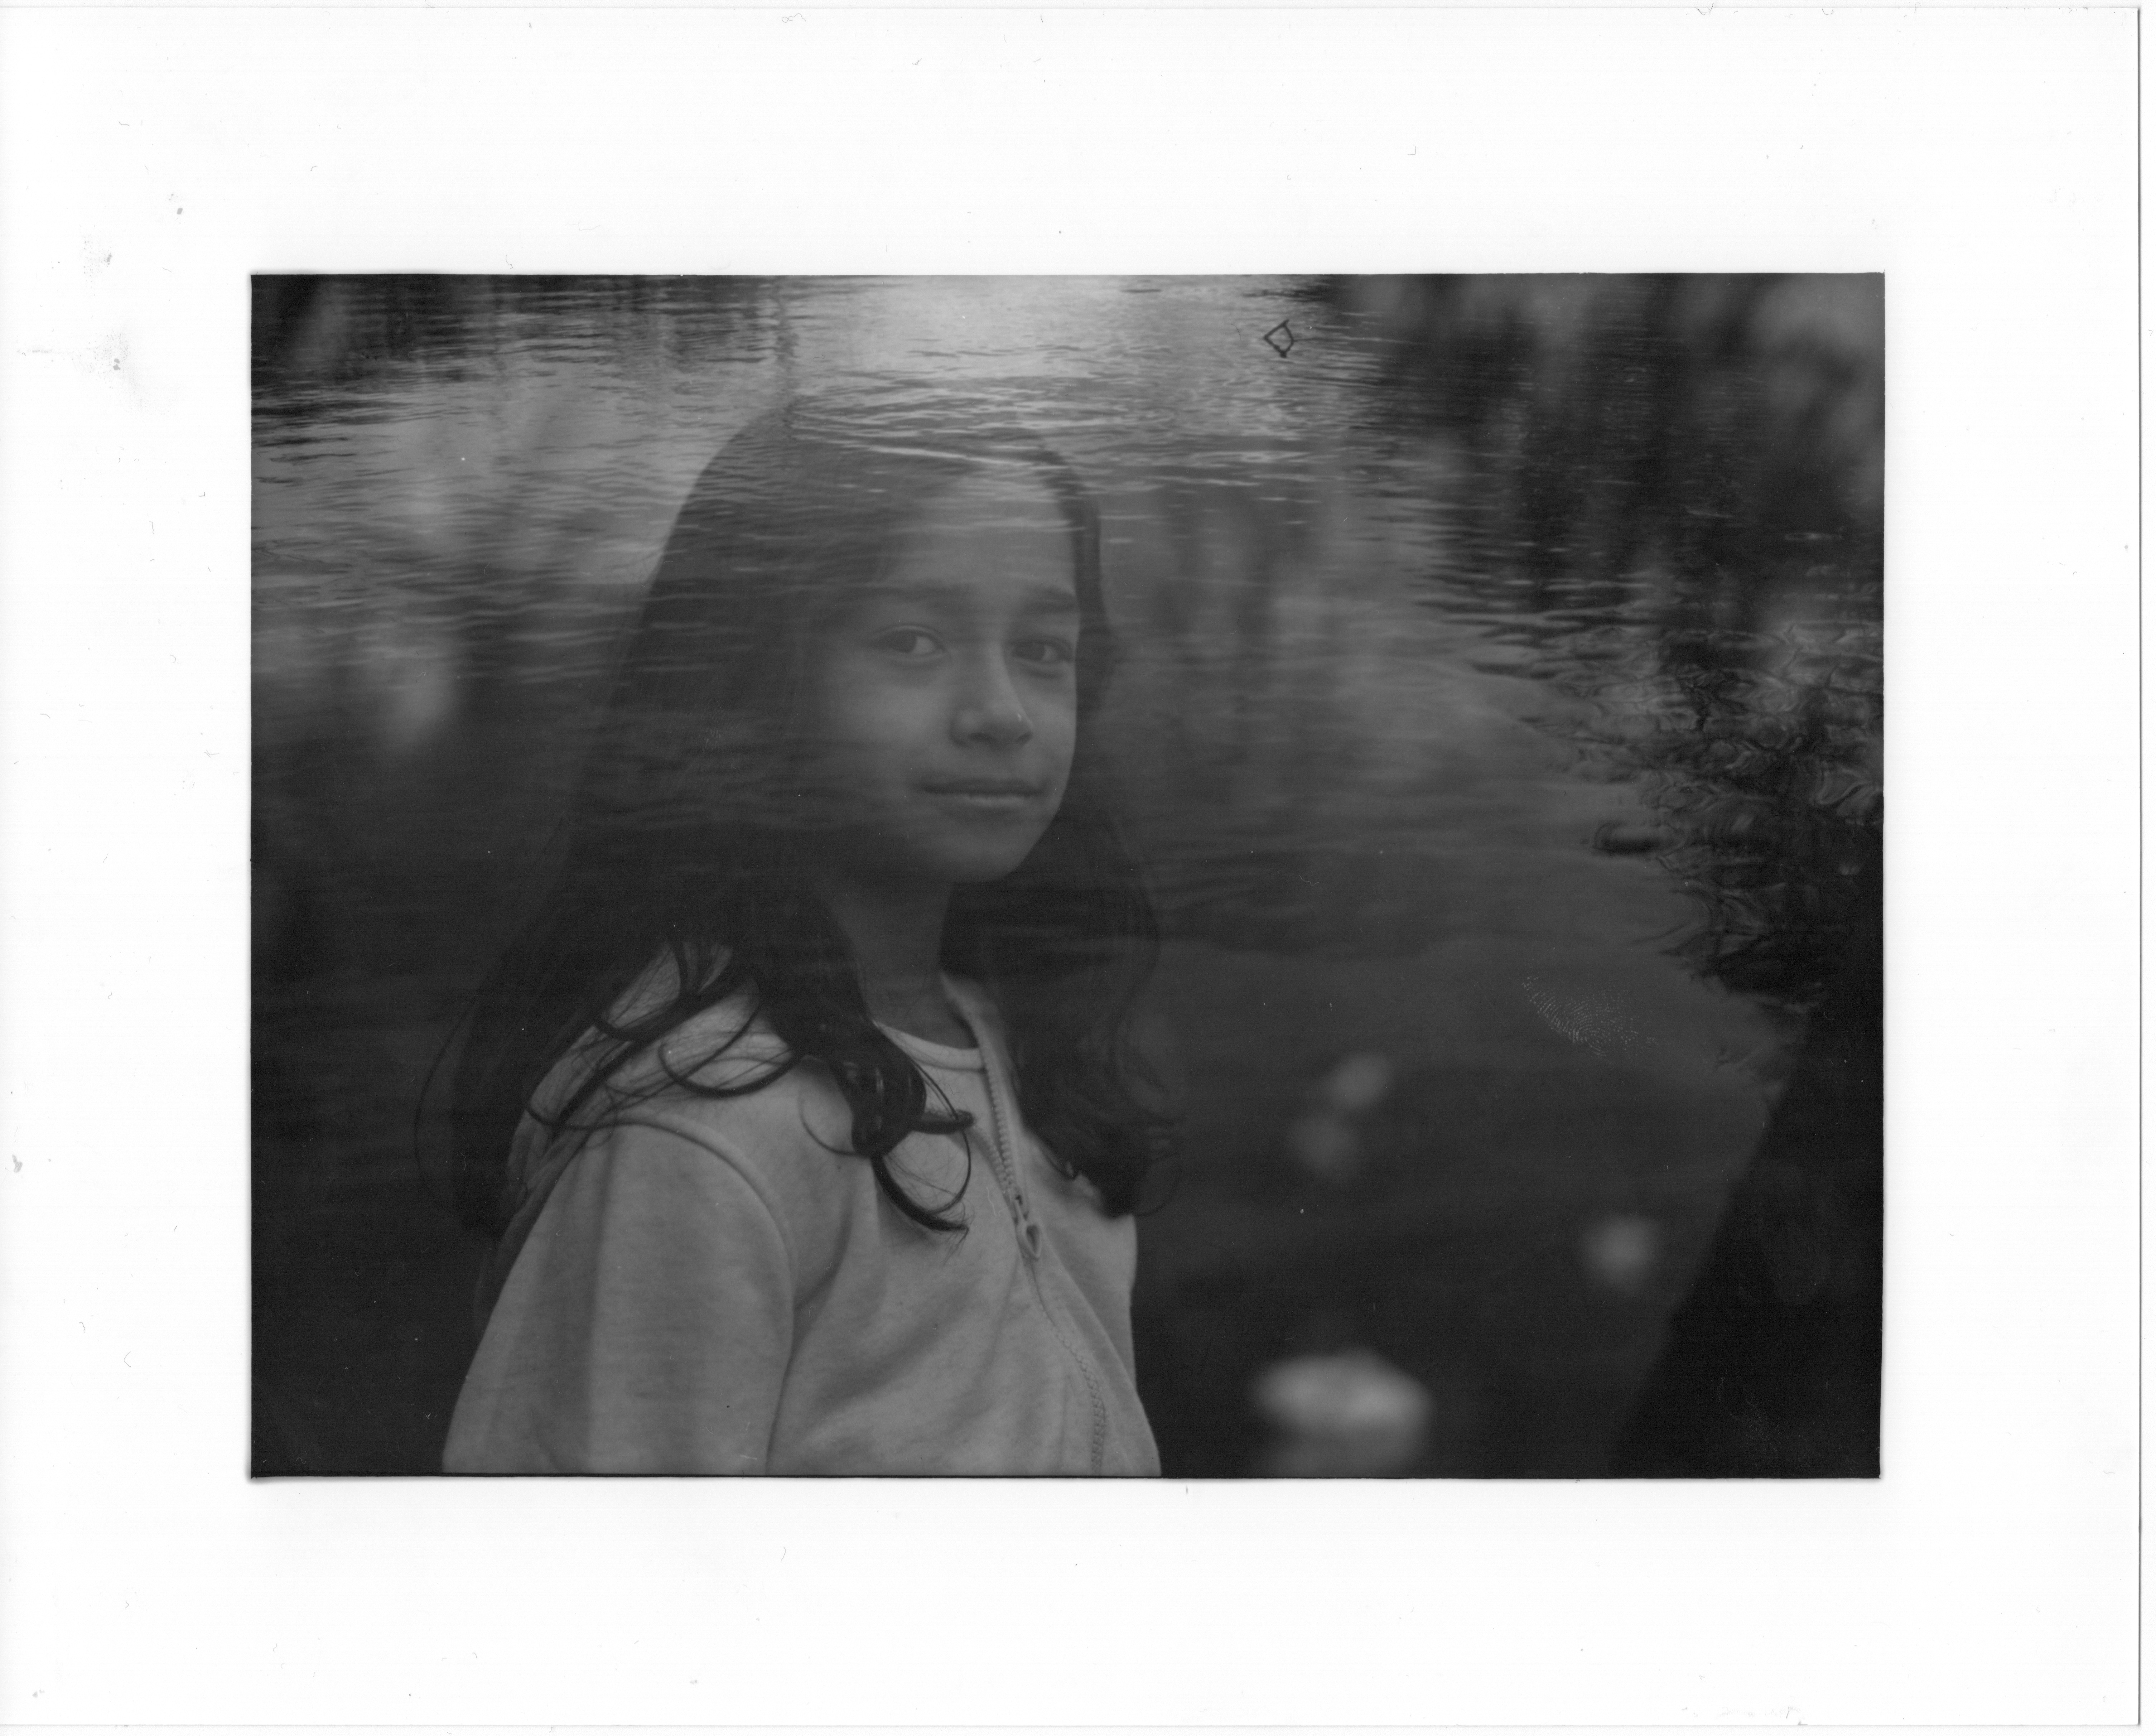
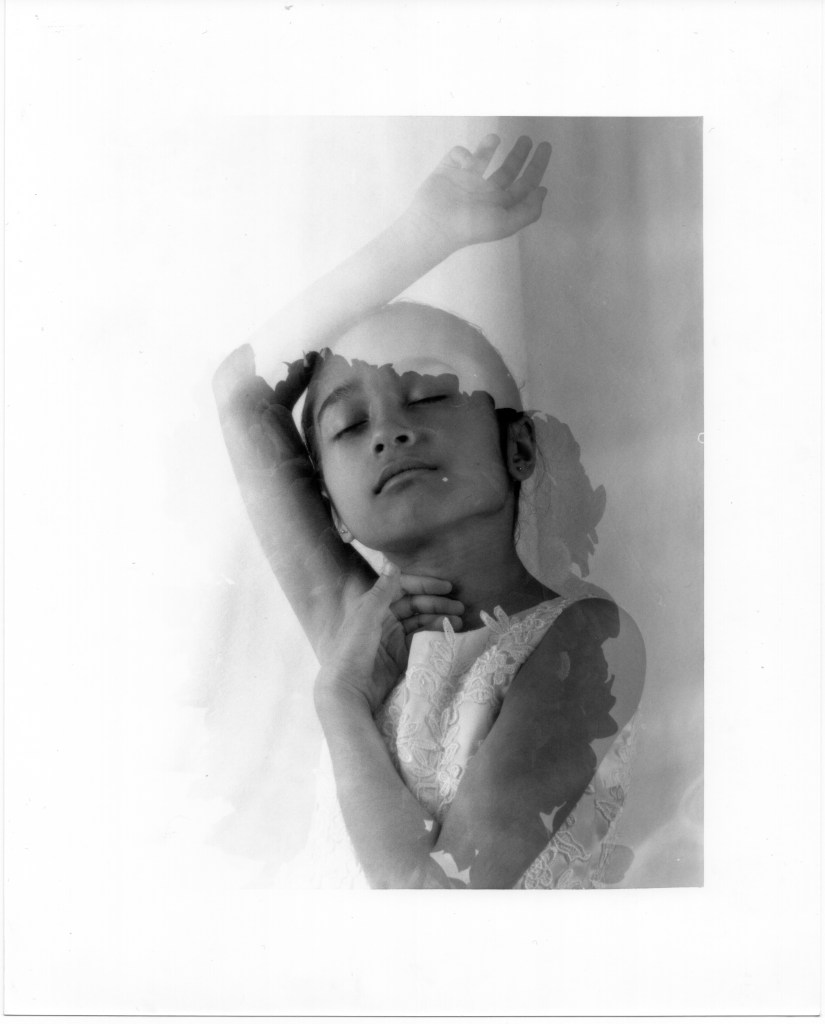
Water and model in double exposure.
F/8 enlarger setting
The test strip begins at 3 seconds and ends at 15 seconds.
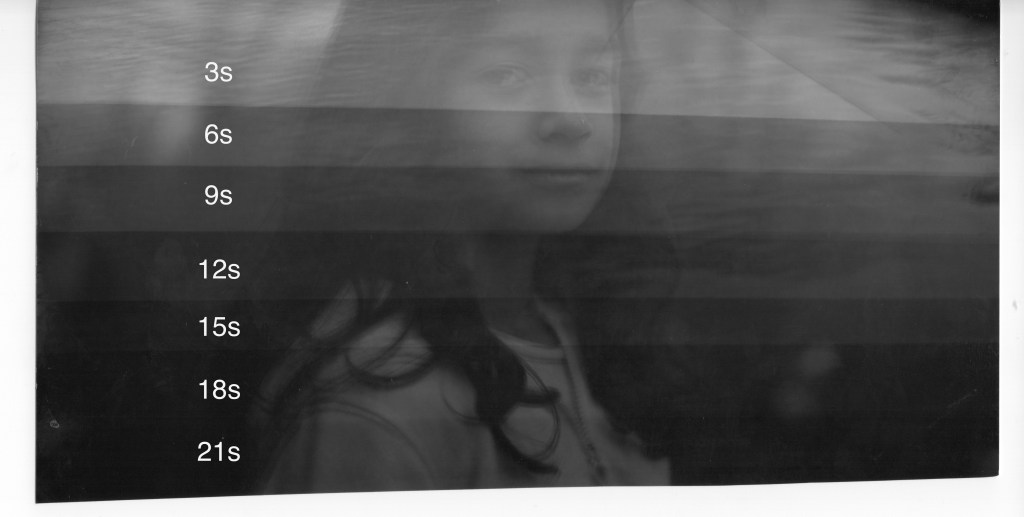
I chose 10 seconds (added one extra second only to allow me time to dodge at the model’s face) for overall exposure is 6 seconds and 4 seconds to dodge the model’s face simply to brighten the model’s face.
This time, I understand better how to dodge the area if I do not want to burn it more. Compare to my previous work, the technique was so terrible and created the “halo effect”.
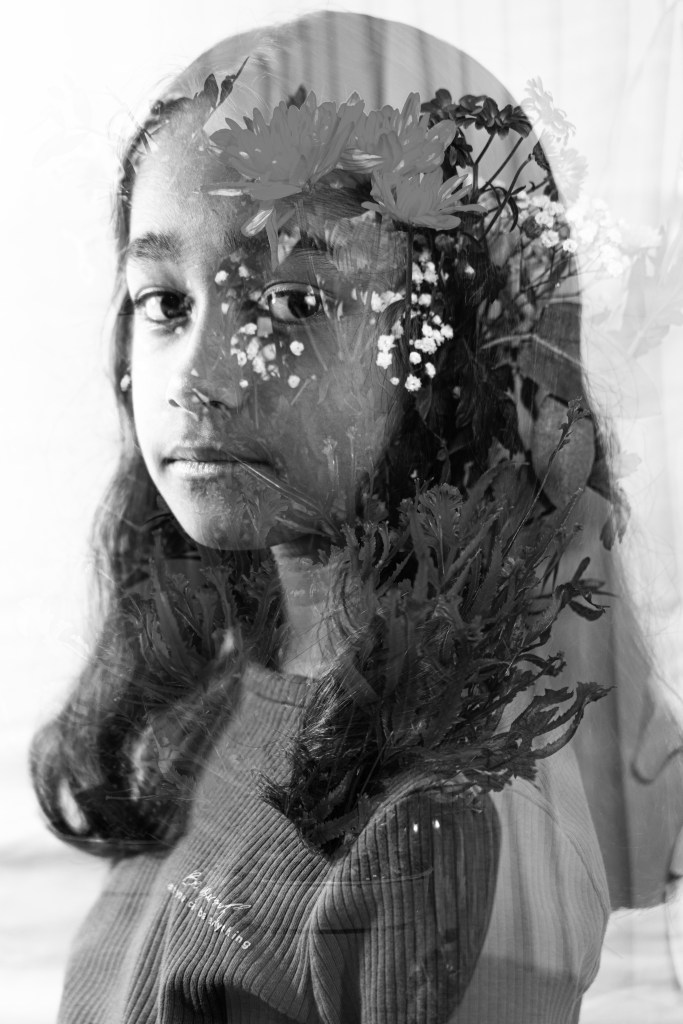
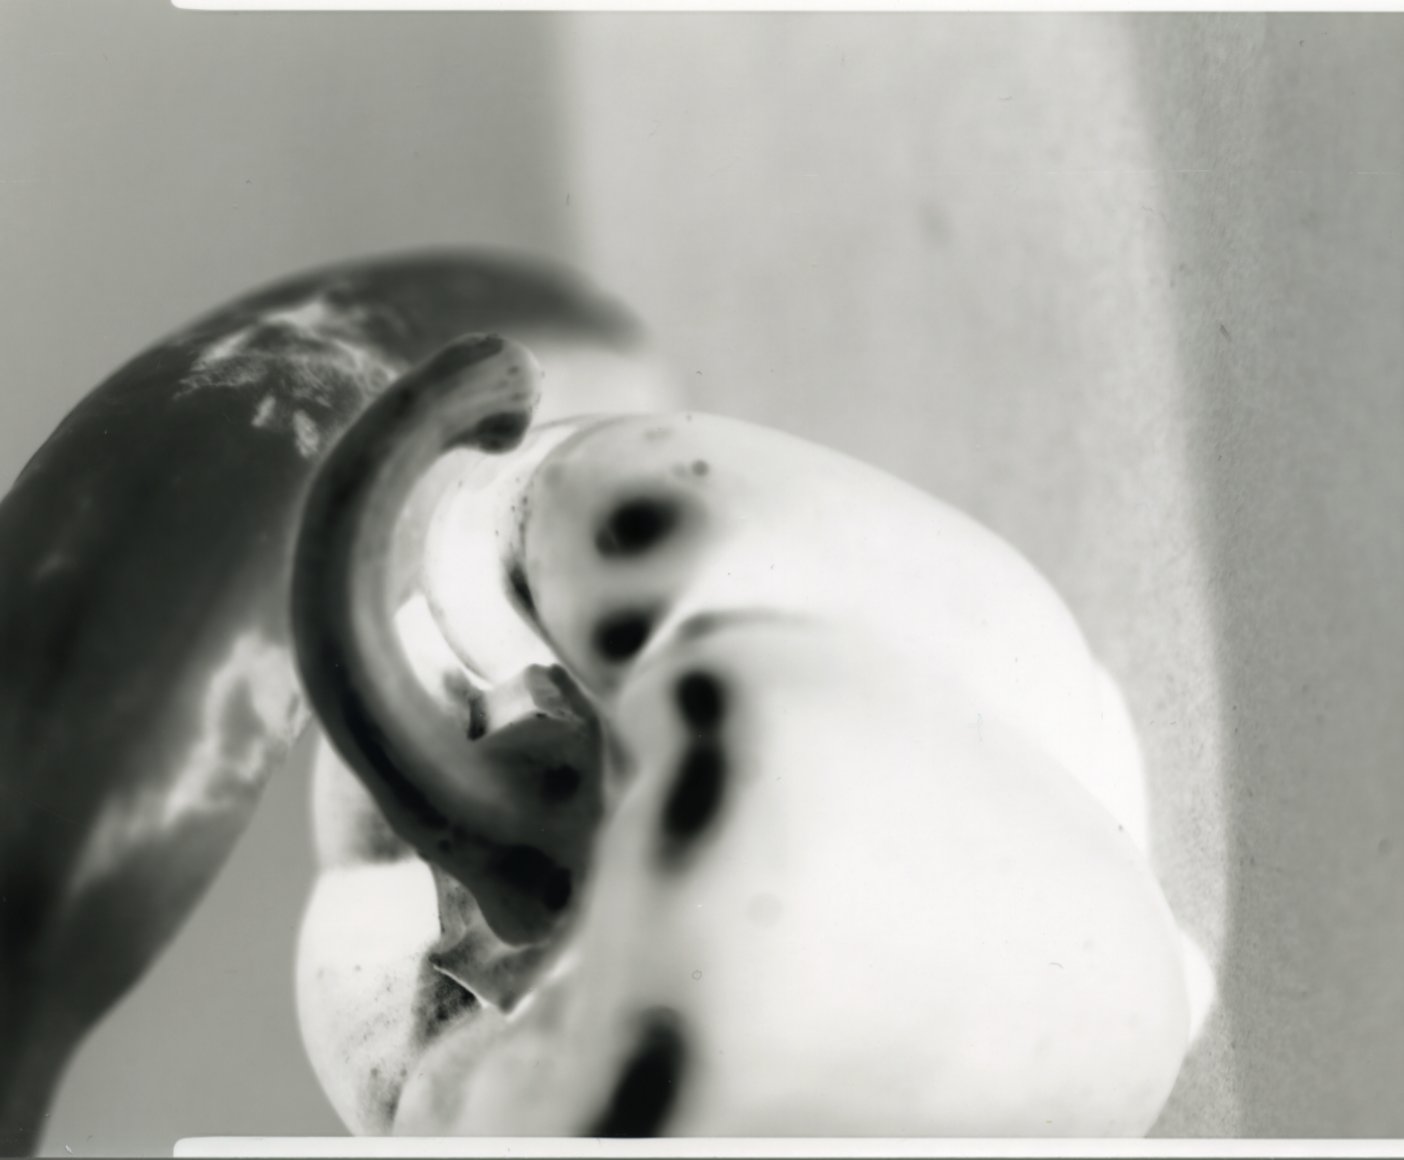
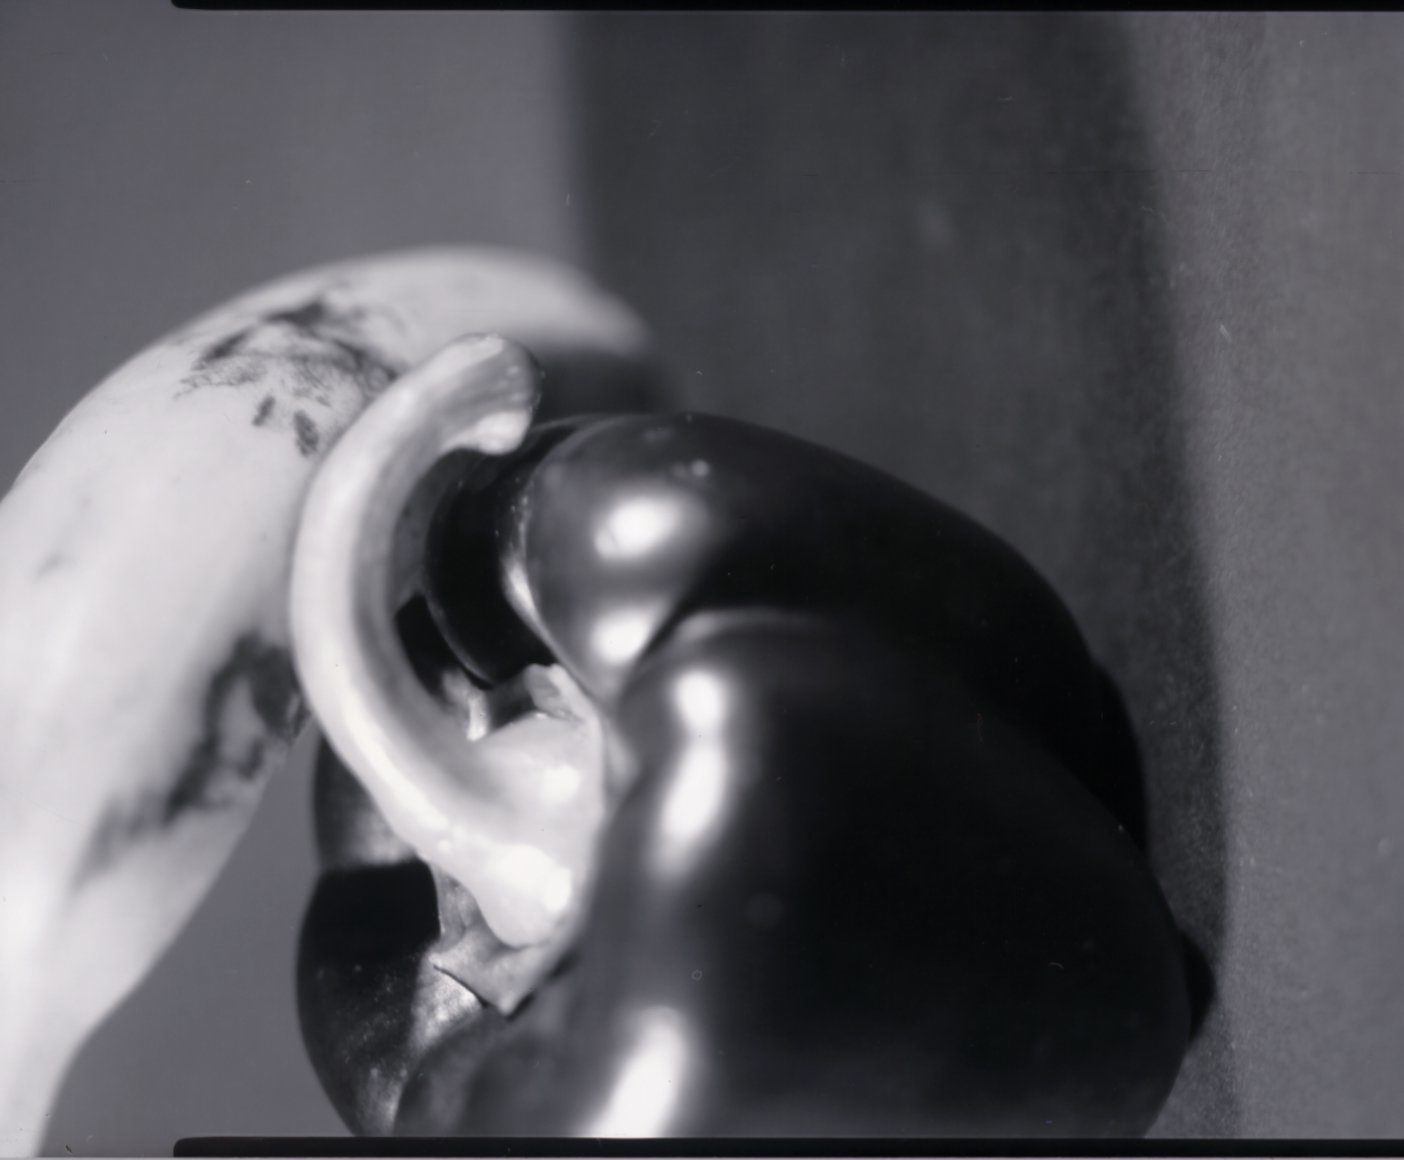
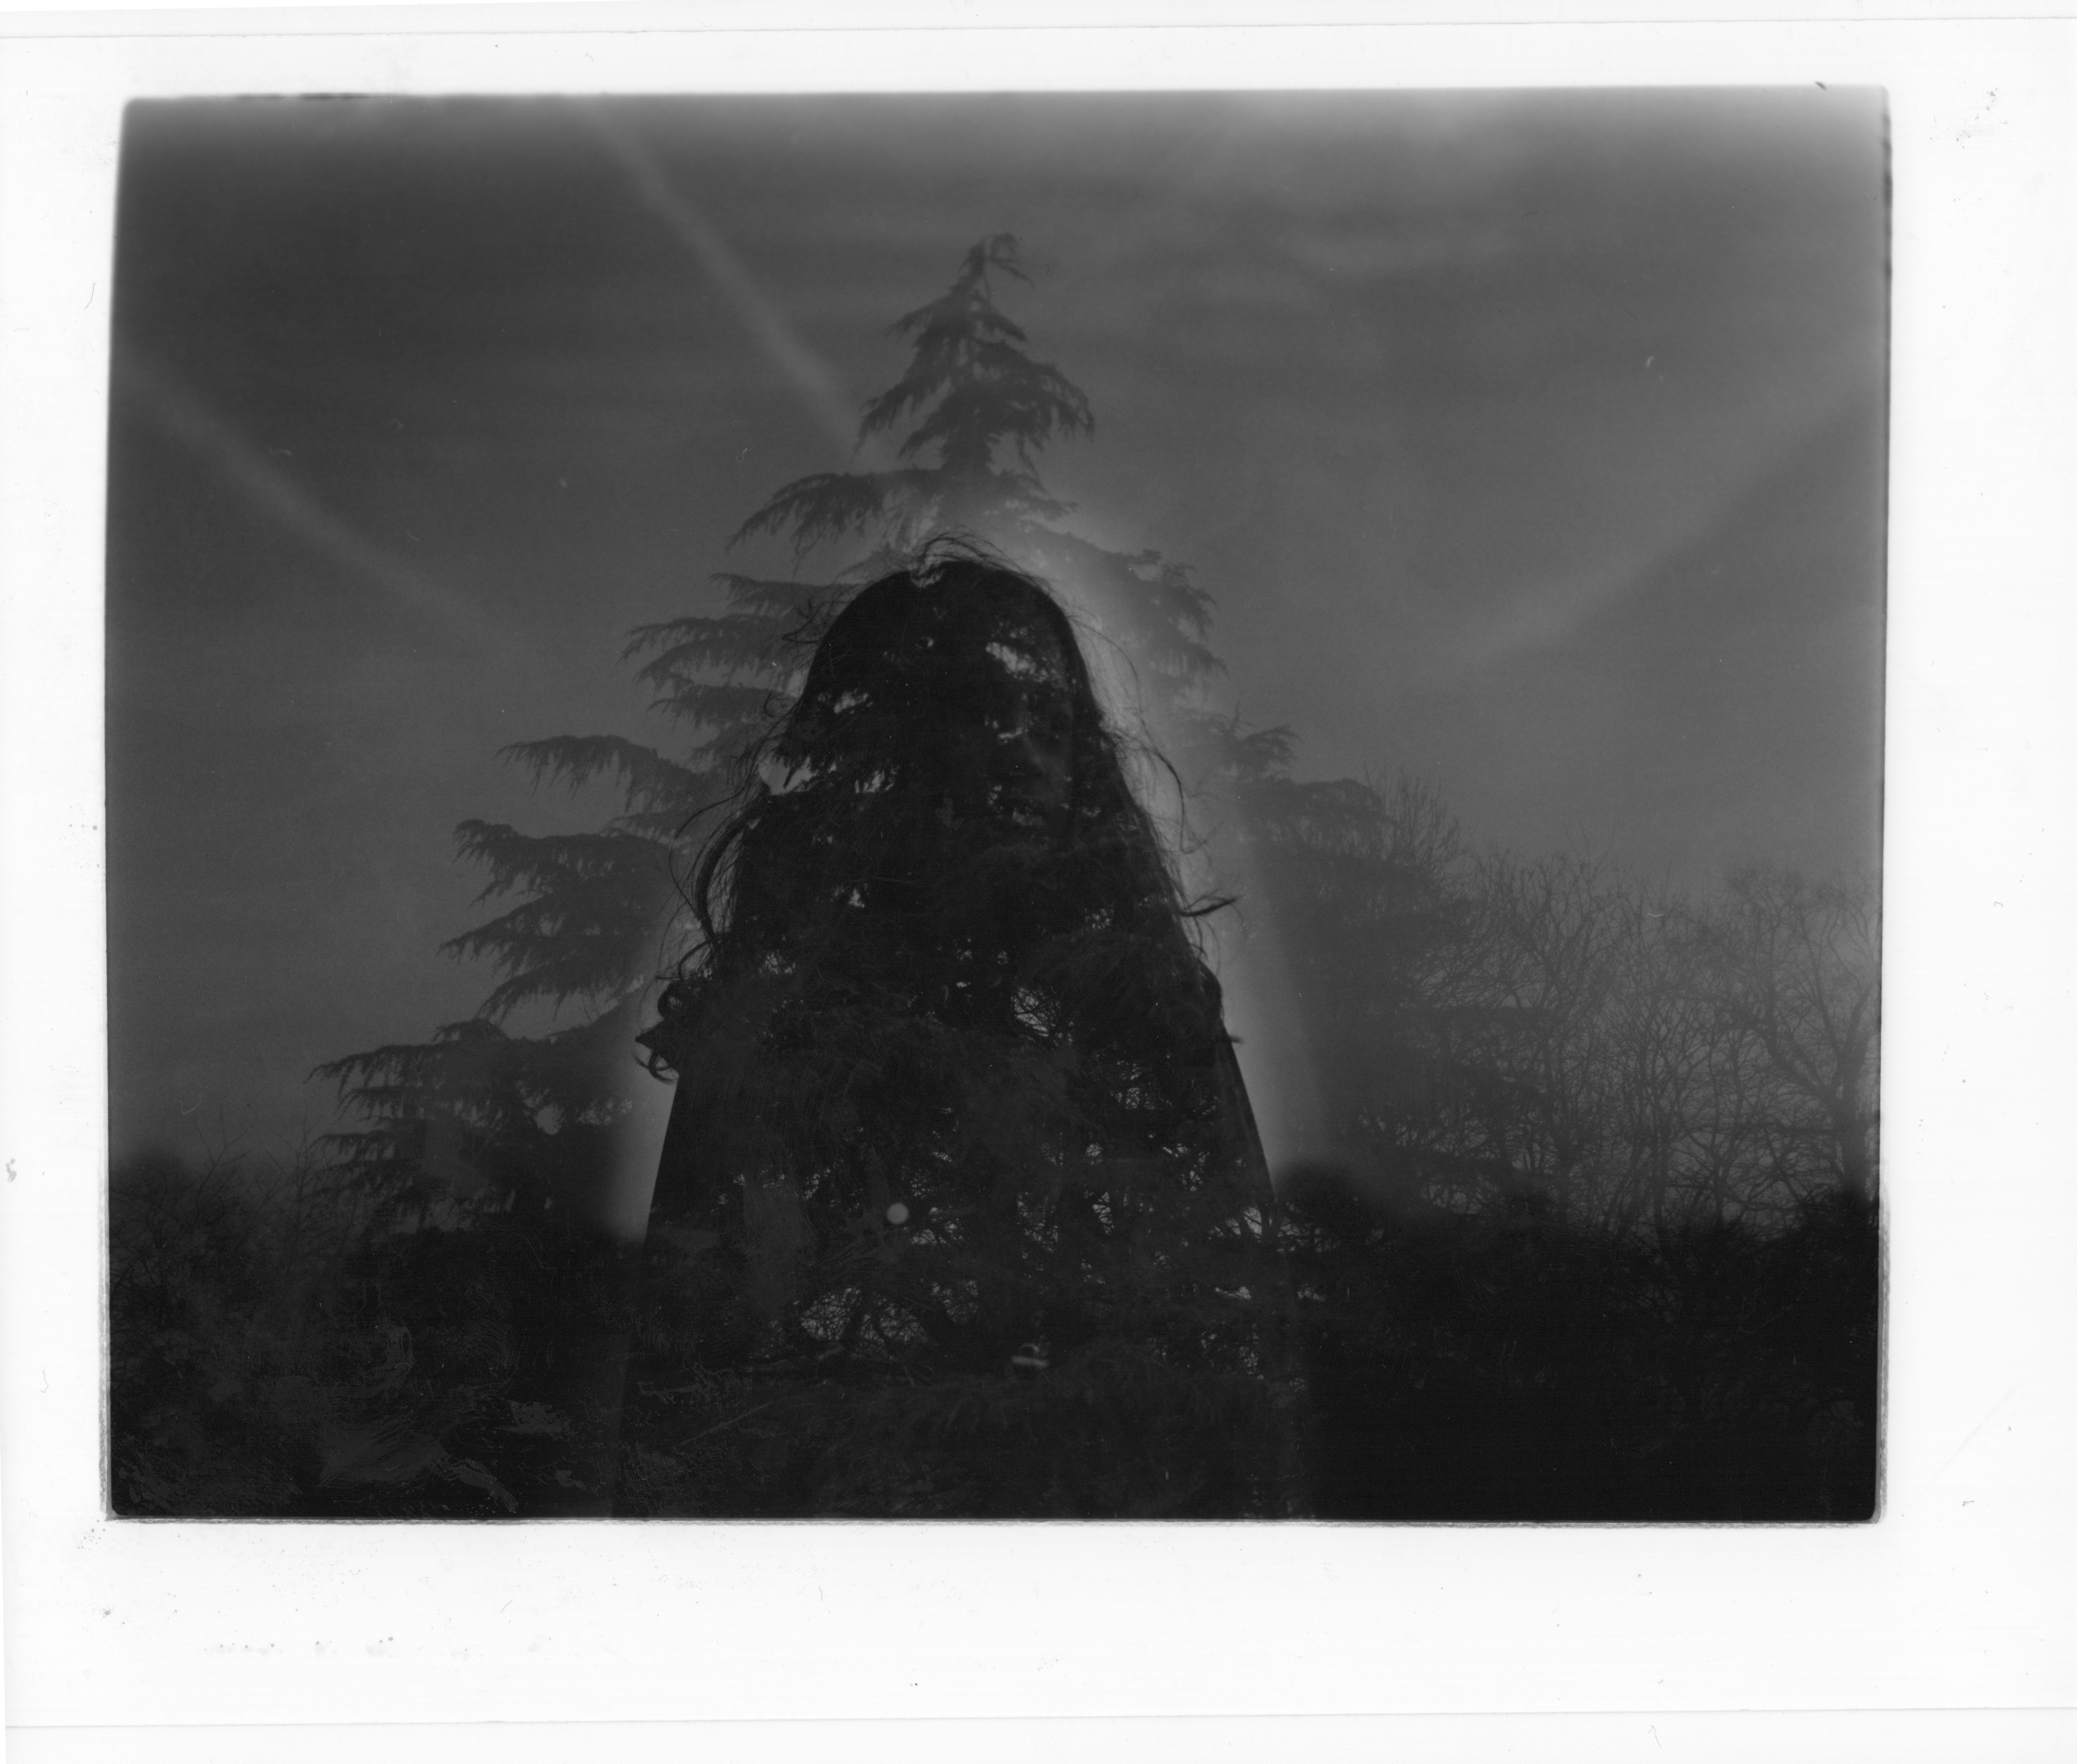
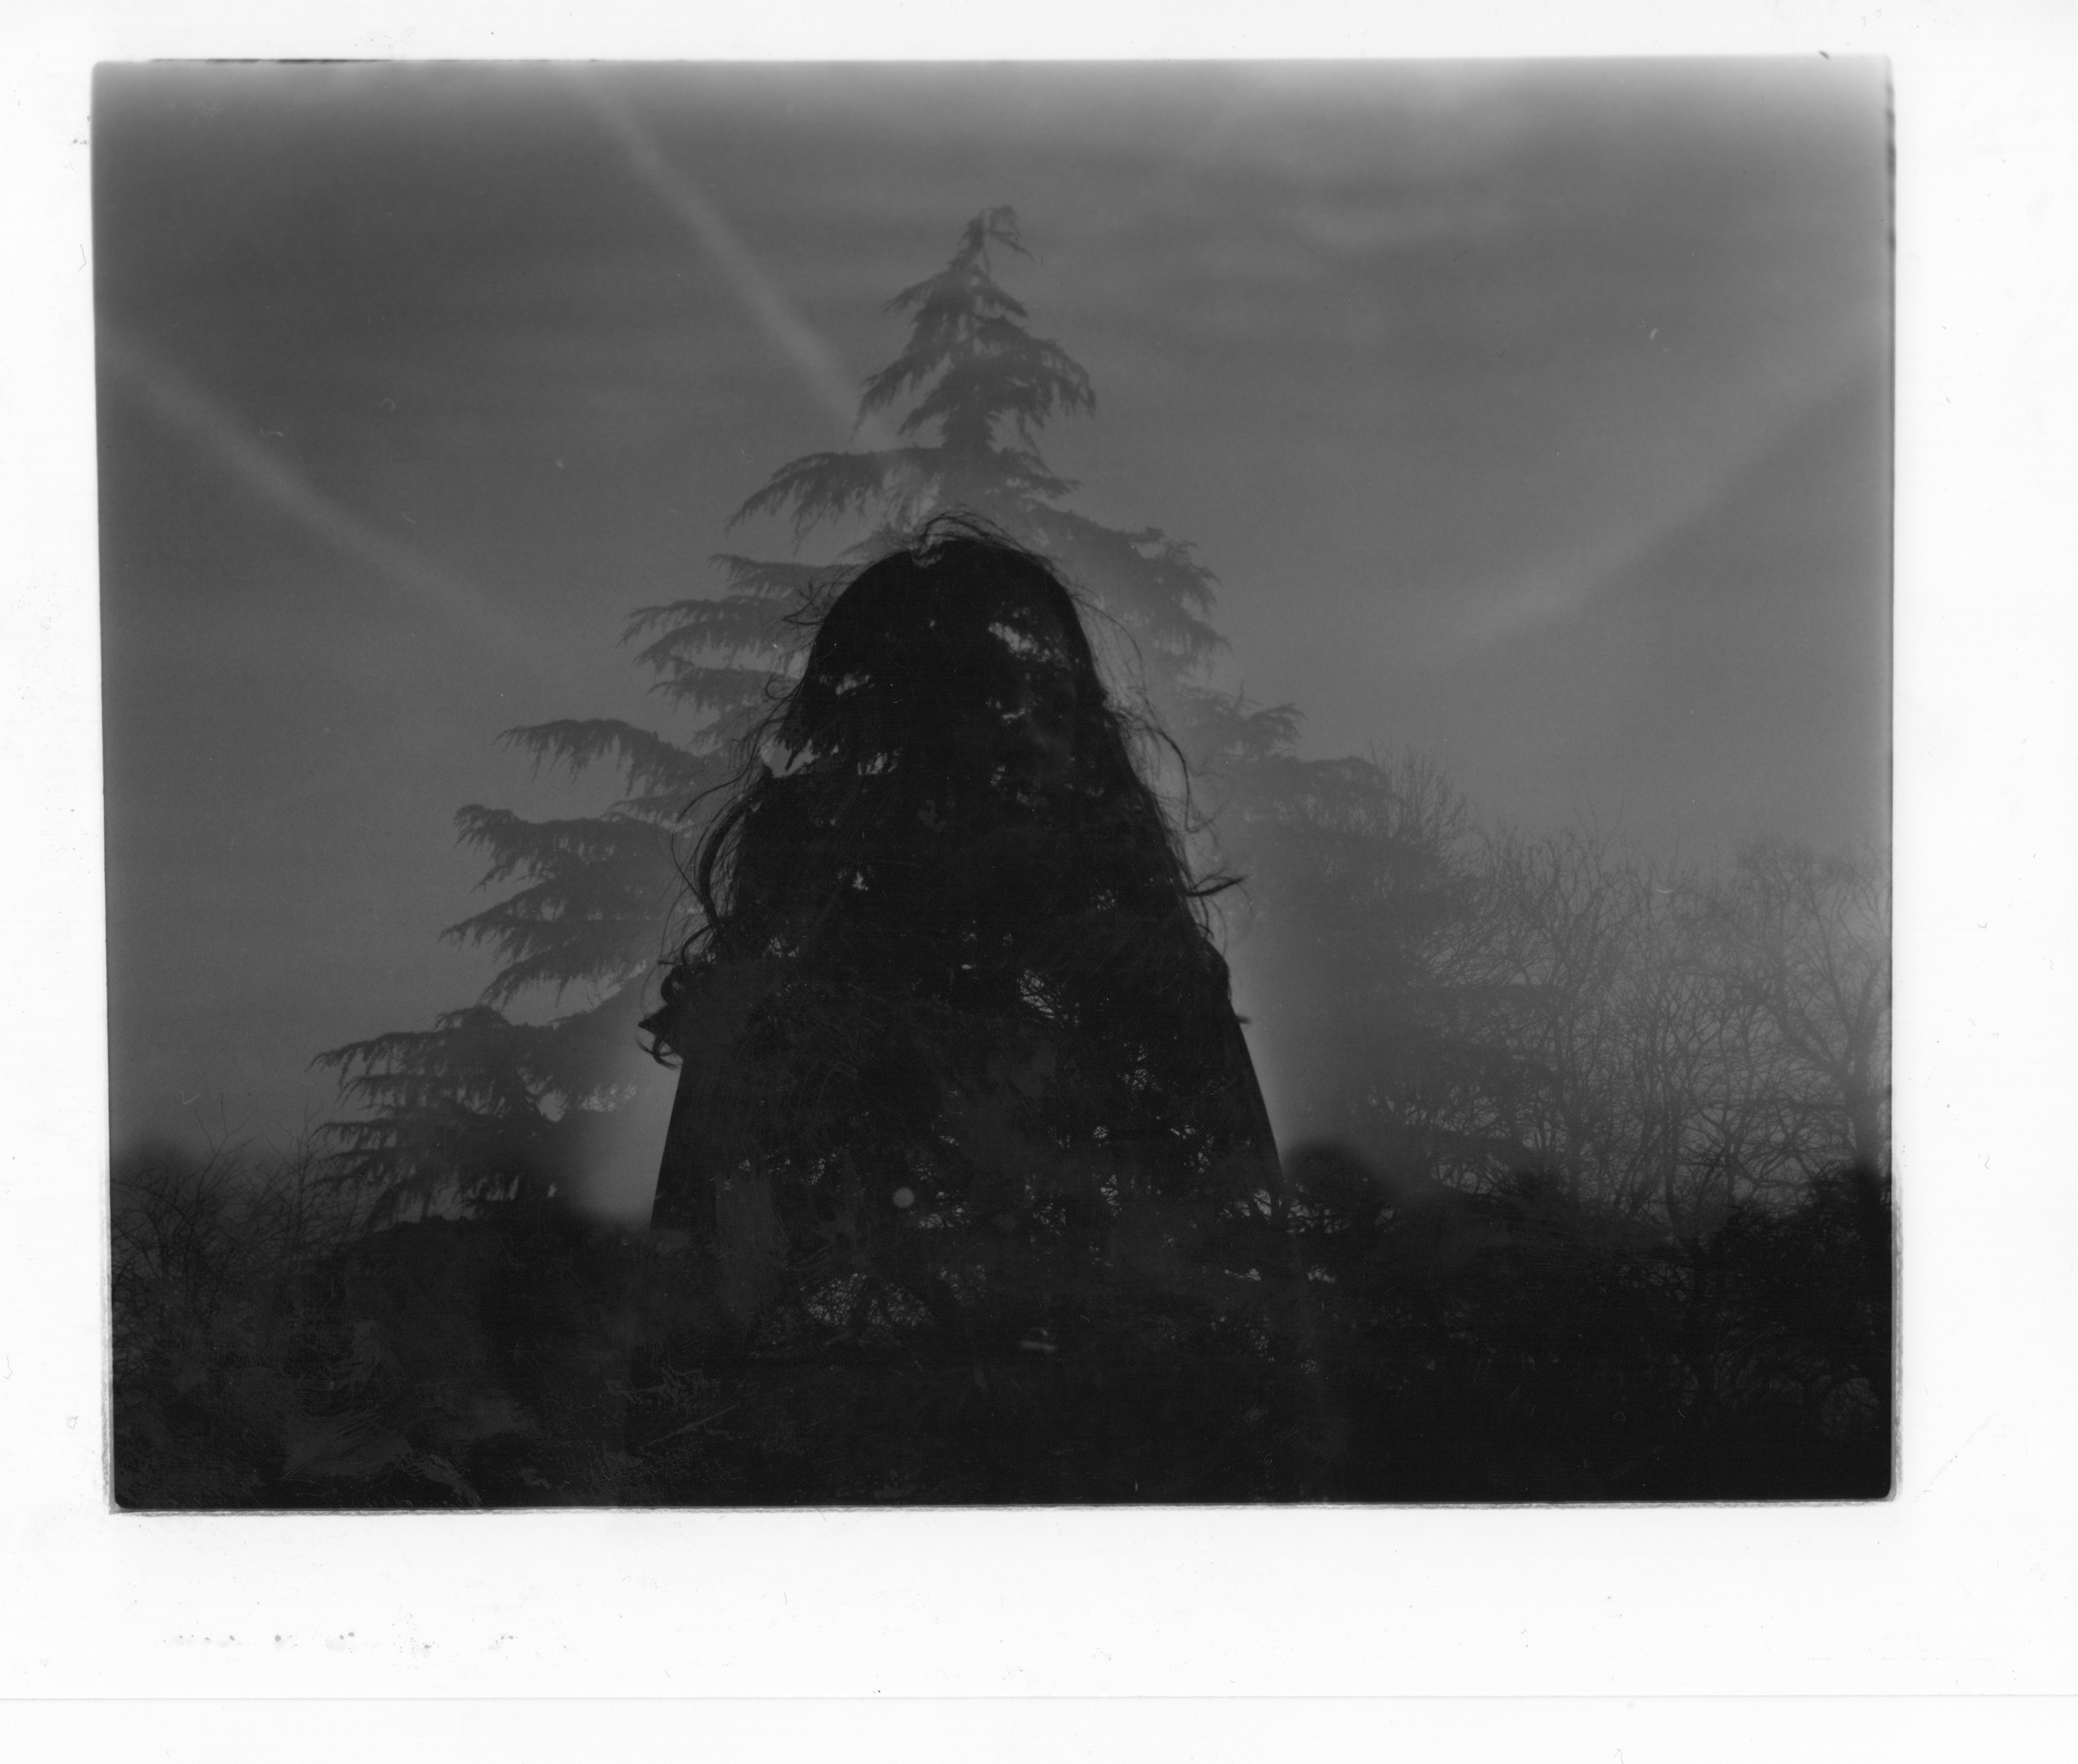
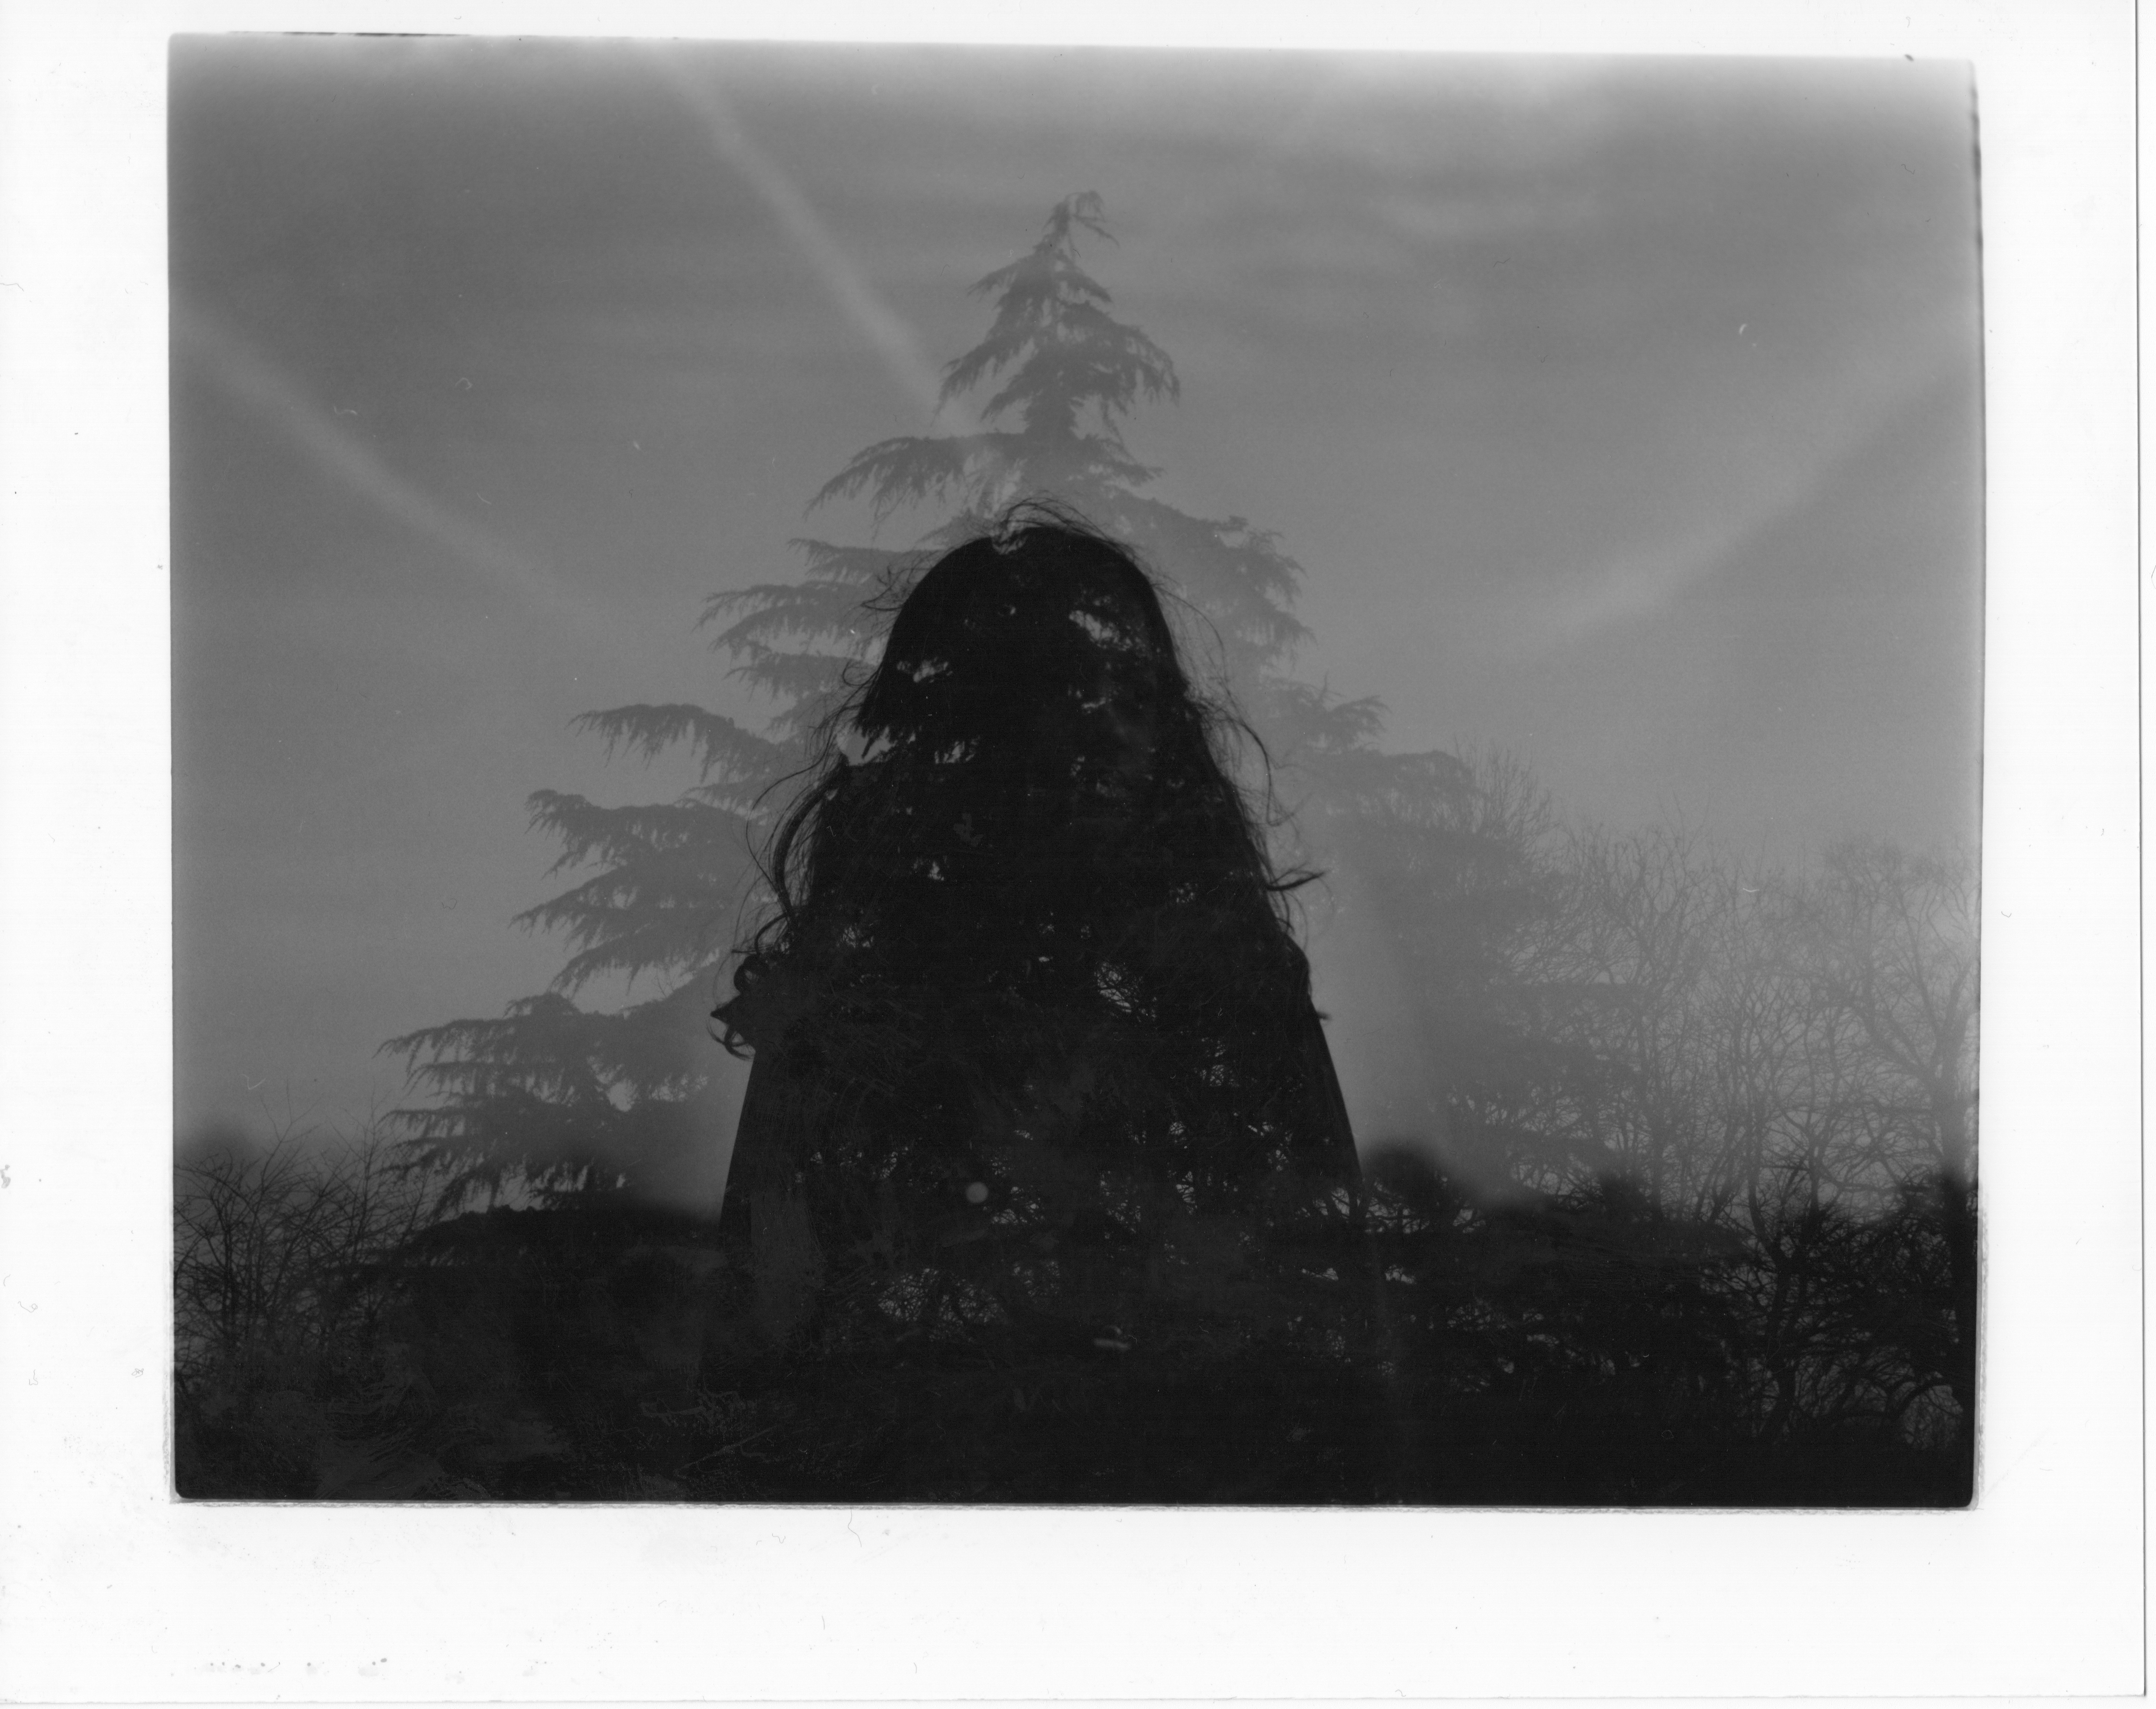
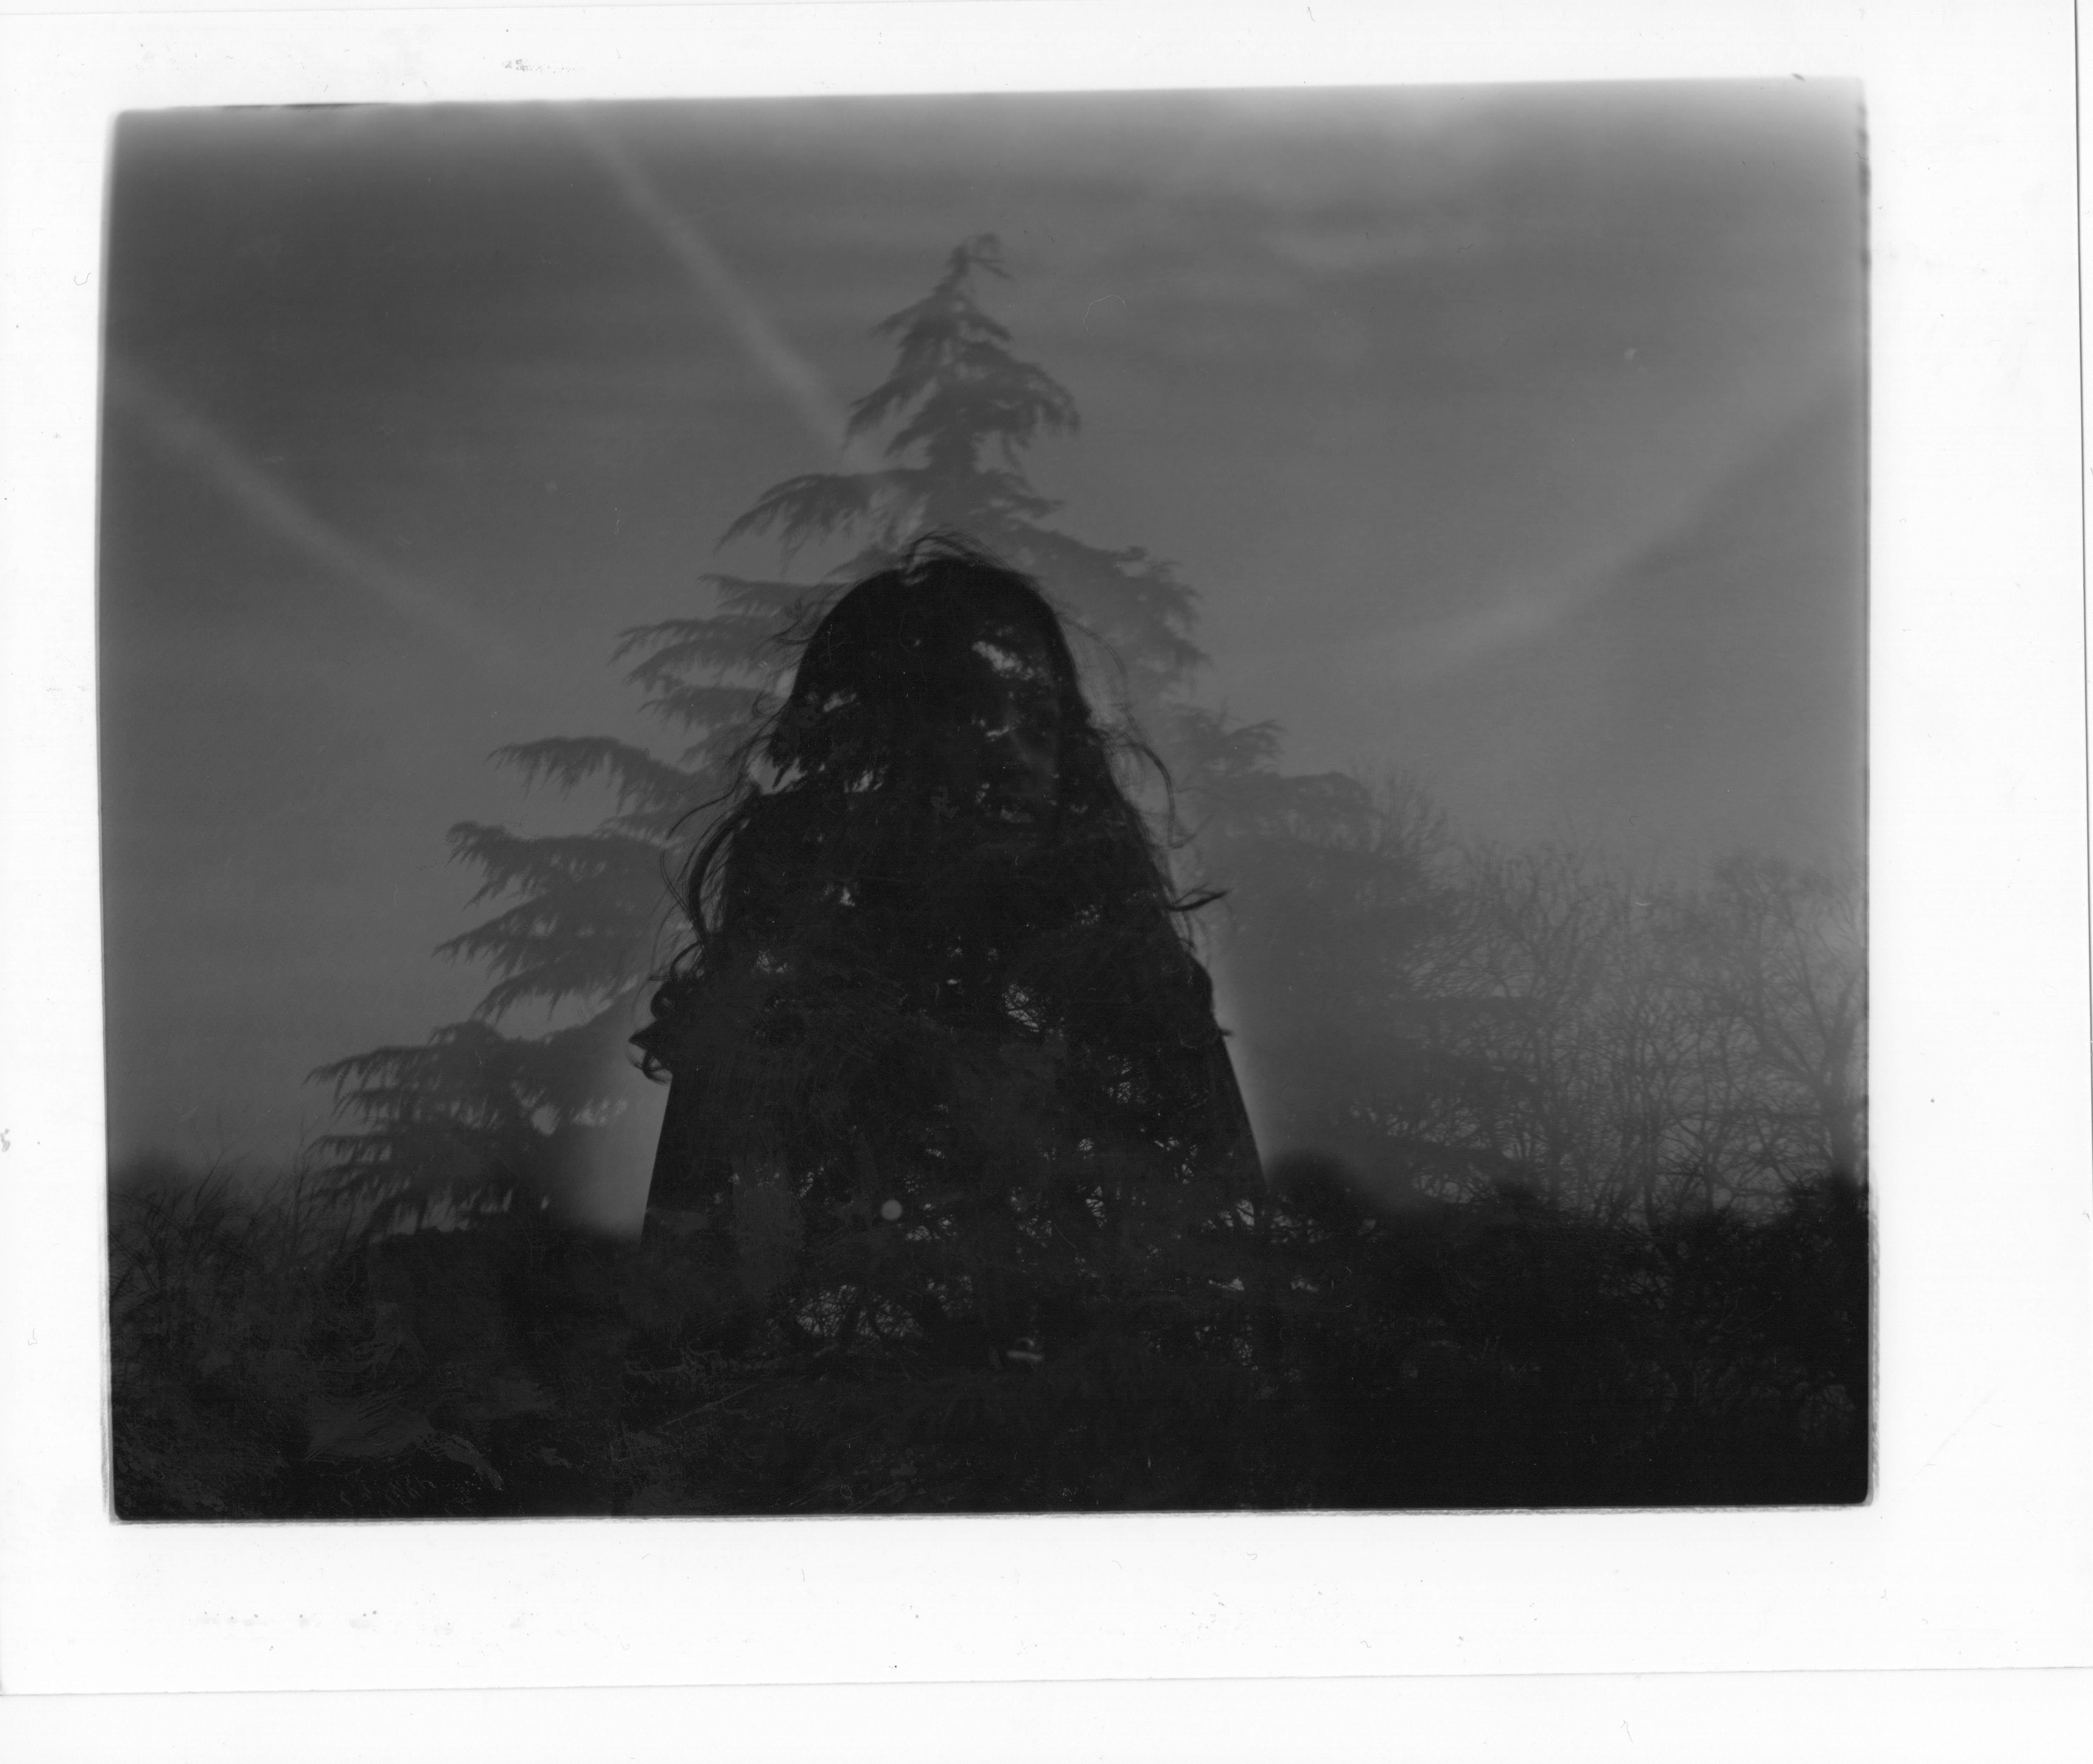
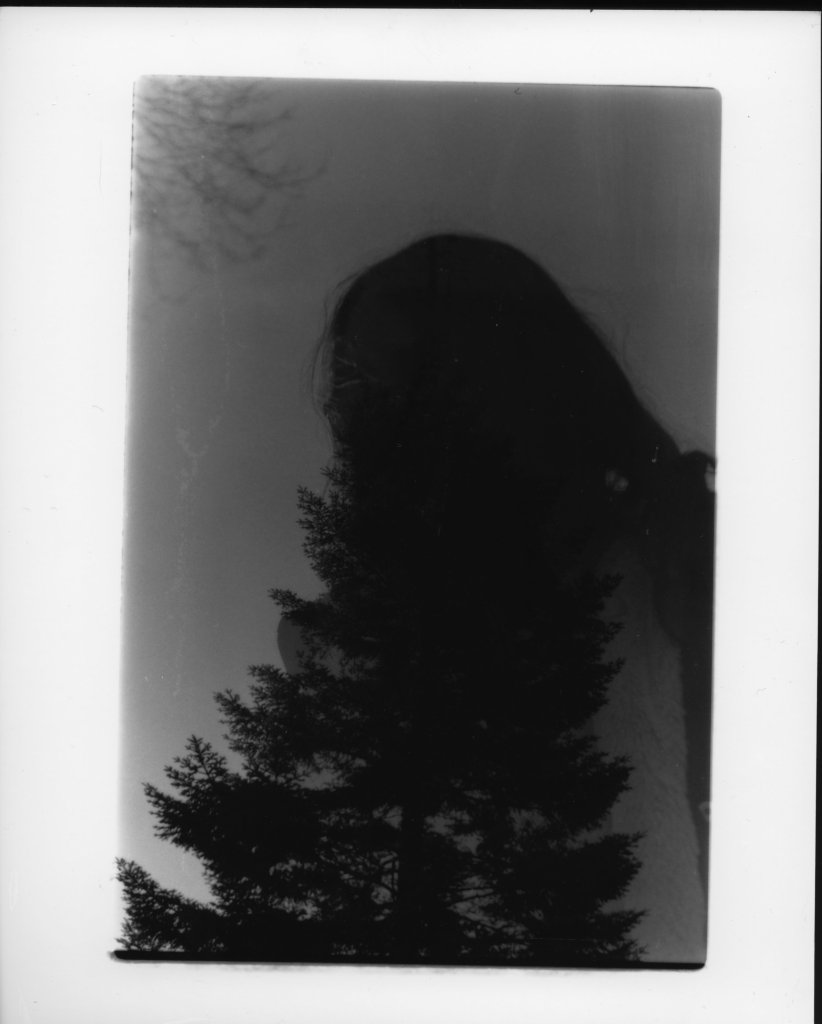
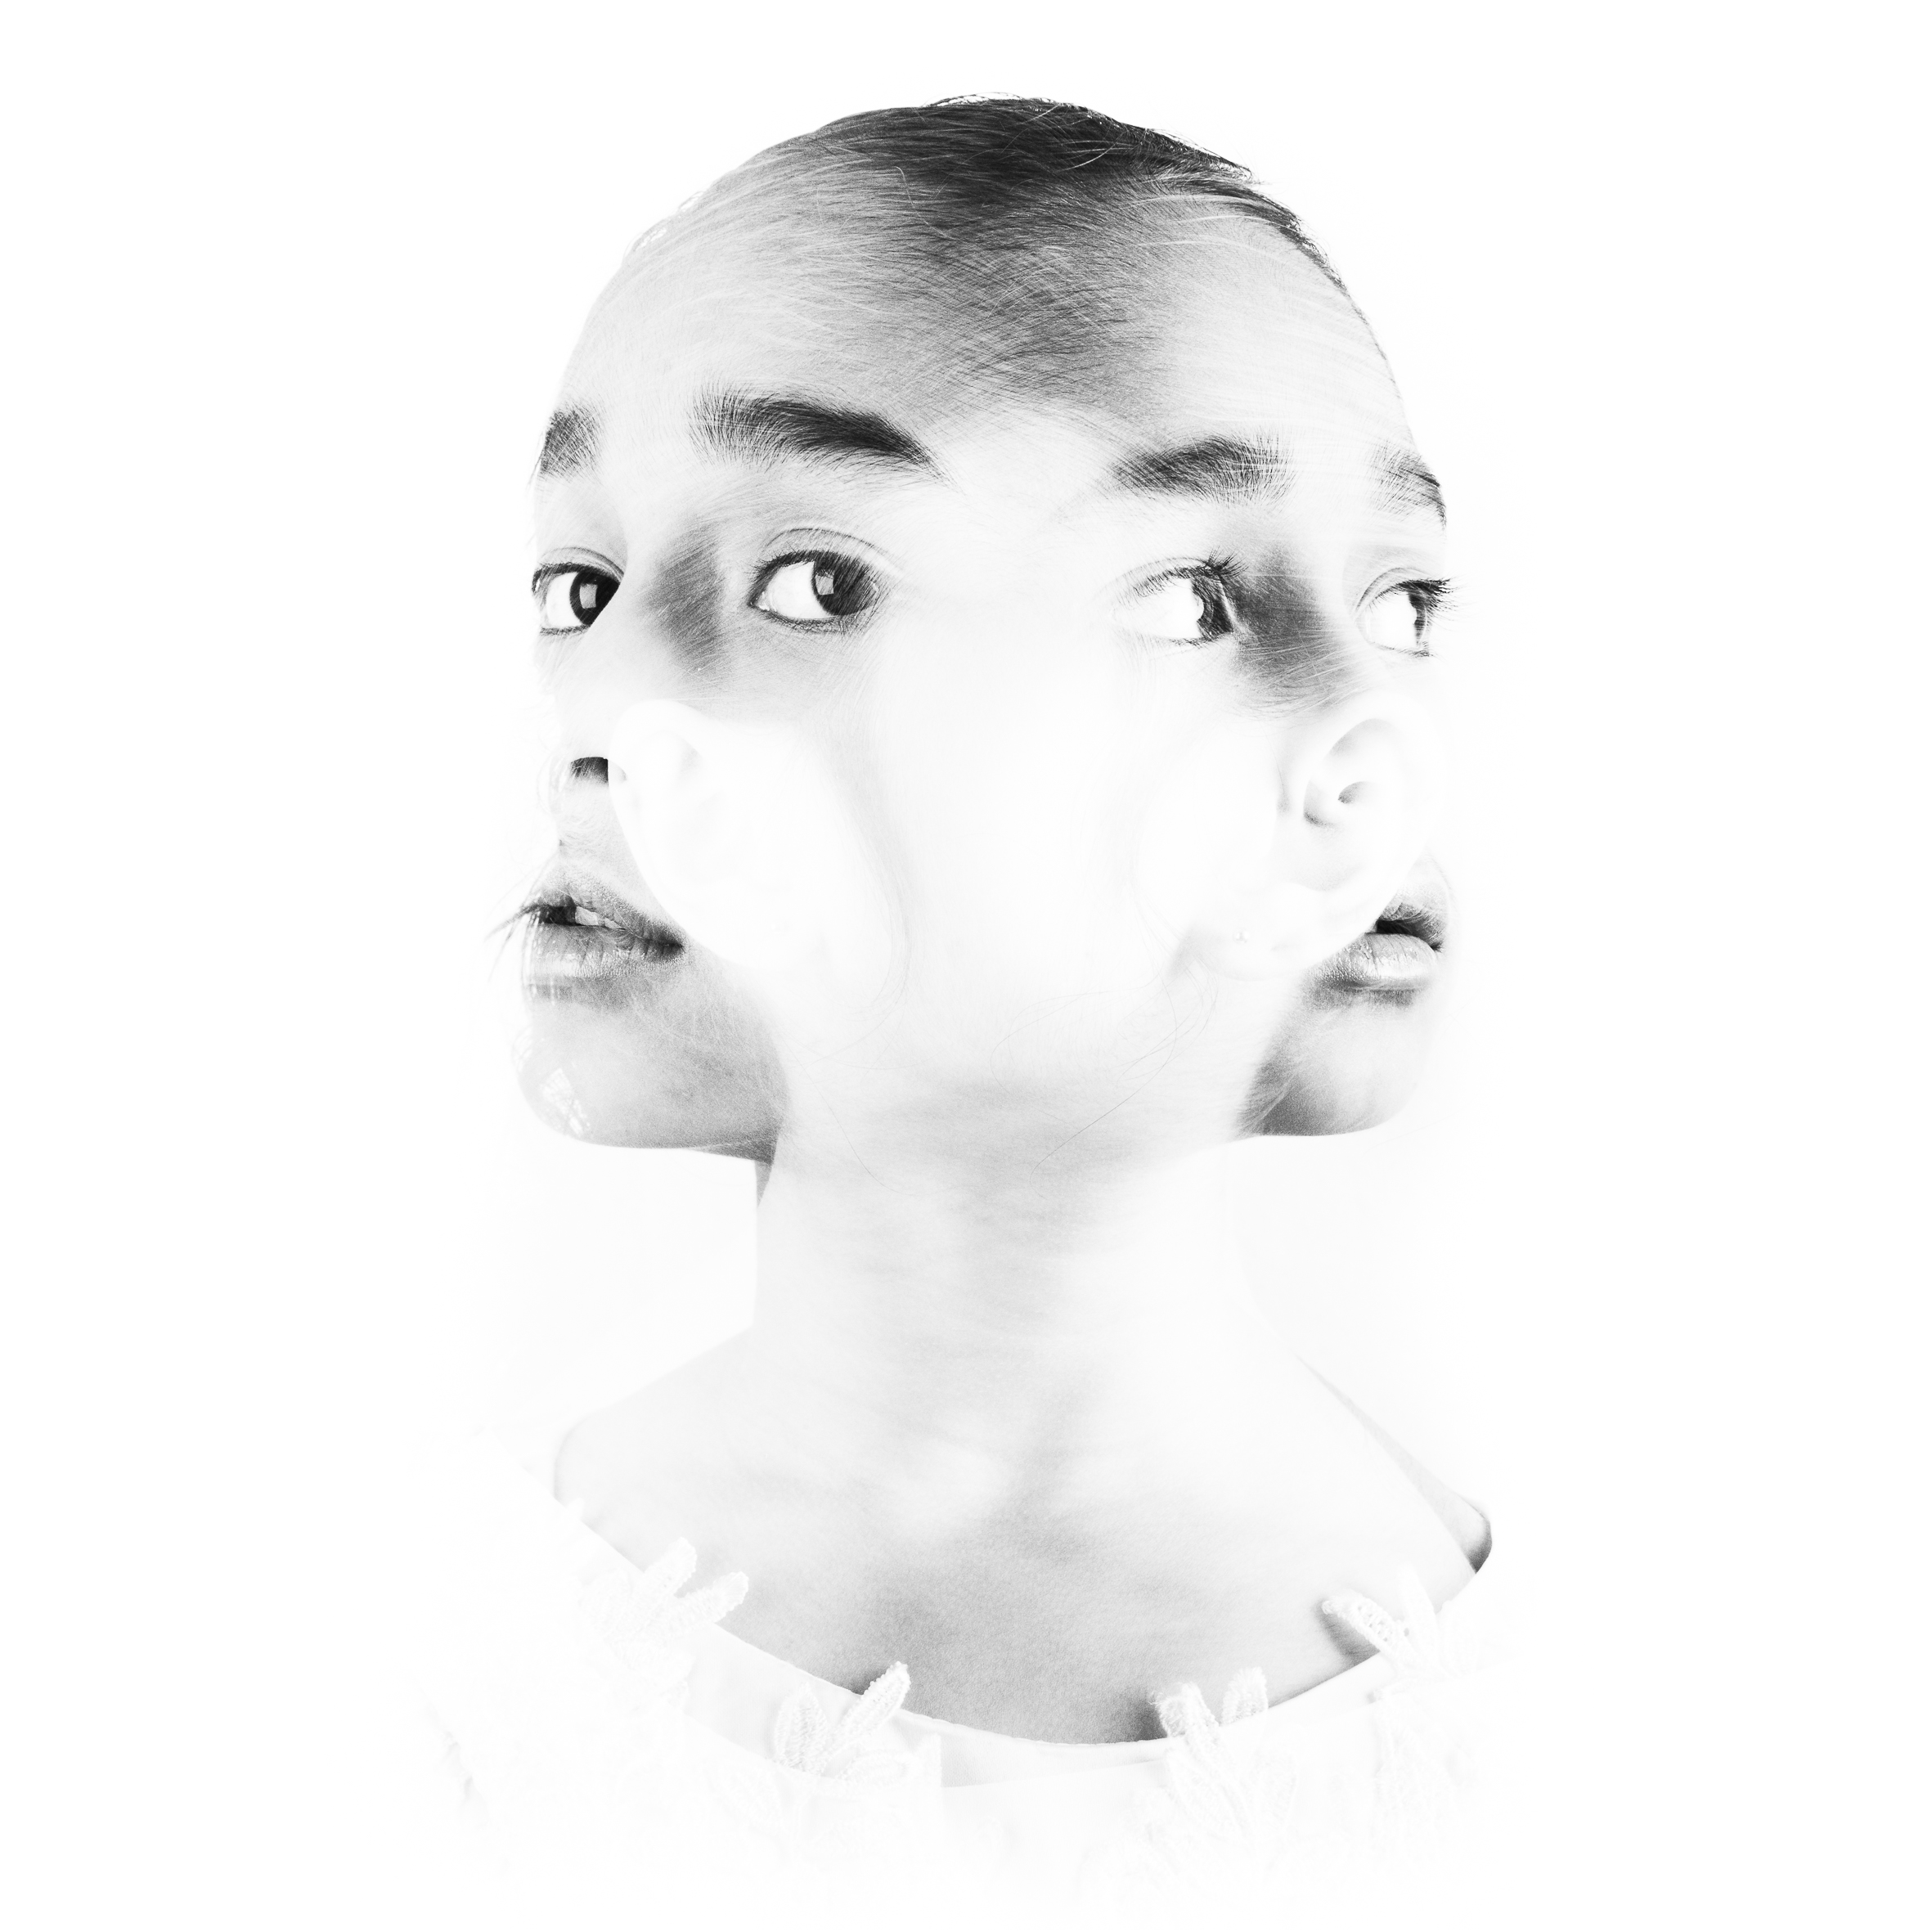
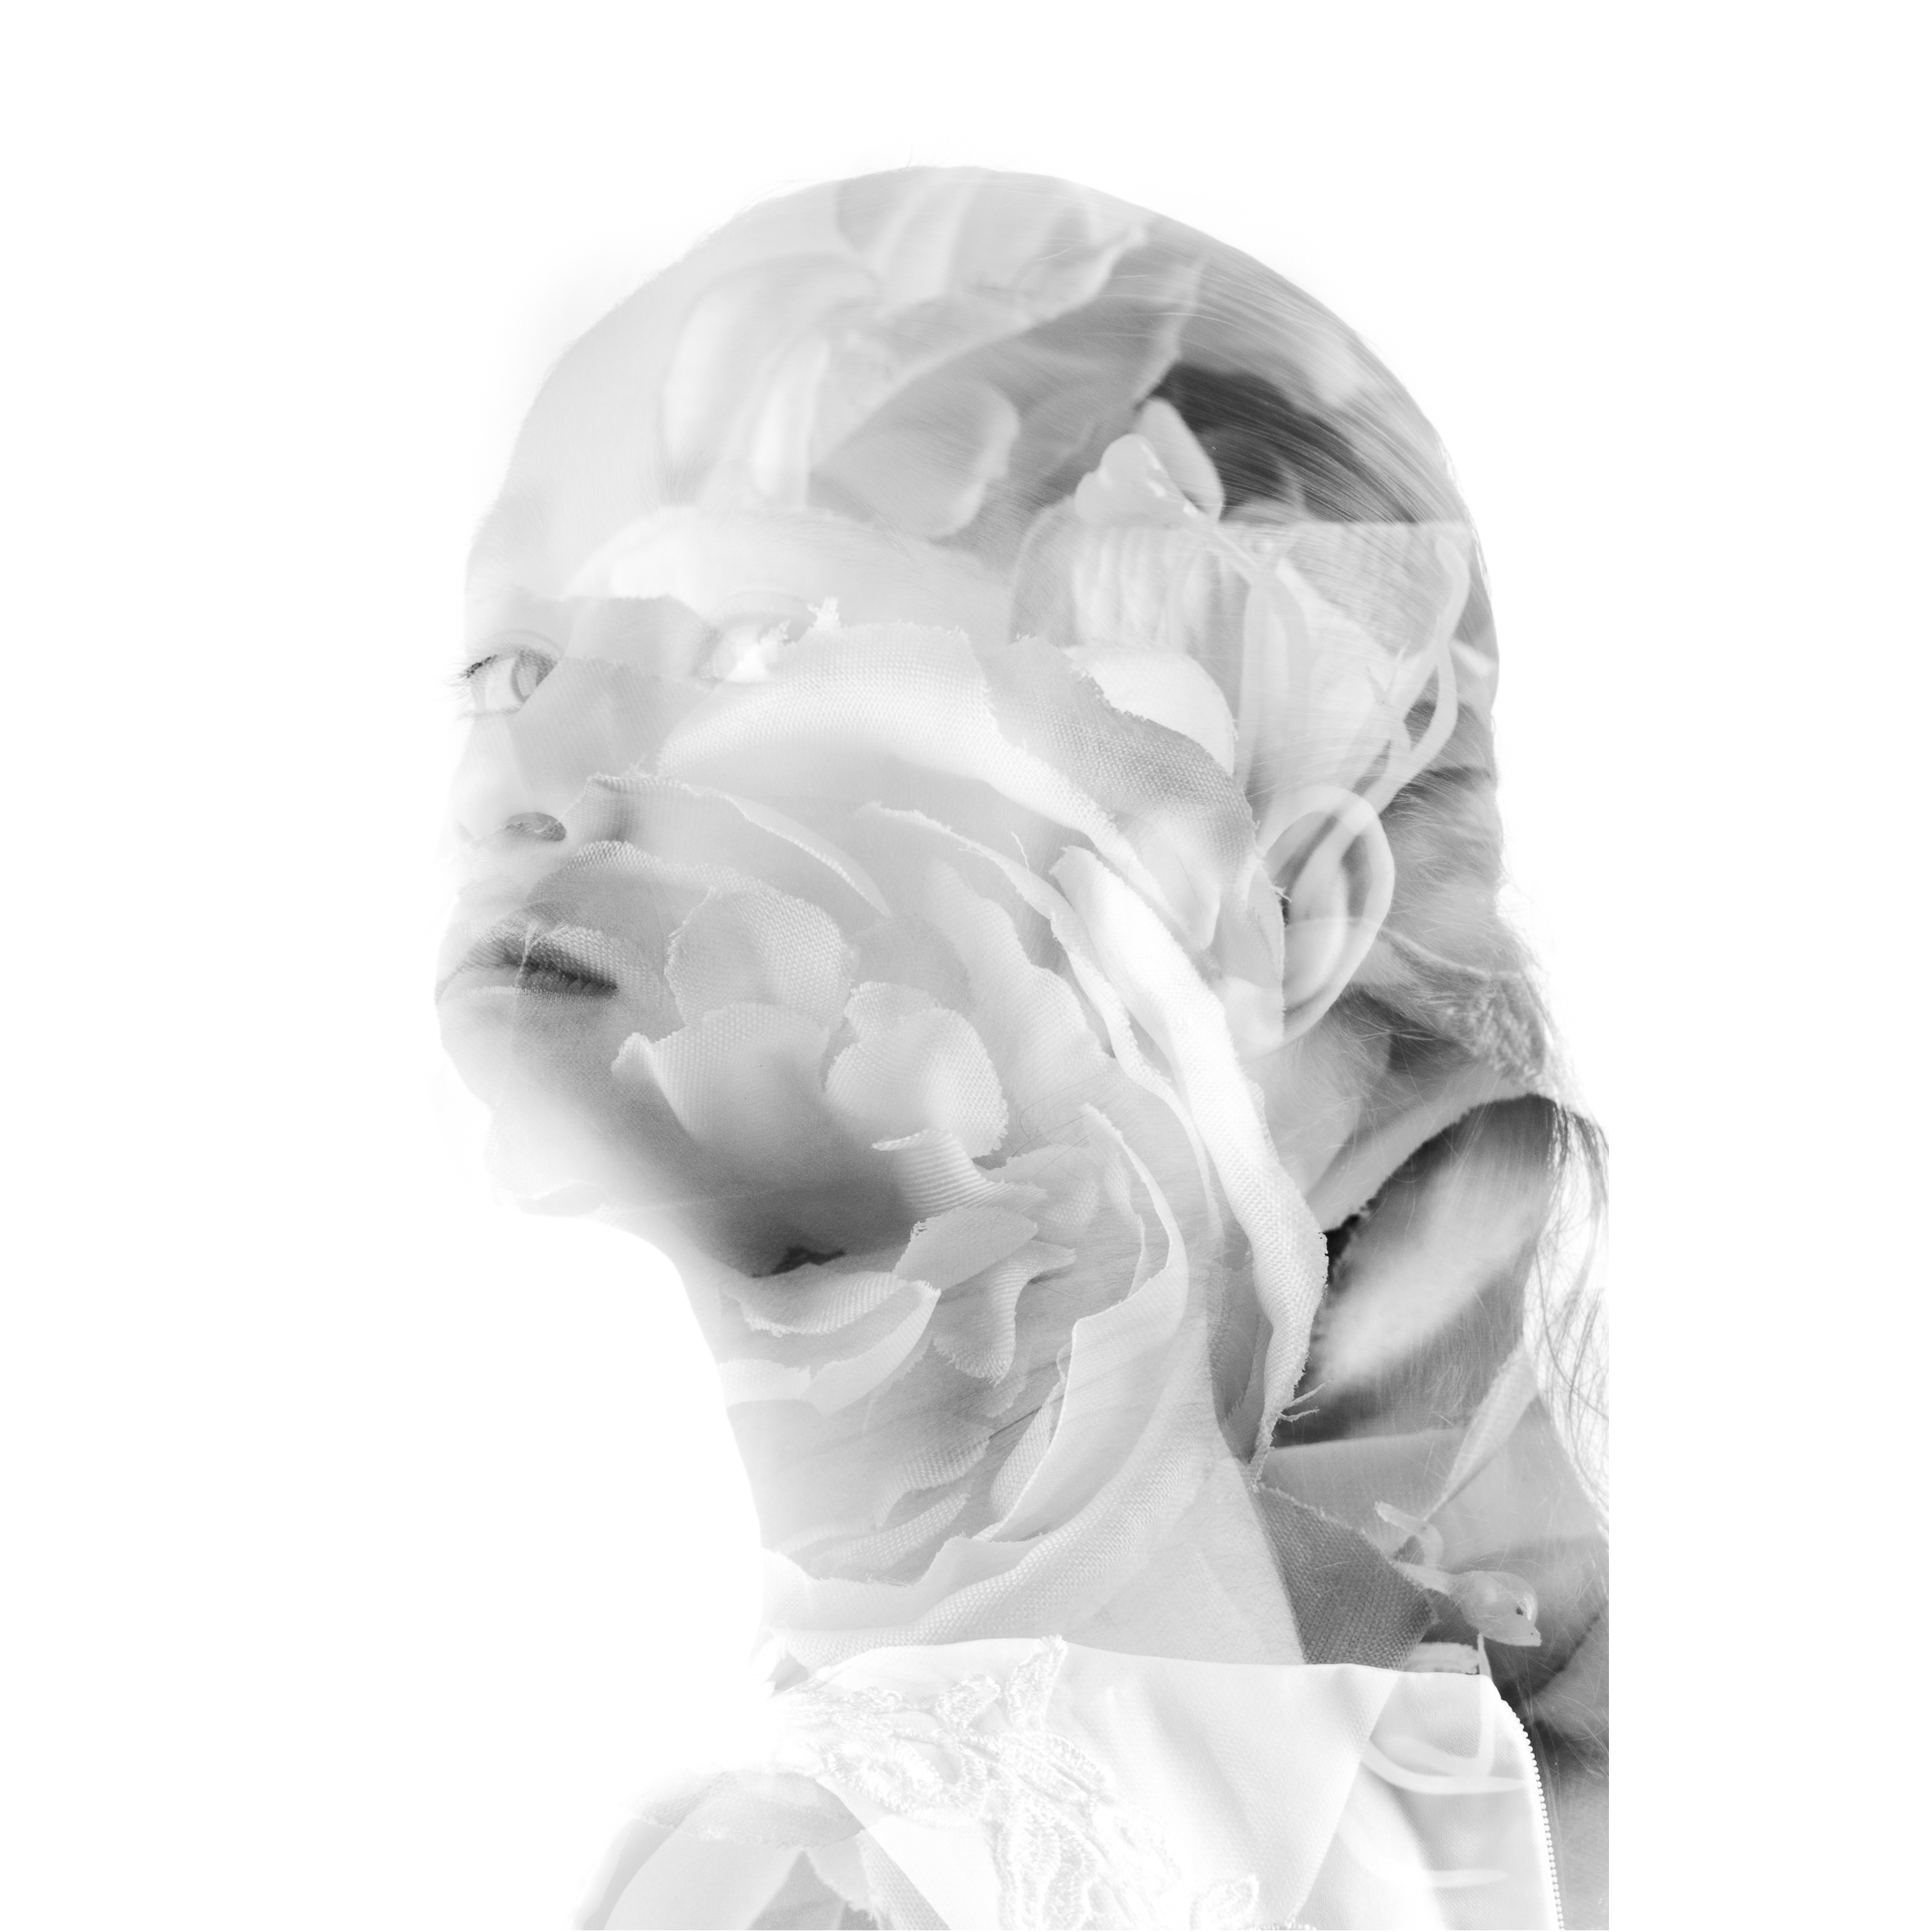
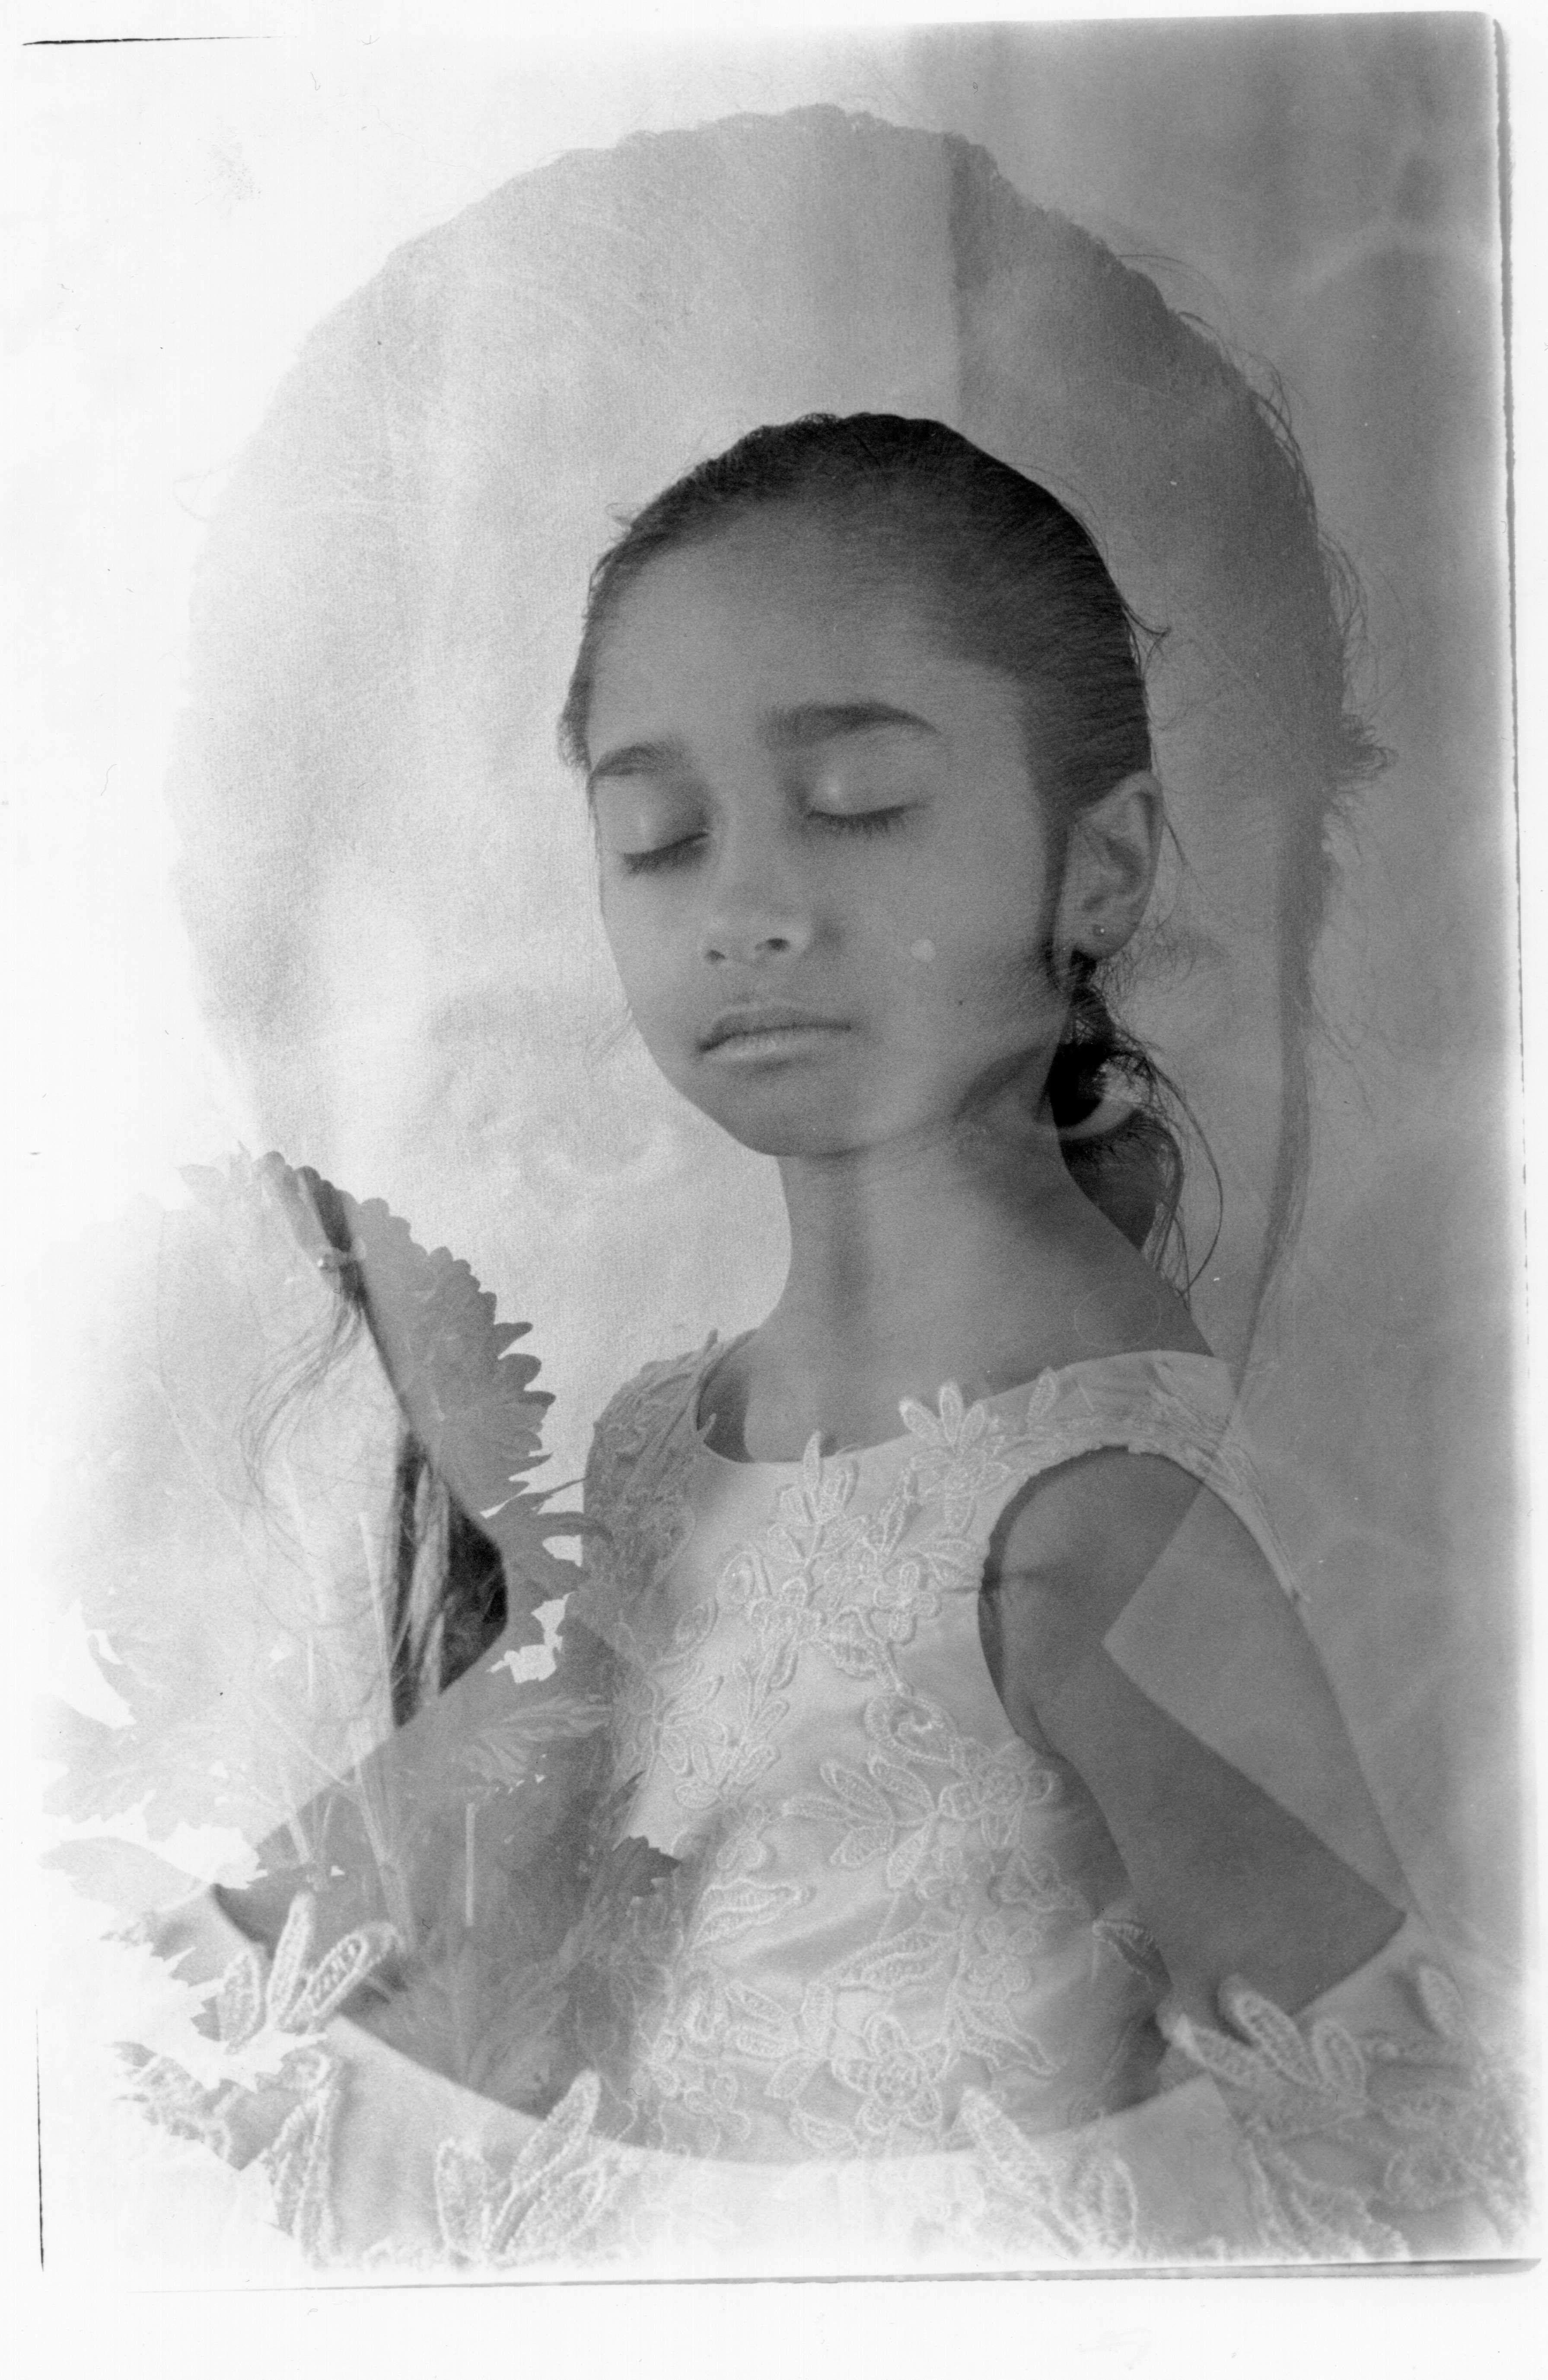
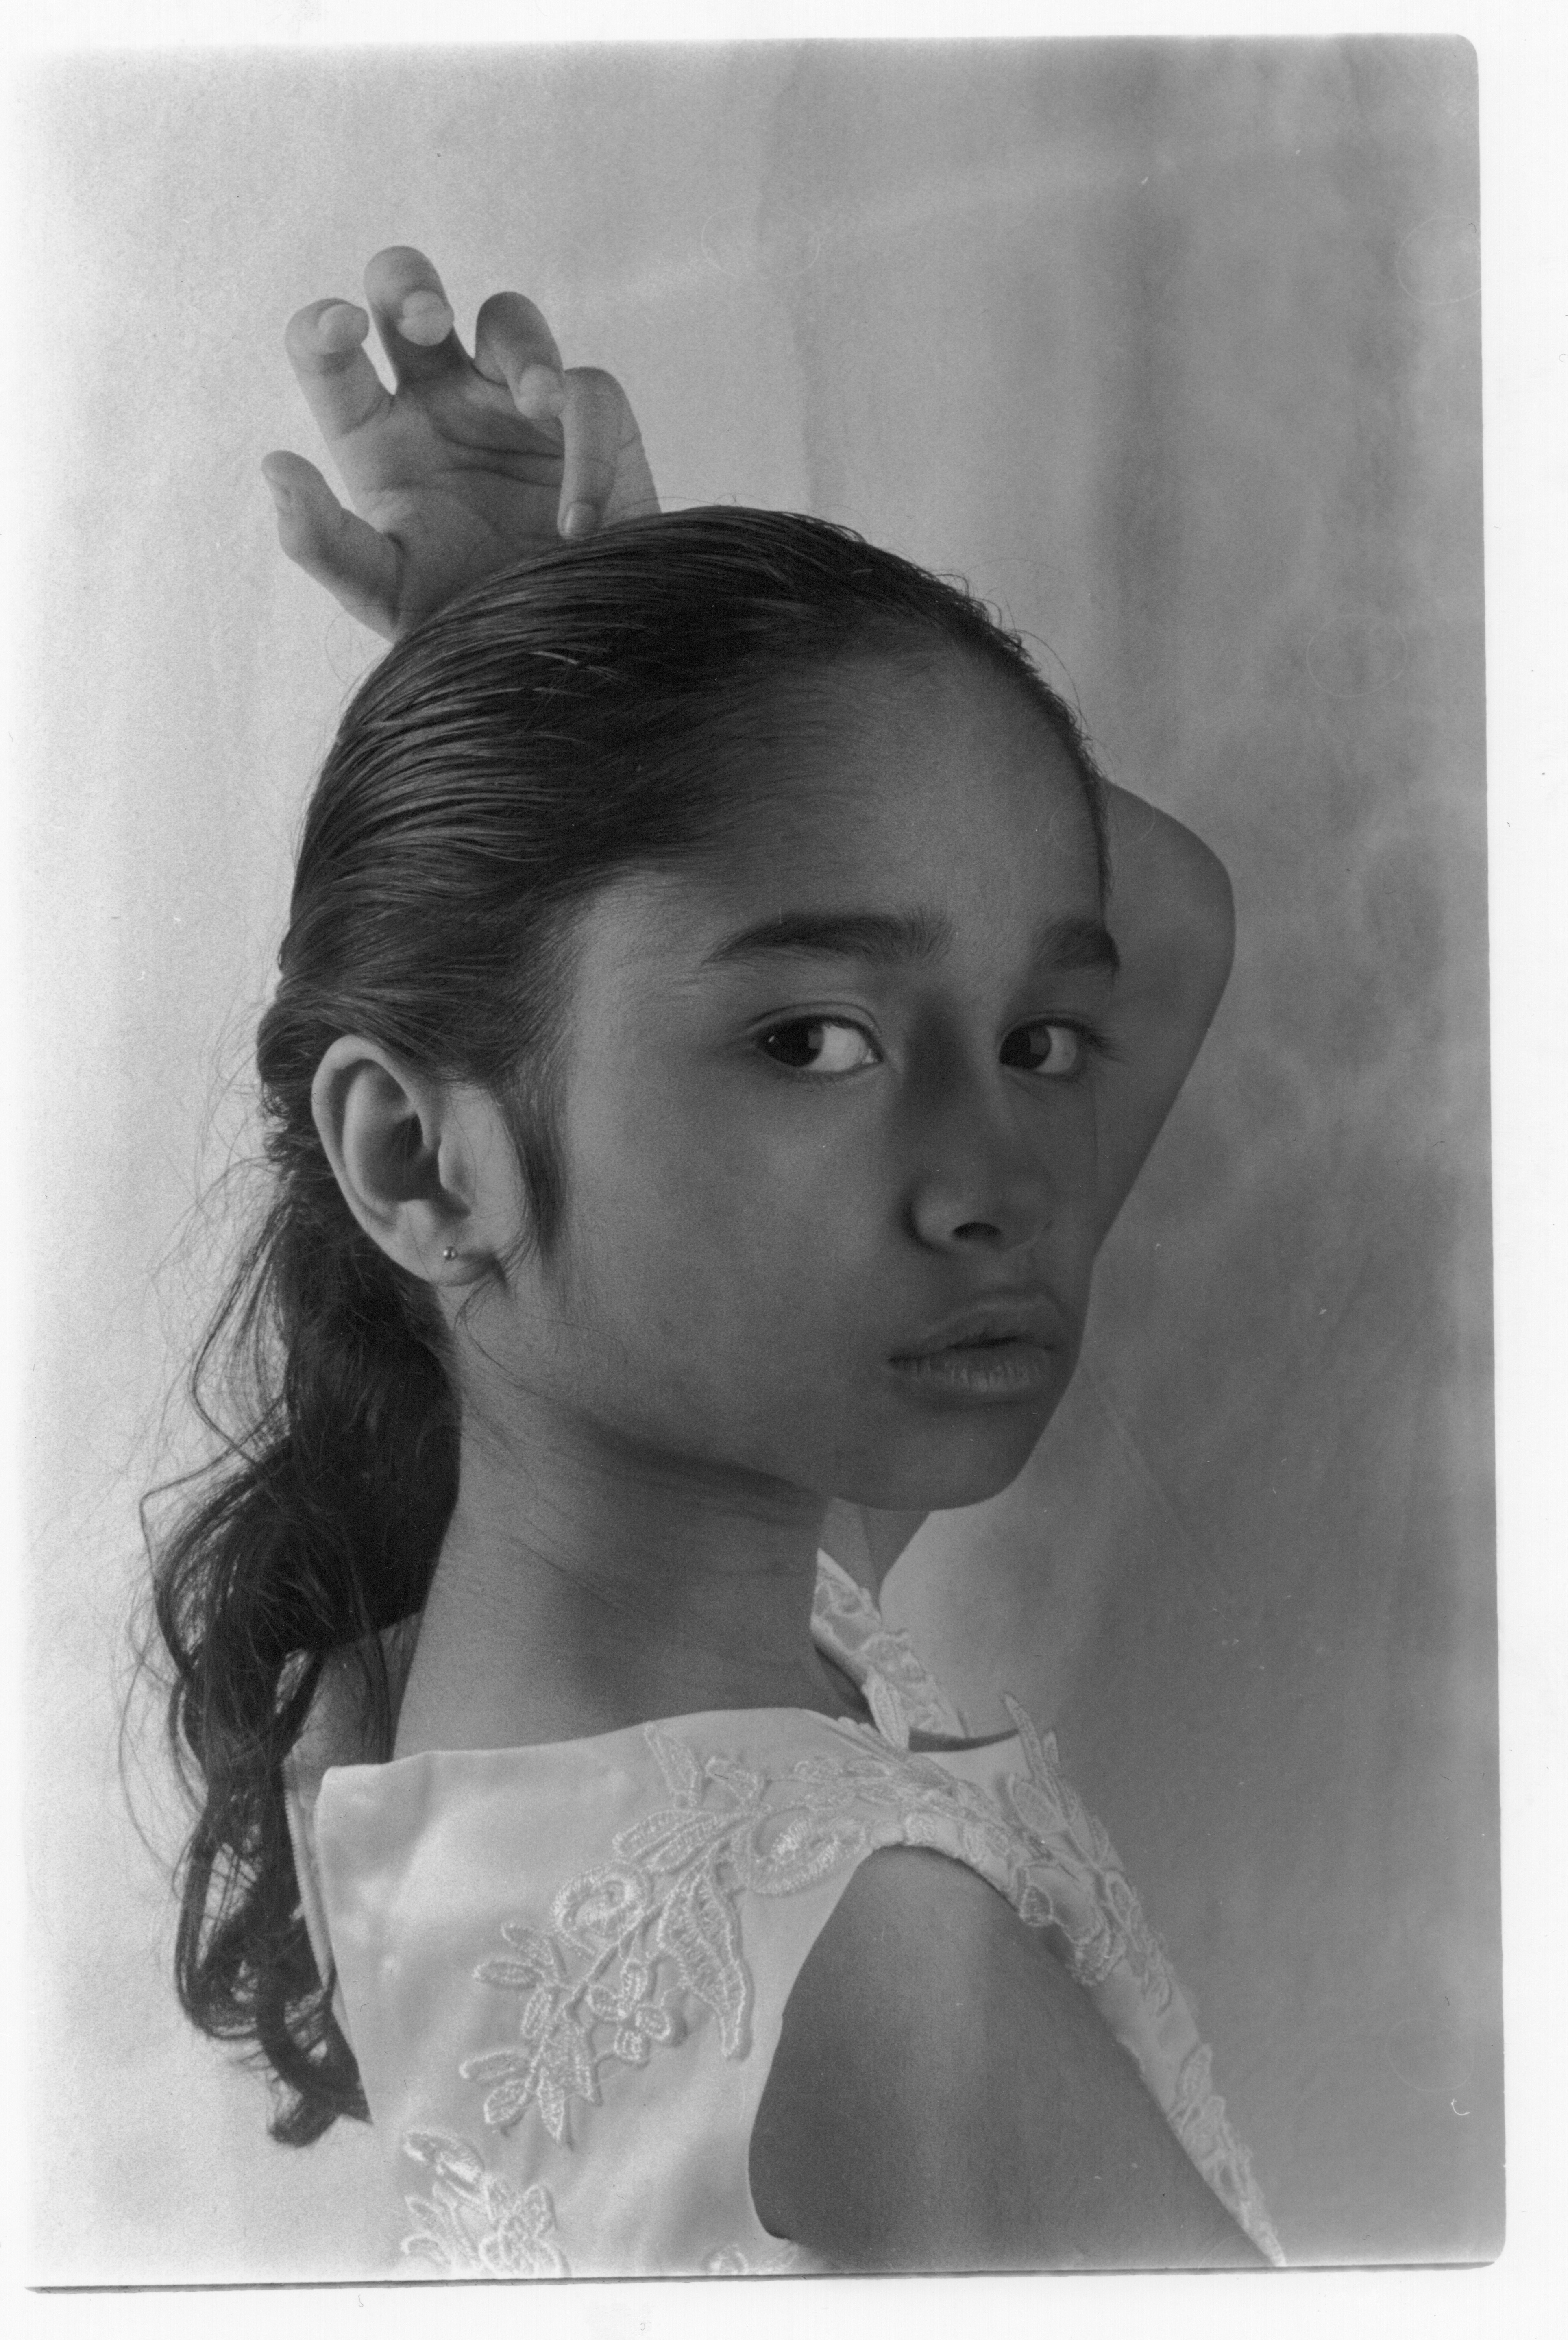
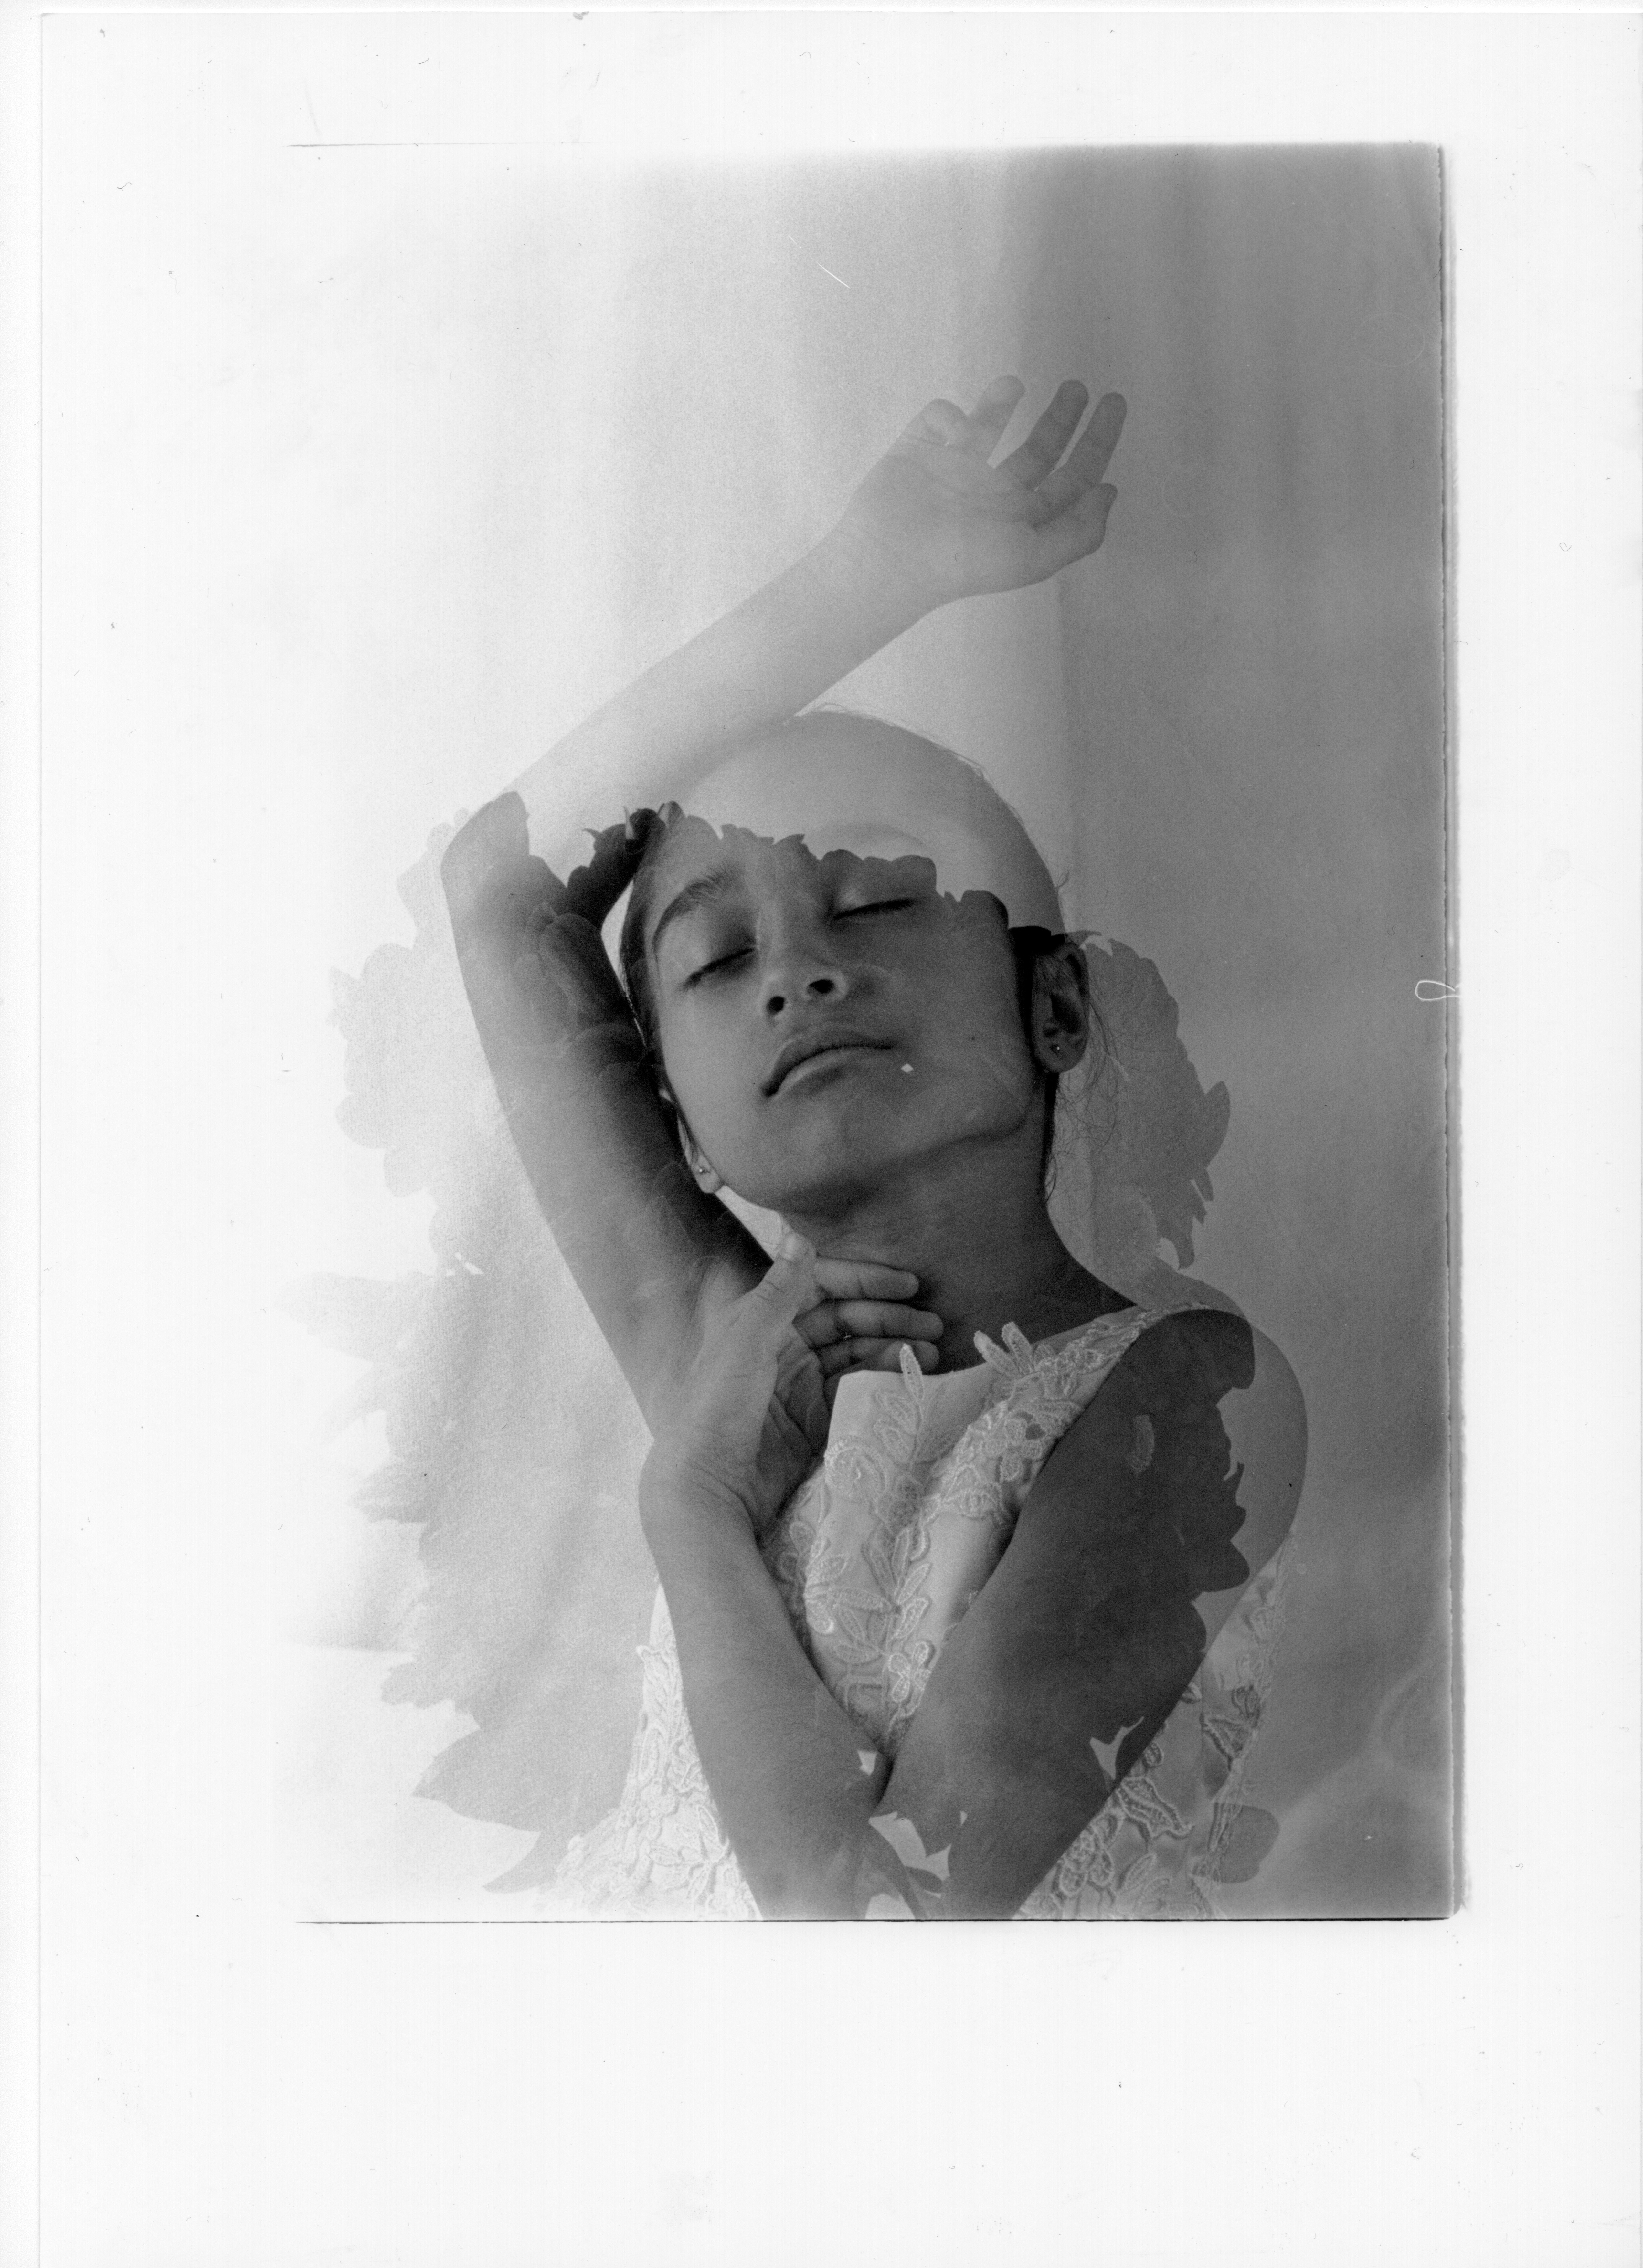
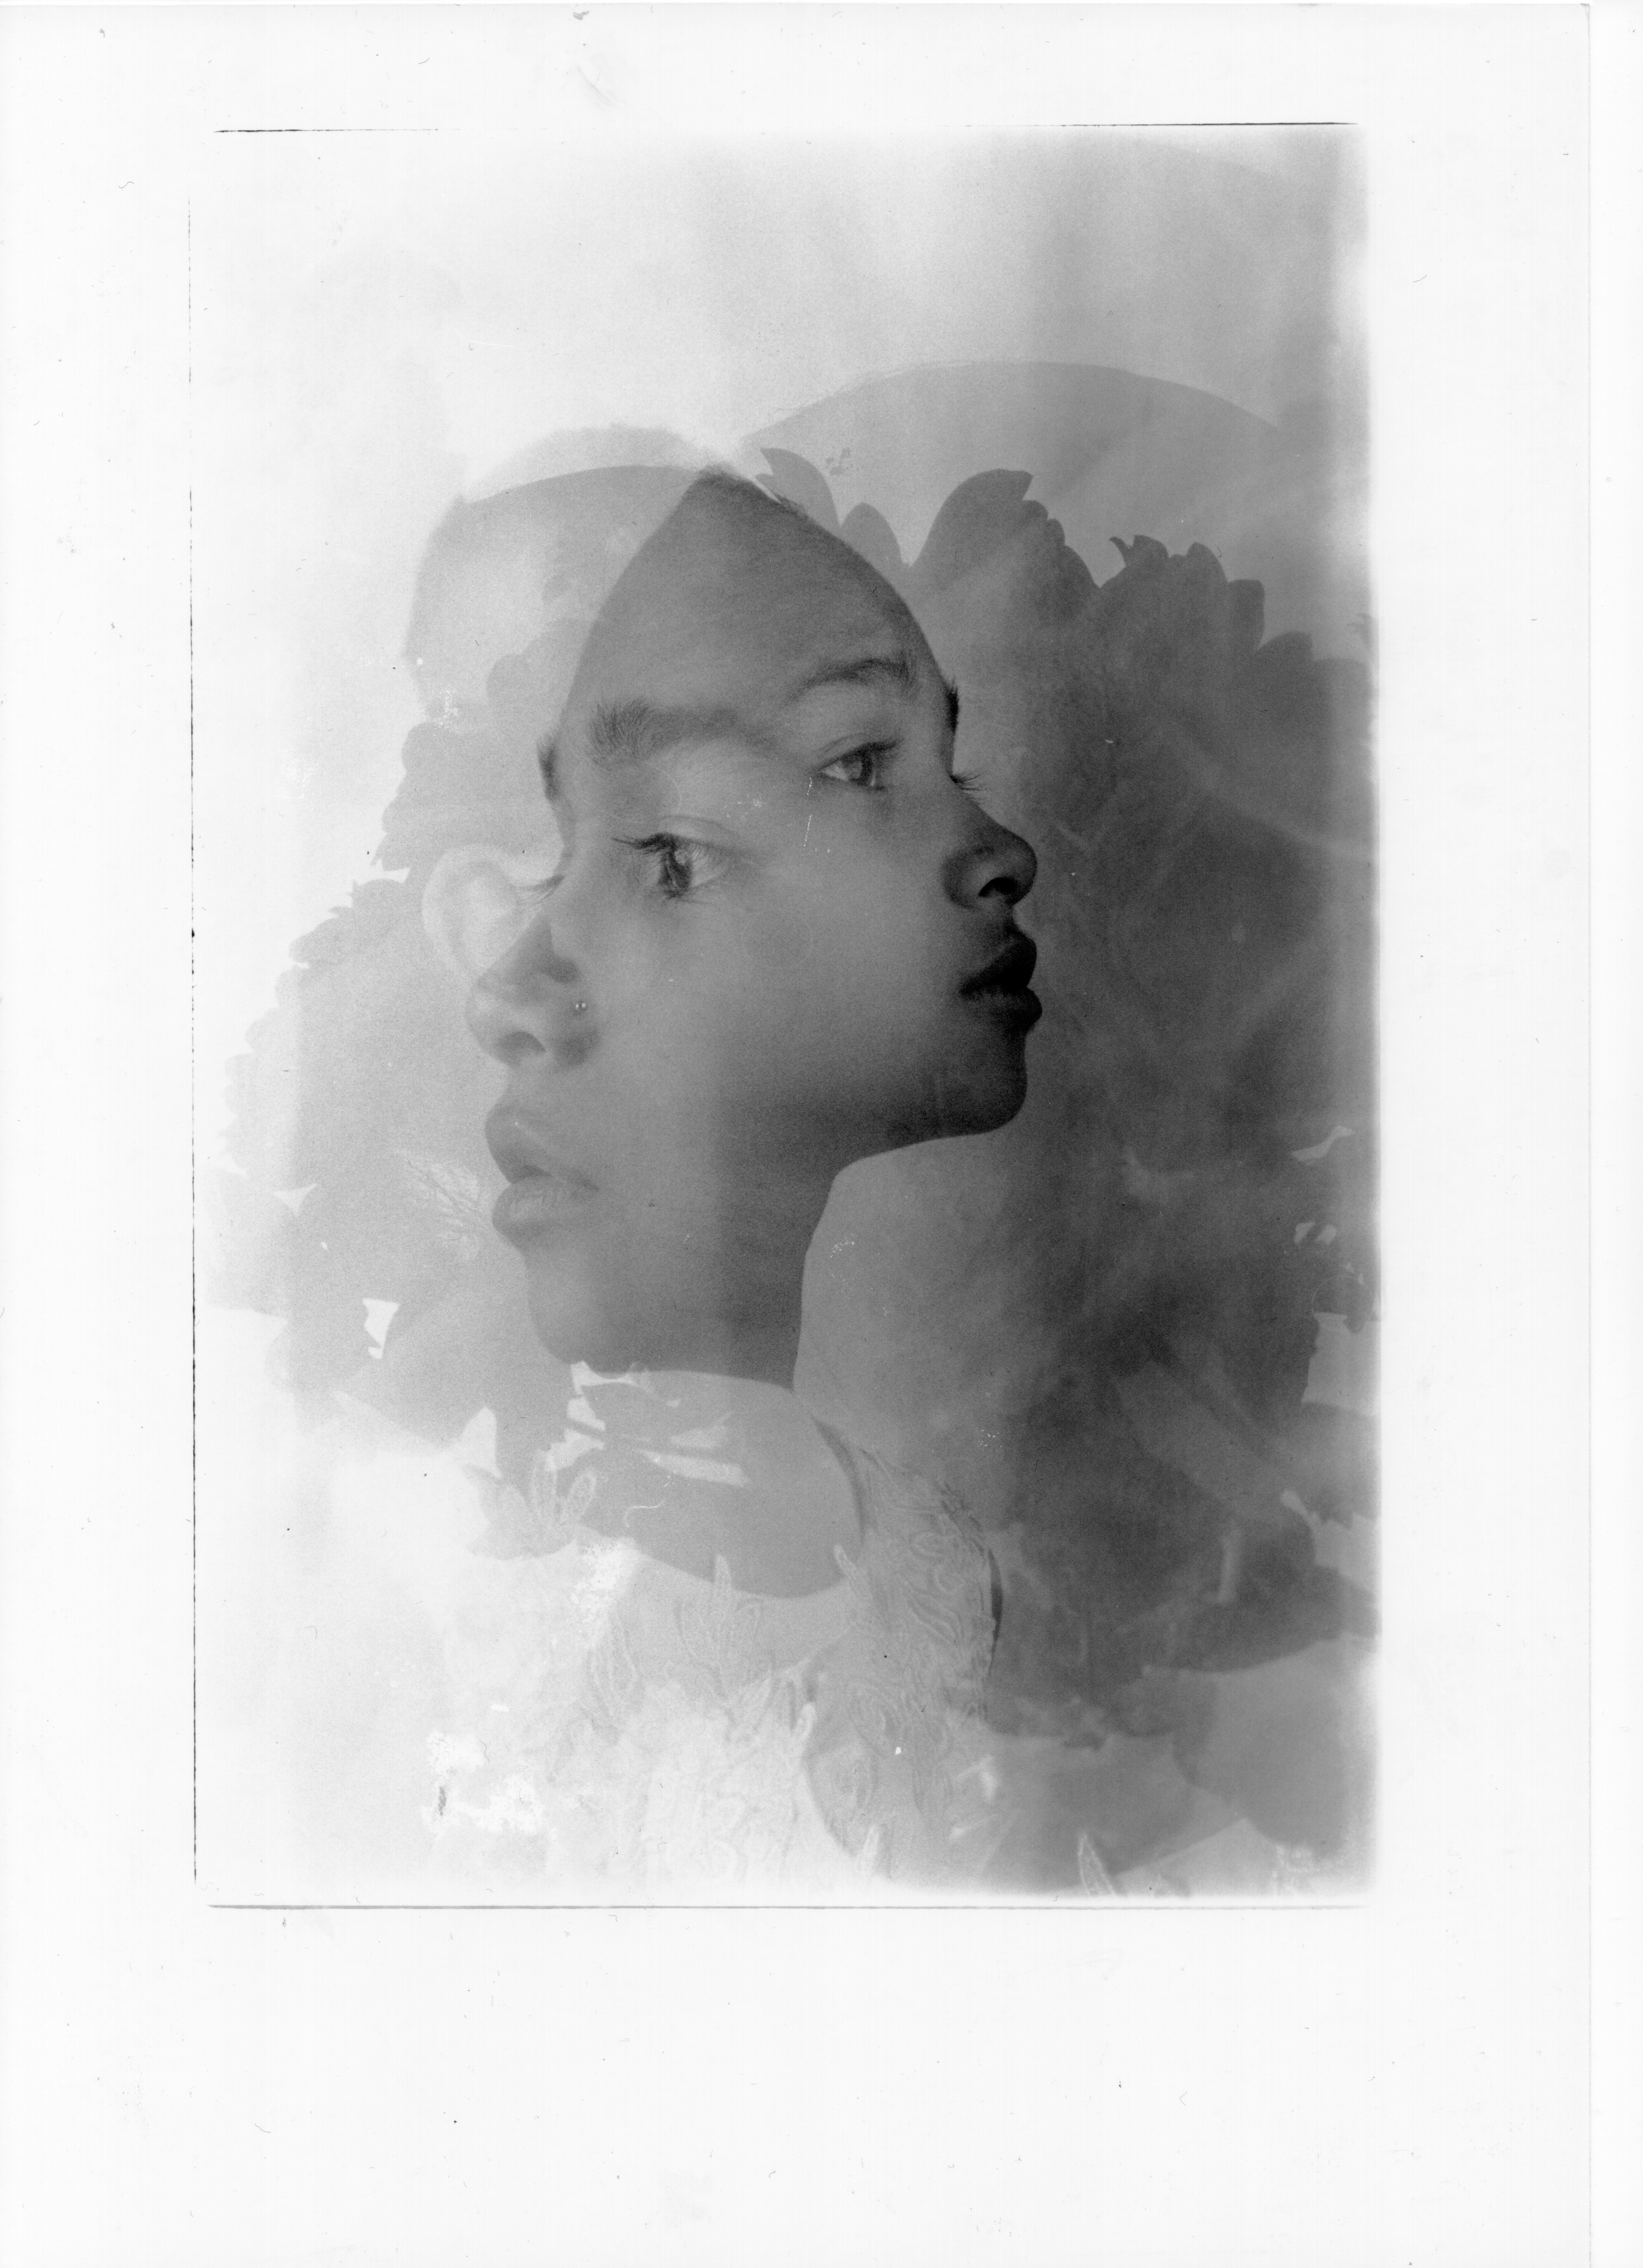
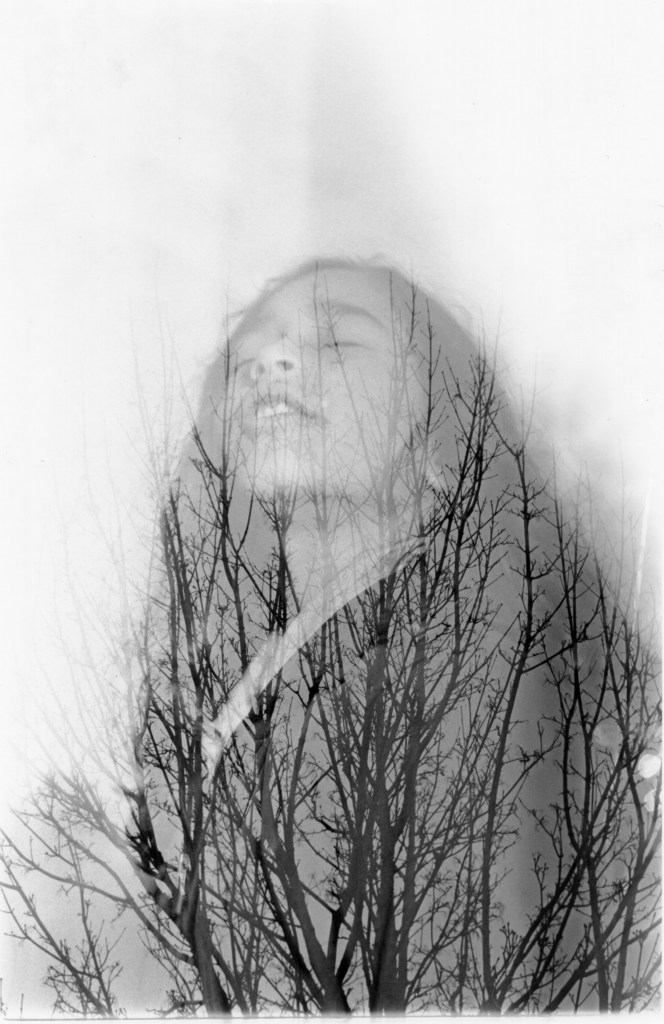
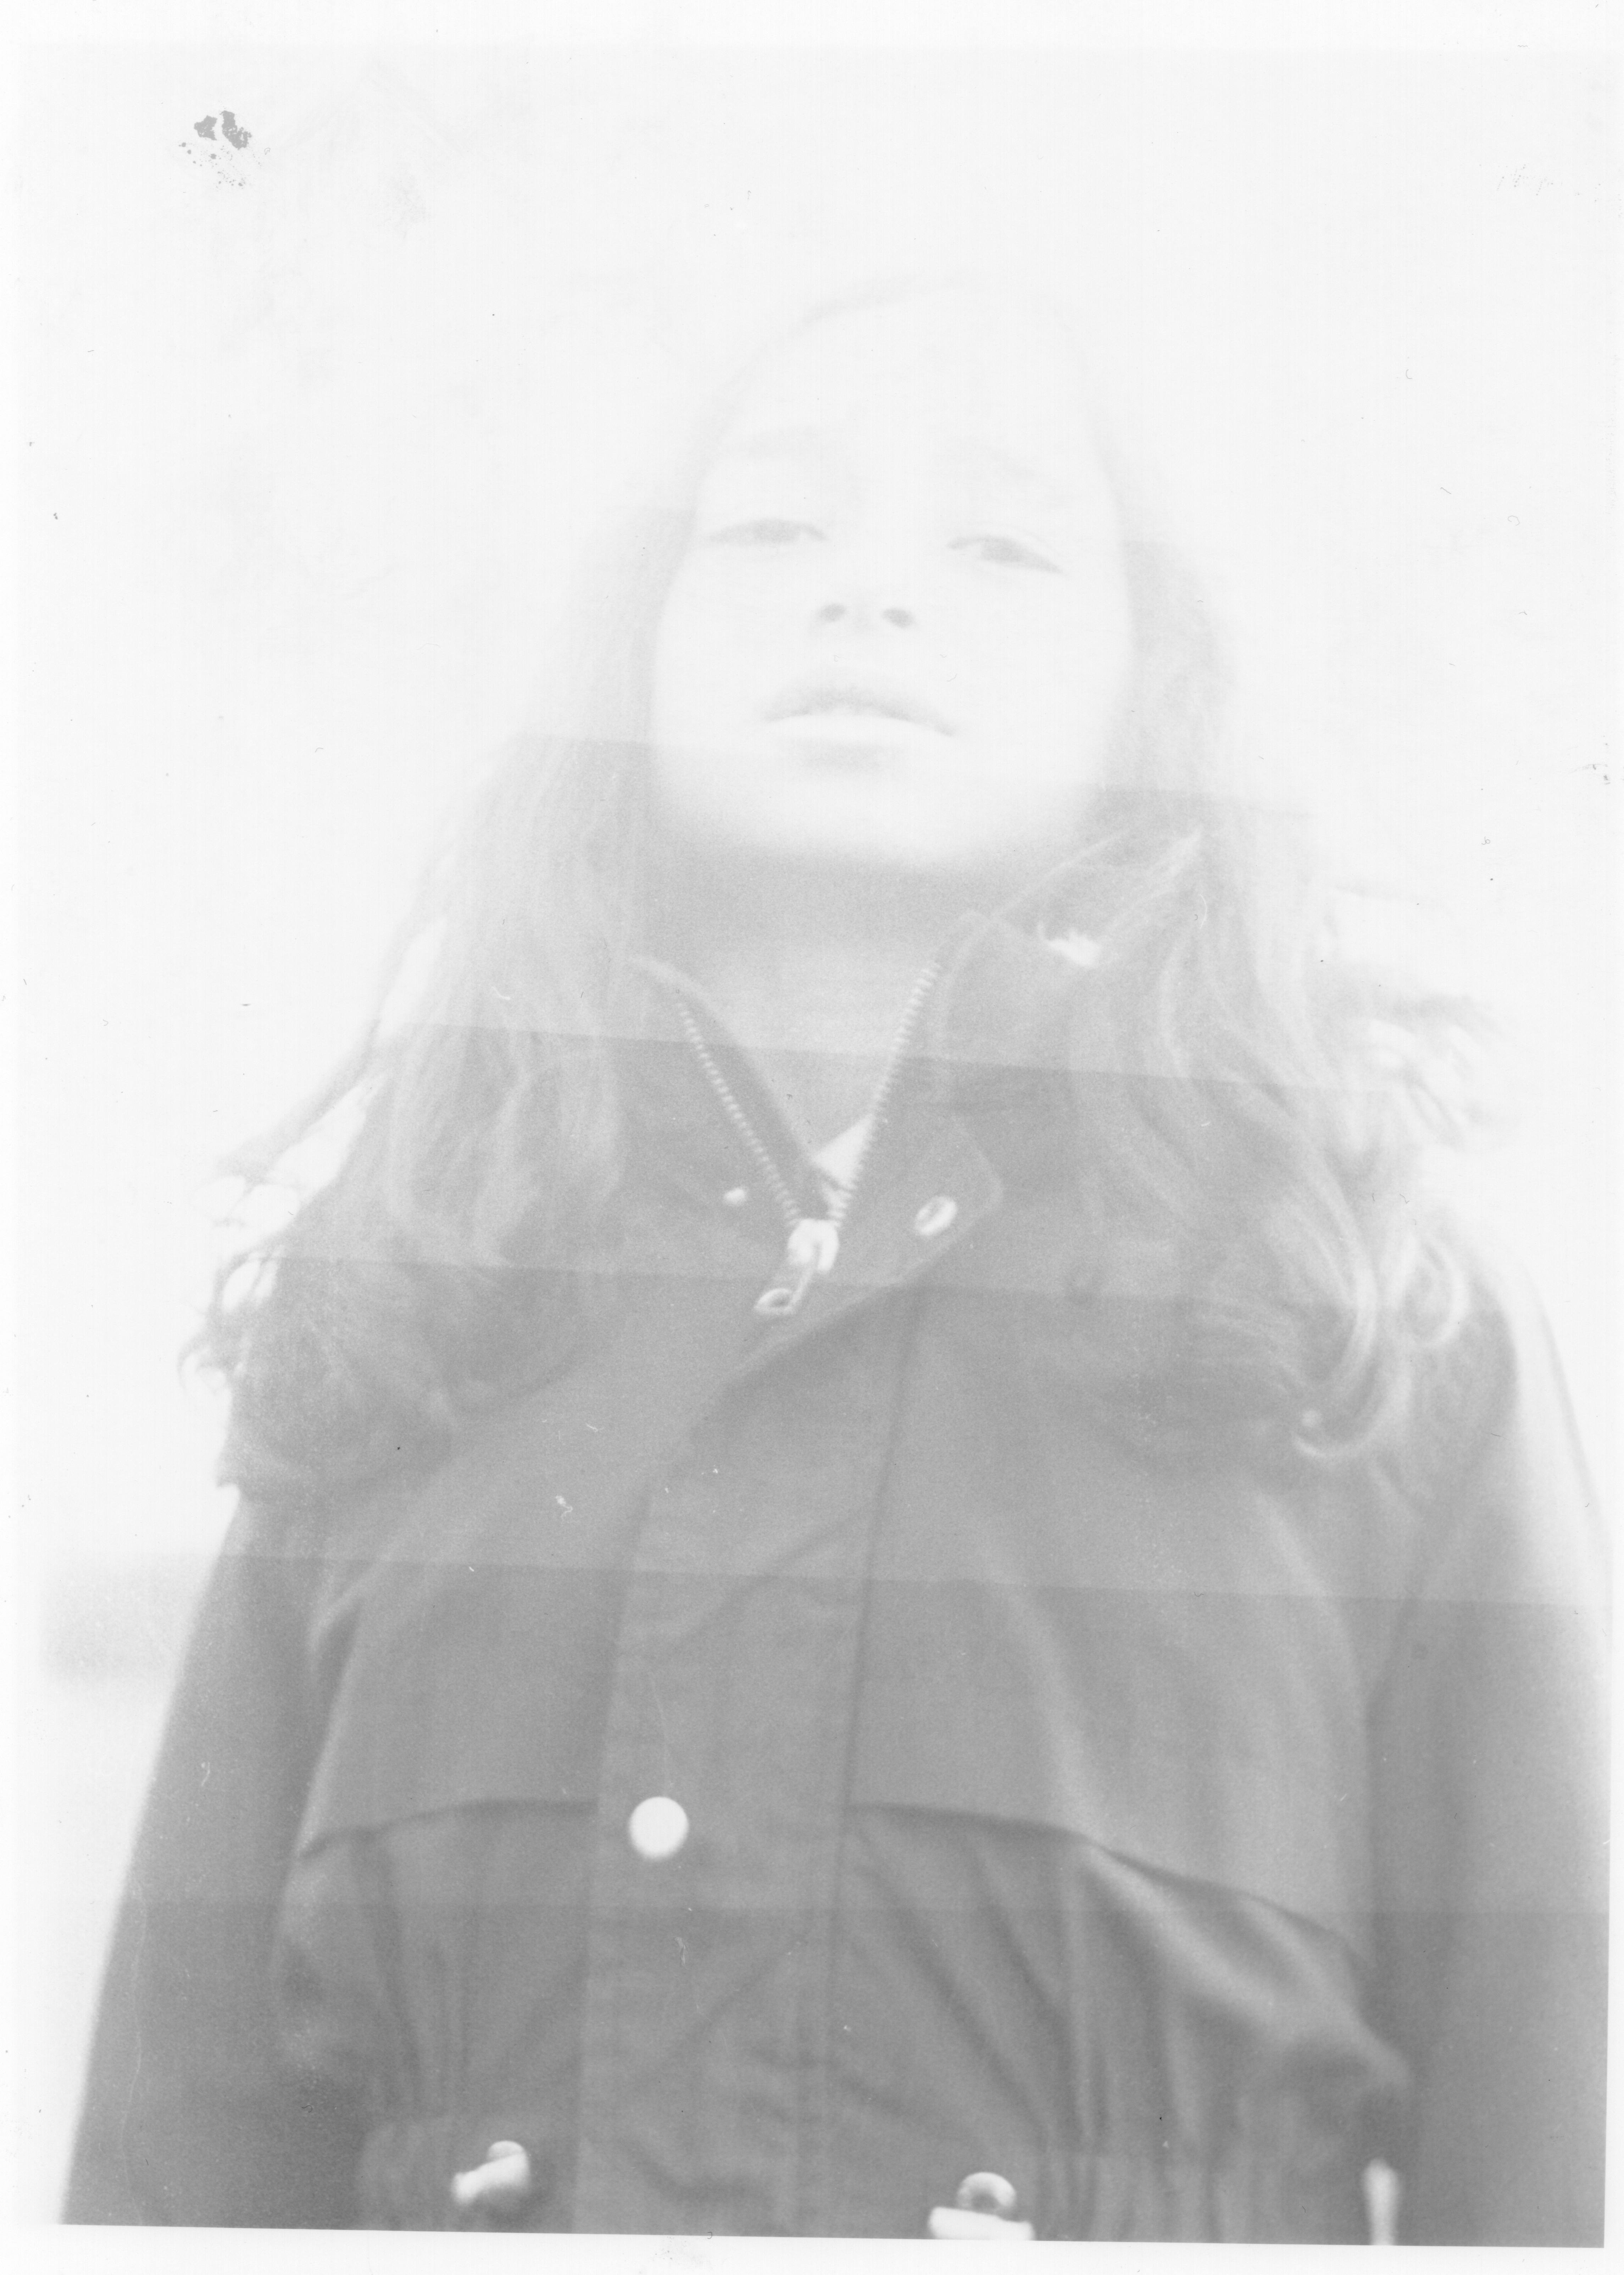
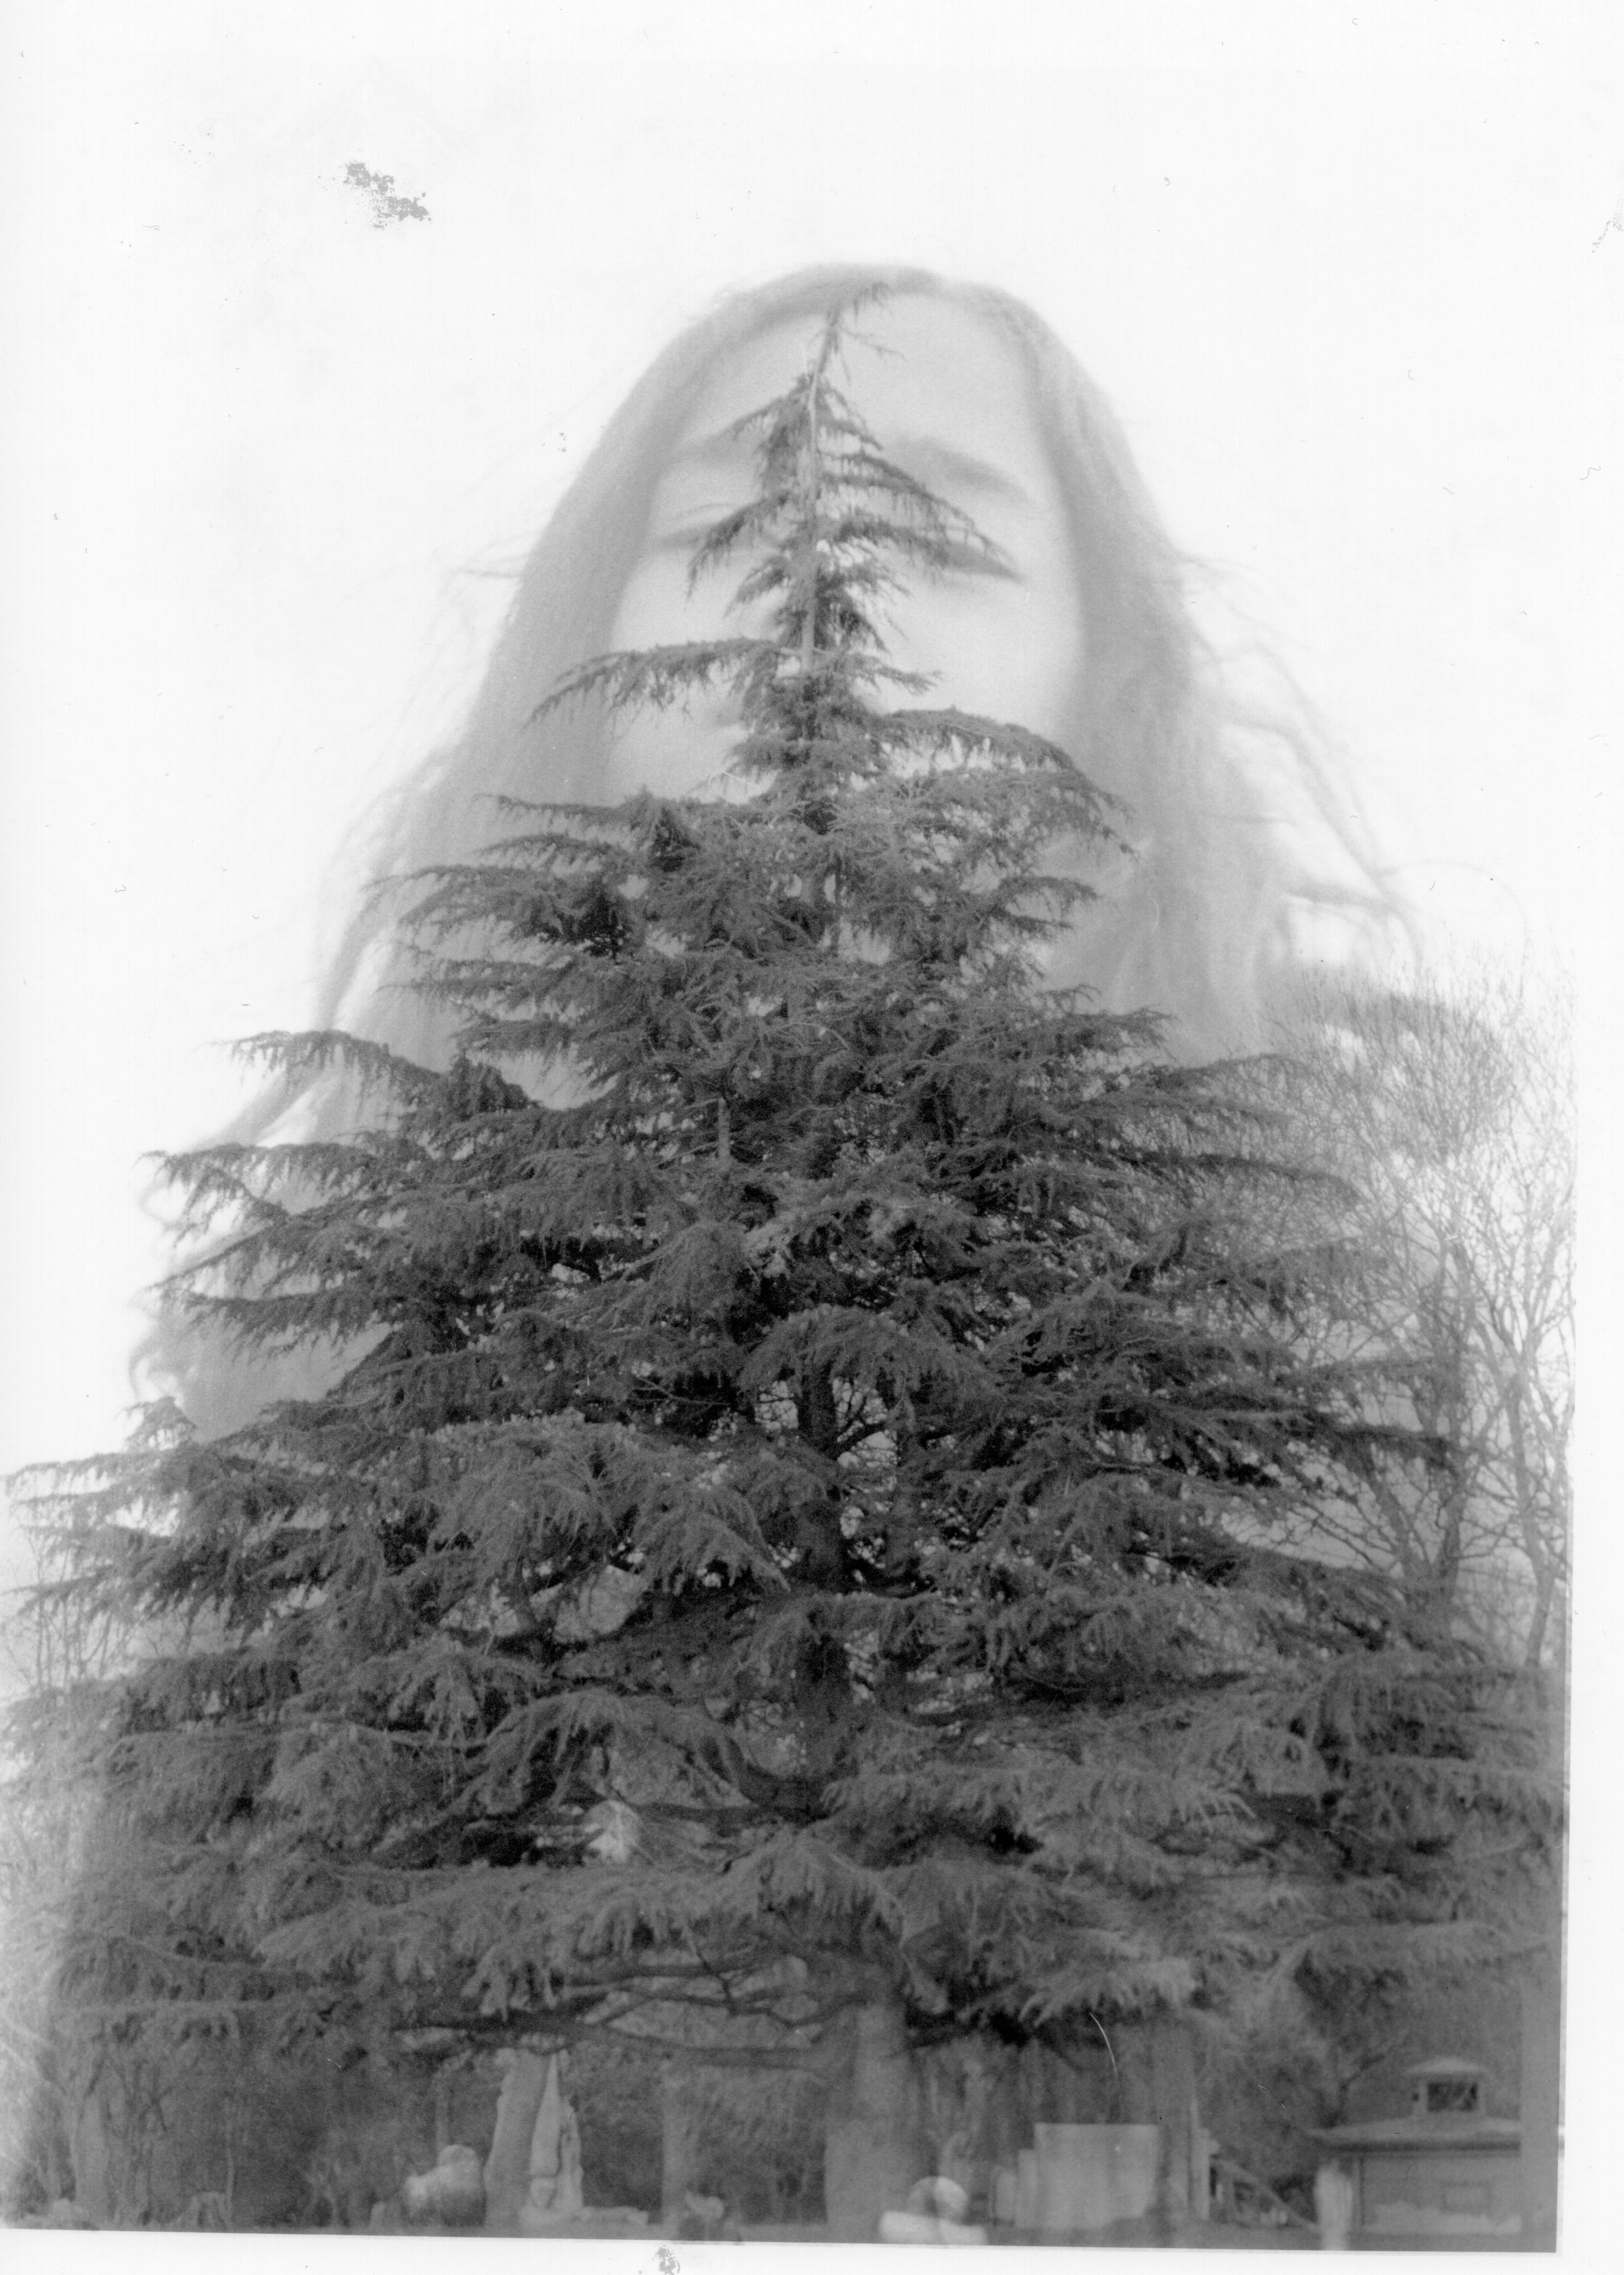
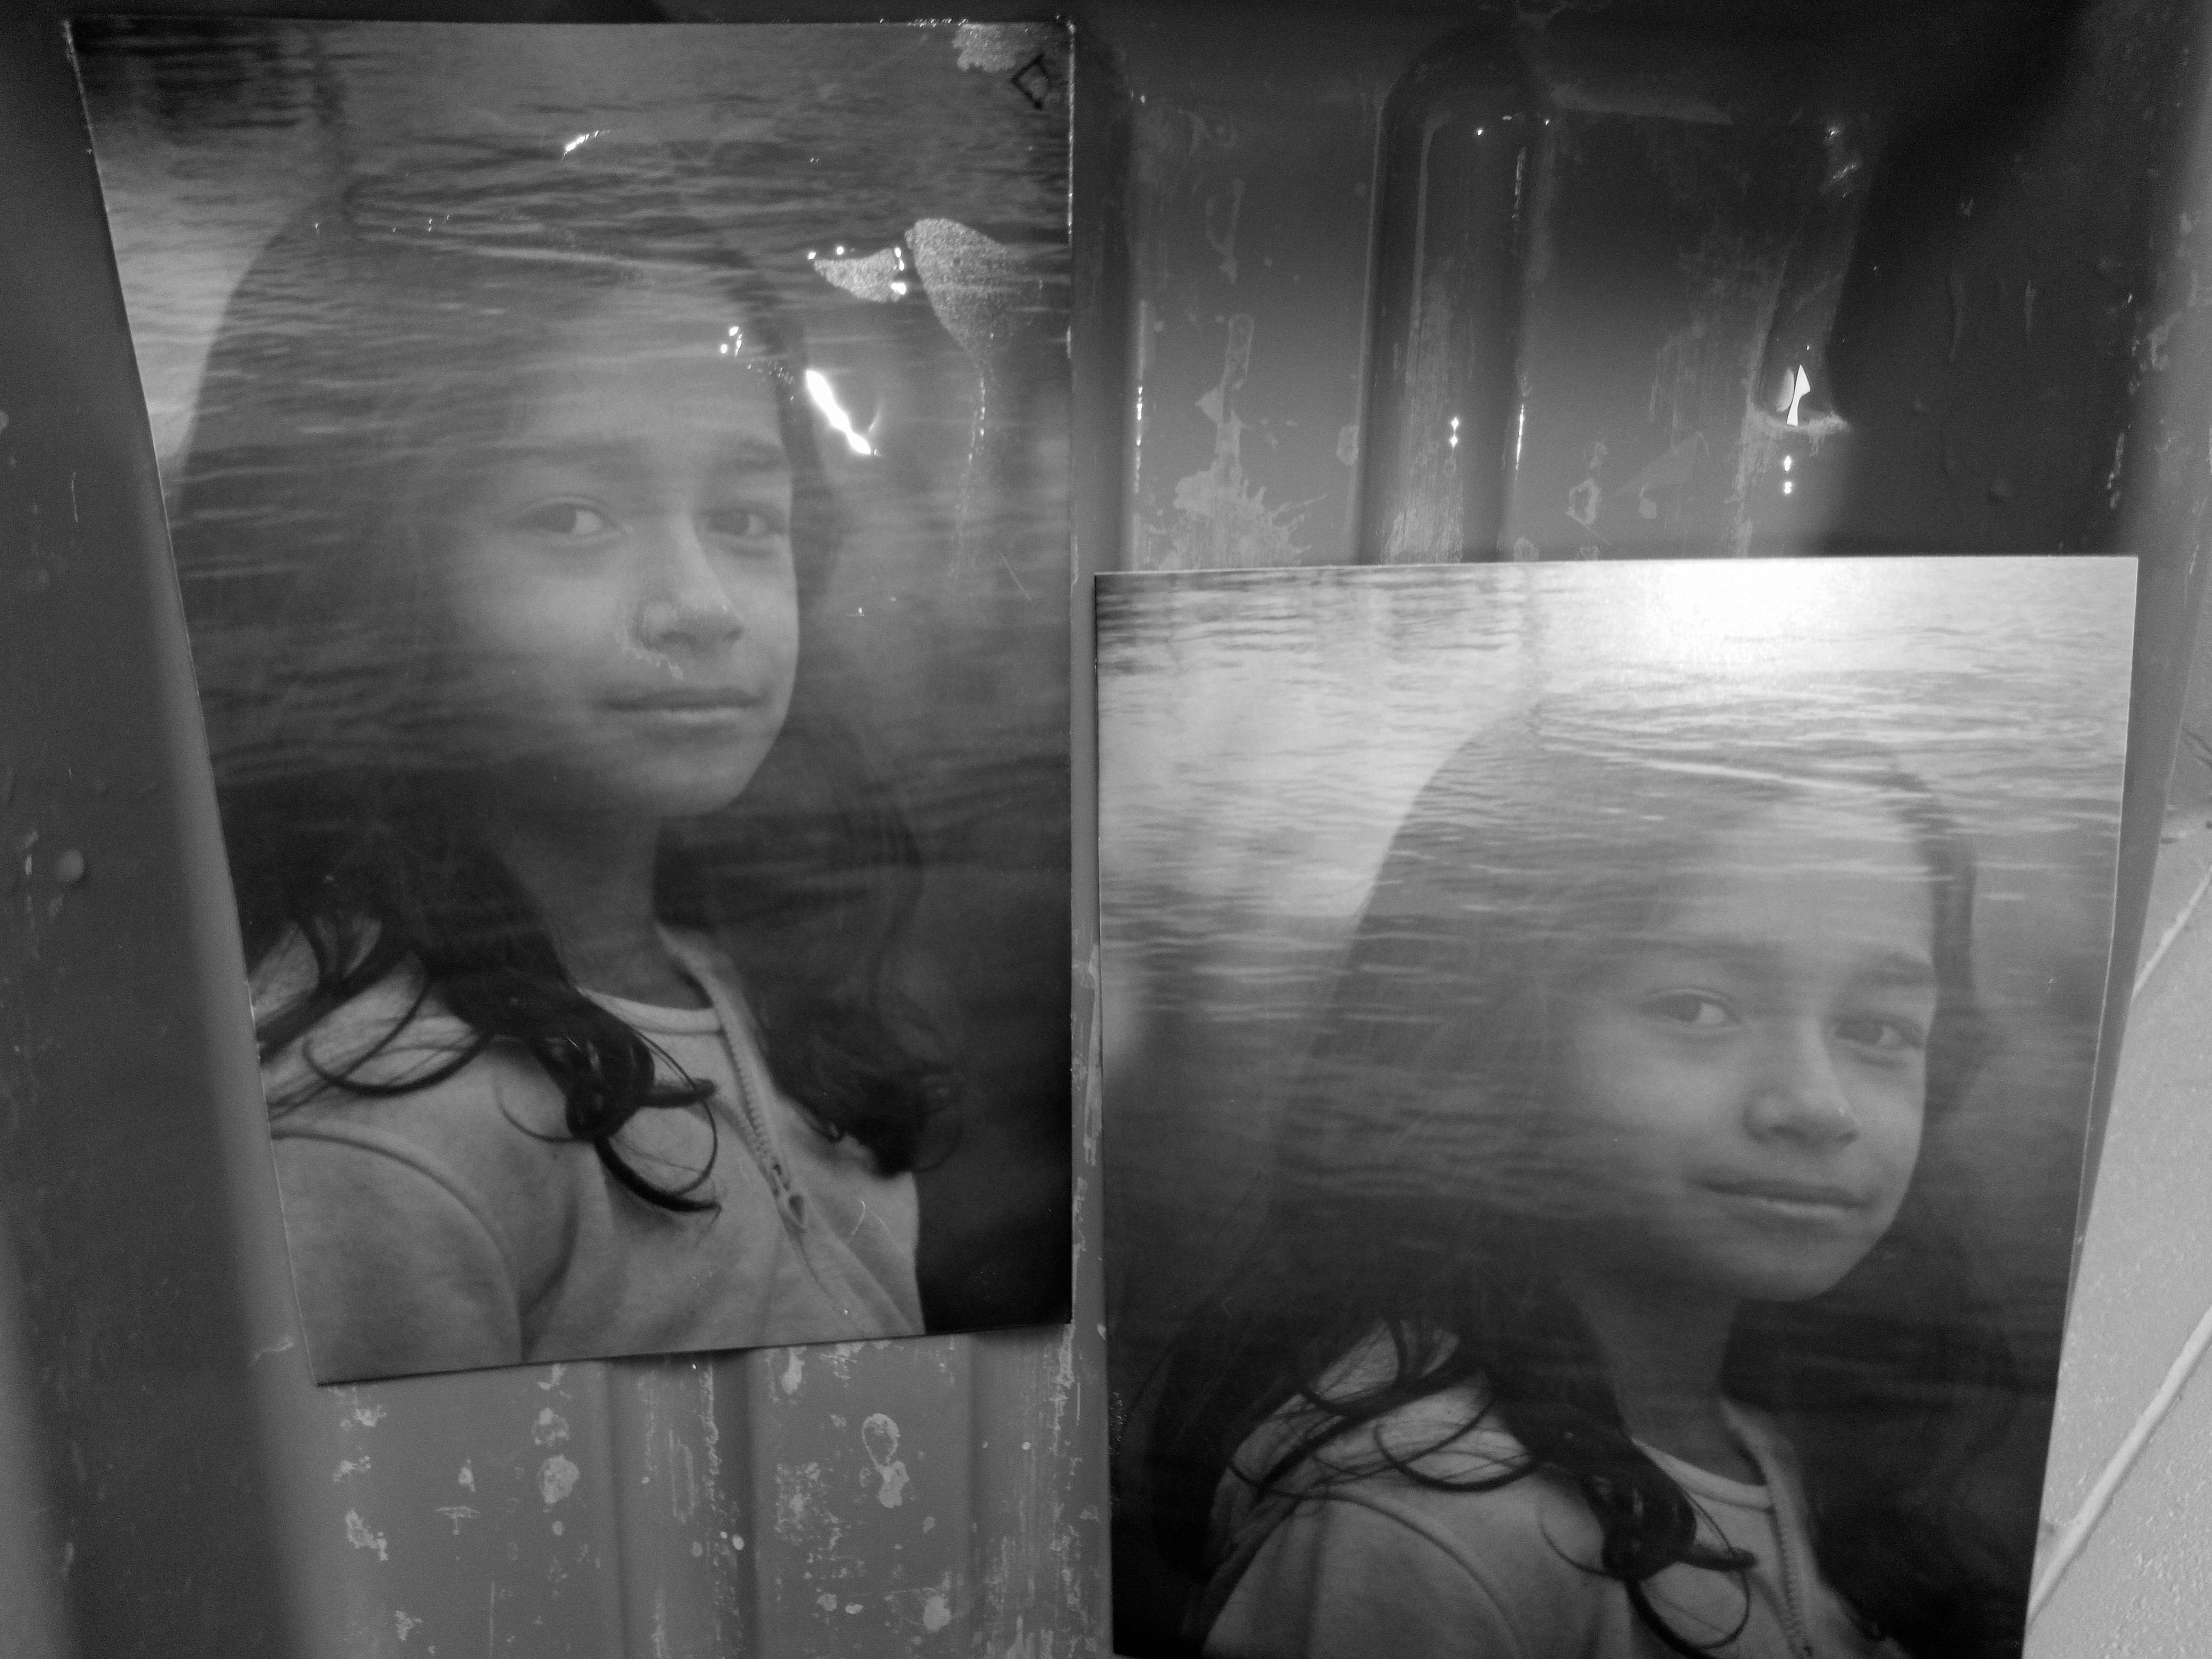
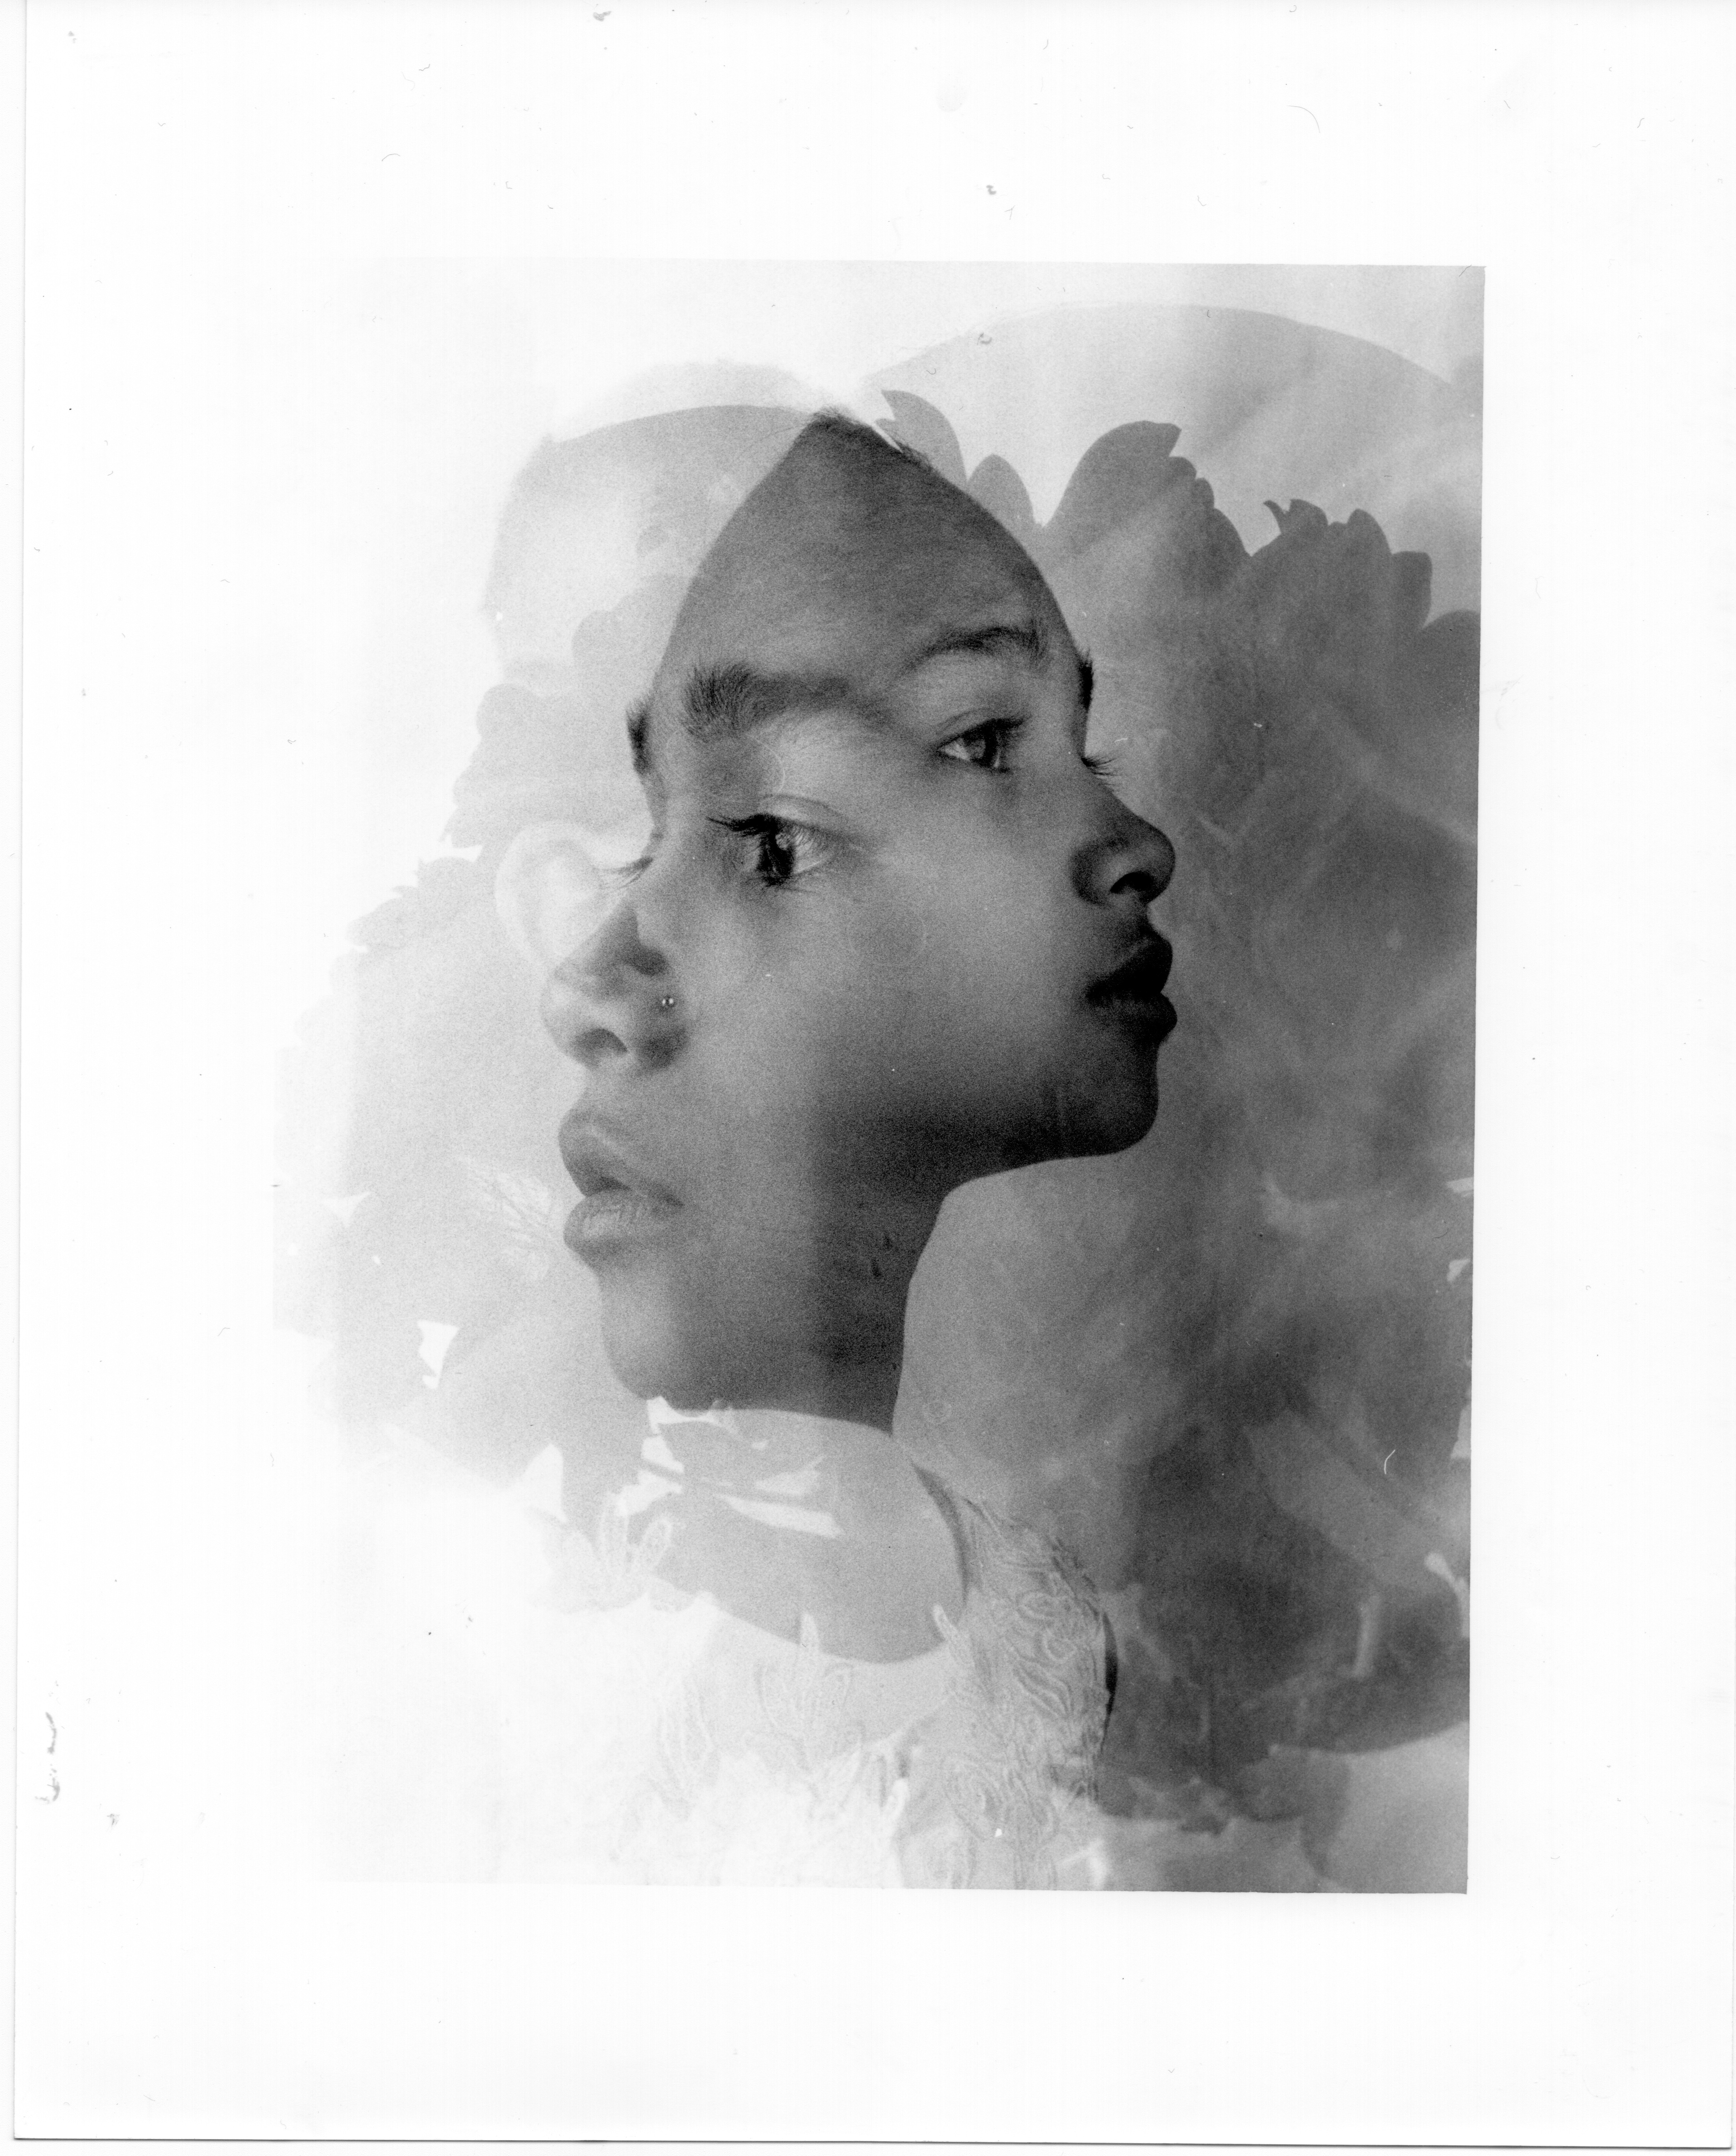
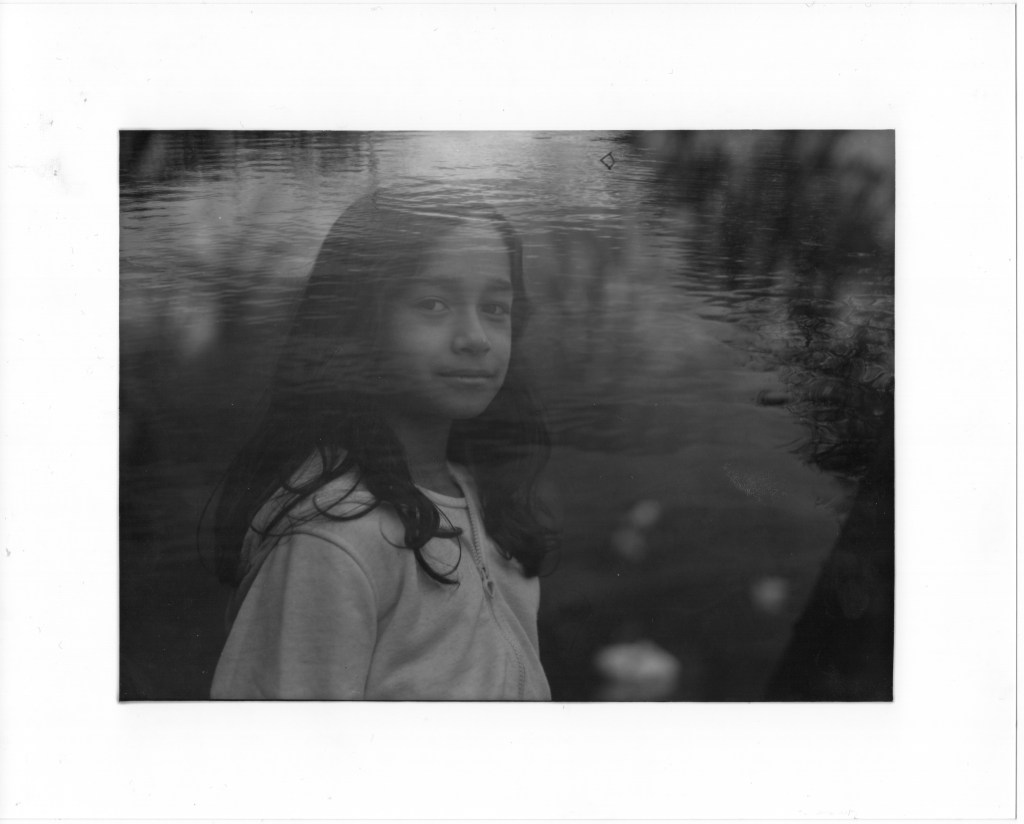
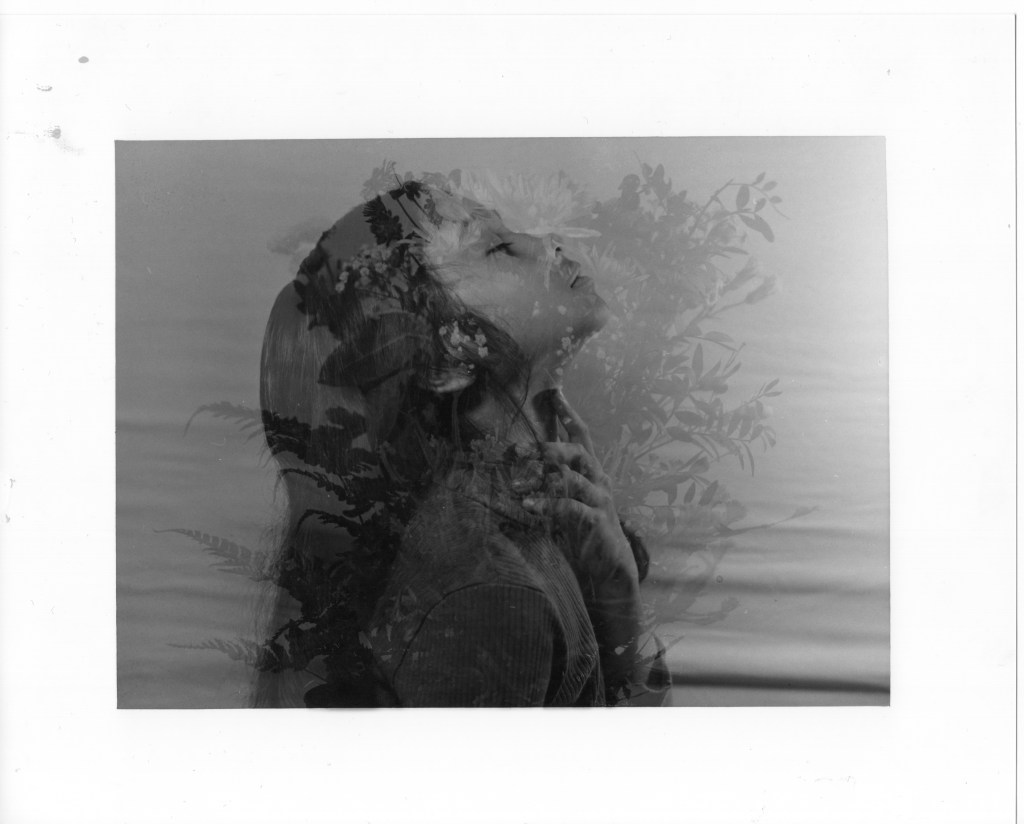
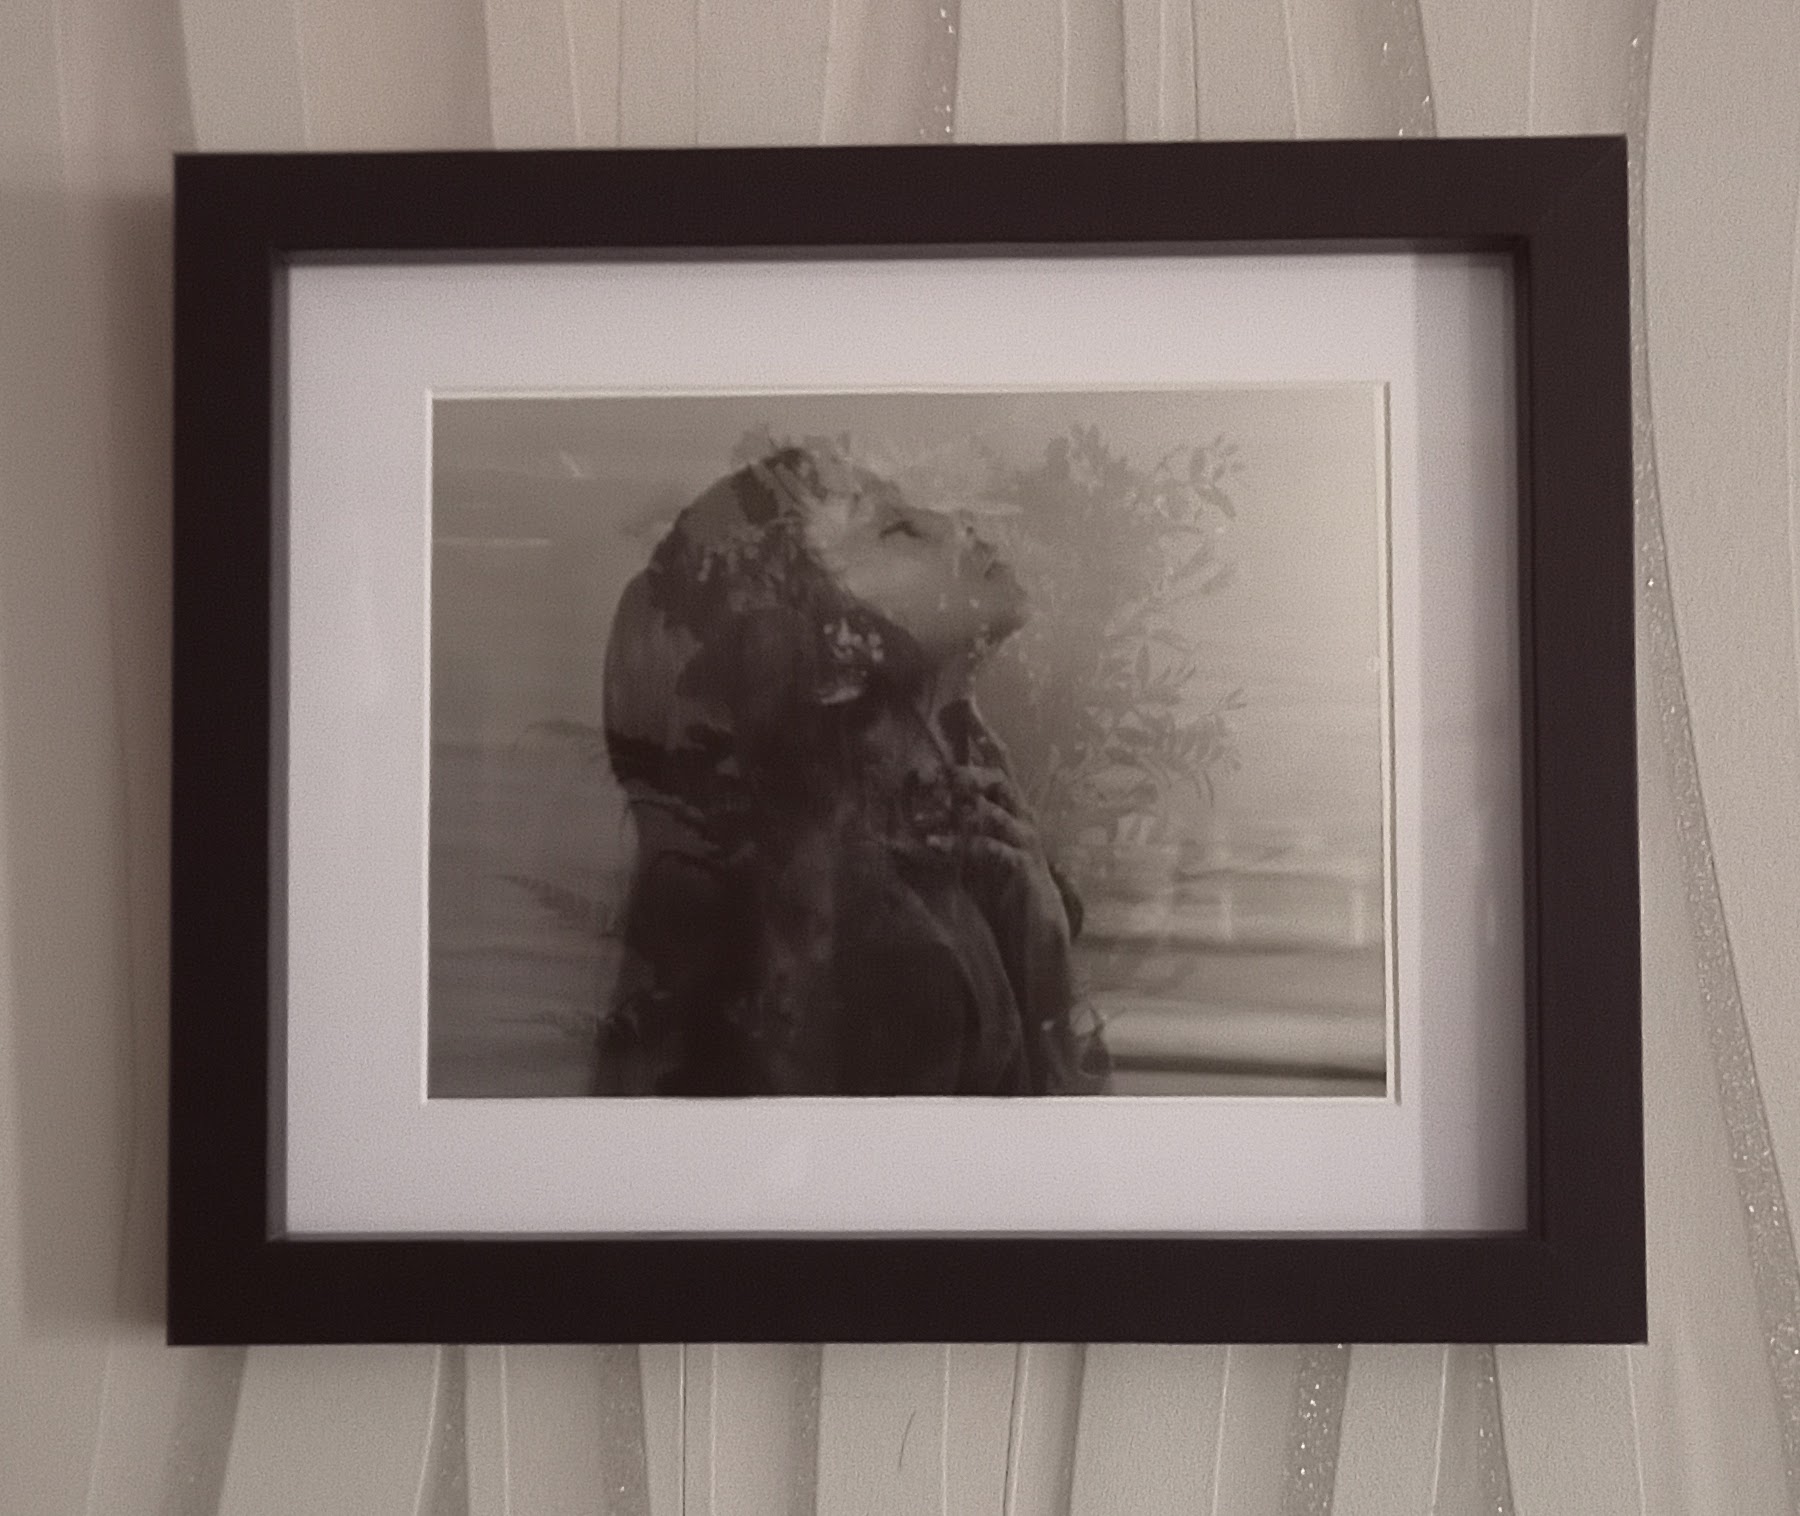
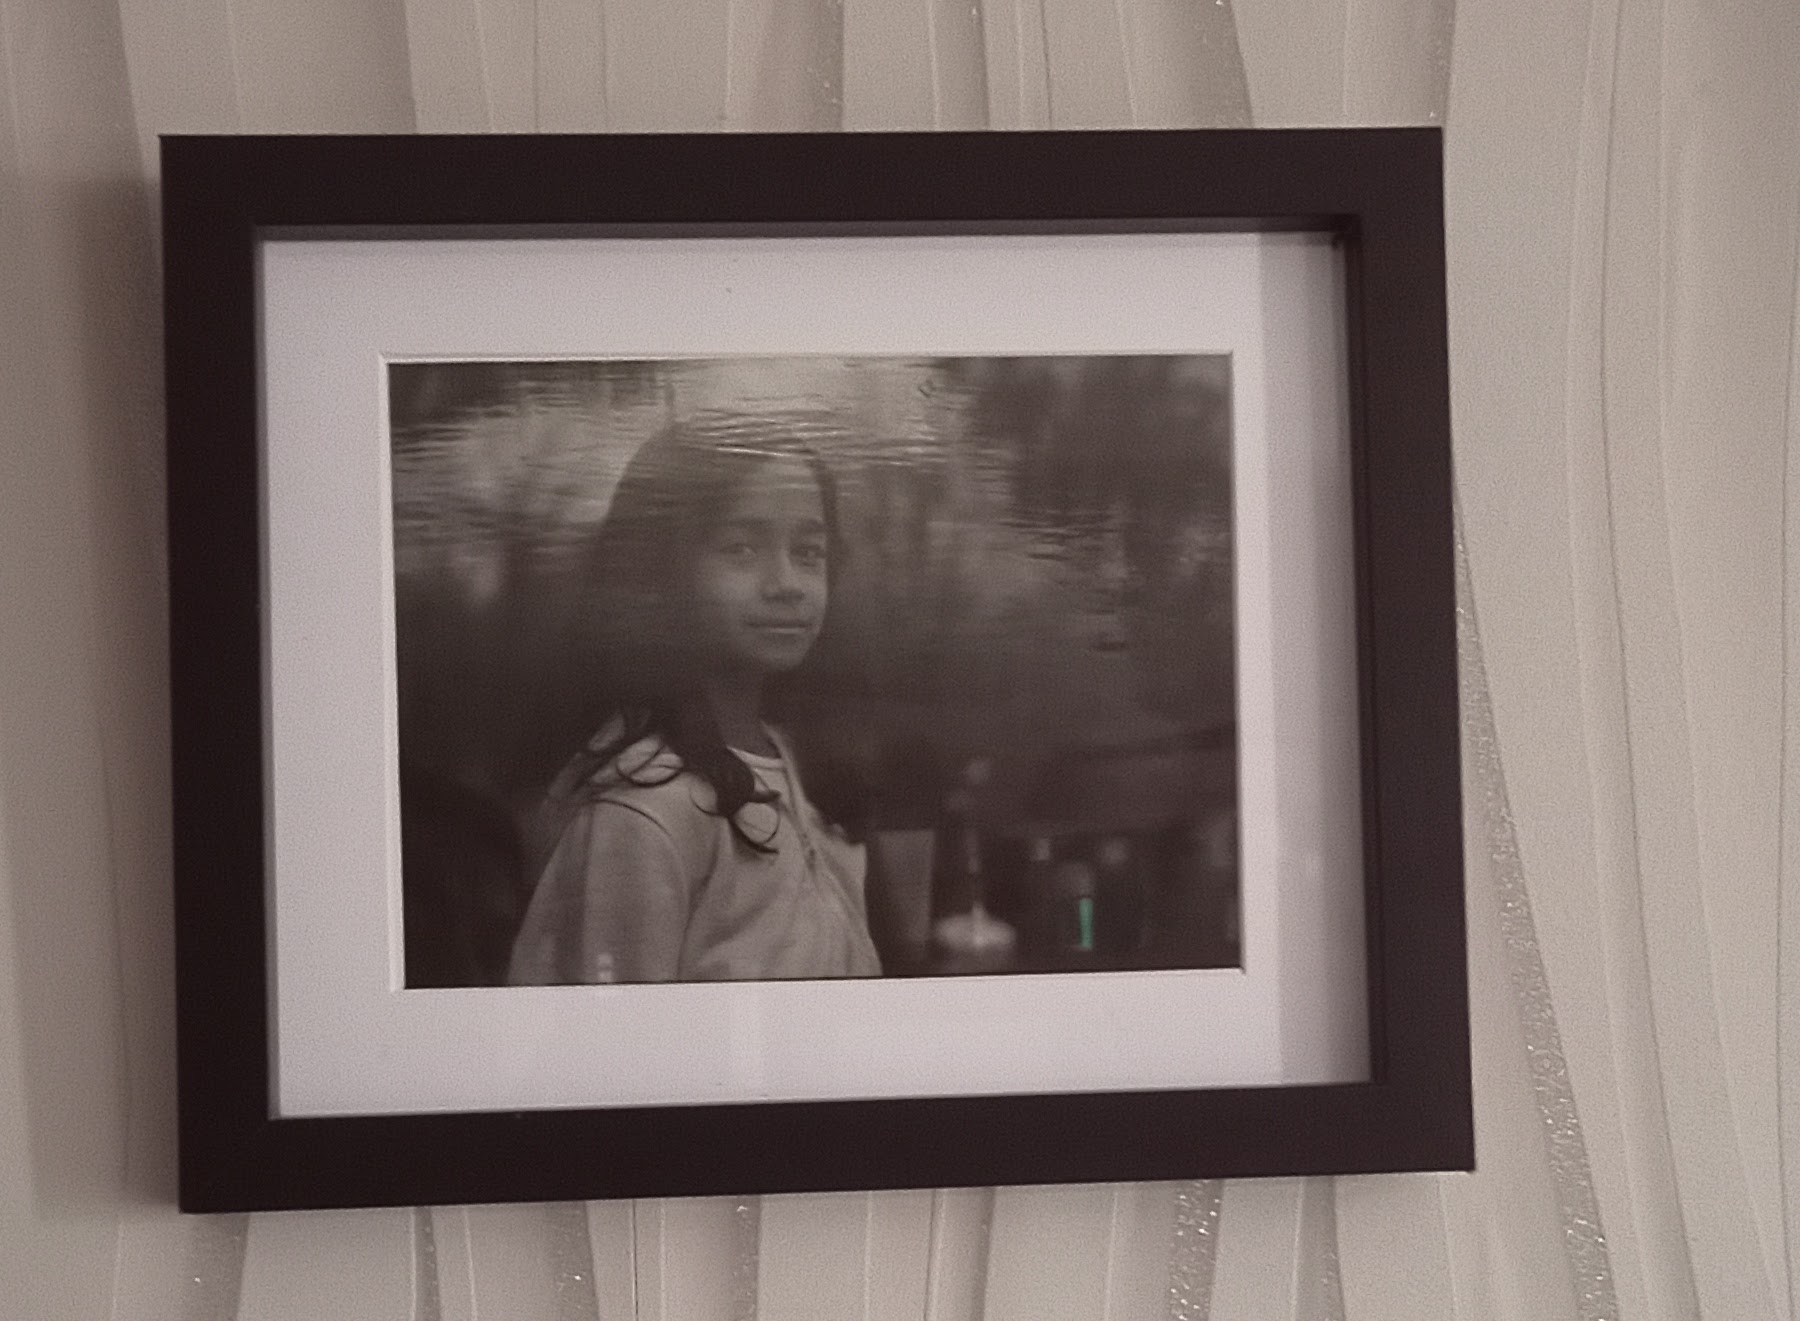
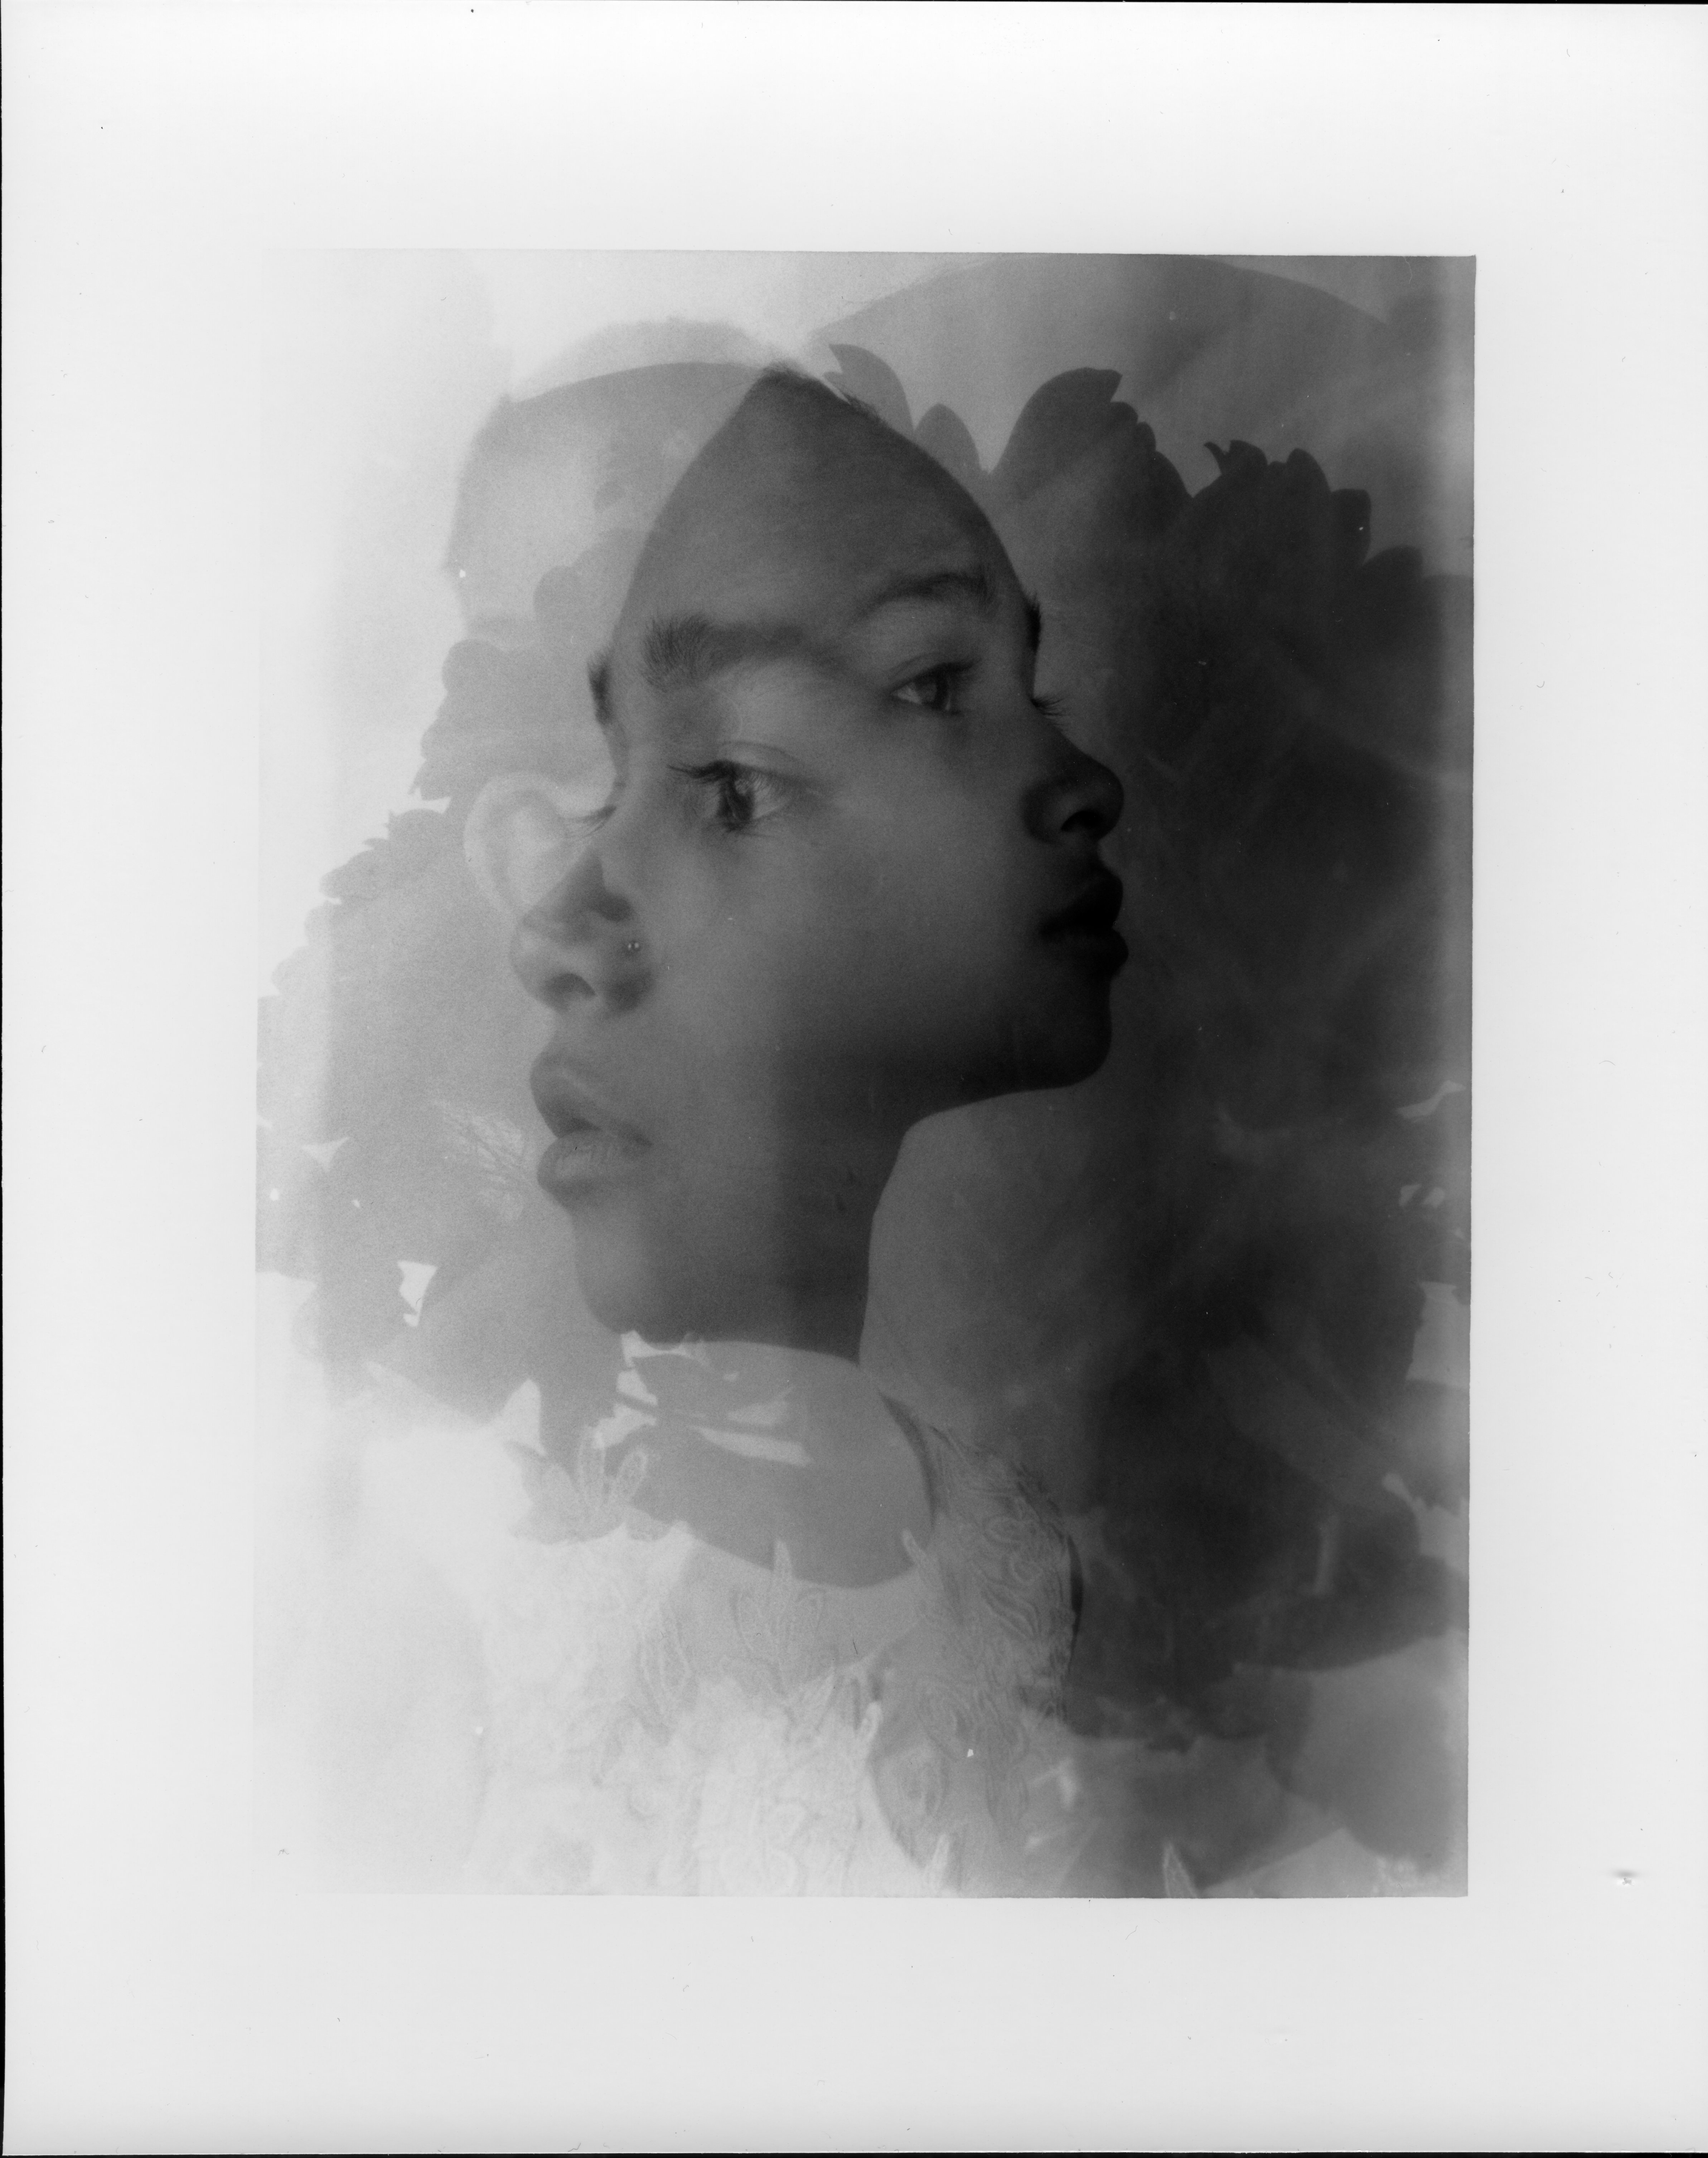
FINAL IMAGES
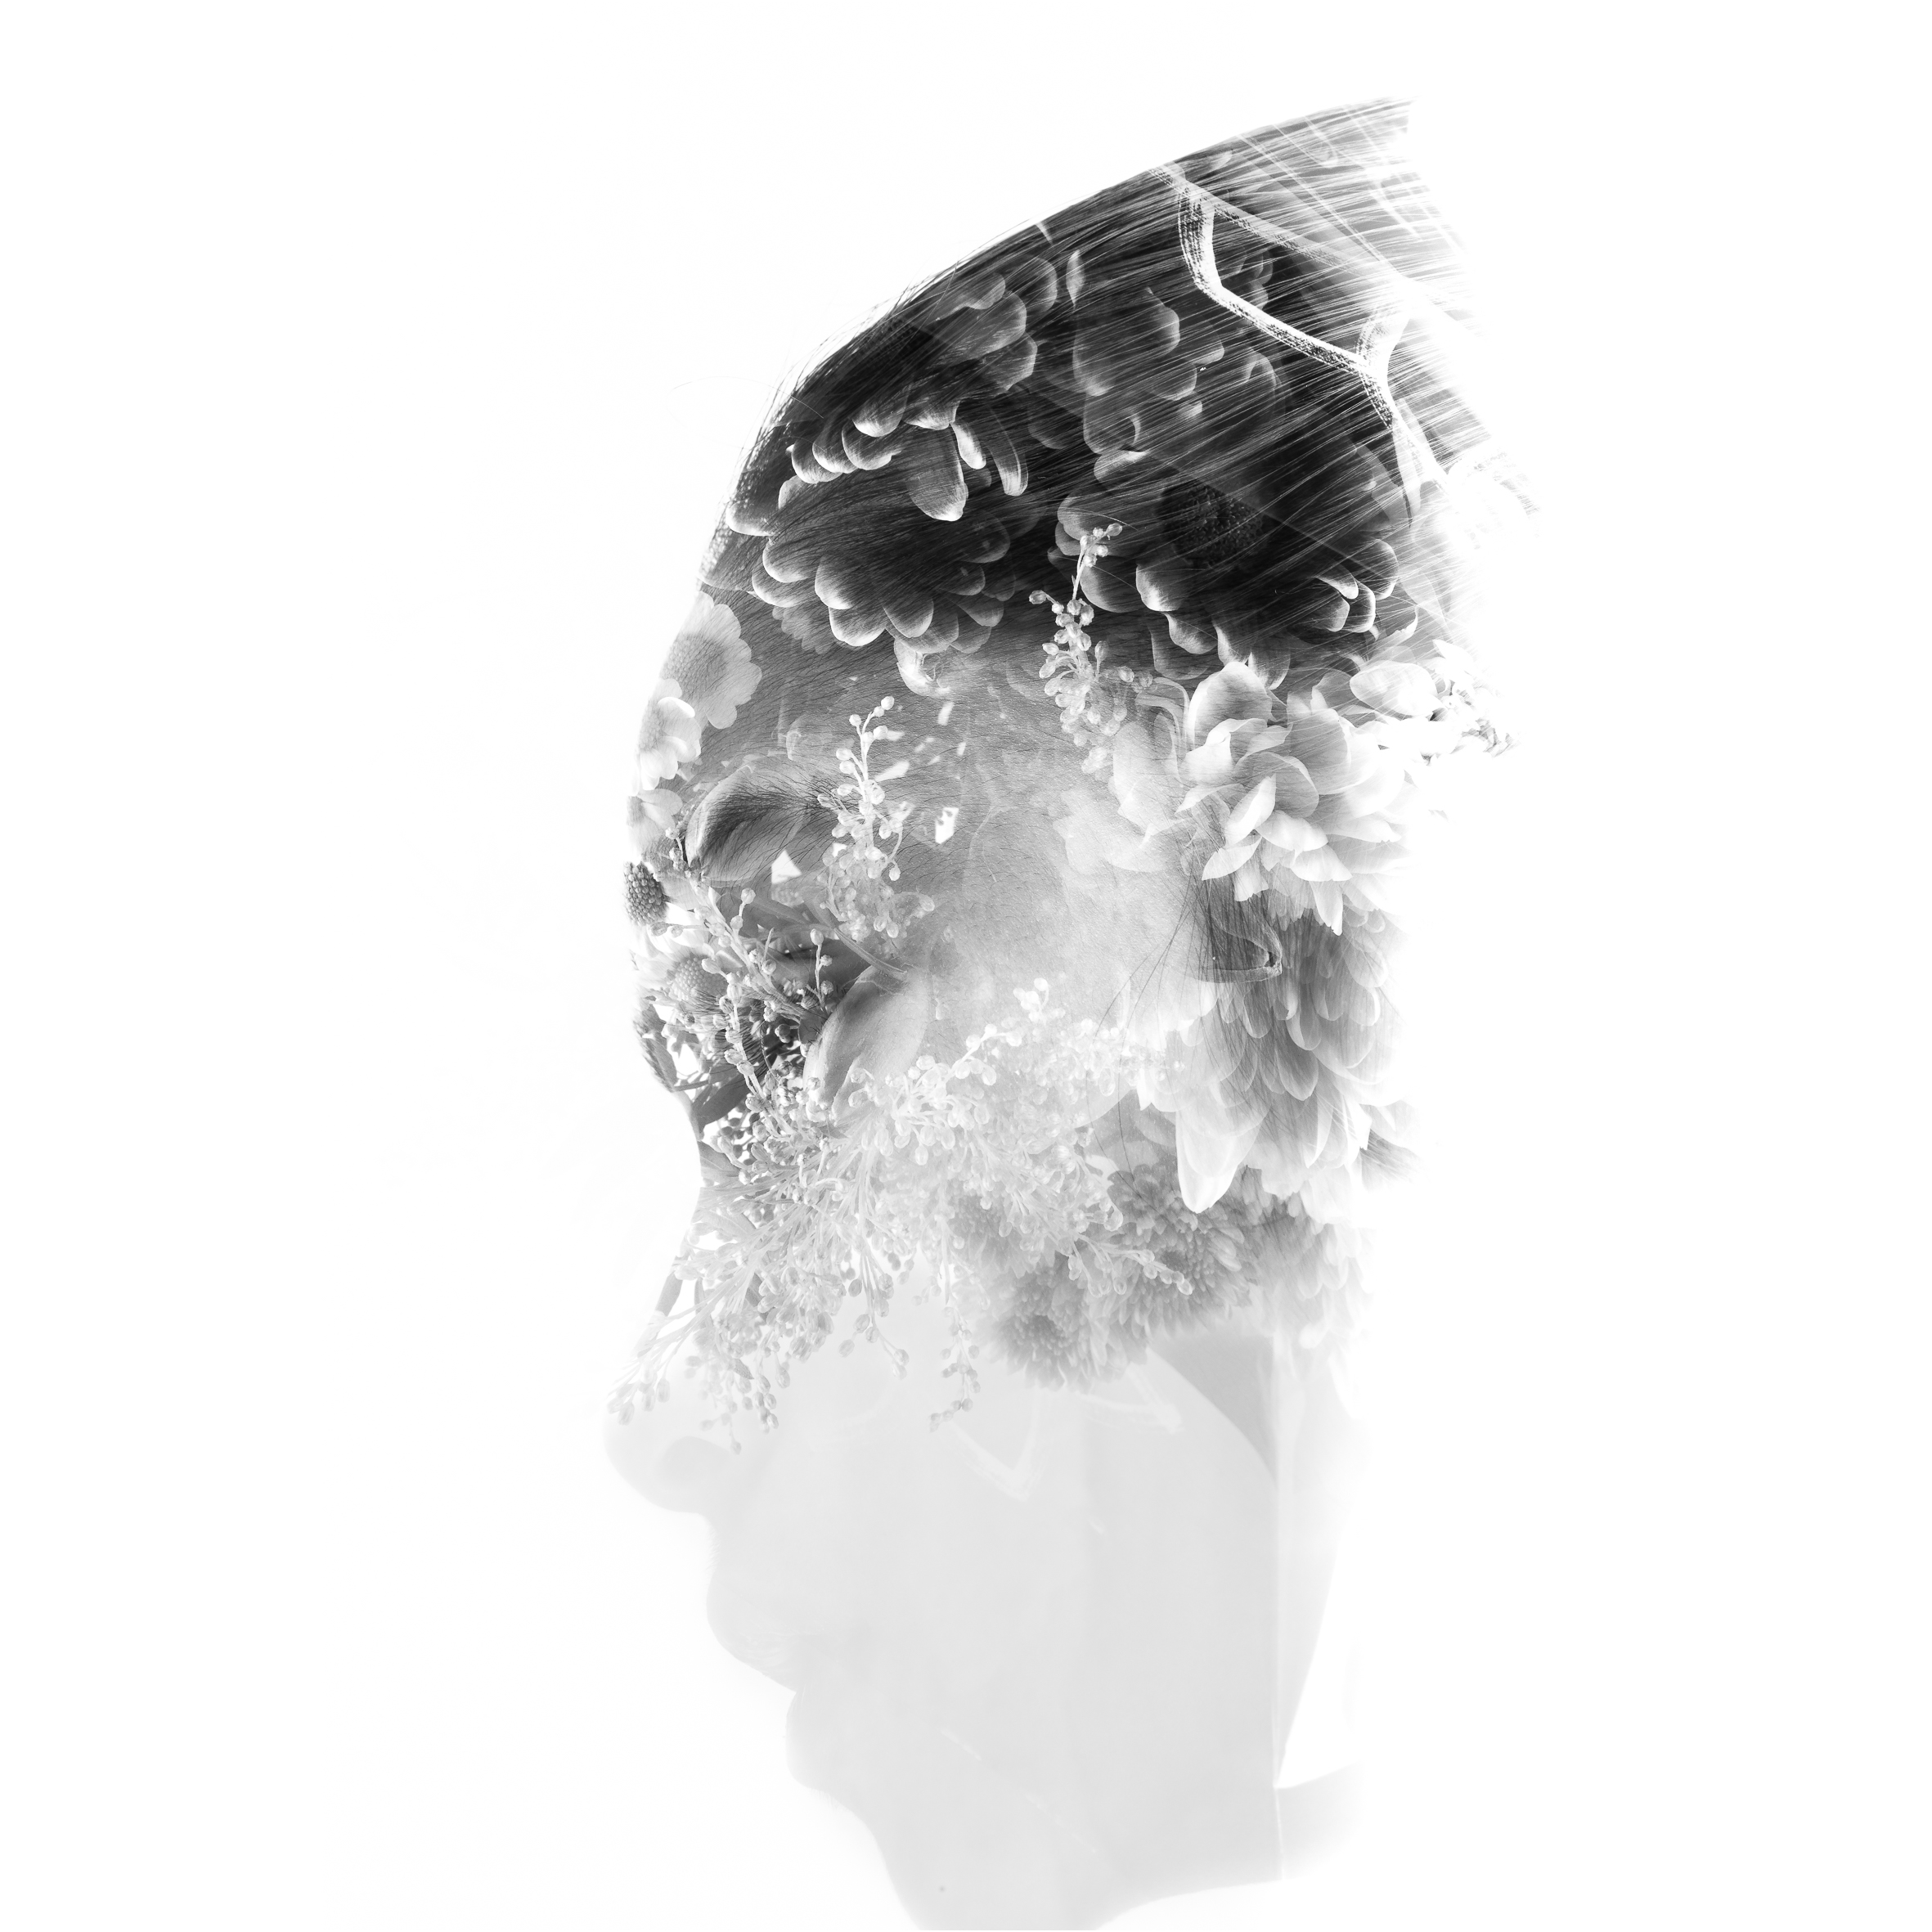
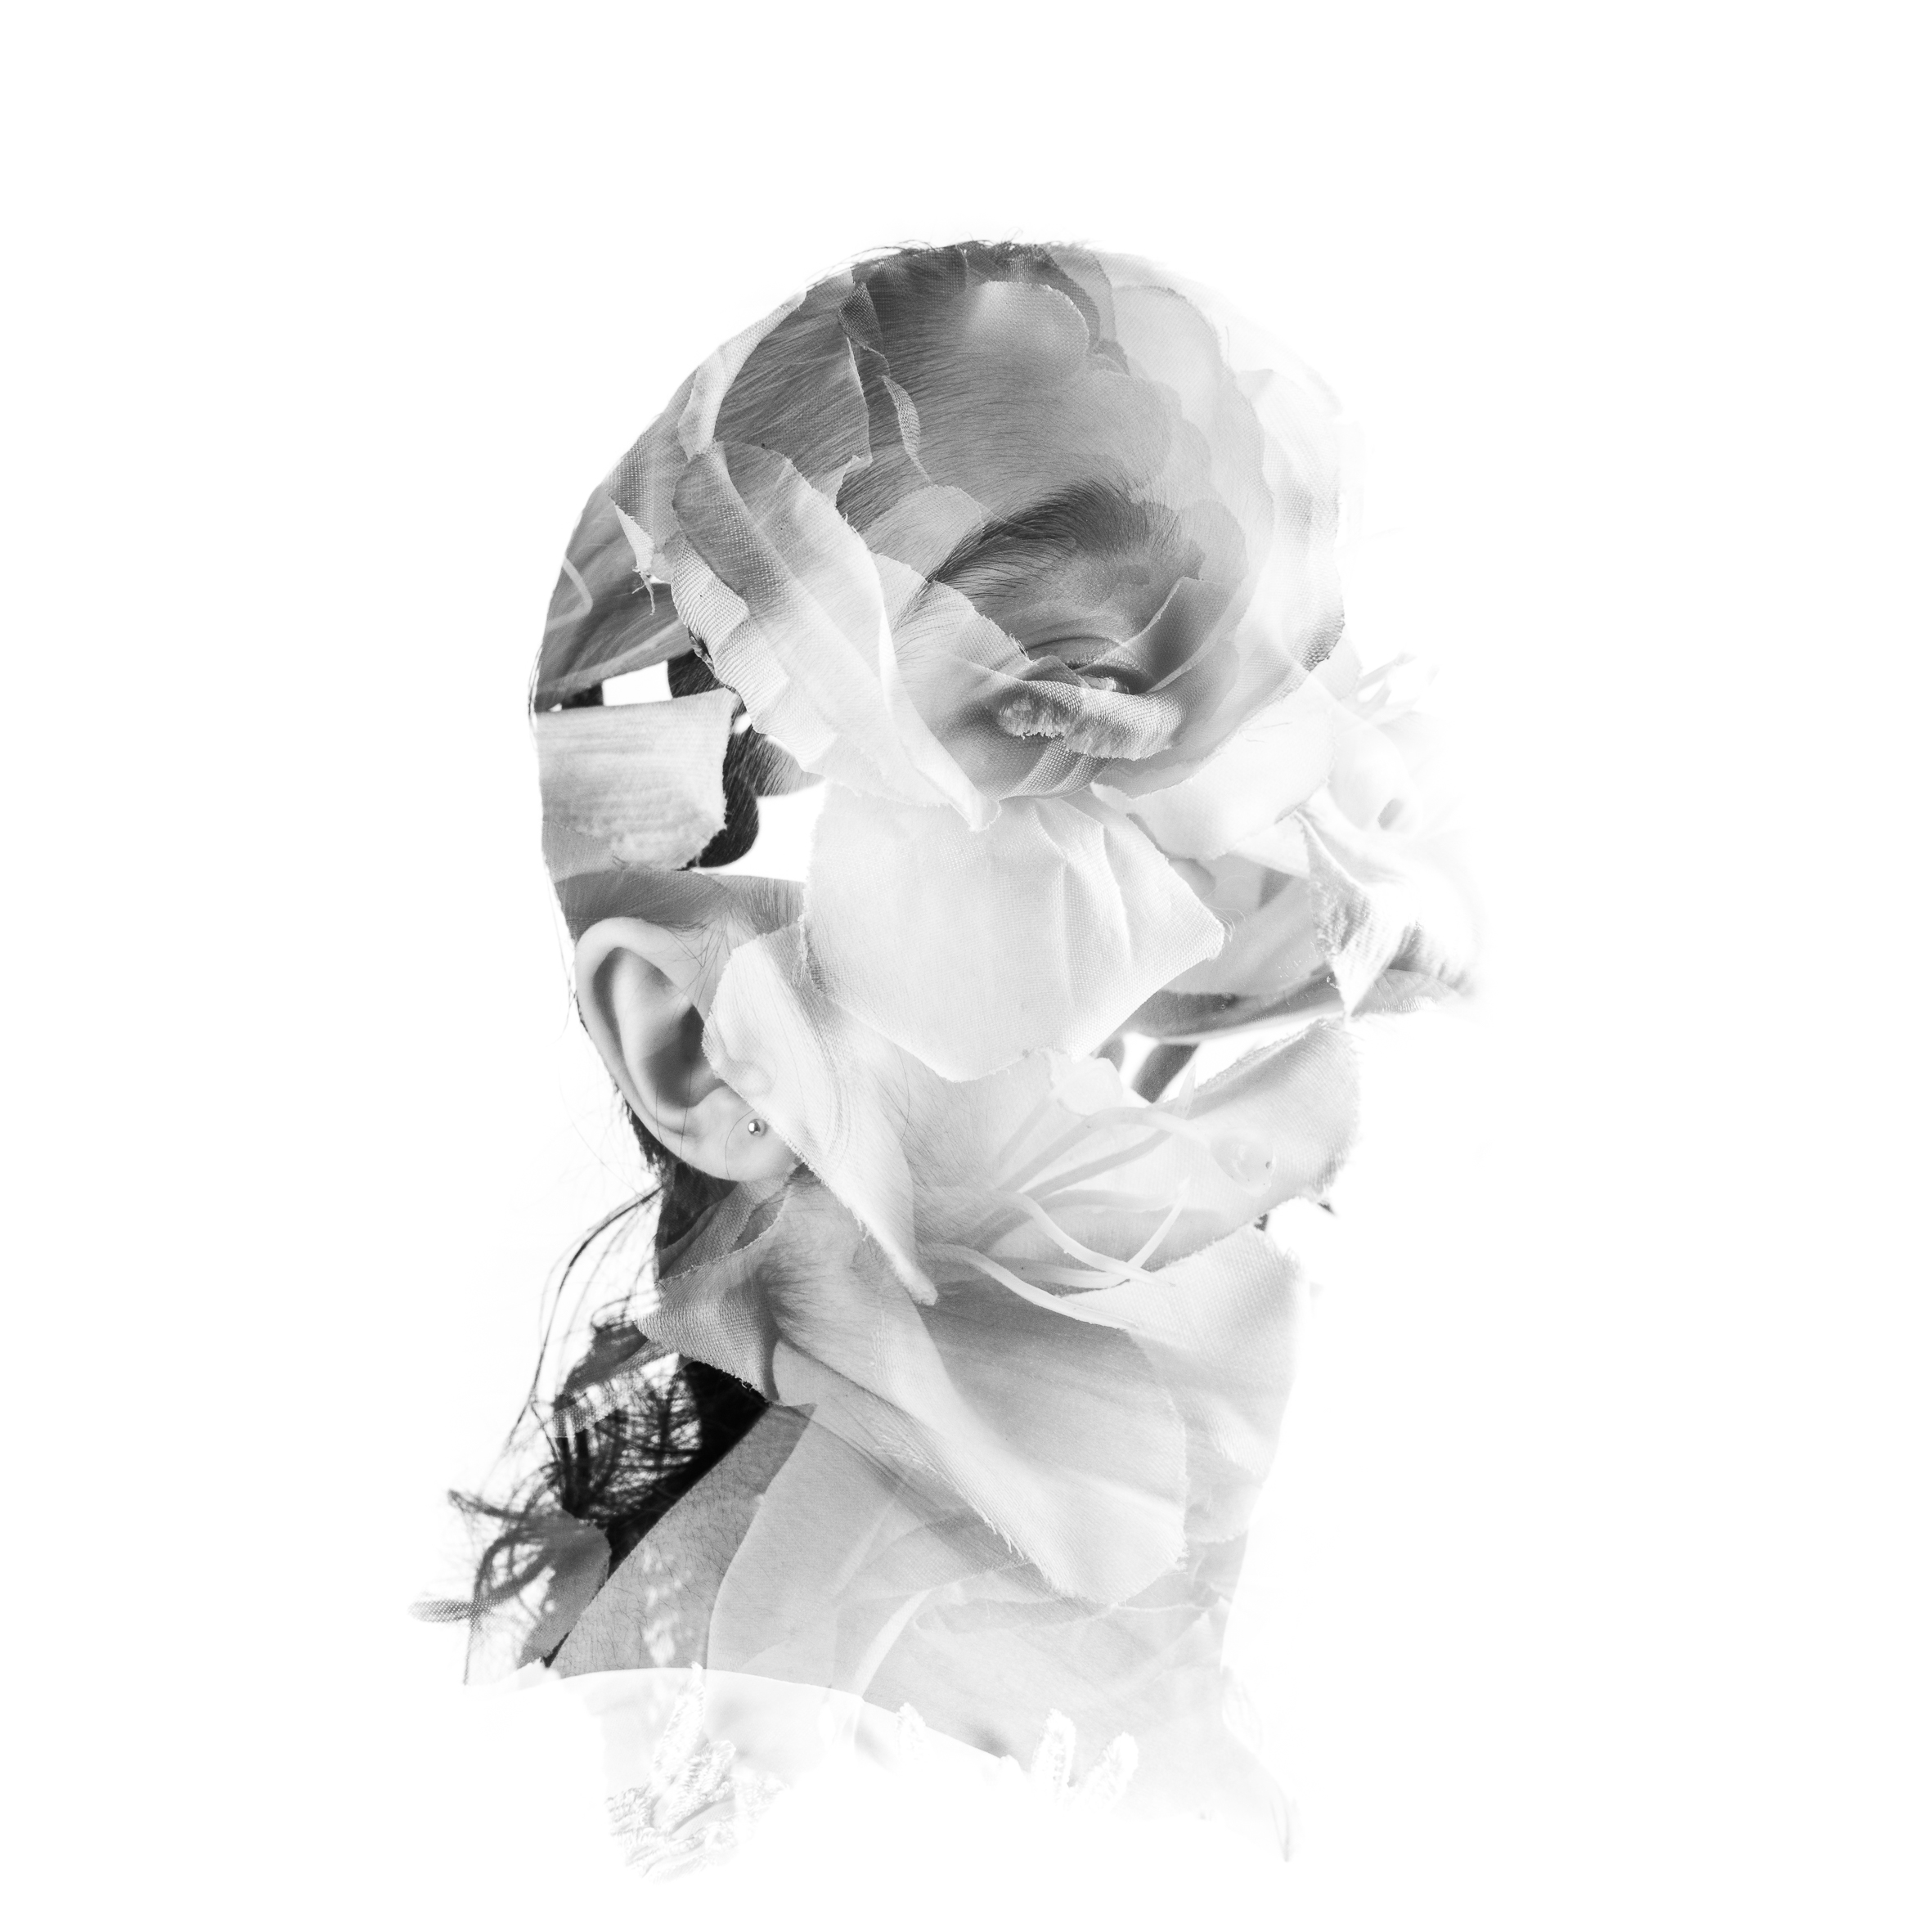
The following four photographs I believe to be the most effective representations of my “Fine art-analogue photography.” I have included these photographs in the following order:
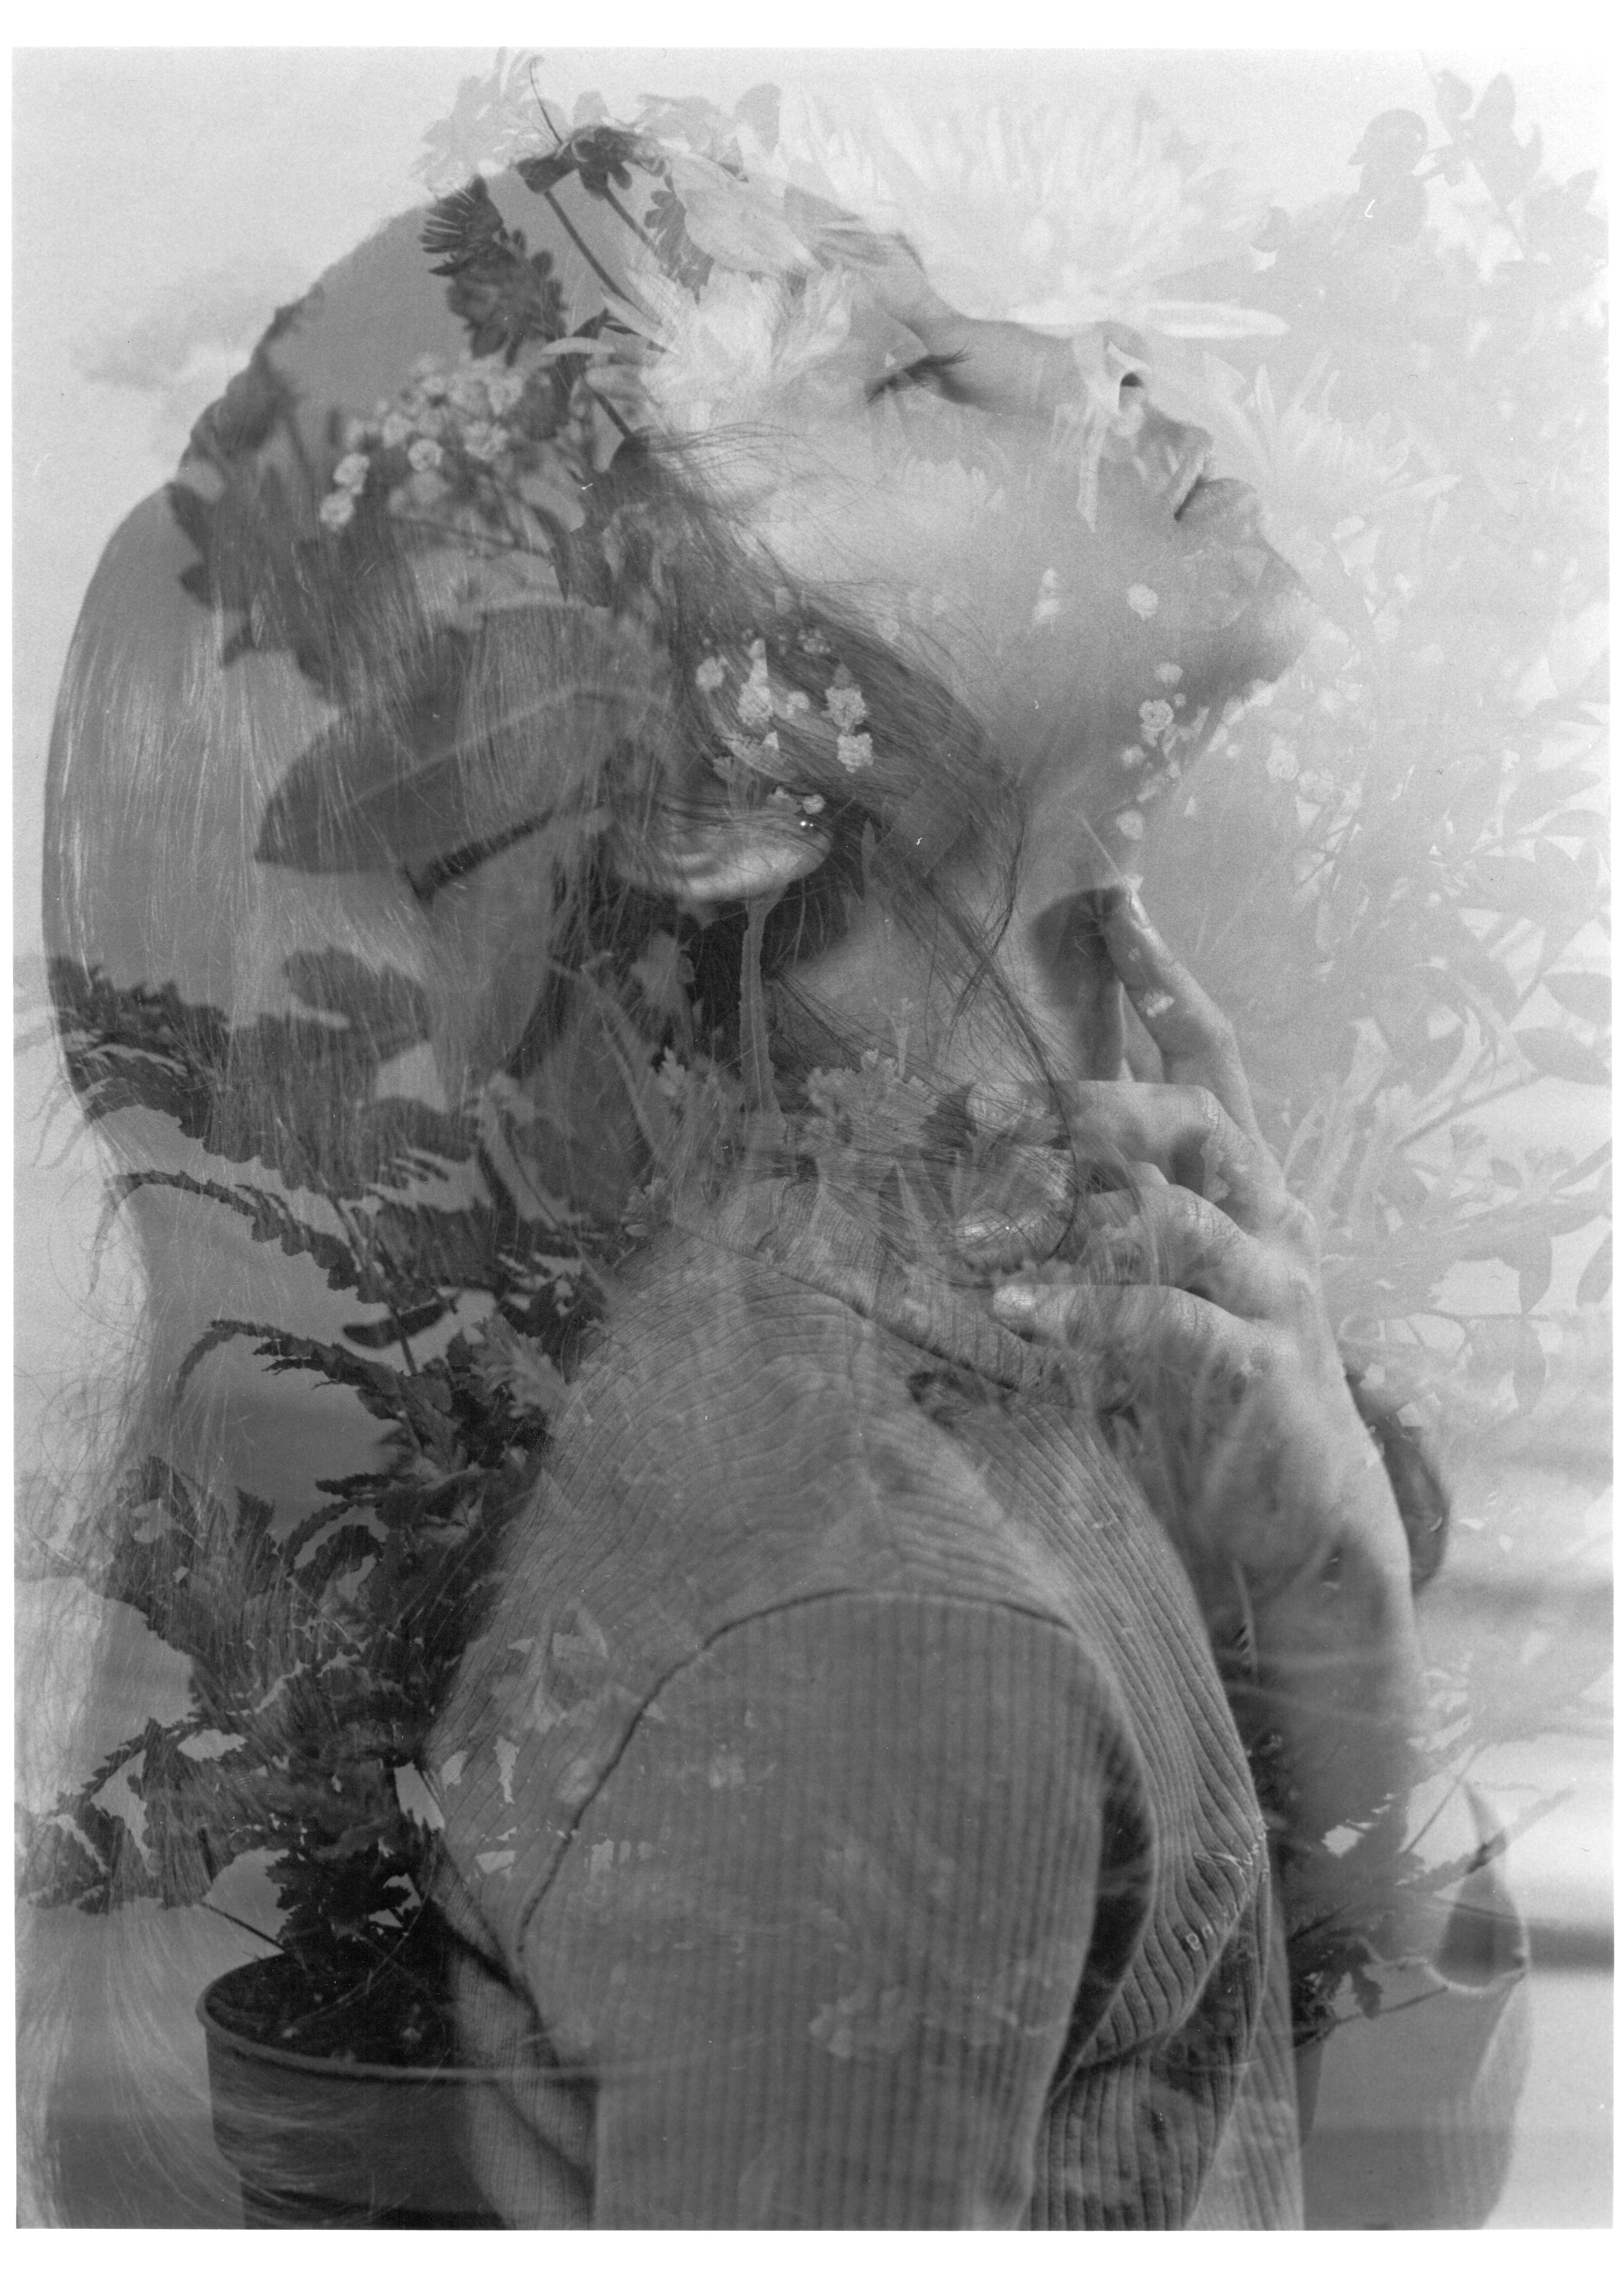
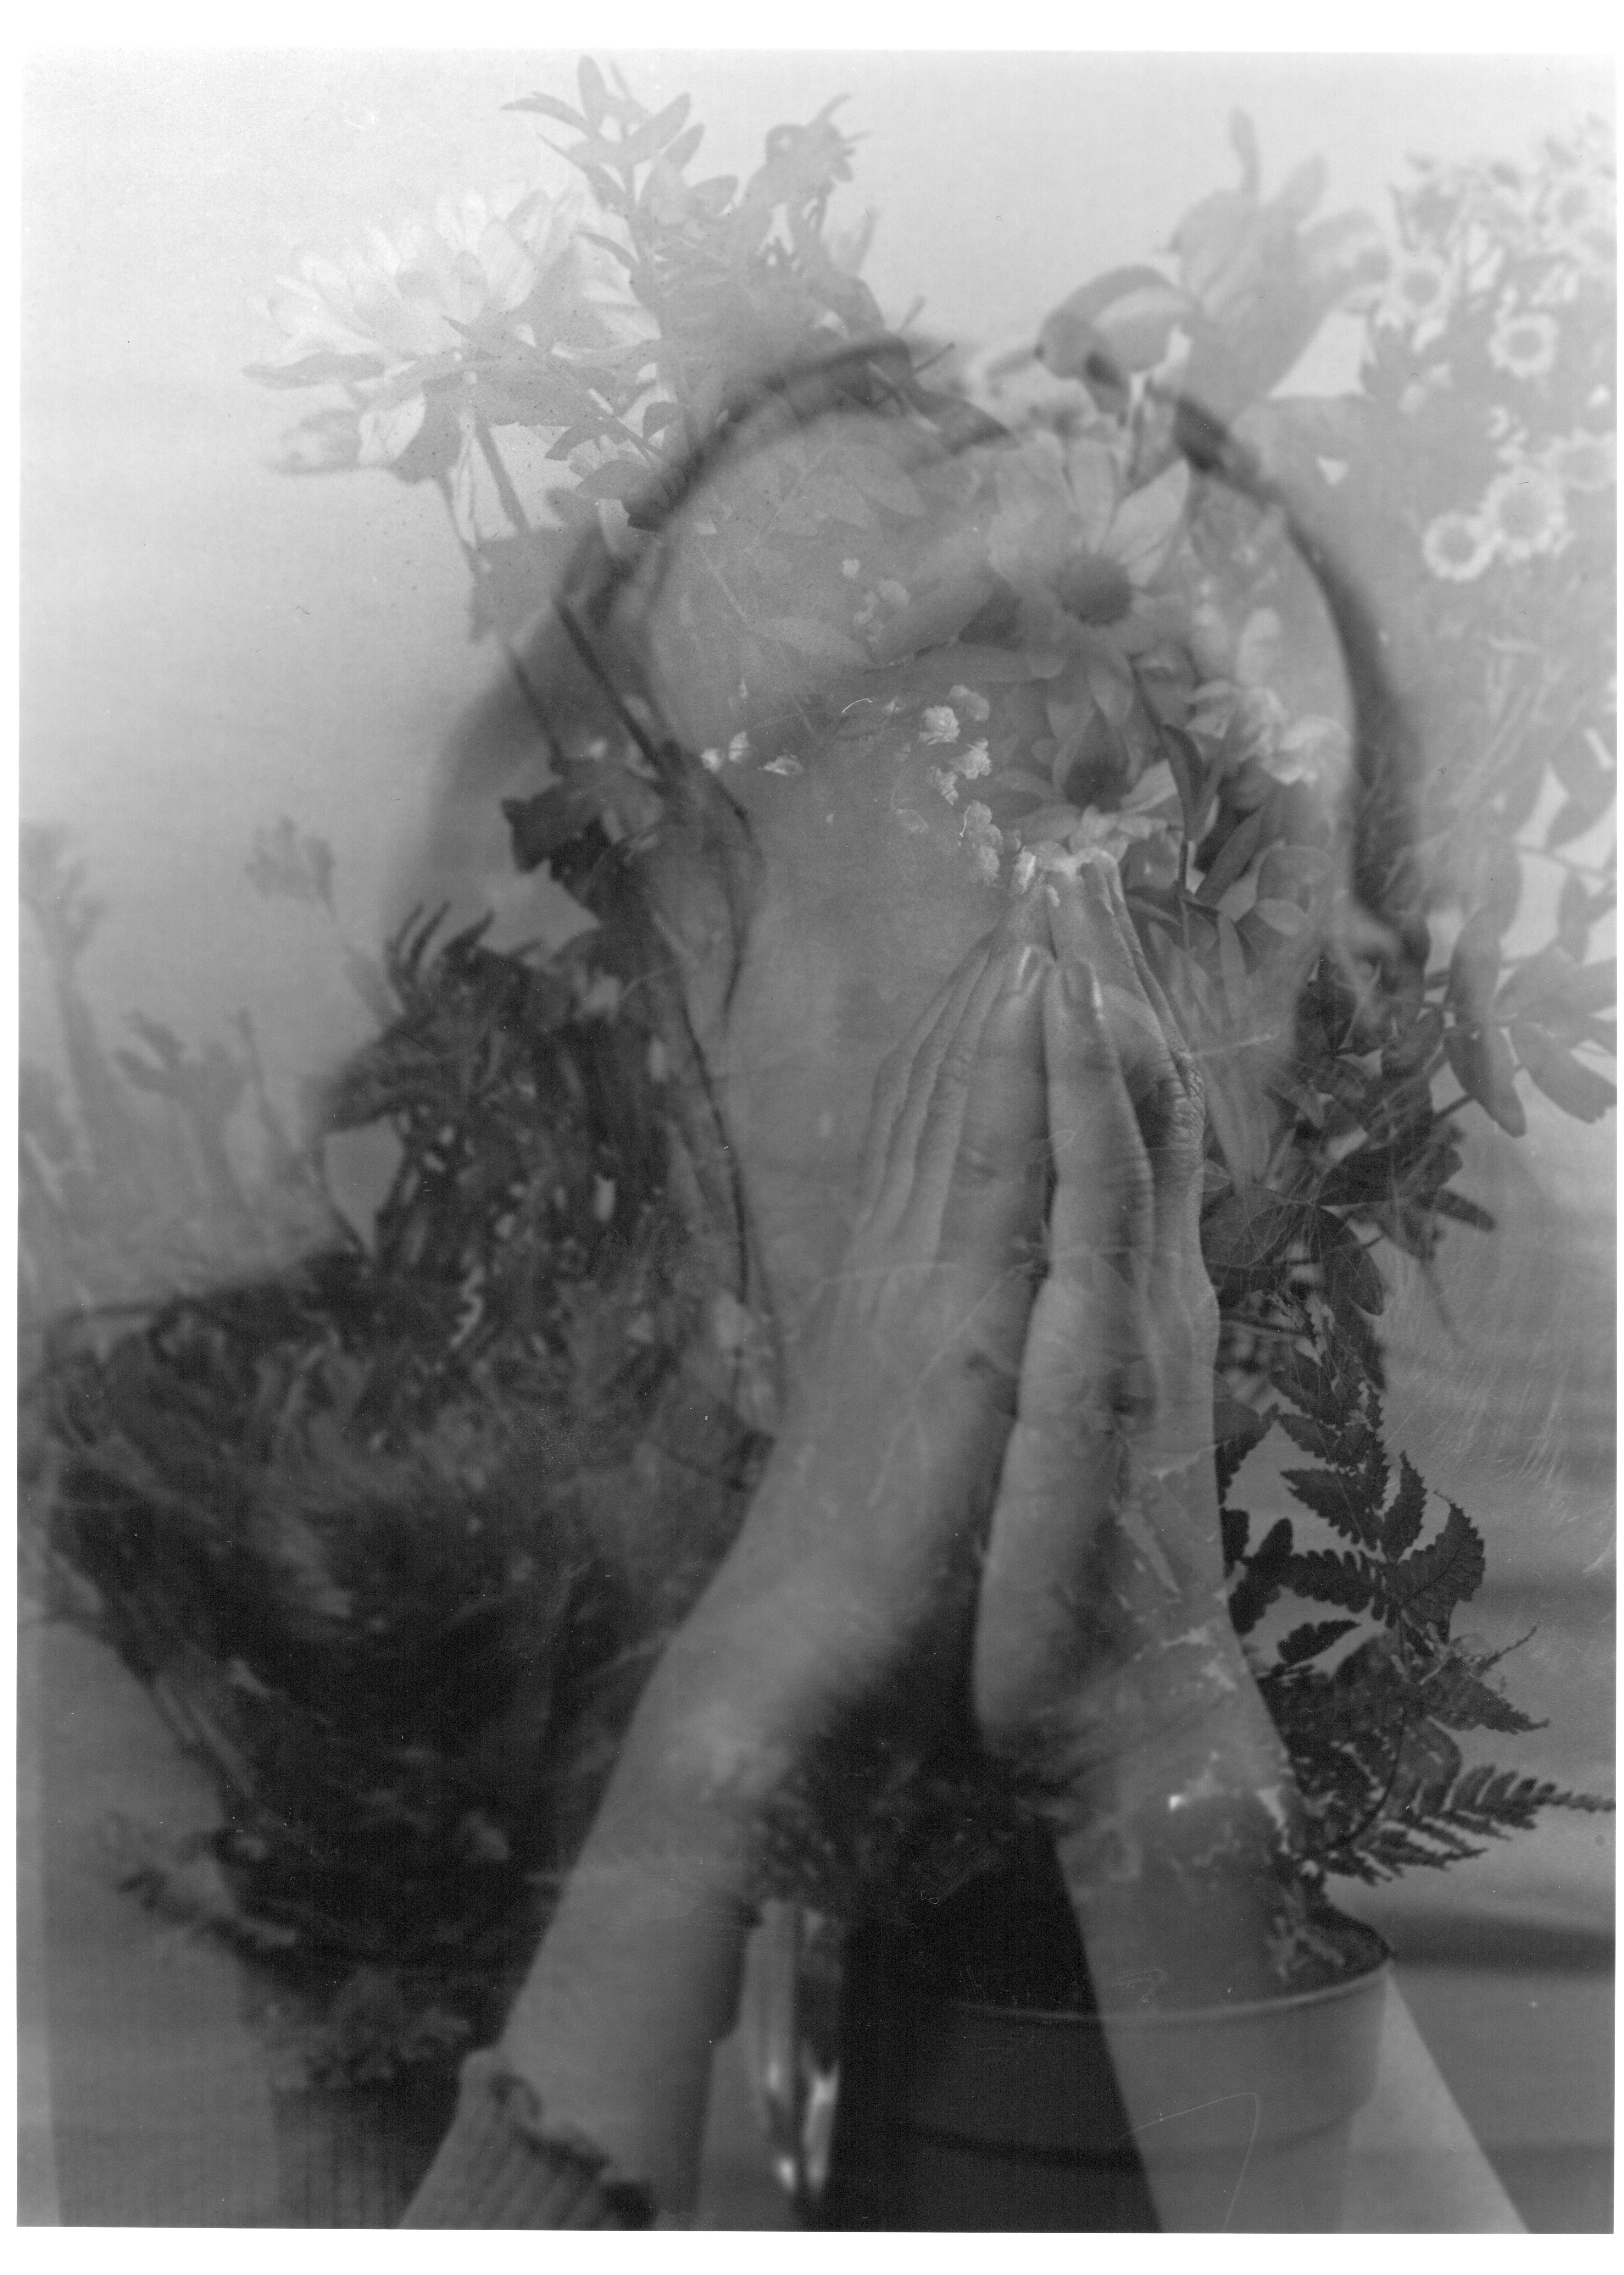
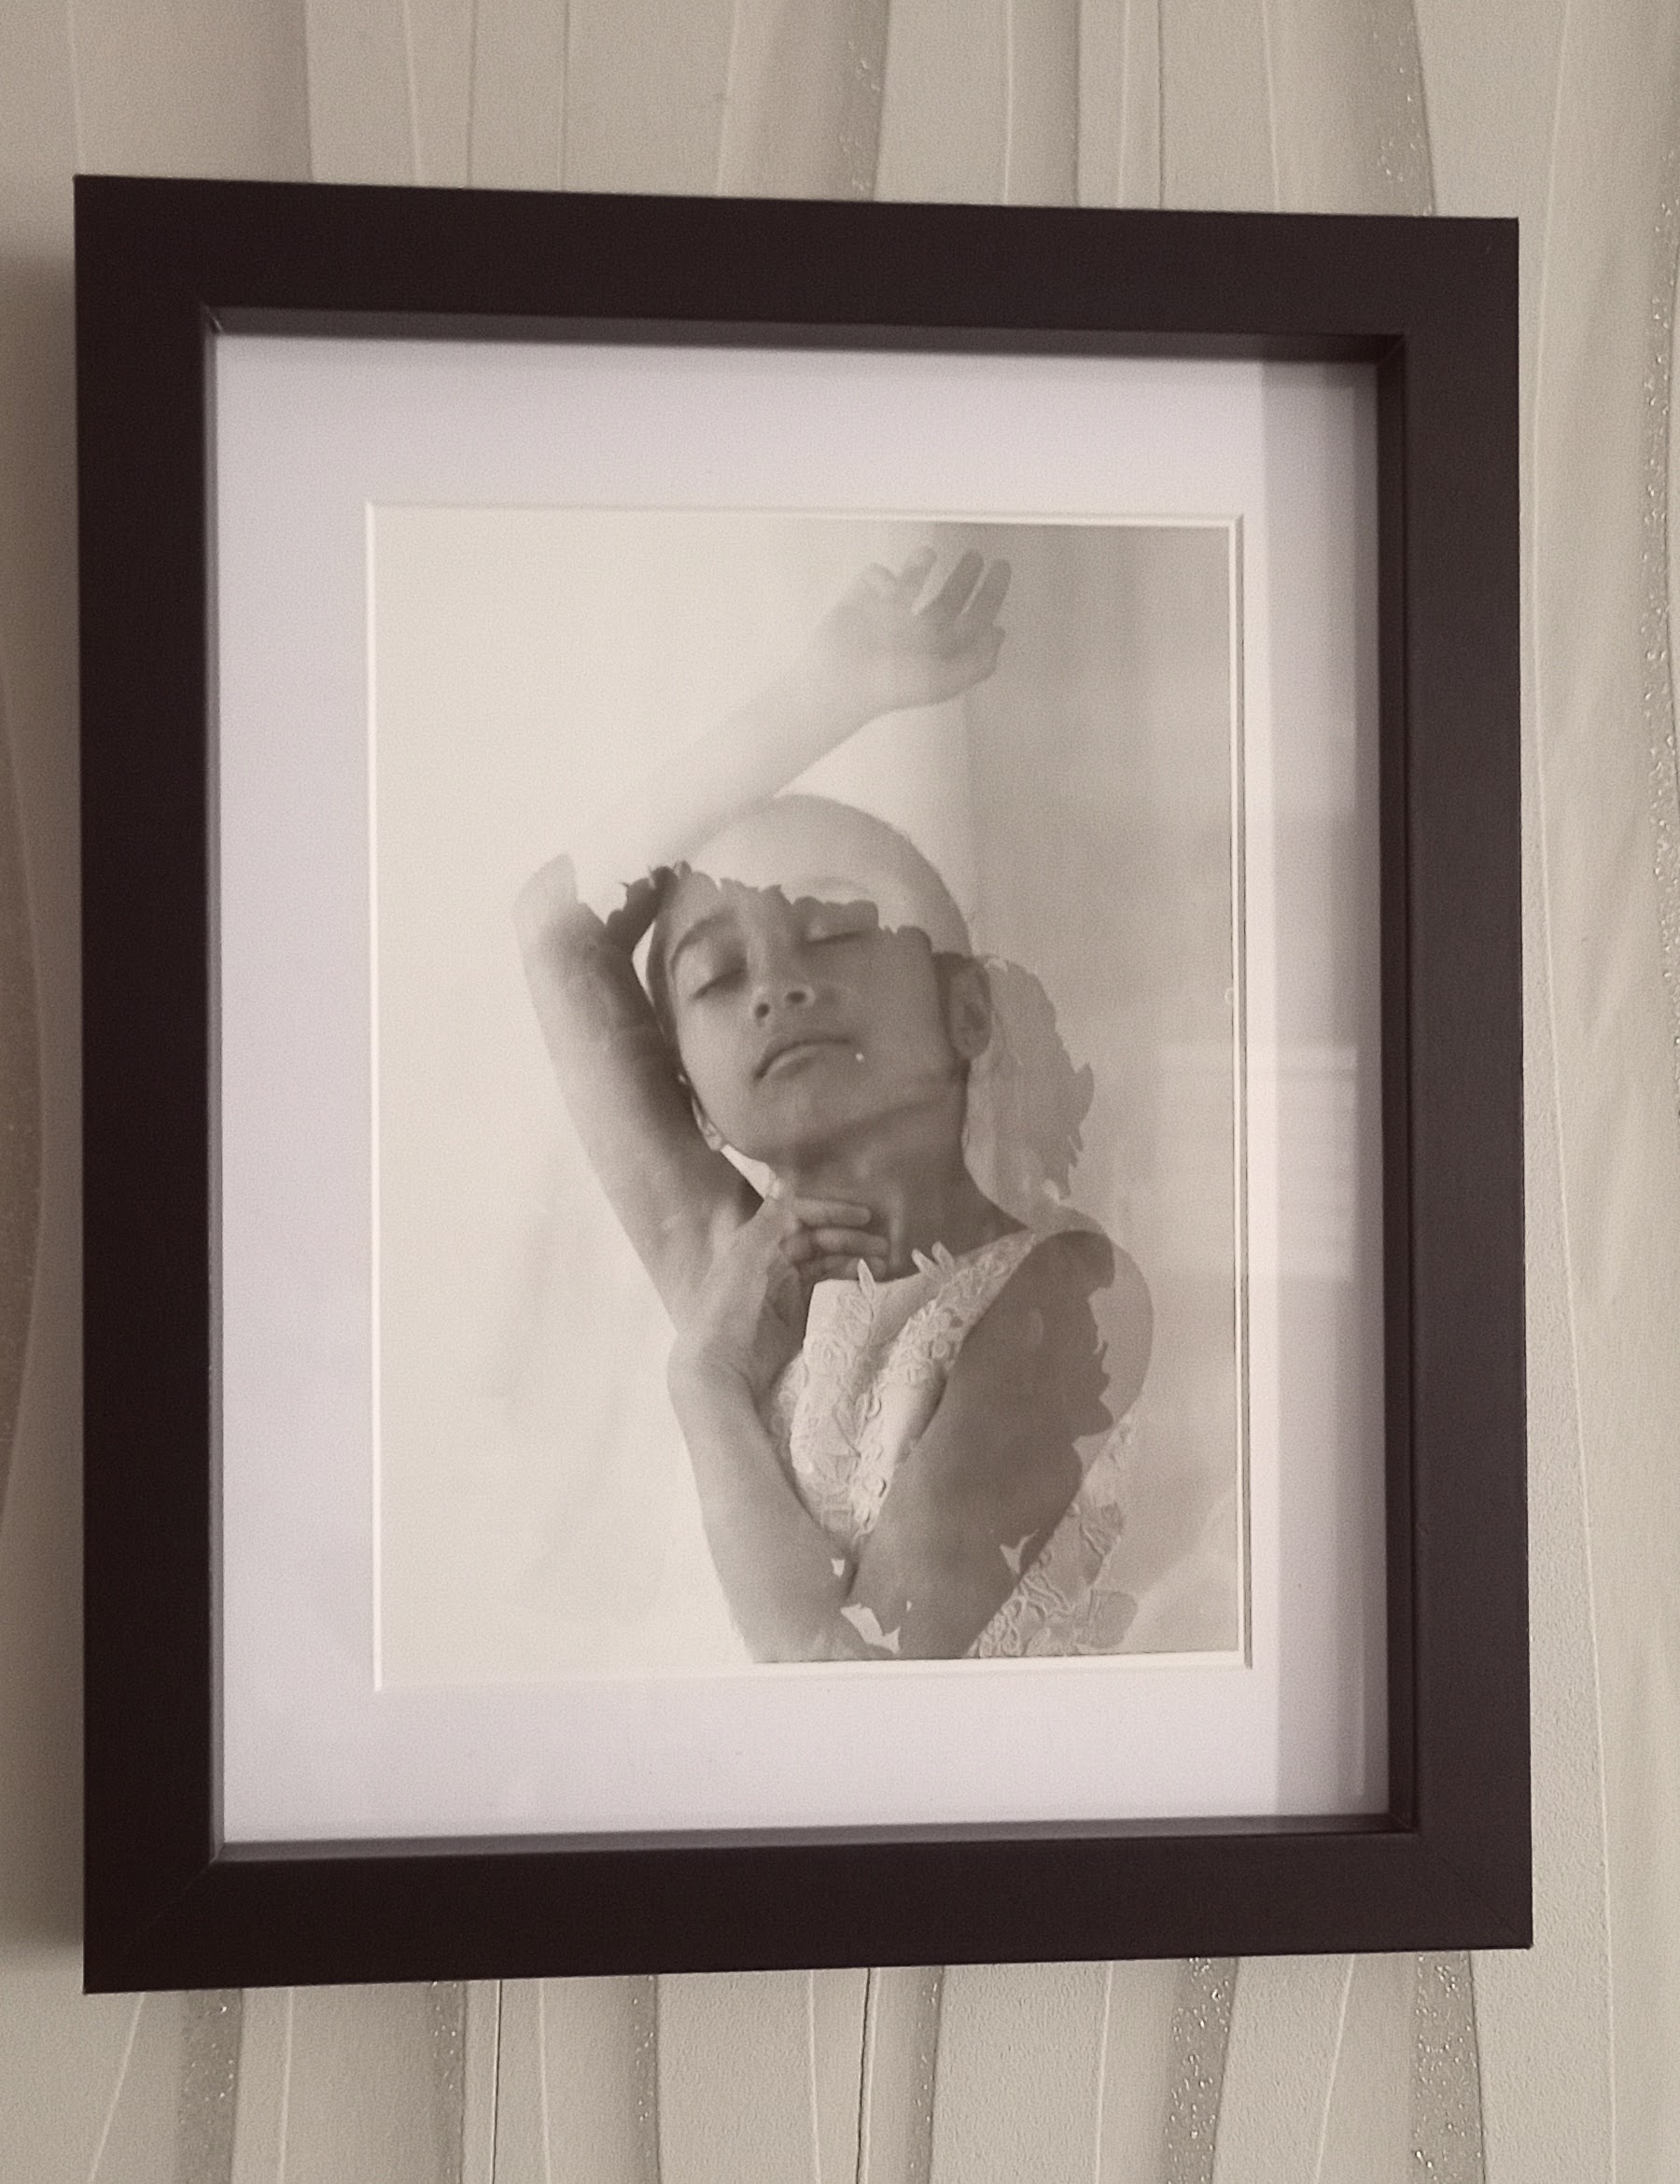
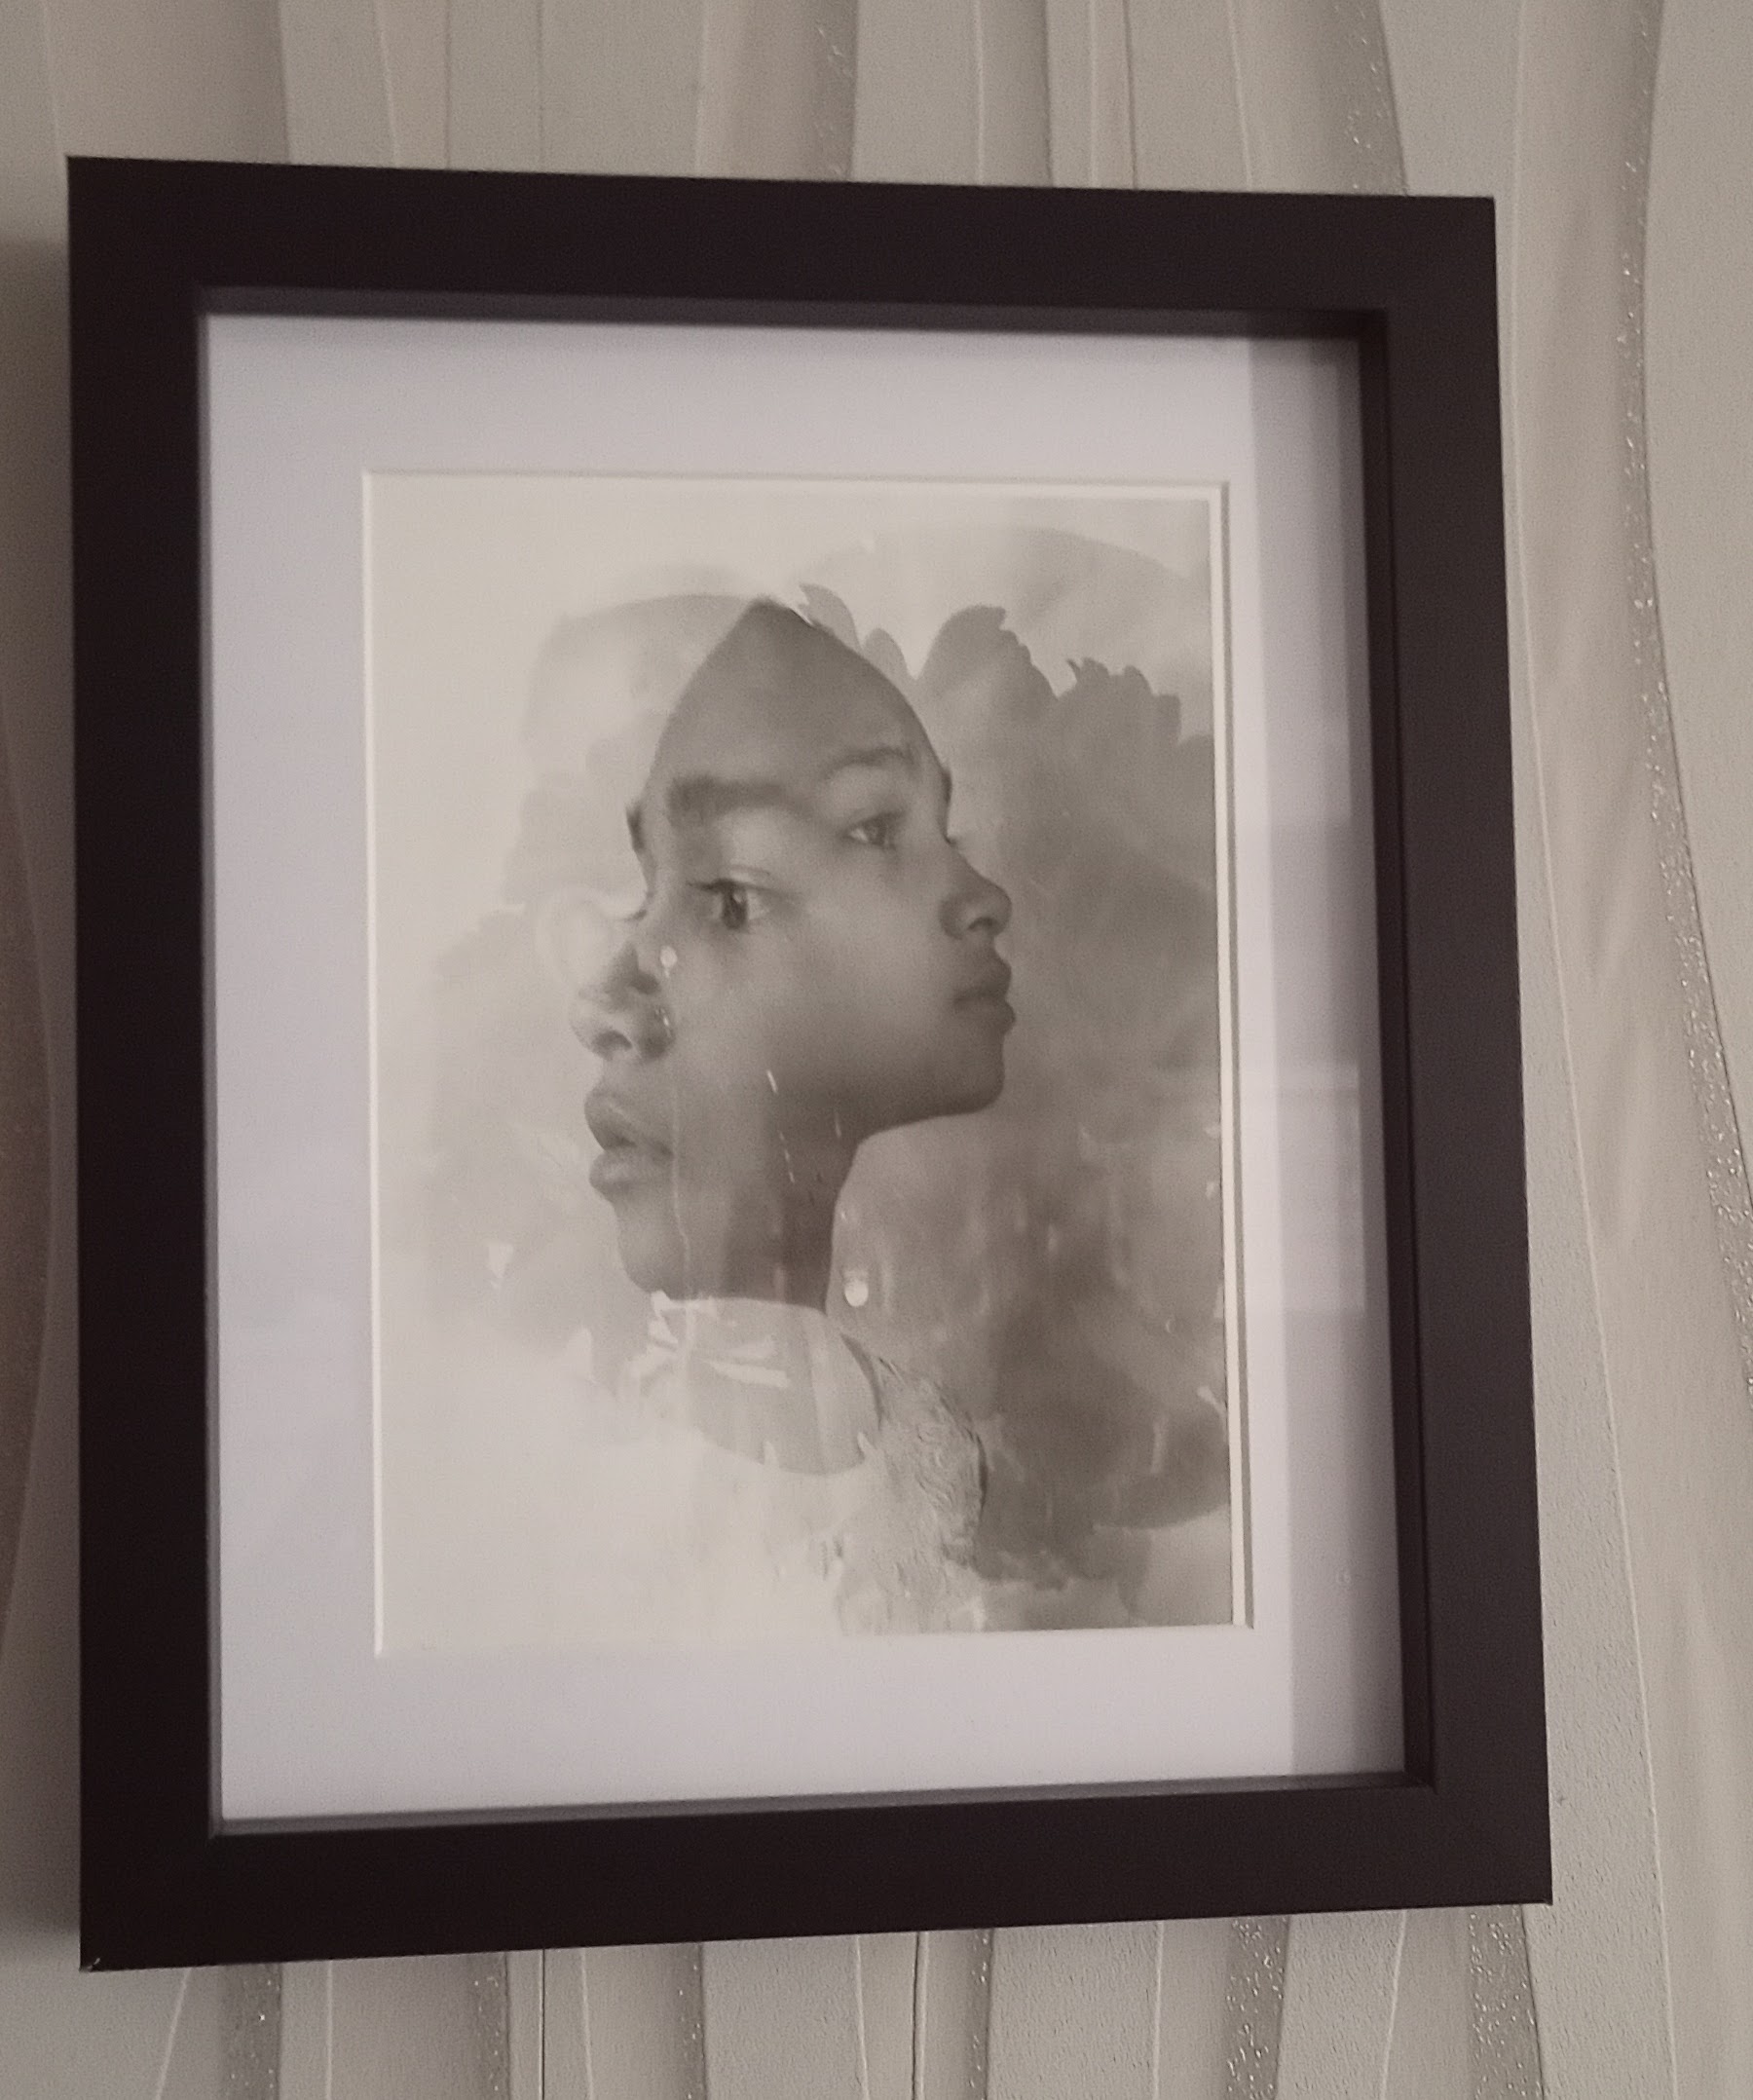
35mm film camera:
These two images were captured indoors using two studio lights.
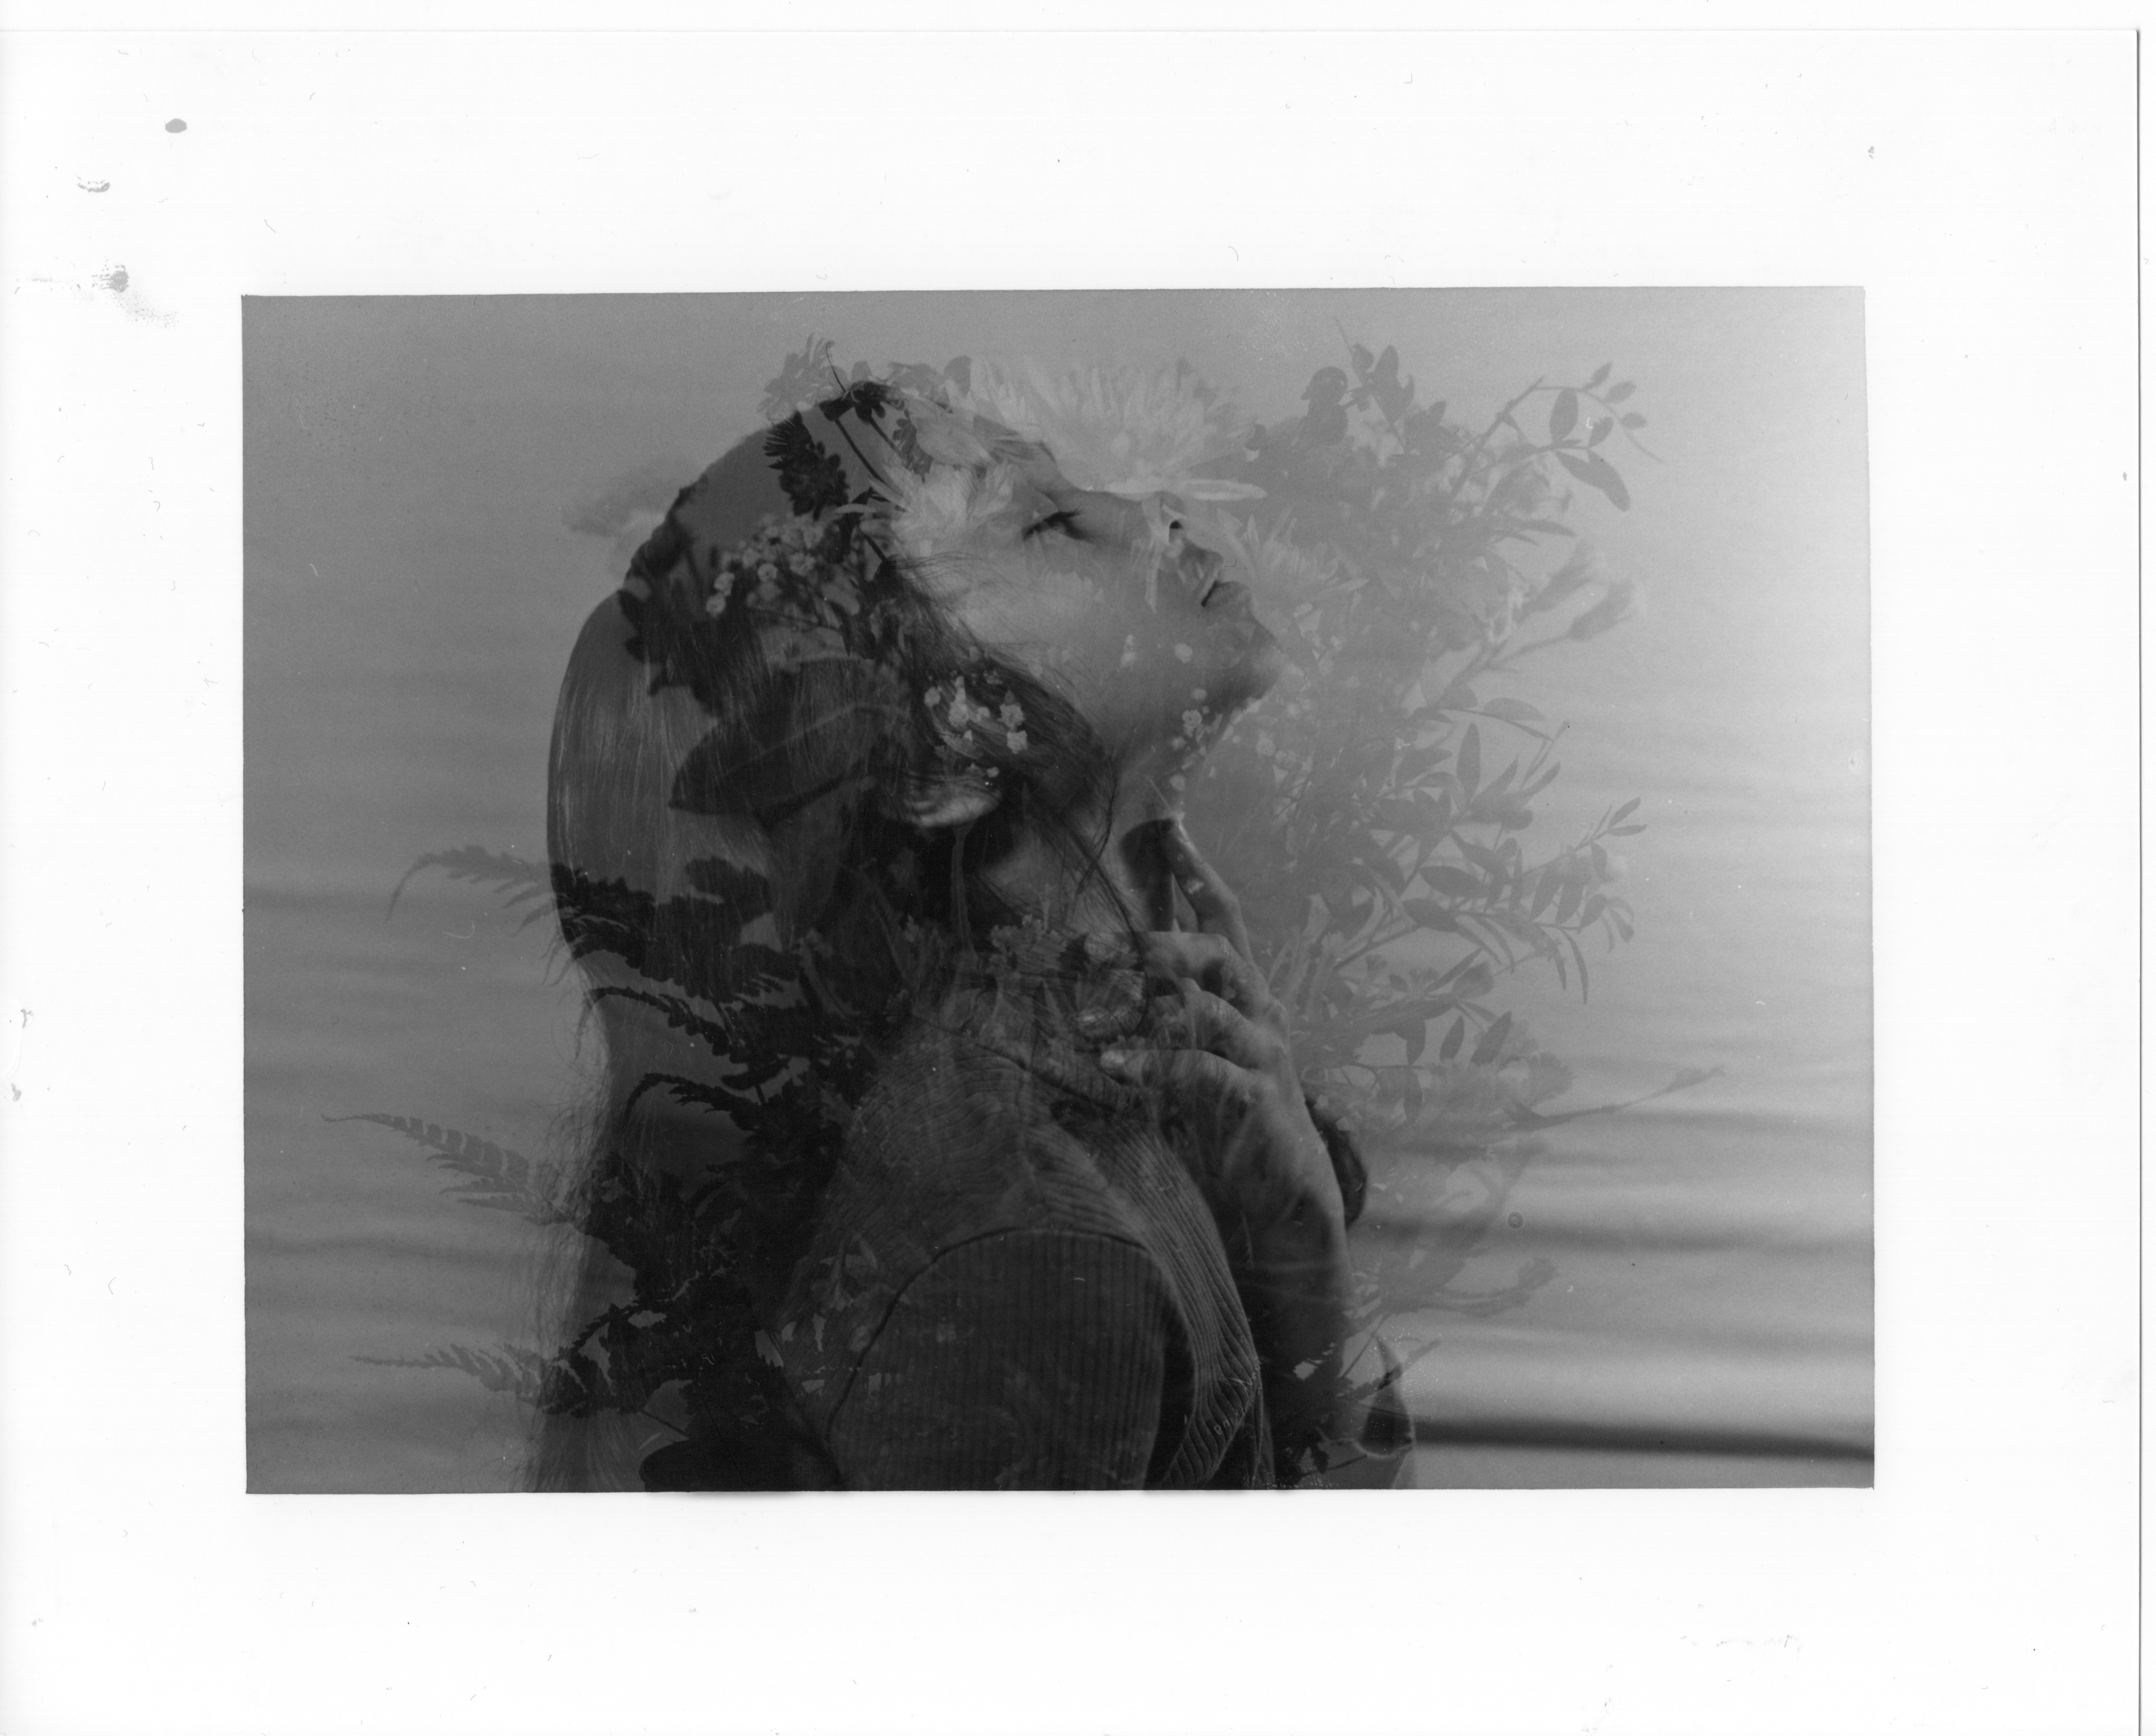
These two images were chosen because I like how the model’s figure communicates her love of nature and because the combination of double and triple exposures of her face with flowers helps me assess my development.

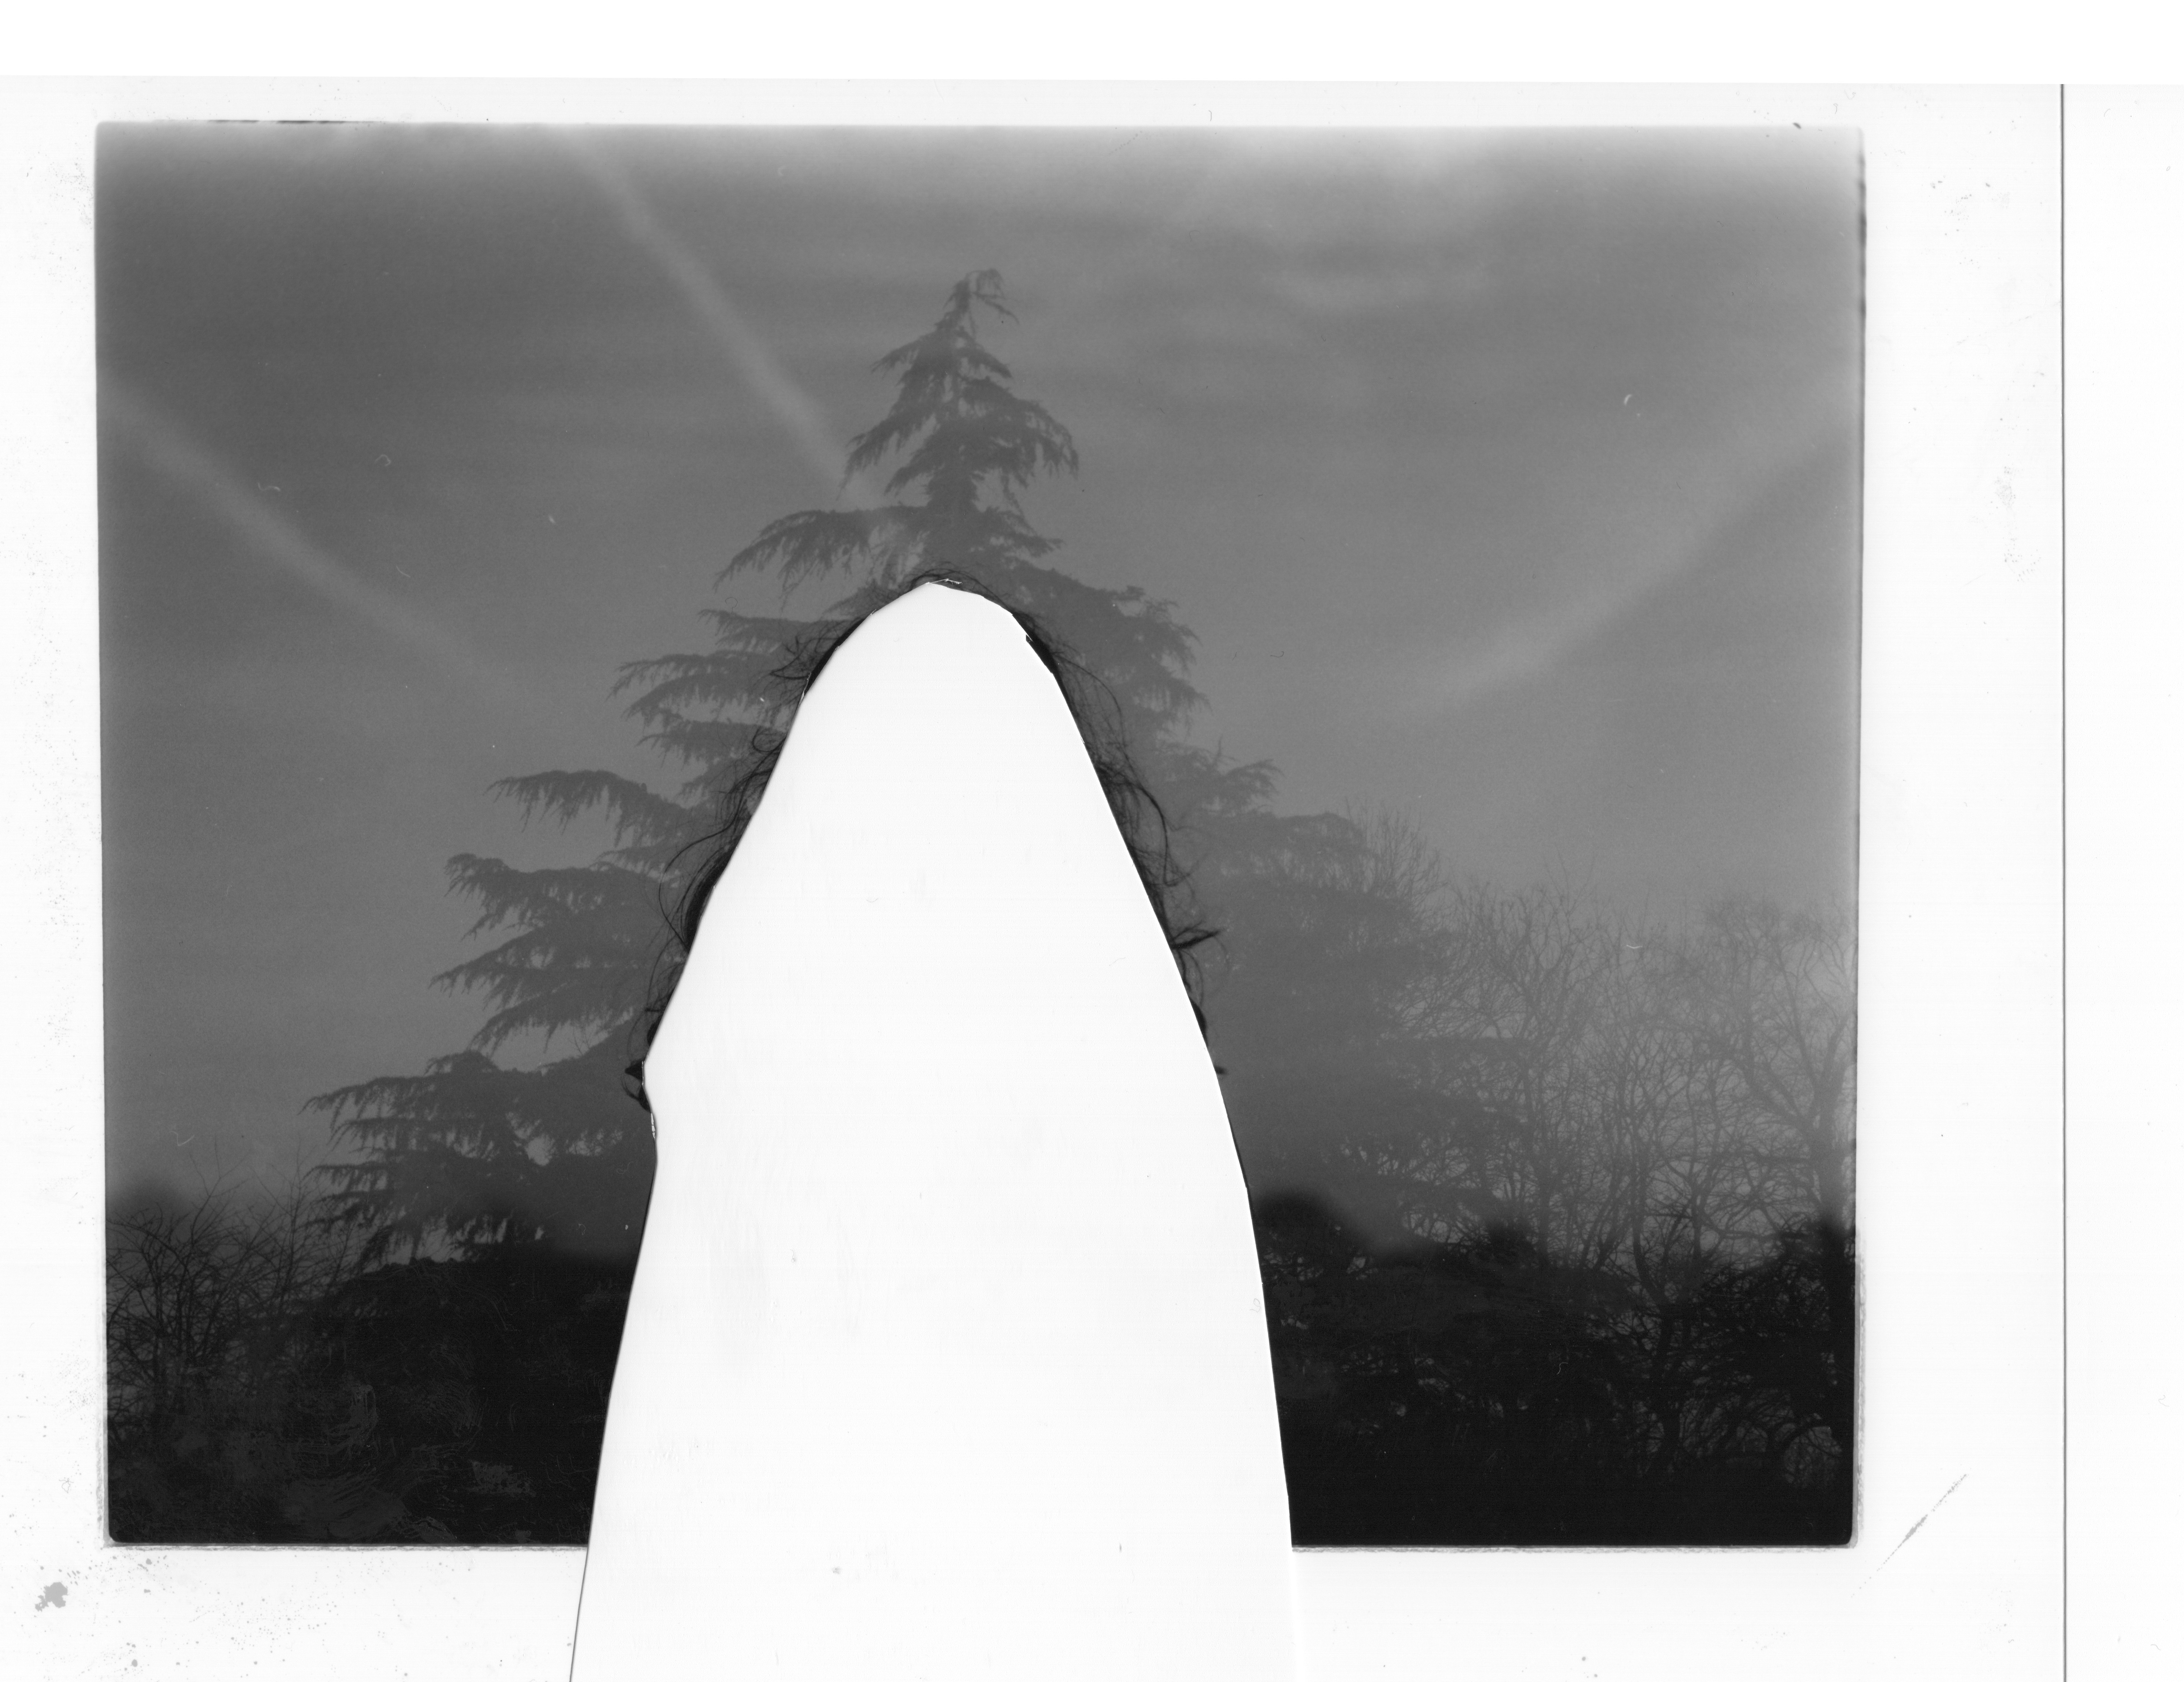
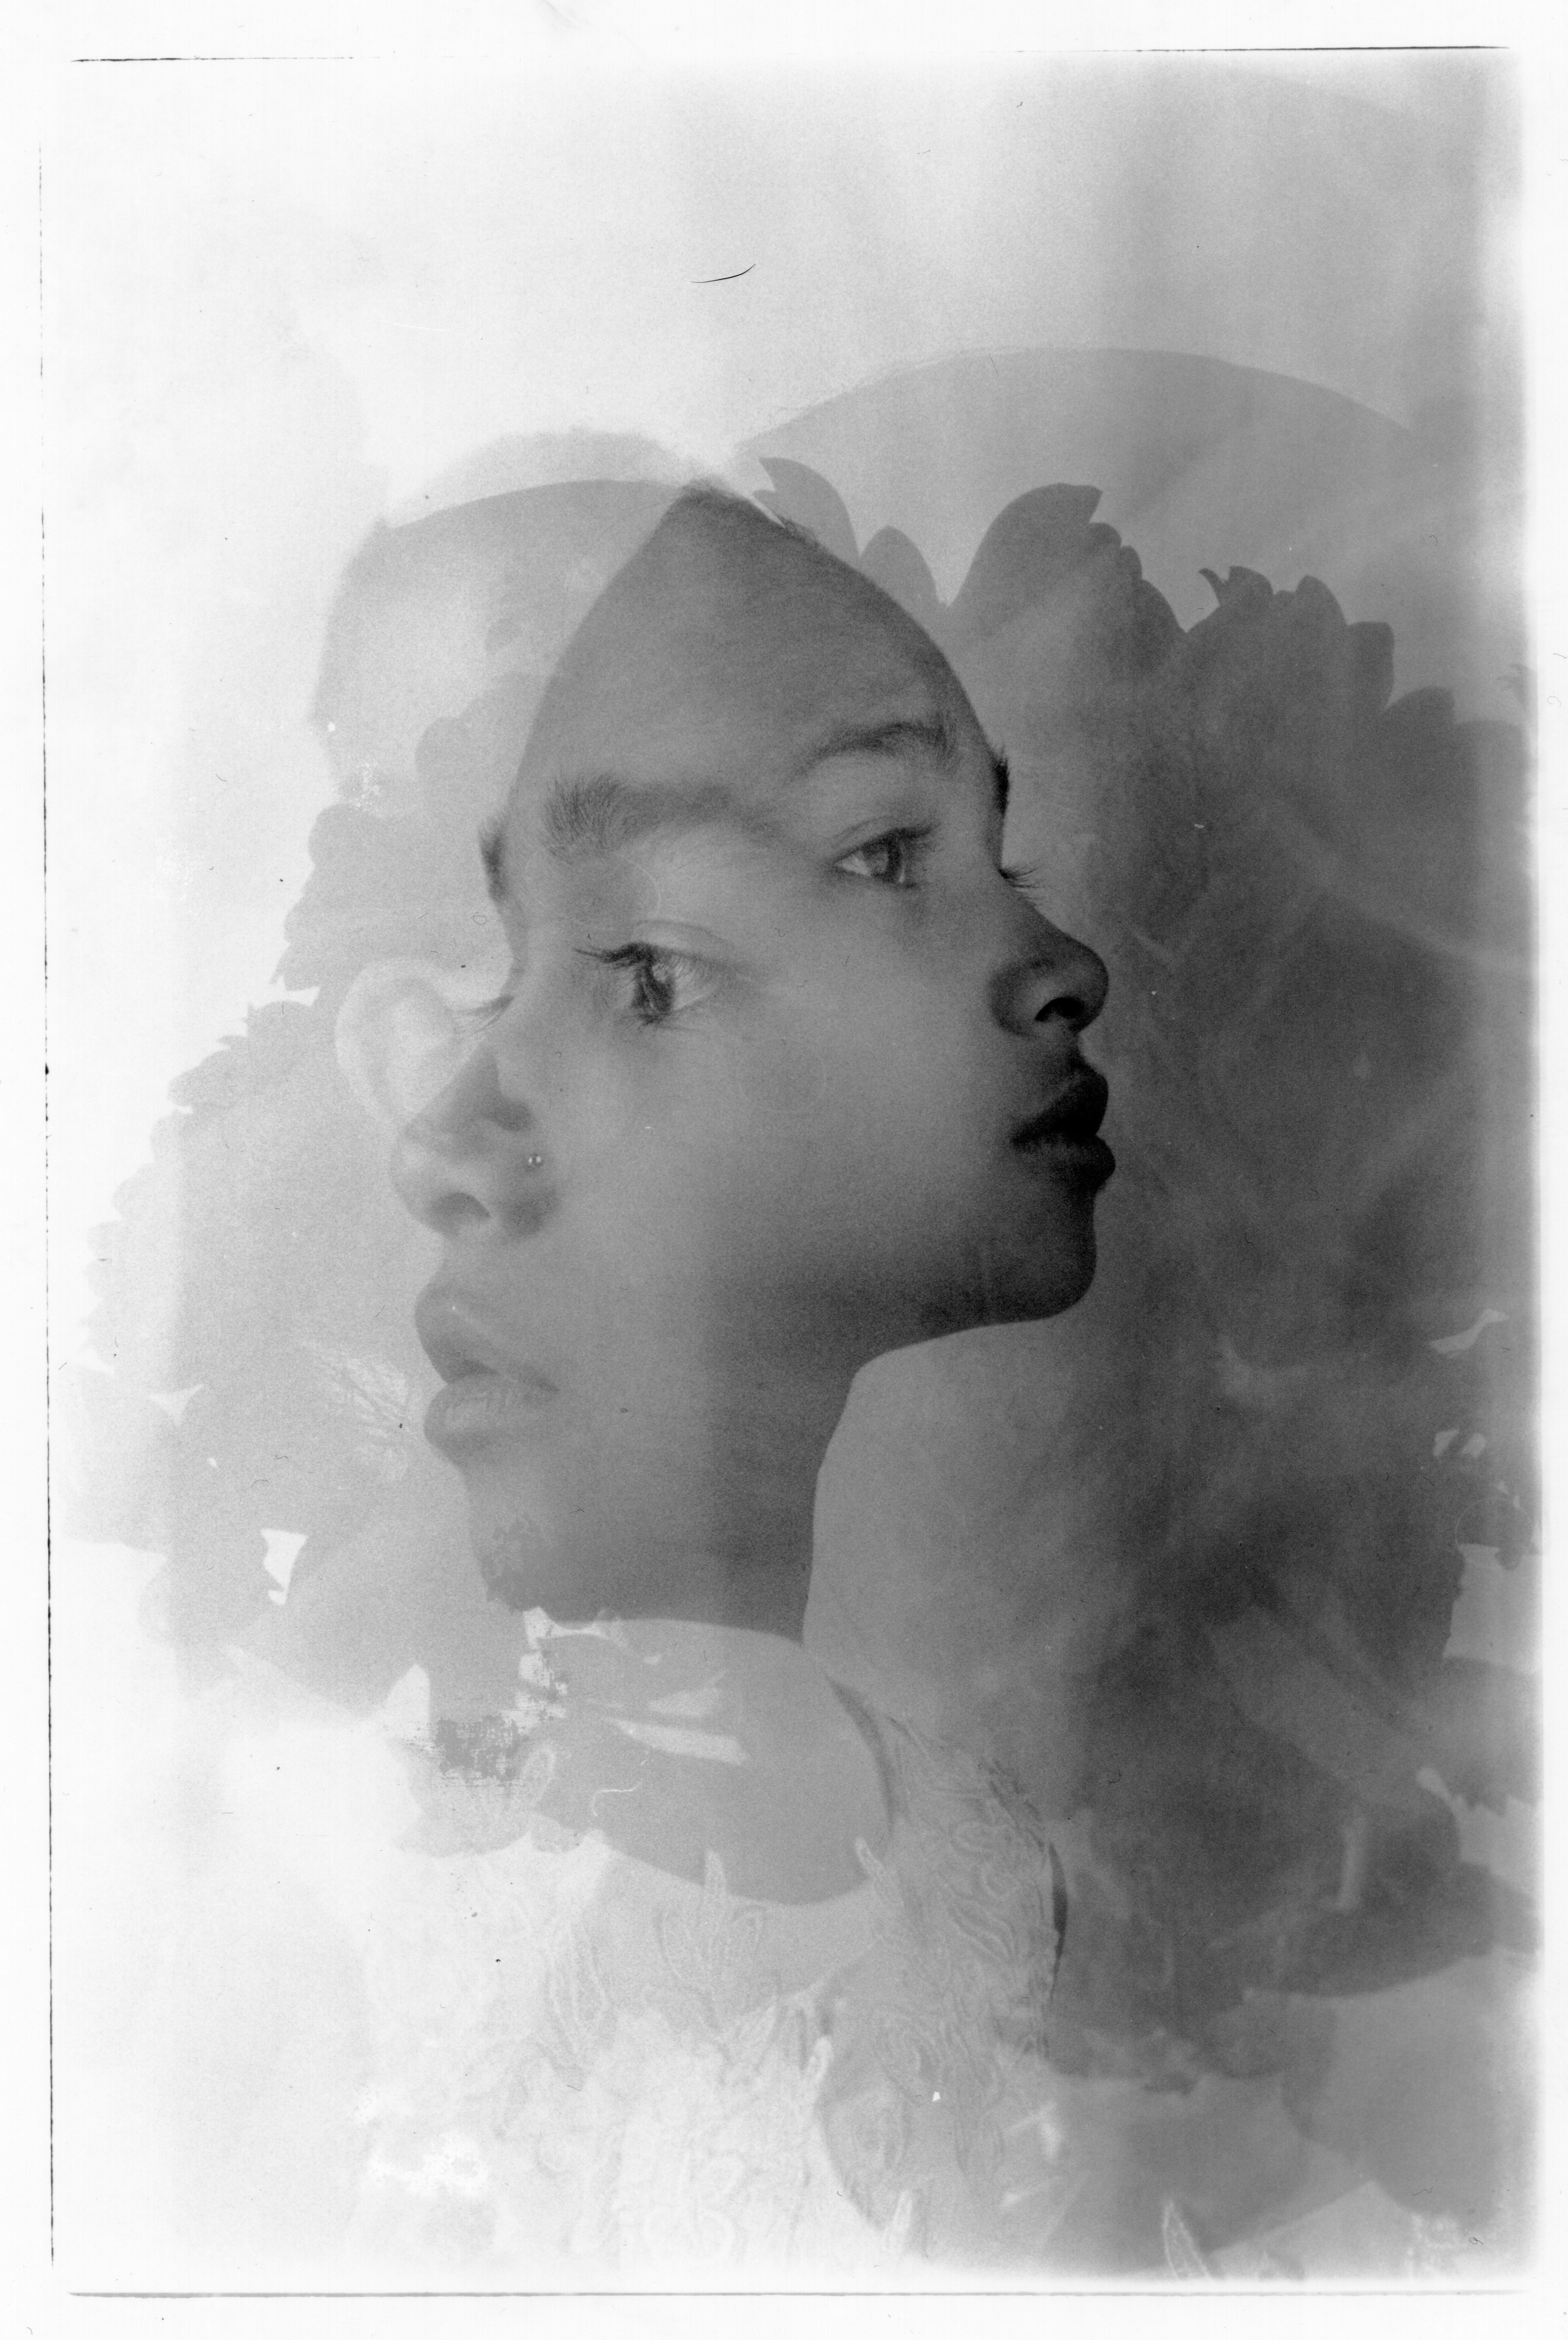
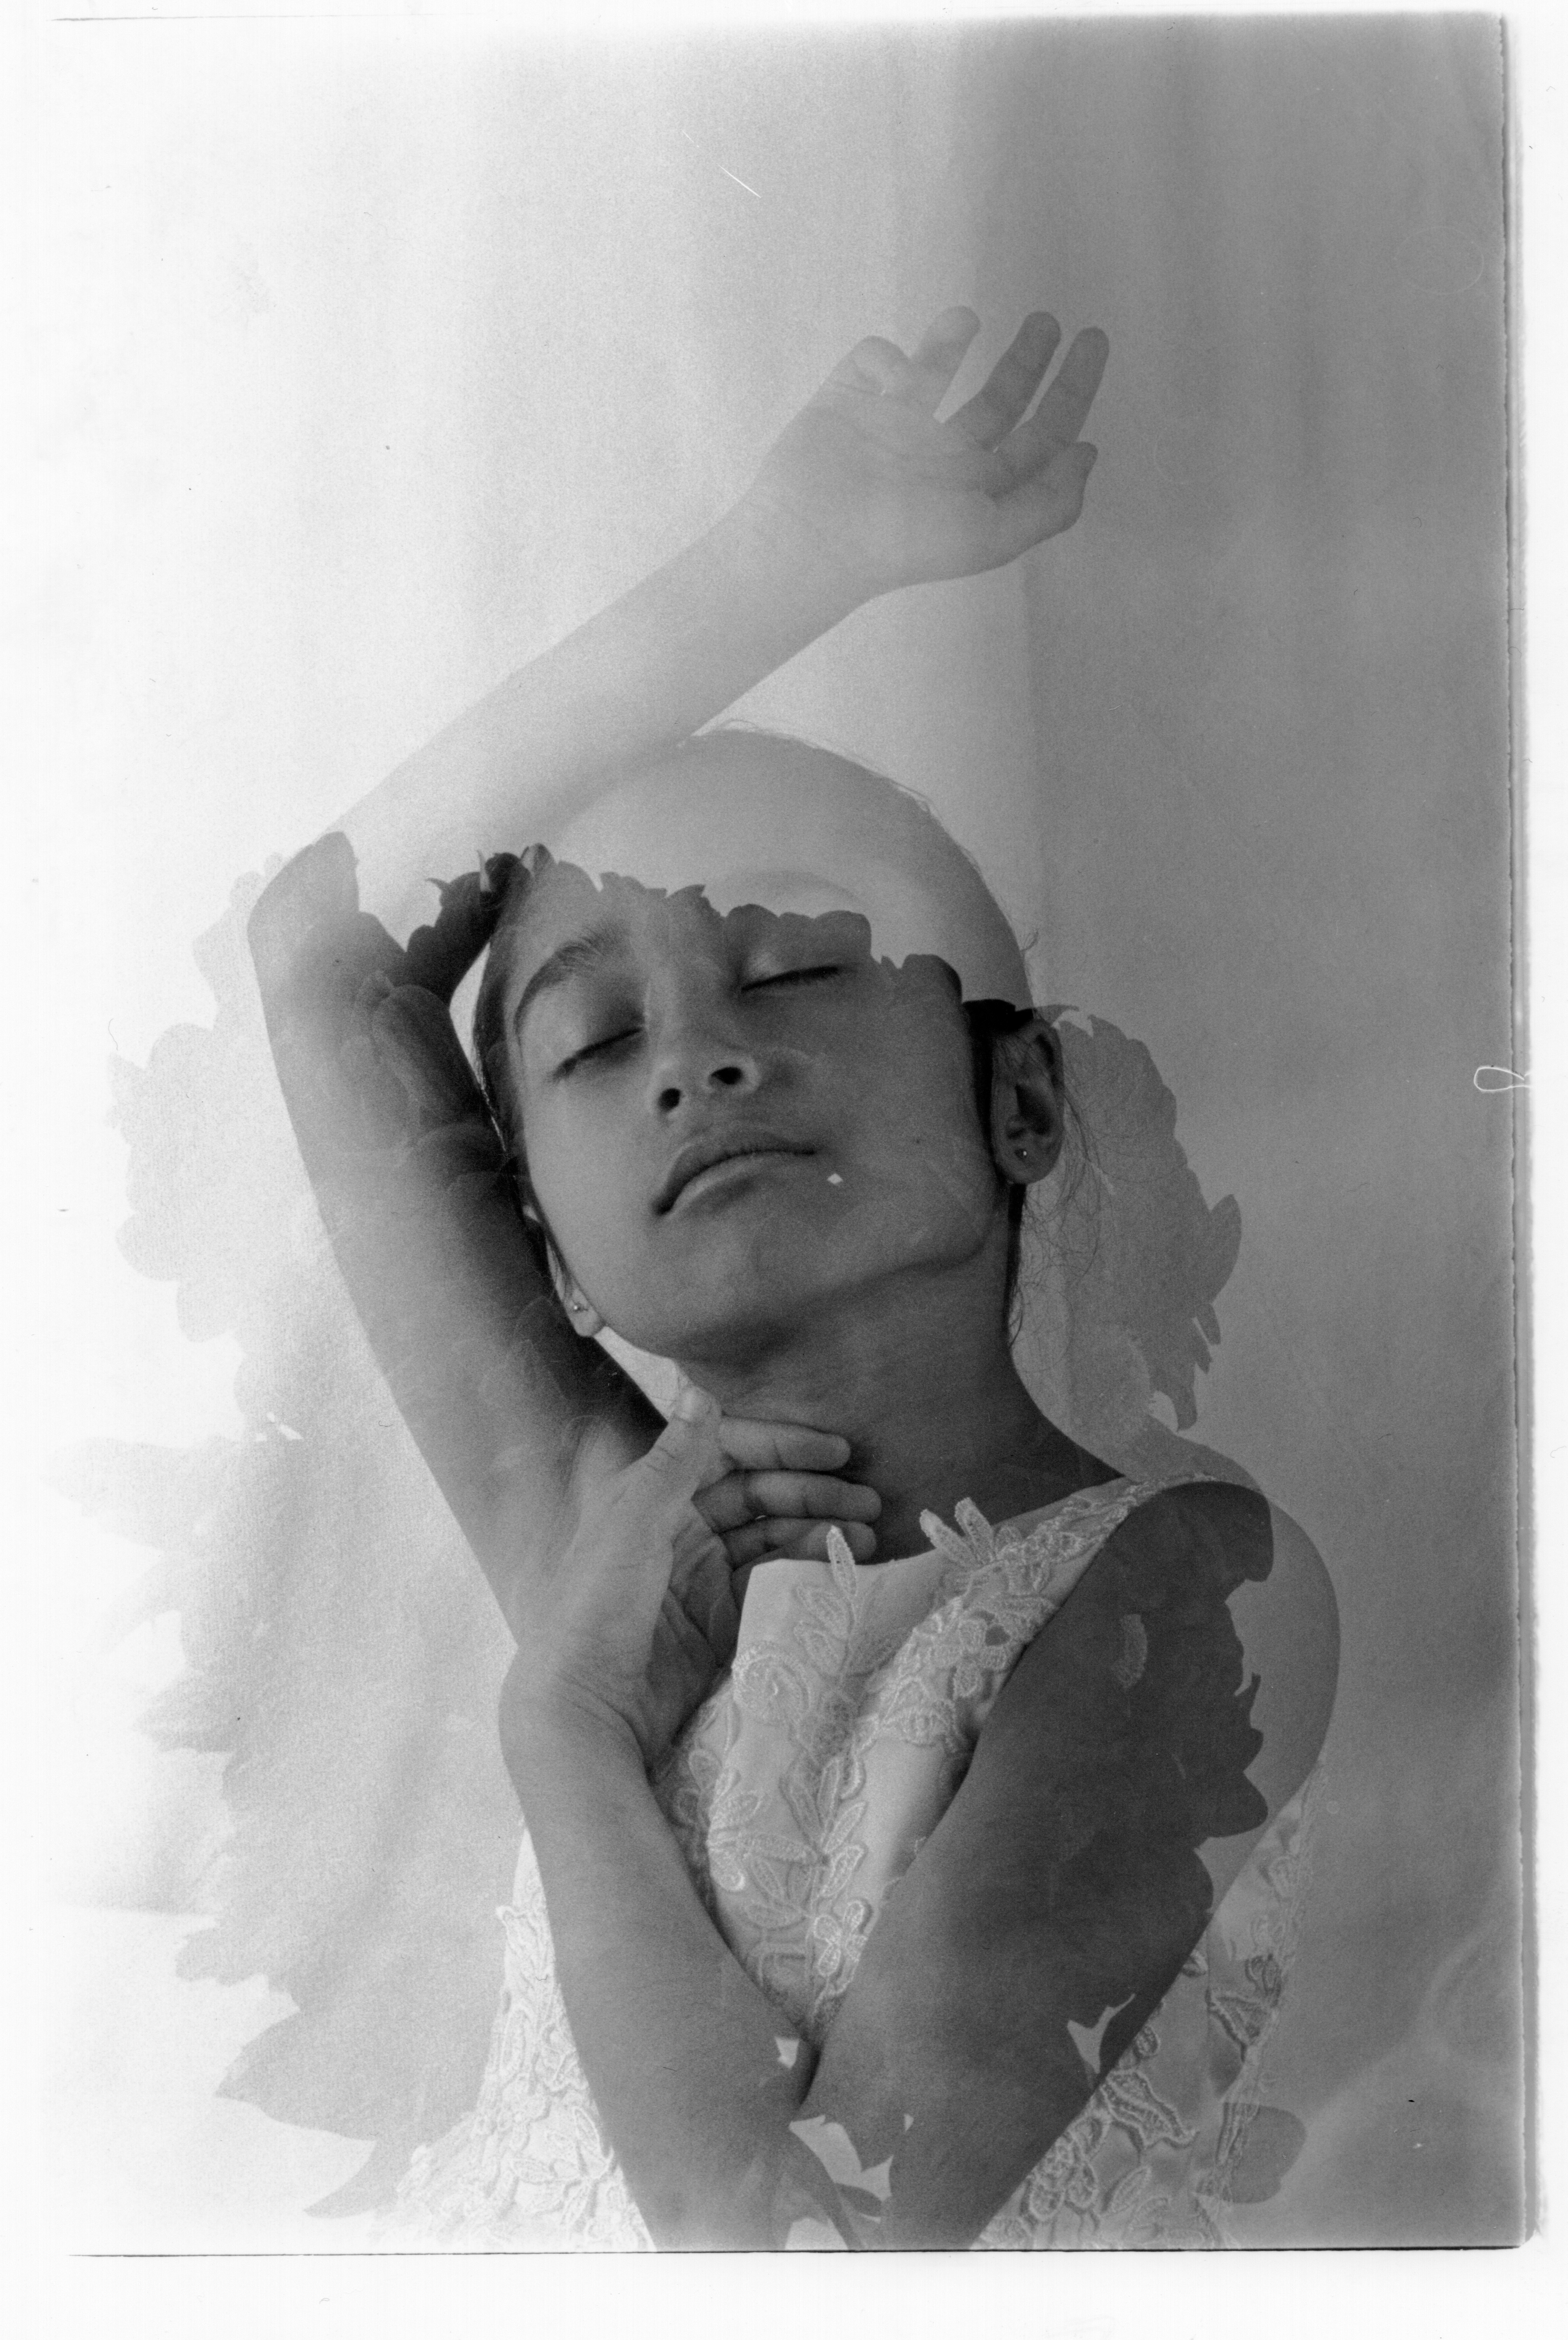
120mm film camera:
One of these two images was taken outside next to a pond, and I like it because it demonstrates how far I’ve come since I first tried using a medium format 6×7 camera for double exposure during my test shot (the first time using the camera). This image represents my knowledge that has been improved during the process of this project including the dodge and burn technique.
The second image was captured inside my mini studio using two continuous lights, a flower in double exposure technique. I chose this image because this was my second attempt with a medium format camera, it marked my memory of my first impression of analogue photography.
MY PRODUCTION RESUME (I KNOW THE WHOLE PROCESS)
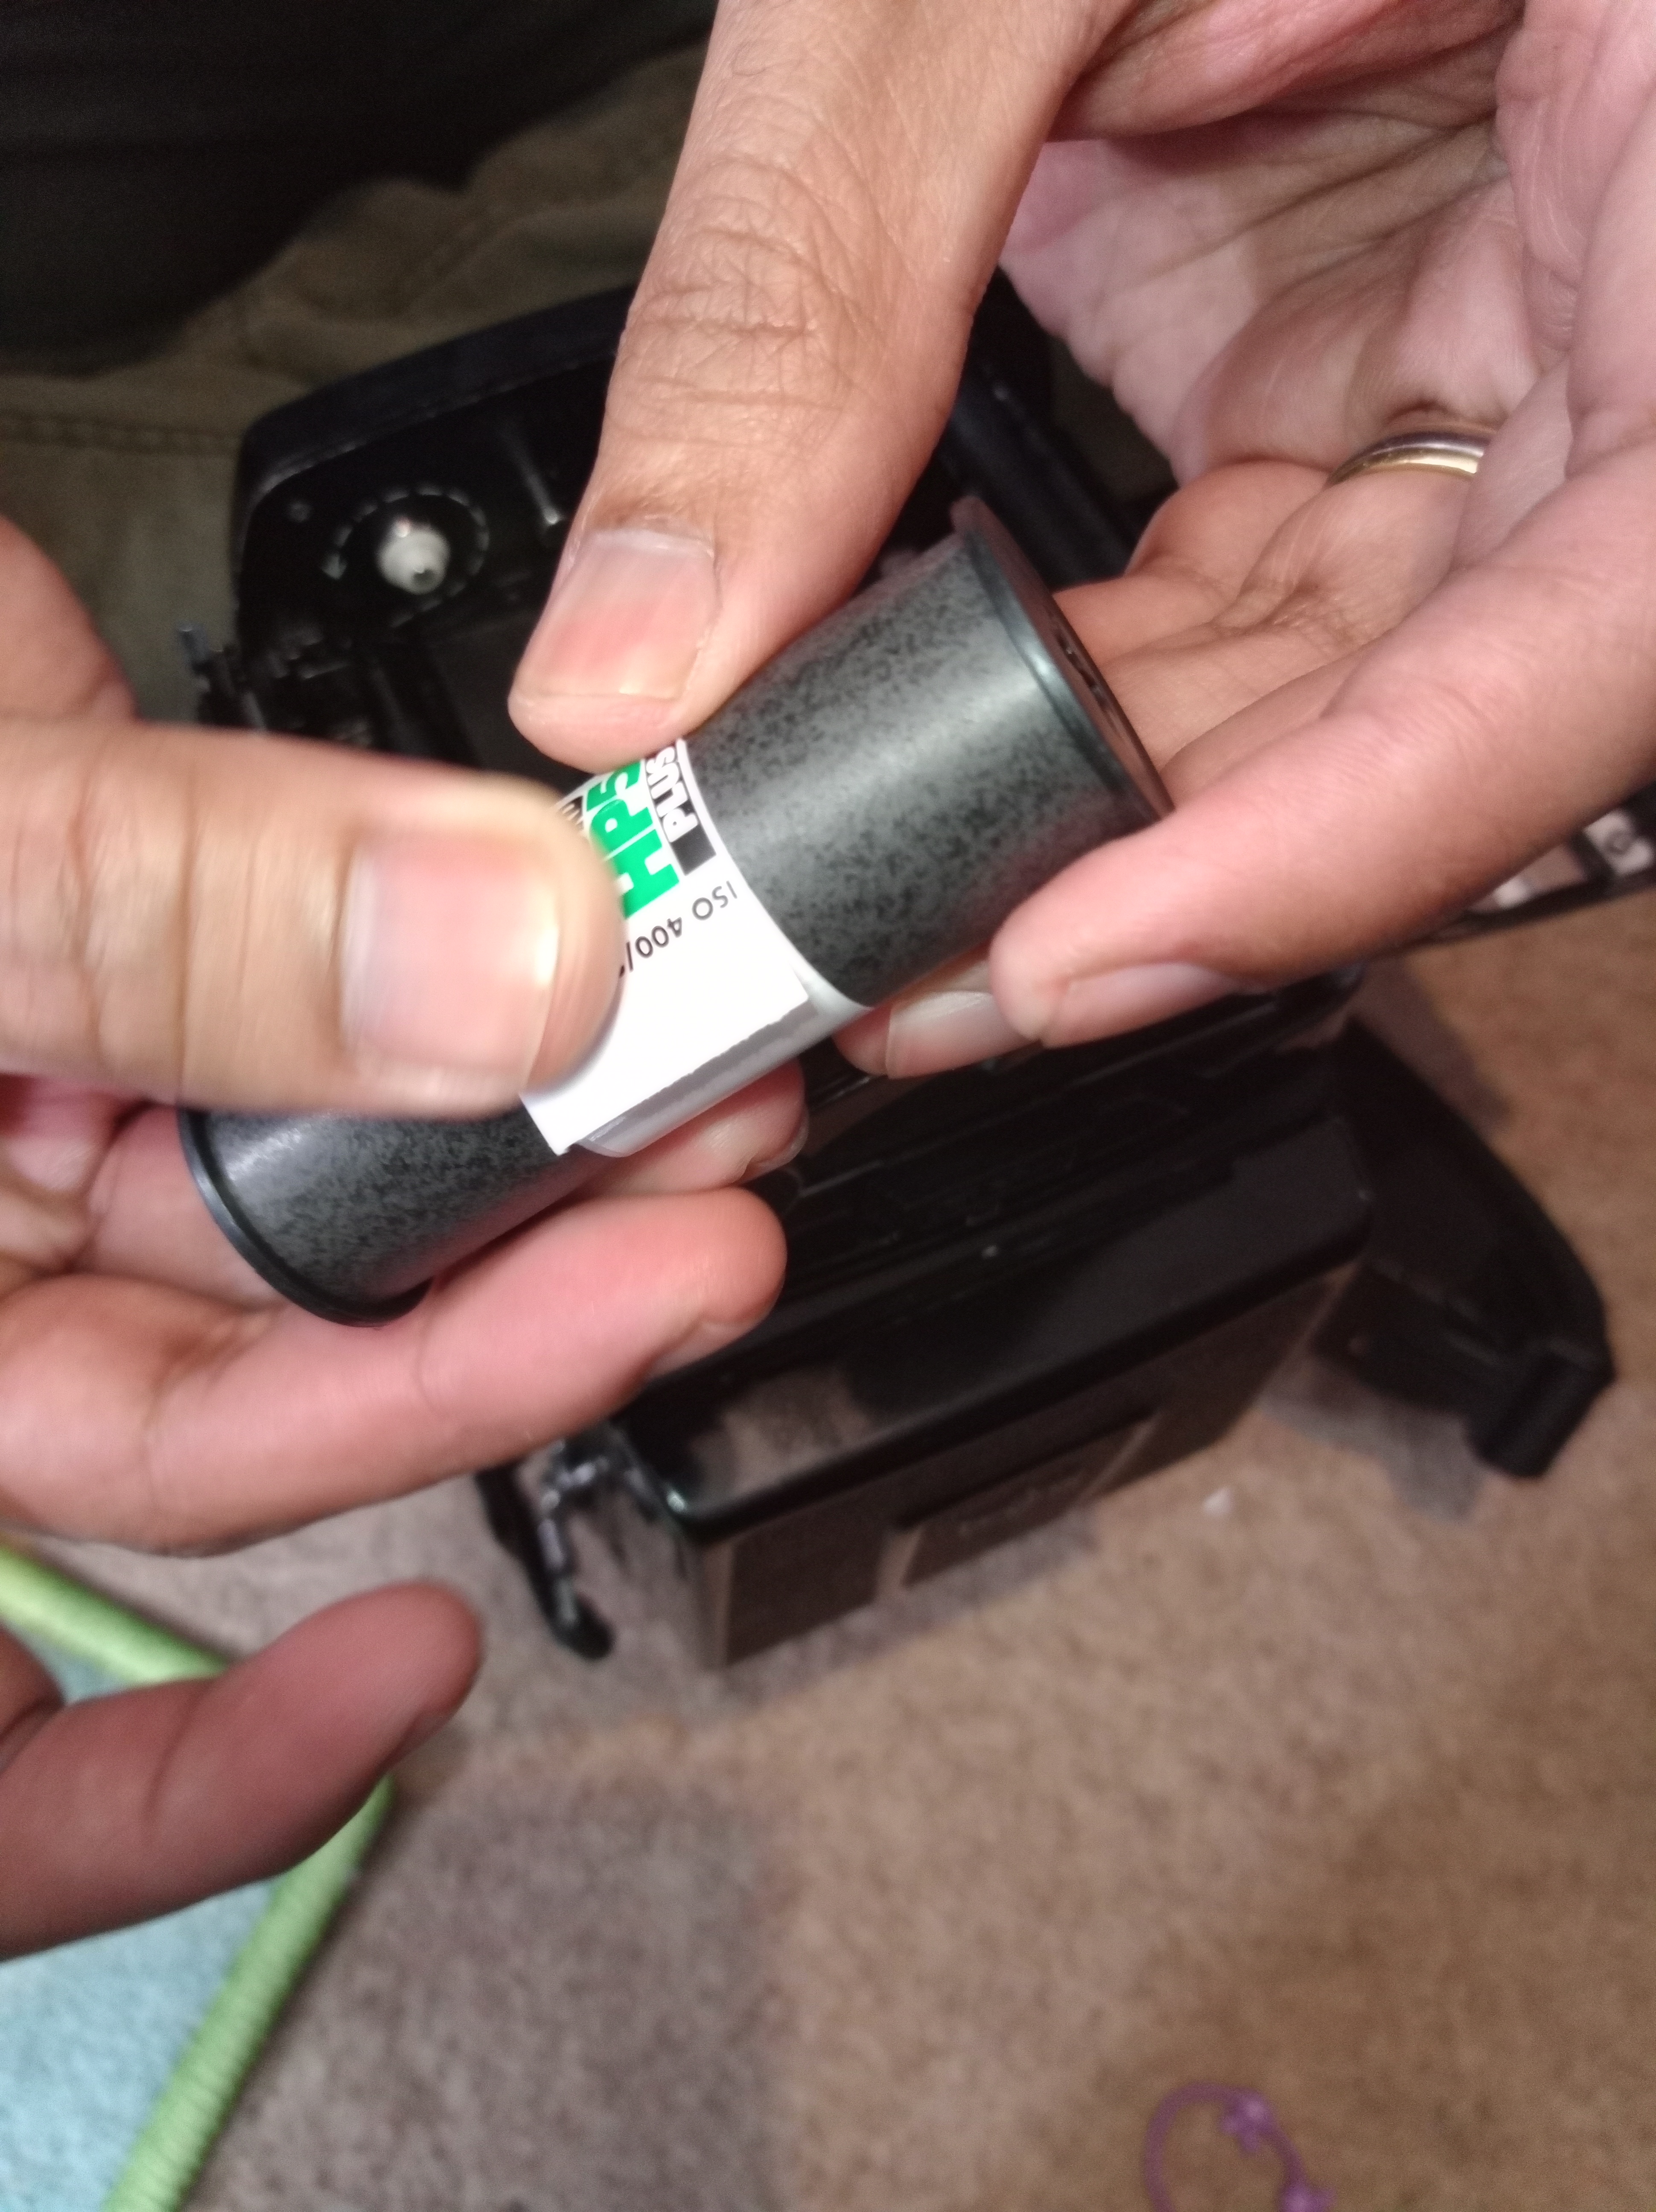
1st Step: Shoot


- Pick an analogue Canon Eos 5 camera and a 120 film medium format camera (do my own research for the camera that I wanted to use)
- Pick a film either black and white or colour film (I did my own research to fit my colour style)
- Load a film to the camera
- Photograph my project
- Unload the film and keep it in a safe box or safe tube to avoid light
2nd Step: Prepare film to process

- Go to the darkroom with the light on
- Prepare all the tools such as a canister opener, a pair of rubber gloves, a tank, lids, a scissor, a spiral, including film to process (all arrange for you to pick later) and safety google.
- Unload my film from the canister and load it into the spiral in the darkroom (not even a safelight on)
3rd Step: Prepare the chemical
- For 35 mm film, prepare developer 150ml and water 150ml water of 20o C mixed in a tube of a total of 300ml
- For 120 film, prepare 300ml of developer and 20o 300ml water mix in a tube of total 600ml
- The water stop bath for 35mm film is 300ml, water stop bath for 120 film is 600ml
- Prepare fixer-ready mix into the tube of 300ml for 35mm film and 600ml for 120 film
4th Step: Processing the film
- Each individual ISO has its own time period of how long the chemical should stay in touch with the film itself, for 125 iso is 10 minutes of processing, and 400 iso is 12 minutes of processing time. (For a complete guide please view The Massive Dev Chart.
- Pour the ready developer into the tank that contains film depending on the timer according to the iso (agitate every minute and rest)
- After reaching the end of processing time (pour the developer into the waste developer container)
- Pour the stop bath for one minute (agitate continuously and drain the water out of the tank)
- Pour the fixer into the tank for 2-4 minutes (agitate continuously and drain the fixer back to the fixer container because the fixer can be used until a week before it died) 20o of 300 pure water into the tank and agitate vigorously with 5 inversions; drain the tank. Repeat with 10 inversions, then 15, then 20.
- Pour another 300ml of 20o C water into the tank and drop a tiny of wetting agent into the tank once or twice and agitate 4 times, drain the tank
- Unload the film from the tank
- Use your two fingers to run both sides of the film to remove the water running in the film
- Dry it by hanging it in the dryer machine cabinet for 30 minutes (make sure to use something to weigh the film down to prevent it from being curled.
5th Step: Develop the ready negative in the darkroom with the safelight on.
- What I will need are a darkroom enlarger and enough working space.
- Negatives, puffer brush, loupe, paper print, focus finder, filters if required, safelight
- Chemicals such as developer to make the image appear on the paper, stop bath to bring the developer to an end, and fixer to make the developed image last permanent on the paper.
- Container for water, a container to mix my chemicals 3 times, a stirrer, measuring cylinders, a thermometer, a set of 3 developing trays and tongs and a darkroom timer.
- For safety when handle ling the chemicals and negatives use: Gloves and safety glasses.
6th Step: preparing the chemicals

- The 200ml of developer and 1800ml of 20o pour into the developer tray and stir it (ideally it should be enough to cover the size of a3 and a4 papers)
- 2 litters water stop bath into the tray, make sure the water is 20o C, if too cold I must extend the processing time)
- Pour the 2 litters of fixer into the tray
7th Step: Chose My negative.

- Recommend using a loupe to look through the negatives and pick one to develop. However, because I don’t have one, I bring it out to the room’s light to see it and picked one.
- Place the negative into the negative carrier (shine side facing down)
- Use a puffer brush to remove any dust that stuck in the negative
- Load the carrier into the enlarger place
- Focusing your image that the enlarger projecting onto the easel
- Turn off the room light and switch on the safe light (if you have good visibility, you can switch off the room light and turn on the safe light at the beginning of the process when you enter the darkroom)
8th Step: Enlarger setup
- Adjust the enlarger head to bring the size of the image onto the easel according to the paper size that I desired
- Use the knobs wheel located on the side of the enlarger to focus the image that projecting onto the easel by looking through the focus finder
- Adjust the lens aperture on the enlarger to project enough light onto the easel (normally, f/8 is a good start to an overall sharp image and good light)
- Adjust the grade level of black and white that you desire by tweaking the cyan and magenta knobs wheel on the enlarger (For black and white enlarger printer)
9th Step: Test Print


- Load a paper onto the easel (shine side up) and conduct a test print to find the best exposure time and good grade level of cyan and magenta for your desired highlight and shadow.
- Set the timer for 3-second increments. Cover approx. 4/5ths of the paper and expose for 3 seconds, repeat until you have revealed all the paper. (Approximate 4/5 exposures)
- Take my paper and load it into the chemical: start with the developer for 1 ½ or 2 minutes (this is where the magic happens, watch the timer and see your image appear)
- Use the developer tong to lift the paper from a developer into the stop bath (remember to avoid the developer tong touching the stop bath liquid for cross-contamination)
- After 10 seconds in the stop bath, use the tong from the stop bath and lift the paper and put it into the next tray of fixer. (Remember to always avoid cross-contamination chemicals from the tong)
- Fixer should only take 30 seconds to 1 minute if the fixer is fresh.
- Use the tong to lift my paper and load it into the running water to rinse my print.
- Turn the room light on to examine your print. It should show 5 strips, each strip is darker than the previous one according to the exposure time that I applied to them. (Each strip represents the exposure time of 3 seconds, 6 seconds, 9 seconds, 12 seconds, and 15 seconds.)
- From the examining test print, I can choose one of the best exposure times that represent the highlight and shadow of my image.
10th Step: Applied Dodge and Burn Method
- After picking one image to print
- I will analyse the image to see which part of the image I should apply dodge and burn
11th Step: Making the Final Print
- Make sure the room light is off and switch the safe light on before taking the paper out of the box. (As the paper cannot exposure to the white or normal light of any lights)
- Load the paper onto the easel
- Set the exposure time that you chose
- Hit the exposure button.
- Bring the paper to the chemicals and repeat the processing time with the chemicals (developer for 1 ½ to 2 minutes, 10 seconds of stop bath, and 1 ½ to 2 minutes of fixer, wash your print for 6 minutes, and dry it).
- Congratulation, I have made my first analogue print.
12th Step: Framing


- I went to the exhibition gallery at Martin Parr Foundation and the RWA photography exhibition
- Print a sample paper to tryout my print with the professional framing at the gallery
- Talk to the artist or photographer about the framing type and size (Anne-Katrin Purkiss)
- Decide my frame type and size.
- and Congratulation, I have framed all 4 of my final prints. (6 by 8 with mount)

- The size of the frame is 8 x 10 without the mount.
- For my image, I decide on the frame 6 x 8 with the mount.
- I got my frames from B&M retail for £3.50/each
EVALUATION
Proposal feedback
In my proposal, I said that I would use both a camera and a darkroom to produce a print of double exposure. I eventually decided that my favourite image was the double exposure created by the camera. Since I was unable to perfect it while creating it, I believe it to be insufficiently excellent to be considered a work of high art. Even if the product is in no way pleasing, at least I attempted the sandwich approach and the one-by-one exposure method.
Film Roll
Plan ahead for the place you want to shoot in, whether it’s inside, outdoors, on a bright day, or on a cloudy day, in order to choose the best film to shoot. The film camera’s ISO is fixed and set at 50, 125, 400, etc.
There is no way to remove the film from the camera once it has been loaded since doing so risks the danger of exposing the film to light. To choose the appropriate ISO, be aware of where you’ll be and what the weather will be like.
I used a 100 ISO setting for my studio shoot since I had complete control over the lighting.
For the outdoor location, I would go for the 400 ISO in general.
Photograph Day
Even if it was challenging, I can’t deny that it was a lot of fun to work on the project I had to finish on my own.
The first step in using an analogue film camera is to learn how to operate it, how to load film into it, and how to utilise the camera’s double exposure mode since various cameras have various ways of achieving double or multiple exposures. I have to get better at it and feel more at comfortable with it.
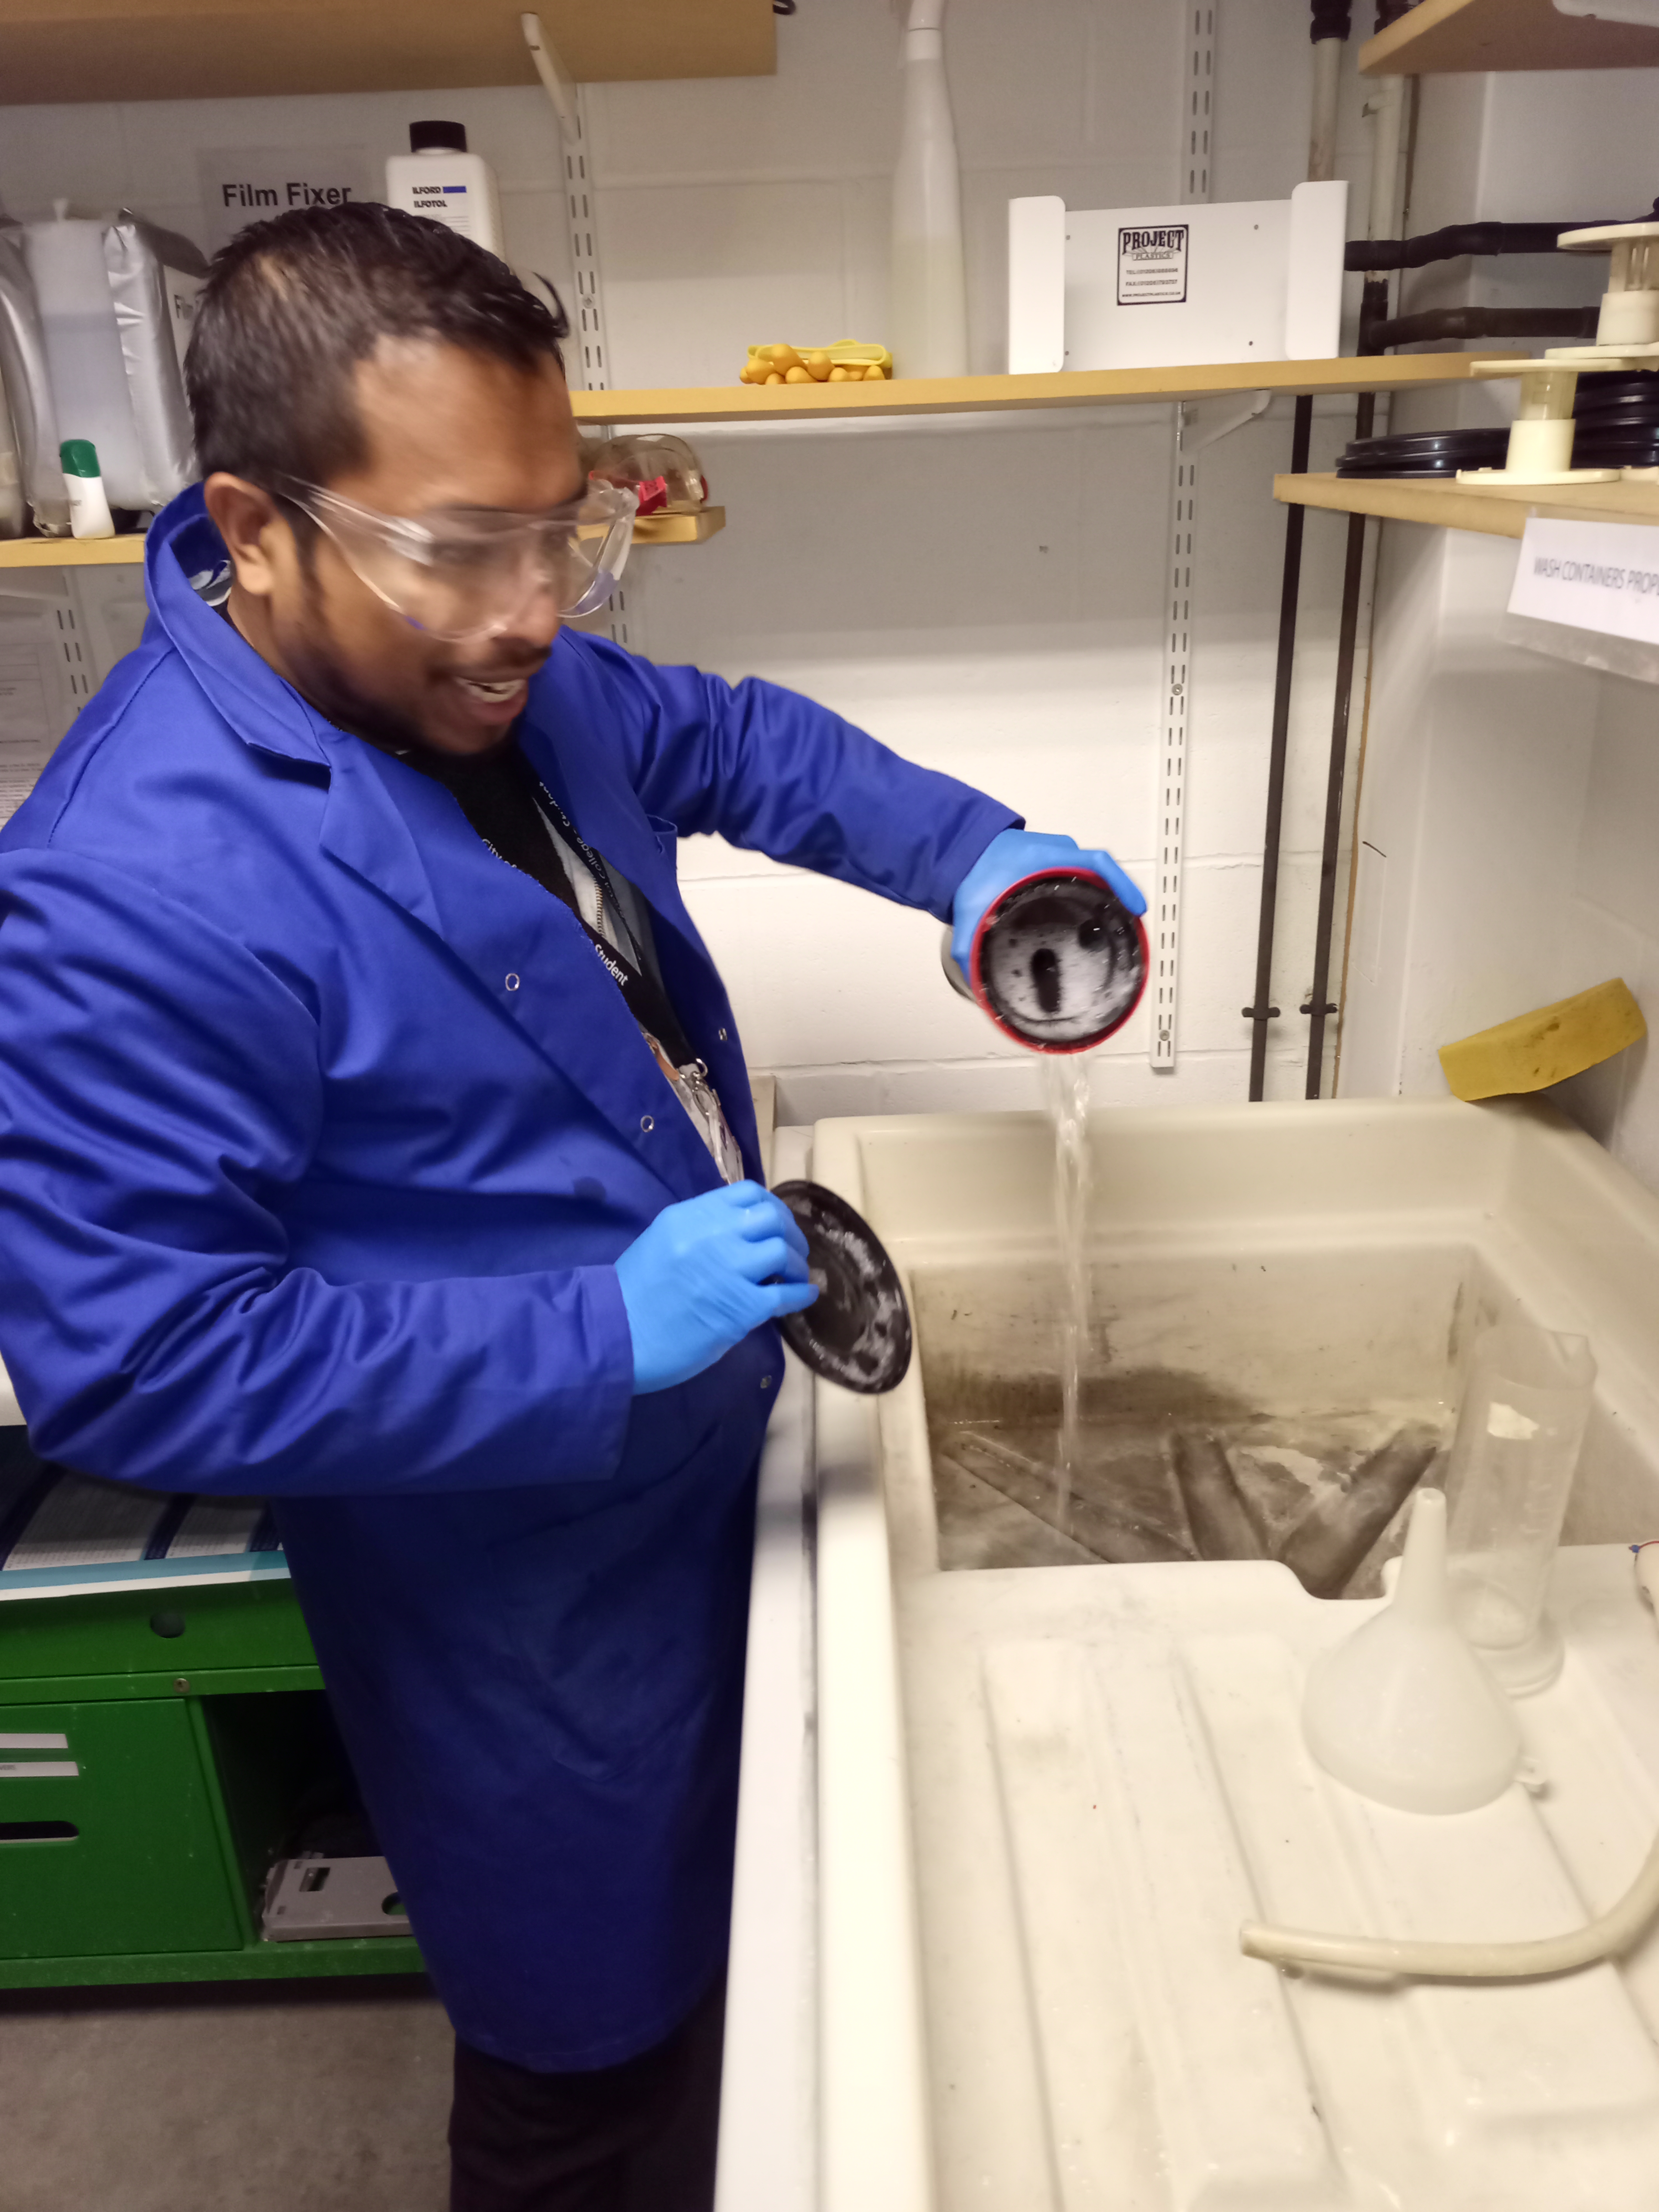
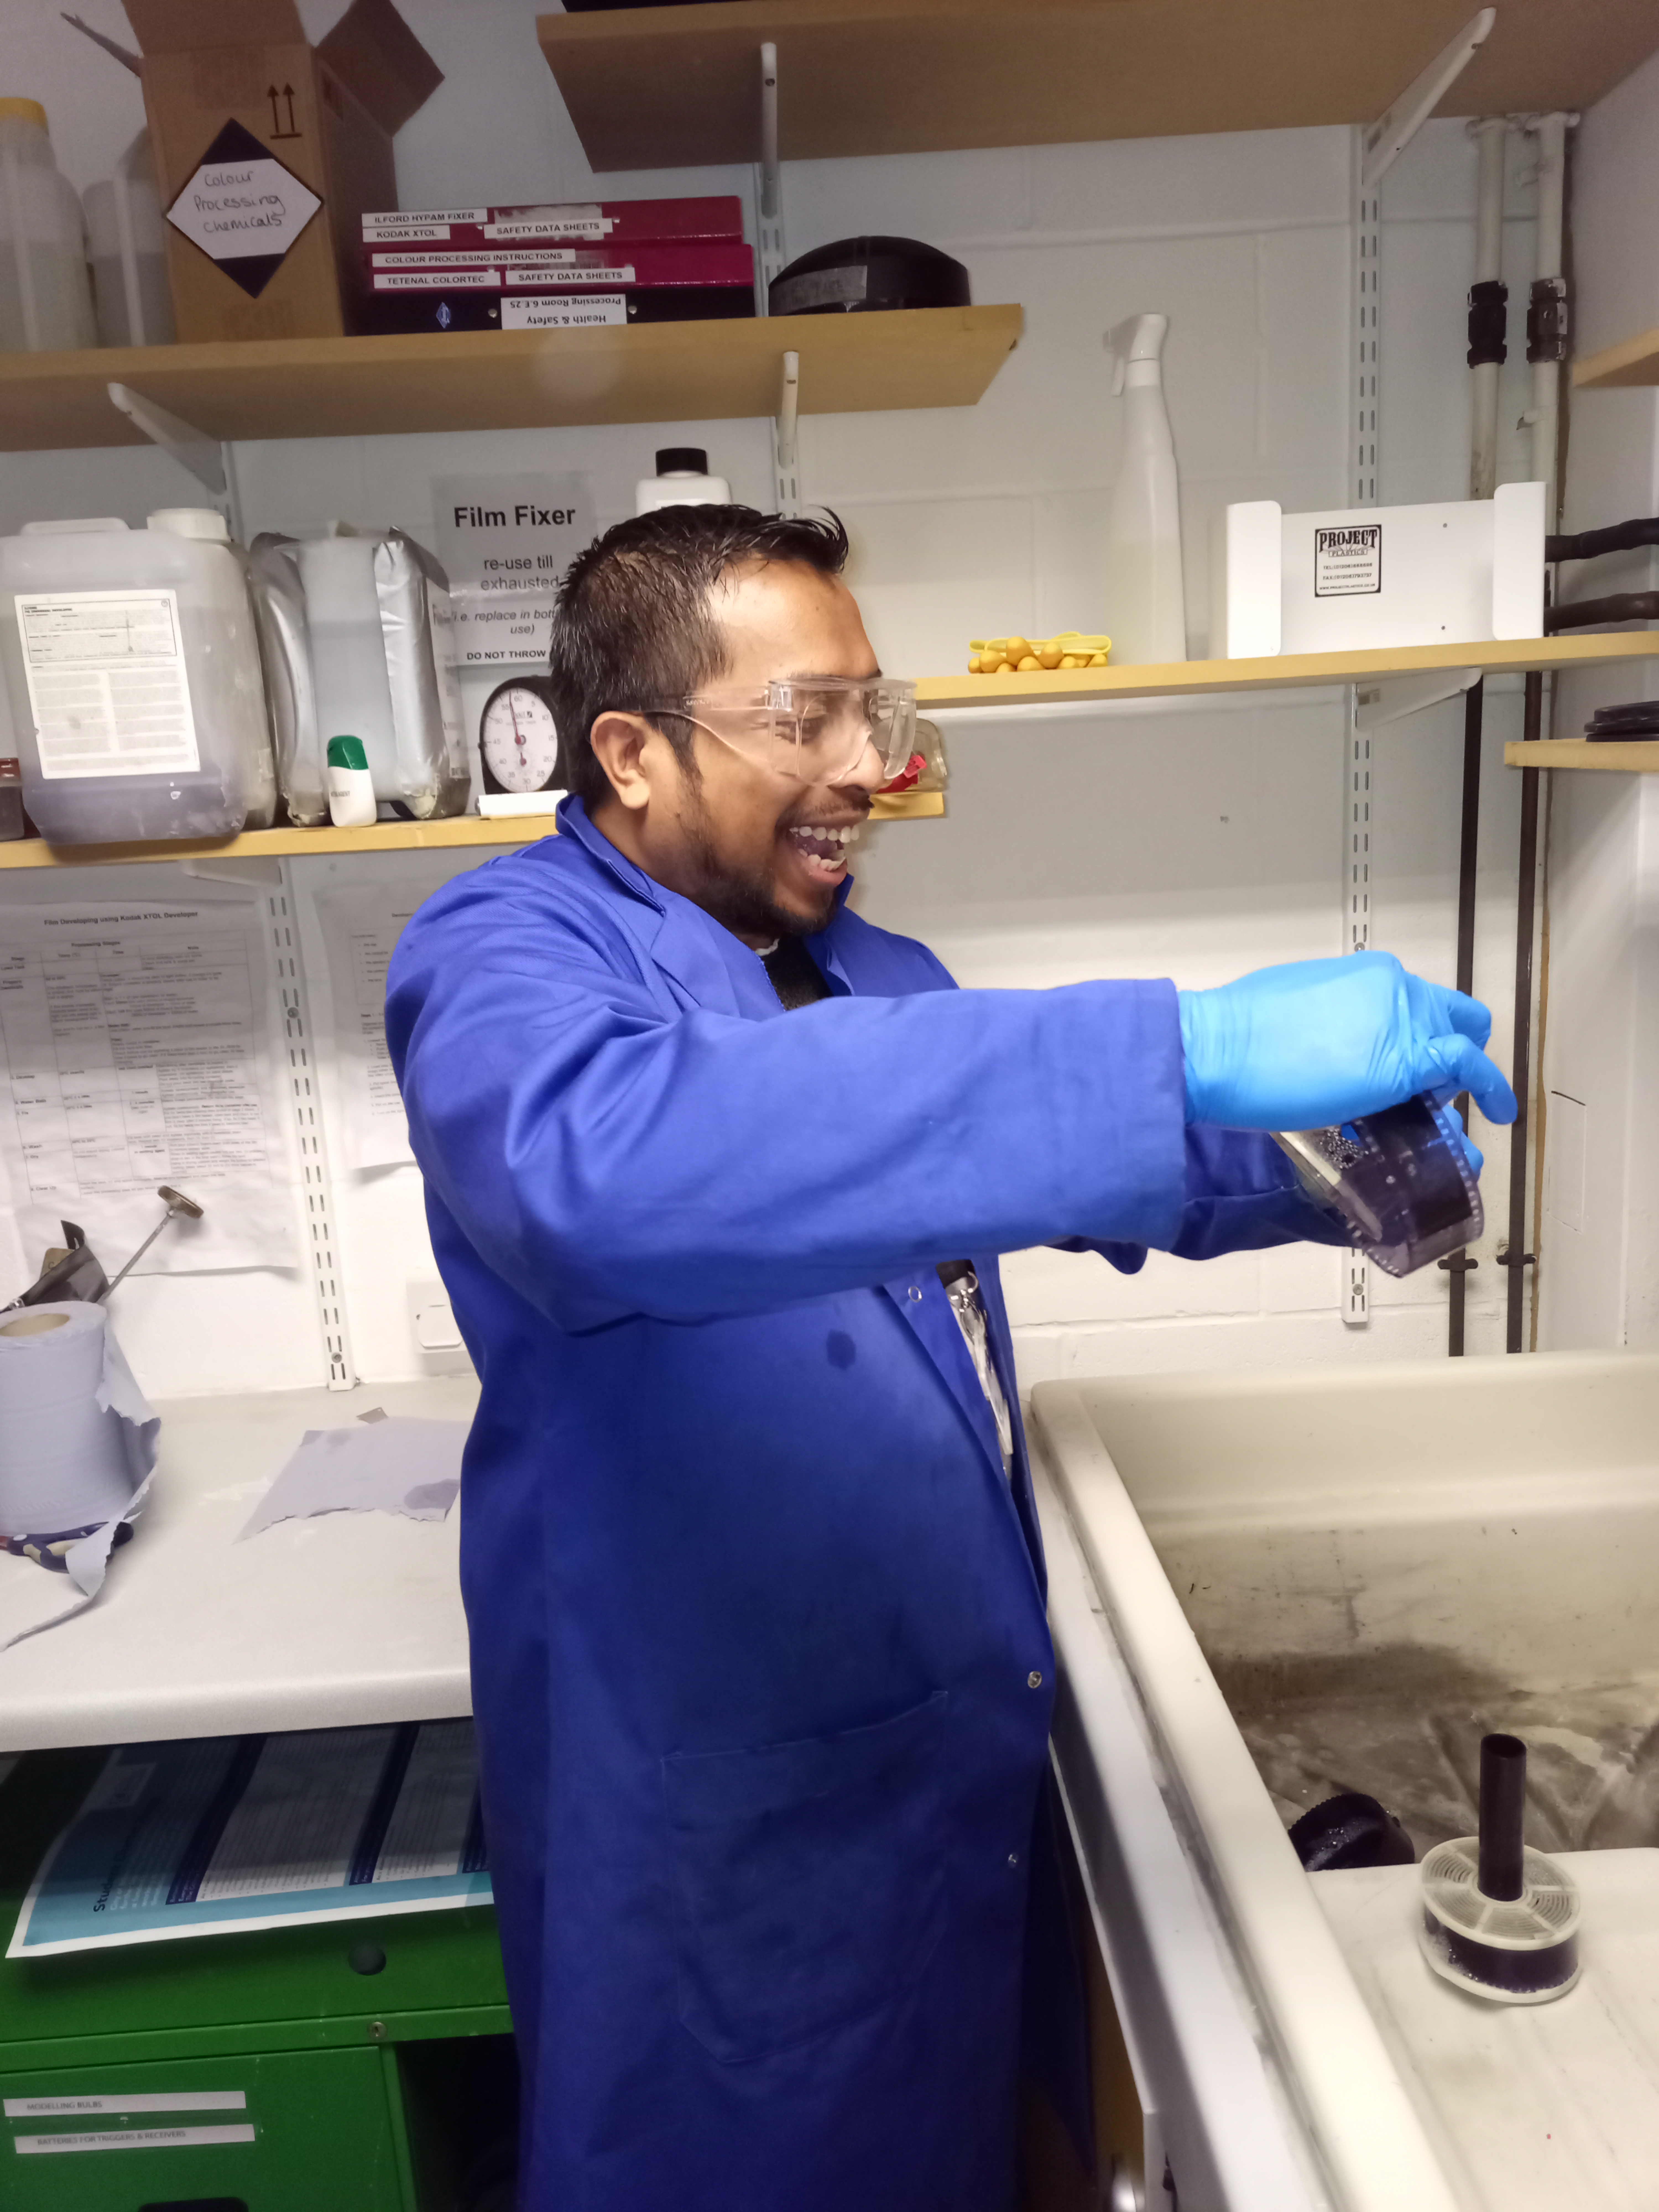
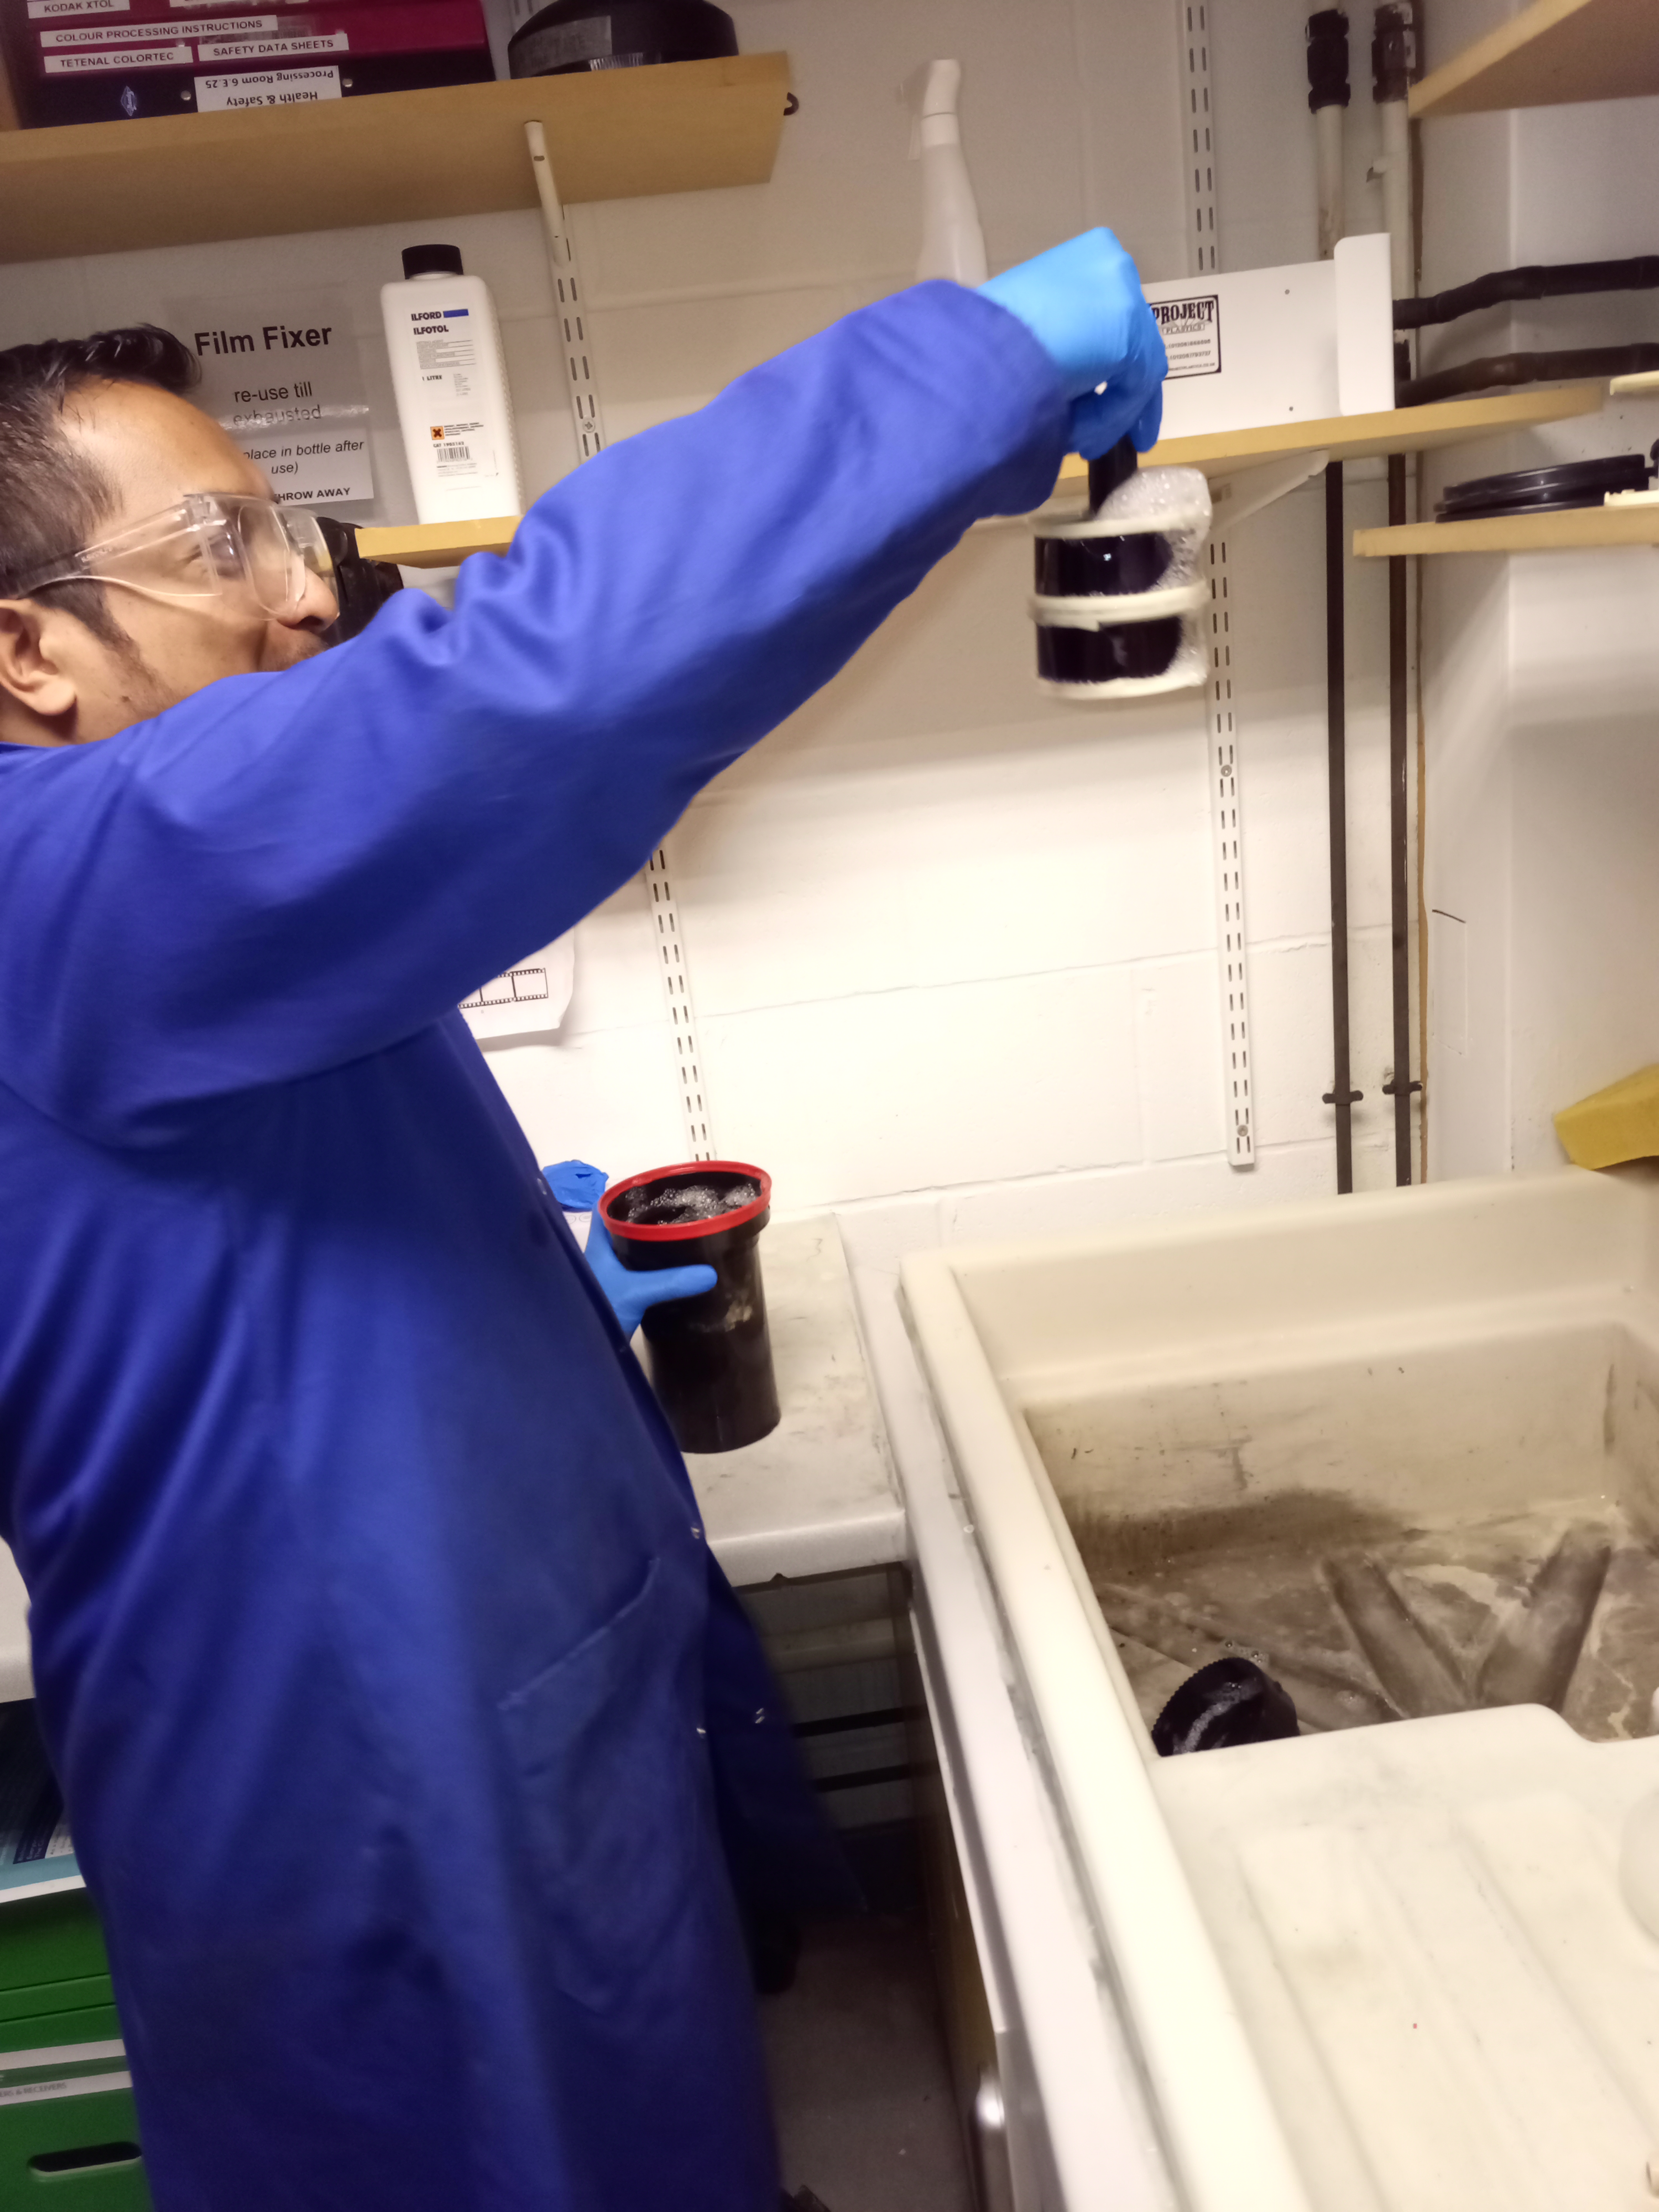
Processing Negative
After having a lesson with the lecturer, the second step was to process the negative film independently. This is the point at which I can see half of my work and am excited to develop it. I was quite apprehensive because I had never done anything like this before, where I had to process the film in the darkroom by myself, but since I did it so many times every time I went out to shoot, it became a muscle memory for me, and I love it.

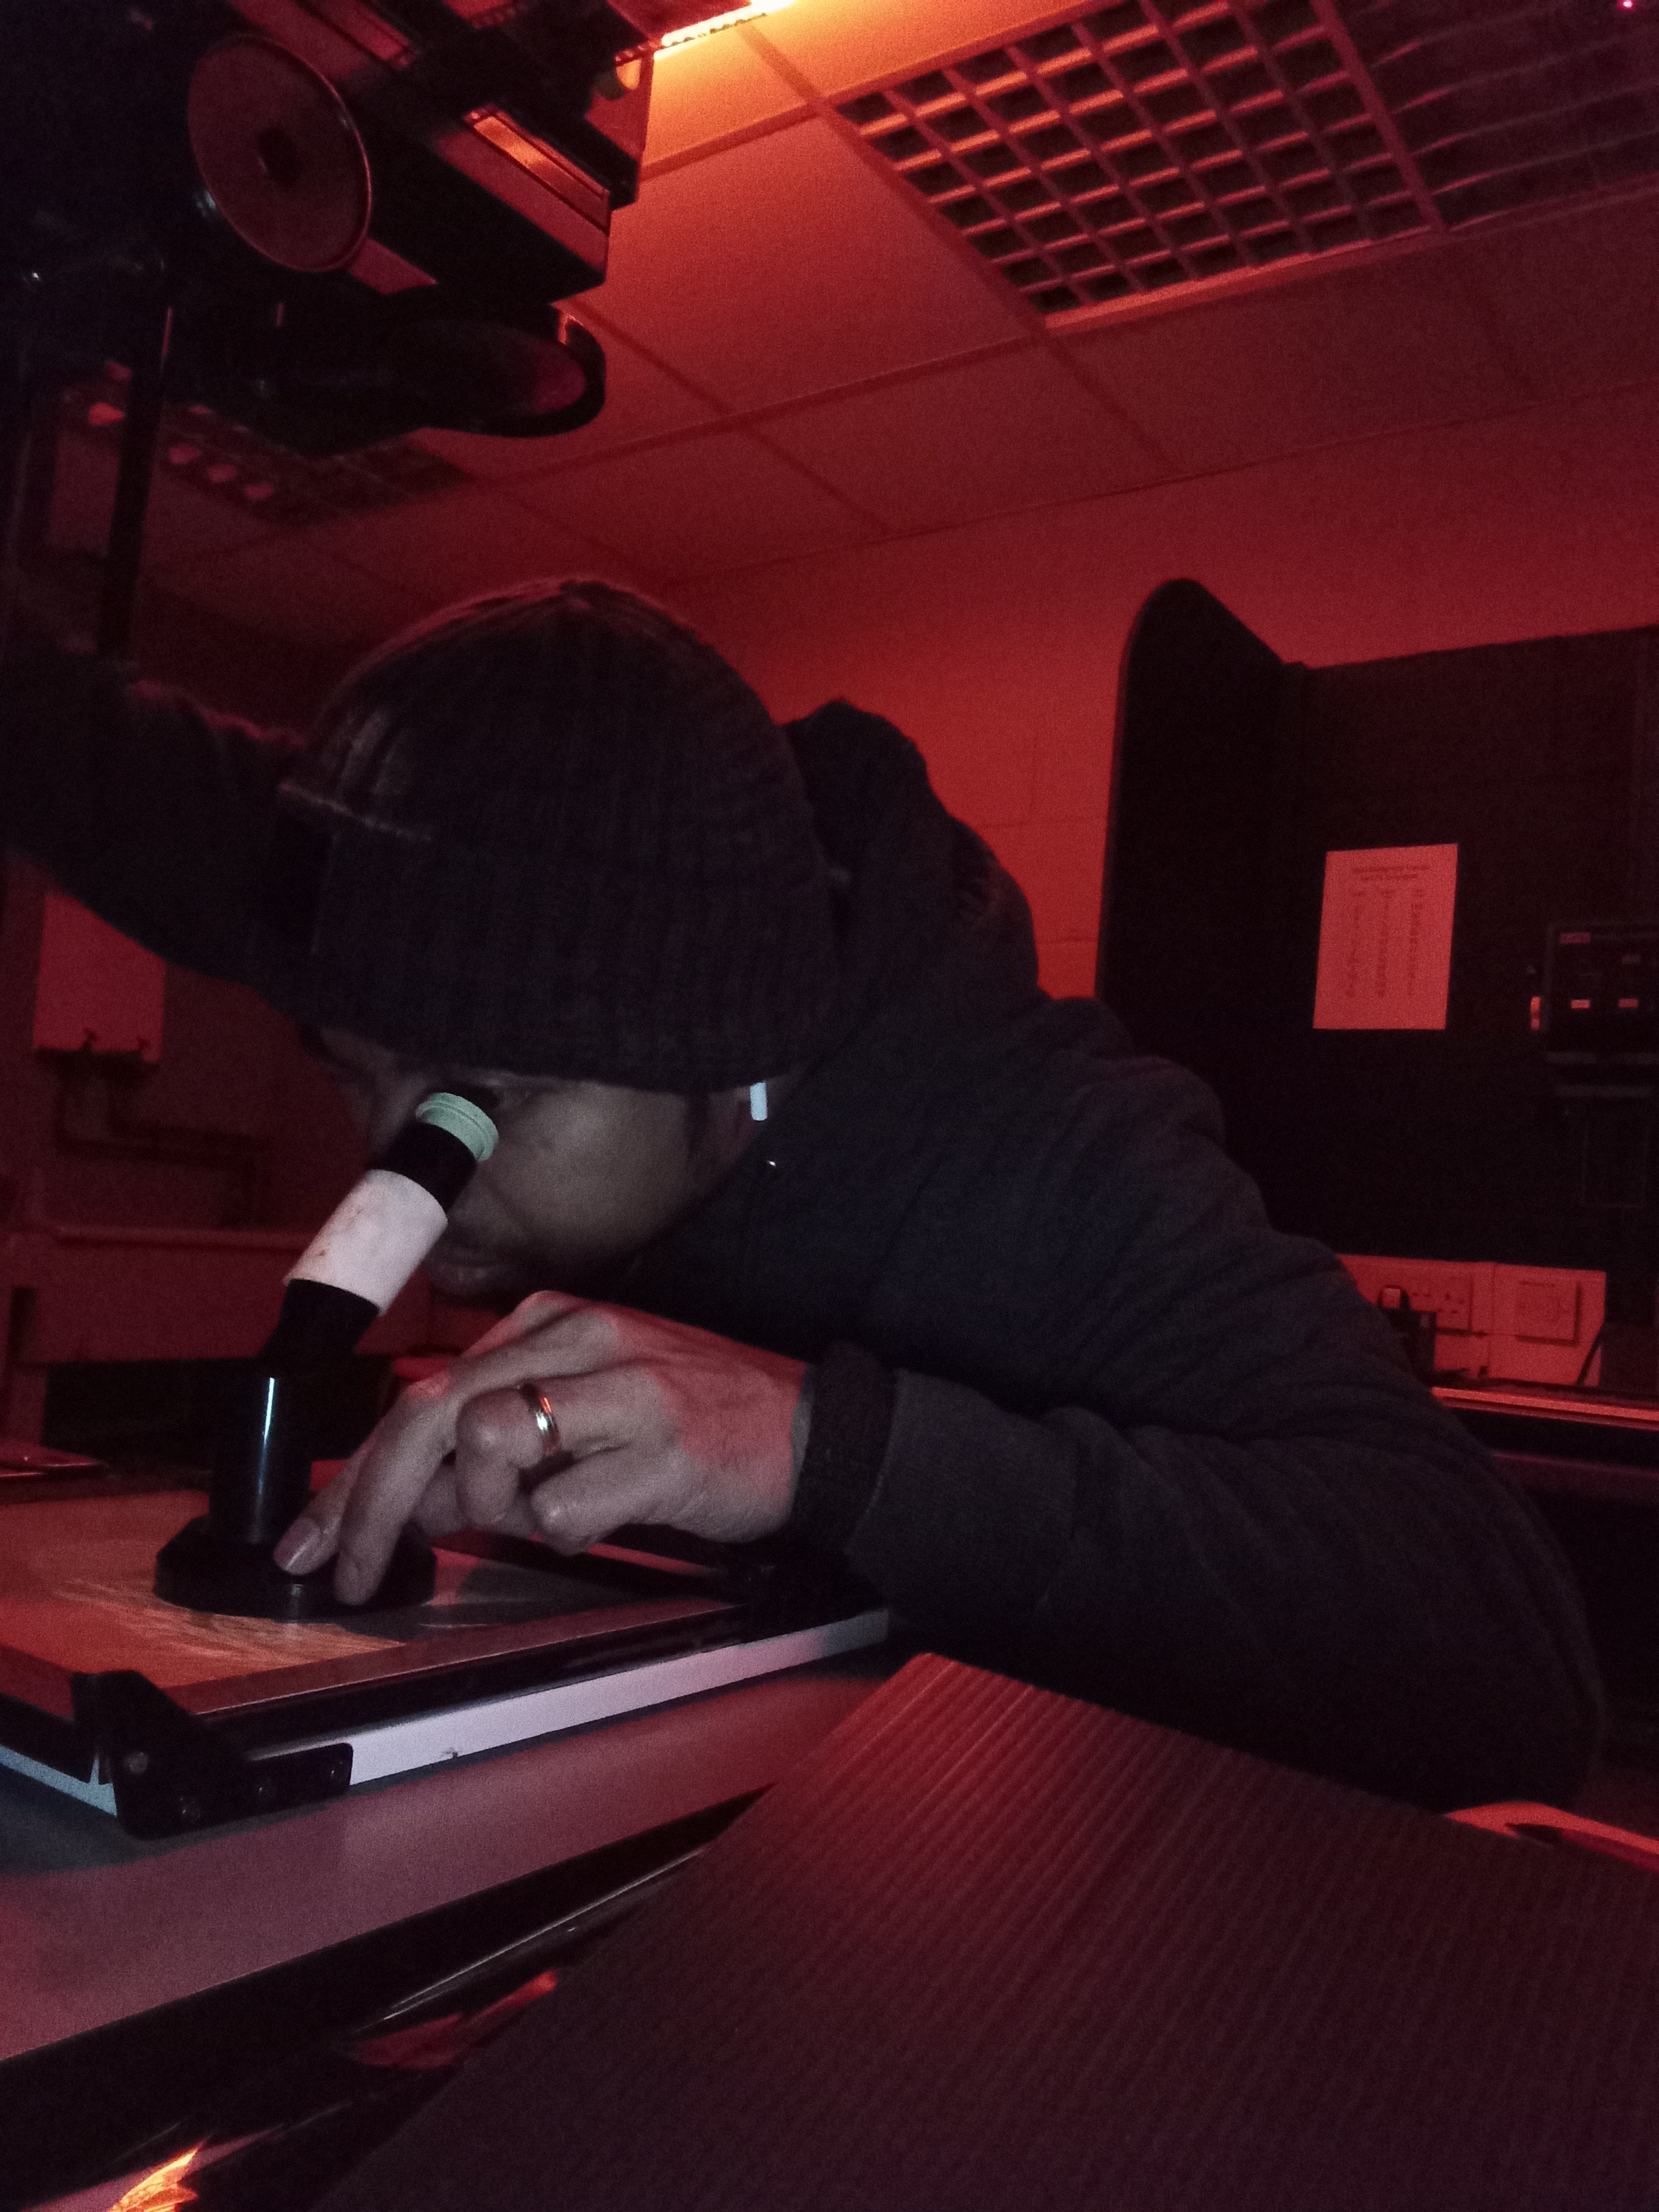
My experience with this project, it reminds me that I have to follow the rules for the best result in keeping the negative for a long period of time and safely handle ling the chemicals in regards to protecting myself from skin burns or eyes blind from the hazardous stuff.
The next stage was to work on it in the darkroom while the safelight was turned on.
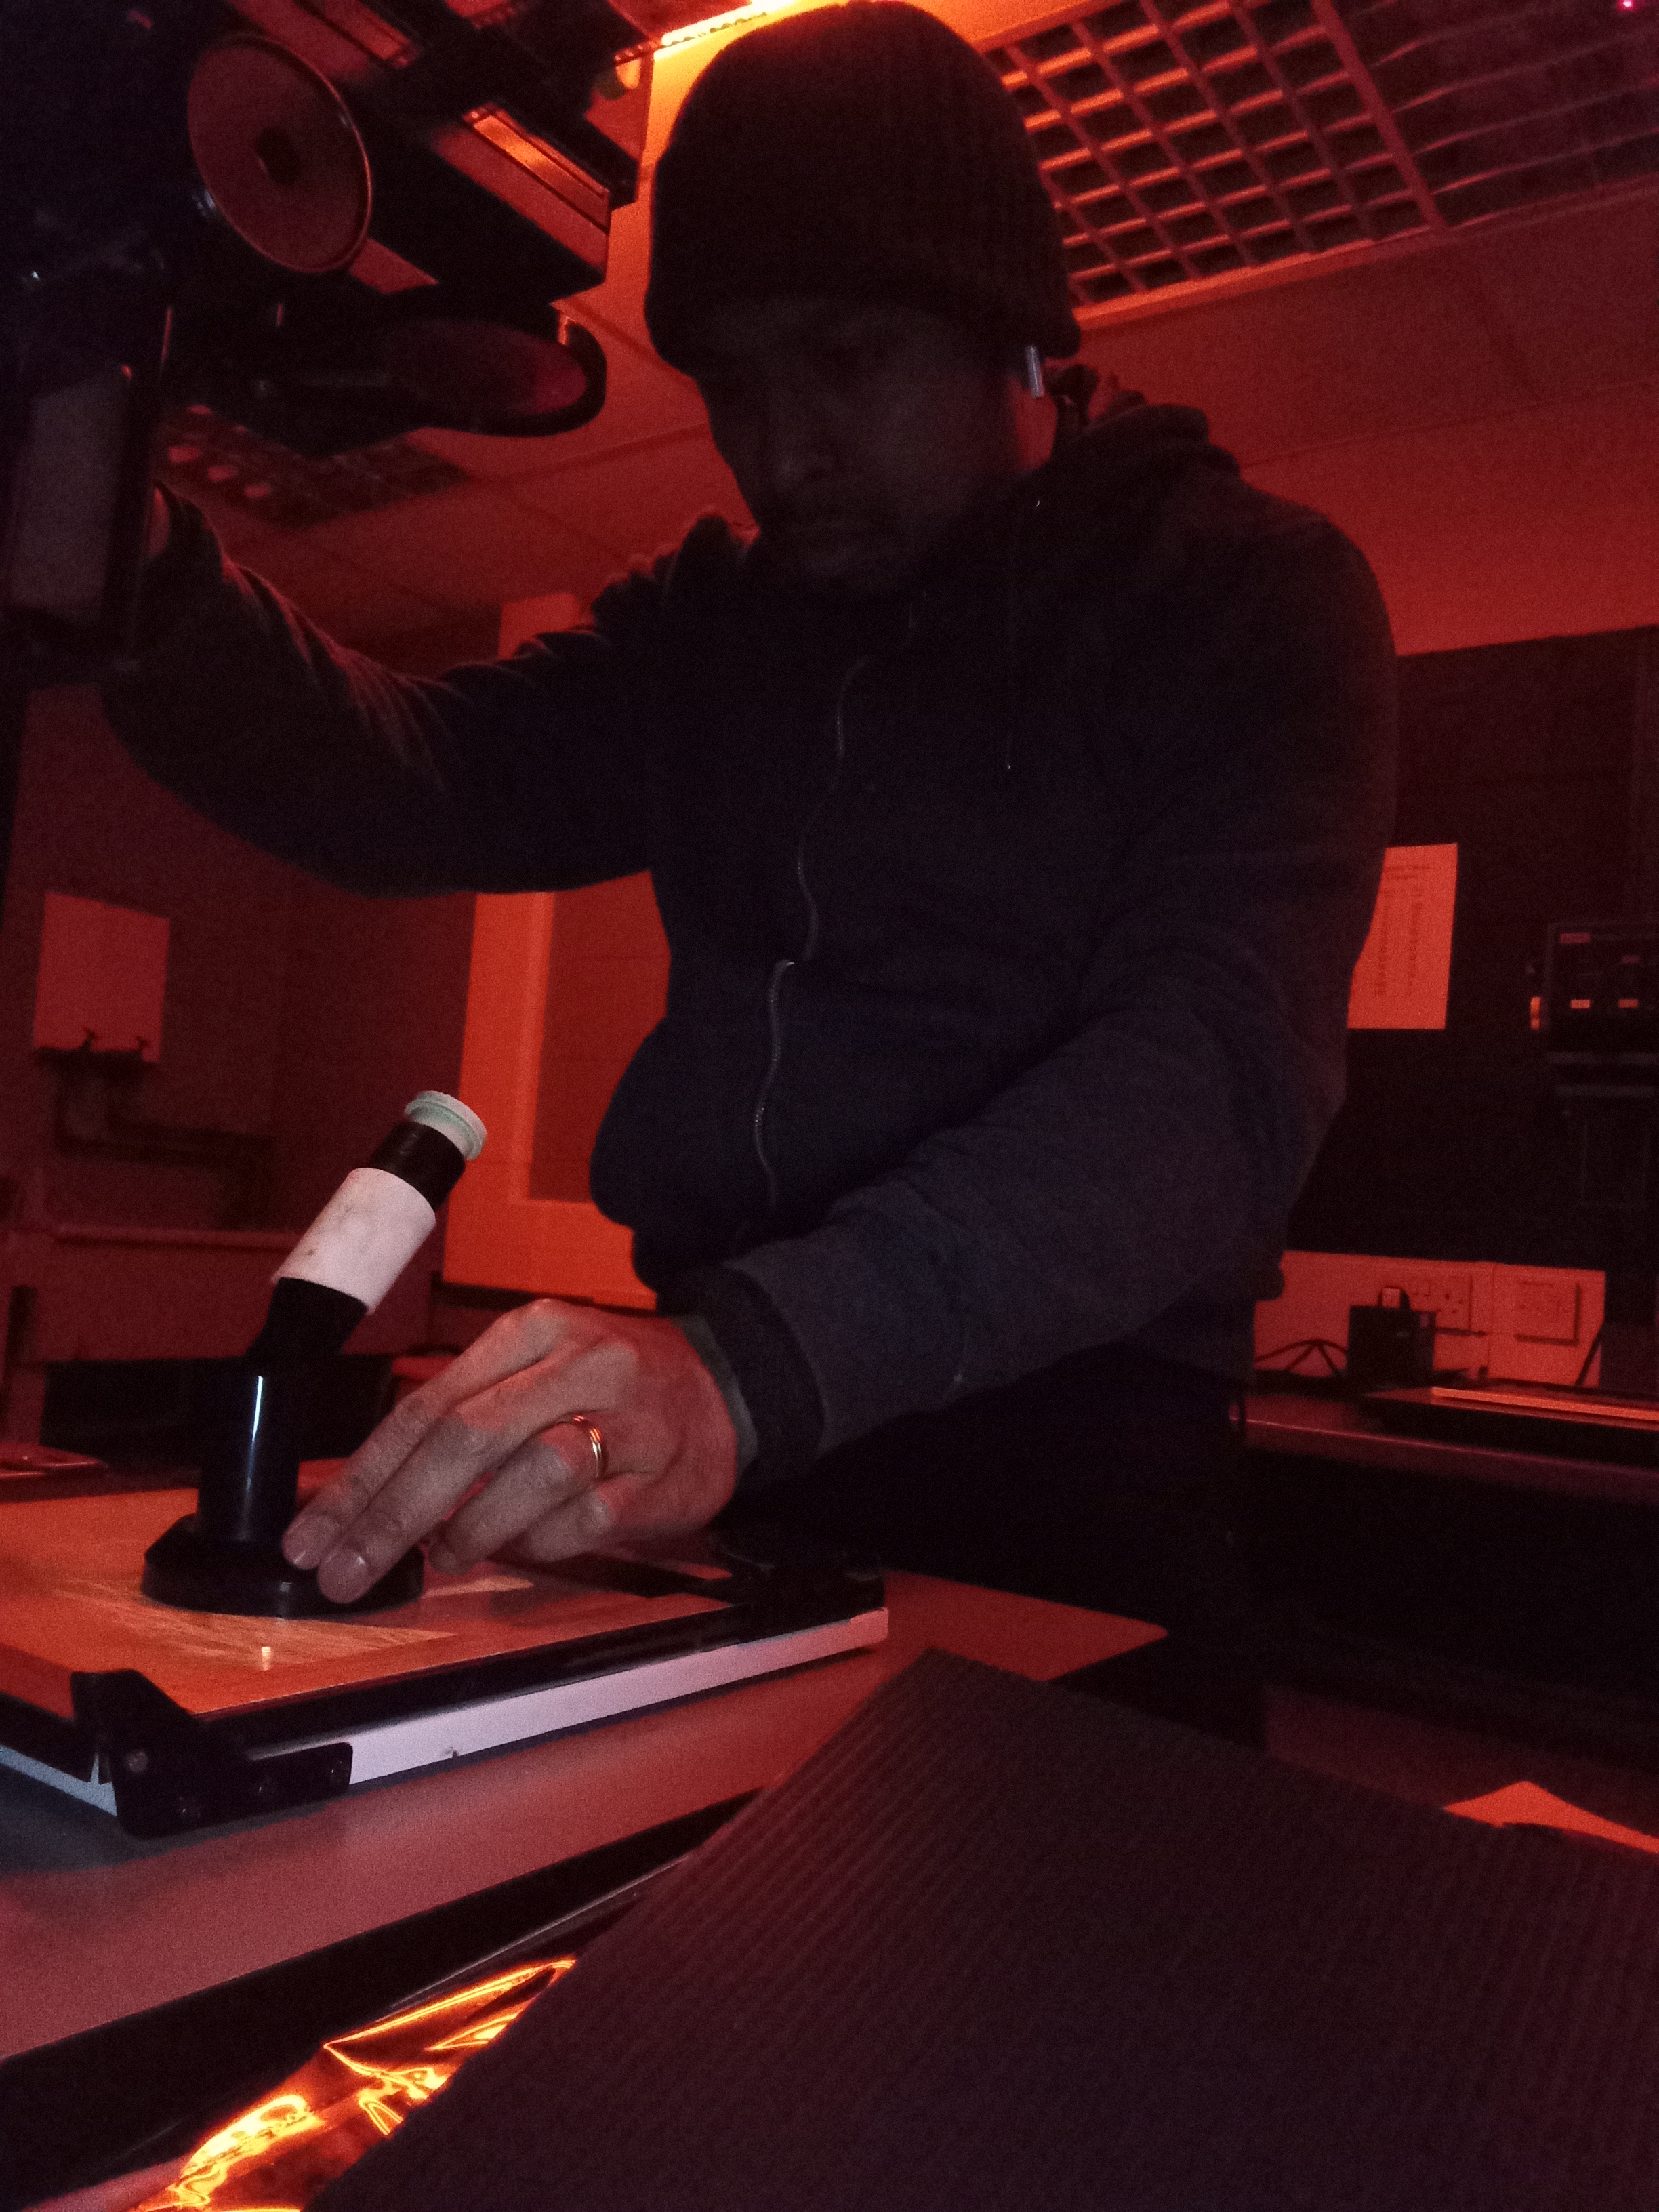
Darkroom (Developing/Print)
It was a magical moment when you choose the perfect exposure time, soaked it in the chemical, and saw your picture begin to emerge on the resin coat paper. It took a long time to get to what you wanted, especially if you didn’t take all of the notes during the setup process with the enlarger, especially if you don’t get used to every step-by-step on how to use all of the tools accordingly, it could be a disaster at the end, as I did the first time when I completely forgot and took an image with the phone using flash while developing a paper in chemical developer, as a result, my test strip went into black paper.

Have a proper mindset to develop an image from the negative in a darkroom. Setup the intended setting with the enlarger, print with a test trip to look for the intended shadow and highlight and not waste the paper because it really cost me as per paper could cost around £1.00 to £1.75
Paper
The paper that I chose for my project is 20,3×25,4cm or 8x10in Multigrade IV RC Warmtone Pearl, A few things that I believe I am required to understand more are understand all types of paper like glossy, pearl and semi-glossy. The paper definitely affects the quality of print when you do not pick the right one.
Glossy Warmtone Pearl
Have the best knowledge by research or guidance about the paper to decide the perfect character that would match the character of the image I wanted to achieve. Either the sharpness of the image, the detail of the shadow, the depth of the image and etc…
Analogue Camera
I would prefer to shoot with a medium format camera 6×7 or 6×6 (square) medium format camera because I love the image quality that comes out from medium format. The reason is that the fine art project I shot with 2 types of cameras which are a 35mm film camera and a Mamiya rb67 really tricky in the end when deciding to print on paper. Because each paper has its own characteristics such as contrast or sharpness. However, if I would shot with one type of camera, it would be easy to choose the paper as well based on the look of the camera that I picked.
The reason I chose the warm tone is that I like its texture and it gives more sharpness to my image because some of my images are shot with 35mm and if mixed with 120 film medium format image it would create some kind of difference in sharpness. However, I am aware that some of the images would be better if you print with glossy. For me, it is just a personal reference.
If I picked the glossy, it would give me contrasting images but it would create separation between the two images that I shot from the 35mm camera from the sharpness of the medium format camera Mamiya 120 film.
Enlarger Accessories
Be more familiar with the tool in the darkroom such as filter and toning because the more I can understand all of that, the more I can produce the advanced technique of printing in the darkroom.
I can declare that I now, know how to use an enlarger generally.
Exposure Time
My difficulty for this project is to perform double exposure in camera I have a 75% understanding the knowledge with the analogue camera method, and a 25% understanding while utilising two negative films in the darkroom.
Above all, I am very happy to have access to all of the knowledge, and it has occurred to me one thing that I compare analogue photography with digital photography, analogue is patience and paying attention to every little detail from the beginning when starting to shoot until the end of developing images in the darkroom, if you start with good technique, you will end up with a good result at the end and it increases my admiration for art and artists since it might take days to properly comprehend even if it is just the little piece we like.
Printing Technique

Making note of every print that I created is a good way of remembering to print it in the future. However, I discovered that that does not determine the result will be the same again because printing the same tone is involved many factors such as lens, fresh chemical or old chemical and also paper type (pearl, glossy, satin, matt and semi-matt) are an important factor to decide the image depth.
Film Roll
The way to choose the right film to shoot is to pay plan ahead for the location where you want to shoot, either indoor, outdoor, sunny day or cloudy. The film camera ISO is set and fixed from 50 ISO, 125 ISO, 400 ISO etc…
Once you load your film into the camera, there is no way you can take the film because it would risk the film being exposed to light. Plan ahead where your location and the weather are so you can pick the right ISO.
For my project in the studio, I shot with 100 ISO because I have control over the light that I have settled myself.
For the outdoor location, I would go for the 400 ISO in general during the winter time so I am able to compensate for lack of the light.
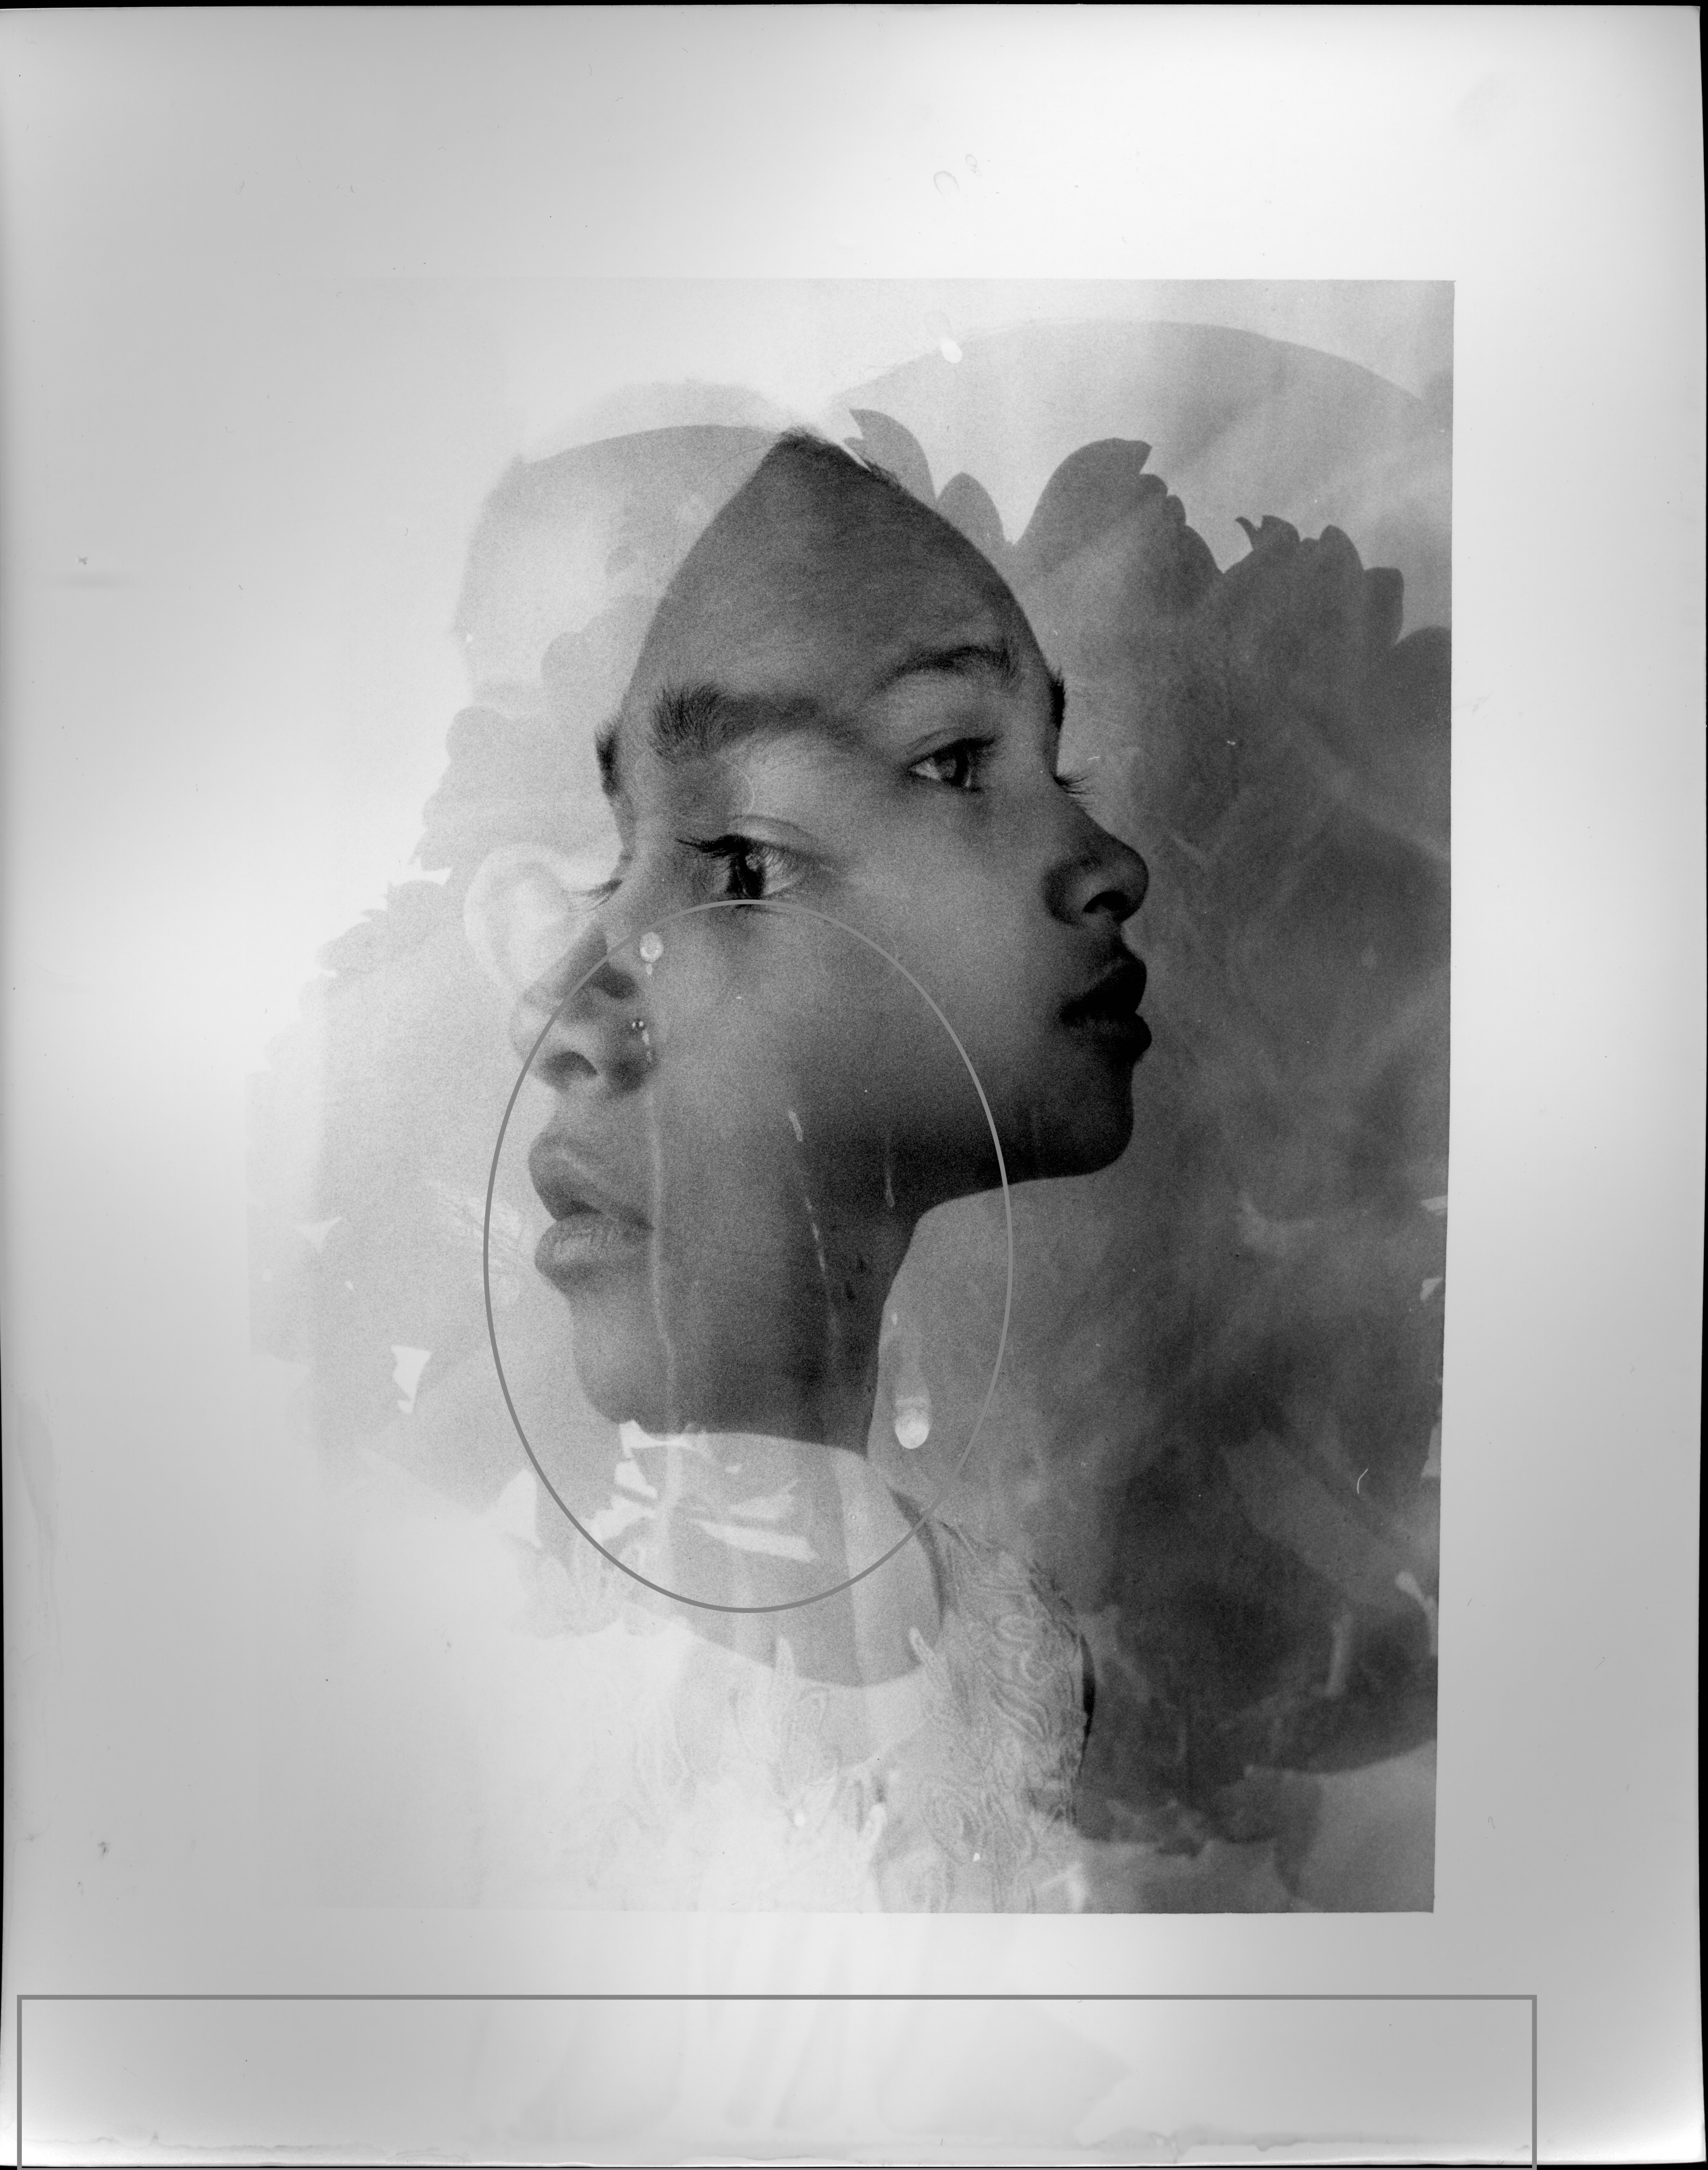
Final Images (slideshow)
I know that I have some of my images were messed up. It was because I did not wash long enough to remove the chemical from the image,

We know that a fixer is for sustaining the image’s lasting durability, thus I think that it was because I didn’t have enough time when I placed it. However, I choose to also utilise this picture since, with the film printing process, there is no guarantee that I will still be able to print the outcome with the exact same level of tone, shadow, details, etc. As a result, I sort of appreciate it since it may indicate to me that a picture was captured on film and developed in a darkroom when I view it. it is kind of a memory to me with the dripping chemical on the paper. t is classic film processing for a new user like me.
I am very aware that the water and the model’s picture do not correspond to the other three. But the purpose of this is just to demonstrate how difficult it was for me to handle the camera at the beginning of my journey with the medium format.
I am skilled in using film cameras, developing negatives in a darkroom, processing film in a lab, and last but not least, I am aware that my fine art project is meant to display in an exhibition gallery.
BIBLIOGRAPHY
- Guest Poster. 2023. What is Fine Art Photography?. [ONLINE] Available at: https://photographylife.com/what-is-fine-art-photography. [Accessed 05 January 2023].
- Sara Barnes. 2023. 10 Photographers Creating Enigmatic Works With Double Exposure – Layers Magazine. [ONLINE] Available at: https://layersmagazine.com/10-photographers-creating-enigmatic-works-with-double-exposure.html. [Accessed 08 January 2023].
- Wikipedia. 2023. William H. Mumler – Wikipedia. [ONLINE] Available at: https://en.wikipedia.org/wiki/William_H._Mumler. [Accessed 08 January 2023].
- Condé Nast. 2023. The Photographer Who Claimed to Capture Abraham Lincoln’s Ghost | The New Yorker. [ONLINE] Available at: https://www.newyorker.com/culture/photo-booth/photographer-who-claimed-to-capture-abraham-lincoln-ghost. [Accessed 08 January 2023].
- Artland Editors. 2023. How the history of fine art photography shaped disturbing insights – read on Artland. [ONLINE] Available at: https://magazine.artland.com/a-history-of-fine-art-photography%E2%80%A8/. [Accessed 08 January 2023].
- The John Deakin Archive. 2023. The John Deakin Archive. [ONLINE] Available at: http://thejohndeakinarchive.co.uk/aboutdeakin.html. [Accessed 08 January 2023].
- David Buckingham. 2023. Colin MacInnes | David Buckingham. [ONLINE] Available at: https://davidbuckingham.net/growing-up-modern/before-london-started-swinging-representing-the-british-beatniks/colin-macinnes/. [Accessed 08 January 2023].
- YouTube. 2023. John Deakin: Double Exposures and Modernism – YouTube. [ONLINE] Available at: https://www.youtube.com/watch?v=UnFab9Z5sig&t=41s. [Accessed 08 January 2023].
- British Art Studies. 2023. Deakin: Double Exposures | Issue 1 – November 2015 | Issues | British Art Studies. [ONLINE] Available at: https://www.britishartstudies.ac.uk/issues/issue-index/issue-1/deakin-double-exposures#:~:text=Double%20Exposures%20and%20Modernism&text=This%20film%20explores%20John%20Deakin’s,of%2020th%20century%20Modernism.. [Accessed 08 January 2023].
- Urth Magazine. 2023. Beginner’s Guide to 35mm Film Photography | Urth Magazine. [ONLINE] Available at: https://urth.co/magazine/beginners-guide-to-using-a-film-camera. [Accessed 12 January 2023].
- Martijn Roos – International Wedding Photographer. 2023. Mamiya RB67 PRO S 120mm Camera Sample Images and Review — Martijn Roos – International Wedding Photographer. [ONLINE] Available at: https://www.martijnroos.com/blog/mamiya-rb67-pro-s-sample-images-review. [Accessed 12 January 2023].
- Flickr: Discussing How to take double exposure on Pro S back in Mamiya RB67. 2023. Flickr: Discussing How to take double exposure on Pro S back in Mamiya RB67. [ONLINE] Available at: https://www.flickr.com/groups/42161461@N00/discuss/72157650361820860/. [Accessed 12 January 2023].
- Samuel Taylor. 2023. Beginners Guide To The Darkroom – Parallax Photographic Coop. [ONLINE] Available at: https://parallaxphotographic.coop/beginners-guide-to-the-darkroom/. [Accessed 12 January 2023].
- Heritage Crafts. 2023. Darkroom photography | Heritage Crafts. [ONLINE] Available at: https://heritagecrafts.org.uk/darkroom-photography/#:~:text=A%20darkroom%20is%20used%20to,including%20film%20and%20photographic%20paper.. [Accessed 12 January 2023].
- Photo & Video Envato Tuts+. 2023. A Simple Guide to Setting Up Your Own Photographic Darkroom. [ONLINE] Available at: https://photography.tutsplus.com/tutorials/a-simple-guide-to-setting-up-your-own-photographic-darkroom–photo-718. [Accessed 12 January 2023].
- Victoria and Albert Museum. 2023. Rayograph | Man Ray | V&A Explore The Collections. [ONLINE] Available at: https://collections.vam.ac.uk/item/O191523/rayograph-photogram-man-ray/. [Accessed 13 January 2023].
- http://www.getty.edu. 2023. No page title. [ONLINE] Available at: https://www.getty.edu/conservation/publications_resources/pdf_publications/pdf/atlas_cyanotype.pdf. [Accessed 13 January 2023].
- http://www.getty.edu. 2023. No page title. [ONLINE] Available at: https://www.getty.edu/conservation/publications_resources/pdf_publications/pdf/atlas_saltprint.pdf. [Accessed 13 January 2023].
- Heritage Crafts. 2023. Darkroom photography | Heritage Crafts. [ONLINE] Available at: https://heritagecrafts.org.uk/darkroom-photography/. [Accessed 13 January 2023].
- ImageExplorers. 2023. How to do Darkroom Printing part 1 – ImageExplorers. [ONLINE] Available at: https://imageexplorers.com/how-to-do-darkroom-printing-part-1/. [Accessed 13 January 2023].
- Photo & Video Envato Tuts+. 2023. A Simple Guide to Setting Up Your Own Photographic Darkroom. [ONLINE] Available at: https://photography.tutsplus.com/tutorials/a-simple-guide-to-setting-up-your-own-photographic-darkroom–photo-718. [Accessed 13 January 2023].
- Massive Dev Chart Film Development, Film Developing Database. 2023. Massive Dev Chart Film Development, Film Developing Database. [ONLINE] Available at: https://www.digitaltruth.com/devchart.php. [Accessed 15 January 2023].
- alexbond. 2023. Burning Dodging Darkroom Techniques Film Photography. [ONLINE] Available at: https://www.alexbond.com.au/burning-dodging-darkroom-tools/. [Accessed 15 January 2023].
- YouTube. 2023. Dodge & Burn – ILFORD PHOTO Darkroom Guides – YouTube. [ONLINE] Available at: https://youtu.be/b-keDPtVnGA. [Accessed 15 January 2023].
- Matt. 2023. What Is Large Format Film Photography: The Definitive Guide • Filmmaking Lifestyle. [ONLINE] Available at: https://filmlifestyle.com/what-is-large-format-film-photography/. [Accessed 15 January 2023].
- Adorama. 2022. FAQ: What is a Medium Format Camera?. [ONLINE] Available at: https://www.adorama.com/alc/faq-what-is-a-medium-format-camera/. [Accessed 15 January 2023].
- Explain that Stuff. 2023. Film cameras and 35mm photography – A simple introduction. [ONLINE] Available at: https://www.explainthatstuff.com/how-film-cameras-work.html. [Accessed 15 January 2023].
- YouTube. 2023. Tutorial: how to make double exposures – YouTube. [ONLINE] Available at: https://www.youtube.com/watch?v=NEzO7QWgv-c&t=190s. [Accessed 16 January 2023].
- Langford, M. and John, M., 1981. The Darkroom Handbook. Ebury Press.
- Lina Bessonova. 2023. Darkroom in Florence, Italy — Lina Bessonova. [ONLINE] Available at: https://www.linabessonova.photography/darkroom. [Accessed 18 January 2023].
- Nat Bevins Photograp. 2023. Half In Half Out | Nat Bevins Photograph. [ONLINE] Available at: https://www.natbevinsphotography.com/half-in-half-out. [Accessed 18 January 2023].
- ANNE-KATRIN PURKISS. 2023. ANNE-KATRIN PURKISS. [ONLINE] Available at: https://purkiss-images.eu/about/. [Accessed 01 February 2023].
- MULTIGRADE RC WARMTONE pearl. 2023. MULTIGRADE RC WARMTONE pearl. [ONLINE] Available at: https://www.ilfordphoto.com/multigrade-rc-warmtone-pearl. [Accessed 06 February 2023].
