PROPOSAL
MOISES
This is the second project; on this project, the assignment required to submit at least four printing professionally images, including supporting blog and group critique.
Nowadays, most people with family would give up on their visions only because of lack of managing all the activities and lack of motivation.
Therefore, I decided to photograph a man with a big family contains seven family members and hardworking, which he managed all and finish his master this year. His name is Moises Ribeiro. The reason I would like to photograph him is not because I know him this late 2021, but it is because he is a surprise man in his life with all his achievements.
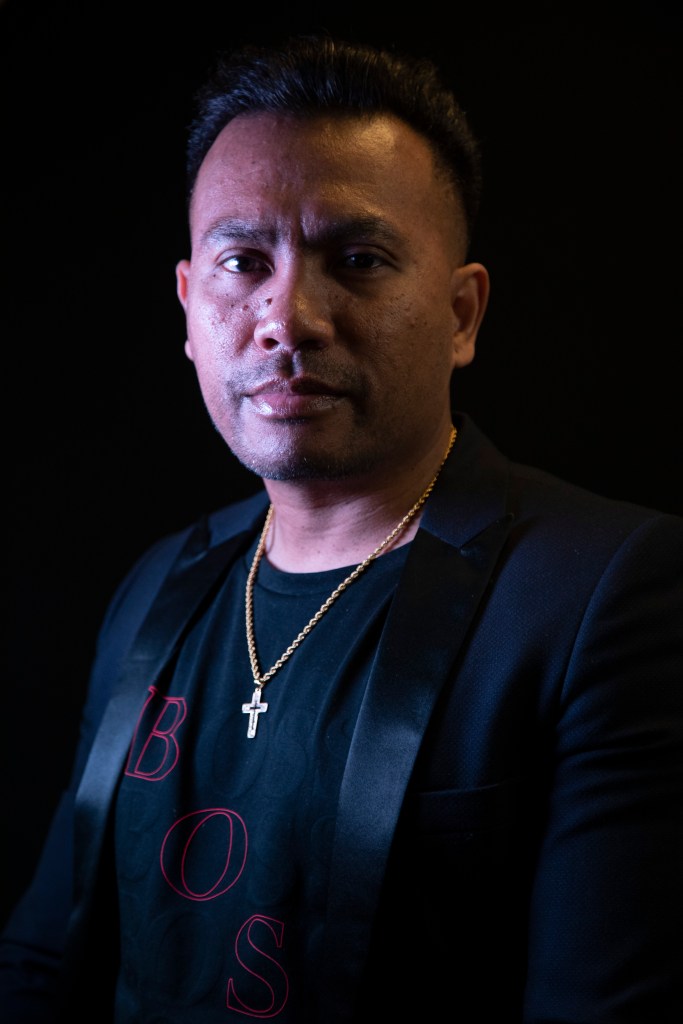
I have known him for the last eighteen months since 2021 because we were working together in a non-organisational community group called Timorese Association-Bristol. He is the vice chairman of the association where he is the second men busy in organisational activities.
Manages between school run for five kids, his own studying, his shipment work and the charity organisation are lots of overloads job to do. Four pages for this project I am going to shoot about his work, his family, his organising meeting, and last but not least, his master cloak.
Probably, I would like to add some narrative picture as well where I want him to wear his cloak, yellow protective had, gloves and his family will stand around him. This picture is purely to represent his story that I am about to present. With this project, I wanted to encourage more people to chase their dreams, if they have one. “Do not give up on any obstacles, as difficult times will level you up when you are willing to solve it. Eventually you will have the result that you deserve.”_Rikii Altamirano.
The type of project will be portraits of individual and family to expose the depth of the story itself.
It is a real-life story of a Charity Man, Moises.
RESEARCH
What is Editorial Photography?
Editorial photography is a work that relay more on the story, not like commercial photography that used to brand a product of a certain company. Editorial portrait is normally used in magazine, newspaper, and editorial features.
According to the Director of Photography at M magazine, Luci Conticello stated at interview with Sophie Wright, 2019; one that has the potential to elicit a response from the viewer, is skilfully composed, exquisitely lit, visually uncluttered, and has an enduring of being suspended, somewhat unresolved.
Studio photography stretches back to the 19th century, and ever since the very first images were taken in 1824 using only natural materials, there has been a constant evolution in the technology used in photography. It may be difficult to imagine, considering that current digital SLR cameras are able to capture pictures that are razor sharp even without the use of film, but the earliest studio photographers were required chemicals in exact proportions for each and every exposure.
Historically, the first photography studios could only produce black-and-white photographs due to technological limitations. To them, the concept of capturing today’s ultra-sharp photos in dazzling colors without film would have been as unimaginable as it would have been for the Wright brothers to fly from New York to California in a matter of a few hours.
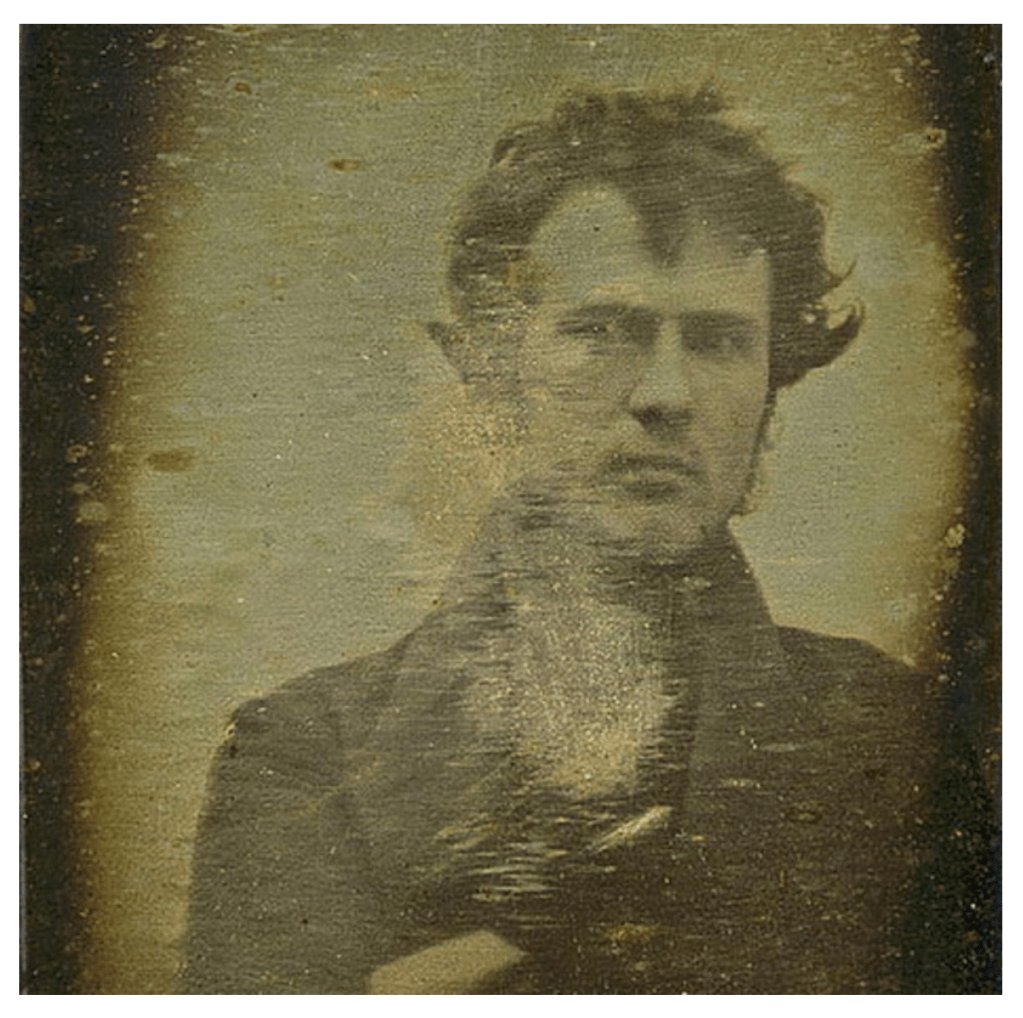
Before “selfies” became all the trend, Robert Cornelius positioned a camera in the rear of a store near Chestnut Street of Center City, Philadelphia, and shot the world’s first portrait, which was also a self-portrait. This was long before “selfies” were popular. A little more than a minute passed while Cornelius was seated right in front of the lens before he got up, covered it, and returned to the seat. The shot that has now become famous was taken in 1839, more than 170 years ago.
Because it became simpler to create high-quality photographs inside as a result of developments in photography equipment, technology, and processes, studio photography started to gain popularity. Human’s portraits were the first subjects of commercial studio photography, and by the 1940s, studio photography was almost entirely supplanted painting as the medium of choice for portraiture. This was due to the fact that the process of photography was significantly easier and required significantly less time than painting. However, it is important to note that the initial studio picture portrait was done in 1826, and the exposure time necessary was eight hours.
It is considered an editorial portrait started when La monde practique (1898), Harper Bazar (1867), and Vogue are credited for birthing fashion photography in the 19th century (1892). These publications were founded on photographic and screen-printing accomplishments. The editors utilised photos instead of popular prints to surpass rivals and increase exposure to the styling and selection of items. Many notable fashion photographers have aided editors with this objective. The 20th century saw an explosion of interest in fashion photography. Fashion shows and collections are mega-events.
In other opinion, it is believed that editorial photography started when Condé Nast recruited the German photographer Baron Adolph de Meyer (1868–1946) in 1913 to capture pictures of models, entertainers, and aristocrats for Vogue, this was the first time that images were used in print editorials.
In social impact, editorial portrait photography is everywhere in our everyday life, surrounding us and influencing our lifestyle and our routine activities.
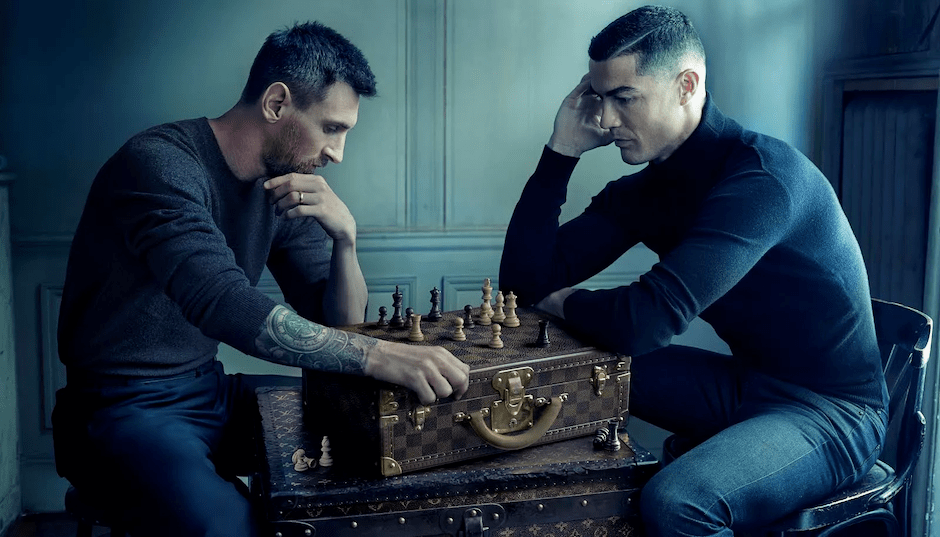
Once Annie Leibovitz, one of the phenomenal American photographers recently photographed duo long rivals football stars Lionel Messi and Cristiano Ronaldo on the chessboard on top of a Louis Vuitton bag, caught my attention because the photos of those two players were never in the same place. However, the composite of that portrait really tells the story of these two long rivals that gives impact on social life can influence people’s idea, lifestyle, or even argument.
Predominantly, editorial portrait produced within the photography studio. However, it is not unusual to compose a portrait on location by setup all the lights that required to produce a good editorial portrait, as Luci mentioned is to create a portrait that likely attracts the audience to read the magazine or newspaper.
There are a few risks and health involvement when conducting a photoshoot for the indoor photoshoot or outdoor photoshoot.
Influencing My Work
Yosuf Karsh
Look at the photographer called Yousuf Karsh’s works. It draws me into the man itself photography character about all black and white. What he was doing is most of his photograph about all men with deep history within them self like Nelson Mandela, John F. Kennedy, Winston Churchill, Princess Elizabeth, Martin Luther King, Fidel Castro, Albert Einstein and many more.

All his works are set out a boundary between what is the proper portrait should look like to tell the story and the history portrait.
At the age of 16, Karsh left his family in the Ottoman Empire, which is now known as Turkey, and went to Canada to move in with his uncle, who was a photographer. After serving as an apprentice to the portrait photographer John Garo in Boston, Karsh eventually took over the running of his own studio. Eventually, he attracted the attention of the Prime Minister of Canada, Mackenzie King, who assisted in the arrangement of portrait sessions with visiting dignitaries.
Karsh addressed each of his clients in the same manner, whether they were well-known figures like Mother Teresa or complete strangers who posed for the photographer so he could give a picture to their partner as a present. He travelled on a frequent basis, since he believed that photographing people in their comfortable place was the best way to ensure that they seemed natural in front of the camera. In addition, he made an effort to spend as much time as possible getting to understand the subjects before he ever touched the camera.

Pete Coco a photographer based in New York on June 18, 2022 via Fstoppers point out five valuable lessons that have been influencing him and may direct us into the interesting portrait photography.
He stated that Karsh has 5 reason as follows:
- He had definite goals and pursued them vigorously.
- He had learned from his failure
- He was always prepared
- Karsh did his homework on each person he photographed
- Karsh didn’t bury his head behind his camera
“Once the lighting and composition were to his satisfaction, he would leave the camera with the shutter release innocently in his hand and engage his subject, ready to squeeze the bulb, capture a moment of truth, and share it with us.”According to Jerry Fielder’s book, “Karsh, Beyond the Camera.
Having seen the finished product in Karsh’s image of Nelson Mandela inspired me to put in the effort to perfect the studio lighting setup as well as the location lighting arrangement.
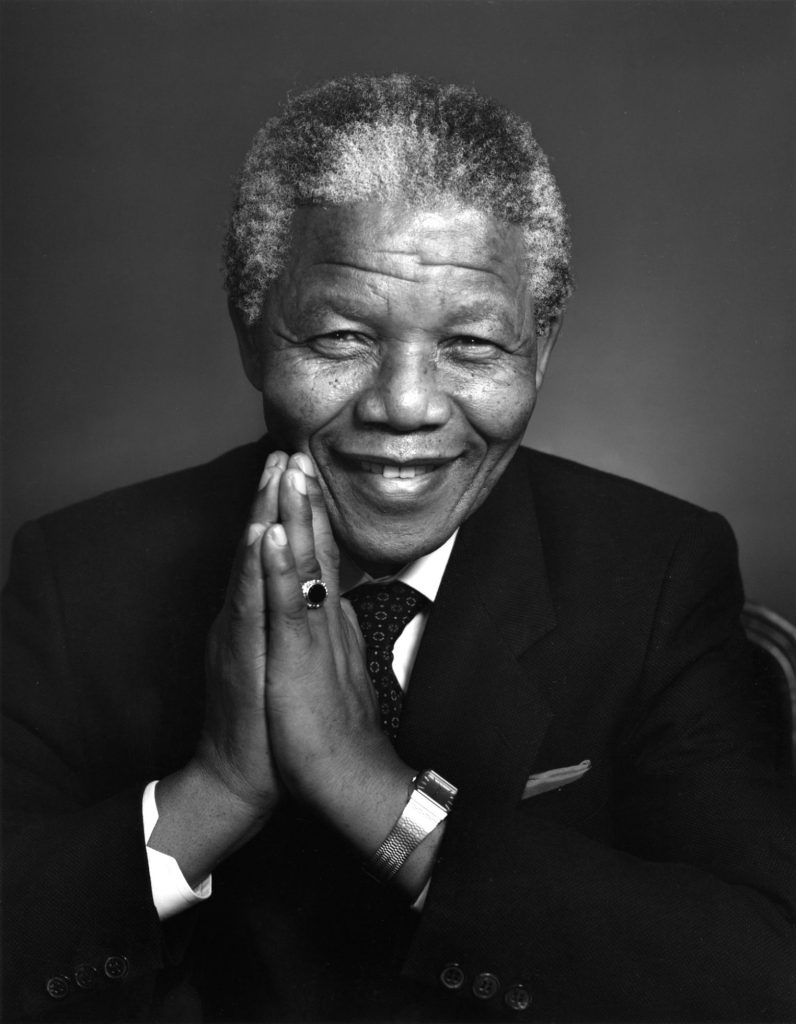
Nelson Mandela’s portrait was successfully brought to life through the use of the Yousuf Karsh style of emotional photography, which involves really getting close to the subject itself before photographing them. This resulted in a portrait that shines with a version that is humble, charismatic, and humorous. The photographs taken by Karsh include a high level of contrast, and the lighting makes them seem virtually identical to natural light.
I believe that Karsh’s works should serve as an example of how to transition from historical portraiture to the current style of portraiture, since they are really remarkable.
I try to photograph people’s spirits and thoughts. As to the soul-taking by the photographer, I don’t feel I take away, but rather that the sitter and I give to each other. It becomes an act of mutual participation.
Yousuf Karsh
I am focusing my attention on how to correctly utilise the light and adjust the light source to achieve the appearance that I have seen from Karsh’s works and enhance it in a modern way on how to accomplish it. I have seen this look before, and it can be improved upon in a contemporary manner.
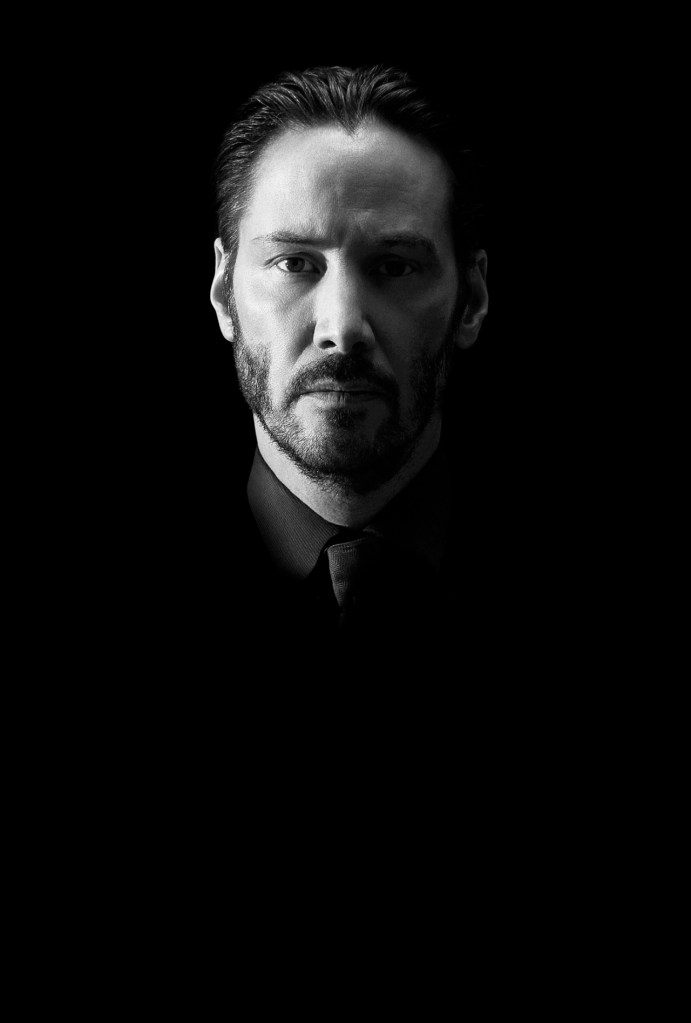
Look of Keanu Reeves
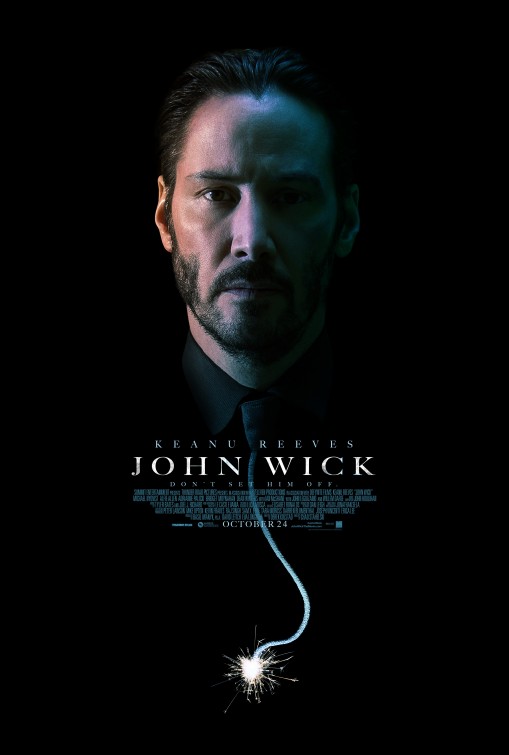
One of the look that I would like to look achieve for this project is the look of John Wick 2014 Black and White (B&W).
I struggle to find who was the photographer captured this beautiful picture. But, I believe this is not in B&W because after online searched; I found lots of images in colourful that have been spreading across the internet.
I picked this specific look because Keanu Reeves is the man that does not talk a lot but really works hard in his life, calm, generous and smart.
I am fully aware that this kind of picture has been massively modified in Photoshop, and this photo originally shot in colour but in related to my work is Keanu Reeves is a famous Hollywood actor and super rich. However, in terms of personal character, they are similar.
Using two different sources of light to create a split on the model’s face creates an intense appearance that may truly help reinforce the concept of the story.
As a result of learning how to approach the model and the looks of Keanu Reeves from Yousuf Karsh, I have in my mind the knowledge that I have gained from all the practises that I have done with the team or by myself with the model; I am confident with what I wanted to accomplish next.
In order to get the results I want for my project, I will experiment with the location of the light, as well as utilise some of my images with just one light and some of them with two lights.
Contemporary portrait
Mood Board
When it comes to creative photography on a professional level, mood boards are created to gather ideas that could or might not end up being used in the final product. I should consider it as part of my learning process. I explored on other publications and sought for projects that are comparable to the one I have. What kinds of ideas are they attempting to get through, and how exactly did they achieve that? I tried to find as many samples of editorial photography as I can since it might be useful for me in the future.
However, mood boards don’t need to go into that much detail. It’s not uncommon to come across a component that strikes your fancy and gives you an inspiration strike or a surge of originality. It might be the model’s appearance or the surroundings; alternatively, it could be the clothes or hairstyles that were chosen. Whatever it may be, add it to the inspiration board you have created for your editorial photography.
The mood board was created with a dual purpose in mind. To begin, it is important to collect all of these different concepts and ideas so that I may better develop my own ideas. In the final, it will assist me in carrying out my shot by providing a location for my thoughts to be arranged into a coherent idea. Second, the use of these boards as part of the collaborative effort required for large projects is an extremely important step. The mood board is a communal resource, and many members of the team are able to contribute to it and take notes there.
I was searching the internet for a photographic model that I can replicate, and I came across a youtuber by the name of Laura BC. She uploads beauty videos to her channel. All of her works contain lots of artistic and dramatic portrait. I am able to see through what she is doing to achieve the look that she intended to go. “Go to Pinterest, find the look you want and improve it to your own style”-Laura BC.
For me, I wanted to give the impression of strong but calm to my subject in the concept of black, moody portrait to match my model’s personal character and story itself.
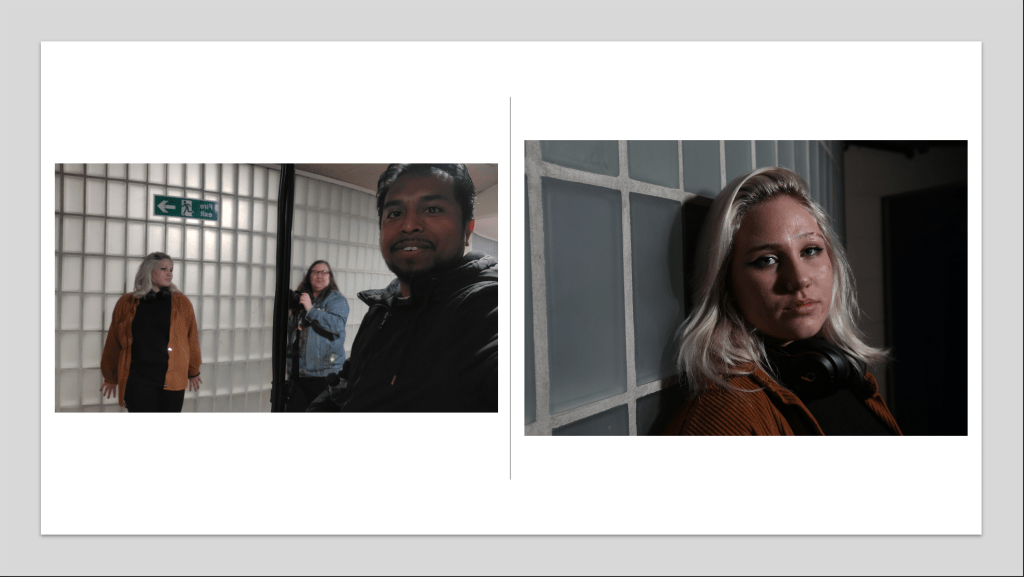
Experimenting with the assistance of friends by sharing the concept as well as by myself with my model on site and in the studio is how I want to incorporate all the different lighting approaches into my own personal style.
I will attempt to demonstrate how I will come up with my photos by first developing my skills in the following ways:
Photoshoot on location practice
- Location 1
In this shot, we work together as a team to explore light technique with only one light elinchrome 500 TTL
- Location 2
We added some rgb constant light to create a portrait of contemporary style
- Location 3
I practice with my model in test shoot combine one rgb light and and one studion light elinchrome 500TTL.

Photoshoot in studio setup
We all work together to set up the light and all equipment base on every each look that we want to recreate and also explore other looks.
- Studio setup 1-high key portrait
- Studio setup 2-low key portrait with extra snoot behind the model
- Studio setup 3-Low key with gels to light the background and key light to the left side of the model
Using a wide range of practises both within the studio and the oudoor. I believe that it will provide me with sufficient experience to be able to create photographs in my own unique style, which I will shoot at the end as my own final product.
Risk and Safety
Working with the electric, cables, and all of the mechanical stuff, it all obviously creates some short of hazards that relate back our health safety and environmental in general, which is why I would like to address those hazards that can happen in the studio and on location if we are not careful enough to prevent it from happening.
Indoor Studio
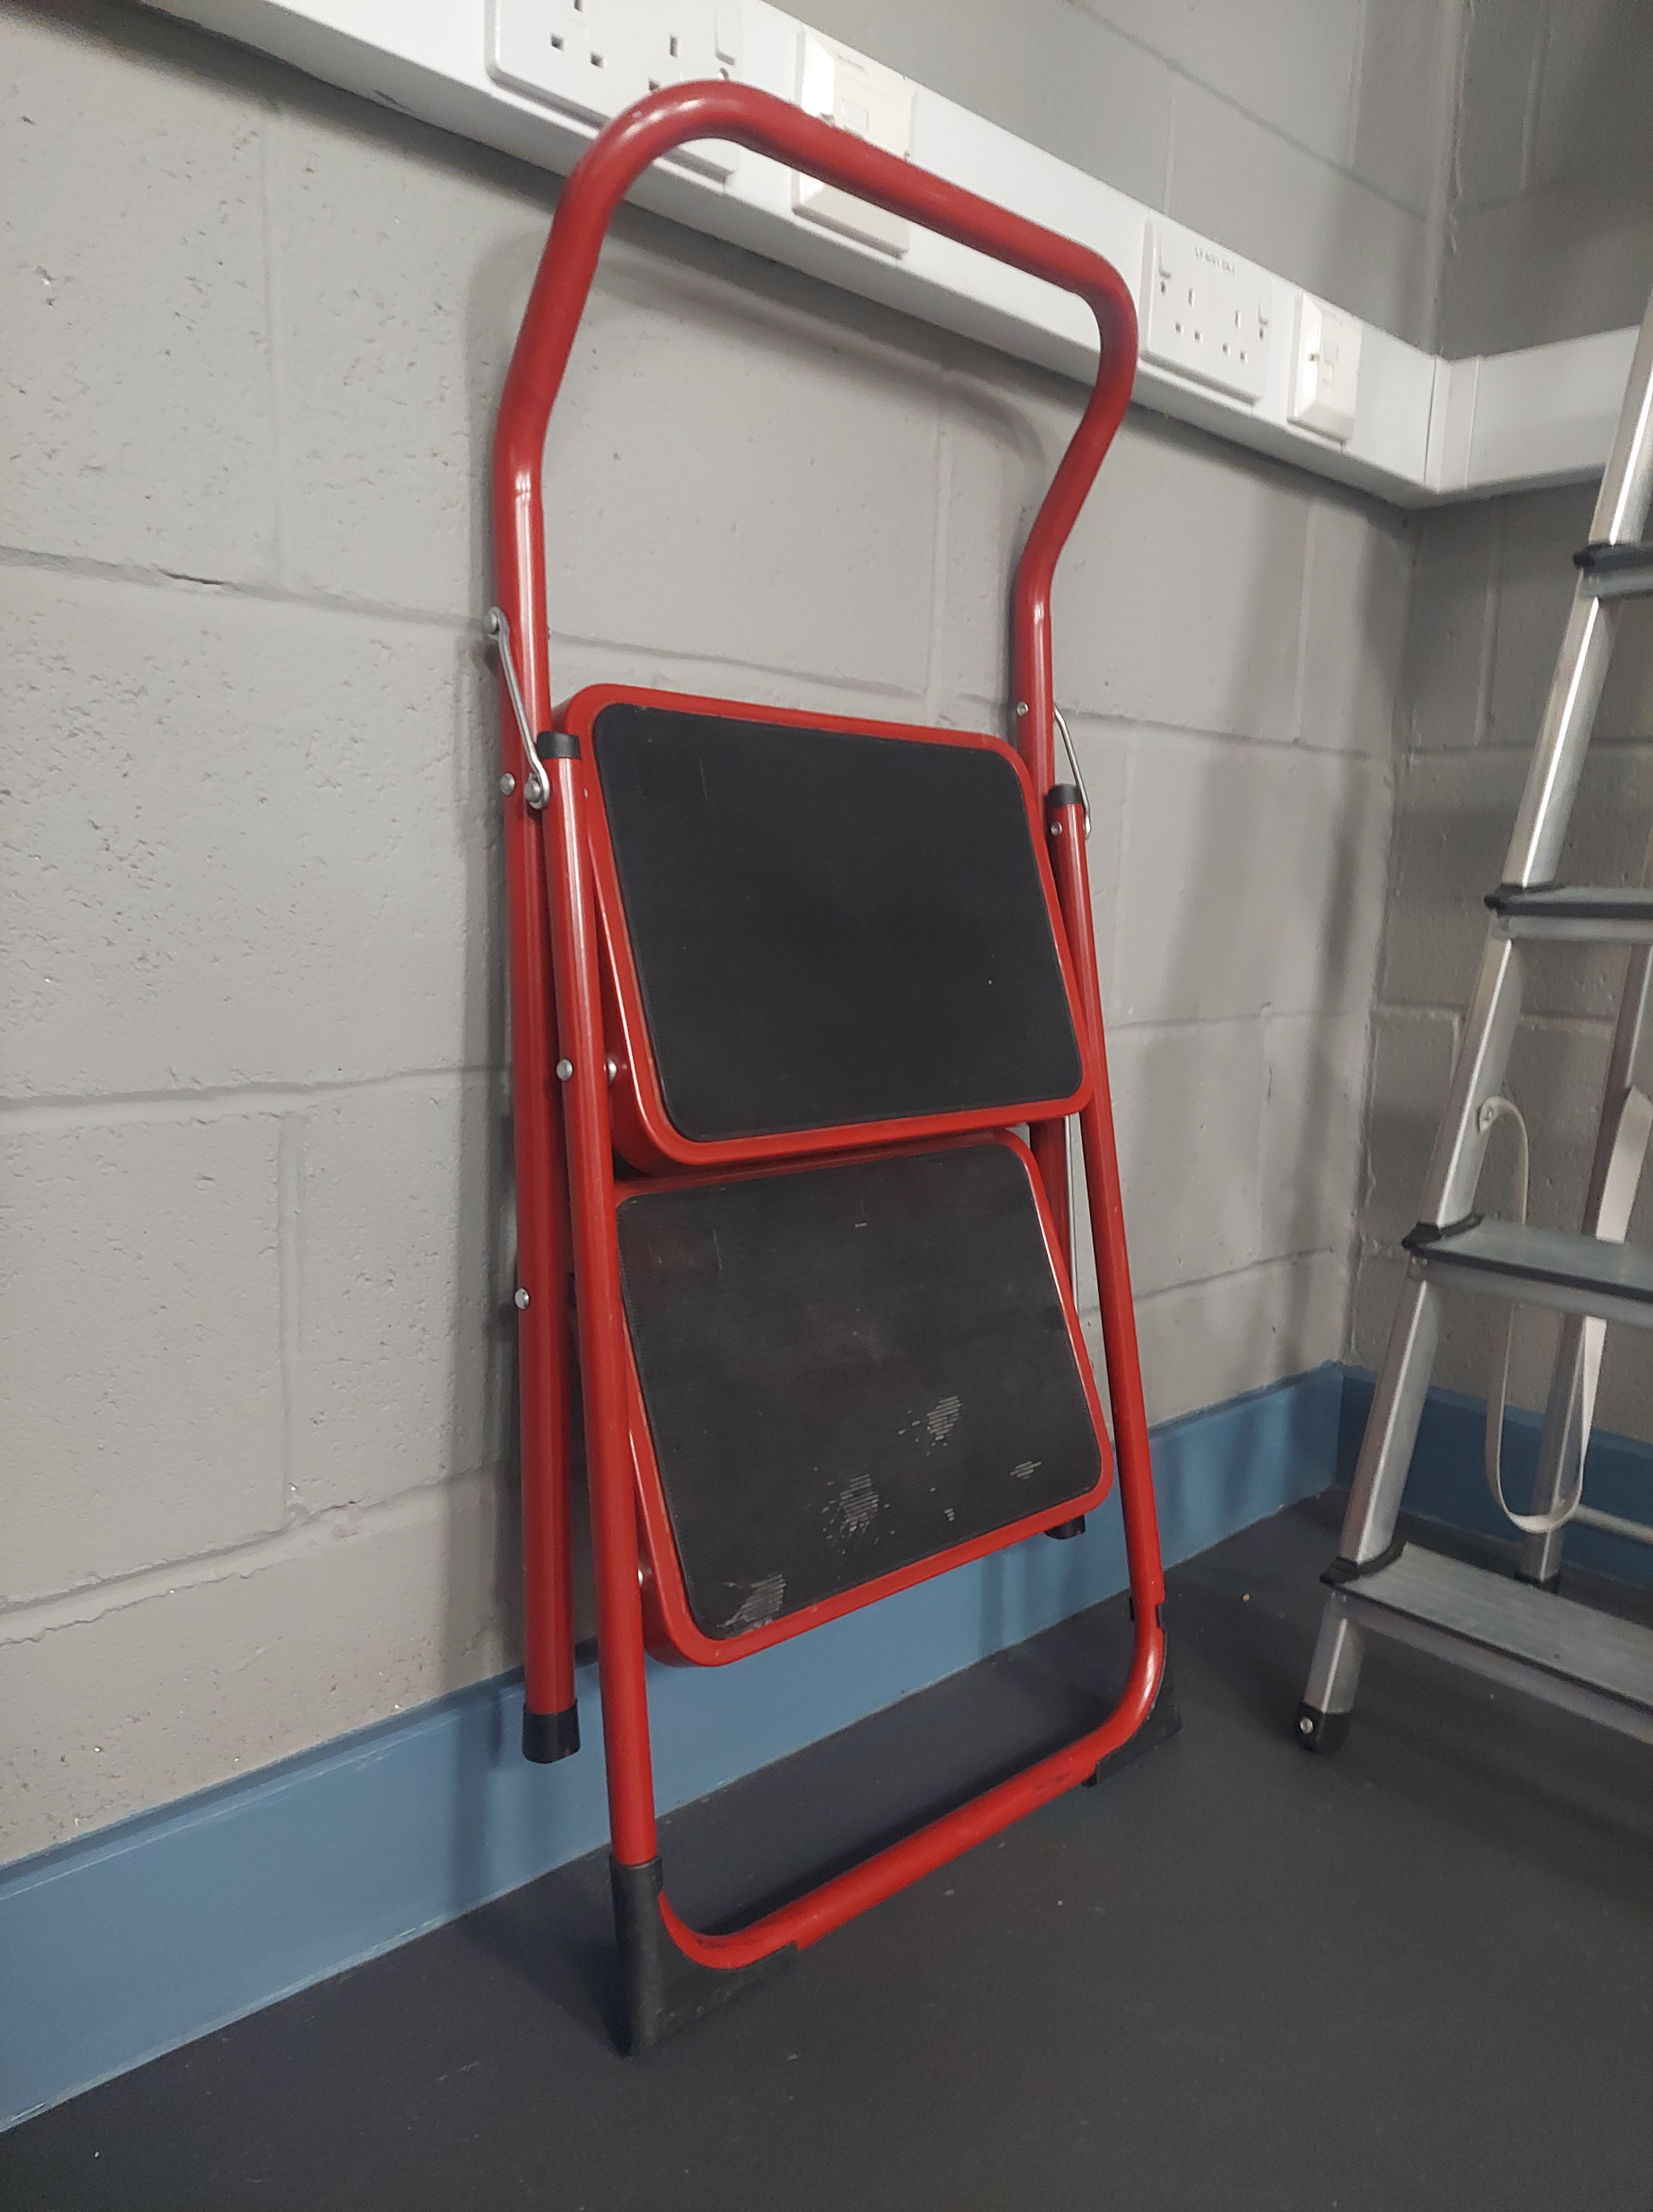
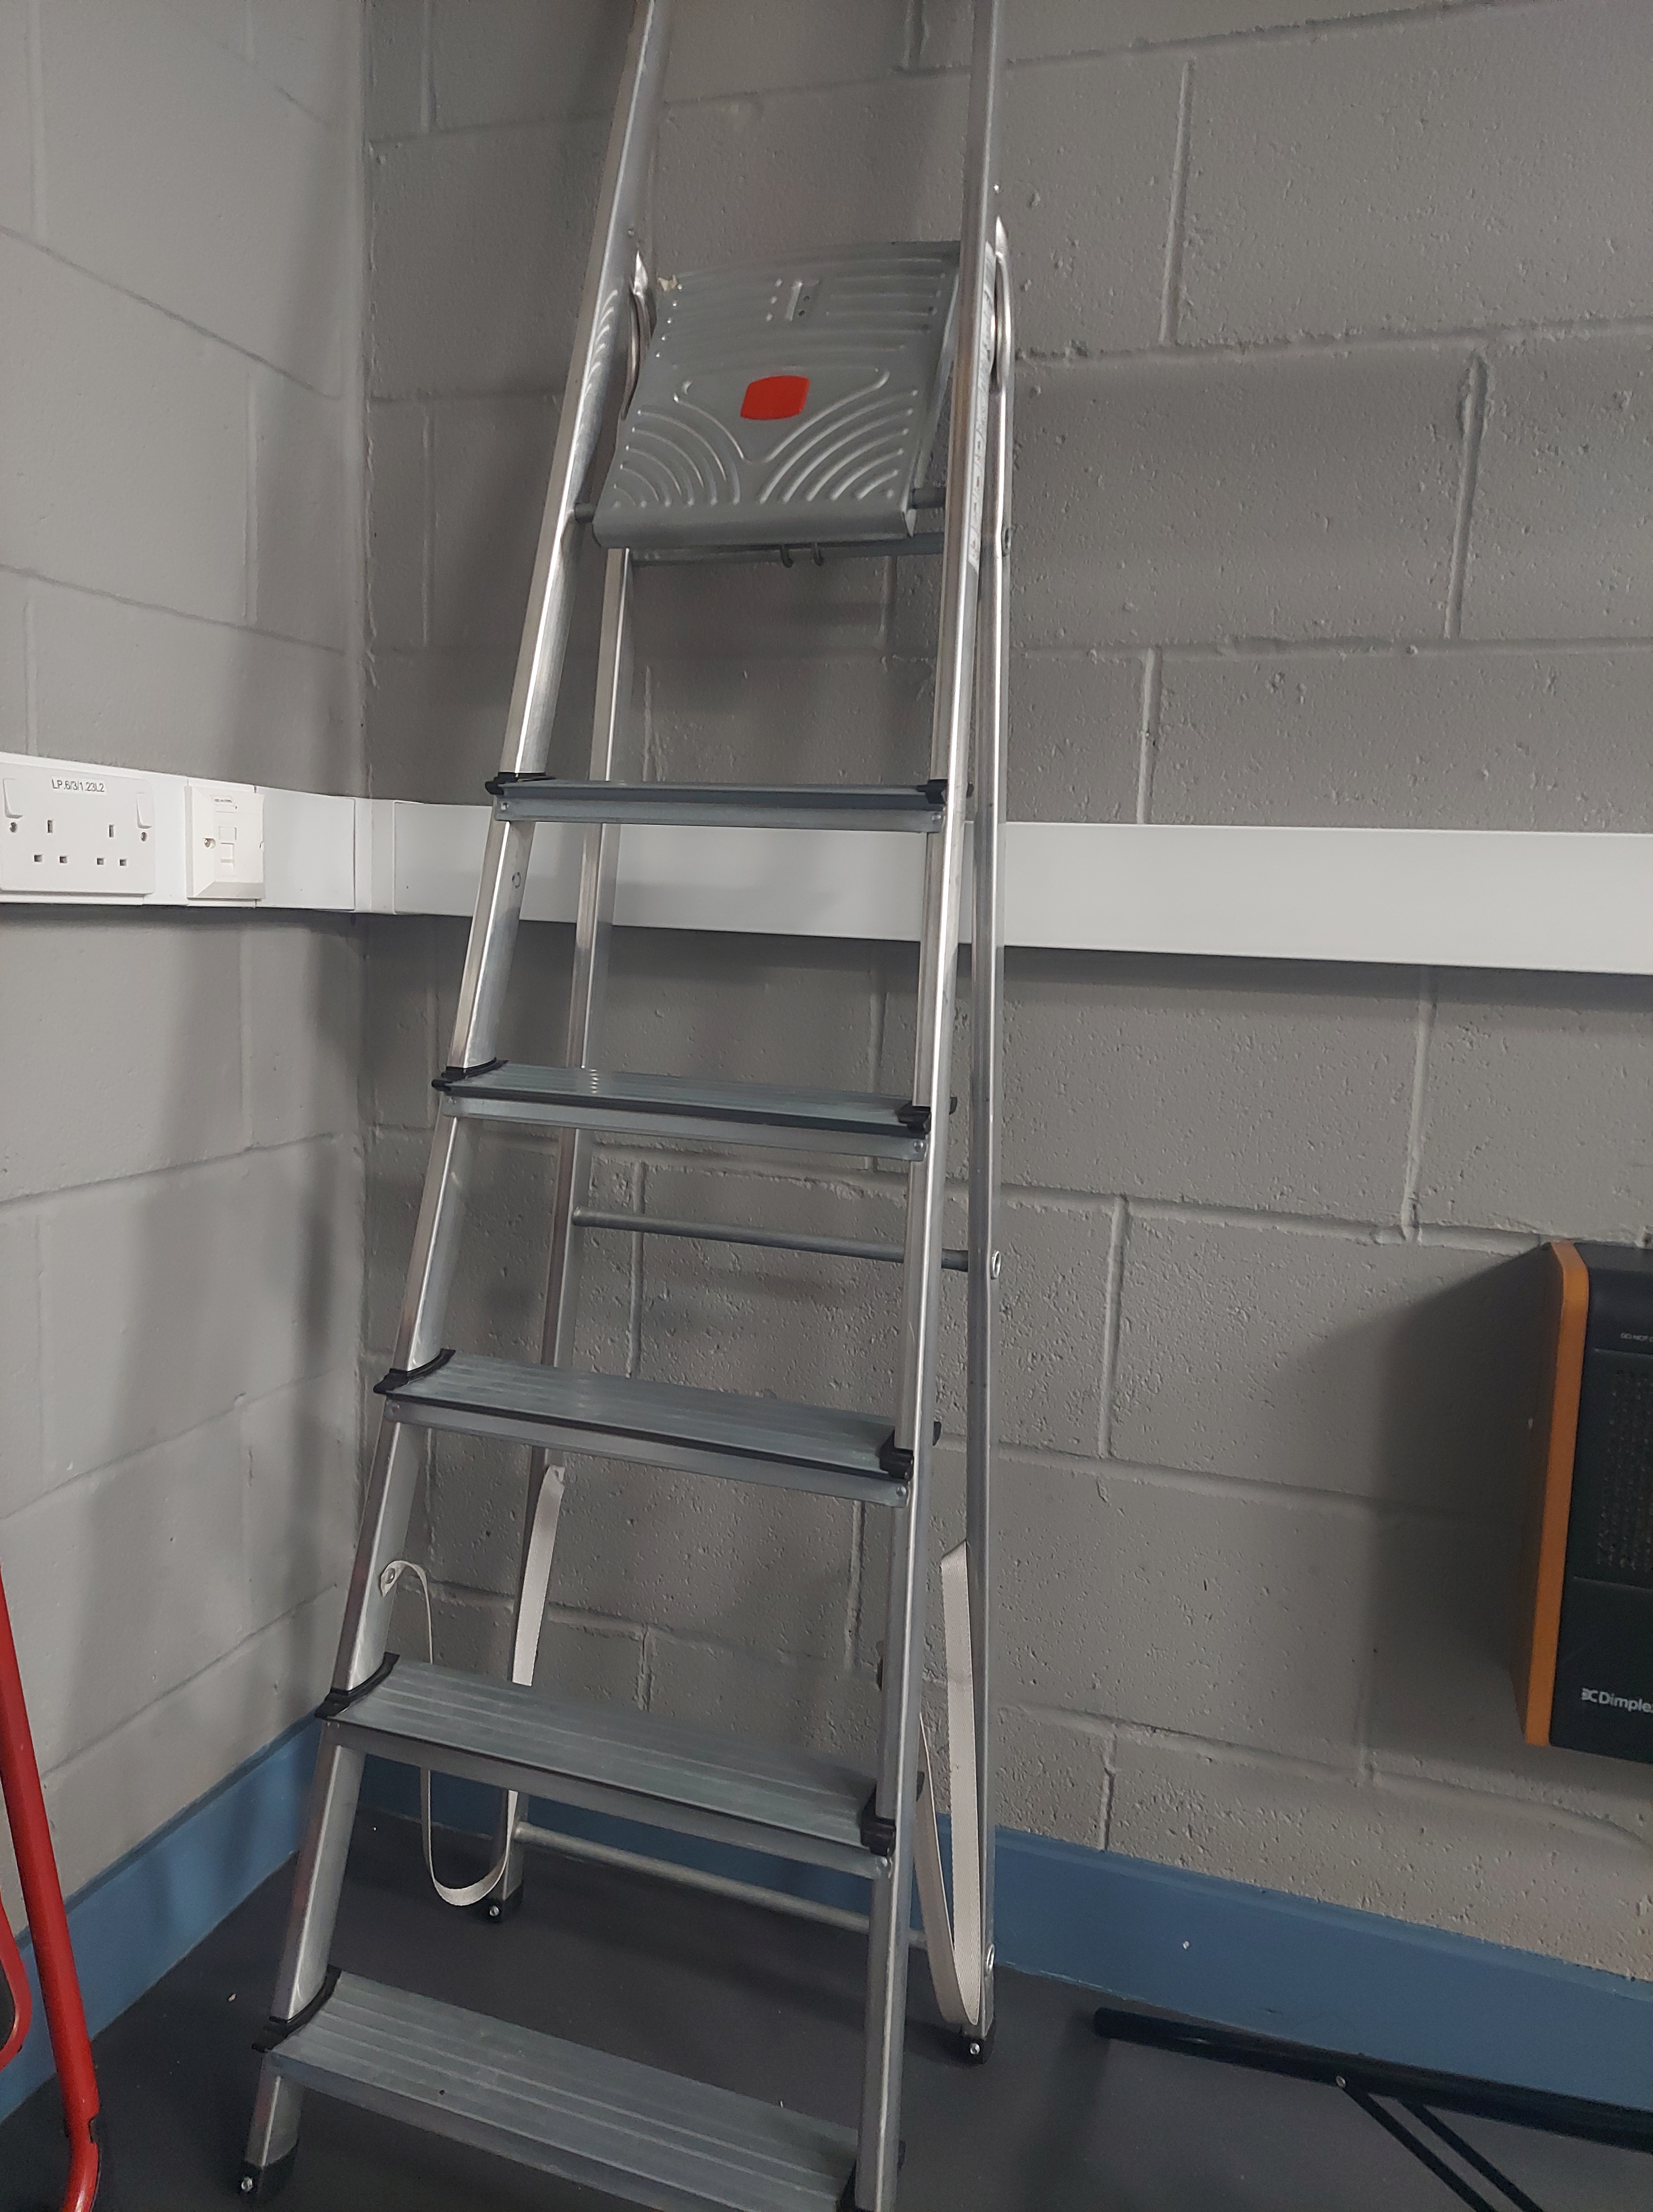
Studio Kit
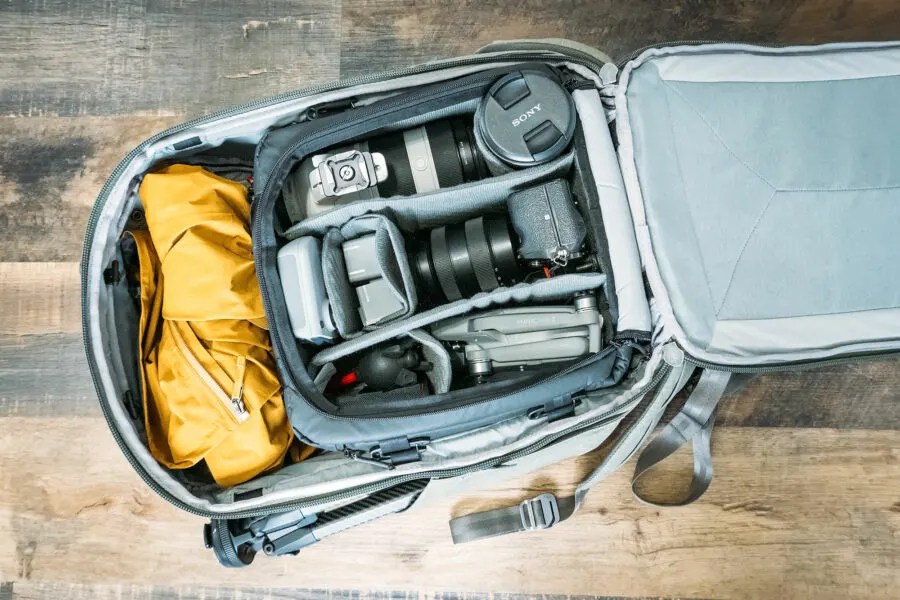
Creating photos clearly requires the use of a variety of instruments, including cameras, lenses, a computer or laptop, a tripod, various lighting gear, and several other accessories. It will give us peace of mind to identify what kind of gear that we need to execute the project without worrying about missing something that could eventually give us stress during the photoshoot process if we organise those tools accordingly on the place that is far from developing hazard in the studio.

No food and beverage
It is highly recommended that do not bring any food or beverages into the studio, since there is a lot of costly and sensitive electronic equipment there. If absolutely must carry any liquid into the studio with, ensure to choose a strong bottle fitted with a sports cap so that the prevention of leaking is guaranteed, even if the bottle is knocked over.
Gear Inspection
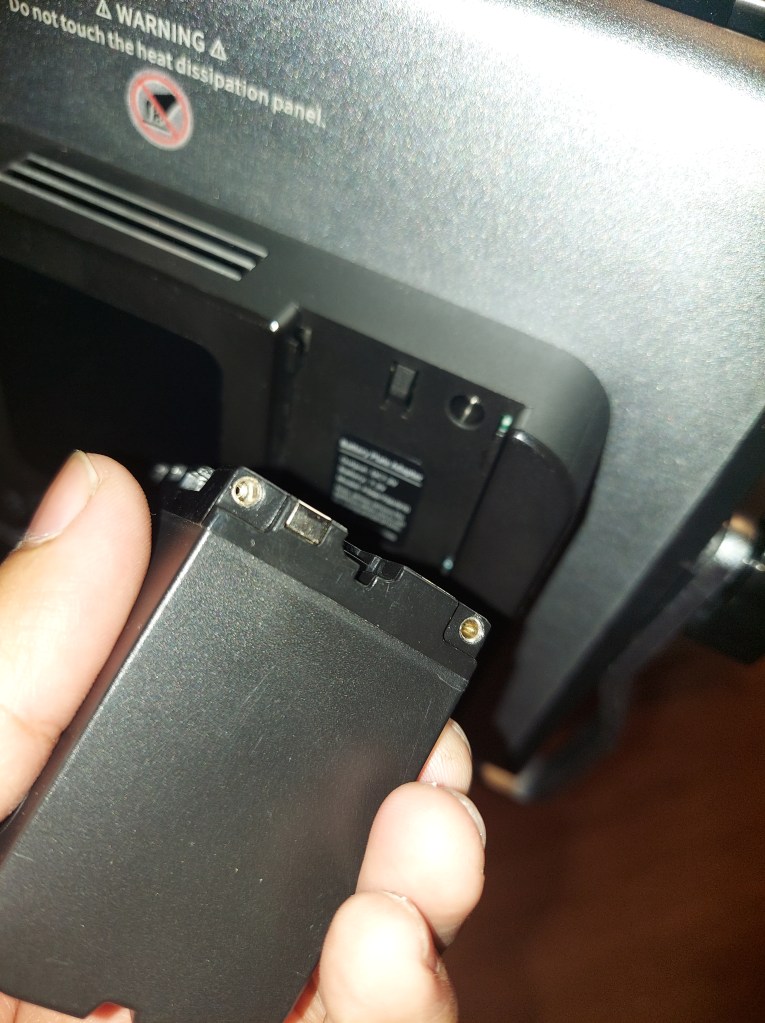
Make sure to inspect the light stands, camera, batteries to all equipment, sd card or external memory card to store images.
Always double verify that tripods and light stands have their legs extended out to their full extent to ensure that they are as sturdy as possible to prevent any of the equipment trip over. They ought to be held in place by locks, so before begin shooting, check that these locks are adequately tightened and that they are in good working order.
Keep your hands off the light bulbs.
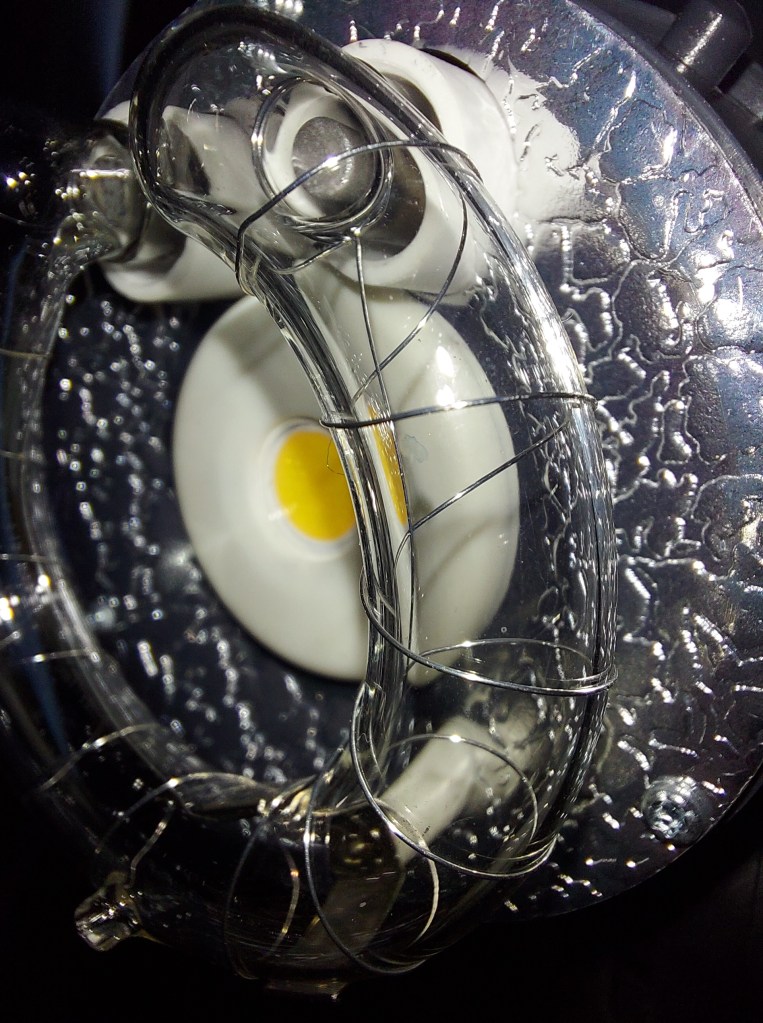
Incandescent light bulbs function at extreme temperatures and can easily burn you when they are switched on. However, always avoid touching them even when they are switched off. Finger-marks and smears left on the bulb can cause localised hot spots, which can lead to the bulb blowing or even exploding if they are not removed. If unable to avoid touching the bulb, be sure to wear gloves and wait until it has cooled before touching it. This will prevent fingerprints or perspiration from being left on the surface.
Replacing the reflector
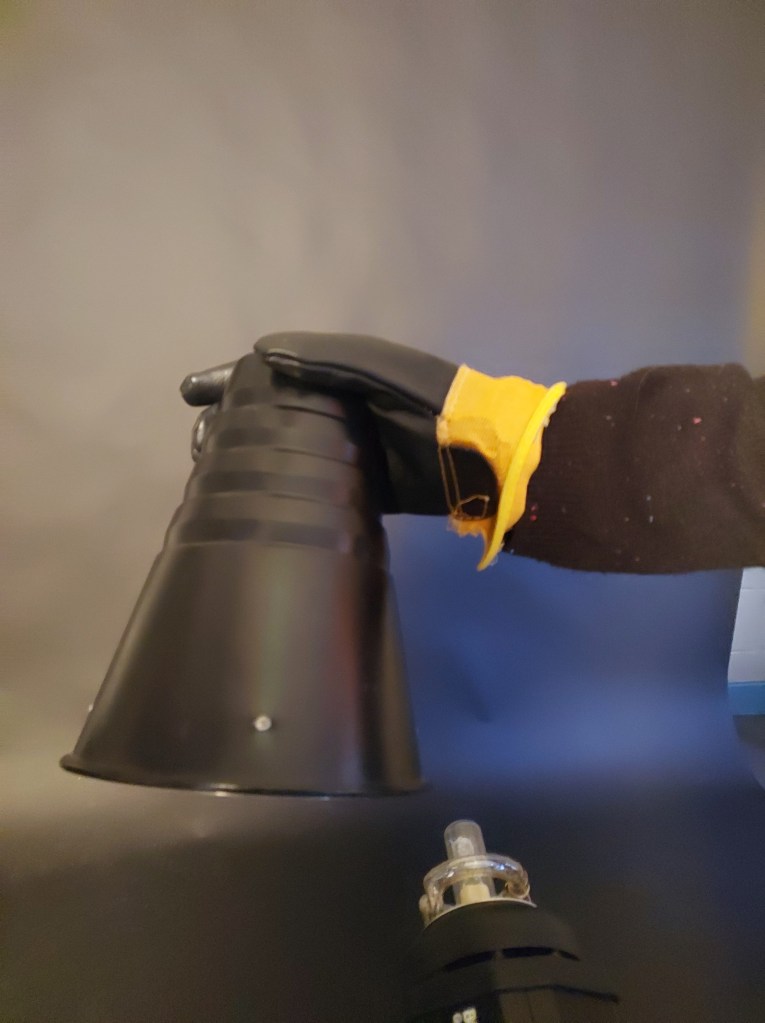
In the event that you absolutely have to replace the reflector for some pressing reason, it is strongly suggested that you always use a pair of heat-resistant gloves to protect your hands from burning. This is because you have a responsibility to prioritise your own safety above all other considerations.
Electrical Equipment
It is important to conduct a risk assessment before beginning work or allowing the subject or model into the studio in order to recognise and remove hazards or control risks. A significant portion of the potential risks that are present in a photography studio are related to the electrical equipment that is present in the studio.
Ensure all gear is connected in and removed securely at all times to prevent the risk of electrical fires. Ensure equipments are turned off before unplugging it and check that the battery has totally deleted before removing the cable from the socket.

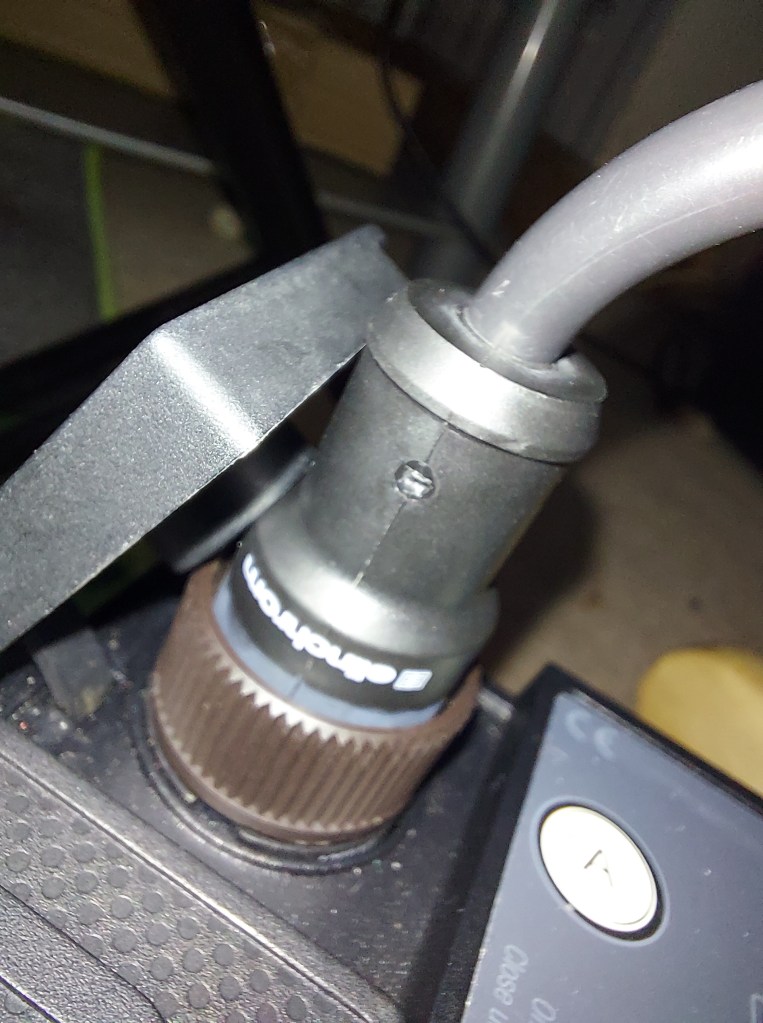
Make sure that equipment is maintained at a safe area from the wall plug whenever it is connected in and being used. This will prevent arcing, which is when sparks move between two points that are electrically connected. Always keep electrical equipment at least a safe distance away from the plug socket, since this might start a fire.
Before you use any of your electrical equipment, you should carefully inspect it for any loose electrical or damage and make sure that it is either fixed or replaced before the start of your shoot. The PAT test should be performed on every piece of your electrical equipment long before use your studio.
Because prolonged use of electrical appliances might cause them to overheat, you should always make sure to turn them off when you’re not going to be making use of them, even if it’s just for a few moments. If you want to prevent your equipment from overheating and catching fire, you should avoid covering it with things like bags, clothes, or other objects.
Cables and wiring
When establishing a connection between an electrical socket and a light, the cable is the component that poses the greatest risk to the safety of everyone in the room. The practise of ensuring that the wire is safe from being tripped over or falling is obligatory and must be followed.
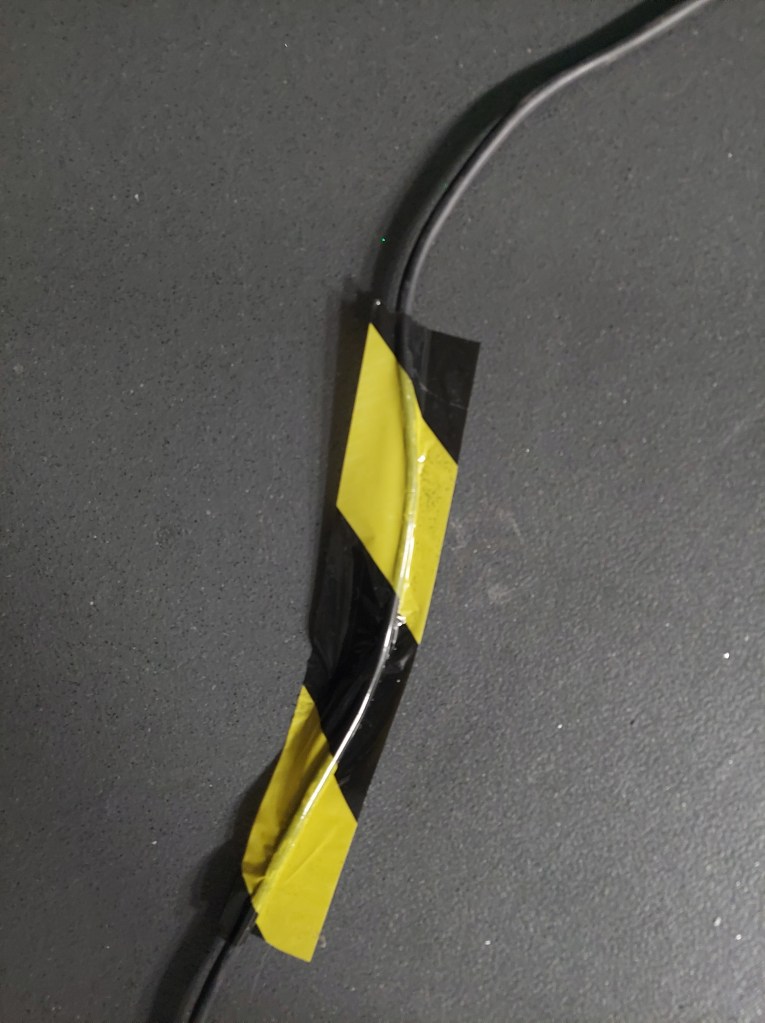
Put the wire as flat as possible on the floor by using duct tape.
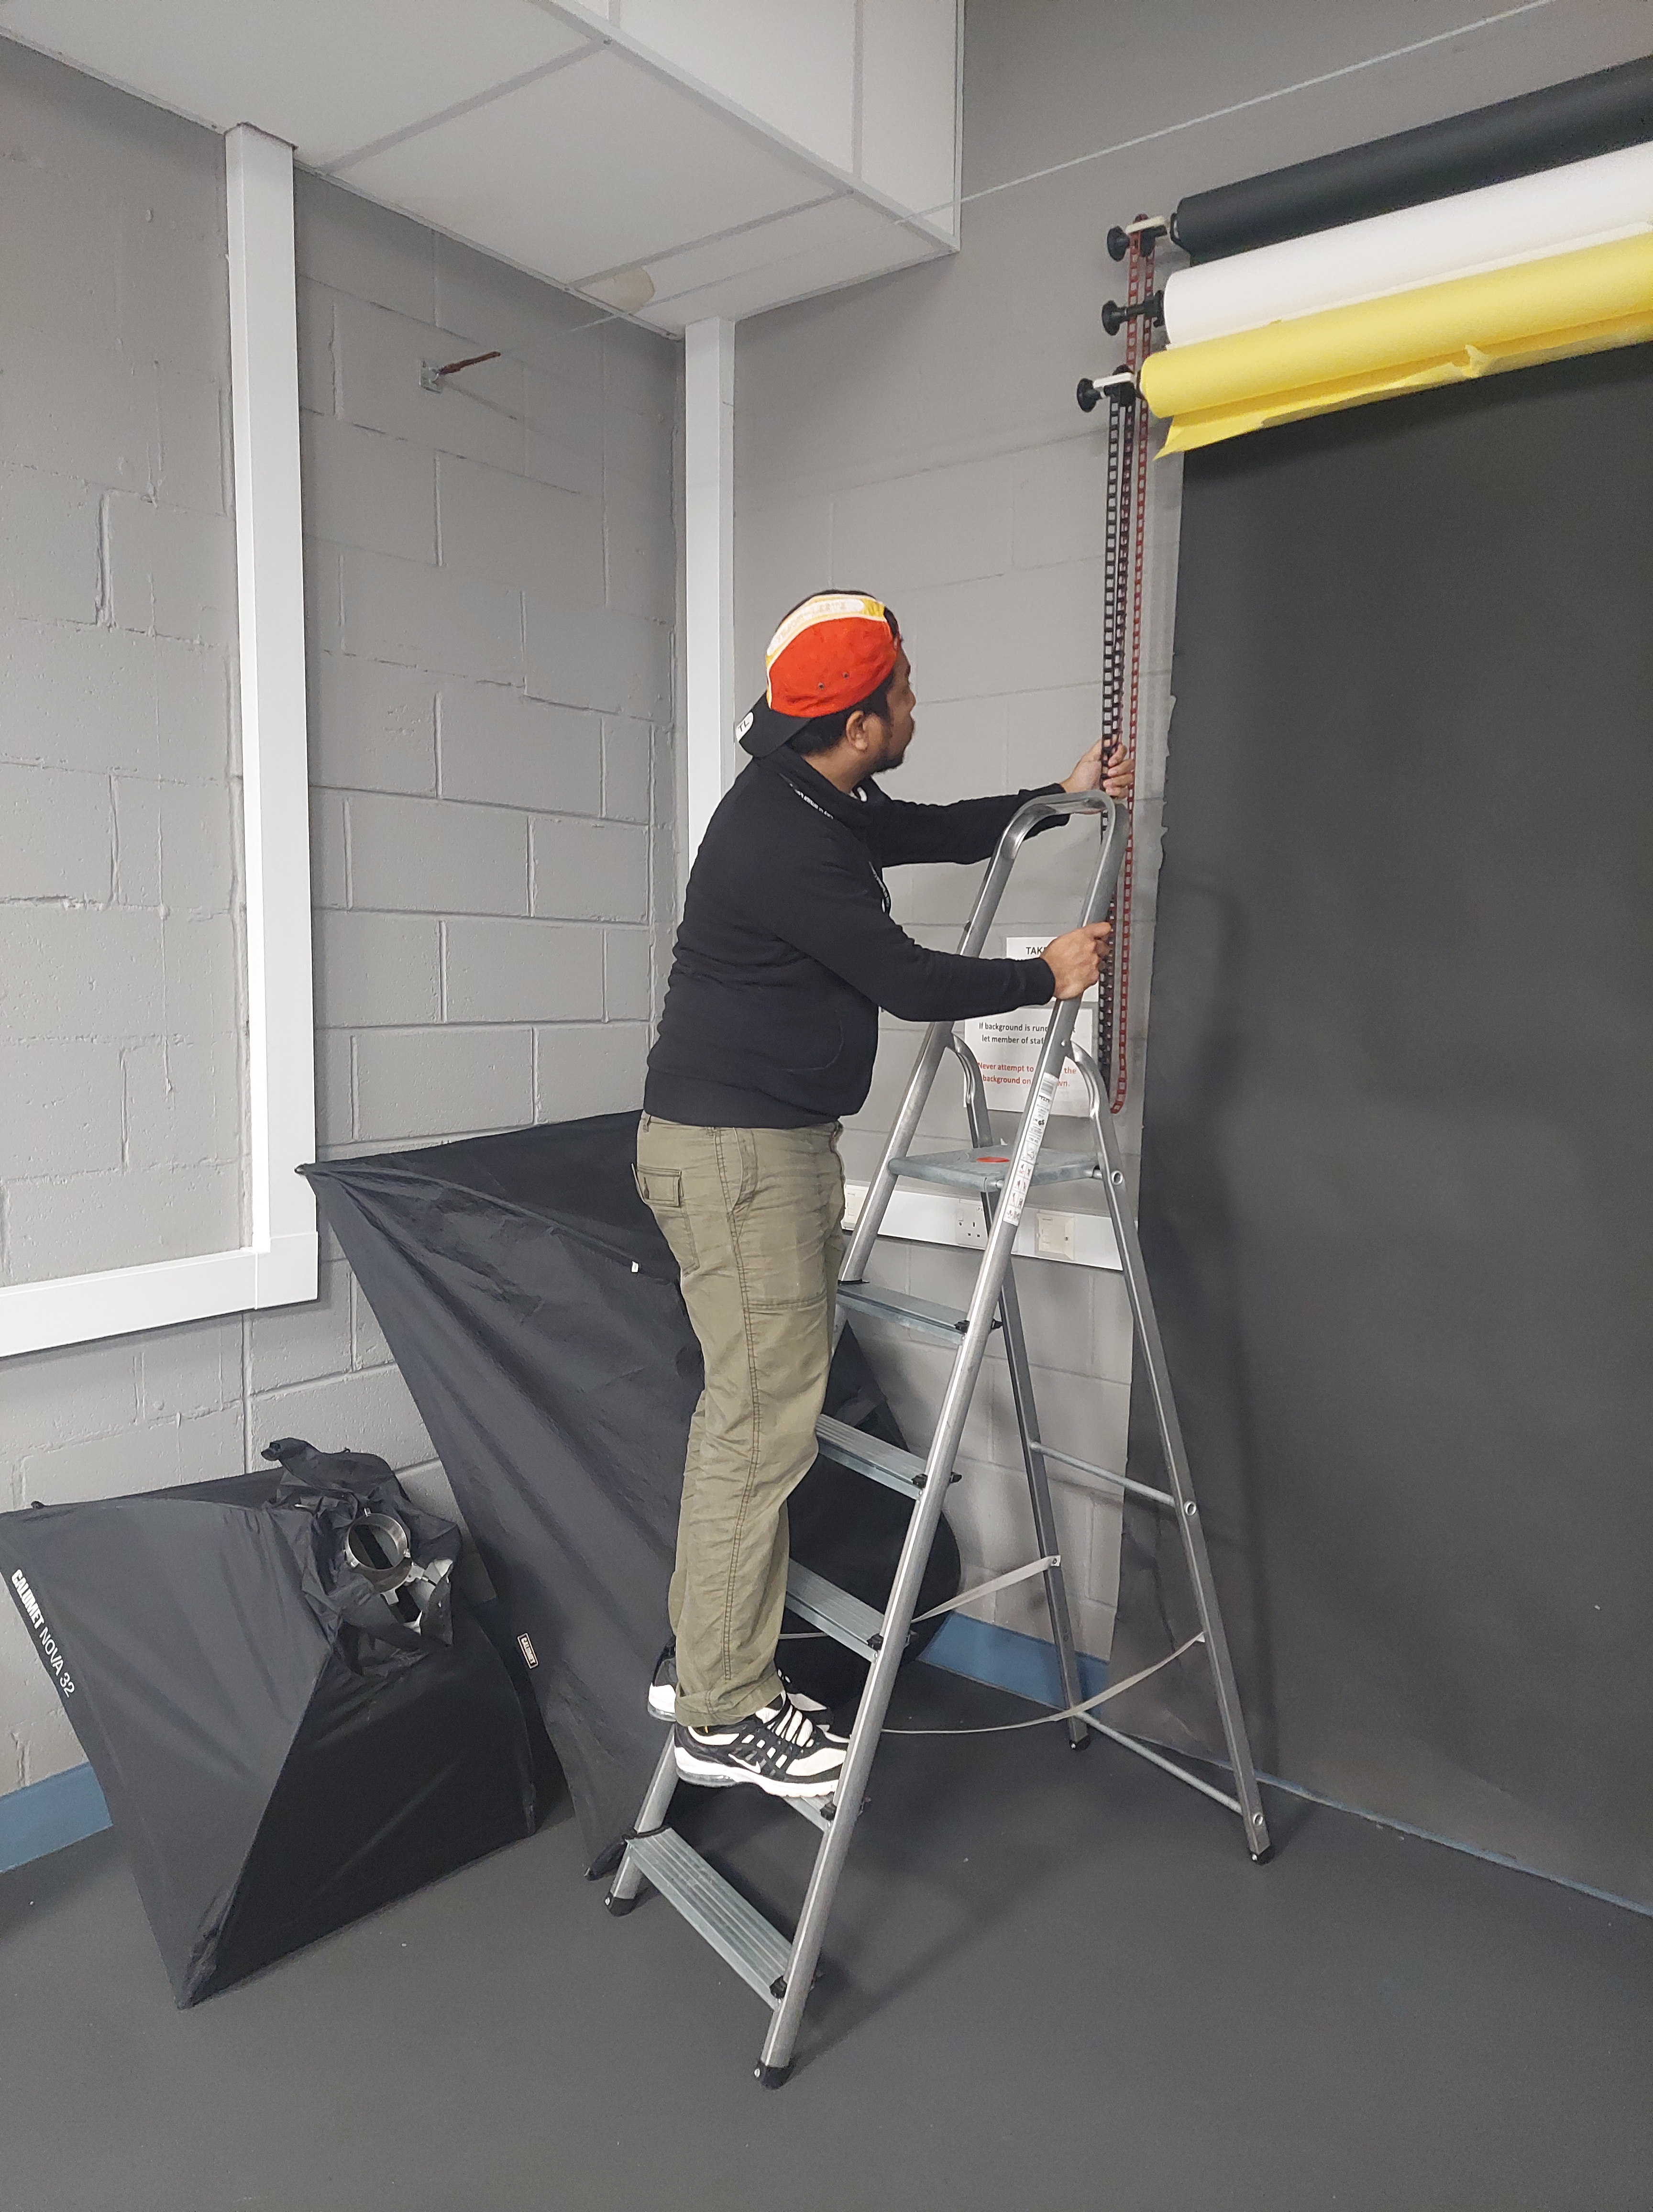
Setup backdrop with safety
If you need some additional height to adjust with the hanging backdrop gear or a background and you have access to a solid deck that is tall enough to accommodate what you require, utilise the ladder. Avoid step on seats or tables, and when using a ladder that’s higher up, make sure that another person holds the base of the ladder while you’re on it so that it doesn’t topple over while you’re on it.
Important Safety tools of kit to provide in the studio
Fire extinguisher
Keep it in the studio to avoid fire because working in something related to electrical, if anything goes wrong in the middle of session or at the end of session, fire extinguisher is the first kit as the first action against fire and then empty the room.
First Aid
It is not always possible to avoid things that are bad. In order to guarantee that everyone would get the appropriate care after any accident that may have occurred. A first aid kit should be kept on at a studio at all times to prevent the worst scenario.
In the first place, any action that results in a burn, cut, even a tiny amount of electric shock, a trip or a slide on the floor, has to be treated first primarily with the first aid kit before calling 999.

Legal Agreement
Always be sure to utilise a model release form on anybody you’re photographing in order to protect yourself legally in the future even it is a free of charge and talk through all agreements mentioned with the model to give a better understanding on both parties regarding your work and how to use you work in the future.
According to the founder of improve photographer Jim Harper, photography doesn’t need a model release. Publishing such a picture may need a model release. A model release is necessary if the picture makes it look like the subject supports the product, service, or organisation. Advertising usually requires a model release. For reporting, creative, or editorial use, no model release is required.
I believe that following the regulation will keep us safe in the boundary line of breaching the law.
Outdoor Risk and Safety (Location photoshoot)
Personally, I would put each kit or item in a bag to avoid destroying or scratches on the gear.
I would like to address all the risk and safety procedures when shooting outdoor in a table as follows:
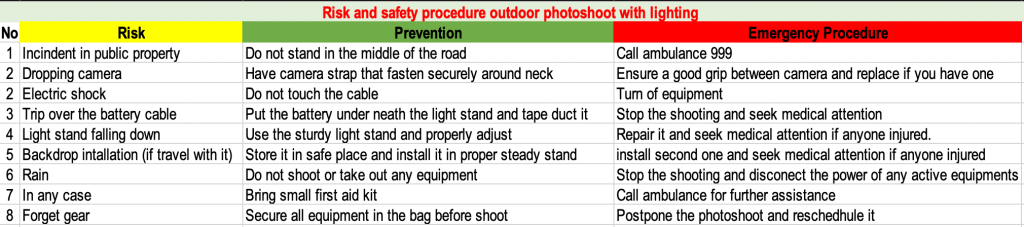
I believe there are still lots of risk on terrain depends on the location and the situation in the field. However, by doing the risk assessment with the location before shooting will guarantee a minimization of the unwanted event from happening. I believe there are still a lot of risks on the environment itself, but it really depends on where you are and what’s going on out there in the field. On the other hand, doing a risk assessment on the area before beginning shooting will ensure that the likelihood of an unfavourable occurrence is reduced to a minimum.
Procedure
Observe
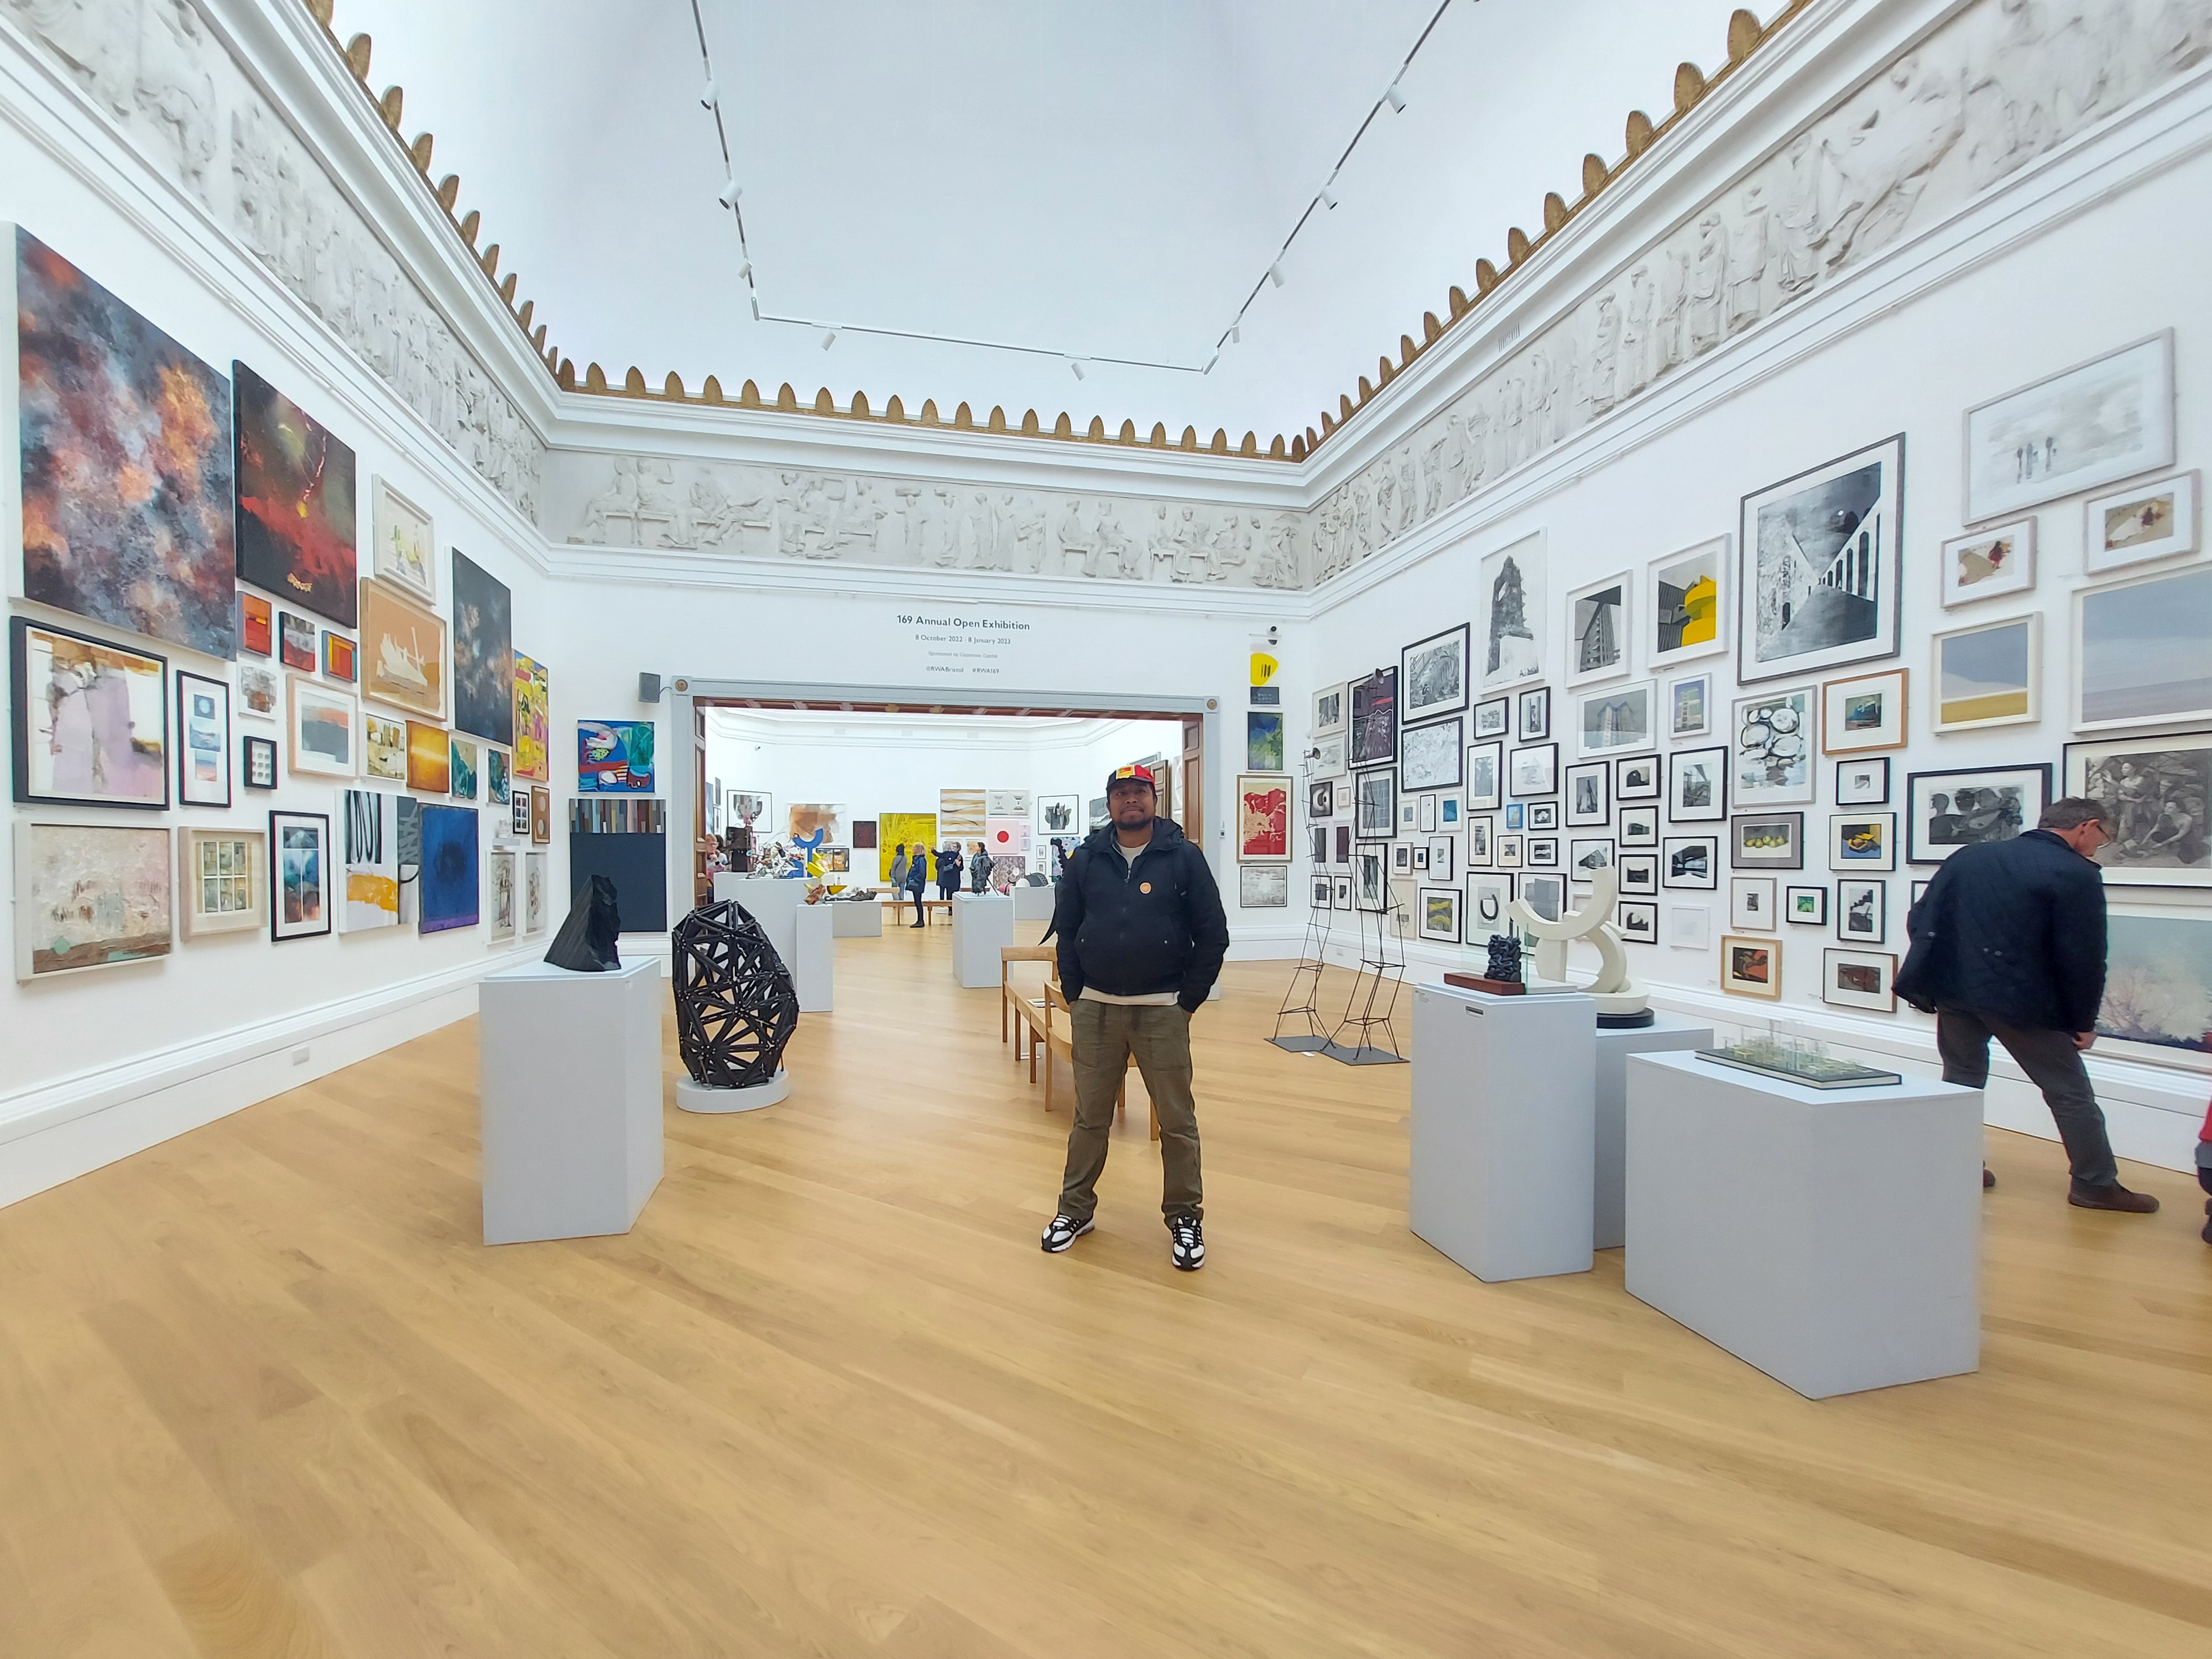
To ensure this project according to plan, I have visited the RWA to have a better idea of how to proceed with this project in terms of how to see images in printing, frame installation and safety wall mount, including the borders inside the frame.
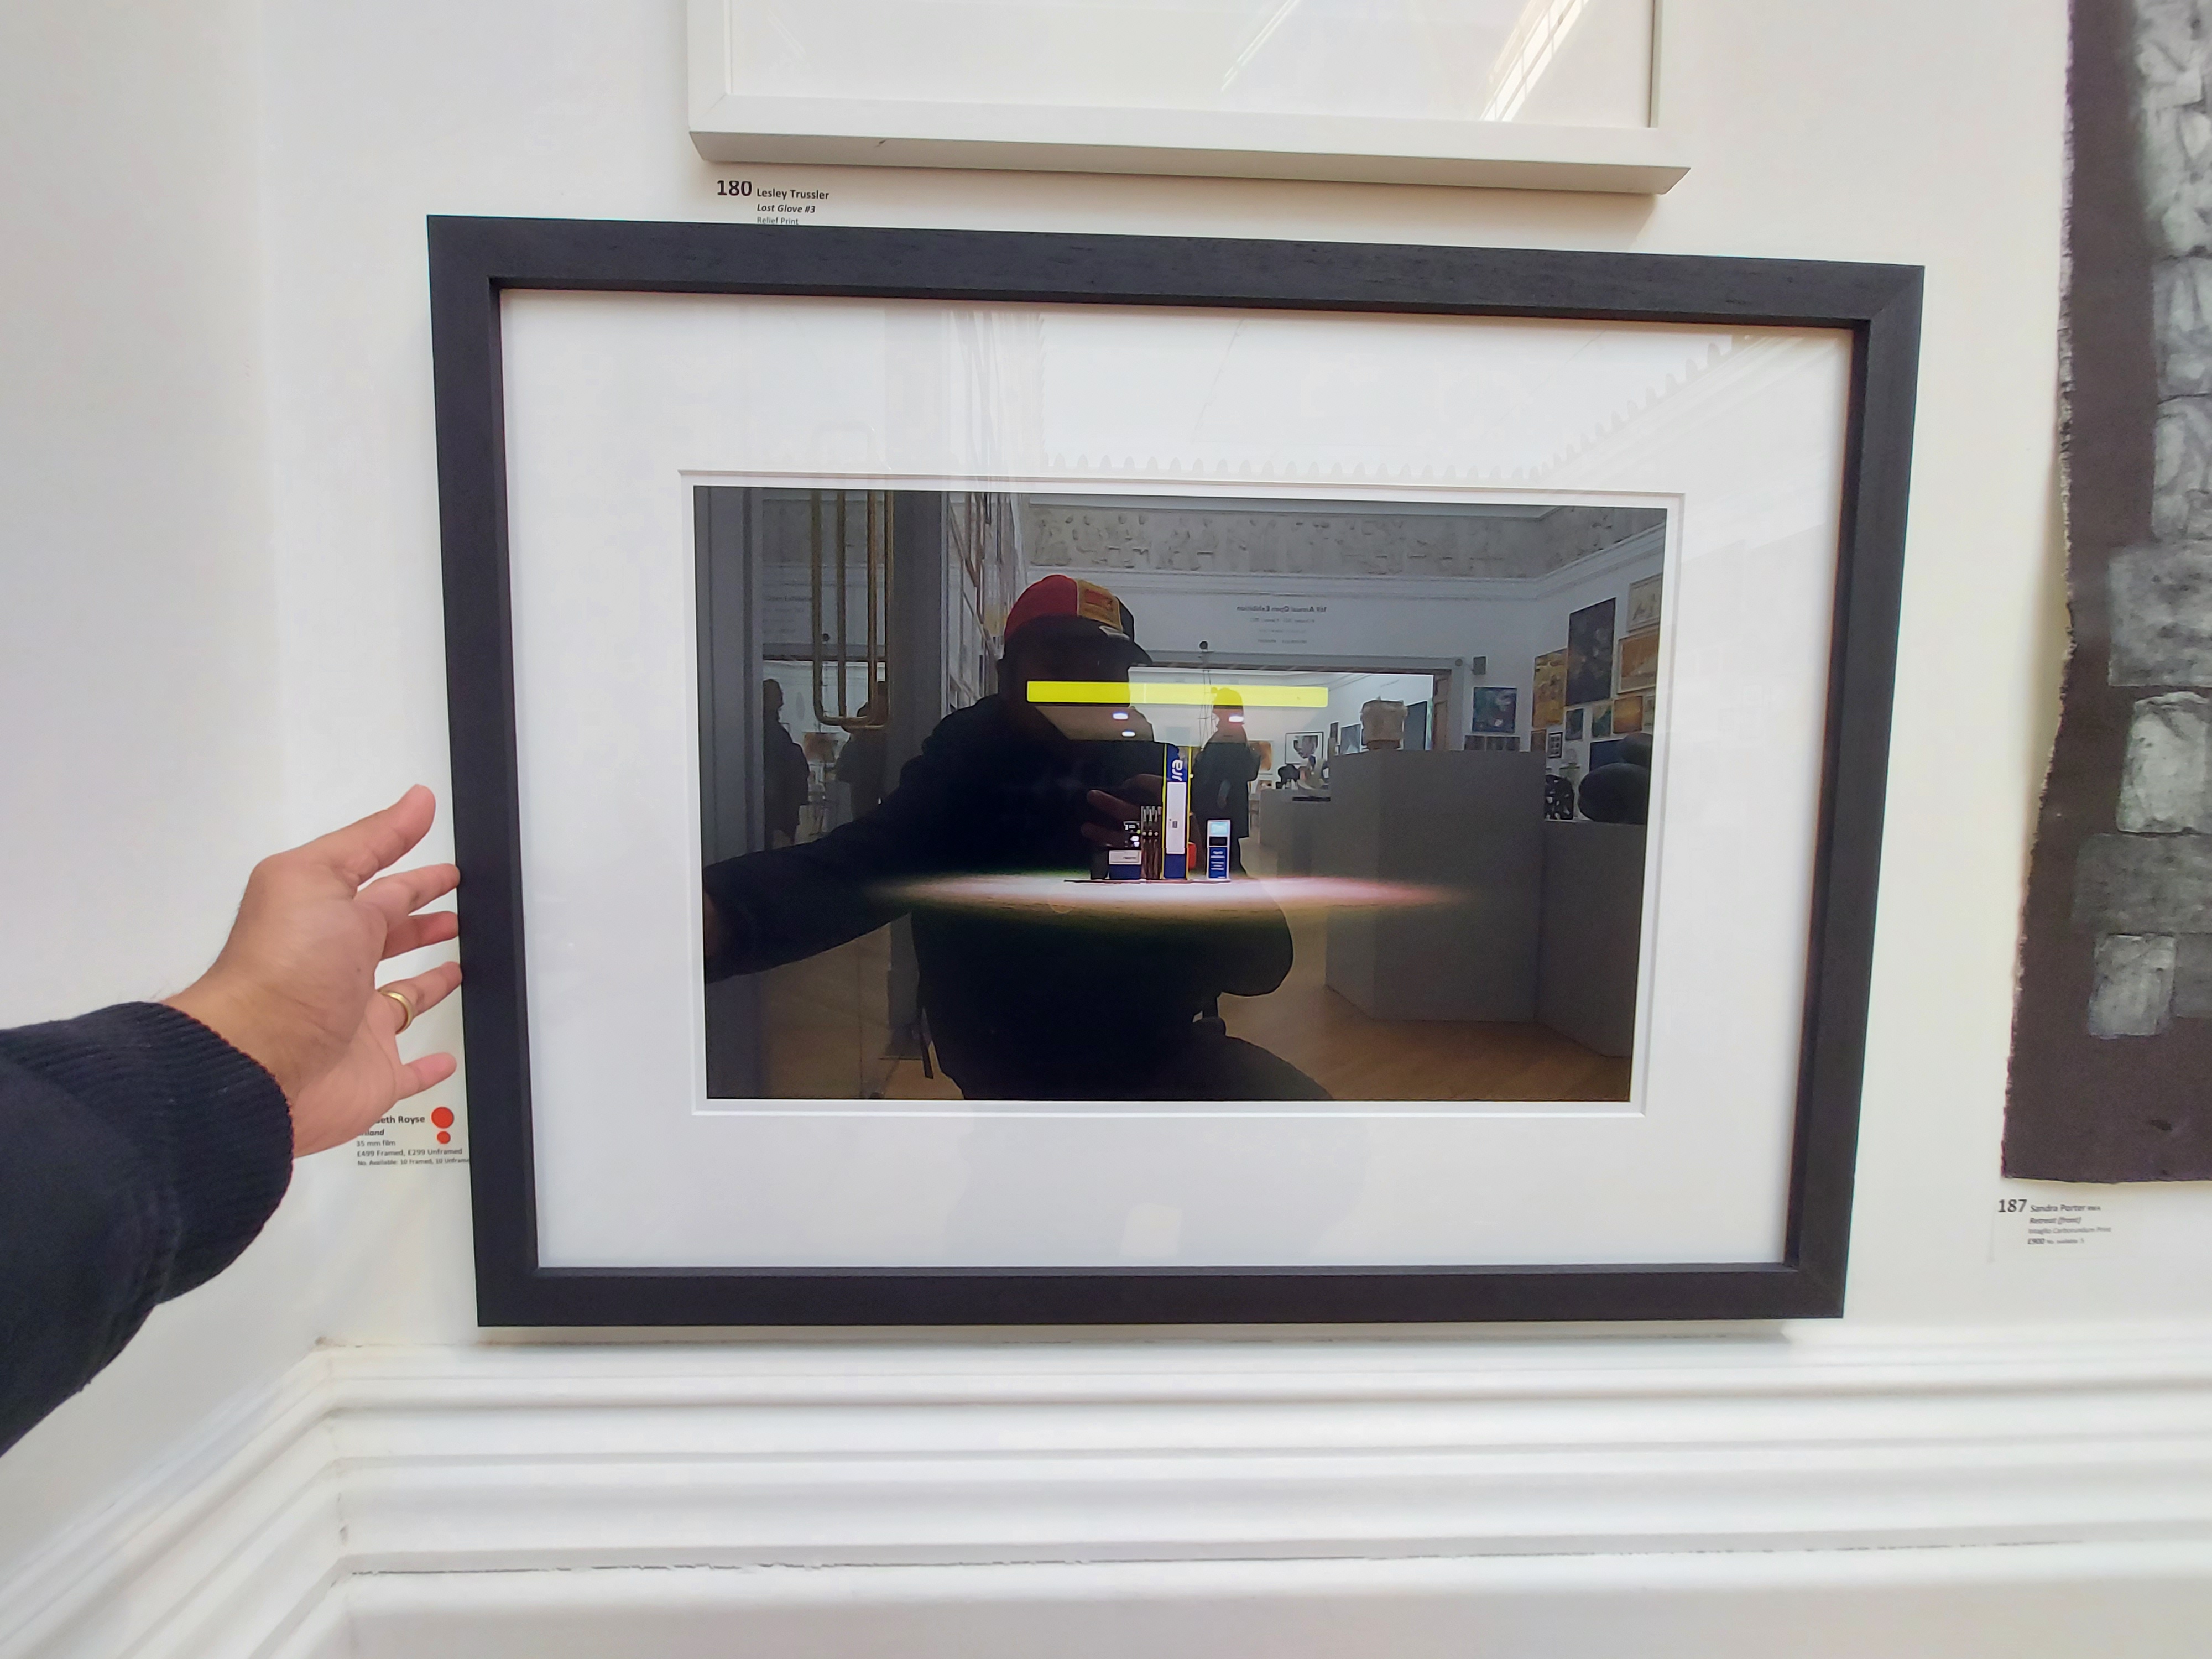
Between discussion of the volunteers in RWA, I stepped up and joint the discussion with Sebastian Thomas (one of the volunteers) regarding where to print and what paper to print on. He mentioned one of the best photography printing and framing is Hello Blue and Steph works as a receptionist added a couple of printing shop and framing called Niche Frames and Bristol Fine Art. I realize that I have to visit them and ask around about the works of printing and framing in order to understand the proper method. The papers they are using, such as matte paper, glossy paper and semi-glossy paper.
Light Technique
Photography is a way of an artist painting with light, as lighting is a crucial part of photography related to how the natural or artificial light source is positioned on your subject. Light may alter your photo’s clarity, tone, emotion, and more. By seeing how light plays off the angles by angles of your subject and which sections are lighted and which are dark, you may become a better photographer because you’ll learn how to utilise your light source effectively for any particular project.
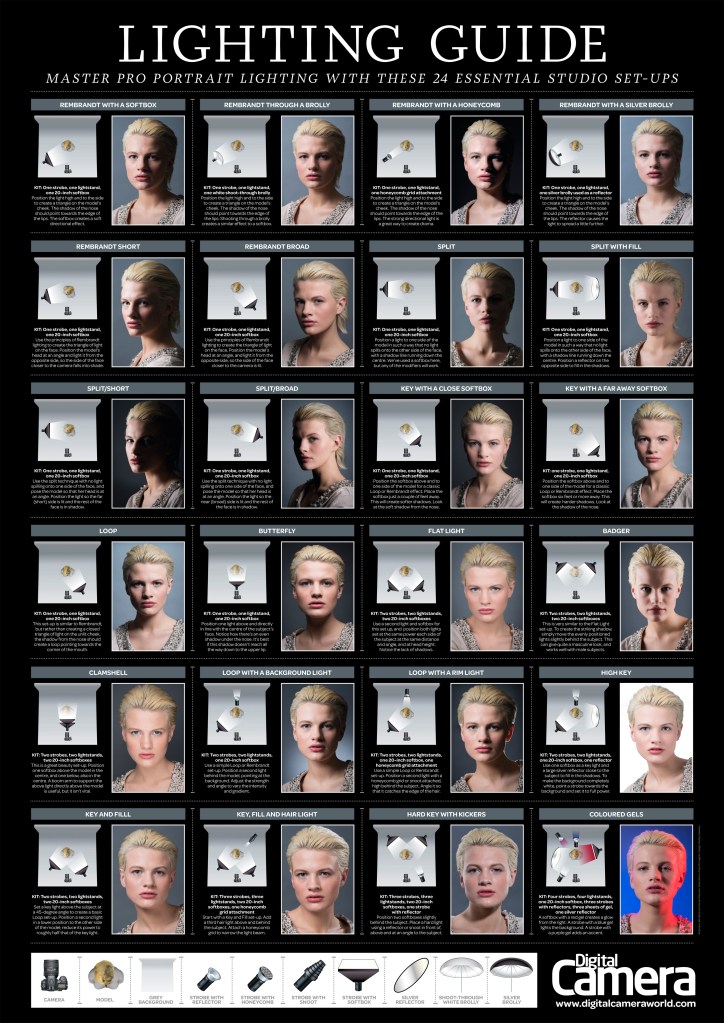
There are lots of lighting technique that we can use to produce a required project that according to the plan such as Rembrandt light, split light, butterfly light, broad lighting, short lighting, loop lighting and many more.
For this specific project, I am experimenting with broad light and split light to expose the subject in half dark, moody tone to tell his unbelievable achievement.
The reason I am using these techniques is because I have decided to give a look that I have never tried for myself but I have seen many photographers that have done the project of editorial photography with moody dark and also because the character of the men that I want to talk about is more of calm, hardworking with details.
Therefore, I am trying to replicate the look that I wanted by using the light diagram to plan for my photoshoot.
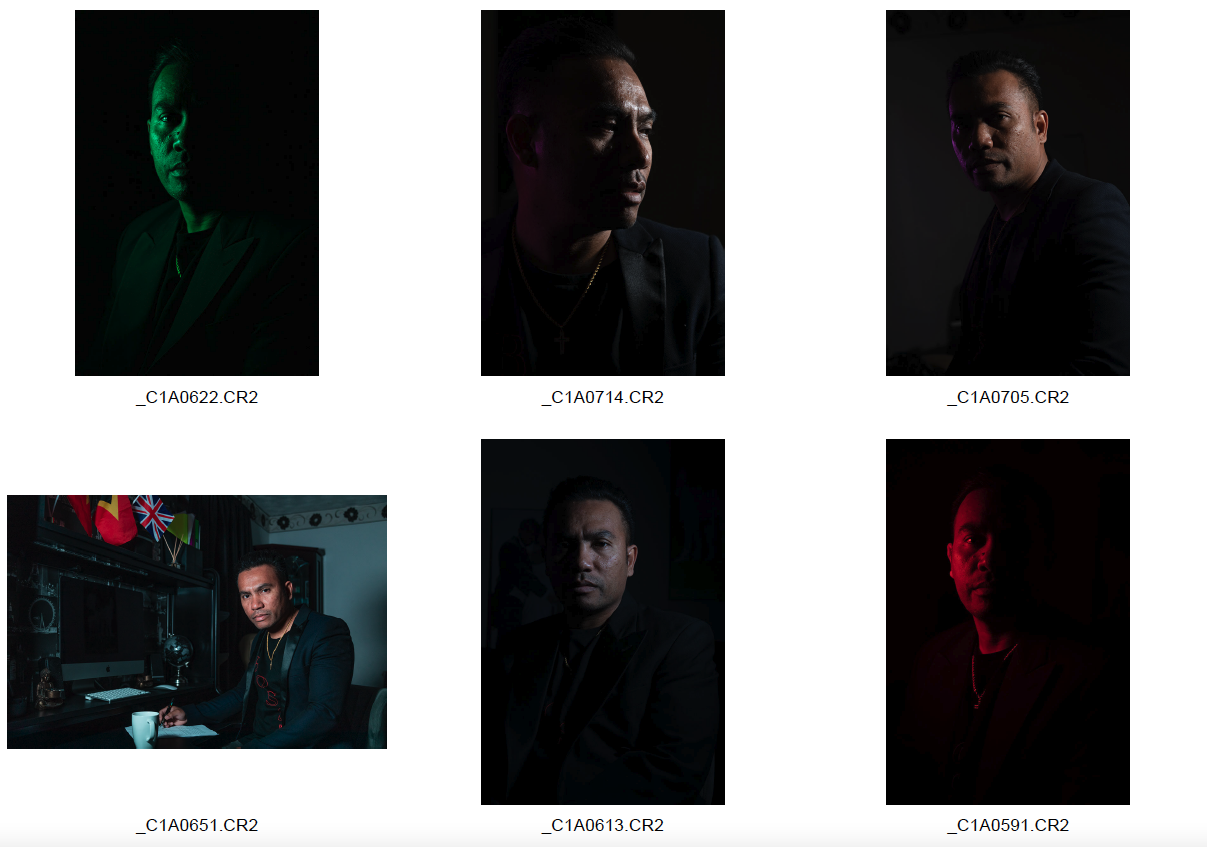
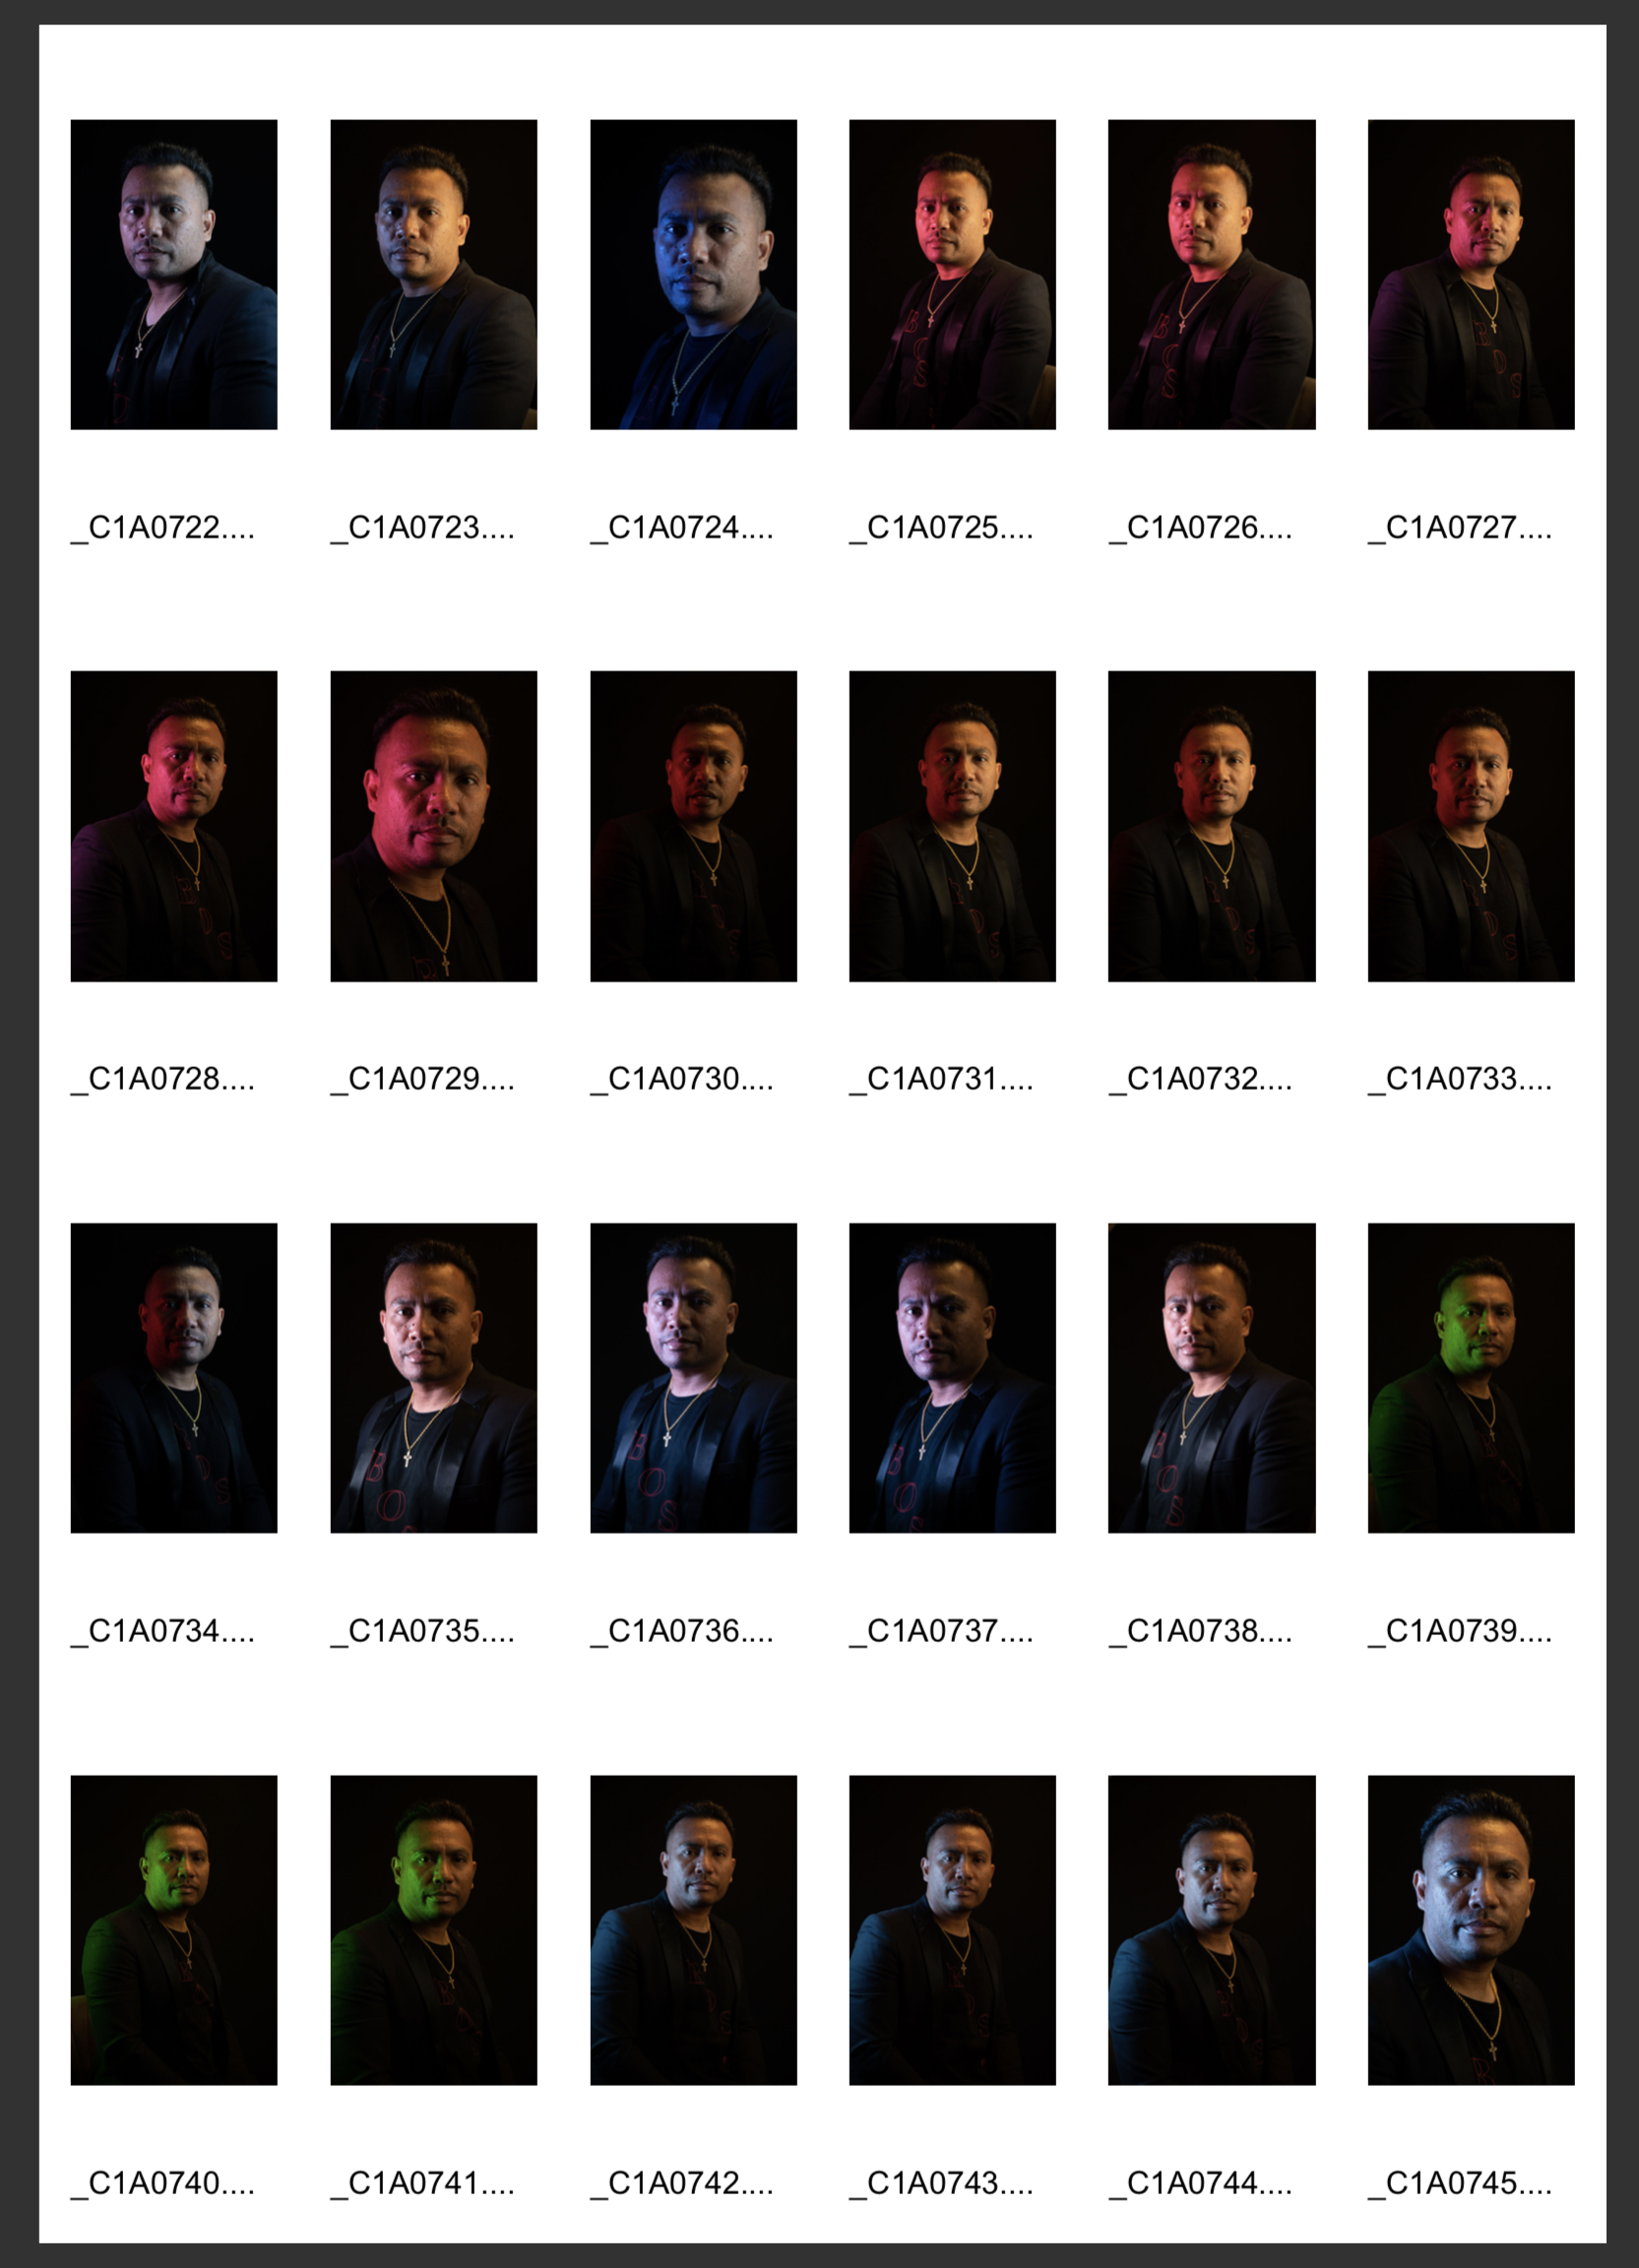
First Shoot lighting technique/position at location with studio setup (Test shoot 1)

Basically, I considered it as my test shot and I liked all of them when experimenting the light colour, light position and the model position but at the end of photoshoot, I particularly like the image of _C1A0714.CR2 because it gives the look of creative to shape the contrast of model.
Second shoot lighting technique/position at location with studio setup (Test shoot 2)

Production
Initial Idea
Editorial Portrait is a project that I must create in this second project as I am required to complete it in five weeks. To create an image that we could use for online magazine or print magazine to tell a story is a photograph that really need plan to show the character of the subject itself. It could be a shoot with natural light, or we could use studio lighting setup on location or in studio.
After receiving what brief is regarding what is the theme that I am planning to be editorialising about, the first thing that I needed to do was to do some preliminary research on the topic. It was just one concept since some briefs put out specific facts that my project is quite specific and not many photographers have done the similar project. However, I intend to go more into this project as I would like my work to draw the attention to the subject itself to inspire people with his story of live, not go to the deep artistic process but still and concentrate upon that historical and cultural aspects of the subject matter. As a result, I did not have a lot of ideas; rather, I only had one idea.
I did invest some time into developing my vision and conceiving of an interesting narrative to convey with the help of my photographs. The earlier on in the process, I was able to devote more time to the formulation of a strategy, the simpler the subsequent steps would be.
Understanding the Process
The production of an image in a studio as opposed to one taken on location is one of the key differences between the two. When working in a studio, a photographer is in charge of controlling the lighting. On the other hand, a location photoshoot is dependent on the natural light source, the wind, and many other variables of the surrounding environment.
When shooting on location, the photographer is required to carry some parts of the “studio” to the site where the session is taking place. Despite the fact that this may assist give the setting a more professional ambiance, it is very difficult to set up a scene in shoot in such a way that will equal the optimum circumstances that can be achieved in a studio that has been properly set up.
The backdrops used in studio photography will cover a wide range of aesthetic categories. These will include a straightforward monochrome backdrop for portrait pictures, as well as more intricate backgrounds that replicate outside locations, like a beach or a bustling street, in order to give the impression that the photograph was taken on location. When photographing models, it is common practise to employ specialised clothing and accessories. These props may take the form of anything from a period-appropriate outfit to a pair of glasses.
Gears
Canon ef 24-105mm f/4 L is usm lens
Elinchrom ELB 500 TTL with the softbox
Legal agreement.
When everything was ready in accordance with my plan, I made the decision to get in touch with the model and provide him the model release form along with a comprehensive explanation so that he could sign it and proceed with the project. Obviously, I got right to work on the test shot in order to get as much practise as I could.
")
")
Photoshoot Session.
I have combined photoshoots in studio indoor, location indoor, and location outdoor settings with my model to conduct a total of six photoshoots with him in order to look for the mood that I intended to go for and learn during the process as well. I did this in order to find the mood that I intended to go for.
First Shot
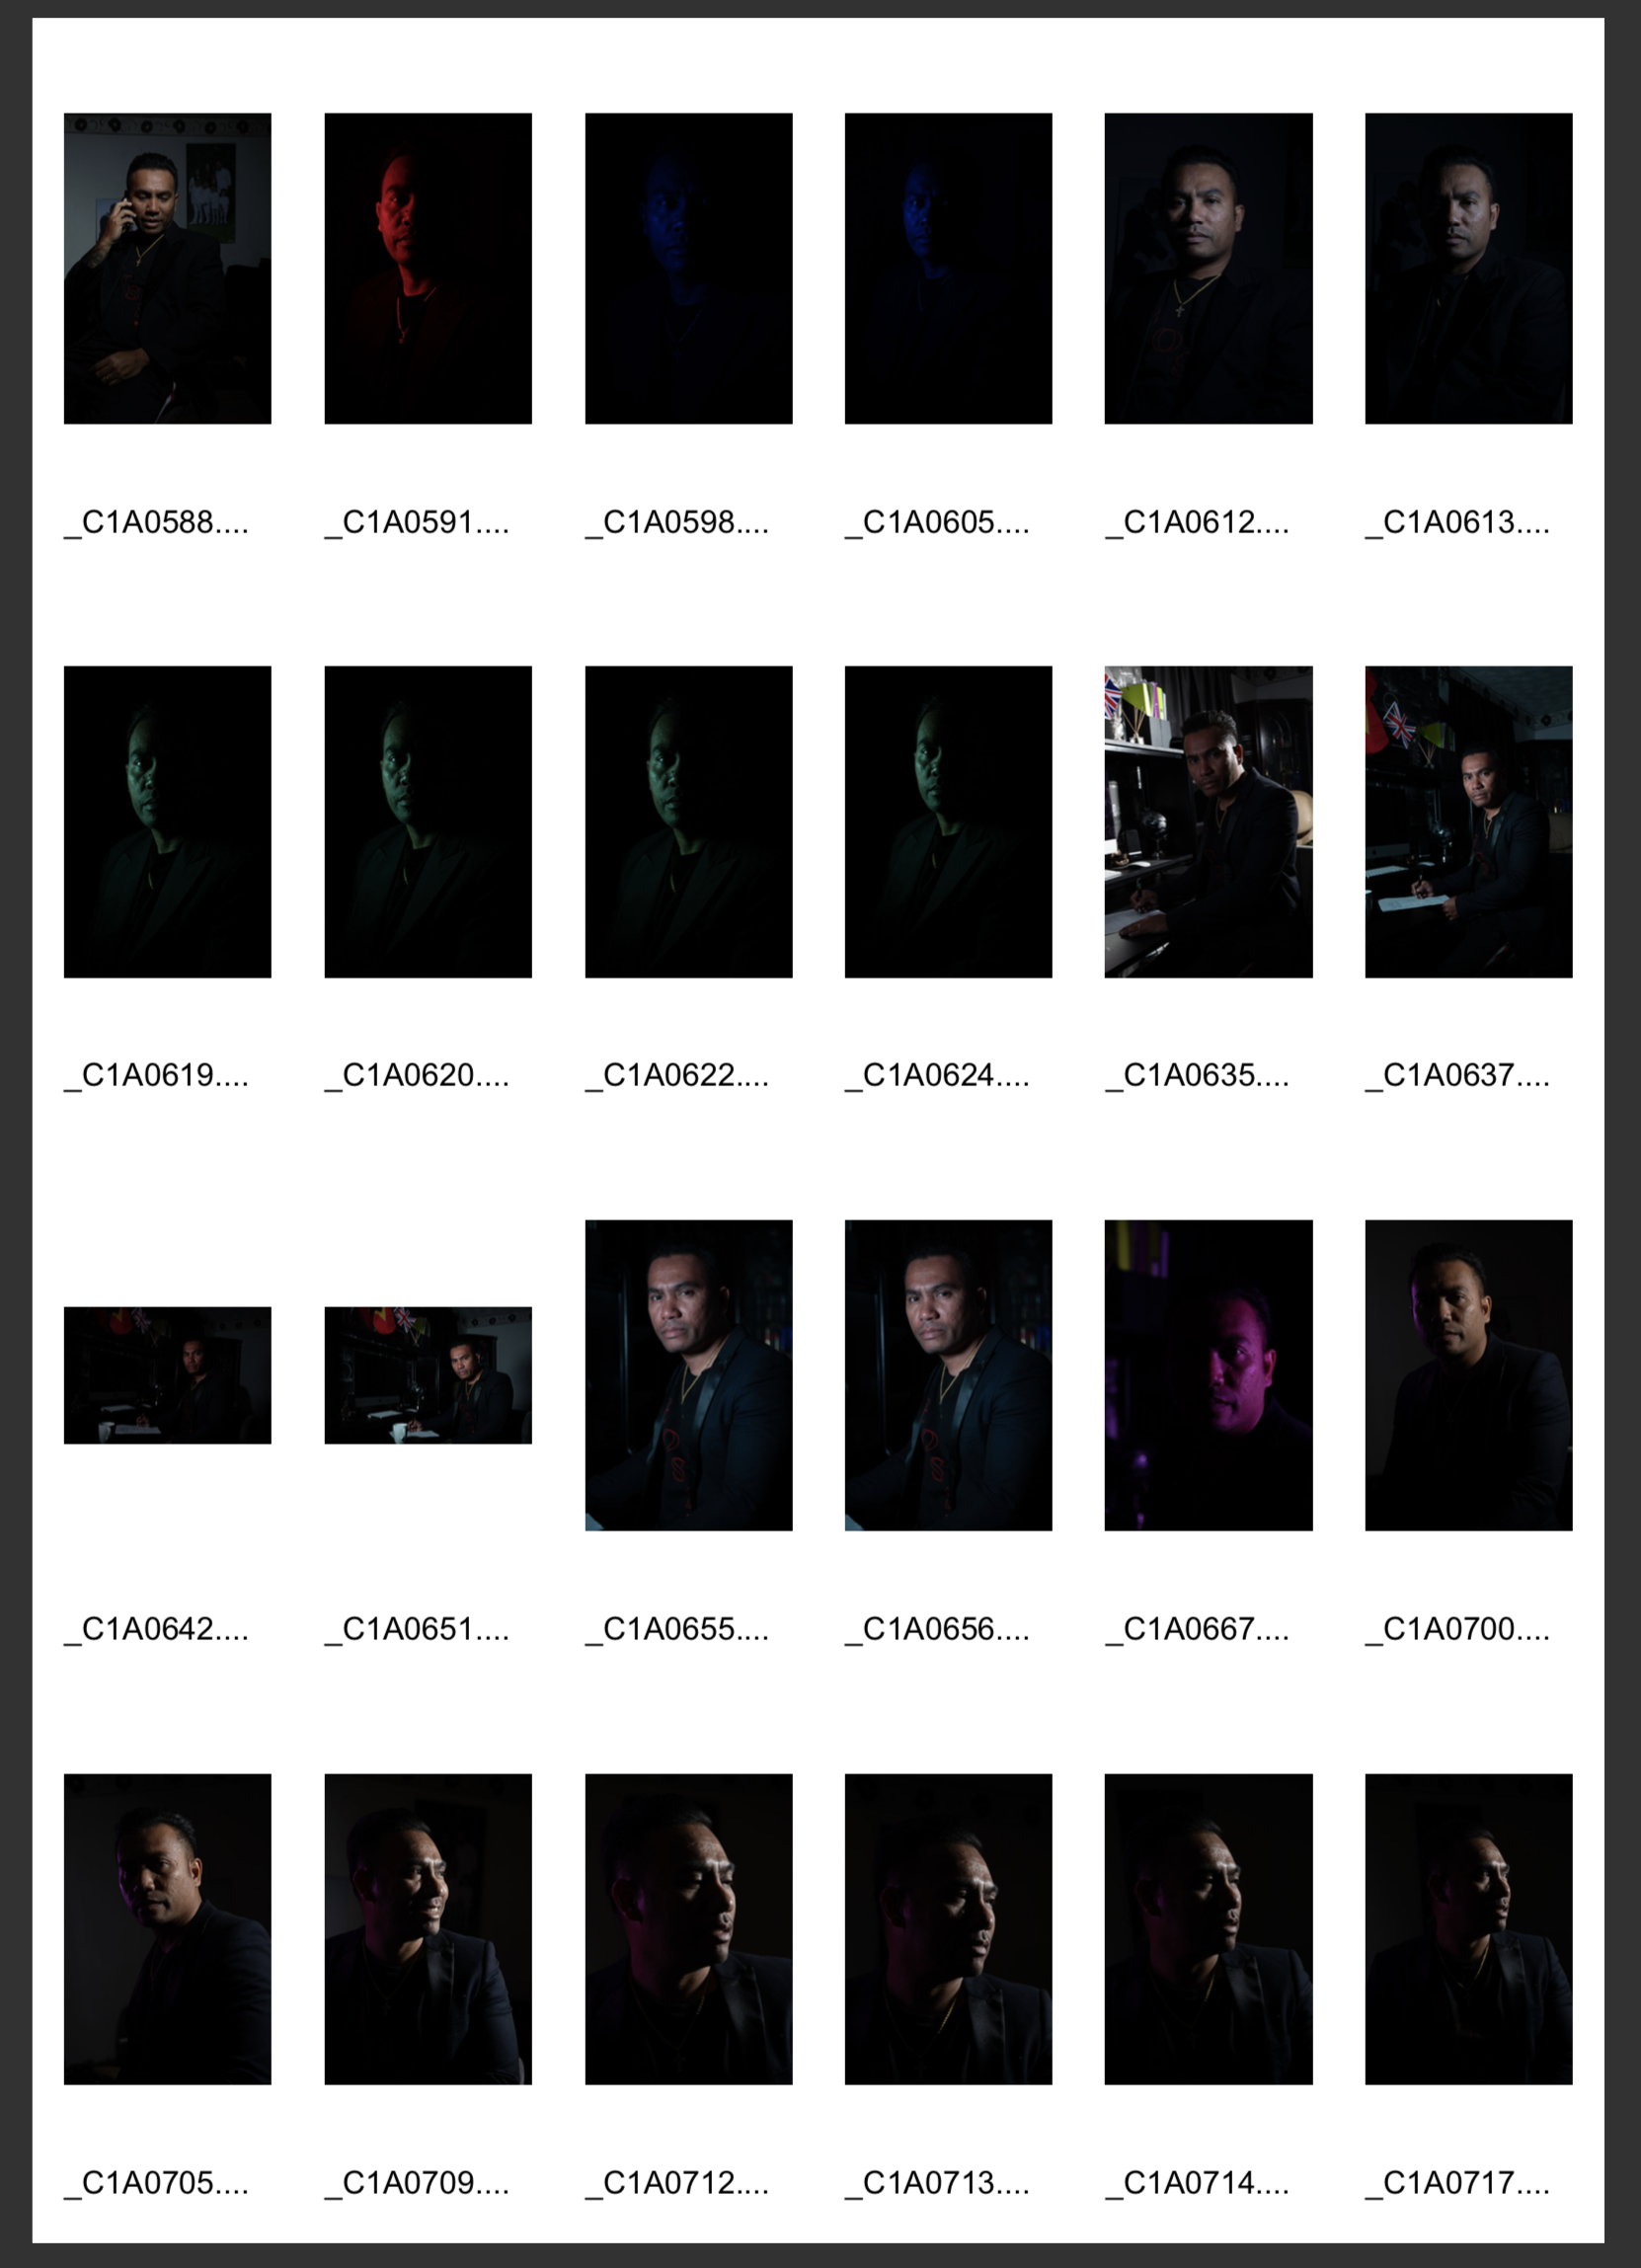
I photographed my model at his residence using a single studio light setup (Elinchrome 500 TTL) and a single continues RGB video light from Neewer to experiment with the light position and explore the mood that I have chosen. I also used the light diagram to determine if there was anything else that was interesting based on my story.
What I discovered was that because I did not utilise the background, the result was not 100 percent, as the side light that was intended only to illuminate the model’s side to create a split-light technique spilled onto the background, which was close to the model because the location was in a regular size of living room.
Light diagram first photoshoot
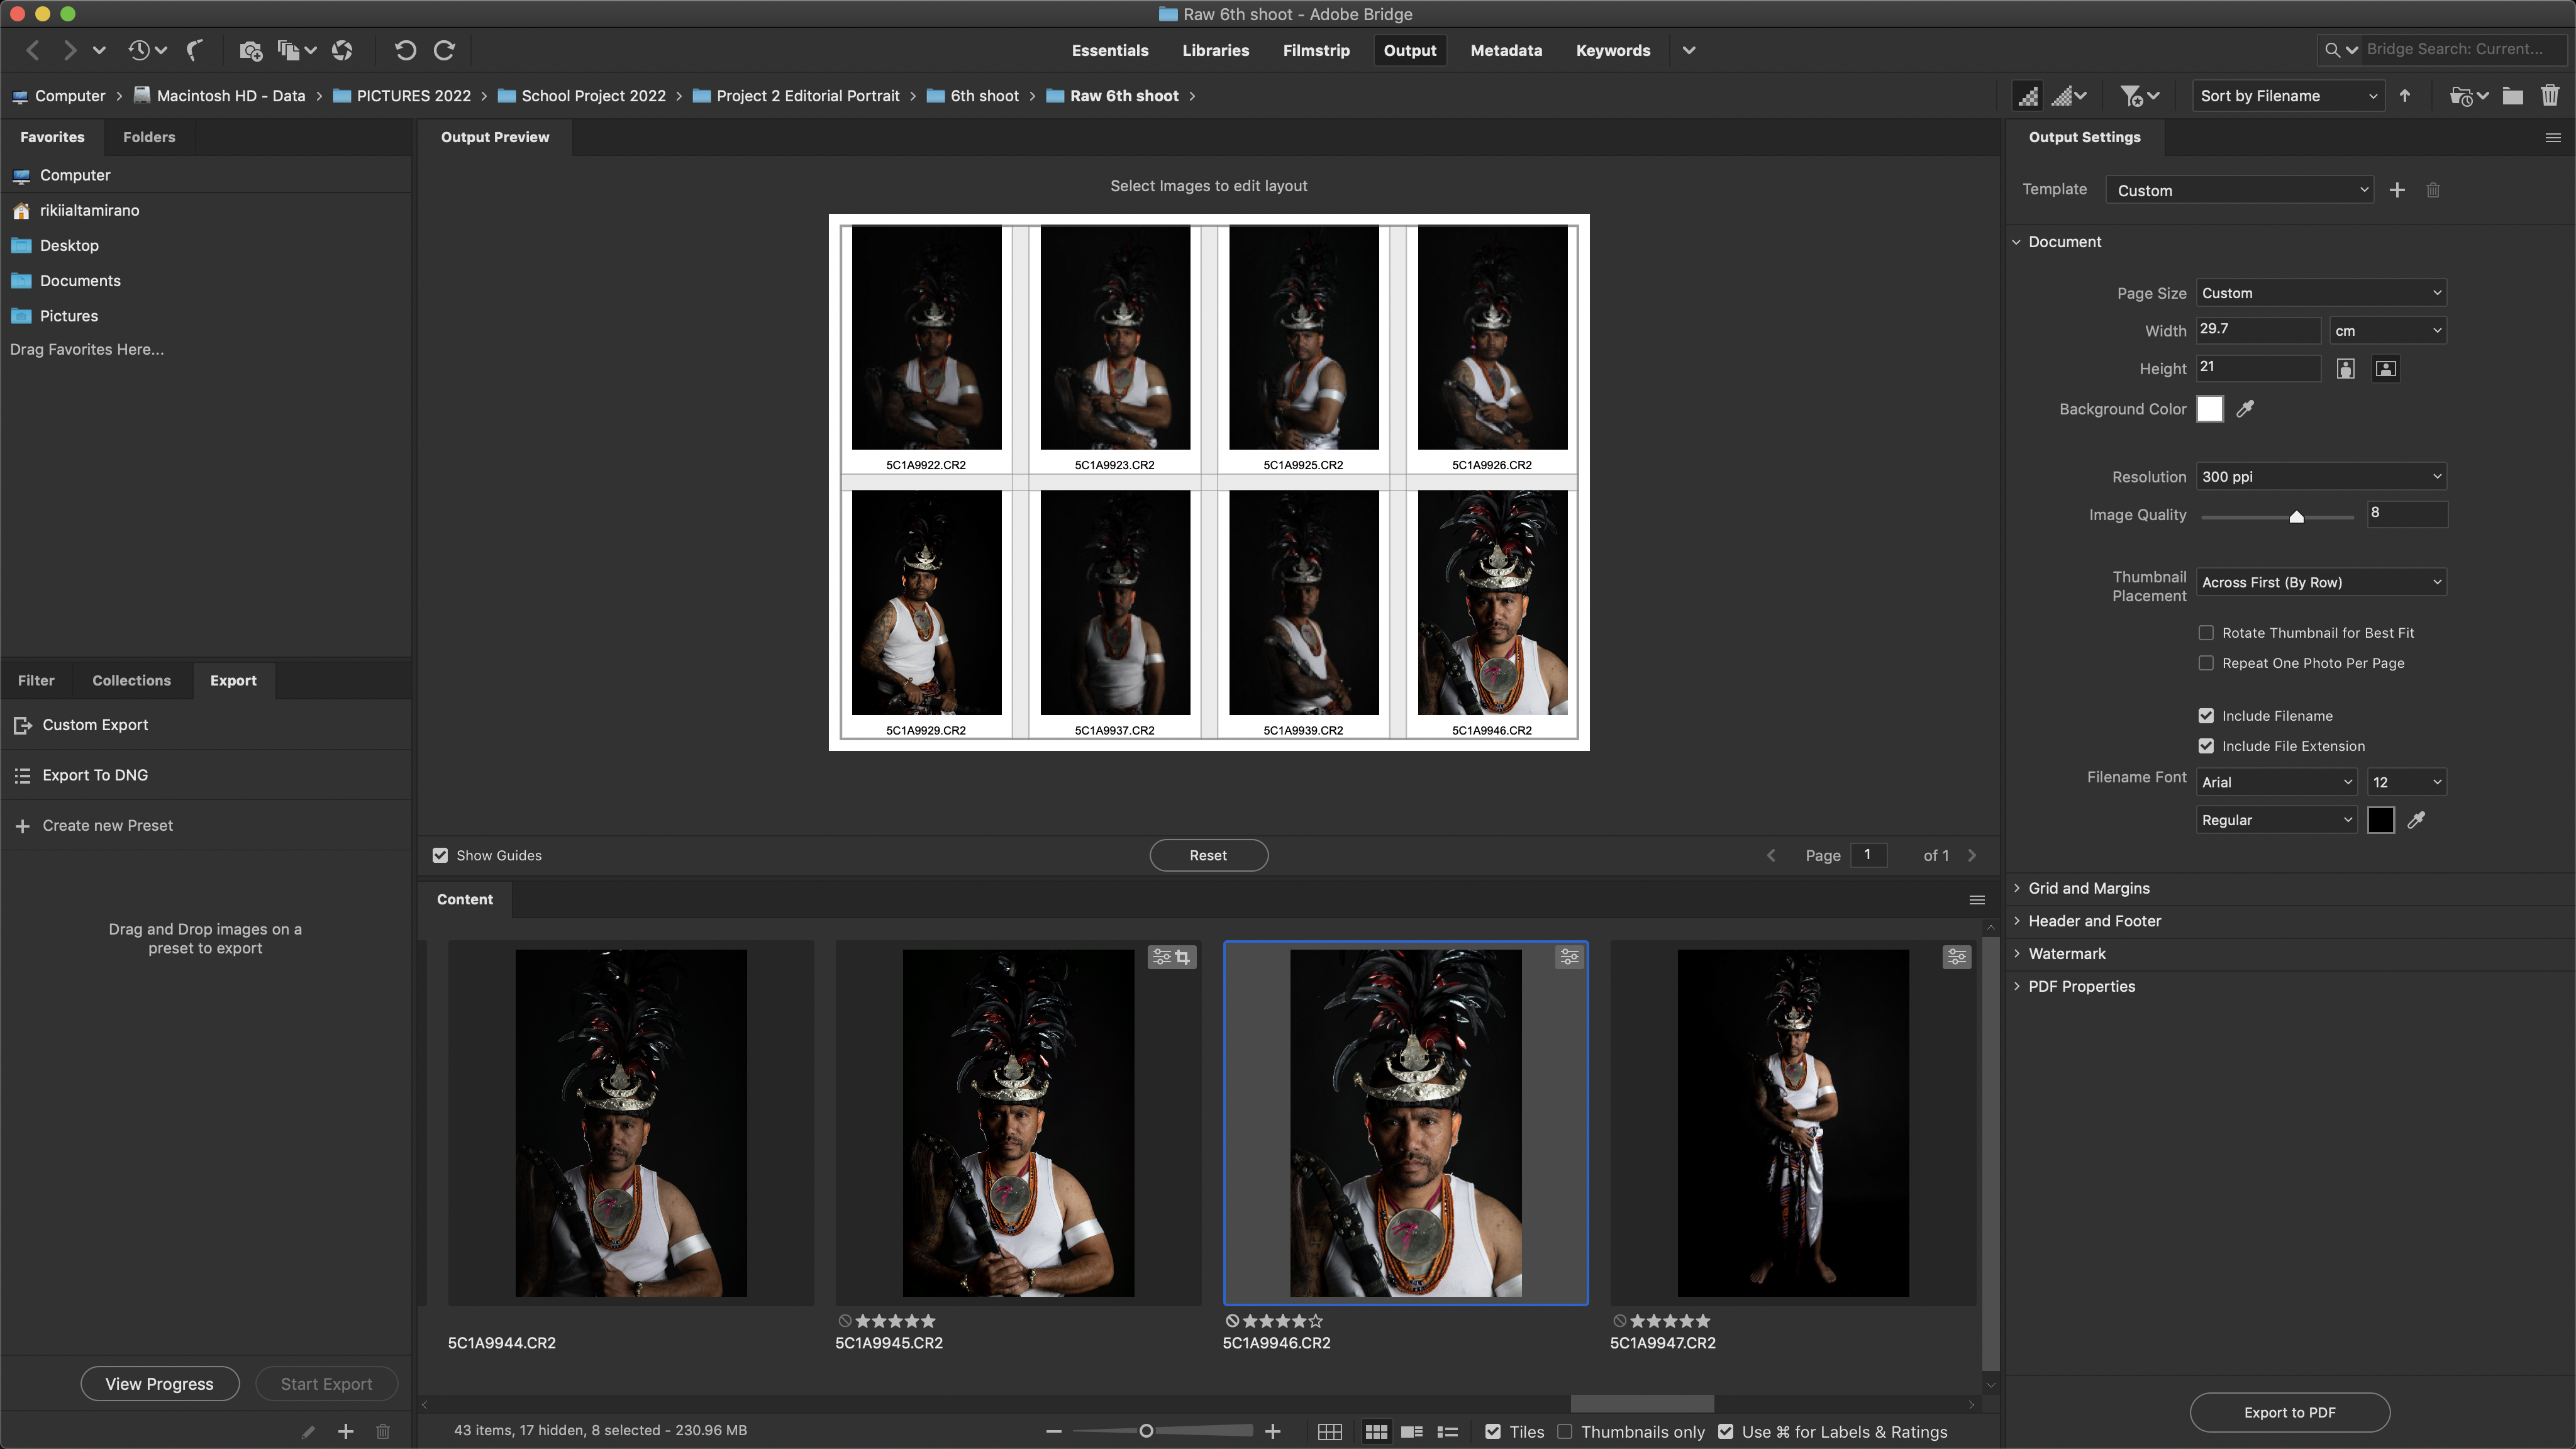
Contact sheet 1, best six for me to work with.
The clarity of the photos straight out of the camera and the pleasing placement of light in these six photographs inspired me to use a hybrid technique, blending elements of Yousuf Karsh’s and Laura BC’s signature styles.
Second Shot
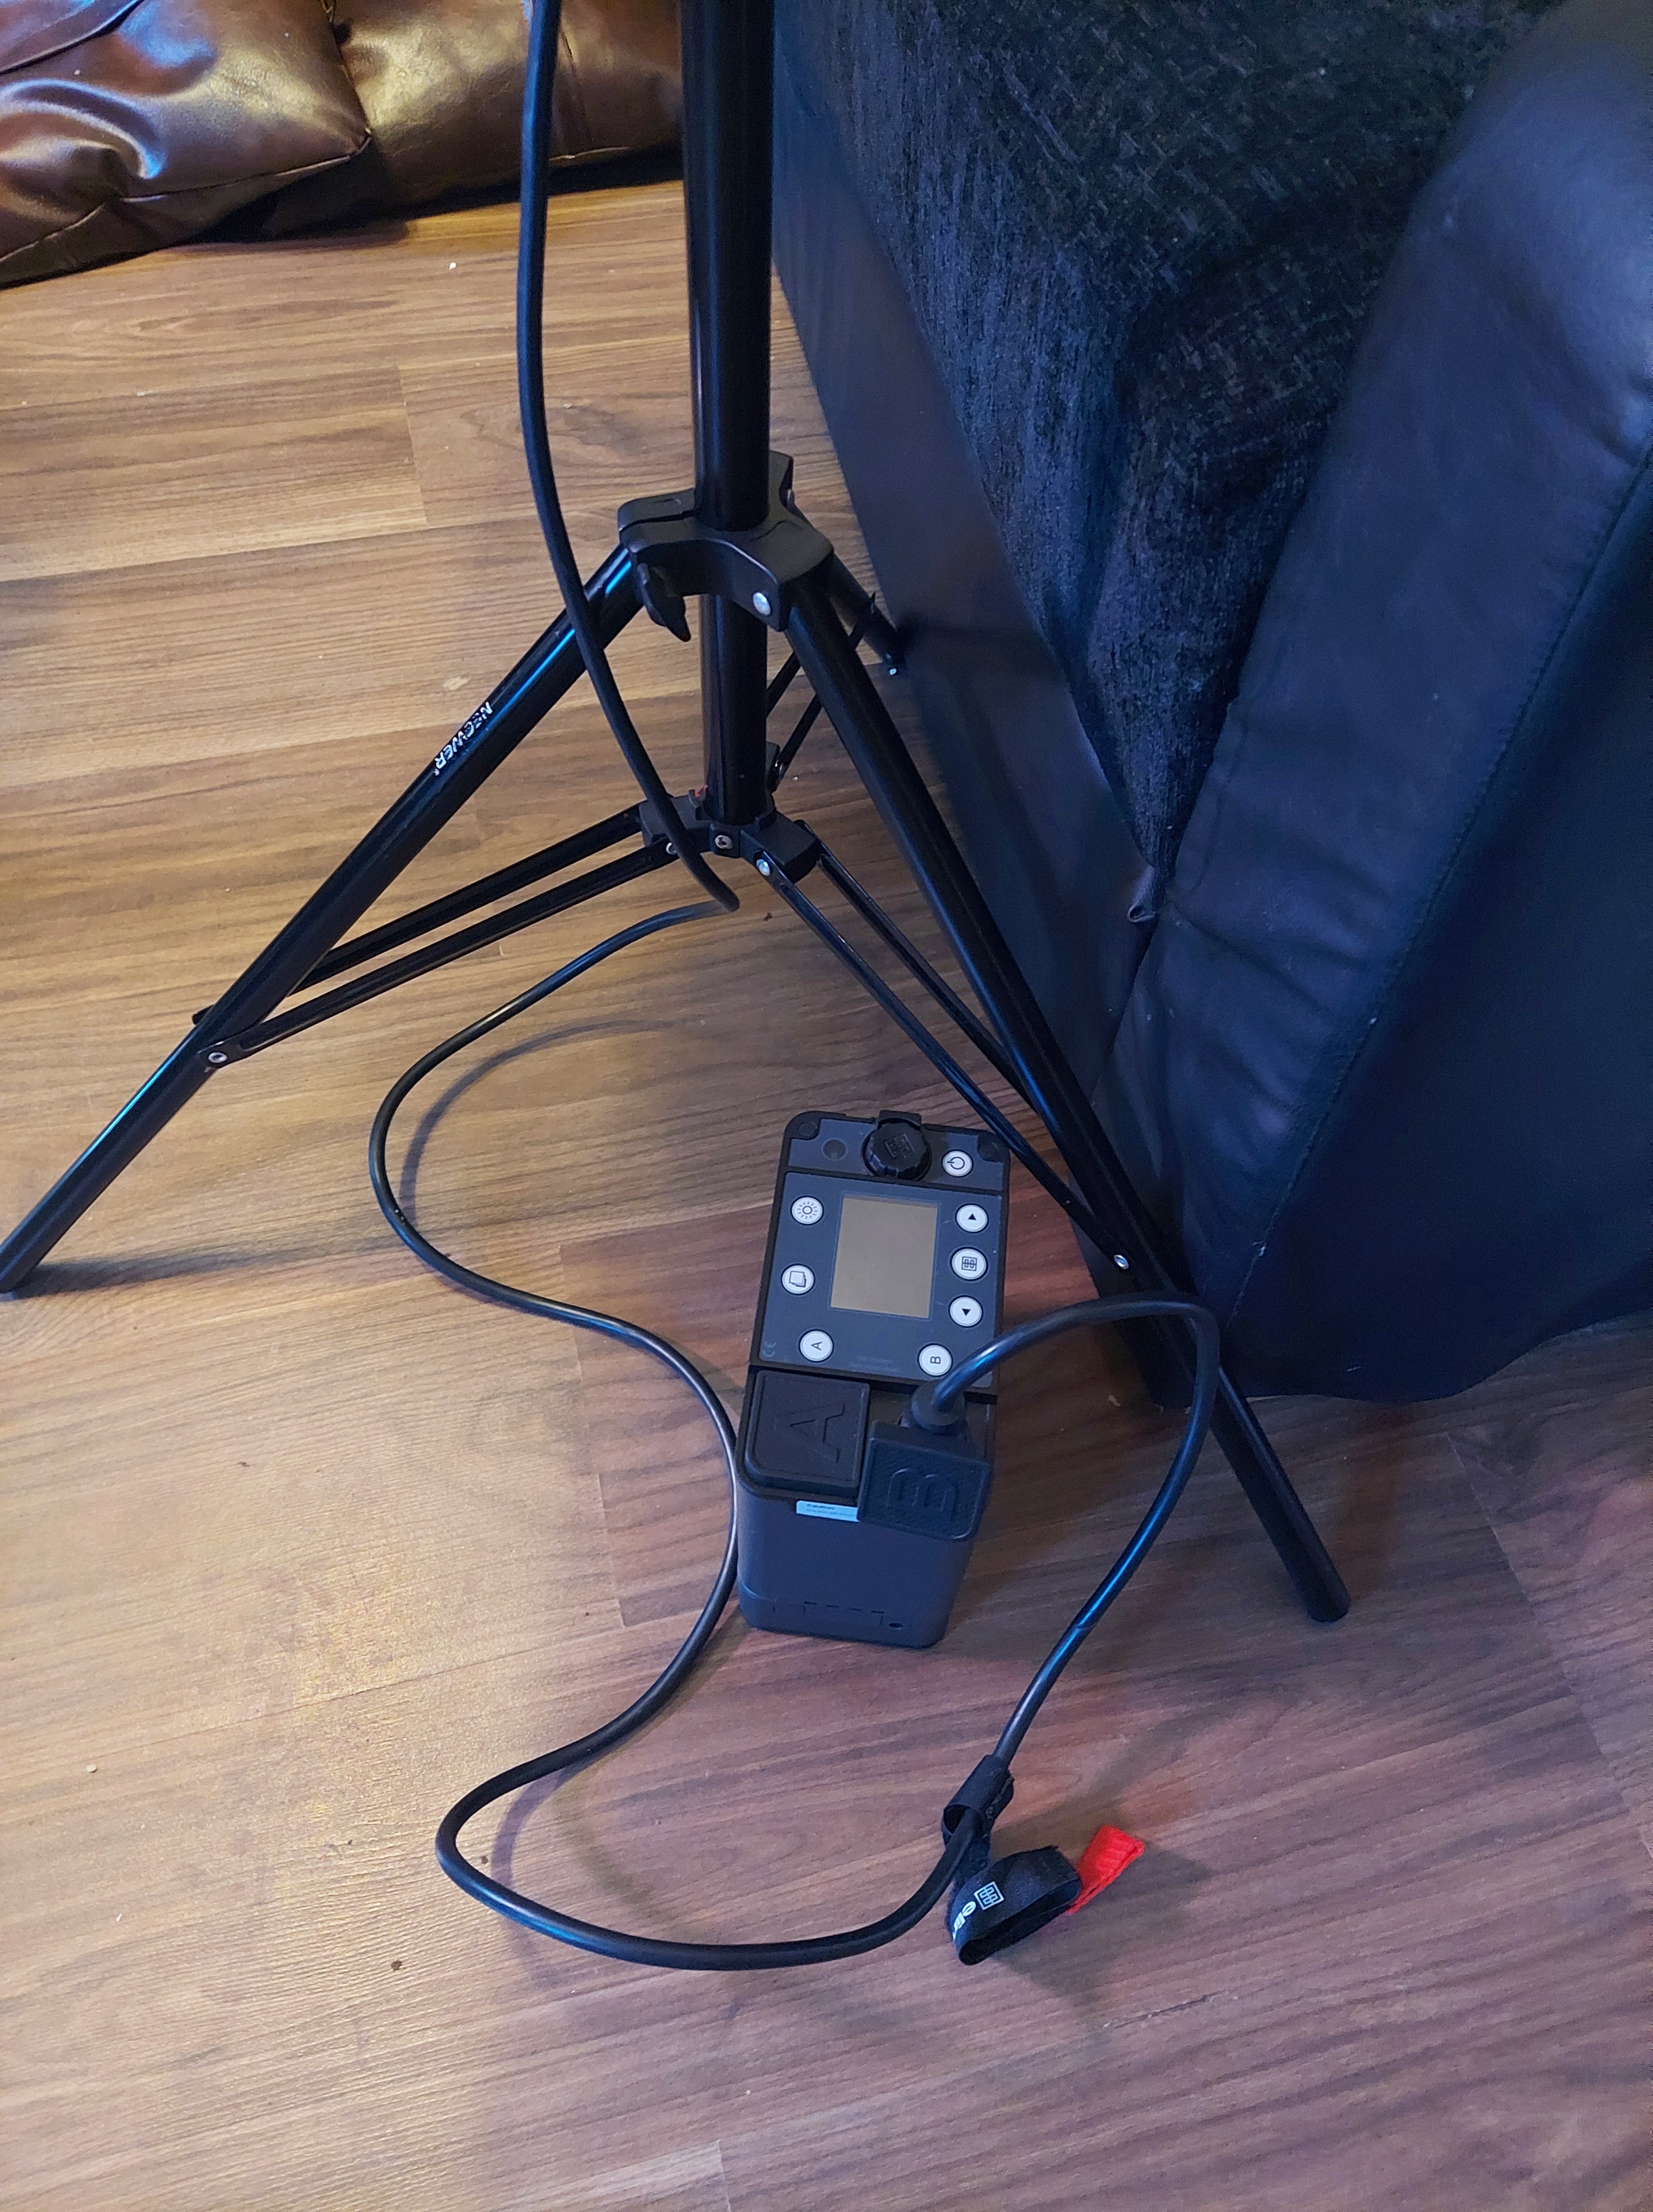
I learned from the first pictures and carried a portable background to the location so that I could produce a dramatic black and moody portait. By doing so, I was able to block off the light that had strayed into the backdrop. When I was about to capture photographs of the model, I remembered that I hadn’t taken the light remote trigger with me. To keep going with the session, I relied on the constant light given by the elinchrome. Because the elinchrome can provide me with the same constant light as when it was activated, I was able to keep continue with the session. Although I am satisfied with the results of my experiment, I remember thinking that I needed to keep shooting until there was no more time for me to shoot because I believed that the long process of experimenting would lead to the end that I needed for my project.
Light diagram
Contact Sheet 2, best six images to work with.

Third Shot (Location photoshoot)
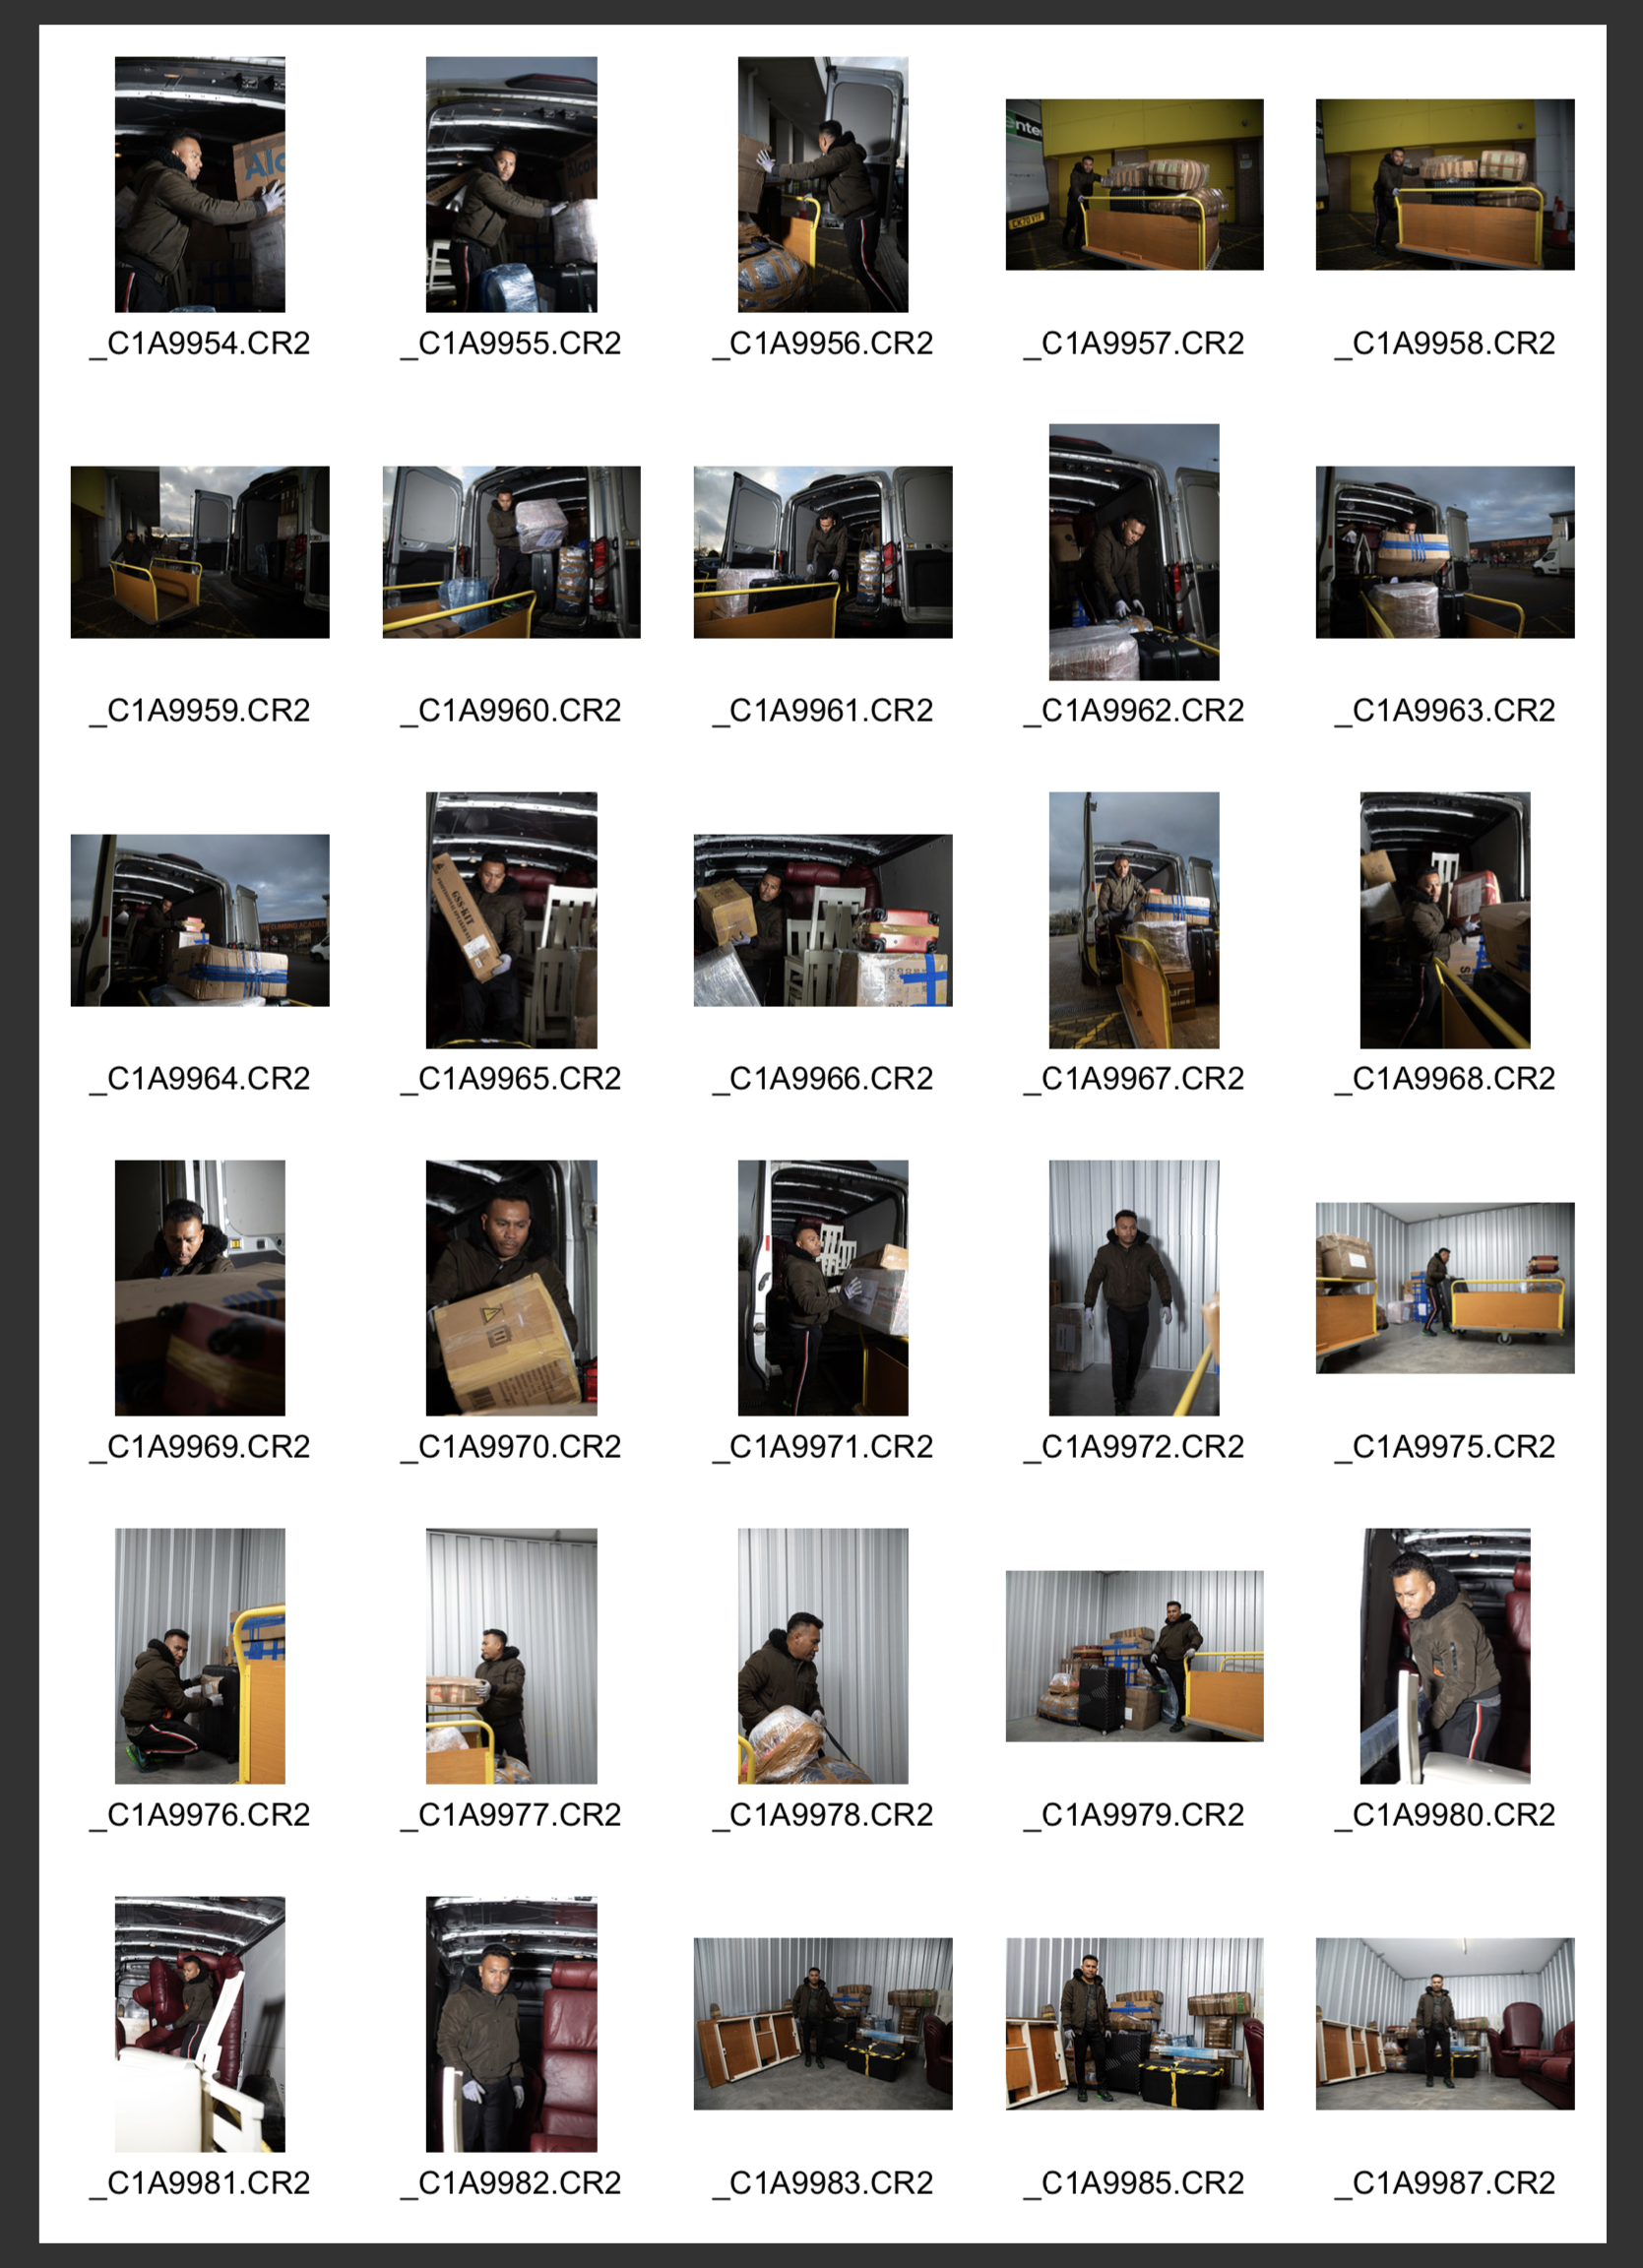
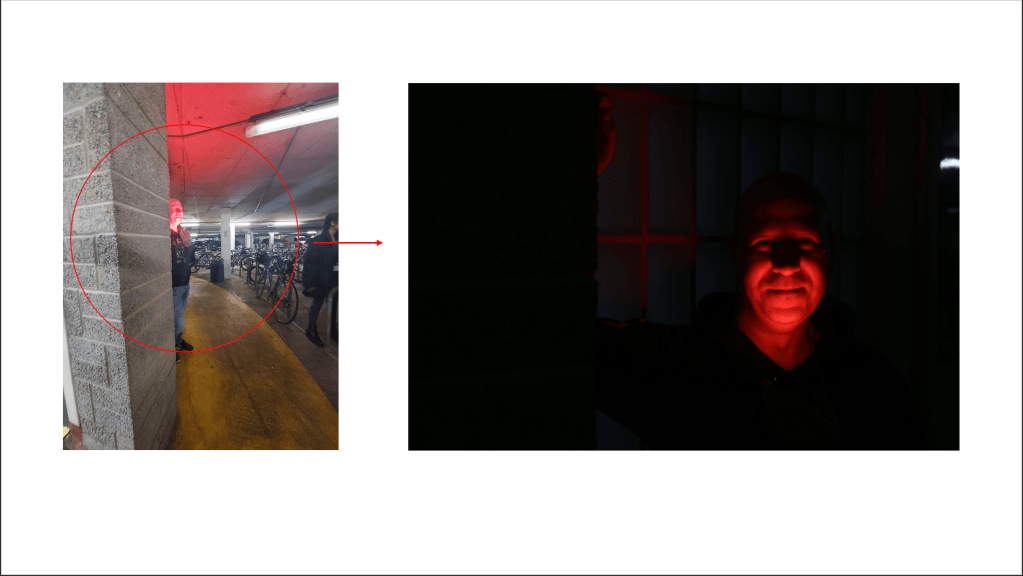
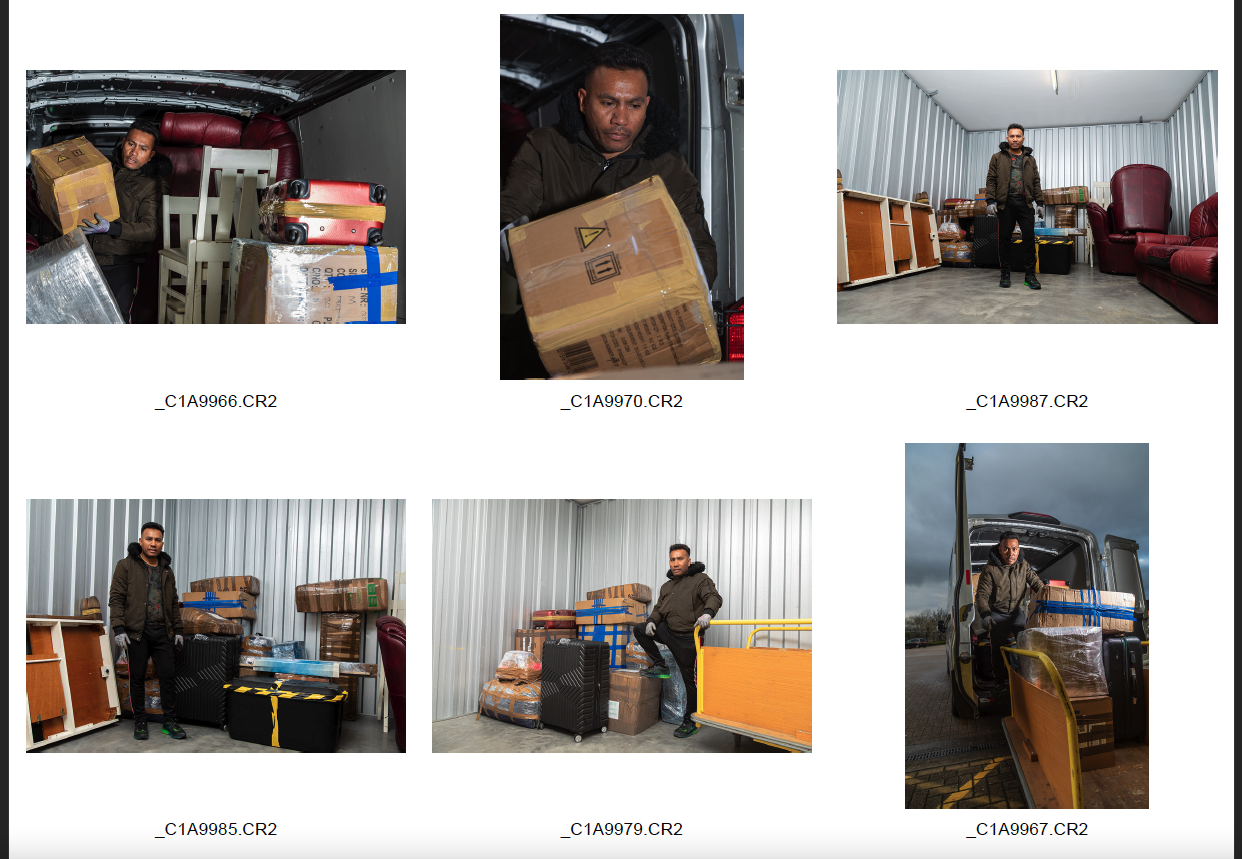
This is where I went to the place where Moises works as a shipping agent in order to put all of his collected packages in the yellow storage facility at St. Philips Road. In this outdoor setting, with the assistance of my partner, she carried and positioned the light where I photographed my model as he performed his duties of unloading packages from the van and placing them into storage. Because I did not want him to stop what he was doing, I kept seeking for the perfect moment to press the shutter button.
Contact sheet 3, six best images to work with
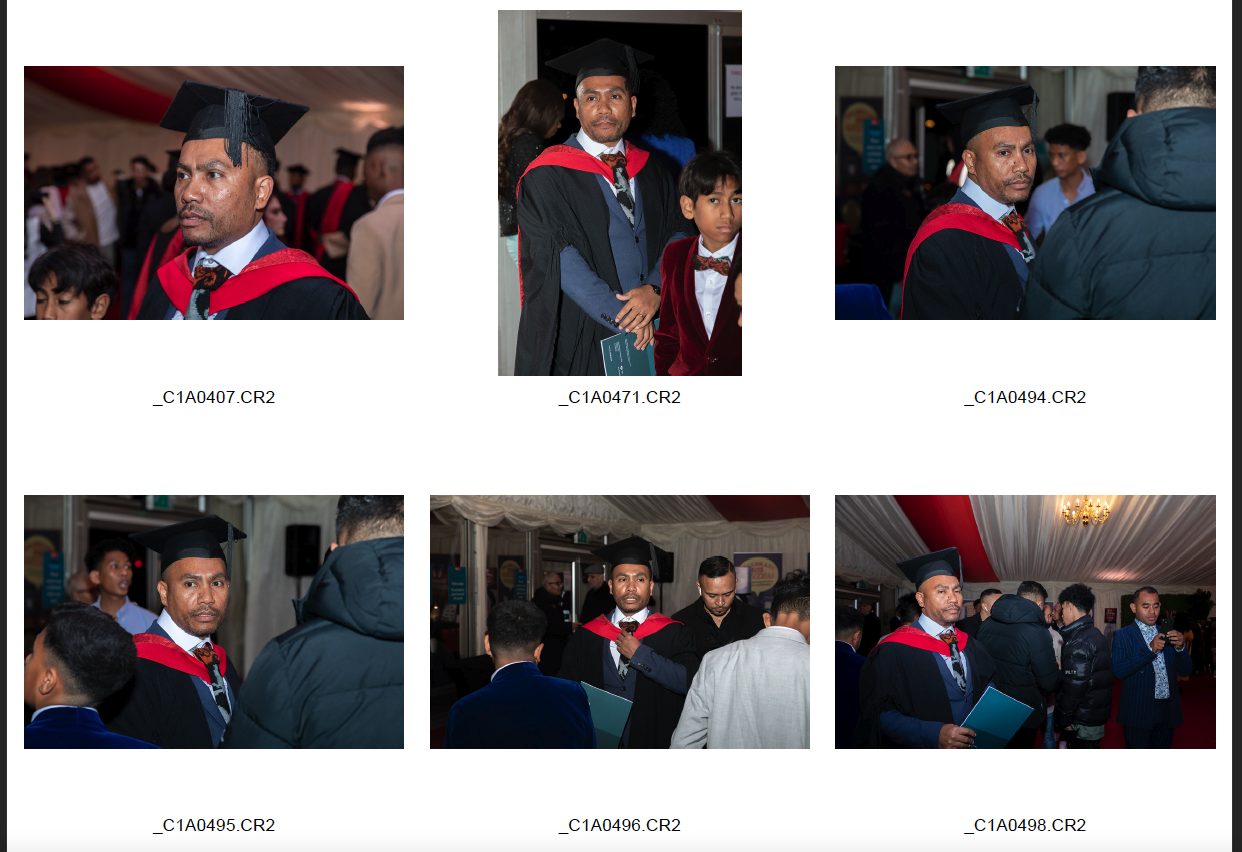
Fourth Shot (Location Photoshoot)
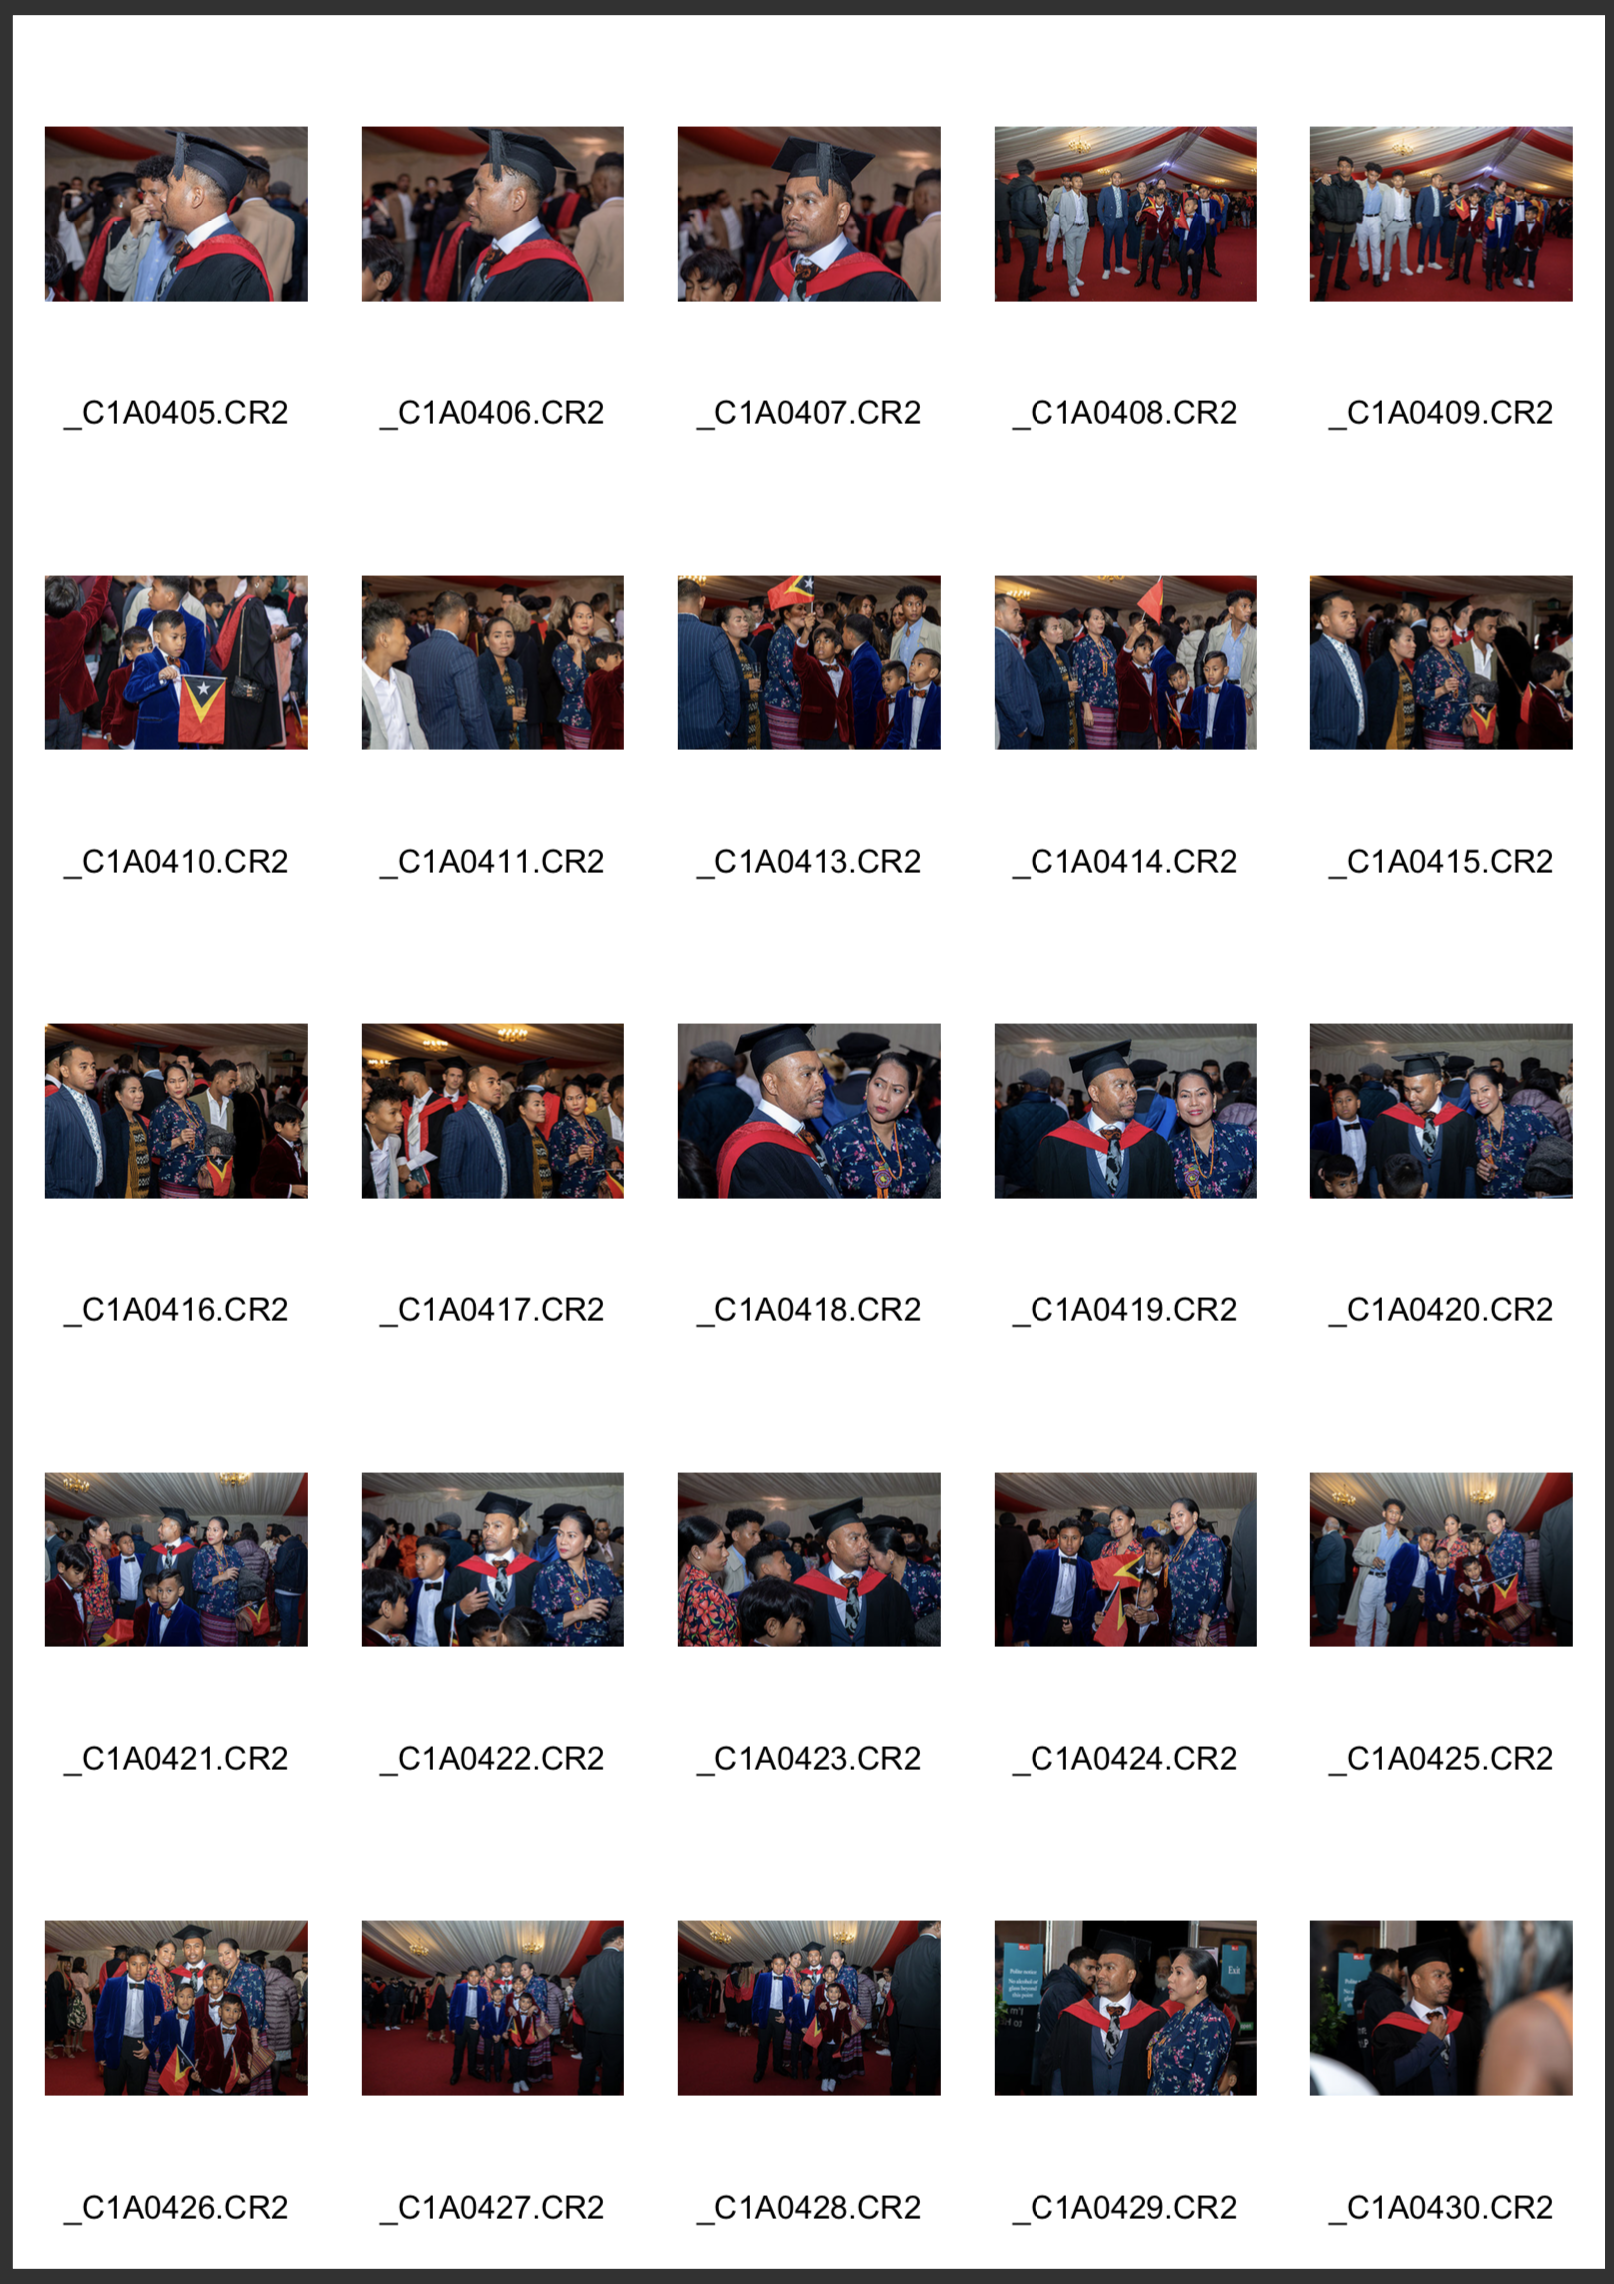
My fourth photo, which I intended from the start to take place on the day of my model’s graduation ceremony at college green cathedral, it went as expected. The equipment that I’ve used in the includes a Canon 5D Mark IV camera and a Flash Pro with a little round diffuser mounted to the top of the camera. The battery was attached to my waist. That turned out really good. However, it was a bit of a challenge when shooting indoors with an unstable decoration roof to bounce the light back down to the model as the roof was made from transparent fabric. This is because I had to constantly adjust the setting whenever I moved location, as the model was required to stand with his family and friends in a variety of photoshoots, including group photoshoots in small and large crowds, as well as individual photoshoots.
Contact sheet 4, six best images to work with
Fifth Shot (Location photoshoot)
I photographed a graduation celebration during my fifth shoot. In this specific photoshoot, I blended both conventional speedlight and the flash pro with little round diffuser mounted on top of camera. But I directed a friend of mine to assist me hold the flash to light the model from the other side, according to my instructions. I was attempting to demonstrate himself was standing still and concentrating on his objective in the mid of a crowd of individuals whose lives sometimes lacked meaning.
Contact sheet 5, six best images to work with
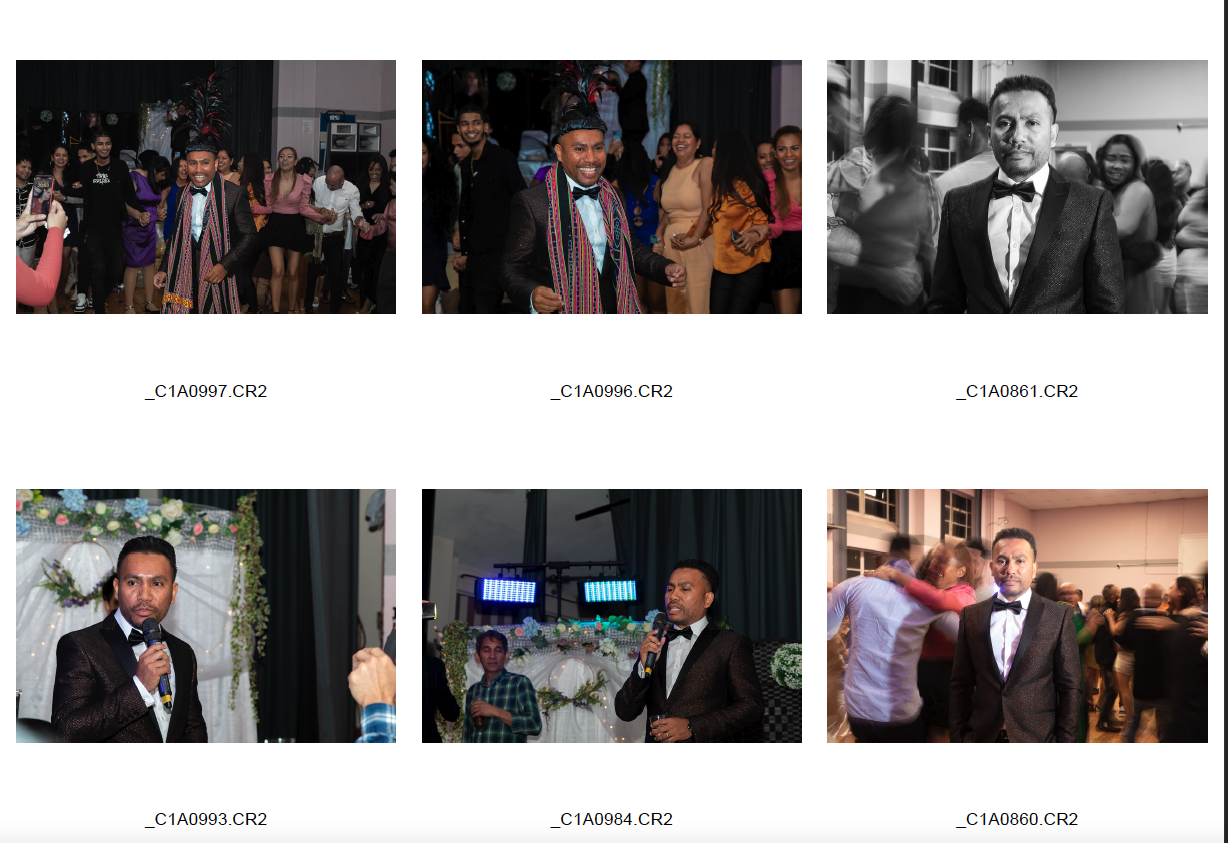
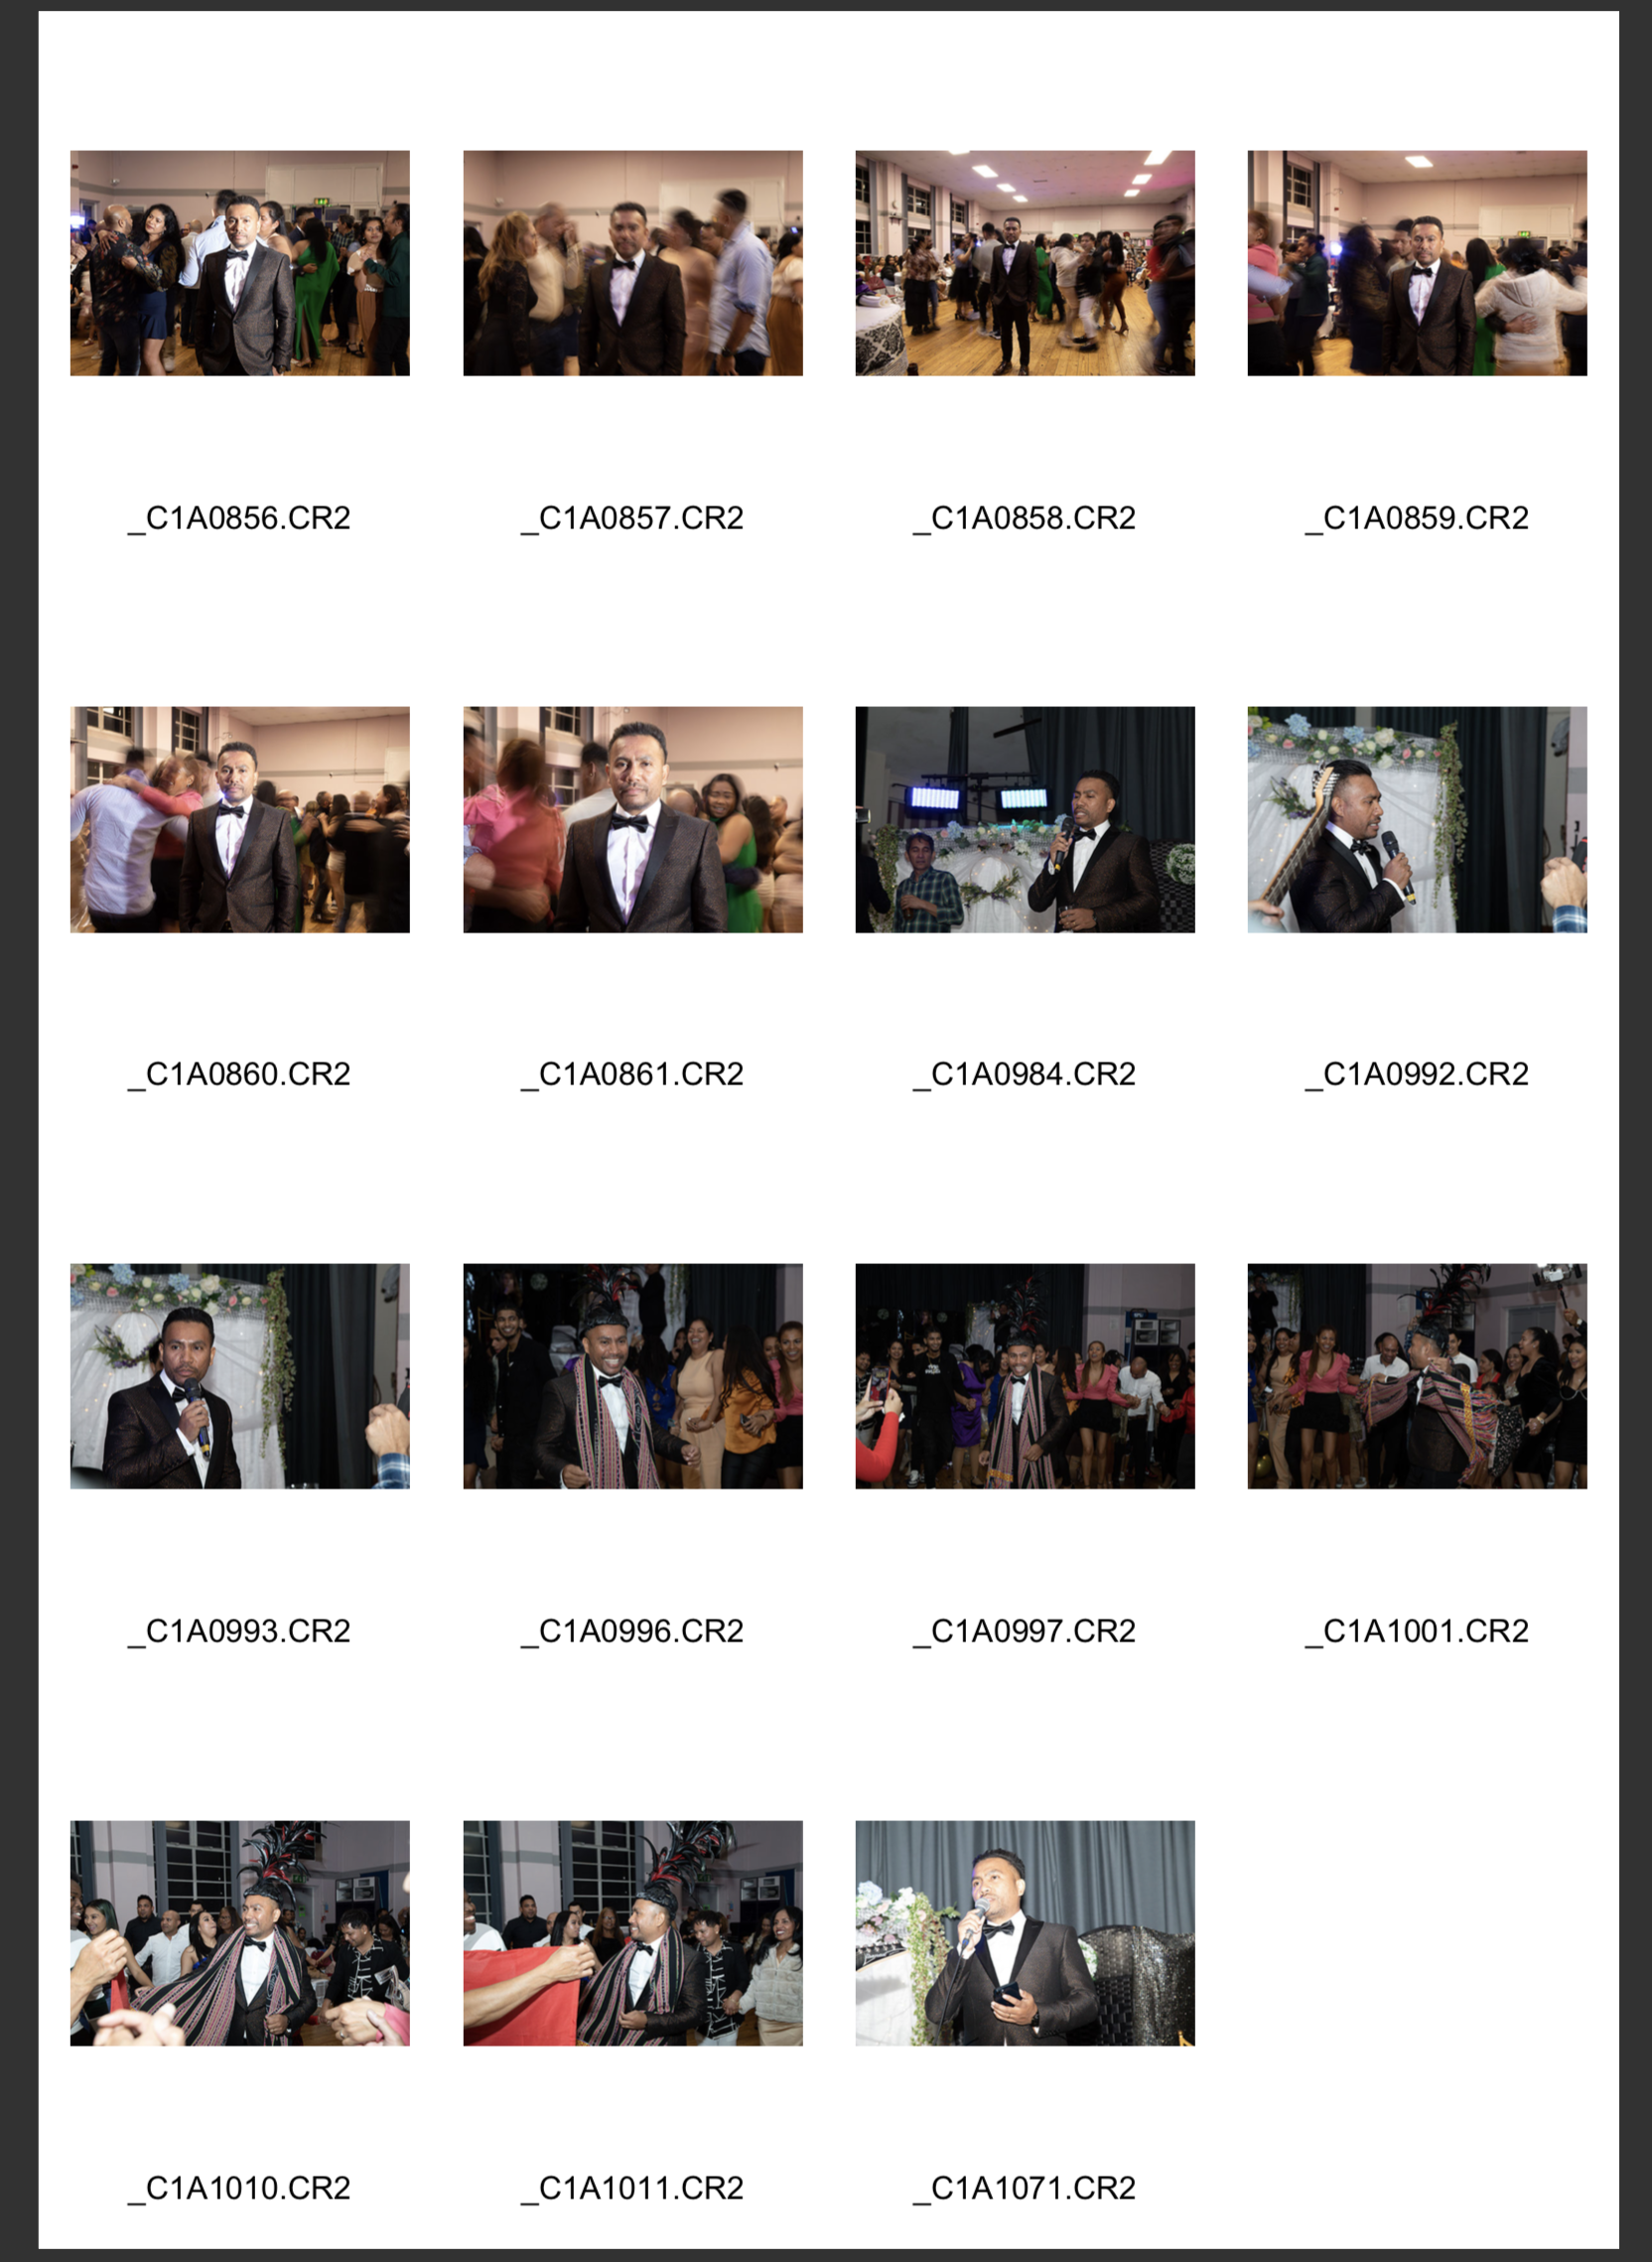
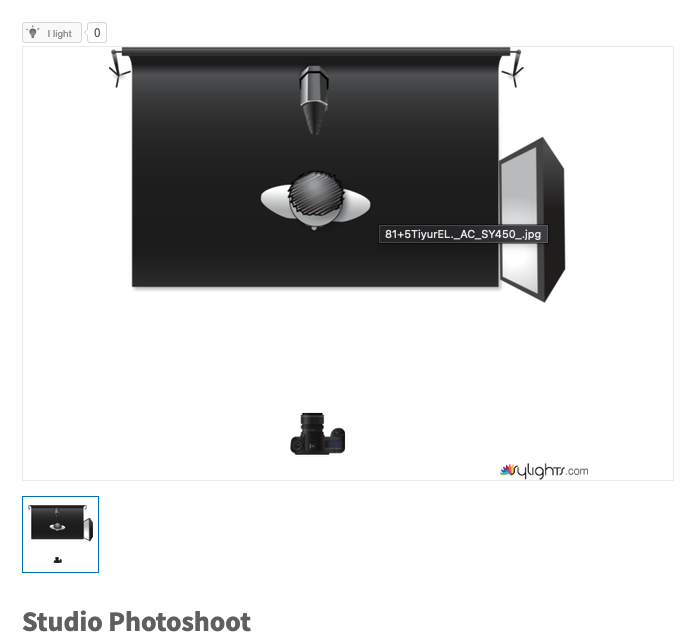
Sixth shot (Studio Photoshoot)

I made the reservation for the college studio two weeks in advance so that Moises could come into the studio. During this session, I carried out a photoshoot with a new costume that was a traditional clothing from his origin nation of Timor Leste. The purpose of the shoot was to demonstrate his individuality and to give him a strong look character in the dark, moody photograph. I have really considered the possibility that this is my very last opportunity to work with him on this project.
During the time that I was conducting in the studio, I had some assistance from Nathalie, the technician, who assisted me in setting up the light. I used a black backdrop, one light on Moises’ left side, and one snoot light from Moises’ back to highlight his prop so that it would not mix in with the background. The prop that Moises wore was feathers from a rooster in dark red and black colour.
Contact sheet 6, eight best images to work with

I created 6th photoshoot in studio with a setup contains one snoot, one soft box light, black paper backdrop and one 5D Mark IV canon camera.
Light diagram from my 6th shoot in the studio
The reason I picked this look is because I wanted to give an impression of a powerful man who does everything by himself for him, his family and community.
Image Processing
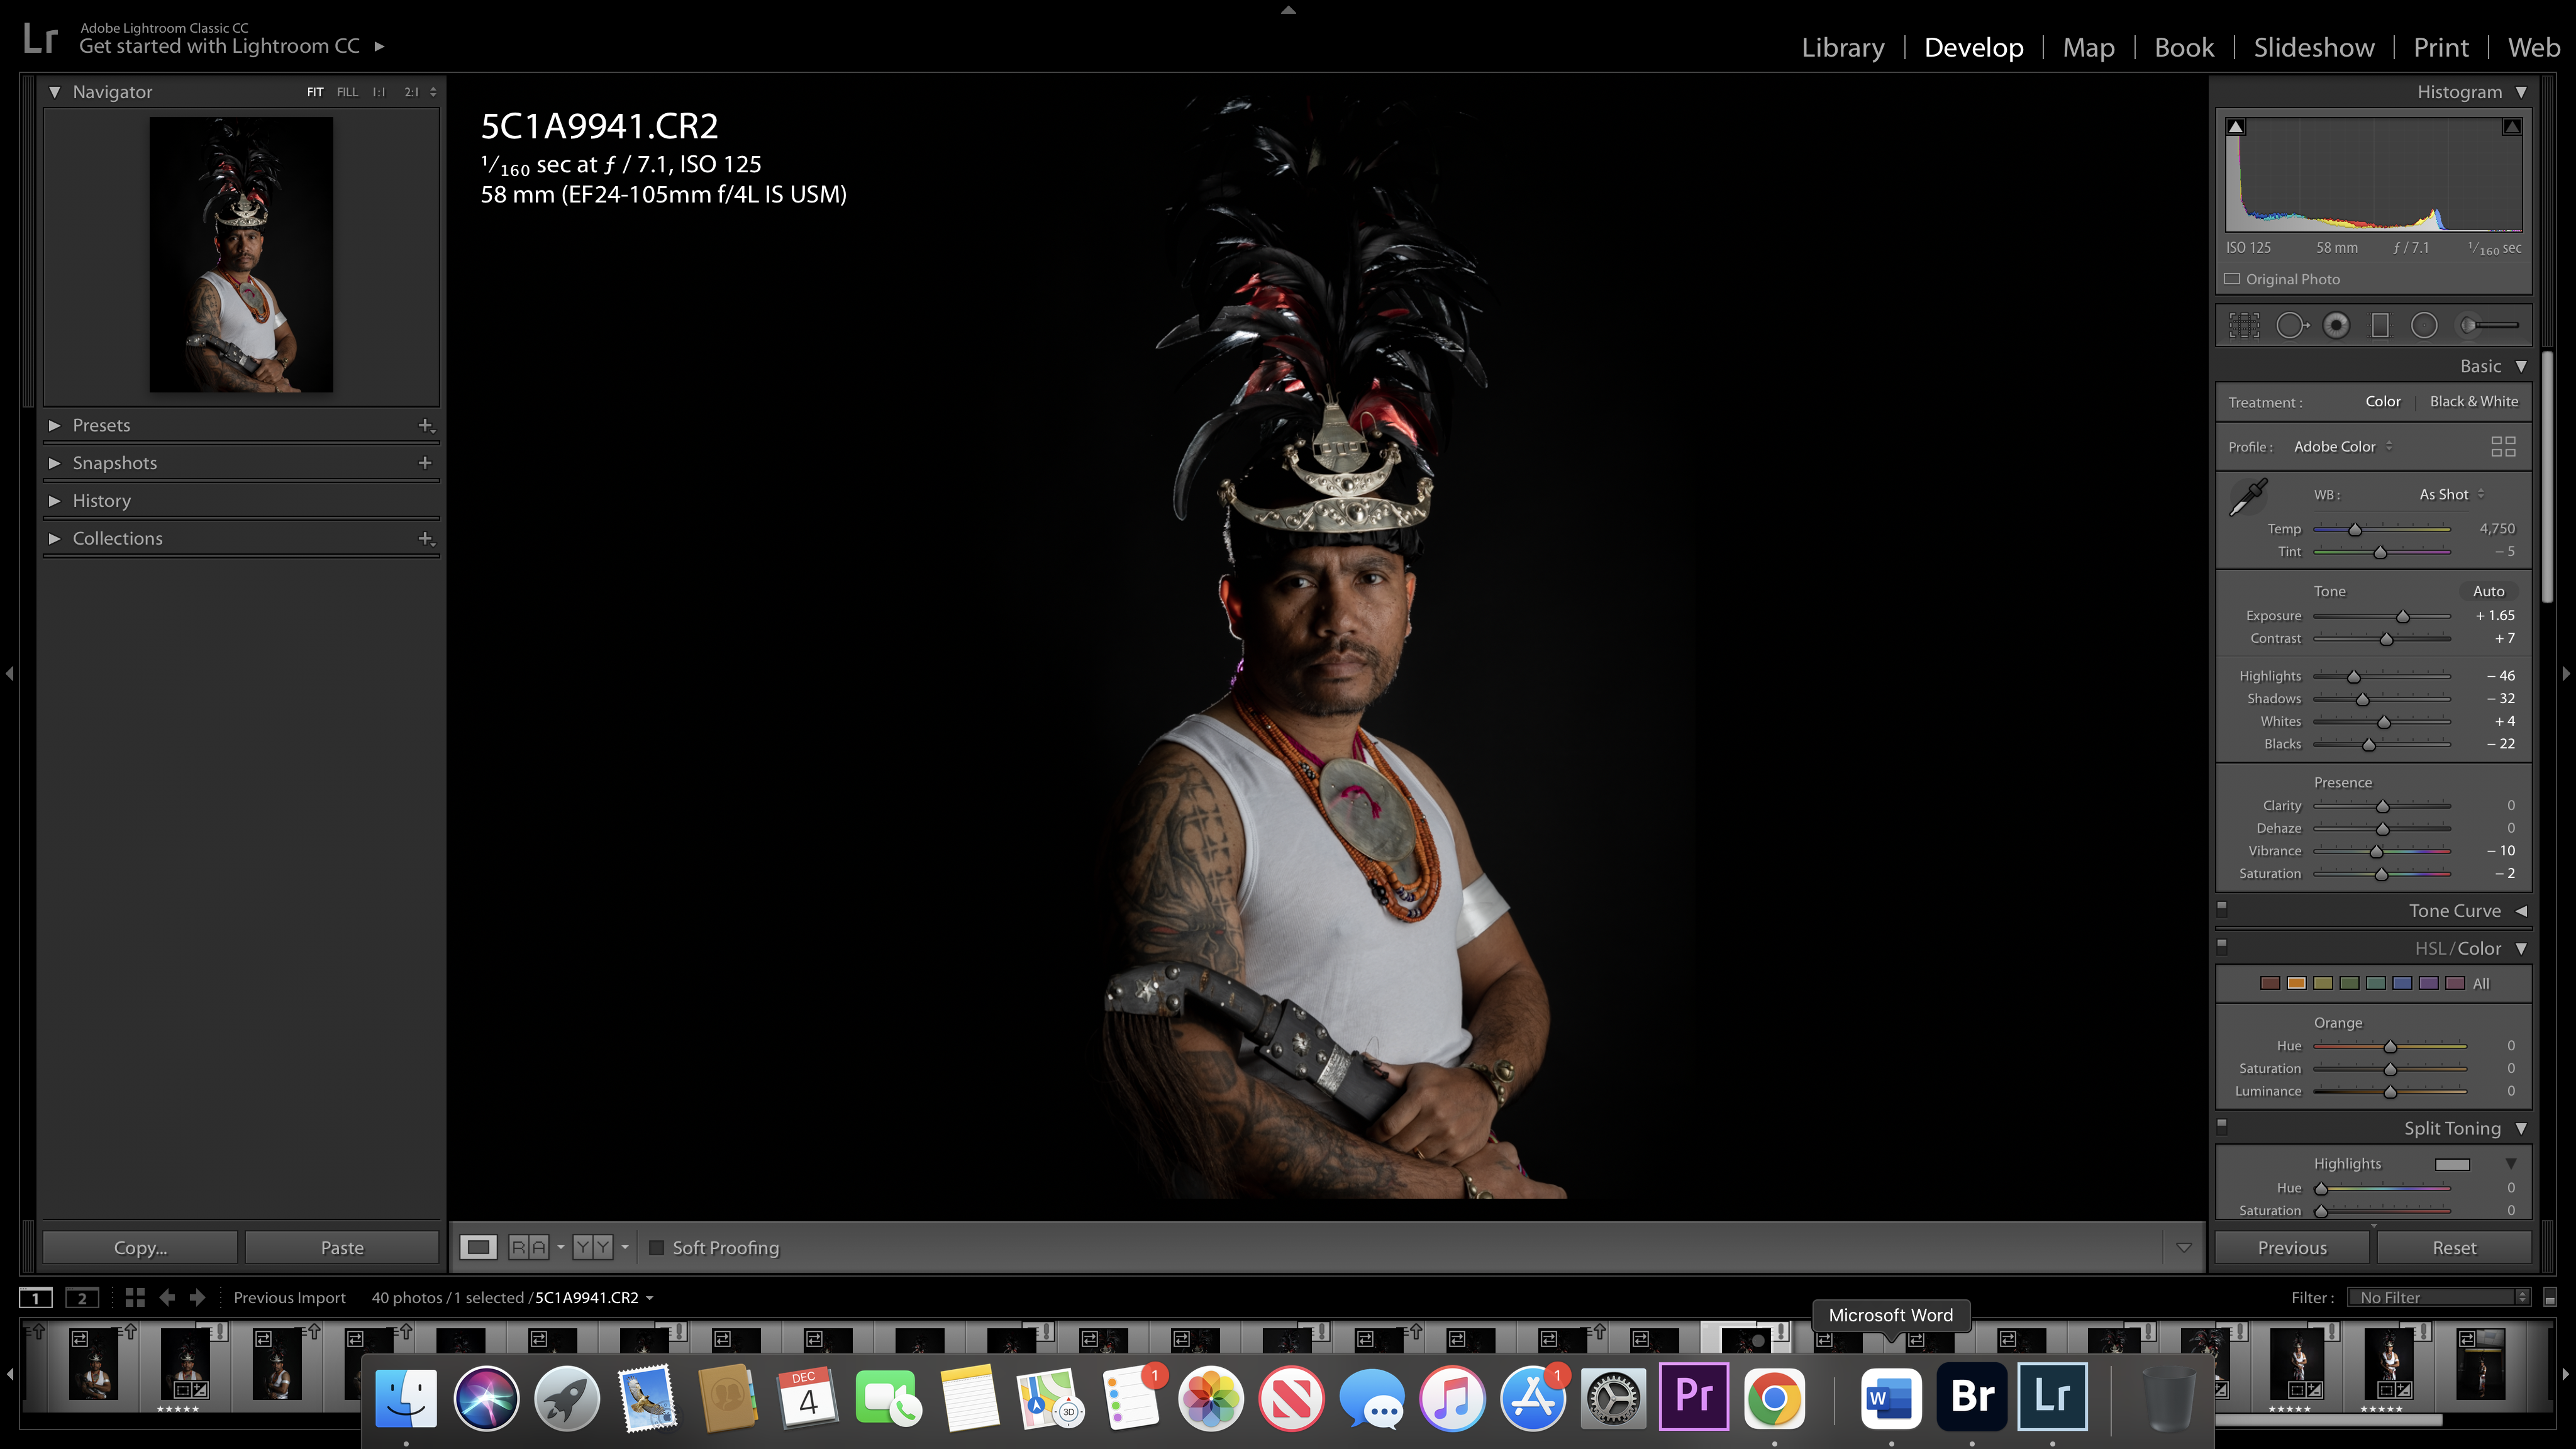
In every photoshoot session, I utilise Adobe Bridge to generate the contact sheet, and then I use that to make my selections. However, in order to modify the exposure, I use lightroom and Photoshop that allows me to eliminate any distracting elements from the frame.
Lightroom
Colouring the picture in accordance with the mood board is an artistic effort in and of itself. I used lightroom to adjust the exposure of my highlights and contrast, as well as to enhance my composition.
Photoshop
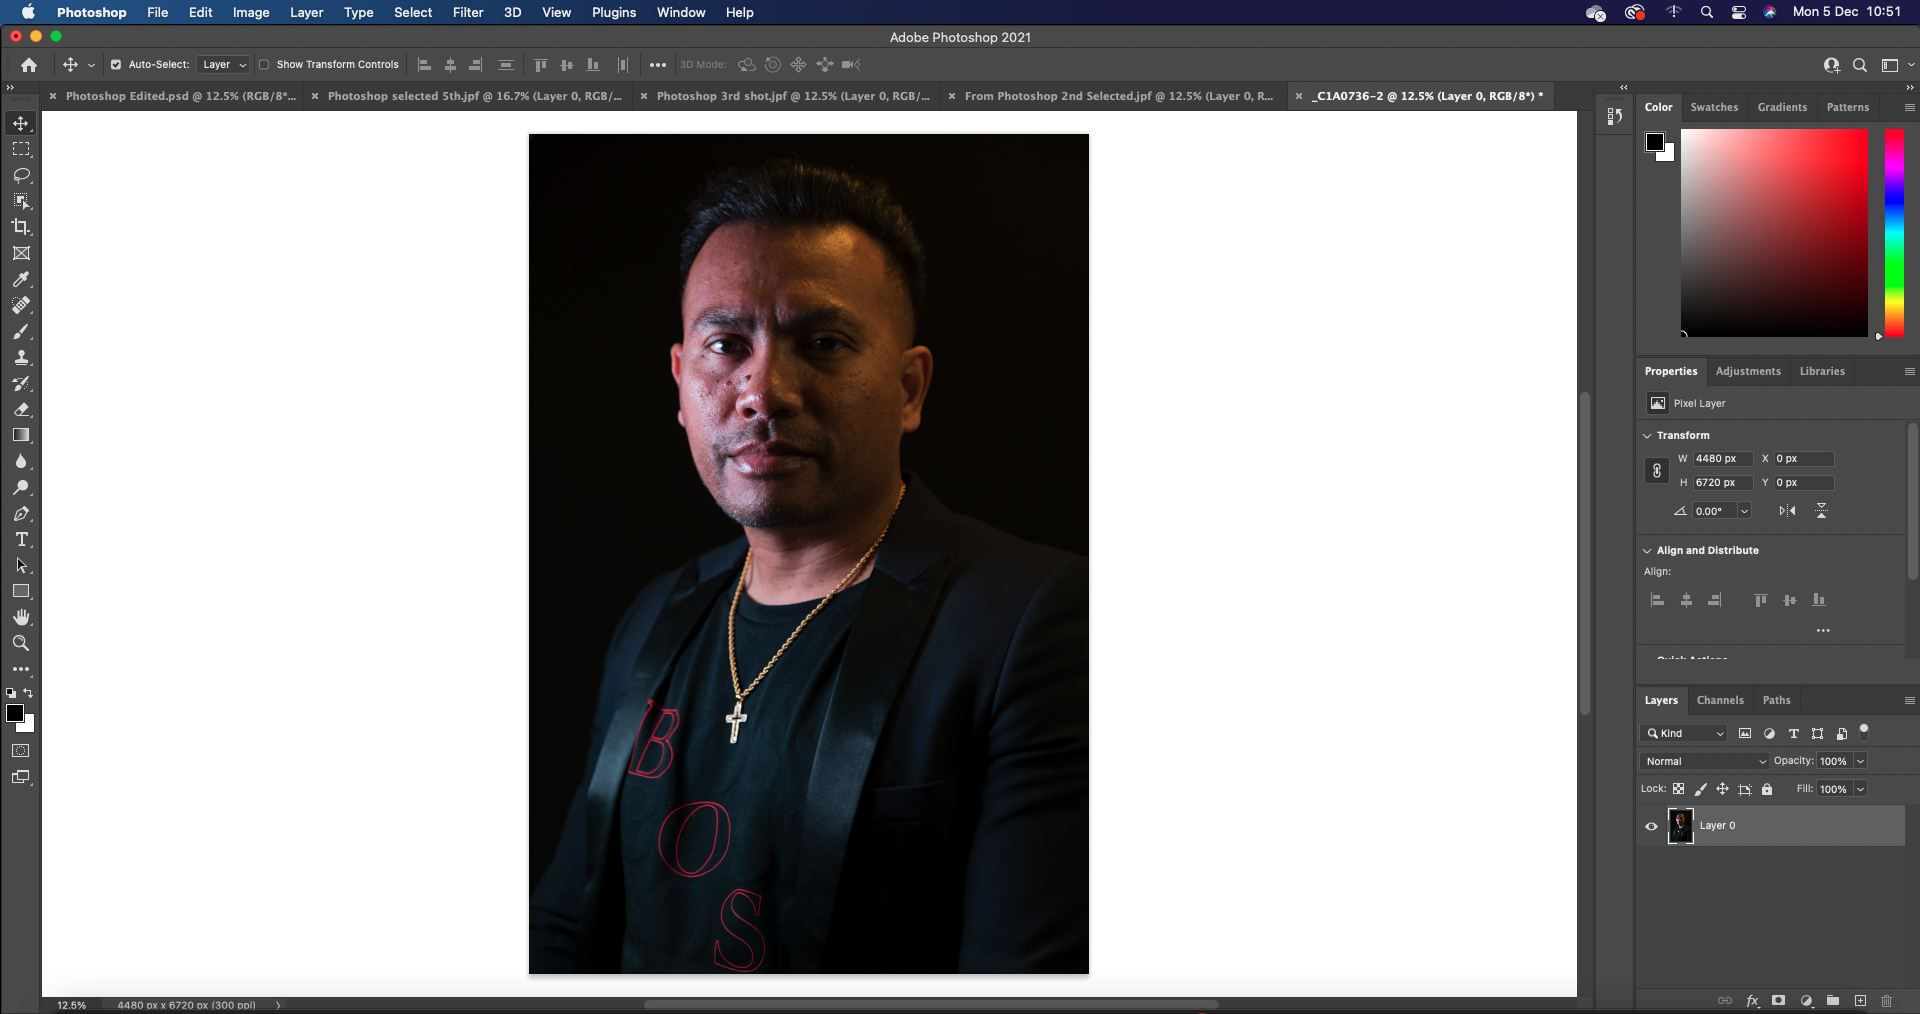
Because I want my work to be as authentic and unaltered as possible for this particular project, the only thing I did to the photographs in the Photoshop was take away any unnecessary elements that were in the frame. Further than that, I avoided creating any other changes.
Files Organising
Keeping all of my files, including those from every shoot, every screen grab, and every image from behind the scenes, in a single general folder and then dividing that folder into individual subfolders, it really make it much simpler to organise my writing and find the specific file I need to illustrate my writing with an image when I need it.
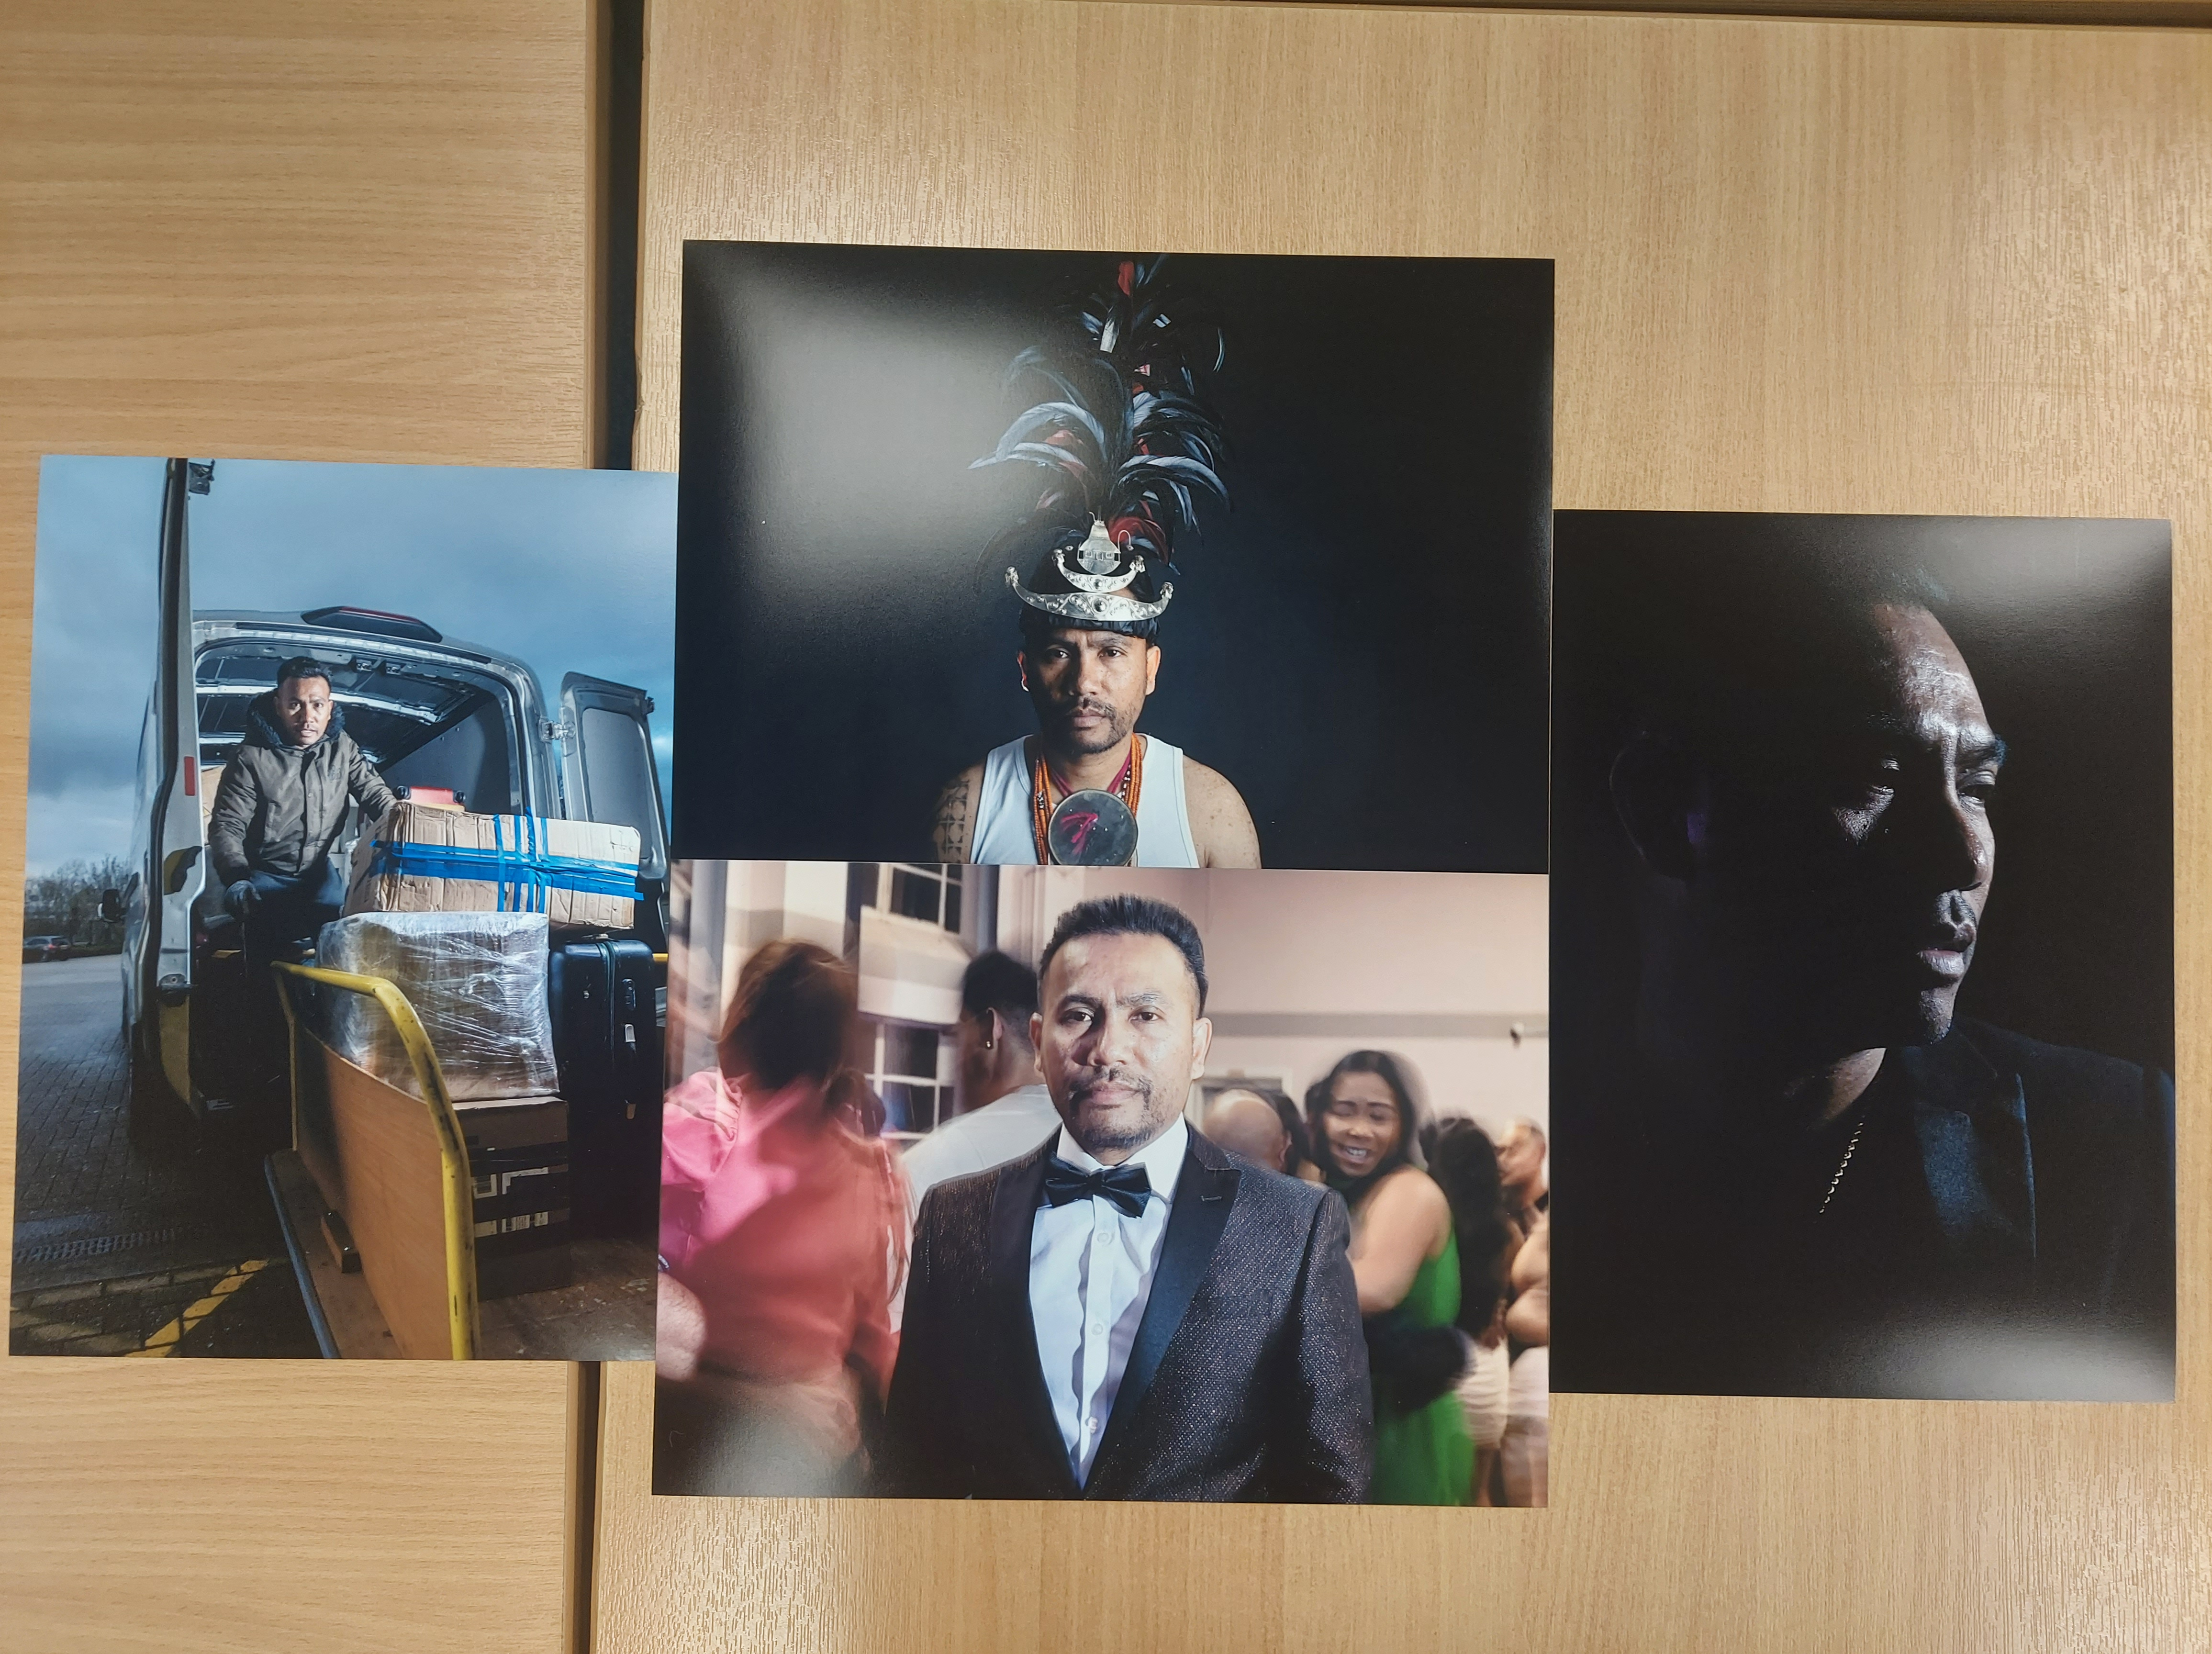
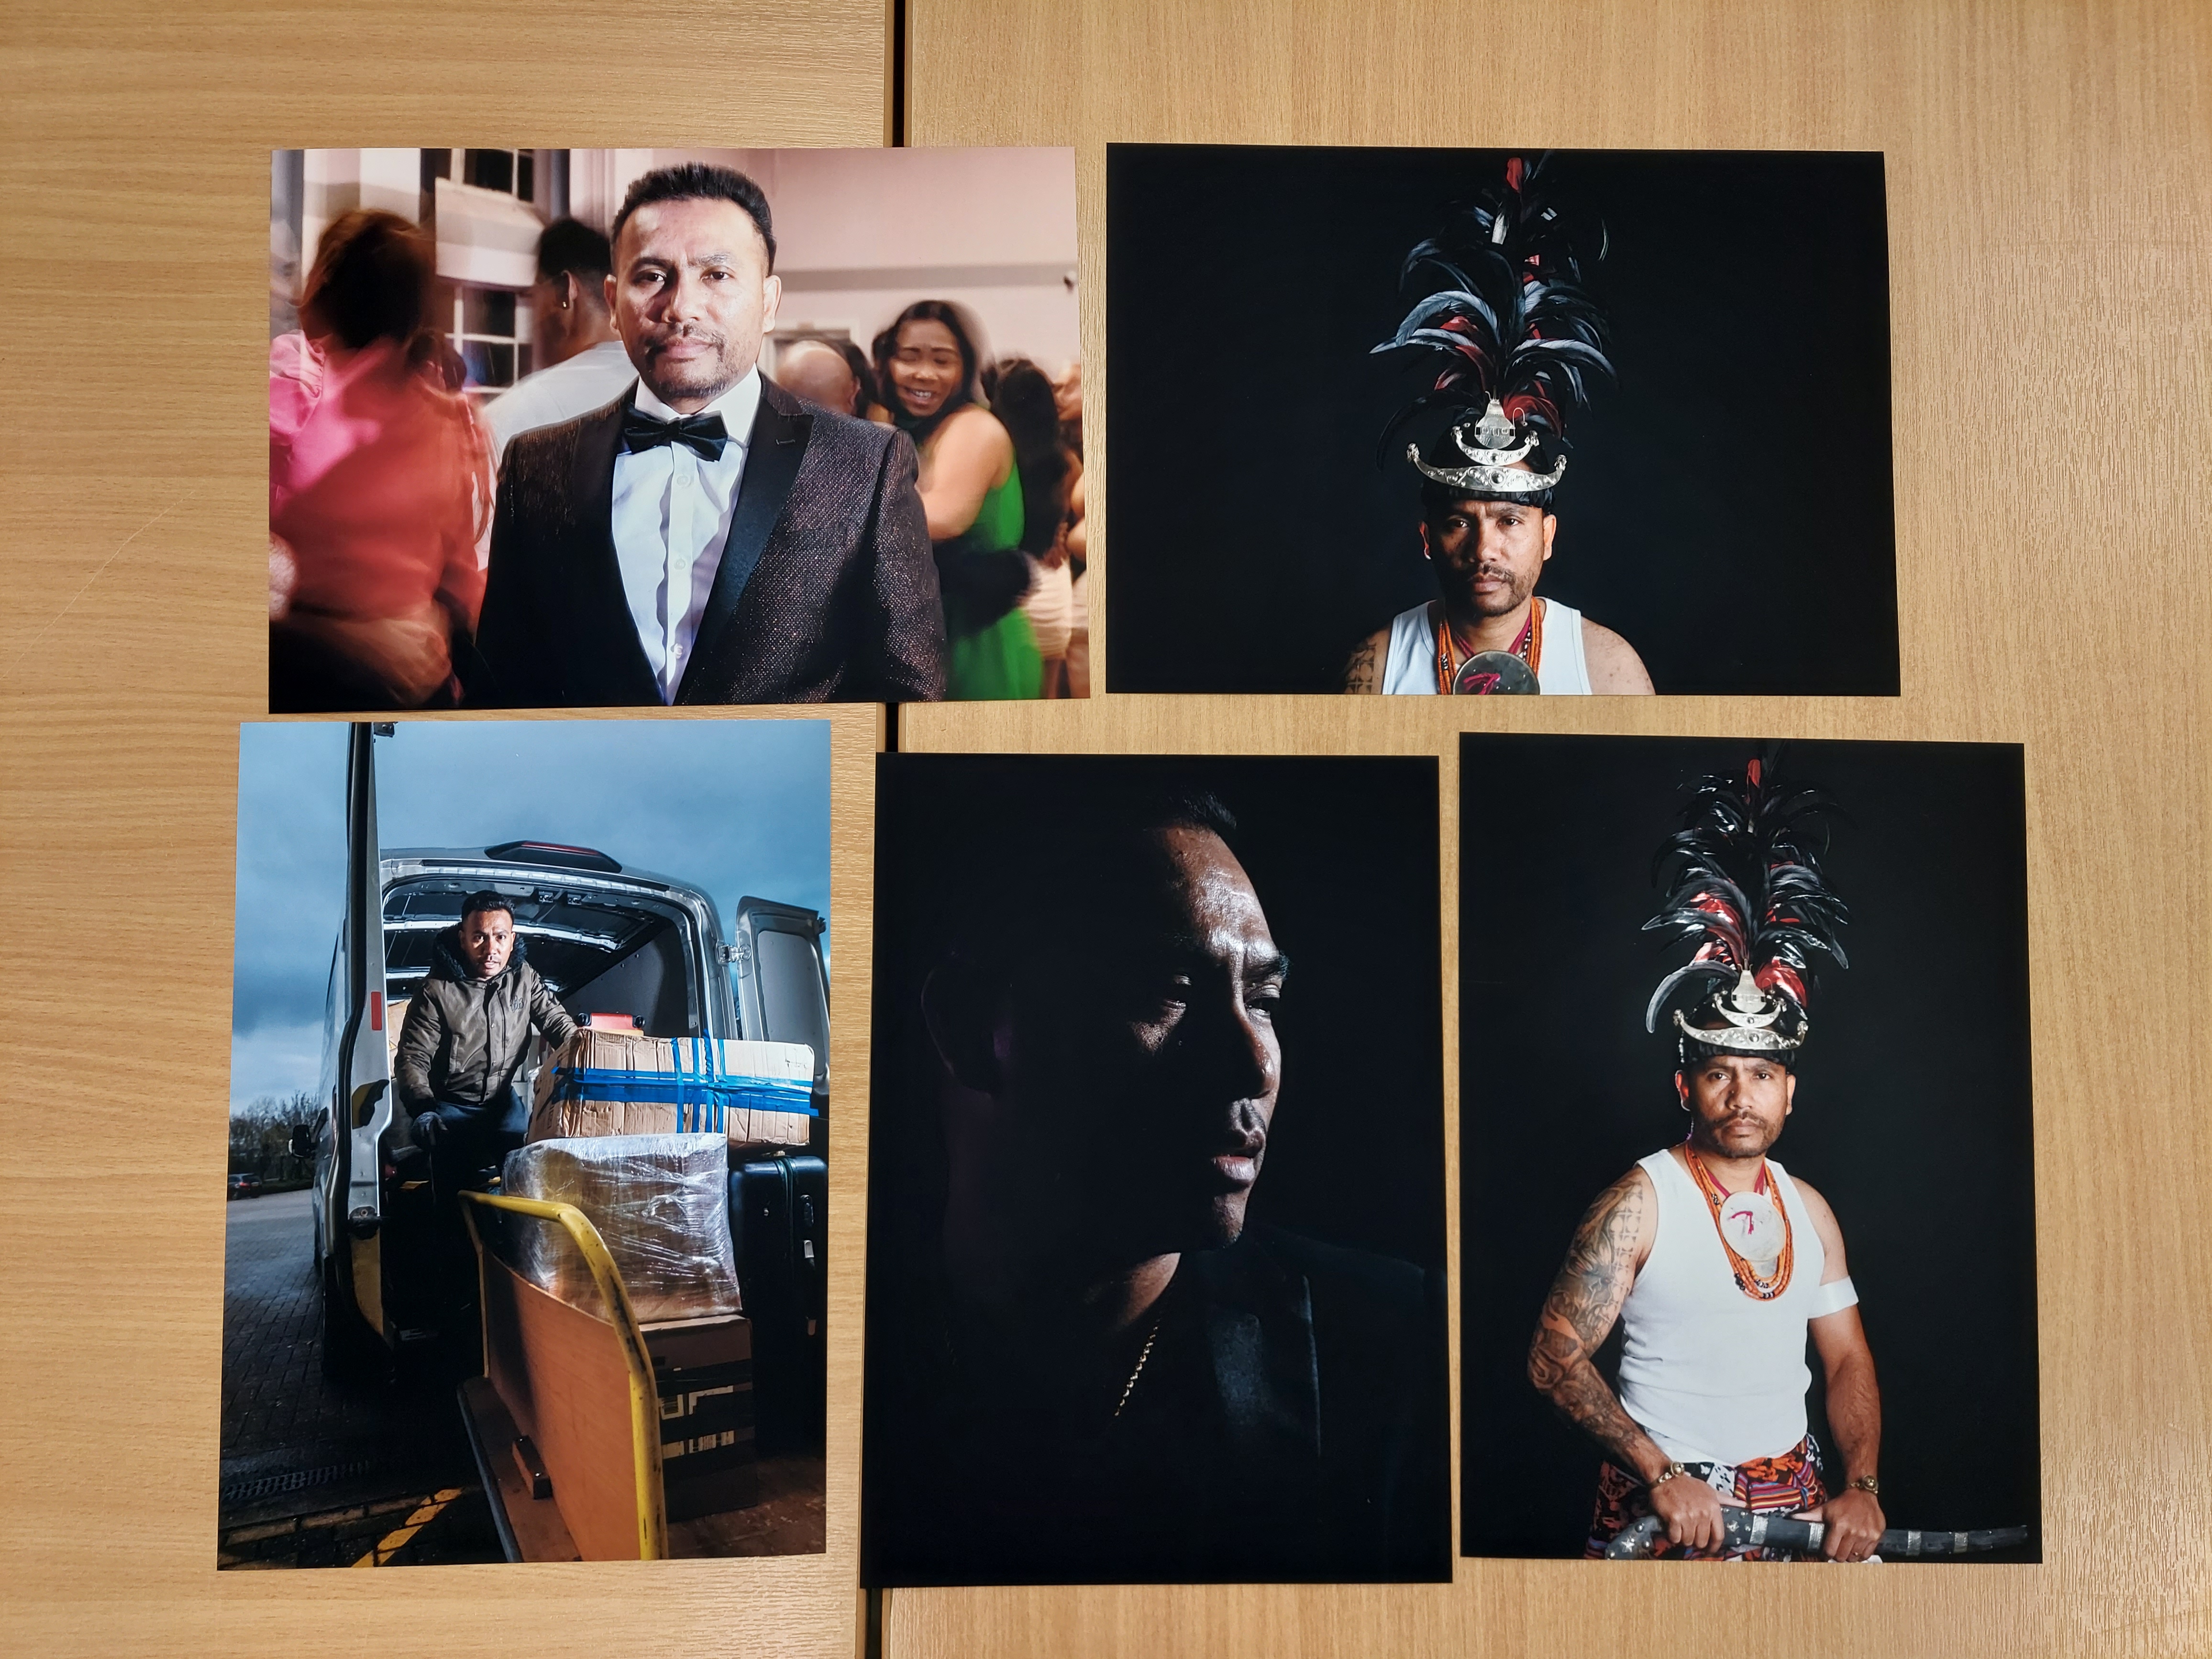
Final Images
These are last four selected that I think will covered all of the requirements.
Evaluation
Due to the fact that my project is very focused on the model, it is difficult for me to identify a photographer who has worked on a project that is comparable to mine. What I did was go back to the works of photographer like Yousuf Karsh and attempt to figure out how he shot and what he was aiming to communicate to the public about the model via his photographs.
Throughout the series of the six photography sessions I had with my model, I tried out a variety of various light setups. A strict selection process was used to narrow down each and every image; for instance, three digits of shots were reduced to two digits of shots, and then each shot was reduced to just one that had been selected to six best shots, and I had to withdraw two of them to make it the best possible four for submission.
It was my intention to include a portion of the photo in which Moise is accompanied by members of his family. However, I was unable to do so since it was quite difficult to collect children from school during that period of time, and I did not want to disrupt their education in any way. Possibly in the future, if it were at all possible, I would schedule it over the weekend using my own equipment.
In spite of the fact that I messed up my plan a little bit, I am pleased with the result that I have now because I can use all of the material appropriately in terms of what I can access from college. Additionally, I believe that capturing Moises in four different versions of him in different styles really hold together the story itself to the audience, and it really relates back to the beginning proposal that I made.
Gear
For this project, I had hoped that I would be able to use my own camera Lumix Panasonic, which I am very familiar with, to take the photographs; however, I was unable to do so due to unforeseen circumstances that arose during the course of the project. Whether I liked it or not, I was forced to take the photographs using a camera that I had borrowed from college; I wan not sure the duration of the loan was limited or not, and I was not very familiar with all of the camera’s features.
Paper
Semi-glossy
Matte
I had a difficult time choosing the appropriate paper for my work. In the event that I need to print my next project, I need to explore this issue regarding oyster paper, matte paper, glossy paper and semi glossy paper so that I may choose the appropriate paper for it. For this specific project I selected semi glossy paper because I can see more details of the shadow in my images.
In general, I am pleased with the process of learning rather than the product since it allows me to try out as many different things as I can during the photoshoots, which take place both on location and in the studio. At the very least, I am aware of how to execute tasks in the correct manner and also how to apply light to produce a certain appearance that is in accordance with the intended plan about many version of Moises’s life.
BIBLIOGRAPHY
-
- ExpertPhotography. 2022. 10 Tips for Better Editorial Portraiture Photography. [ONLINE] Available at: https://expertphotography.com/editorial-portrait-photography/. [Accessed 15 November 2022].
-
- Lucy Monticello | LensCulture. 2022. The Editorial Portrait – Interview by Sophie Wright | LensCulture. [ONLINE] Available at: https://www.lensculture.com/articles/lucy-conticello-the-editorial-portrait. [Accessed 23 November 2022].
-
- Health And Safety In The Studio | Articles & Guides | Towergate. 2022. Health And Safety In The Studio | Articles & Guides | Towergate. [ONLINE] Available at: https://www.towergateinsurance.co.uk/hub/more-personal/health-and-safety-in-the-studio. [Accessed 23 November 2022].
-
- FORMAT. 2022. 12 Types of Lighting in Photograph. [ONLINE] Available at: https://www.format.com/magazine/resources/photography/lighting-in-photography. [Accessed 23 November 2022].
-
- Dylan M Howell. 2022. A Brief History of Fashion Photography – Dylan M Howell. [ONLINE] Available at: https://dylanmhowell.com/history-fashion-photography/. [Accessed 23 November 2022].
-
- Artnet News. 2022. A Brief History of Fashion Photography | Artnet News. [ONLINE] Available at: https://news.artnet.com/market/a-brief-history-of-fashion-photography-32620. [Accessed 23 November 2022].
-
- digitalcameraworld. 2022. The secret message behind Annie Leibovitz’s chess image of Messi and Ronaldo | Digital Camera World. [ONLINE] Available at: https://www.digitalcameraworld.com/news/the-secret-message-behind-leibovitzs-chess-image-of-messi-and-ronaldo. [Accessed 23 November 2022].
-
- Yousuf Karsh. 2022. A Gallery Overview of Portraits – Yousuf Karsh. [ONLINE] Available at: https://karsh.org/overview/#thumbnails. [Accessed 28 November 2022].
-
- SHOOTFACTORY. 2022. What is Studio Photography? – SHOOTFACTORY. [ONLINE] Available at: https://www.shootfactory.co.uk/what-is-studio-photography/. [Accessed 02 December 2022].
-
- Michael Archambault. 2022. 32 First Photos from the History of Photography | PetaPixel. [ONLINE] Available at: https://petapixel.com/first-photos-photography-history/. [Accessed 02 December 2022].
- Encyclopedia Britannica. 2022. Yousuf Karsh | Armenian-Canadian photographer | Britannica. [ONLINE] Available at: https://www.britannica.com/biography/Yousuf-Karsh. [Accessed 05 December 2022].
- Improve Photography. 2022. When Do You Need a Model Release? A lawyer answers. – Improve Photography. [ONLINE] Available at: https://improvephotography.com/48423/model-release/. [Accessed 09 December 2022].
- Fstoppers. 2022. How Studying Karsh, the Man and the Artist, Can Make Us Better Portrait Photographers | Fstoppers. [ONLINE] Available at: https://fstoppers.com/education/how-studying-karsh-man-and-artist-can-make-us-better-portrait-photographers-607829. [Accessed 12 December 2022].
